Breezy PariX2 Gebrauchsanweisung
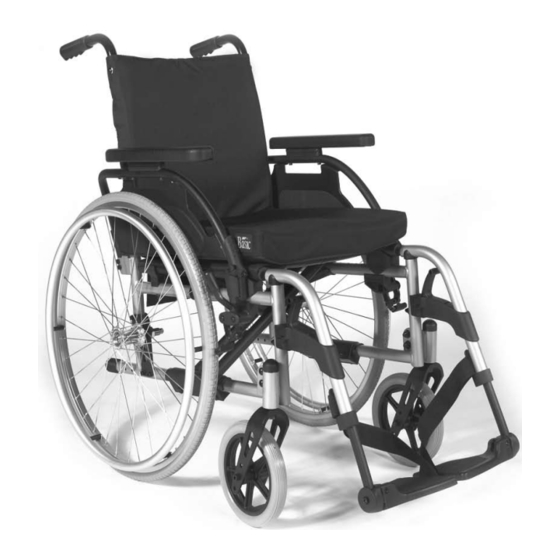
Der leichtgewichtrollstuhl parix2 bietet drei sitzhöhen und ist dank dem xfamily2 gleichteileprinzip flexibel einsetzbar
Inhaltsverzeichnis
Verfügbare Sprachen
Verfügbare Sprachen
Kapitel
Inhaltsverzeichnis
Fehlerbehebung

Verwandte Anleitungen für Breezy PariX2


Inhaltszusammenfassung für Breezy PariX2
- Seite 1 Wheelchair rollstuhl Directions for use Gebrauchsanweisung PariX 000690914...
-
Seite 2: Wheelchair Components
Wheelchair components We at SUNRISE MEDICAL have been awarded the ISO-9001 certificate, which affirms the quality of our products at every stage, from R & D to production. This products meet the requirements in accordance with EC guidelines. Options or accessories shown are available at extra cost. - Seite 3 1060 1010 1060 1010 +350 -350 < 10° 10° 10° < 0° 0° 0° < 3° 79° 115° < 0° 79° 115° 11.0 17.6 16.6 PariX...
-
Seite 16: Vorwort
vorwort inhaltsverzeichnis rollstuhl komponenten Sehr geehrter Kunde, vorwort Wir freuen uns sehr, dass Sie ein Spitzenqualitätsprodukt von legende für die symbole SUNRISE MEDICAL gewählt haben. inhaltsverzeichnis Dieses Handbuch vermittelt Ihnen zahlreiche Tipps und Ideen, verwendung damit Ihr neuer Rollstuhl ein vertrauter und zuverlässiger verwendungszweck Partner im Leben werden kann. -
Seite 17: Allgemeine Sicherheitshinweise Und Fahrbeschränkungen
allgemeine sicherheitshinweise und Fahrbeschränkungen GeFahr! Technik und Bauweise dieses Rollstuhls sind für die maximale Sicherheit entworfen. Die aktuell gültigen internationalen • Lassen Sie bei der Benutzung des Rollstuhls immer Vorsicht walten. Sicherheitsstandards wurden erfüllt oder teilweise übererfüllt. Vermeiden Sie z.B. ein ungebremstes Fahren gegen ein Hindernis Dennoch kann sich der Benutzer einem Risiko aussetzen, wenn er (Stufen, Bordsteinkante) oder Herunterfahren von Kanten. -
Seite 18: Garantie
GeFahr! vorsicht! • Wenn und wann immer möglich, sollten Fahrzeuginsassen • Die Rollstühle, die in diesem Handbuch abgebildet und während der Fahrt in einem Behindertentransportkraftwagen beschrieben sind, entsprechen möglicherweise nicht in (BTW) die im Fahrzeug installierten Sitze und die dazugehörigen allen Einzelheiten genau Ihrem eigenen Modell. -
Seite 19: Transport
7. Das Rückhaltesystem muss so nah wie möglich mit einem transport Winkel von 45 Grad angebracht und gemäß der Bedienungsanleitung des Herstellers sicher befestigt werden. GeFahr! Bei Nichtbeachtung dieser Ratschläge besteht die Gefahr von 8. Ohne Rücksprache mit dem Hersteller dürfen an den Befestigungspunkten des Rollstuhls oder an Bauteilen des schweren Körperverletzungen und sogar Lebensgefahr! Fahrgestells und des Rahmens keine Änderungen vorgenommen... - Seite 20 transport >>> Lage der Befestigungspunkte für das Rückhaltesystem am Rollstuhl: 1. Lage der vorderen und hinteren Verankerungsaufkleber (Fig. G - aNleituNG FÜr das aNschNalleN des rollstuhlBeNutZers: 2. Lage der vorderen (Fig. I) und hinteren (Fig. J) Aufkleber mit den 1. Der Beckengurt muss unten an der Vorderseite des Beckens Befestigungspunkten für das Rückhaltesystem am Rollstuhl und getragen werden, so dass der Winkel des Beckengurts innerhalb des Verankerungsaufklebers.
-
Seite 21: Handhabung
vorwiegend von einer Begleitperson FiG. 5 handhabung geschoben werden, einen Ankippbügel zu verwenden. Wenn der Rollstuhl nicht FalteN über einen Ankippbügel verfügt und das Entfernen Sie zuerst das Sitzkissen FiG. 1 Rückenrohr ständig als Hebel zum vom Rollstuhl, und klappen Sie die Kippen des Rollstuhls benutzt wird, kann Fußplatte oder die einzelnen dadurch das Rückenrohr beschädigt... -
Seite 22: Optionen - Fußplatten
optionen - Fußplatten verstelleN des WadeNPolsters (Fig. 15). FiG. 15 Das Wadenpolster kann wie folgt FussPlatteN: FiG. 10 verstellt werden: Die Fußplatten können hochgeklappt Höhe: Lösen Sie die Schraube (4) werden, um das Ein- und Aussteigen zu und schieben Sie das Klemmstück erleichtern. -
Seite 23: Optionen - Seitenteil
eiNstelluNG leNKachseNWiNKel: seiteNteil, hochschWeNKBar, aBNehMBar (Fig. 17-18). Mit KurZer / laNGer arMauFlaGe, Lösen Sie die Schrauben (1), stellen Sie den Lenkradwinkel auf 90° höheNverstellBar ein. Ziehen Sie die Schrauben wieder fest. Die Armauflage kann folgendermaßen in der Höhe verstellt werden. Drücken Sie den Hebel nach unten vorsicht! FiG. -
Seite 24: Optionen - Beckengurt
optionen – Beckengurt WARNUNG! FiG. 25 Vor der Benutzung des Rollstuhls sicherstellen, dass der Sicherheitsgurt angelegt und richtig Zum anschnallen: Zum öffnen: eingestellt ist. das einsteckteil des die sichtbaren teile des steckverschlusses fest in das einsteckteils des Gurtschloss stecken. Der Beckengurt ist wie abgebildet steckverschlusses am Rollstuhl angebracht. -
Seite 25: Tägliche Überprüfungen
typenschild tägliche Überprüfungen vorsicht! tyPeNschild Als Benutzer bemerken Sie mögliche Schaden als Erstes Das Namenschild befindet sich entweder unter der . Wir empfehlen daher, dass Sie vor jeder Benutzung Kreuzstrebeneinheit oder am diagonalen Rahmenrohr, auch auf die Punkte in der folgenden Liste überprüfen: dem Benutzerhandbuch befindet sich ein entsprechendes Etikett. -
Seite 26: Fehlersuche
Wartung und Pflege >>> Fehlersuche rollstuhl hat drall Nach eiNer seite hyGieNe Bei WiedereiNsatZ: • Reifendruck überprüfen (nur bei Luftreifen). • Prüfen, ob sich das Rad reibungslos dreht (Lager, Achse) Im Falle eines Wiedereinsatzes sollte dieser Rollstuhl durch eine • Überprüfen, dass die Lenkradwinkel einheitlich eingestellt sind sorgfältige Wisch- und Sprühdesinfektion aller Flächen, die und die Lenkräder richtig auf dem Boden aufliegen. -
Seite 27: Technische Daten
technische daten MaXiMale ZuladuNG: 125 KG ZuM aNheBeN oder traGeN des rollstuhls (ohNe aNBauteile) das vordere rahMeN- uNd das rÜcKeNrohr GreiFeN. siehe auch seite 3 Nach EN12183: 2009 sind alle aufgeführten Teile (Sitz - Rückenbespannung, Armpolster, Seitenverkleidung...) schwer entflammbar gemäß EN1021-2 Die dynamische Stabilität an Gefällen hängt von der Konfiguration des Rollstuhls, den Fertigkeiten und dem Fahrstil des Benutzers ab.