Guntermann & Drunck UCON-IP-NEO Installationsanleitung

Verwandte Anleitungen für Guntermann & Drunck UCON-IP-NEO


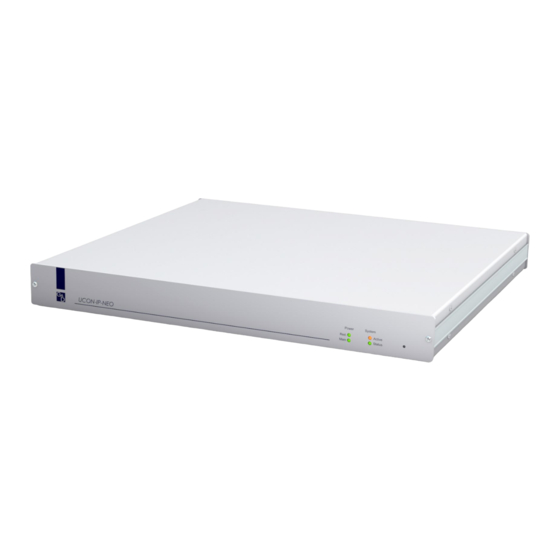
Inhaltszusammenfassung für Guntermann & Drunck UCON-IP-NEO
- Seite 1 Guntermann & Drunck GmbH www.gdsys.de UCON-IP-NEO Installationsanleitung Installation Guide A9100181-1.01...
-
Seite 2: Zu Dieser Dokumentation
© Guntermann & Drunck GmbH 2015. Alle Rechte vorbehalten. Version 1.01 – 19.02.2015 Firmware: 1.0.000 (00026) Guntermann & Drunck GmbH Dortmunder Str. 4a 57234 Wilnsdorf Germany Telefon +49 (0) 2739 8901-100 Telefax +49 (0) 2739 8901-120 http://www.GDsys.de sales@GDsys.de i · G&D UCON-IP-NEO... -
Seite 3: Inhaltsverzeichnis
Inhaltsverzeichnis Inhaltsverzeichnis Sicherheitshinweise ..................1 Das Arbeitsplatzmodul »UCON-IP-NEO« ............2 Lieferumfang ....................2 Installation ....................... 3 Erforderliches Zubehör ..................3 Anschluss der Kabel und Geräte ................ 3 Verbindung mit dem IP-Netzwerk ..............3 Verbindung mit dem Matrixswitch ............... 3 Optional: Anschluss der Geräte des lokalen Arbeitsplatzes ......3 Stromversorgung .................... -
Seite 4: Sicherheitshinweise
Betreiben Sie dieses Gerät nur mit dem mitgelieferten oder in der Bedienungs- anleitung aufgeführten Netzteil. ! Betreiben Sie das Gerät ausschließlich im vorgesehenen Einsatzbereich Die Geräte sind für eine Verwendung im Innenbereich ausgelegt. Vermeiden Sie extreme Kälte, Hitze oder Feuchtigkeit. 1 · G&D UCON-IP-NEO... -
Seite 5: Das Arbeitsplatzmodul »Ucon-Ip-Neo
Das Arbeitsplatzmodul »UCON-IP-NEO« Das Arbeitsplatzmodul »UCON-IP-NEO« Mit dem Arbeitsplatzmodul UCON-IP-NEO erweitern Sie einen KVM-Matrixswitch der CATCenter-Serie um einen IP-Arbeitsplatz. Das Arbeitsplatzmodul wird über eine Twisted-Pair-Verkabelung mit einem IP-Netz- werk verbunden. Die Rechner innerhalb des Netzwerks können den IP-Arbeitsplatz über den Java-Client des Arbeitsplatzmoduls oder über die mitgelieferte Software G&D IP-Console Client aufrufen und bedienen. -
Seite 6: Installation
Schließen Sie die PS/2-Tastatur des lokalen Arbeitsplatzes an. Mouse: Schließen Sie die PS/2-Maus des lokalen Arbeitsplatzes an. Schließen Sie den Monitor des lokalen Arbeitsplatzes an. Monitor: HINWEIS: Die Schnittstelle wird ausschließlich zur Wartung des Gerätes COM1 durch das Service-Team verwendet. 3 · G&D UCON-IP-NEO... -
Seite 7: Stromversorgung
Red. Power Abbildung 2: Rechter Ausschnitt der Rückansicht des Arbeitsplatzmoduls Main Power: Stecken Sie das mitgelieferte Stromversorgungskabel ein. Optional kann ein Netzteil der Power-Set 12-Serie angeschlossen werden. Red. Power: Hierdurch wird eine zweite, redundante Stromversorgung erreicht. G&D UCON-IP-NEO · 4... -
Seite 8: Konfiguration Vor Erstinbetriebnahme
Zum Gerät übertragen WICHTIG: Erfolgt innerhalb von 5 Minuten nach Übertragung der neuen Netz- werkeinstellungen keine Aufschaltung eines Benutzers auf das Arbeitsplatzmo- dul, werden die Standardeinstellungen (s. oben) wiederhergestellt. 8. Trennen Sie den Rechner vom Twisted-Pair-Kabel. 5 · G&D UCON-IP-NEO... -
Seite 9: Konfiguration Der Firewall Des Ip-Netzwerkes
Konfiguration . Die aktuellen Konfigurationsein- stellungen werden im Web-Interface angezeigt. 4. Geben Sie auf der Registerkarte System die von Ihnen gewünschte Port-Nummer in der Zeile TCP-Port ein. Klicken Sie abschließend auf die Schaltfläche Zum Gerät übertragen G&D UCON-IP-NEO · 6... -
Seite 10: Starten Des Java-Clients
Webapplikation auf die Schaltfläche Client starten 3. Der Java-Client wird auf dem lokalen Rechner gestartet und zeigt die Login- Maske. 4. Geben Sie den Benutzernamen und das Kennwort Ihres Benutzerkontos ein und klicken Sie auf die Schaltfläche Anmelden 7 · G&D UCON-IP-NEO... -
Seite 11: Standardeinstellungen Wiederherstellen
3. Halten Sie den Taster weiterhin gedrückt und schalten Sie das Gerät ein. 4. Sobald die Status-LED schnell blinkt, lassen Sie die Taste los. HINWEIS: Die Wiederherstellung der Standardeinstellungen ist alternativ auch über das Web-Interface möglich. G&D UCON-IP-NEO · 8... -
Seite 12: Statusanzeigen
Das Netzteil ist ausgeschaltet oder die Verbindung mit dem Stromnetz nicht hergestellt. System Active blinkt IP-Zugriff über Java-Client oder IP-Console Client aktiv. Es findet kein IP-Zugriff statt. Status blinkt Das Arbeitsplatzmodul ist betriebsbereit. Das Arbeitsplatzmodul wird gestartet. 9 · G&D UCON-IP-NEO... -
Seite 13: Rückseite
Bedeutung Network gelb blinkt Aktivitätsanzeige grün Link hergestellt. blinkt Link kann nicht hergestellt werden. Transmission gelb Port ist aktuell durch einen Benutzer belegt. Port ist frei. grün Verbindung zum Matrixsystem hergestellt. Keine Verbindung zum Matrixswitch möglich. G&D UCON-IP-NEO · 10... -
Seite 14: Technische Daten
+5 bis +40 °C Luftfeuchte: < 80%, nicht kondensierend Schnittstellen für Arbeitsplatz: 1 × D-Sub HD 15-Buchse (Video) 2 × PS/2-Buchse (Tastatur/Maus) zum Matrixswitch: 1 × RJ45-Buchse zum lokalen Netzwerk: 1 × RJ45-Buchse Konformität CE, RoHs 11 · G&D UCON-IP-NEO... - Seite 15 NOTIZEN...
- Seite 29 NOTES...
- Seite 30 NOTES...
- Seite 31 NOTES...
- Seite 32 Das Handbuch wird fortlaufend aktualisiert und im Internet veröffentlicht. The manual is constantly updated and available on our website. http://gdsys.de/A9100181 Guntermann & Drunck GmbH Dortmunder Str. 4a 57234 Wilnsdorf Germany http://www.GDsys.de sales@GDsys.de...