
Verwandte Anleitungen für Guntermann & Drunck CATCenter NEO4


Inhaltszusammenfassung für Guntermann & Drunck CATCenter NEO4
- Seite 1 Guntermann & Drunck GmbH www.gdsys.de G&D CATCenter NEO4 Installationsanleitung Installation Guide A9100133-1.03a...
-
Seite 2: Zu Dieser Dokumentation
Impressum © Guntermann & Drunck GmbH 2009. Alle Rechte vorbehalten. Version 1.03a – 25.08.2009 Guntermann & Drunck GmbH Dortmunder Str. 4a 57234 Wilnsdorf Germany Telefon+49 (0) 2739 8901-100 Telefax +49 (0) 2739 8901-120 http://www.GDsys.de sales@GDsys.de i · G&D CATCenter NEO4... -
Seite 3: Sicherheitshinweise
Betreiben Sie dieses Gerät nur mit dem mitgelieferten oder in der Bedienungs- anleitung aufgeführten Netzteil. ! Betreiben Sie das Gerät ausschließlich im vorgesehenen Einsatzbereich Die Geräte sind für eine Verwendung im Innenbereich ausgelegt. Vermeiden Sie extreme Kälte, Hitze oder Feuchtigkeit. G&D CATCenter NEO4 · ii... -
Seite 4: Inhaltsverzeichnis
Installationsanleitung Inhaltsverzeichnis Der Matrixswitch CATCenter NEO4 ............3 Lieferumfang ..................4 Matrixswitch CATCenter NEO4............... 4 Arbeitsplatzmodul UCON ................4 Arbeitsplatzmodul UCON-a................4 Arbeitsplatzmodul UCON-s ................4 Arbeitsplatzmodul UCON-IP-eco ..............4 Installationsanleitung ................. 5 Anschluss der Target-Computer ..............5 Anschluss über das Target-Modul CATpro2-PS/2........5 Anschluss über das Target-Modul CATpro2-USB ........ - Seite 5 Installationsanleitung Status-Anzeigen ................19 Matrixswitch CATCenter NEO4 ..............19 Frontseite ....................19 Rückseite....................20 Target-Module der CATpro2-Serie..............20 Arbeitsplatzmodul UCON ................21 Frontseite ....................21 Rückseite....................21 Arbeitsplatzmodul UCON-a ................22 Frontseite ....................22 Rückseite....................22 Arbeitsplatzmodul UCON-s................23 Frontseite ....................23 Rückseite....................
-
Seite 6: Der Matrixswitch Catcenter Neo4
Installationsanleitung Der Matrixswitch CATCenter NEO4 Der Matrixswitch CATCenter NEO4 ermöglicht die Steuerung von bis zu 32 Target- Computer über 4 Arbeitsplätze. Durch Kaskadierung kann die Anzahl der Target- Computer auf 2048 erhöht werden. Sowohl die Target-Computer als auch die Arbeitsplätze werden über Twisted-Pair- Verkabelungen der Kategorie 5 (oder höher) mit dem CATCenter-System verbunden. -
Seite 7: Lieferumfang
Installationsanleitung Lieferumfang Matrixswitch CATCenter NEO4 1 × Matrixswitch CATCenter NEO4 1 × Installationsanleitung (CATCenter NEO4) 1 × Bedienungsanleitung (CATCenter NEO) 1 × Bedienungsanleitung (Webapplikation Config Panel) 1 × Stromversorgungskabel (PowerCable-2 Standard) 1 × Rackmount-Set (19" RM-Set-435) Arbeitsplatzmodul UCON ... -
Seite 8: Installationsanleitung
Stecken Sie ein Ende eines Twisted-Pair-Kabels der Kategorie 5 (oder höher) in die RJ45-Buchse des Target-Moduls. Verbinden Sie das andere Ende des Twisted-Pair-Kabels mit einer CPU-Schnittstelle (RJ45-Buchse) des Matrixswitches CATCenter NEO4. Anschluss über das Target-Modul CATpro2-USB So schließen Sie das Target-Modul CATpro2-USB an den Matrixswitch an: ... -
Seite 9: Anschluss Über Das Target-Modul Catpro2-Audio-Ps/2
Stecken Sie ein Ende eines Twisted-Pair-Kabels der Kategorie 5 (oder höher) in die RJ45-Buchse des Target-Moduls. Verbinden Sie das andere Ende des Twisted-Pair-Kabels mit einer CPU-Schnittstelle (RJ45-Buchse) des Matrixswitches CATCenter NEO4. Anschluss über das Target-Modul CATpro2-Audio-USB So schließen Sie das Target-Modul CATpro2-Audio-USB an den Matrixswitch an: ... -
Seite 10: Anschluss Über Das Target-Modul Catpro2-Sun-Usb
Stecken Sie ein Ende eines Twisted-Pair-Kabels der Kategorie 5 (oder höher) in die RJ45-Buchse des Target-Moduls CATpro2-USB. Verbinden Sie das andere Ende des Twisted-Pair-Kabels mit einer CPU-Schnittstelle (RJ45-Buchse) des Matrixswitches CATCenter NEO4. Anschluss über das Target-Modul CATpro2-VT100 So schließen Sie das Target-Modul CATpro2-VT100 an den Matrixswitch an: ... -
Seite 11: Anschluss Der Arbeitsplätze
Anschluss der Arbeitsplätze Die Arbeitsplatzmodule werden mit einem als Zubehör erhältlichen Twisted-Pair- Kabel der Kategorie 5 (oder höher) mit dem Matrixswitch CATCenter NEO4 verbunden. Die Distanz zwischen dem Target-Modul CATpro2 und dem Arbeitsplatzmodul kann bei Verwendung des empfohlenen Kabels K-C7/LD-x bis zu 300 Meter (UCON-a: bis zu 100 Meter) betragen. -
Seite 12: Anschluss Über Das Arbeitsplatzmodul Ucon-A
Stecken Sie ein Ende eines Twisted-Pair-Kabels der Kategorie 5e (oder höher) in die Transmission-Buchse des Arbeitsplatzmoduls. Verbinden Sie das andere Ende des Twisted-Pair-Kabels mit einer beliebigen, der insgesamt 4 Console-Schnittstellen des Matrixswitches CATCenter NEO4. Arbeitsplatzmodul UCON-a Twisted-Pair-Verkabelung A b i... -
Seite 13: Anschluss Über Das Arbeitsplatzmodul Ucon-S
Stecken Sie ein Ende eines Twisted-Pair-Kabels der Kategorie 5e (oder höher) in die Transmission-Buchse des Arbeitsplatzmoduls. Verbinden Sie das andere Ende des Twisted-Pair-Kabels mit einer beliebigen, der insgesamt 4 Console-Schnittstellen des Matrixswitches CATCenter NEO4. Arbeitsplatzmodul UCON-s Twisted-Pair-Verkabelung Matrixswitch CATCenter NEO4 ... -
Seite 14: Anschluss Über Das Arbeitsplatzmodul Ucon-Ip-Eco
Stecken Sie ein Ende eines Twisted-Pair-Kabels der Kategorie 5e (oder höher) in die Transmission-Buchse des Arbeitsplatzmoduls. Verbinden Sie das andere Ende des Twisted-Pair-Kabels mit einer beliebigen, der insgesamt 4 Console-Schnittstellen des Matrixswitches CATCenter NEO4. Arbeitsplatzmodul UCON-IP-eco Twisted-Pair-Verkabelung Matrixswitch CATCenter NEO4 ... -
Seite 15: Stromversorgung
Schalten Sie die Geräte nach dem Anschluss der Stromversorgungskabel an den Power-Schaltern ein. Netzwerkschnittstellen Über die Netzwerkschnittstellen an der Rückseite des CATCenter NEO4 können Sie folgende Netzwerkfunktionalitäten erreichen: Durchführung der Netzwerkkonfiguration des Matrixswitches Authentifizierung gegenüber Verzeichnisdiensten (LDAP, Active Directory, RADIUS, TACACS+) ... -
Seite 16: Installation Der Erweiterungseinheit
CPU Ports 17 - 20: Anschluss eines fünften Slave-Gerätes CPU Ports 21 - 24: Anschluss eines sechsten Slave-Gerätes CPU Ports 25 - 28: Anschluss eines siebten Slave-Gerätes CPU Ports 29 - 32: Anschluss eines achten Slave-Gerätes 13 · G&D CATCenter NEO4... - Seite 17 Sie die CPU-Ports 5 bis 8 mit den Console-Ports des zweiten Slave-Gerätes. Für den Anschluss der dritten und vierten Slave-Geräte verfahren Sie ebenso. Hinweis: Bei einer Komplettbelegung des Master-Gerätes mit vier Slave-Geräten können am Master-Gerät keine Target-Computer angeschlossen werden. G&D CATCenter NEO4 · 14...
- Seite 18 Gerät, sondern mit einem Matrixswitch der ersten Kaskadenstufe verbunden. Das Anschlussverfahren zwischen diesen Matrixswitches entspricht exakt dem zuvor beschriebenen Verfahren: Master-Gerät Slave-Gerät (1. Kaskadenstufe) Slave-Gerät (2. Kaskadenstufe) Weiterführende Informationen: Abschnitt Festlegung des Kaskadenmodus des Matrixswitches der Bedienungsanleitung 15 · G&D CATCenter NEO4...
-
Seite 19: Besonderheiten
Strg Aufschalten auf das zweite lokale Target Strg Herstellen einer direkten Verbindung CATCenter-System. Diese Tastenkombinationen können vom Anwender innerhalb eines vorgegebenen Rahmens im OSD konfiguriert werden. Detaillierte Informationen hierzu sind im folgenden Abschnitt zu finden. G&D CATCenter NEO4 · 16... -
Seite 20: Anzeige Und Bedienung Des Osd Des Arbeitsplatzmoduls
Zifferntasten 1, 2, und 3 des alphanumerischen Tastenblocks NUM1 - NUM3: Zifferntasten 1, 2 und 3 des numerischen Tastenblocks A-C: Buchstaben a, b, c der Tastatur F1 - F3: Funktionstasten F1, F2, F3 der Tastatur 17 · G&D CATCenter NEO4... -
Seite 21: Ps/2-Maus Der Lokalen Targets Aktivieren Oder Zurücksetzen
Sie die Eingabetaste: Reset Mouse: Reset der PS/2-Maus-Schnittstelle eines Windows-Rechners Enable mouse Aktivierung der PS/2-Maus eines Linux-Rechners (for Unix): Enable Intelli: Aktivierung der PS/2-Wheel-Maus eines Linux-Rechners Enable Intelli- Aktivierung der PS/2-Wheel-Maus mit Zusatztasten eines Linux-Rechners Explorer: G&D CATCenter NEO4 · 18... -
Seite 22: Status-Anzeigen
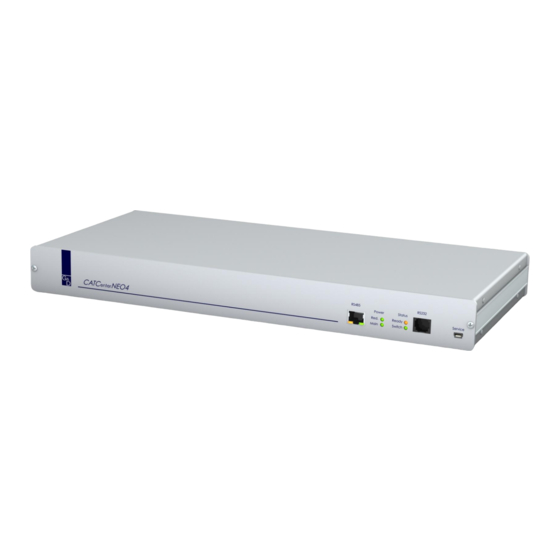
Installationsanleitung Status-Anzeigen Matrixswitch CATCenter NEO4 Frontseite Die LEDs auf der Frontseite des Matrixswitches CATCenter NEO4 haben folgende Funktion: Bereich Bedeutung Power Main Leuchtet, wenn die Spannungsversorgung hergestellt wurde. Status Ready Blinkt unregelmäßig, wenn das Netzwerk-Subsystem läuft. Erlischt, wenn keine Netzwerkfunktionalität unter- stützt wird. -
Seite 23: Rückseite
Verbindung zum CATCenter-System besteht, ein Target- kurz auf: Computer ist aber nicht aufgeschaltet. leuchtet Verbindung zum CATCenter-System besteht und ein Target- Computer ist aufgeschaltet flackert: Verbindung zum CATCenter-System besteht, ein Target- Computer ist aufgeschaltet und Tastatur-/Mausdaten wer- den empfangen. G&D CATCenter NEO4 · 20... -
Seite 24: Arbeitsplatzmodul Ucon
Auf der Rückseite des Arbeitsplatzmoduls UCON befinden sich an der RJ45- Schnittstelle zusätzliche Status-LEDs. Diese LEDs haben folgende Funktion: Bereich Bedeutung gelb Port ist aktuell durch einen Benutzer belegt. grün Verbindung zu einem Target-Modul CATpro2. 21 · G&D CATCenter NEO4... -
Seite 25: Arbeitsplatzmodul Ucon-A
Auf der Rückseite des Arbeitsplatzmoduls UCON-a befinden sich an jeder RJ45- Schnittstelle zusätzliche Status-LEDs. Diese LEDs haben folgende Funktion: Bereich Bedeutung Transm. gelb Port ist aktuell durch einen Benutzer belegt. grün Verbindung zum CATCenter-System besteht. G&D CATCenter NEO4 · 22... -
Seite 26: Frontseite
Leuchtet, wenn ein externes Netzteil angeschlossen ist und 12V liefert. Main Leuchtet, wenn Spannungsversorgung hergestellt ist. Remote Active Leuchtet, wenn eine Tastatur initialisiert wurde. Blinkt, wenn keine Tastatur initialisiert wurde. Status Leuchtet immer, wenn das CATCenter-System betriebs- bereit ist. 23 · G&D CATCenter NEO4... - Seite 27 Schnittstelle zusätzliche Status-LEDs. Diese LEDs haben folgende Funktion: Bereich Bedeutung gelb Port ist aktuell durch einen Benutzer belegt. grün Verbindung zu einem Target-Modul CATpro2. Trans- gelb Port ist aktuell durch einen Benutzer belegt. mission grün Verbindung zum CATCenter-System besteht. G&D CATCenter NEO4 · 24...
-
Seite 28: Frontseite
Port ist aktuell durch einen Benutzer belegt. mission grün Verbindung zum CATCenter-System besteht. Ethernet gelb Leuchtet dauerhaft bei einer Voll-Duplex-Verbindung. Blinkt bei einer Halb-Duplex-Verbindung (Collision). grün Zeigt den Verbindungsstatus an. Blinkt bei Aktivität. 25 · G&D CATCenter NEO4... -
Seite 29: Technische Daten
< 80%, nicht kondensierend zum Arbeitsplatzmodul: 4 × RJ45-Buchse Schnittstellen zum Target-Modul: 32 × RJ45-Buchse für Netzwerkanbindung: 2 × RJ45-Buchse für Update: nicht erforderlich (über Webapplikation Config Panel) für Powerswitch: 1 × RJ11-Buchse CE, RoHs Konformität G&D CATCenter NEO4 · 26... -
Seite 30: Target-Modul Catpro2 (Standardvarianten)
1 × USB-A, 1 × D-Sub HD 15 CATpro2-SUN-USB (de): 1 × USB-A, 1 × D-Sub HD 15 CATpro2-SUN-USB (us): 1 × USB-A, 1 × D-Sub HD 15 zum Matrixswitch: 1 × RJ45-Buchse CE, RoHs Konformität 27 · G&D CATCenter NEO4... -
Seite 31: Target-Modul Catpro2-Audio-Ps/2
120 g Temperatur: +5 bis +45 °C Einsatz- Luftfeuchte: < 80%, nicht kondensierend umgebung zum Target-Computer: 1 × USB-A, 1 × D-Sub HD 15, Schnittstellen 1 × Klinkenstecker zum Matrixswitch: 1 × RJ45-Buchse CE, RoHs Konformität G&D CATCenter NEO4 · 28... -
Seite 32: Target-Modul Catpro2-Vt100
105 × 26 × 84 mm Bauform: Konverter Gewicht: ca. 200 g Temperatur: +5 bis +45 °C Einsatz- Luftfeuchte: < 80%, nicht kondensierend umgebung zum Target: 1 × D-Sub 9-Buchse Schnittstellen zum Zentralmodul: 2 × RJ45-Buchse CE, RoHs Konformität 29 · G&D CATCenter NEO4... -
Seite 33: Arbeitsplatzmodul Ucon
1 × D-Sub HD 15-Buchse (Video) Schnittstellen 2 × PS/2 Buchse (Tastatur/Maus) 2 × USB-A-Buchse (Tastatur/Maus) 1 × D-Sub 9-Buchse (LED) zum Matrixswitch: 1 × RJ45 Buchse für Update: 1 × 2,5 mm-Klinkenbuchse CE, RoHs Konformität G&D CATCenter NEO4 · 30... -
Seite 34: Arbeitsplatzmodul Ucon-A
Luftfeuchte: < 80%, nicht kondensierend für Arbeitsplatz: 1 × D-Sub HD 15-Buchse (Video) Schnittstellen 2 × PS/2 Buchse (Tastatur/Maus) zum Matrixswitch: 1 × RJ45 Buchse für Update: 1 × 2,5 mm-Klinkenbuchse CE, RoHs Konformität 31 · G&D CATCenter NEO4... -
Seite 35: Arbeitsplatzmodul Ucon-S
Schnittstellen 2 × PS/2 Buchse (Tastatur/Maus) 2 × USB-A Buchse (Tastatur/Maus) zum Matrixswitch: 1 × RJ45 Buchse für lokale Arbeitsplatzrechner: 2 × RJ45 Buchse (mit ArbeitsplatzmodulCATpro2) für Update: 1 × 2,5 mm-Klinkenbuchse CE, RoHs Konformität G&D CATCenter NEO4 · 32... -
Seite 36: Arbeitsplatzmodul Ucon-Ip-Eco
Arbeitsplatz: 1 × D-Sub HD 15-Buchse (Video) Schnittstellen 2 × PS/2 Buchse (Tastatur/Maus) zum Matrixswitch: 1 × RJ45 Buchse für Netzwerk: 1 × RJ45 Buchse für Update: nicht erforderlich (erfolgt über Netzwerkschnittstelle) CE, RoHs Konformität 33 · G&D CATCenter NEO4... - Seite 37 NOTIZEN...
- Seite 38 Imprint © Guntermann & Drunck GmbH 2009. All rights reserved. Version 1.03a – 25/08/2009 Guntermann & Drunck GmbH Dortmunder Str. 4a 57234 Wilnsdorf Germany Phone +49 2739 8901-100 +49 2739 8901-120 http://www.GDsys.de sales@GDsys.de i · G&D CATCenter NEO4...
-
Seite 39: Safety Guidelines
Operate this device with the provided G&D power pack or with the power packs listed in the operating manual. ! Operate the device only in the intended area of application This device has been designed for indoor use. Do not expose it to extreme cold, heat or humidity. G&D CATCenter NEO4 · ii... - Seite 40 Installation Guide Contents The matrix switch CATCenter NEO4 ............3 Scope of delivery................4 Matrix switch CATCenter NEO4..............4 User module UCON ..................4 User module UCON-a ..................4 User module UCON-s ..................4 User module UCON-IP-eco................4 Installation..................5 Connecting the target computers ..............
- Seite 41 Installation Guide Status displays ................. 19 Matrix switch CATCenter NEO4 ..............19 Front panel ....................19 Back panel ....................20 The target modules of the CATpro2 series ............20 The user module UCON................21 Front panel ....................21 Back panel ....................21 The user module UCON-a ................
-
Seite 42: The Matrix Switch Catcenter Neo4
Installation Guide The matrix switch CATCenter NEO4 The matrix switch CATCenter NEO4 enables to control up to 32 target modules using 4 user modules. By cascading, the number of target computers can be in- creased to 2048. Both the target computers as well as the user modules are connected to the CATCenter system through category 5 (or better) twisted pair cables. -
Seite 43: Scope Of Delivery
Installation Guide Scope of delivery Matrix switch CATCenter NEO4 1 × matrix switch CATCenter NEO4 1 × Installation Guide (CATCenter NEO4) 1 × Operating Guide (CATCenter NEO) 1 × Operating Guide (Web application Config Panel) 1 × power cable (PowerCable-2 Standard) ... -
Seite 44: Installation
Connect the other end of the twisted pair cable to a CPU interface (RJ45 socket) of the matrix switch CATCenter NEO4. Connection via the target module CATpro2-USB How to connect the target module CATpro2-USB to the matrix switch: ... -
Seite 45: Connection Via The Target Module Catpro2-Audio-Ps/2
Connect the other end of the twisted pair cable to a CPU interface (RJ45 socket) of the matrix switch CATCenter NEO4. Connection via the target module CATpro2-Audio-USB How to connect the target module CATpro2-Audio-USB to the matrix switch: ... -
Seite 46: Connection Via The Catpro2-Sun-Usb Target Module
Connect the other end of the twisted pair cable to a CPU interface (RJ45 socket) of the matrix switch CATCenter NEO4. Connection via the target module CATpro2-VT100 How to connect the target module CATpro2-VT100 to the matrix switch: ... -
Seite 47: Connecting The User Modules
Insert one end of the category 5 (or better) twisted pair cable into the Transmission port of the user module. Connect the other end of the twisted pair cable to any of the 4 Console ports of the matrix switch CATCenter NEO4. user module UCON twisted pair cable... -
Seite 48: Connection Via The User Module Ucon-A
Insert one end of the category 5 (or better) twisted pair cable into the Transmission port of the user module. Connect the other end of the twisted pair cable to any of the 4 Console ports of the matrix switch CATCenter NEO4. user module UCON-a twisted pair cable... -
Seite 49: Connection Via The User Module Ucon-S
Insert one end of the category 5 (or better) twisted pair cable into the Transmission port of the user module. Connect the other end of the twisted pair cable to any of the 4 Console ports of the matrix switch CATCenter NEO4. user module UCON-s twisted pair cable... -
Seite 50: Connection Via The User Module Ucon-Ip-Eco
Insert one end of the category 5 (or better) twisted pair cable into the Transmission port of the user module. Connect the other end of the twisted pair cable to any of the 4 Console ports of the matrix switch CATCenter NEO4. user module UCON-IP-eco twisted pair cable... -
Seite 51: Power Supply
sending log messages to the syslog server carrying out firmware updates and backups These functions of the matrix switch CATCenter NEO4 are operated using the web application Config Panel. They are separately described in the manual of the web application. -
Seite 52: Installing The Expansion Unit
CPU Ports 21 - 24: connect the sixth slave device CPU Ports 25 - 28: connect the seventh slave device CPU Ports 29 - 32: connect the eighth slave device 13 · G&D CATCenter NEO4... - Seite 53 Proceed as described to connect the third and fourth slave devices. Hint: When the maximum number of four slave devices is connected to the mas- ter device, no targets can be connected to the master. G&D CATCenter NEO4 · 14...
- Seite 54 The procedure used to connect these matrix switches is exactly the same as described above: master device slave device (1st cascade level) slave device (2nd cascade level) Further information: Chapter Defining the cascade mode of the matrix switch of the Operating Guide 15 · G&D CATCenter NEO4...
-
Seite 55: Features
Ctrl establishes a direct connection to the CATCenter system The user is enabled to configure these key combinations in the OSD. The following chapter provides detailed information regarding this topic. G&D CATCenter NEO4 · 16... -
Seite 56: Activating And Operating The User Module Osd
1 - 3: keys 1, 2, and 3 at the alphanumeric keypad NUM1 - NUM3: keys 1, 2, and 3 at the numeric keypad A-C: keys a, b, c F1 - F3: function keys F1, F2, F3 17 · G&D CATCenter NEO4... -
Seite 57: Activating Or Resetting The Ps/2 Mouse Of The Local Targets
PS/2 mouse of a Linux computer (for Unix): Enable Intelli: activates the PS/2 wheel mouse of a Linux computer Enable Intelli- activates the PS/2 wheel mouse with additional keys of a Linux computer Explorer: G&D CATCenter NEO4 · 18... -
Seite 58: Status Displays
Installation Guide Status displays Matrix switch CATCenter NEO4 Front panel The LEDs on the front panel of the matrix switch CATCenter NEO4 have the fol- lowing function: Section Meaning Power Main Lights up if the main power supply is connected. -
Seite 59: Back Panel
Connected to the CATCenter system but no target computer is accessing. 1,5 sec.: lights up: Connected to the CATCenter system and a target computer is accessing. flickers: Connected to the CATCenter system, a target computer is accessing and keyboard/mouse data are being received. G&D CATCenter NEO4 · 20... -
Seite 60: The User Module Ucon
Every RJ45 interface at the back panel of the user module UCON provides addi- tional status LEDs. These LEDs have the following function: Section Meaning Transm. yellow The port is currently occupied by a user. green Connected to the CATpro2 target module. 21 · G&D CATCenter NEO4... -
Seite 61: The User Module Ucon-A
Every RJ45 interface at the back panel of the user module UCON-a provides addi- tional status LEDs. These LEDs have the following function: Area Meaning Transm. yellow The port is currently occupied by a user. green Connected to the CATCenter system. G&D CATCenter NEO4 · 22... -
Seite 62: The User Module Ucon-S
Lights up if the main power supply is connected and is supplying power. Remote Active Lights up if a keyboard has been initialised. Flashes if no keyboard has been initialised. Status Always Lights up when the CATCenter system is ready for operation. 23 · G&D CATCenter NEO4... -
Seite 63: Back Panel
Section Meaning yellow The port is currently occupied by a user. green Connected to the CATpro2 target module. Trans- yellow The port is currently occupied by a user. mission green Connected to the CATCenter system. G&D CATCenter NEO4 · 24... -
Seite 64: The User Module Ucon-Ip-Eco
Connected to the CATCenter system. green Ethernet yellow Lights up constantly during a full-duplex connection. Lights up during a half-duplex connection (collision). green Indicates the connection status. Flashes during activity. 25 · G&D CATCenter NEO4... -
Seite 65: Technical Data
4 × RJ45 socket Interfaces to target module: 32 × RJ45 socket for network connection: 2 × RJ45 socket for update: not required (via web application Config Panel) for powerswitch: 1 × RJ11 socket CE, RoHs Conformity G&D CATCenter NEO4 · 26... -
Seite 66: Target Module Catpro2 (Standard Versions)
1 × USB-A, 1 × D-Sub HD 15 CATpro2-SUN-USB (de): 1 × USB-A, 1 × D-Sub HD 15 CATpro2-SUN-USB (us): 1 × USB-A, 1 × D-Sub HD 15 to matrix switch: 1 × RJ45 socket CE, RoHs Conformity 27 · G&D CATCenter NEO4... -
Seite 67: Target Module Catpro2-Audio-Ps/2
+5 to +45 °C Operational Air humidity: < 80%, non-condensing environment to target computer: 1 × USB-A, 1 × D-Sub HD 15, Interfaces 1 × audio jack to matrix switch: 1 × RJ45 socket CE, RoHs Conformity G&D CATCenter NEO4 · 28... -
Seite 68: Target Module Catpro2-Vt100
Weight: approx. 200 g Temperature: +5 to +45 °C Operational Air humidity: < 80%, non-condensing environment to target: 1 × D-Sub 9 socket Interfaces to central module: 2 × RJ45 socket CE, RoHs Conformity 29 · G&D CATCenter NEO4... -
Seite 69: User Module Ucon
Interfaces 2 × PS/2 socket (keyboard/mouse) 2 × USB-A socket (keyboard/mouse) 1 × D-Sub 9 socket (LED) to matrix switch: 1 × RJ45 socket for update: 1 × 2,5 mm jack plug CE, RoHs Conformity G&D CATCenter NEO4 · 30... -
Seite 70: User Module Ucon-A
< 80%, non-condensing for user module: 1 × D-Sub HD 15 socket (video) Interfaces 2 × PS/2 socket (keyboard/mouse) to matrix switch: 1 × RJ45 socket for update: 1 × 2,5 mm jack plug CE, RoHs Conformity 31 · G&D CATCenter NEO4... -
Seite 71: User Module Ucon-S
2 × PS/2 socket (keyboard/mouse) 2 × USB-A socket (keyboard/mouse) to matrix switch: 1 × RJ45 socket for local computer: 2 × RJ45 socket (with target moduleCATpro2) for update: 1 × 2,5 mm phone jack CE, RoHs Conformity G&D CATCenter NEO4 · 32... -
Seite 72: User Module Ucon-Ip-Eco
1 × D sub HD 15 socket (video) Interfaces 2 × PS/2 socket (keyboard/mouse) to matrix switch: 1 × RJ45 socket for network: 1 × RJ45 socket for update: not required (over network interface) CE, RoHs Conformity 33 · G&D CATCenter NEO4... - Seite 73 NOTES...
- Seite 74 NOTES...
- Seite 75 NOTES...
- Seite 76 Das Handbuch wird fortlaufend aktualisiert und im Internet veröffentlicht. The manual is constantly updated and available on our website. http://gdsys.de/A9100133 Guntermann & Drunck GmbH Dortmunder Str. 4a 57234 Wilnsdorf Germany http://www.GDsys.de sales@GDsys.de...