Guntermann & Drunck FIBREVision Installationsanleitung

Verwandte Anleitungen für Guntermann & Drunck FIBREVision


Inhaltszusammenfassung für Guntermann & Drunck FIBREVision
- Seite 1 Guntermann & Drunck GmbH www.gdsys.de G&D FIBREVision Installation und Bedienung Installation and Operation A9100096-1.71...
-
Seite 2: Zu Dieser Dokumentation
© Guntermann & Drunck GmbH 2015. Alle Rechte vorbehalten. Version 1.71 – 13.04.2015 Firmware: 1.10.4cpu; 1.9.8con Guntermann & Drunck GmbH Dortmunder Str. 4a 57234 Wilnsdorf Germany Telefon +49 (0) 2739 8901-100 Telefax +49 (0) 2739 8901-120 http://www.GDsys.de sales@GDsys.de i · G&D FIBREVision... -
Seite 3: Inhaltsverzeichnis
Unterschied zwischen Multimode- und Singlemode-Übertragungstechnik ..... 4 Lieferumfang ....................5 Installation ....................... 6 Vorbereitung ..................... 6 Installation des Rechnermoduls (FIBREVision-CPU) ..........7 Anschluss des Rechners ................7 Optional: Anschluss des lokalen Arbeitsplatzes ..........8 Anschlüsse für Datenübertragung und Stromversorgung ....... 8 Zusätzliche Schnittstellen der Multi-Channel-Varianten ........ - Seite 4 Installation der G&D Power Card im Rechner ..........54 Verbindung der Signalleitungen mit der Slotkarte ........54 Verbinden der G&D Power Card und des Panels mit FIBREVision ....55 Bedienung der Erweiterung FIBRE-Power ............55 Belegung des Anschlusskabels für das Panel ............. 56 Technische Daten ...................
-
Seite 5: Sicherheitshinweise
Betreiben Sie dieses Gerät nur mit dem mitgelieferten oder in der Bedienungsan- leitung aufgeführten Netzteil. ! Betreiben Sie das Gerät ausschließlich im vorgesehenen Einsatzbereich Die Geräte sind für eine Verwendung im Innenbereich ausgelegt. Vermeiden Sie extreme Kälte, Hitze oder Feuchtigkeit. G&D FIBREVision · 1... -
Seite 6: Besondere Hinweise Zum Umgang Mit Laser-Technologie
Sicherheitshinweise Besondere Hinweise zum Umgang mit Laser-Technologie Die Geräte der FIBREVision-Serie verwenden Baugruppen mit Laser-Technologie, die der Laser-Klasse 1 entsprechen. Sie erfüllen dabei die Richtlinien gemäß DIN EN 60825-1:2001-11, IEC 60825-1 sowie U.S. CFR 1040.10 und 1040.11. LASER KLASSE 1... -
Seite 7: Die Fibrevision-Serie
Die Bedienung des Rechners kann wahlweise am entfernten Arbeitsplatz des Arbeitsplatzmoduls oder am lokalen Arbeitsplatz des Rechnermoduls erfolgen. Verfügbare Gerätevarianten Innerhalb der FIBREVision-Serie sind weitere Geräte verfügbar, die die Übertragung zusätzlicher Signale und die Verwendung mehrerer Bildschirme erlauben: Modell Video- Tastatur &... -
Seite 8: Unterschied Zwischen Multimode- Und Singlemode-Übertragungstechnik
Die FIBREVision-Serie Unterschied zwischen Multimode- und Singlemode- Übertragungstechnik Die Geräte der FIBREVision-Serie sind wahlweise als Variante für die Verwendung von Multimodefasern und als Variante für die Verwendung von Singlemodefasern verfügbar: Multimodefasern erlauben eine maximale Entfernung von 550 Metern. Die Signalübertragung auf diesen Fasern erfolgt über viele verschiedene Licht- wege, wodurch es zu Signalbeeinflussungen kommt. -
Seite 9: Lieferumfang
1 × Servicekabel (USB-Service-2) 1 × Installations- und Bedienhandbuch Erweiterter Lieferumfang der Varianten -AR und -ARU Falls Sie die Variante -AR oder -ARU der FIBREVision-Serie erworben haben, befin- den sich zusätzlich folgende Kabel im Lieferumfang. 2 × Audio-Kabel (Audio-M/M-2) ... -
Seite 10: Installation
Beachten Sie bei der Installation eines Rechner- bzw. Arbeitsplatzmo- duls der Variante FIBREVision-MC4 die ergänzenden Informationen auf Seite 48. 1. Stellen Sie sicher, dass der an das FIBREVision-System anzuschließende Rechner ausgeschaltet ist. Falls der Rechner mit einer Tastatur und einer Maus verbunden ist, ziehen Sie die Kabel der Eingabegeräte aus den Schnittstellen. -
Seite 11: Installation Des Rechnermoduls (Fibrevision-Cpu)
Mouse CPU: Verbinden Sie die grünen PS/2-Buchse (Maus) des Rechners mit dieser Schnittstelle. Verwenden Sie hierzu den grünen Stecker des Twin-PS/2-Kabels. Zusätzliche Schnittstellen der Varianten FIBREVision-AR und -ARU: Line Out: Verbinden Sie die Line-In-Schnittstelle des Rechners mit dieser Schnitt- stelle. Verwenden Sie hierzu das Kabel Audio-M/M-2. -
Seite 12: Optional: Anschluss Des Lokalen Arbeitsplatzes
Arbeitsplatzmoduls zu verbinden. Power: Stecken Sie hier das mitgelieferte Kaltgerätekabel PowerCable-2 Standard ein. Red. Power: Optional kann über diese Buchse das Netzteil Power-Set 12/Typ 2 ange- schlossen werden. Hierdurch wird eine zweite, redundante Stromversorgung des Rechnermoduls erreicht. 8 · G&D FIBREVision... - Seite 13 Adapter auf diese Schnittstelle. Schließen Sie anschließend das VGA-Kabel des Monitors an den Adapter an. DVI CPU: Verbinden Sie den digitalen Videoausgang des Rechners mit dieser Schnitt- stelle. Verwenden Sie hierzu das Kabel DVI-D-SL-M/M-2. G&D FIBREVision · 9...
-
Seite 14: Installation Des Arbeitsplatzmoduls (Fibrevision-Con)
Speaker: Schließen Sie hier die Lautsprecher des Arbeitsplatzes an. Micro In: Schließen Sie hier gegebenenfalls ein Mikrofon an. RS232: Verbinden Sie das serielle Endgerät mit dieser Schnittstelle. Das serielle Endgerät wird dem, an das Rechnermodul (FIBREVision-CPU) ange- schlossenen, Rechner zur Verfügung gestellt. 10 · G&D FIBREVision... - Seite 15 – Tx des Rechnermoduls zu verbinden. Power: Stecken Sie hier das mitgelieferte Kaltgerätekabel PowerCable-2 Standard ein. Red. Power: Optional kann über diese Buchse das Netzteil Power-Set 12/Typ 2 ange- schlossen werden. Hierdurch wird eine zweite, redundante Stromversorgung des Arbeitsplatzmoduls erreicht. G&D FIBREVision · 11...
-
Seite 16: Zusätzliche Schnittstellen Der Multi-Channel-Varianten
Installation Zusätzliche Schnittstellen der Multi-Channel-Varianten Abbildung 7: Zusätzliche Schnittstellen der Multi-Channel-Varianten an FIBREVision-CON HINWEIS: Für jeden zusätzlichen Videokanal sind die Geräte der Multi-Channel- Varianten des Arbeitsplatzmoduls FIBREVision-CON zusätzlich mit den Schnitt- stellen Transmission - Tx. Transmission - Rx und DVI/VGA Out ausgestattet. -
Seite 17: Inbetriebnahme
Nach der ordnungsgemäßen Installation des FIBREVision-Systems kann dieses sofort in Betrieb genommen und eingesetzt werden. Beachten Sie folgende Einschaltreihenfolge bei der Inbetriebnahme des Systems: 1. Schalten Sie das Arbeitsplatzmodul (FIBREVision-CON) am Schalter oberhalb der Power-Buchse ein. 2. Schalten Sie das Rechnermodul (FIBREVision-CPU) am Schalter oberhalb der Power-Buchse sein. -
Seite 18: Bedienung
Sofort nach Betätigung dieser Tastenkombination sind die Eingabegeräte des konkurrie- renden Arbeitsplatzes deaktiviert. Erst durch erneutes Ausführen der Tastenkombina- tion am aktiven Arbeitsplatz, wird die Bedienung des FIBREVision-Systems – nach Ablauf der Zeitspanne der Eingabesperre – wieder für beide Arbeitsplätze freigeschaltet. -
Seite 19: Konfiguration
Konfiguration Konfiguration Die Konfiguration des FIBREVision-Systems kann wahlweise im Setup-Modus oder im Setup-Menü durch den Anwender geändert werden: Der Setup-Modus wird über die Tastatur eines Arbeitsplatzes aktiviert. Durch spezielle Setup-Keys kann anschließend die Änderung der Konfiguration erreicht werden. Alternativ steht das Setup-Menü zur Verfügung. Durch Verwendung eines Termi- nalemulationsprogramms und des mitgelieferten Servicekabels kann die Konfigu- ration geändert werden. -
Seite 20: Vorgehen Zur Änderung Der Konfiguration
Setup-Menü. Bedienung des Setup-Modus Der Setup-Modus kann jederzeit mit der Tastatur eines Arbeitsplatzes aktiviert wer- den. Nach der Aktivierung kann die Konfiguration des FIBREVision-Systems mit verschiedenen Setup-Keys verändert werden. HINWEIS: Nach dem Aufruf des Setup-Modus kann nur eine Setup-Funktion aus- geführt werden. -
Seite 21: Bedienung Des Setup-Menüs
Installieren Sie vor der Einrichtung der Verbindung im Terminalemula- tionsprogramm den Gerätetreiber CP210x USB to UART Bridge VCP. Dieser Treiber stellt die per Servicekabel verbundene Service-Buchse des FIBREVision- Systems als virtuelle serielle Schnittstelle (COM-Port) zur Verfügung. Die virtuelle Schnittstelle kann anschließend im Terminalemulationsprogramm zum Verbindungs- aufbau ausgewählt werden. -
Seite 22: Show System Info
Betätigen Sie zwei mal die Tastenkombination Strg+X um das Setup-Menü zu beenden. Bedienung des Setup-Menüs Das Setup-Menü listet alle Einstellungen des FIBREVision-Systems in Tabellenform auf: Setup Menu for FIBREVision-CPU Show System Info ... Show Version Info Show Line Info... -
Seite 23: Konfigurationseinstellungen
Konfiguration Konfigurationseinstellungen Aktivierung der Hotkey-Verzögerung In der Standardeinstellung des FIBREVision-Systems ist die Tastenkombination Hotkey+Backspace (Vorgabe: Strg+Backspace ) sieben Sekunden lang zu betätigen um den Setup-Modus zu starten. Falls Sie den Setup-Modus unmittelbar nach Betäti- gung der Tastenkombination starten möchten, kann die Hotkey-Verzögerung deak- tiviert werden. -
Seite 24: Verwendung Von Einfachen Oder Doppel-Hotkeys
Nach der Umschaltung wird der aktive Hotkey in einen Doppel-Hotkey (oder umgekehrt) konvertiert: einfacher Hotkey Doppel-Hotkey Strg Strg+Shift Alt+Shift Alt Gr Alt Gr+Strg Win+Strg Shift Shift+Win Verwandte Themen: Änderung des einfachen Hotkeys auf Seite 21 Änderung des Doppel-Hotkeys auf Seite 22 20 · G&D FIBREVision... -
Seite 25: Änderung Des Einfachen Hotkeys
Änderung des einfachen Hotkeys Der Hotkey wird gleichzeitig mit der Taste Backspace betätigt, um den Setup-Modus des FIBREVision-Systems zu starten. Falls ein Anwendungsprogramm oder ein anderes G&D-Gerät innerhalb der Kaskade den gleichen Hotkey verwendet, kann dieser geändert werden. HINWEIS: Im Auslieferungszustand ist der einfache Hotkey Strg voreingestellt. -
Seite 26: Änderung Des Doppel-Hotkeys
Alt Gr+Ctrl Alt Gr+Strg Aktivierung des Doppel-Hotkeys Win+Ctrl Win+Strg Aktivierung des Doppel-Hotkeys Shift+Win Shift+Win 5. Betätigen Sie die Taste , um die Einstellung zu speichern. Verwandtes Thema: Verwendung von einfachen oder Doppel-Hotkeys auf Seite 20 22 · G&D FIBREVision... -
Seite 27: Änderung Des Scancode-Sets Einer Ps/2-Tastatur
Scancode-Set zu aktivieren: Aktivierung des Scancode-Sets 2 für PS/2-Tastatureingaben Aktivierung des Scancode-Sets 3 für PS/2-Tastatureingaben 3. Schalten Sie das FIBREVision-System aus und wieder ein. Die Tastatur wird nach dem erneuten Einschalten initialisiert und das ausgewählte Scancode-Set angewendet. 1. Starten Sie mit dem Terminalemulationsprogramm den Verbindungsauf- bau zum FIBREVision-System. -
Seite 28: Unterstützung Für Ps/2-Spezialtastaturen
Unterstützung für PS/2-Spezialtastaturen Das FIBREVision-System unterstützt die Sonderfunktionen der PS/2-Spezialtastatu- ren PixelPower Clarity (blue) und SKIDATA1. Aktivieren Sie die Unterstützung einer dieser Tastaturen durch das FIBREVision- System, falls Sie eine solche Tastatur am Arbeitsplatz einsetzen möchten. HINWEIS: Die Unterstüzung von Spezialtastaturen kann auschließlich im Setup- Menü... -
Seite 29: Usb-Tastaturmodus Auswählen
EINSTELLUNG PC-Tastatur mit zusätzlichen Multimedia-Tasten PC Multimedia PC-Tastatur mit Standard-Tastaturlayout PC Standard Apple Keyboard mit Ziffernblock (A1243) Apple A1243 Sun Keyboard (deutsches Tastaturlayout) SUN German Sun Keyboard (amerikanisches Tastaturlayout) SUN US G&D FIBREVision · 25... - Seite 30 Bei Verwendung einer Standardtastatur können die Funktionen – durch Verwendung der unten aufgelisteten Tastenkombinationen – bedient werden: TASTENKOMBINATION »SOLARIS SHORTCUT KEY« DES SUN KEYBOARDS Strg+Alt+F2 Wiederholen Strg+Alt+F3 Eigenschaften Strg+Alt+F4 Zurücknehmen Strg+Alt+F5 Vordergrund Strg+Alt+F6 Kopieren Strg+Alt+F7 Öffnen 26 · G&D FIBREVision...
-
Seite 31: Ps/2-Auto-Repeat Des Rechnermoduls
Bei längerem Tastendruck wird der Scancode der Taste wiederholt an den Rechner gesendet (Standard). Unabhängig von der Dauer des Tastendrucks wird der Scancode nur einmalig gesendet. 4. Betätigen Sie die Taste , um die Einstellung zu speichern. G&D FIBREVision · 27... -
Seite 32: Änderung Der Zeitspanne Der Eingabesperre
Wird an einem Arbeitsplatz eine Eingabe per Tastatur oder Maus durchgeführt, sperrt das FIBREVision-System automatisch die Eingabegeräte des konkurrierenden Arbeitsplatzes. Die Sperre wird aufgehoben, wenn innerhalb der eingestellten Zeit- spanne der Eingabesperre (Vorgabe: 1 Sekunde) keine weitere Eingabe am aktiven Arbeitsplatz erfolgt. -
Seite 33: Berechtigung Für Dauerhaften Zugriff Des Arbeitsplatzes
Erfolgt innerhalb der eingestellten Zeitspanne der automatischen Eingabesperre (Vorgabe: 1 Sekunde) keine Eingabe am aktiven Arbeitsplatz, erlaubt das FIBREVision-System in der Standardeinstellung auch dem anderen Arbeitsplatz die Bedienung des Systems. Wird die Funktion Berechtigung für dauerhaften Zugriff des Arbeitsplatzes im Setup-Menü... -
Seite 34: Änderung Der Videobetriebsart Der Arbeitsplätze
HINWEIS: Diese Funktion kann ausschließlich im Setup-Menü ein- bzw. ausge- schaltet werden. In der Standardkonfiguration des FIBREVision-Systems wird das Videosignal des Rechners sowohl am Monitor des aktiven als auch am Monitor des konkurrieren- den Arbeitsplatzes ausgegeben. Durch Verwendung der Funktion Änderung der Videobetriebsart der Arbeitsplätze können Sie festlegen, ob das Videosignal am lokalen bzw. -
Seite 35: Auswahl Des Edid-Modus
Zugriff auf die Eigenschaften des entfernten Monitors hat, ist eine Cache- Funktion integriert. Auch wenn das Rechner- oder das Arbeitsplatzmodul ausge- schaltet oder nicht miteinander verbunden sind, stehen entweder die Eigenschaften des zuletzt angeschlossenen Monitors oder die Werksvorgabe im FIBREVision- System zu Verfügung. Keep stored EDID:... -
Seite 36: Anzeige Des Letzten Bildes Bei Verbindungsabbruch (Freeze)
Bildschirmzustände am Arbeitsplatz- Monitor auszuwählen: Bei Verbindungsabbruch kein Bild anzeigen (Standard) Anzeige des letzten Bildes und Färbung des Randbereichs 4. Betätigen Sie die Taste , um die Einstellung zu speichern. 32 · G&D FIBREVision... -
Seite 37: Optimierung Des Videobildes
(Videos etc.) verringerte Farbtiefe Farbtiefe: 18 bit leichte Latenz kein Tearing Höchste Performance höchste Bildaktualisierungsrate HDIP: aus verringerte Farbtiefe Farbtiefe: 18 bit kürzeste Latenz Tearing möglich G&D FIBREVision · 33... - Seite 38 Bilder mit einer reduzierten Farbtiefe von 18 bit übertragen. 6. Optional: Wählen Sie mit den Tasten bzw. die Spalte eines wei- Pfeil Pfeil teren Videokanals, dessen Einstellung Sie editieren möchten. 7. Betätigen Sie die Taste , um die Einstellung zu speichern. 34 · G&D FIBREVision...
-
Seite 39: Aktivierung Oder Reset Einer Ps/2-Maus
Rechner nicht erkannt. Um die Aktivierung oder einen Reset der PS/2-Maus zu erreichen, kann durch das FIBREVision-System ein spezieller Befehl an den Rechner gesendet werden. Da die Befehle in Abhängigkeit vom verwendeten Maustyp und Betriebssystem unterschiedlich sind, stehen vier verschiedene Setup-Keys zur Verfügung. -
Seite 40: Anzeige Der Statusinformationen Des Systems
Anschlussart der Eingabegeräte, usw.) über das FIBREVision-System. HINWEIS: In der Zeile Console Access wird angezeigt, welcher Arbeitsplatz (CPU oder CON) zurzeit das FIBREVision-System bedient und ob der permanente Zugriff (Anzeige im Setup-Menü: Permanent) auf das FIBREVision-System aktiviert wurde. Anzeige der Versionsnummern der verschiedenen Komponenten Show Version Info: des FIBREVision-Systems. -
Seite 41: Wiederherstellung Der Standardeinstellungen
4. Betätigen Sie die Taste , um wieder in das Hauptmenü zu gelangen. Wiederherstellung der Standardeinstellungen Mit dieser Funktion werden die Standardeinstellungen des FIBREVision-Systems wiederhergestellt. Nach dem Ausführen der Funktion sind die auf Seite 15 aufge- führten Standardeinstellungen des FIBREVision-Systems wieder aktiv. -
Seite 42: Erweiterte Konfigurationseinstellungen
Ändern Sie die in diesem Abschnitt beschriebenen Einstellungen nur auf Aufforderung des Support-Teams. Die erweiterten Konfigurationseinstellungen im Setup-Menü erlauben die Anpas- sung spezieller Eigenschaften des FIBREVision-Systems an Besonderheiten der Einsatzumgebung des Anwenders: ------ Special extended options ------ --- Check manual,... -
Seite 43: Verwendung Des Rauschfilters
– aufgrund der fehlenden Kompression – zu einer großen Datenmenge, die zwischen dem Rechner- und dem Arbeitsplatzmodul übertragen wird. Dies kann sich auf die Performance des FIBREVision-Systems auswirken. Aktivieren Sie bei der Feststellung von Performanceeinbußen die niedrige oder die hohe Rauschfilterstufe, die zur Angleichung der Flächen-Farbwerte führt und somit... -
Seite 44: Unterstützung Nicht Dvi-Konformer Bildquellen
Dies betrifft sowohl die Darstellung auf dem Monitor des Rechnermoduls als auch die Darstellung auf dem Monitor des Arbeitsplatzmoduls. HINWEIS: Der Sachverhalt wird durch schwache oder gestörte DVI-Signale des angeschlossenen Rechners verursacht. Die am FIBREVision-System eingehenden DVI-Signale des angeschlossenen Rech- ners sind nicht DVI-konform. 40 · G&D FIBREVision... - Seite 45 7. Betätigen Sie die Taste , um das Menü Set PLL bandwidth zu verlassen. 8. Betätigen Sie die Taste , um das Menü Special Extended Options zu verlassen. 9. Betätigen Sie die Taste , um die Einstellung zu speichern. G&D FIBREVision · 41...
-
Seite 46: Wiederherstellung Der Standardwerte Der Erweiterten Konfiguration
Set Defaults for Spec. Options auszu- wählen. 4. Betätigen Sie die Eingabetaste , um die Standardeinstellungen wiederherzu- stellen. 5. Bestätigen Sie die erscheinende Sicherheitsabfrage mit der Eingabetaste . Ein Abbruch der Funktion ist alternativ mit der Taste möglich. 42 · G&D FIBREVision... -
Seite 47: Monitoring
Während des Betriebs des KVM-Extenders werden die 32 zuletzt aufgetretenen Ereignisse protokolliert. Ist der Puffer für neue Ereignisse belegt, wird bei Auftreten eines neuen Ereignisses das älteste Ereignis überschrieben. Mit dem -Kommando können neue Ereignisse vom KVM-Extender abge- GETLOG fragt werden. G&D FIBREVision · 43... - Seite 48 Verbindung zum Arbeitsplatzmodul (CON) unterbrochen Remote-Unit Online Verbindung zum Arbeitsplatzmodul (CON) hergestellt Screen Freezing active Freeze-Funktion aktiviert Screen Freezing inactive Freeze-Funktion deaktiviert USB-Emulation active USB-Verbindung zum Rechner wurde hergestellt USB-Emulation inactive USB-Verbindung zum Rechner wurde unterbrochen 44 · G&D FIBREVision...
-
Seite 49: Abfrage Der Statusinformationen (Getstatus)
USBStatus Mode=“TRANS” Status des transparenten USB-Bus OK, FAIL HINWEIS: Der Status des transparenten USB-Busses wird nur von KVM-Exten- dern mit USB 1.1-Unterstützung überwacht. Bei Geräten mit USB 2.0-Unterstützung wird in der Zeile USBStatus Mode=“TRANS” immer FAIL angezeigt. G&D FIBREVision · 45... -
Seite 50: Abfrage Der Diagnosefunktionen (Getdiag)
Abfrage der Firmware- und Monitorinformationen (GETINVENTORY) Mit dem GETINVENTORY -Kommando können die Firmware-Revisionen des KVM- Extenders und Informationen über den angeschlossenen Monitor abgefragt werden. Kommando: <GETINVENTORY ReqID=”123”/> Exemplarische Antwort des KVM-Extenders: <INVENTORY Ver="1" ReqID="123"> <FirmwareLocal>1.2.3</FirmwareLocal> <FirmwareRemote>1.2.3</FirmwareRemote> <MonitorManufacturer>Samsung</MonitorManufacturer> <MonitorModel>Syncmaster</MonitorModel> <MonitorSerial>H9XP4711123</MonitorSerial> </INVENTORY> 46 · G&D FIBREVision... -
Seite 51: Neustart Das Kvm-Extenders (Doreboot)
Wert Neustart das KVM-Extenders (DOREBOOT) Mit dem -Kommando erreichen Sie den Neustart des Rechner- sowie des DOREBOOT Arbeitsplatzmoduls. Kommando: <DOREBOOT ReqID=”123”/> Rückmeldung unmittelbar vor Reboot des KVM-Extenders: <REBOOT ReqID=”123”/> Rückmeldung, wenn Befehl nicht ausführbar: <FAIL ReqID=”123”/> G&D FIBREVision · 47... -
Seite 52: Weiterführende Informationen
Berücksichtigen Sie ggf. die Auswirkungen von in der Nähe befindlichen Wärmequellen (beispielsweise durch weitere Geräte). Die Unterbringung in geschlossenen beschränkten Räumlichkeiten ist in der Regel nicht zulässig. Vermeiden Sie die Verdeckung der Lüftungsöffnungen. 48 · G&D FIBREVision... -
Seite 53: Temperaturwarnungen
Weiterführende Informationen Temperaturwarnungen Die Temperatur im Arbeitsplatz- sowie im Rechnermodul der Variante FIBREVision- MC4 wird permanent überwacht. WICHTIG: Zur Vermeidung der Überhitzung des Gerätes wird das Videosignal der Kanäle 2 bis 4 abgeschaltet, sobald der kritische Wert erreicht ist! Vor dem Erreichen des kritischen Wertes wird dem Anwender das Erreichen einer... - Seite 54 Timings weichen von den Vorgaben des Bildschirms ab, um die Frequenzen der digitalen Signale zu reduzieren. Auf das FIBREVision-System und digital angeschlossene Bildschirme hat dies übli- cherweise keine Auswirkung. Analog angeschlossene Bildschirme können auf- grund des nicht-standardisierten Timings die Bildgröße und die Bildlage möglicherweise nicht korrekt wiedergeben.
-
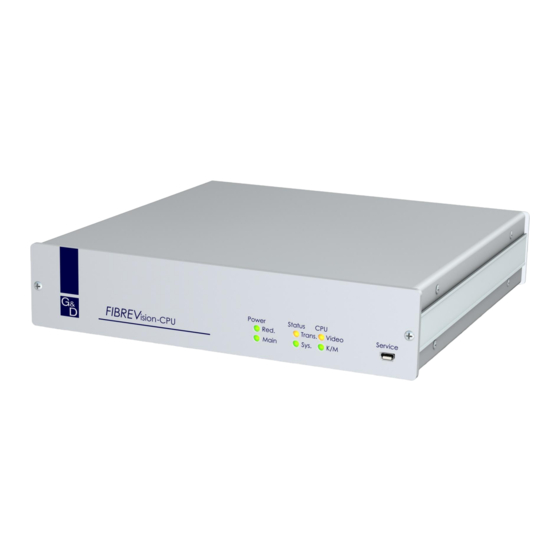
Seite 55: Statusanzeigen
Die Kommunikation mit dem Arbeitsplatzmodul konnte nicht hergestellt werden. Video Am Videoeingang wurde ein stabiles Bildsignal festgestellt. blinkt Das vom Rechner eingehende Videosignal wurde nicht erkannt oder es ist qualitativ nicht ausreichend, um durch das System verarbeitet zu wer- den. G&D FIBREVision · 51... -
Seite 56: Arbeitsplatzmodul (Fibrevision-Con)
Die Kommunikation mit dem Rechnermodul wurde erfolgreich aufgebaut. blinkt Die Kommunikation mit dem Rechnermodul konnte nicht hergestellt werden. Video Das am Videoeingang des Rechnermoduls eingehende Bildsignal wird korrekt durch das Arbeitsplatzmodul empfangen. blinkt Es werden keine Bilddaten vom Rechnermodul empfangen. 52 · G&D FIBREVision... -
Seite 57: Die Erweiterung Fibre-Power
Die Erweiterung FIBRE-Power Die Erweiterung FIBRE-Power Um die Taster ATX-Power und Reset des Rechners am entfernten Arbeitsplatz fernbe- dienen zu könnnen, wird für die Varianten FIBREVision-AR und -ARU die optionale Erweiterung FIBRE-Power angeboten. Lieferumfang Im Lieferumfang der Erweiterung FIBRE-Power befinden sich folgende Artikel: ... -
Seite 58: Installation
Pins. Falls die Länge des Kabels nicht ausreicht, kann dieses mit einem der Verlän- gerungskabel erweitert werden. Res-MB: Verbinden Sie diese Pins mit der zuvor notierten Steckposition des Reset- Tasters auf dem Motherboard. Verwenden Sie hierzu eines der mitgelieferten Ver- bindungskabel. 54 · G&D FIBREVision... -
Seite 59: Verbinden Der G&D Power Card Und Des Panels Mit Fibrevision
Die Erweiterung FIBRE-Power Verbinden der G&D Power Card und des Panels mit FIBREVision Abbildung 8: Schnittstelle Power Card am Rechnermodul (FIBREVision-CPU) Power Card: Verbinden Sie diese Schnittstelle des Rechnermoduls mit der Schnitt- stelle an der Rückseite der G&D Power Card. -
Seite 60: Belegung Des Anschlusskabels Für Das Panel
Um eines der Signale ATX-Power oder Reset zu schalten, ist das Signal mit dem gemeinsamen Minus-Kontakt (Pin 4) leitend zu verbinden: I1 SW1_ATXPWR# (Pin 1) I2 SW2_RESET# (Pin 3) - 0V (Pin 4) Abbildung 11: Prinzipschaltung mit Tastern für ATX-Power und Reset 56 · G&D FIBREVision... -
Seite 61: Technische Daten
25 MHz bis 165 MHz Vertikalfrequenz: 20 Hz bis 100 Hz Horizontalfrequenz: 25 kHz bis 130 kHz Audio Übertragungsart: transparent, bidirektional Varianten -AR und -ARU Auflösung: 24 bit digital, Stereo Abtastrate 96 kHz Bandbreite: 22 kHz G&D FIBREVision · 57... - Seite 62 RxD, TxD, RTS, CTS, DTR, DSR, DCD Update Verfahren: lokale Service-Buchse Schnittstelle: 1 × Mini-USB-Buchse (Typ B) Hauptstrom- Typ: internes Netzteil versorgung Anschluss: Kaltgerätestecker (IEC-320 C14) Spannung: AC100-240V/60-50Hz redundante Strom- Typ: externes Netzteil versorgung Anschluss: miniDIN-4 Power-Buchse Spannung: +12VDC 58 · G&D FIBREVision...
-
Seite 63: Spezifische Eigenschaften Der Single-Channel-Geräte
Dimensionen (B × H × T): 210 × 44 × 210 mm (Desktop) 19” × 1 HE × 210 mm (Rackmount) Gewicht: ca. 1,3 kg Einsatzumgebung Temperatur: +5 bis +45 °C Luftfeuchte: 20% - 80 %, nicht kondensierend G&D FIBREVision · 59... -
Seite 64: Spezifische Eigenschaften Der Multi-Channel-Geräte
2 × LC-Duplex-Buchse Übertragung Gehäuse Material: Aluminium eloxiert Dimensionen (B × H × T): 435 × 44 × 210 mm Gewicht: ca. 3,1 kg Einsatzumgebung Temperatur: +5 bis +40 °C Luftfeuchte: 20% - 80 %, nicht kondensierend 60 · G&D FIBREVision... - Seite 65 Aluminium eloxiert (oben, seitlich) Stahlblech verzinkt (unten) Dimensionen (B × H × T): 435 × 44 × 285 mm Gewicht: ca. 3,4 kg Einsatzumgebung Temperatur: +5 bis +35 °C Luftfeuchte: 20% - 80 %, nicht kondensierend G&D FIBREVision · 61...
-
Seite 66: Eigenschaften Der Übertragungsmodule
10 Kilometer Klasse OS1: Wellenlänge (λ): 1310 nm (1270 nm bis 1360 nm) Leistungsdaten Optische Abgabeleistung (P -9,5 dBm bis -3 dBm in 9 μm SMF: Empfangsempfindlichkeit (P -19 dBm Empfindlichkeit – Stressed (P -14,4 dBm 62 · G&D FIBREVision... -
Seite 67: Strom- Und Leistungsaufnahme
MC4-U-CPU 100-120V/210-240V, 60-50Hz, 0.8-0.4A 44W@100VAC, 44W@240VAC MC4-U-CON 100-120V/210-240V, 60-50Hz, 0.8-0.4A 42W@100VAC, 41W@240VAC MC4-AR-CPU 100-120V/210-240V, 60-50Hz, 0.8-0.4A 44W@100VAC, 44W@240VAC MC4-AR-CON 100-120V/210-240V, 60-50Hz, 0.6-0.3A 36W@100VAC, 36W@240VAC MC4-ARU-CPU 100-120V/210-240V, 60-50Hz, 0.8-0.4A 45W@100VAC, 44W@240VAC MC4-ARU-CON 100-120V/210-240V, 60-50Hz, 0.8-0.4A 43W@100VAC, 42W@240VAC G&D FIBREVision · 63... -
Seite 68: Redundante Stromversorgung
MC2-AR-CPU 12VDC/1.7A 18W@12VDC MC2-AR-CON 12VDC/1.5A 17W@12VDC MC2-ARU-CPU 12VDC/1.8A 18W@12VDC MC2-ARU-CON 12VDC/2.5A 27W@12VDC MC4-CPU 12VDC/3.2A 36W@12VDC MC4-CON 12VDC/2.6A 28W@12VDC MC4-U-CPU 12VDC/3.2A 37W@12VDC MC4-U-CON 12VDC/3.0A 34W@12VDC MC4-AR-CPU 12VDC/3.2A 37W@12VDC MC4-AR-CON 12VDC/2.6A 29W@12VDC MC4-ARU-CPU 12VDC/3.2A 37W@12VDC MC4-ARU-CON 12VDC/3.0A 35W@12VDC 64 · G&D FIBREVision... - Seite 140 Das Handbuch wird fortlaufend aktualisiert und im Internet veröffentlicht. The manual is constantly updated and available on our website. http://gdsys.de/A9100096 Guntermann & Drunck GmbH Dortmunder Str. 4a 57234 Wilnsdorf Germany http://www.GDsys.de sales@GDsys.de...