Kindermann QuickSelect 3.0+ Installations- Und Bedienungsanleitung
Multiformat hdbaset transceiver kaskadierbar in reihenschaltung
Vorschau ausblenden
Andere Handbücher für QuickSelect 3.0+:
- Installations- und bedienungsanleitung (36 Seiten) ,
- Kurzinstallationsanleitung (4 Seiten)

Verwandte Anleitungen für Kindermann QuickSelect 3.0+


Inhaltszusammenfassung für Kindermann QuickSelect 3.0+
- Seite 1 QuickSelect 3.0+ Multiformat HDBT Transceiver kaskadierbar in Reihenschaltung (Daisy Chain) Multiformat HDBT transceiver cascadable in series connection (daisy Chain) Art.-Nr. 7447000500 Ref. No. 7447000500 Installations- und Bedienungsanleitung Installation and operating instructions 07.2018...
-
Seite 2: Inhaltsverzeichnis
Inhaltsverzeichnis Sicherheitshinweise Anschlüsse Vorder- und Rückseite Lieferumfang Systembeschreibung und Funktionen Schnell-Inbetriebnahme 5.1. Geräte verkabeln 5.2. Geräte-Adressen manuell konfigurieren 5.3. Geräte-Adressen automatisch konfigurieren (Adresse “99“) 5.4. EDID-Information vom Wiedergabegerät lesen und speichern 5.5. Reihen- oder Ringverkabelung? Konfiguration mit dem grafischen Benutzerinterface 6.1. Basis Konfiguration 6.2. Experten Konfiguration RS232 Steuerung Bedienung per ShowMe-Taster Technische Daten 10. Verfügbares Zubehör 11. Anwendungsbeispiele 11.1. Eintischlösung mit HDBT-Wandanschlussfeld 11.2. Zwei Tische oder Bodentanks mit HDBT-fähigem Projektor 11.3. Konferenztisch mit WiPG und Bedienmöglichkeiten an jedem Platz... -
Seite 3: Sicherheitshinweise
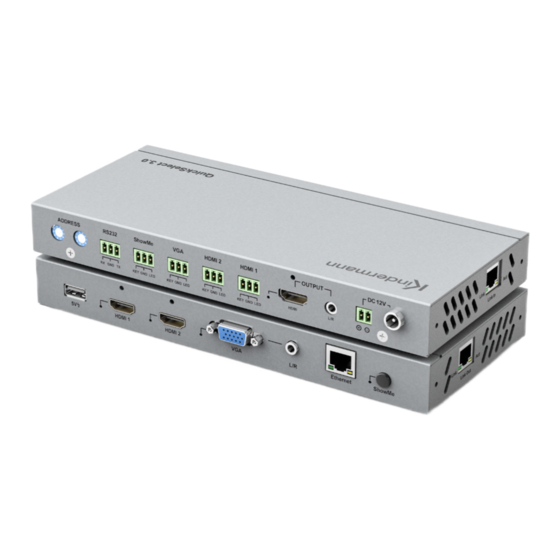
Eingang Ethernet ShowMe- 10/100Mbit Taster 3. Lieferumfang • 1 x Kindermann QuickSelect 3.0+ • 1 x Netzteil 100-240 V~ / 12 V DC, 3 A, mit verschraubbarem Kleinspannungsanschluss • 2 x Haltewinkel für Montage des Gehäuses • 4 x Gerätefüße •... -
Seite 4: Systembeschreibung
4. Systembeschreibung Das QuickSelect 3.0 + ist ein Multiformat Umschalter für die Übertragung von analogen und digitalen AV-Signalen über ein HDBT-Bussystem in Reihenschaltung (Daisy Chain) oder Ringschaltung. Das QuickSelect 3.0 + ist Sender und Empfänger zugleich. Das Gerät besitzt Signal-Eingänge für: 2 x HDMI, 1 x VGA plus analogem Stereo-Audio, 1x HDBT-In sowie einen Ethernet-Anschluss. -
Seite 5: Funktionen
Funktionen • Eingangsselektion wahlweise über Kontakteingänge, ShowMe-Taster, RS232 oder per integrierter automatischer Signalerkennung • Umsetzung des Eingangssignals auf HDBT um auf Cat-6/7 (AWG23) über eine große Entfernung zu senden (Bild und Ton unidirektional, RS232 und LAN bidirektional) • Die Reichweite beträgt bei 1080p bis zu 100 m, 4K60 bis zu 30 m •... - Seite 6 Anwendungsbeispiel: Reihenschaltung Projektor HDMI Laut- Audio sprecher RS232 Cat-Kabel (HDBT) Medien- steuerung R S 2 3 A u d i Display L i n k o u t H D M I V G L i n k U D I O L i n k o u t H D M...
-
Seite 7: Geräte-Adressen Manuell Konfigurieren
5.2 Geräte-Adressen manuell konfigurieren Mit Hilfe eines kleinen Schlitz-Schraubendrehers die beiden BCD-Drehschalter an der Rückseite jedes QuickSelect Gerätes auf eine individuelle Adresse zwischen 01…98 einstellen. Die Adresse 00 ist für den speziellen Fall einer Ringverkabelung reserviert und muss in diesem Fall zwingend dem „ersten“... -
Seite 8: Konfiguration Über Die Grafische Benutzeroberfläche (Gui)
6. Konfiguration über die grafische Benutzeroberfläche (GUI) Die kostenlose Konfigurations-Software zum Download finden Sie in unserem Händlerportal (nur für Wiederverkäufer): http://shop.kindermann.de/erp/webshop/navigationPath/7447000500.html Bitte stellen sie eine Verbindung zwischen Ihrem PC und dem QuickSelect 3.0 + System per RS232 her (Pinbelegung für GUI auf S. 19). Falls Ihr PC keinen RS232-Anschluss haben sollte, bedienen Sie sich bitte eines RS232/USB Adapters. -
Seite 9: Experten Ansicht
6.2 Experten Ansicht Durch Auswählen des Modus ‚Expert‘ wechselt die Software in die Experten Ansicht. Hier können Sie Ihr Quickselect System individuell konfigurieren. Dies ist z. B. nötig, um unterschiedliche EDIDs in den einzelnen Transmittern zu hinterlegen, ON/OFF Befehle zu nutzen oder die HDMI-Ausgänge zu konfigu- rieren. -
Seite 10: Systemübersicht Und Adressvergabe
Systemübersicht und Adressvergabe: Mit dem Betätigen dieser Taste werden die in dieser Kette verbundenen und korrekt angeschlossenen, QuickSelect 3.0+ Transmitter gesucht und er- kannt. Die linke der beiden Zahlen stellt die interne ID dar (für den Benutzer nicht relevant) und die zweite Zahl die momentan vergebene Adresse. Mit Auto Address werden die Adressen automatisch vergeben (gilt nur für die Geräte, deren BCD Schalter auf 99 stehen). - Seite 11 Das QuickSelect 3.0 + System leitet die EDID Tabelle des Endgerätes nicht automatisch an die Bildquelle weiter. Unter bestimmten Umständen wäre dies auch unerwünscht, da z. B. DVI Endgeräte keine Toninformationen enthalten – somit der Laptop über HDMI auch keinen Ton ausgeben würde. Darum ist ein EDID Management im GUI des QuickSelect 3.0 + vorgesehen.
- Seite 12 VGA Signale: Verfügbare Auflösungen und Bildwiederholfrequenzen Native/preferred timing 1920x1080p at 60Hz (16:9) Modeline „1920x1080“ 148,500 1920 2008 2052 2200 1080 1081 1085 1125 +hsync +vsync Detailed timing #1 1366x768p at 60Hz Modeline „1366x768“ 85,500 1366 1436 1579 1792 768 771 774 798 +hsync +vsync Detailed timing #2 1920x1200p at 60Hz (16:10)
-
Seite 13: Tastensperre Und Energiesparfunktion
Voreingestellte Auflösungszuordnung zwischen VGA Ein- und Ausgang Gängige VGA Formate VGA Sonderformate Eingangsauflösung Ausgangsauflösung Eingangsauflösung Ausgangsauflösung 1024x768 1024x768 832x624 (MAC) 1920x1080P 1280x720 1280x720 1152x864 (MAC) 1920x1080P 1280x800 1280x800 1152x870 (MAC) 1920x1080P 1280x1024 1280x1024 1360x768 1360x768 1366x768 1366x768 1400x1050 1400x1050 1400x900 1400x900 1600x900 1600x900... -
Seite 14: Firmware Versionen Auslesen Und Firmware Updaten
- Valens Chipset Ausgang Um eine neuere Firmware auf ein QuickSelect 3.0+ zu laden gehen Sie bitte wie folgt vor: Kopieren Sie den über Kindermann zur Verfügung gestellten Firmware File auf einen USB Stick ins Hauptverzeichnis (Dateiname: MERGE.BIN). 2. Trennen Sie das zu flashende QuickSelect 3.0+ von der Stromversorgung und stecken Sie den USB Stick in dessen USB Ladebuchse. -
Seite 15: Zurücksetzten Eines/Aller Quickselect 3.0+ Auf Werkseinstellungen
Display bidirektional übertragen (pass through). Schließen Sie z. B. die RS232-Schnittstelle der Mediensteuerung einfach an eine RS232-Klemme an. Das ausführliche RS232-Protokoll und einen Treiber für Neets-Steuerungen finden Sie online unter: shop.kindermann.de/evp/webshop/navigation_Path/7447000500.html RS232 Befehle manuell eingeben und Antworten auslesen: Über diese Textfelder können Sie RS232 Befehle senden und die Antwort der QuickSelect 3.0+ Kette auslesen. -
Seite 16: Display Power Control Funktion
Display Power Control Funktion: Mittels der Display Power Control Funktion ist das direkte, automatische Ein- und Ausschalten eines oder mehrerer Displays oder Projektoren bei Signalerkennung auch ohne externe Steuerung möglich. Hierzu muss jedes der Wiedergabegeräte mit jeweils einem Quickselect Modul per RS232 verbunden werden. Ist das letzte Quickselect einer Kette über den HDBT Link-out mit einem kompatiblen Anzeigegerät verbun- den so können zusätzlich zum Bildsignal auch die RS232 Befehle über diese Verbindung an das Anzeige- gerät übertragen werden (vorbehaltlich der Kompatibilität des zu steuernden Gerätes). -
Seite 17: Bedienung Per Showme-Taster
8. Bedienung per ShowMe-Taster Sind die Quickselect-Geräte für die Teilnehmer frei zugänglich aufgestellt (z. B. auf einem Tisch), so kann die Aktivierung entweder durch Drücken der frontseitigen ShowMe Taste erfolgen oder auch automatisch durch Signalerkennung (hierzu „Auto ShowMe“-Betrieb mittels Konfigurationssoftware einschalten). Für den Fall eines verdeckten Einbaus verfügt jedes QuickSelect an der Rückseite über Anschlüsse für drei externe Taster mit Status-LED, damit der Anwender jeden Eingang auch separat, z. -
Seite 18: Technische Daten
9. Technische Daten Eingang Ausgang Video/Audio- 2 x HDMI (HDMI 1.4 mit Video/Audio- HDMI (HDMI 1.4 mit HDCP), schnittstellen HDCP), VGA, Audio (3,5 mm) schnittstellen Audio (3,5 mm) HDBT HDBT-In HDBT HDBT-Out USB-Buchse Typ-A, max. 2A Steuerung Je ein Ausgang (3 pol. Je ein Kontakteingang (3 pol. -
Seite 19: Verfügbares Zubehör
Rx GND Tx RS232 10. Verfügbares Zubehör Quickselect • RS232-Kabel vorkonfektioniert (7447 000 410) • VGA-Kabel (7483 000 4xx) • HDMI-Kabel, Typ A, 19-Pin (5809 000 1xx) • DP auf HDMI-Kabel (5809 000 60x) • HDMI Medienswitchkabel (5809 000 099) •... -
Seite 20: Zwei Tische Oder Bodentanks Mit Hdbt-Fähigem Projektor
11.2 Zwei Tische oder Bodentanks mit HDBT-fähigem Projektor 2 x HDMI, VGA 2 x HDMI, VGA Control + LED Control + LED Link Out Link In Link In Link Out HDBT-fähiger Projektor 11.3 Konferenztisch mit WiPG und Bedienmöglichkeiten an jedem Platz CablePort flex CablePort flex CablePort flex...