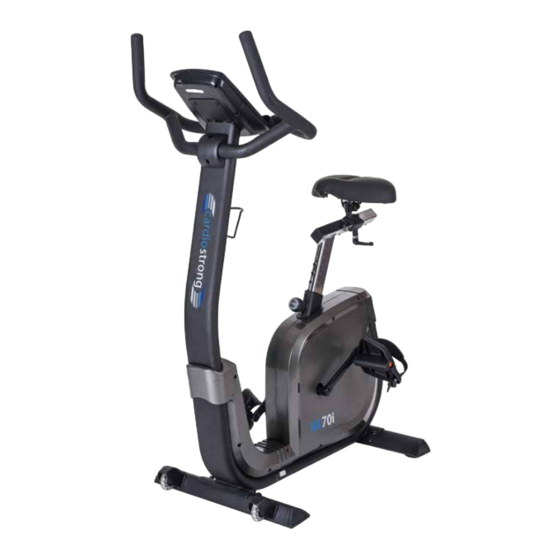
CARDIOSTRONG Ergometer BX70i Betriebsanleitung
Quelle: cardiostrong.de, sport-tiedje.de
Vorschau ausblenden
Andere Handbücher für Ergometer BX70i:
- Montage- und bedienungsanleitung (44 Seiten)
Inhaltsverzeichnis
Kapitel
Inhaltsverzeichnis

Verwandte Anleitungen für CARDIOSTRONG Ergometer BX70i


Inhaltszusammenfassung für CARDIOSTRONG Ergometer BX70i
- Seite 1 Assembly and Operating Instructions Art. No. CST-BX70i Ergometer BX70i...
- Seite 2 BX70i...
-
Seite 3: Safety Notice
Dear Customer, Thank you for deciding for a high-quality training equipment of the brand cardiostrong, the brand that makes athlete‘s hearts beat faster. cardiostrong offers a wide range of home fitness equipment like elliptical cross trainers, ergometers, treadmills and rowing machines. cardiostrong equipment is the optimal equipment for all those who want to train at home independent of goals and fitness level. -
Seite 4: Inhaltsverzeichnis
CONTENTS GENERAL INFORMATION 1.1 Technical data 1.2 Personal safety 1.3 Electrical safety 1.4 Set-up place ASSEMBLY INSTRUCTIONS, MAINTENANCE AND CARE 2.1 General instructions 2.2 Faults and Troubleshooting 2.3 Maintenance and service calendar ASSEMBLY 3.1 Package contents 3.2 Assembly instructions OPERATING INSTRUCTIONS 4.1 Console display 4.2 Button functions 4.3 Turning on and setting the equipment... - Seite 5 WARRANTY INFORMATION DISPOSAL ORDERING ACCESSORIES ORDERING SPARE PARTS 9.1 Service hotline 9.2 Serial number and model name 9.3 Parts list 9.4 Exploded drawing USER MANUAL iCONSOLE+ APP...
-
Seite 6: General Information
GENERAL INFORMATION Technical data LED display of speed in km/h training time in min training distance in km cadence (rotations per minute) calories burnt heart rate (when using the hand sensors or a chest strap) watt resistance level Resistance system: electromagnetic induction brake Resistance level: Watt:... -
Seite 7: Personal Safety
Personal safety Before you start using the equipment, you should consult your physician that this type of exercise is suitable for you from a health perspective. Particularly affected are persons who: have a hereditary disposition to high blood pressure or heart disease, are over the age of 45, smoke, have high cholesterol values, are overweight and/or have not exercised regularly in the past year. -
Seite 8: Electrical Safety
Electrical safety The equipment requires a 220 - 230V / 50 Hertz mains power supply. The equipment should be connected directly to a grounded plug socket only by means of the power cable supplied. The use of multi-socket adapters or similar is not recommended. -
Seite 9: Assembly Instructions, Maintenance And Care
You should therefore immediately replace damaged or worn components. Please contact your contract partner in such a case. The equipment should no longer be used until it has been repaired. When needed, only use original cardiostrong spare parts. -
Seite 10: Faults And Troubleshooting
Check the tightness of all screw connections once a month. In order to be able to guarantee the constructively defined safety level of this equipment, we recommend having the equipment regularly maintained (at least once a year) by specialists (service technicians of your contract partner). The equipment may be cleaned of dust, dirt and sweat using a damp cloth. -
Seite 11: Maintenance And Service Calendar
Maintenance and service calendar The following routine work must be done in the specified time intervals: Part Weekly Monthly 2x annually Annually Display console Tighten the pedals Plastic covers Seat rail Legends: C = cleaning; I = inspect... -
Seite 12: Assembly
ASSEMBLY Package contents The package contains the parts represented in the illustration, including a power cable with mains plug. If one of the illustrated parts is missing, please contact your contract partner. BX70i... -
Seite 13: Assembly Instructions
Assembly instructions Before starting assembly, look carefully through the individual assembly steps shown and assemble the equipment in the order indicated. Step 1: Assembly of the bases (1) Mount the front base (4) and the rear base (2) on the main frame (1) with the help of the spacer sleeve (7), spring washer (8) and socket screw (9). - Seite 14 Step 2: Assembly of the saddle and seat tube (1) Mount the seat (10) on the adjusting tube of the seat (11). (2) Mount the adjusting tube on the seat post (66) with the help of the spacer sleeve (15) and the control knob (16). (3) The seat can be adjusted in a vertical and horizontal direction, see figure a.
- Seite 15 Step 3: Assembly of the handlebar tube (1) This assembly step should be executed by at least two persons. (2) First take the upper protective cover (28) off (see figure a). Then connect the computer cables (72 & 73) (see figure b). (3) Insert the handlebar tube (29) on the main frame and mount this with the spacer sleeve (7), spring washer (8) and socket screw (30).
- Seite 16 Step 4: Assembly of the handlebars (1) Mount the handlebars (32) on the handlebar tube (29) by means of the protective cover (65), the spacer sleeve (7), the spring washer (8), the socket screw (9) and the screw (20). (2) Make sure that all cables are correctly connected, see figure a, b, c, d. BX70i...
- Seite 17 Step 5: Assembly of the console & pedals (1) Connect the upper computer cable (72) and the hand pulse cable (68) with the computer (17) and mount the computer (17) on the handlebar tube (29) by means of the screw (64). (2) Mount the pedals (62 &...
- Seite 18 Step 6: Power connection (1) Connect the adapter (81) with the adapter access on the rear part of the equipment. BX70i...
-
Seite 19: Operating Instructions
OPERATING INSTRUCTIONS Console display Training time displayed during training. Range 0:00 to TIME 99:59 min. Training speed displayed during training. Range 0.0 to 99.9 SPEED km/h Training distance displayed during training. Range 0.0 to DISTANCE 99.9 km/h Calories burnt displayed during training. Range 0 to 999 CALORIES kcal Pulse (beats per minute) displayed during training. -
Seite 20: Button Functions
Rotations per minute Range 0 to 999 Training power consumption. In the watt program mode, WATT the computer remains in the pre-set watt value (range 0 to 350) MANUAL Training in the manual mode. PROGR Beginner, Advance and Sporty PROGRAM selection. CARDIO Training mode target heart rate. -
Seite 21: Turning On And Setting The Equipment
Turning on and setting the equipment Connect the equipment to the power supply. The computer will turn on and shows all segments on the LCD screen for two seconds. If the pedals are not moved and no pulse is recorded for four minutes, the console will go into the energy saving mode. The console will turn on by pressing any button. -
Seite 22: Beginner Mode
4.4.2 Beginner Mode 1. Press UP or DOWN to select a training program. Select Beginner mode and press ENTER. 2. Press UP or DOWN to select Beginner 1 to 4 and confirm with ENTER. 3. Press UP or DOWN to set the TIME. 4. -
Seite 23: Sporty Mode
4.4.4 Sporty Mode 1. Press UP or DOWN to select a training program. Select Sporty mode and press ENTER. 2. Press UP or DOWN to select Beginner 1 to 4 and confirm with ENTER. 3. Press UP or DOWN to set the TIME. 4. -
Seite 24: Watt Mode
4.4.6 Watt Mode 1. Press UP or DOWN to select a training program. Select WATT and press ENTER. 2. Press UP or DOWN to set the WATT target. (Default: 120) 3. Press UP or DOWN to set the TIME. 4. Press START/STOP to start the training. Press UP or DOWN to set the watt level. 5. -
Seite 25: Workout Instructions
WORKOUT INSTRUCTIONS Heart-rate measuring Pulse measuring via hand sensors The hand sensors integrated in the handles beside the seat allow you to determine your heart rate. You can measure your heart rate by lightly grasping the sensors with both hands at the same time. Blood pressure changes occur due to the heartbeat. The sensors measure the changes to the electric skin resistance caused by it. - Seite 26 while exercising. The transmitter turns on automatically once it is put on. In order to allow for a precise measuring, you should moisten the rubber electrodes. This is best done with a special chest strap contact gel, which is also used for ultrasound scans. Note: If you have not been active in doing sports for a longer period of time, you should first go to your physician in order to discuss your training with them.
- Seite 27 Example: For a 45-year-old man or woman, the maximum heart rate is 175 (220 - 45 = 175). • The fat burning target zone (55%) is at approximately 96 beats/min. = (220 - age) x 0.55. • The cardio target zone (75%) is at approximately 131 beats/min. = (220 - age) x 0.75.
-
Seite 28: Tips For Effective Ergometer Training
10 tips for effective ergometer training 1. Set goals What would you like to achieve with your training? Weight regulation, improved stamina, prevent risk of disease, more mobility, cardiovascular training, etc. In order to achieve your long-term training goal, set individual partial goals, e. g., weekly or monthly goals. -
Seite 29: Designing A Workout
9. Workout journal Keep a record of your training sessions. Note the date, resting pulse, active pulse, recovery pulse, resistance level, time, distance, calories burnt and fitness level. 10. Reward yourself Do something good for you and your body after training or after achieving a partial goal. Go to the sauna or a swimming pool. - Seite 30 WEEK 5 + 6 Beginner Advanced Days Duration Intensity Duration Intensity 30 min. Moderate speed, keep 40 min. Vary speed, keep resistance low resistance low 30 min. Moderate speed, keep 40 min. Vary speed, keep resistance low resistance low 30 min. Moderate speed, keep 40 min.
-
Seite 31: Stretching Exercises For Leg And Chest Muscles
Stretching exercises for leg & chest muscles 1. Exercise: Stretching of front thigh / leg extension (quadriceps) • Stable position, grab arches of feet • Pull heel towards buttocks, knee points downwards (no abduction) • Straight upper body, avoid tilting the pelvic forward (hollow back) by tensing the abdominal muscles •... - Seite 32 3. Exercise: Stretching the calf muscles (gastrocnemius) • Place feet parallel to each other pointing forward, the heels touch the floor • Support yourself on a chair coming from a lunge • Move your body weight to the front leg, press your heel from the rear leg towards the floor and hold the contact •...
-
Seite 33: Workout Journal
Workout journal Date Time (min.) Training weight Calories burnt Body weight Ø Pulse Distance Resistance level I feel ... -
Seite 34: Warranty Information
WARRANTY INFORMATION cardiostrong‘s fitness equipment is subject to strict quality controls. However, if a fitness equipment purchased from us does not work perfectly, we take it very seriously and ask you to contact our customer service as indicated. We are happy to help you by phone via our service hotline. - Seite 35 The terms of use are defined as follows: • Home use: solely for private use in private households up to 3 hours per day • Semi-professional use: up to 6 hours per day (e. g. rehabilitation centers, hotels, clubs, company gyms) •...
-
Seite 36: Disposal
Service outside of the warranty period We are also happy to issue an individual cost estimate if there is a problem with your fitness equipment after the warranty has expired, or in cases which do not fall under the terms of the warranty, e. g. normal wear and tear. Please contact our customer service team to find a quick and cost-effective solution to your problem. -
Seite 37: Ordering Accessories
ORDERING ACCESSORIES Sport-Tiedje floor mat, size L Art. no. ST-FM-L Sport-Tiedje 122 kHz chest strap Art. no. ST1030 VITALIS Uni-FitViewer Art. no. VIT-80104 Chest-strap contact gel 250ml Art. no. BK-250 Fitness equipment care kit Art. no. HF-500... -
Seite 38: Ordering Spare Parts
9:00 am - 6:00 pm Serial number and model name Before assembling your equipment, find the serial number on the white sticker and enter it in the appropriate space. Serial number: Brand / category: Model name: cardiostrong ergometer BX70i BX70i... -
Seite 39: Parts List
Parts list Qty. Description Material Specification Main frame Rear stabilizer Q195 95.4*50.6*2.0Tx500L Adjustable wheel Q235A+ABS D59*M10*40L Front stabilizer Tri-angle cap(left) 95.7*57.2*51.3 Tri-angle cap(right) 95.7*57.2*51.3 Flat washer D16*D8.5*1.2T Q235A D16*D8.5*1.2T Spring washer D15.4 XD8.2x2T D15.4 XD8.2x2T Allen bolt M8x1.25x20L M8x1.25x20L Seat LS-A28 LS-A28,clamp Seat adjustment tube Oval cap... - Seite 40 Qty. Description Material Specification Anti-loosen nut M10*1.25*10T Left crank 1015A 1015A Left chain cover HIPS HIPS Right chain cover HIPS HIPS Allen nut M6*1.0*6T Q235A Q235A Adjustable bolt Q235A Q235A Round cycle for chain cover EMS system Allen bolt M8x1.25x50L Flat washer D13*D6.5*1.0T Q235A Q235A...
- Seite 41 Qty. Description Material Specification Handle pulse sensor PE18 Handle pulse cable 700L Round magnet Bearing #6004-2RS(C0) GCr15 #6004-2RS(C0) Connecting cable 350L Upper computer cable 1000L Lower computer cable 1800L Sensor cable 450L Knob Q235A+ABS D50xM16x22xD8 Inner tube 40x80x129 Flat washer D24*D16*1.5T Q235A D24*D16*1.5T Round wheel...
-
Seite 42: Exploded Drawing
Exploded drawing BX70i... -
Seite 44: User Manual Iconsole+ App
Bedienungsanleitung user manual BX70i... - Seite 45 CONTENTS INHALT Setting manual: Android tablet Bluetooth Einstellungs-Anleitung: Android Tablet Bluetooth Setting manual: Android mobile phone Bluetooth Einstellungs-Anleitung: Android Handy Bluetooth Setting manual: iOS Bluetooth Einstellungs-Anleitung: iOS Bluetooth Setting manual: Log in Einstellungs-Anleitung: Log in Setting manual: Program Einstellungs-Anleitung: Programm Setting manual: Mobile phone program Setting manual: Quick Start Einstellungs-Anleitung: Handy Programm...
-
Seite 46: Setting Manual: Android Tablet Bluetooth Einstellungs-Anleitung: Android Tablet Bluetooth
Setting manual Einstellungs-Anleitung Android tablet Bluetooth Android Tablet Bluetooth Download iConsole+ in Google play Download iConsole+ bei Google play System requirements: Systemanforderungen: Samsung Galaxy Tab 2 Samsung Galaxy Tab 2 - Android tablet OS 4.02 or higher - Android tablet OS 4.02 oder höher - Android tablet resolution: - Android tablet Auflösung: 1280x752 Pixel... -
Seite 47: Setting Manual: Android Mobile Phone Bluetooth Einstellungs-Anleitung: Android Handy Bluetooth
Setting manual Einstellungs-Anleitung Android mobile phone Bluetooth Android Handy Bluetooth Download iConsole+ in Google play Download iConsole+ bei Google play System requirements: Samsung S3, S4, Note I, Note II, Premier Systemanforderungen: HTC ONE, NEW ONE, Butterfly, Samsung S3, S4, Note I, Note II, Permier Google Nexus5, Nexus7 I, Nexus7 II HTC ONE, NEW ONE, Butterfly, SONY XperiaZ, Ultra... - Seite 48 Once the download is complete, press “SCAN FOR DEVICES” to connect it Sobald der Download beendet ist, drücken Sie “SCAN FOR DEVICES”, with Bluetooth. Check the device and enter the standard code 0000. um es mit Bluetooth zu verbinden. Kontrollieren Sie das Gerät und geben Sie den Standardcode 0000 ein.
-
Seite 49: Setting Manual: Ios Bluetooth
Setting manual Einstellungs-Anleitung iOS Bluetooth iOS Bluetooth Download iConsole+ in the App Store. Download iConsole+ im App Store System requirements: Systemanforderungen: iOS 5.1.1 or higher iOS 5.1.1 oder höher Supports iOS devices: Unterstützt iOS Geräte: - iPhone 4S, 5, 5S, 6 and 6+ - iPhone 4S, 5, 5S, 6 und 6+ - iPad Air, iPad Air2, iPad 4, iPad3, iPad 2, iPad, - iPad Air, iPad Air2, iPad 4, iPad3,... -
Seite 50: Setting Manual: Log In
Setting manual Einstellungs-Anleitung Log in Log in “SETTING” edit profile. EINSTELLEN Profil bearbeiten Select imperial / metric. Metrisch auswählen If you use the app for the first Wenn Sie das 1. Mal die time, you have to log in. Press App nutzen, müssen Sie “LOG IN”. - Seite 51 Log in with Google account. Anmelden mit Google Konto. Press “ACCEPT”. drücken Log in successful. Anmeldung erfolgreich. Log in with Facebook Anmelden mit account. Facebook Konto.
- Seite 52 Press “OK”. " drücken Log in successful. Anmeldung erfolgreich. Create new account. Neues Konto erstellen. Enter user account Benutzerkontoinfos und information and password. Passwort eingeben. BX70i...
- Seite 53 Activate email account. E-Mail-Konto aktivieren. Find the email to activate Finden Sie die your account and click on the kontoaktivierende Mail und URL to verify the account. klicken Sie die URL an, um das Konto zu verifizieren. Press “EDIT” after logging in Nach der Anmeldung "E to create personal data.
- Seite 54 Click on the camera symbol Auf das Kamerasymbol to select an image or to make klicken, um ein Bild an image. Then press “DONE” auszuwählen oder ein Bild zu (upper right) to end the setting. machen. Dann "DONE" drücken (oben rechts), um die Eingabe zu beenden.
-
Seite 55: Setting Manual: Program Einstellungs-Anleitung: Log In
Setting manual Einstellungs-Anleitung Programm program “PROGRAM“ The user can choose between 12 training Der Nutzer kann 12 programs. Trainingsprogramme wählen. Set “TIME”, “DISTANCE” and “CALORIES” by " pressing the lower right symbol. durch Drücken des unteren rechten Symbols einstellen. Set time. Zeit einstellen. - Seite 56 Set distance. Entfernung einstellen. Set calories. Kalorien einstellen. The set time starts the countdown. The Die eingestellte Zeit startet den user can adjust the incline value on the Countdown. Benutzer kann den console. Steigungswert an der Konsole anpassen. After completion, the training summary Nach Beendigung kann die can be sent to FB or Twitter.
- Seite 57 Click on FB in order to upload the training FB klicken, um summary. Trainings-Zusammenfassung hochzuladen.
-
Seite 58: Setting Manual: Mobile Phone Program Einstellungs-Anleitung: Programm
Setting manual Einstellungs-Anleitung Handy Programm mobile phone program “PROGRAM“ The user can choose between Der Nutzer kann 12 12 training programs. Trainingsprogramme wählen. Set time. Set distance. Zeit einstellen. Entfernung einstellen. BX70i... - Seite 59 Set calories. Press START to begin with the Kalorien einstellen. "START" drücken, um das training. Training zu beginnen. The user can stop and adjust the The user can adjust the incline Der Benutzer kann stoppen Der Benutzer kann die incline values at any time by clicking values.
- Seite 60 Click on FB in order to upload After completion, the training Nach Beendigung kann die FB klicken, um die the training summary. summary can be sent to Facebook Trainings-Zusammenfassung Trainings-Zusammenfassung or Twitter. an Facebook oder Twitter hochzuladen. gesendt werden. BX70i...
-
Seite 61: Setting Manual: Quick Start Einstellungs-Anleitung: Handy Programm
Setting manual Einstellungs-Anleitung Quick Start Quick Start “QUICK START“ Press “QUICK START” to start the exercise. " drücken, um die The user can stop at any time by pressing Übung zu starten. the “STOP” symbol on the lower right of Der Benutzer kann jederzeit the console. - Seite 62 Click on FB in order to upload the FB klicken, um die training summary. Trainings-Zusammenfassung hochzuladen. BX70i...
-
Seite 63: Setting Manual: Mobile Phone Quick Start
Setting manual Einstellungs-Anleitung Handy Quick Start mobile phone Quick Start “QUICK START“ The user can stop and adjust Der Benutzer kann stoppen und the incline values at any time by die Steigungswerte durch clicking on the upper right red Drücken des oberen rechten symbol on the console. - Seite 64 Click on FB in order to upload the FB klicken, um die training summary. Trainings-Zusammenfassung hochzuladen. BX70i...
-
Seite 65: Setting Manual: Heart Rate Control
Setting manual Einstellungs-Anleitung Herzfrequenzkontrolle heart rate control “HRC“ The BPM value is calculated with the age. Der BPM Wert wird mit dem Alter The user can select the percentage. berechnet. Der Benutzer kann den Prozentanteil wählen. The user can set the percentage to be Der Benutzer kann den Prozentanteil user-defined. - Seite 66 Set time. Zeit einstellen. The set time counts down. The incline Die eingestellte Zeit zählt runter. value changes depending on the heart rate value. Der Steigungswert verändert sich in Abhängigkeit vom Herzfrequenzwert. The hand pulse does not receive a Der Handpuls erhält kein Signal. signal.
- Seite 67 Click on FB in order to upload the training summary. FB klicken, um die Trainings-Zusammenfassung hochzuladen.
-
Seite 68: Einstellungs-Anleitung: Handy Quick Start
Setting manual Einstellungs-Anleitung Handy Herzfrequenzkontrolle mobile phone heart rate control “HRC“ The user can set the percentage Der Benutzer kann den to be user-defined. Prozentanteil benutzerdefiniert einstellen. Set time. The set time counts down. The Zeit einstellen. Die eingestellte Zeit zählt runter. incline value changes depending Der Steigungswert verändert sich on the heart rate value. - Seite 69 The hand pulse does not receive After completion, the training Der Handpuls erhält kein Nach Beendigung kann die a signal. summary can be sent to Facebook Signal. Trainings-Zusammenfassung or Twitter. an Facebook oder Twitter gesendt werden. Click on FB in order to upload the FB klicken, um die training summary.
-
Seite 70: Setting Manual: Watt Einstellungs-Anleitung: Herzfrequenzkontrolle
Setting manual Einstellungs-Anleitung WATT WATT “WATT“ Click on “TARGET WATT”. Auf "TARGET WATT" klicken. Move the slider to the right or left Regler nach rechts oder links to set the watt target. bewegen, um Wattziel einzustellen. Click on “TIME TOOL”. Auf "... - Seite 71 Set time. Zeit einstellen. After completion, the training summary can be sent to Facebook Nach Beendigung kann die or Twitter. Trainings-Zusammenfassung an Facebook oder Twitter gesendt werden. Click on FB in order to upload the training summary. FB klicken, um die Trainings- Zusammenfassung hochzuladen.
-
Seite 72: Setting Manual: Mobile Phone Watt Einstellungs-Anleitung: Handy Herzfrequenzkontrolle
Setting manual Einstellungs-Anleitung Handy WATT mobile phone WATT “WATT“ Set time. Zeit einstellen. Click on the “TARGET WATT” Set watt target. " Symbol Wattziel einstellen. symbol to adjust the watt value. anklicken, um Wattwert anzupassen. BX70i... - Seite 73 Nach Beendigung kann die FB klicken, um die After completion, the training Click on FB in order to upload the summary can be sent to Facebook training summary. Trainings-Zusammenfassung Trainings-Zusammenfassung or Twitter. an Facebook oder Twitter hochzuladen. gesendt werden.
-
Seite 74: Setting Manual: Iroute Einstellungs-Anleitung: Watt
Setting manual Einstellungs-Anleitung iRoute iRoute Press “PURCHASED ITEMS” to " enter. drücken, um rein zu kommen. Press “PLAN MY OWN ROUTE”. drücken Enter a keyword to search Stichwort eingeben um den for the user location. The Benutzerstandort zu suchen. user can also set the starting Benutzer kann auch Start- und and end point personally Endpunkt selbst einstellen und... - Seite 75 There are five standard routes in Es gibt 5 Standardrouten in my favorites. User-defined routes can be saved under my routes. meinen Favoriten. Benutzerdefinierte Routen können unter meine Routen gespeichert werden. Once the route has been set and Nachdem die Route the route begins, there are three eingestellt ist und die Route view modes to choose from.
- Seite 76 Street view mode. odus. After completion, Nach Beendigung kann training summary can be die Trainings- sent to Facebook or Twitter. Zusammenfassung an Facebook oder Twitter gesendt werden. Click on FB in order to upload training summary. FB klicken, um die Trainings-Zusammenfassung hochzuladen.
- Seite 77 The user can name the route. Der Benutzer kann der Press “SAVE” to save the route. Route eine Bezeichnung geben. "SAVE" zur Speicherung drücken. The saved route can be viewed Die gespeicherte Route ist under my favorites. unter meine Favoriten zu sehen.
-
Seite 78: Trainings-Zusammenfassung
Trainings-Zusammenfassung Training summary Click on “iConsole+”. klicken. Total training history. Gesamte Trainingshistorie. BX70i... -
Seite 79: General Information
DISCLAIMER ©2010 cardiostrong is a registered brand of the company Sport-Tiedje GmbH. All rights reserved. Any use of this trademark without the explicit written permission of Sport-Tiedje is prohibited. Product and manual are subject to change. Technical data can be changed without advance notice. - Seite 80 Ergometer BX70i...