Herunterladen Inhalt Inhalt Diese Seite drucken
clage SMARTRONIC MCX 3 Gebrauchs- Und Montageanleitung
Vorschau ausblenden Andere Handbücher für SMARTRONIC MCX 3:
Inhaltsverzeichnis

Werbung

Verfügbare Sprachen
  • DE

Verfügbare Sprachen

  • DEUTSCH, seite 1
Gebrauchs- und Montageanleitung
Operating and installation instructions
E-Kleindurchlauferhitzer
MCX 3..7
E-mini instant water heater
MCX 3..7
de
>
2
en
>
17
fr
>
32
nl
>
48
pl
>
63
cs
>
79

Werbung

Inhaltsverzeichnis
loading

Inhaltszusammenfassung für clage SMARTRONIC MCX 3

  • Seite 1 Gebrauchs- und Montageanleitung Operating and installation instructions E-Kleindurchlauferhitzer MCX 3..7 E-mini instant water heater MCX 3..7 > > > > > >...
  • Seite 2: Inhaltsverzeichnis

    MCX 3..7 SMARTRONIC ® Inhalt 1. Übersichtsdarstellung ..............3 2.
  • Seite 3: Übersichtsdarstellung

    CLAGE 1. Übersichtsdarstellung Bei Ersatzteilbestellungen stets Gerätetyp und Serien nummer angeben! Pos. Bezeichnung Wassermengen-Justierschraube Haube mit Bedienfeld Heizkartusche Sicherheits temperatur begrenzer (STB) Filtersieb Wasseranschlussstücke Wandhalter Erdungssicherungsklammer Kabeldurchführungstülle...
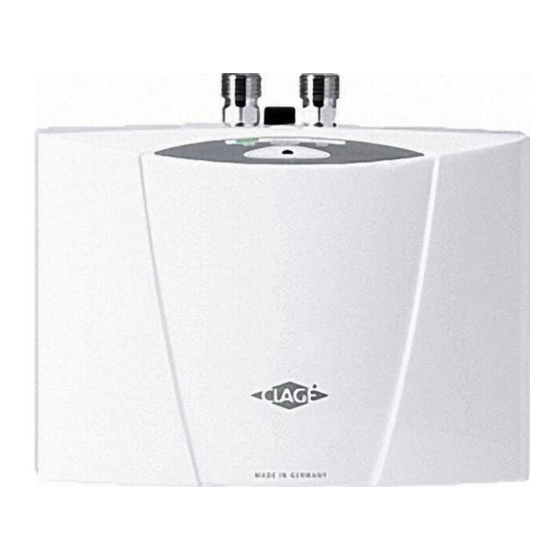
  • Seite 4: Gerätebeschreibung

    MCX 3..7 SMARTRONIC ® 2. Gerätebeschreibung Dieser Klein-Durchlauferhitzer (Abb.1) ist zur sparsamen Warmwasserversorgung einer einzelnen Zapfstelle, insbesondere Hand- waschbecken vorgesehen und kann an einer Sanitärarmatur installiert werden. Durch Öffnen des Warmwasserventiles der Armatur schaltet der Durchlauferhitzer bei Über schreiten der Einschaltwassermenge auto- matisch ein und erwärmt das Wasser während es durch das Gerät strömt.
  • Seite 5: Technische Daten

    CLAGE 3. Technische Daten MCX 3 MCX 4 MCX 6 MCX 6-220 MCX 7 Artikel-Nummer 15003 15004 15006 15005 15007 Nenninhalt Liter Nennüberdruck MPa (bar) 1 (10) 1 (10) 1 (10) 1 (10) 1 (10) Heizsystem Blankdraht-Heizsystem IES ® Einsatzbereich: erforderlicher spezifischer ≥...
  • Seite 6: Installationsbeispiele

    MCX 3..7 SMARTRONIC ® 4. Installationsbeispiele Drucklose (offene) Installation Spezial-Strahlregler einsetzen: mit Armatur für drucklose Warmwassergeräte MCX 3/4: CSP 3 MCX 6/7: CSP 6 Elektroanschluss mit Netz- leitung (ggf. kürzen) Eckventil Abgang G ⅜" Maßangaben in mm Druckfeste (geschlossene) Spezial-Strahlregler einsetzen: Installation mit Armatur für druckfeste Geräte MCX 3/4: CSP 3...
  • Seite 7: Montagehinweise

    5. Montagehinweise Die Montage erfolgt direkt an die Anschluss rohre der Sanitärarmatur in einem frostfreien Raum. Wir garantieren einwandfreie Funktion nur bei Verwendung von CLAGE Armaturen und Zubehör. Bei der Installation beachten: • DIN VDE 0100 und EN 806 sowie die gesetzlichen Vor schriften des jeweiligen Landes und die Bestim mungen des örtlichen Elektrizitäts- und Wasserversorgungsunternehmens...
  • Seite 8: Flexible Verbindungsschläuche

    MCX 3..7 SMARTRONIC ® 6. Flexible Verbindungsschläuche Einbaurichtlinien: DN Schlauch außen 8 mm 12 mm 20 bar 27 mm Achten Sie auf ausreichenden Potential ausgleich! • Der zulässige Biegeradius R = 27 mm darf nicht unter- schritten werden, sowohl bei Transport, Montage als auch im eingebauten Zustand.
  • Seite 9: Montage Und Wasseranschluss

    CLAGE 7. Montage und Wasseranschluss • Das Gerät so installieren, dass die Wasseranschlüsse senkrecht nach oben stehen und direkt an die Anschlüsse der Sanitärarmatur angeschlossen werden können. • Wandhalter mit Schrauben dübeln (Abb. 5). • Gerät auf den Wandhalter stecken und einrasten (Abb. 6). Das Gerät darf nur betrieben werden, wenn es ordnungsgemäß...
  • Seite 10: Abnehmen Des Gerätes Aus Dem Wandhalter

    MCX 3..7 SMARTRONIC ® 7. Montage und Wasseranschluss Abnehmen des Gerätes aus dem Wandhalter Breite Schraubendreherspitze bis Anschlag in Verriegelung zwischen den Wasser anschluss- stücken stecken und Schraubendreher leicht nach oben drücken (1), Gerät maximal 15° nach vorne kippen (2) und nach oben entnehmen (3). 8.
  • Seite 11: Entlüften

    Temperatur nicht erreicht wird. 4. Dem Benutzer die Funktion des Gerätes erklären und mit dem Gebrauch vertraut machen. Diese Anleitung dem Benutzer zur Aufbewahrung überreichen. 5. Registrieren Sie das Gerät mit der Registrierkarte beim Werkskundendienst bzw. online auf der Internetseite www.clage.de.
  • Seite 12: Typenschild-Blende

    Blende befinden sich neben der Geräte- Gerät an Schutzleiter MCX 3 1500-15003 anschließen! 012345-012345 Appliance must be earthed! typen bezeichnung CLAGE GmbH (1) auch die Geräte- 21337 Lueneburg GERMANY Seriennummer (2) und MADE IN GERMANY die Artikelnummer (3). Aufsetzen der Blende 1.
  • Seite 13: Einstellung Der Wassermenge

    CLAGE 12. Einstellung der Wassermenge Nur durch einen Fachmann auszuführen. Entfernen Sie die Blende (siehe Abb. 10), lösen die darunter befindliche Haubenschraube und nehmen die Haube ab. Reduzierung der Durch fluss menge: Durch Drehen der Justierschraube im Uhrzeiger sinn reduziert sich die Durchfluss menge, wodurch eine höhere Auslauftemperatur erreicht werden kann.
  • Seite 14: Tasten- Und Temperatursperre

    MCX 3..7 SMARTRONIC ® 13. Gebrauch Tasten- und Temperatursperre Die aktuell gewählte Temperatur lässt sich gegen unbeabsichtigtes Verstellen sperren. Sie ist dann nicht mehr durch einen einfachen Tastendruck verstellbar. Tastensperre aktivieren / deaktivieren: Sensortaste gedrückt hal ten (ca. 5 Sekunden) bis die aktive LED erlischt, dann Sensortaste los- lassen.
  • Seite 15: Umwelt Und Recycling

    Wasserdruck schwankt, erhöhen, andere Zapfstellen schließen, Eckventil ein und aus zu geringer Durchfluss weniger drosseln Wassermengeneinstellung prüfen lassen, Fließwasserdruck zu gering Eckventil weniger drosseln, CLAGE-Strahlregler einsetzen, Wasserdruck prüfen Das Wasser bleibt kalt Verschmutzungen im Zu- oder Auslauf Verschmutzungen beseitigen elektrische Spannung Spannung prüfen...
  • Seite 16 Gefährdungen zu vermeiden. Die beschädigte Leitung muss durch eine Original-Anschlussleitung ausgetauscht werden (als Ersatzteil erhältlich). Sollte das Gerät weiterhin nicht einwandfrei funktionieren, wenden Sie sich bitte an den Werkskundendienst. CLAGE GmbH Werkskundendienst Pirolweg 1 – 5 21337 Lüneburg...
  • Seite 17 CLAGE Contents 1. Overview ................18 2.
  • Seite 18: Overview

    MCX 3..7 SMARTRONIC ® 1. Overview When ordering spare parts, please always specify the appliance model and serial number. Pos. Description Adjusting screw for water flow rate Hood with control panel Heating cartridge Safety temperature limiter Filter Water connector Wall bracket Safety earthing terminal Cable grommet...
  • Seite 19: Description Of Appliance

    CLAGE 2. Description of appliance This instantaneous water heater (fig. 1) is intended to provide economical heating of water sufficient for a single outlet i.e. kitchen sink or wash basin and can be installed with a sanitary water fitting. When the hot-water tap is opened, the...
  • Seite 20: Technical Specifications

    MCX 3..7 SMARTRONIC ® 3. Technical specifications MCX 3 MCX 4 MCX 6 MCX 6-220 MCX 7 Art. No. 15003 15004 15006 15005 15007 Capacity Liter Nominal pressure MPa (bar) 1 (10) 1 (10) 1 (10) 1 (10) 1 (10) Heating system Bare wire heating system IES ®...
  • Seite 21: Typical Installations

    CLAGE 4. Typical installations Vented installation with Fit jet regulator: special open outlet tap MCX 3/4: CSP 3 MCX 6/7: CSP 6 Electrical connection with mains power cable (shorten if necessary) Angle valve G ⅜" Dimensions in mm Unvented installation (closed Fit jet regulator:...
  • Seite 22: The Following Must Be Observed

    5. The following must be observed The heater is installed as shown in the immediate vicinity of the outlet in a frost-free room. We guarantee trouble-free operation only if CLAGE fittings and accessories are used. Note the fol- lowing during installation: •...
  • Seite 23: Flexible Connecting Hoses

    CLAGE 6. Flexible connecting hoses Installation guidelines: Hose DN external 8 mm 12 mm 20 bar 27 mm Ensure sufficient equipotential bonding. • The permissible bending radius R = 27 mm must be observed at all times, including during transport and assembly as well as when installed.
  • Seite 24: Installing The Appliance

    MCX 3..7 SMARTRONIC ® 7. Installing the appliance • Install the appliance with the water connectors vertically upwards for direct connection to the sanitary tap. • Secure the wall bracket to the wall with screws and suitable wall plugs (fig. 5). •...
  • Seite 25: Removing The Appliance From The Wall Bracket

    CLAGE 7. Installing the appliance Removing the appliance from the wall bracket Put the wide screwdriver tip into the interlock between the water connections until it stops, then press slightly upwards (1), tilt the appliance forward by max. 15° (2) and remove it upwards (3).
  • Seite 26: Purging

    4. Explain the functions of the heater to the user and ensure that he knows how to use it. Hand over these operating instructions to the user. 5. Use the registration card for the registration at the factory service centre or register the appliance online on the website www.clage.com.
  • Seite 27: Rating Plate Cover

    Gerät an Schutzleiter MCX 3 1500-15003 the name of the appli- anschließen! 012345-012345 Appliance must be earthed! cation type (1), as well CLAGE GmbH 21337 Lueneburg as the serial number GERMANY MADE IN (2) and the article GERMANY number (3).
  • Seite 28: Adjusting The Water Flow

    MCX 3..7 SMARTRONIC ® 12. Adjusting the water flow May only be carried out by a specialist. Remove the cover (see Fig. 10), undo the hood screw underneath and remove the hood. Decreasing the flow rate: Turn the adjusting screw clockwise to decrease the flow rate, thus making a higher outlet temperature possible.
  • Seite 29: Key Lock And Temperature Lock

    CLAGE 13. How to use Key lock and temperature lock The current selected temperature setting can be locked against unintended alteration. Thus, the temperature cannot be changed by a single keypress anymore. Activate keylock / Deactivate keylock: Press and hold touch key for approx. 5 seconds until the active LED goes out, then release the touch key.
  • Seite 30: Environment And Recycling

    No water flows Water supply is turned off valve The jet regulator is not fitted Fit the special CLAGE jet regulator Water flows Water pressure is not suf- Check the water flow pressure or let check the more slowly than...
  • Seite 31 If you cannot rectify the fault with the aid of the troubleshooting table, please contact the custo mer service. If you cannot rectify the fault with the aid of this table, please contact customer service. CLAGE GmbH After-Sales Service Pirolweg 1 – 5 21337 Lüneburg...
  • Seite 32 MCX 3..7 SMARTRONIC ® Sommaire 1. Présentation générale de l‘appareil ............33 2.
  • Seite 33: Présentation Générale De L'appareil

    CLAGE 1. Présentation générale de l‘appareil Il faut toujours indiquer le type d‘appareil et le numéro de série lors d‘une commande de pièces de rechange! Pos. Désignation Vis de réglage de la quantité d’eau Capot avec clavier de commande Cartouche chauffante Limiteur de température de sécurité...
  • Seite 34: Description De L'appareil

    MCX 3..7 SMARTRONIC ® 2. Description de l’appareil Ce petit chauffe-eau instantané (Fig. 1) est conçu pour l‘alimentation économique en eau chaude d‘un lavabo et il peut être monté sur un robinet de distribution. Pour ouvrir la vanne à eau chaude du robinet de distribu- tion, le chauffe-eau instantané...
  • Seite 35: Caractéristiques Techniques

    CLAGE 3. Caractéristiques techniques Type MCX 3 MCX 4 MCX 6 MCX 6-220 MCX 7 Numéro de référence 15003 15004 15006 15005 15007 Capacité nominale Litres Surpression nominale MPa (bar) 1 (10) 1 (10) 1 (10) 1 (10) 1 (10) Système de chauffage...
  • Seite 36: Exemples D'installation

    MCX 3..7 SMARTRONIC ® 4. Exemples d‘installation Installation hors pression (ouverte) Utiliser un régulateur de jet spécial avec robinetterie pour appareils à eau chaude basse pression MCX 3/4: CSP 3 MCX 6/7: CSP 6 Branchement électrique avec câble secteur (à raccourcir si nécessaire) Raccord en T et tuyau de pression...
  • Seite 37: Instructions De Montage

    Le bon fonctionnement ne peut être garanti qu‘avec l‘utilisation de robinets de distribution et accessoires CLAGE. À observer lors de l‘installation : • Normes DIN VDE 0100 et EN 806 respectivement ainsi que les prescriptions légales du pays et les dispositions de l‘entreprise locale de distribution d‘électricité...
  • Seite 38: Tuyaux De Raccordement Souples

    MCX 3..7 SMARTRONIC ® 6. Tuyaux de raccordement souples Consignes de montage des tuyaux de raccordement souples DN tuyau extérieur 8 mm 12 mm 20 bar 27 mm Veillez à un équilibrage suffisant des potentiels ! • Le rayon de courbure ne doit pas être inférieur au mini- mum admissible Rmin = 27 mm, que ça soit pendant le transport, lors du montage et aussi en position montée.
  • Seite 39: Montage Et Branchement De L'eau

    CLAGE 7. Montage et branchement de l‘eau • Poser l’appareil de telle sorte que les raccords d’eau soient dirigés verticalement vers le haut et qu’ils puissent être raccordés directement aux raccords du robinet de distribution. • Fixer le support mural avec des vis et des chevilles (voir figure 5).
  • Seite 40: Dépose De L'appareil Du Support Mural

    MCX 3..7 SMARTRONIC ® 7. Montage et branchement de l‘eau Dépose de l’appareil du support mural Insérer la lame large d’un tournevis jusqu’en butée dans le verrouillage entre les raccords à eau et pousser légèrement le tournevis vers le haut (1). Basculer l’appareil de 15° max. vers l’avant (2) puis le retirer vers le haut (3).
  • Seite 41: Purge

    CLAGE 8. Branchement électrique (220 V~ ) MCX 6-220 Schéma électrique (230 V~ ) MCX 3..6 1. Régulateur électronique (400 V 2~ ) MCX 7 2. Élément chauffant 3. Limiteur de température de sécurité 9. Purge Il faut purger l’appareil avant la première mise en service pour éviter que l‘élément chauffant soit endommagé.
  • Seite 42: Cache À Plaque Signalétique

    Gerät an Schutzleiter MCX 3 1500-15003 que le numéro de réfé- anschließen! 012345-012345 Appliance must be earthed! rence (3) se trouvent CLAGE GmbH 21337 sur le côté inférieur du Lueneburg GERMANY MADE IN cache, en plus de la GERMANY désignation du type d’appareil (1)
  • Seite 43: Réglage Du Volume D'eau

    CLAGE 12. Réglage du volume d‘eau À réaliser par un spécialiste uniquement. Retirer le cache (voir fig. 10), desserrer la vis de capot qui se trouve en dessous et retirer le capot. Réduction du débit : Une rotation de la vis de réglage dans le sens des aiguilles d’une montre réduit le débit, ce qui permet d’atteindre une température de sortie plus élevée.
  • Seite 44: Verrouillage De La Touche Et De La Température

    MCX 3..7 SMARTRONIC ® 13. Utilisation Verrouillage de la touche et de la température La température actuellement sélectionnée peut être verrouillée pour empêcher toute modifica- tion involontaire. Elle ne peut alors plus être modifiée par une simple pression sur la touche Activation/désactivation du blocage de la touche: Maintenir la touche tactile enfoncée (pendant 5 s environ) jusqu’à...
  • Seite 45: Consignes D'entretien

    CLAGE 15. Consignes d‘entretien • Essuyer l’appareil et les robinets de distribution uniquement avec un chiffon humide. Ne pas utiliser de détergent abrasif ou contenant un solvant ou du chlore. • Le clavier de commande doit être gardé au sec! •...
  • Seite 46: Auto-Dépannage Et S.a.v

    Vérifier le réglage du volume d'eau (voir Pression d'eau courante trop fig. 9), ouvrir un peu plus le robinet d'arrêt, Pas de mise en faible utiliser un régulateur de jet CLAGE, vérifier la marche audible de pression d'eau l'appareil et l'eau reste froide Éliminer les impuretés dans l'arrivée ou la...
  • Seite 47 CLAGE 17. Auto-dépannage et S.A.V. La touche tactile n’a pas été Ne pas toucher la touche tactile pendant La LED clignote effleurée au centre 3 s environ (jusqu’à ce que la LED s’allume après avoir appuyé de nouveau normalement), puis effleurer la...
  • Seite 48 MCX 3..7 SMARTRONIC ® Inhoud 1. Overzicht van het apparaat ............. . 49 2.
  • Seite 49: Overzicht Van Het Apparaat

    CLAGE 1. Overzicht van het apparaat Bij onderdeelbestelling altijd het apparaattype en het serienummer vermelden! Pos. Omschrijving Stelschroef voor het instellen van de waterhoeveelheid Kap met bedieningspaneel Verwarmingselement Veiligheidstemperatuurbegrenzer (STB) Filterzeef Wateraansluitstukken Wandhouder Klem voor aardleiding Kabeldoorvoerrubber...
  • Seite 50: Beschrijving Toestel

    MCX 3..7 SMARTRONIC ® 2. Beschrijving toestel Deze kleine doorloopverwarmer (fig. 1) is bedoeld voor de energiezuinige voorziening van warm water bij een wastafel en wordt geïnstalleerd in combinatie met een kraan. Bij het opendraaien van de warmwaterkraan schakelt de doorloopverwarmer automatisch in wanneer de drempelwaarde van de water- hoeveelheid wordt overschreden en verwarmt het water terwijl het door het apparaat...
  • Seite 51: Technische Gegevens

    CLAGE 3. Technische gegevens MCX 3 MCX 4 MCX 6 MCX 6-220 MCX 7 Artikel nummers 15003 15004 15006 15005 15007 Nominale capaciteit Liter Nominale overdruk MPa (bar) 1 (10) 1 (10) 1 (10) 1 (10) 1 (10) Verwarmingssysteem Blankdraad verwarmingssysteem IES ®...
  • Seite 52: Montagevoorbeelden

    MCX 3..7 SMARTRONIC ® 4. Montagevoorbeelden Drukloze (open) installatie Speciale straalregelaar plaatsen met kraan voor drukloze warmwatertoestellen MCX 3/4: CSP 3 MCX 6/7: CSP 6 Elektrische aansluiting met kabel (zo nodig inkorten) T-stuk met drukslang Maten in mm Speciale straalregelaar plaatsen Drukvaste (gesloten) installatie MCX 3/4: CSP 3 MCX 6/7: CSP 6...
  • Seite 53: Montage-Instructies

    Wij kunnen een probleemloze werking alleen garanderen wanneer gebruik wordt gemaakt van een CLAGE-kraan en -toebehoren. Let bij de installatie op het volgende: • DIN VDE 0100 en EN 806 alsmede de wettelijke voorschriften van het betreffende land en de bepalingen van de plaatselijke leverancier van water en elektriciteit.
  • Seite 54: Inbouwvoorschrift Voor De Flexibele Verbindingslang

    MCX 3..7 SMARTRONIC ® 6. Flexibele verbindingslang Inbouwvoorschrift voor de flexibele verbindingslang DN slang Uitw. 8 mm 12 mm 20 bar 27 mm Let u op voldoende uitzetting en gelijkmatigheid! • De toegestane buigradius Rmin = 27 mm deze mag niet overschreden worden, zowel bij transport, montage als ook in ingebouwde toestand.
  • Seite 55: Montage En Aansluiting Van Water

    CLAGE 7. Montage en aansluiting van water • Het toestel zodanig installeren dat de wateraansluitingen verticaal naar boven zijn gericht en direct op de aansluitingen van de kraan kunnen worden aangesloten. • De wandplaat met pluggen en schroeven bevestigen (zie figuur 5).
  • Seite 56: Elektrische Aansluiting

    MCX 3..7 SMARTRONIC ® 7. Montage en aansluiting van water aansluitstukken steken en de schroevendraaier licht naar boven drukken (1), het toestel maxi- maal 15° naar voren kantelen (2) en naar boven uit de wandhouder nemen (3). 8. Elektrische aansluiting Alleen door de vakman! Voordat u begint met de elektrische aansluiting van het apparaat moet u het apparaat met water vullen en volledig ontluchten door de warmwaterkraan meerdere malen te...
  • Seite 57: Ontluchten

    4. Leg de gebruiker de werking van het apparaat uit en zorg dat hij ermee vertrouwd is. Geef deze handleiding aan de gebruiker zodat hij deze kan bewaren. 5. Registreer het toestel met de registratiekaart bij de klantenservice van de fabriek resp. online op de website www.clage.com...
  • Seite 58: Afdekking Typeplaatje

    (1) ook Gerät an Schutzleiter MCX 3 1500-15003 anschließen! 012345-012345 Appliance must be earthed! het serienummer (2) CLAGE GmbH en het artikelnummer 21337 Lueneburg GERMANY (3) van het apparaat MADE IN GERMANY weergegeven Plaatsen van de afdekking 1.
  • Seite 59: Het Instellen Hoeveelheid Water

    CLAGE 12. Het instellen hoeveelheid water Mag alleen uitgevoerd worden door een vakman. Verwijder de klep (zie afb. 10), draai de schroef die zich daaronder bevindt los en verwijder de kap. Reductie van de waterhoeveelheid: Door de stelschroef rechtsom te draaien wordt de waterhoeveelheid gereduceerd, waardoor een hogere uitgangstemperatuur kan worden bereikt.
  • Seite 60: Toetsen- En Temperatuurblokkering

    MCX 3..7 SMARTRONIC ® 13. Gebruik Toetsen- en temperatuurblokkering De actueel gekozen temperatuur kan ter bescherming tegen onbedoelde wijzigingen worden geblokkeerd. De temperatuur kan dan niet meer met een eenvoudige druk op de toets worden gewijzigd. Toetsenblokkering activeren / deactiveren: De sensortoets ingedrukt houden (ca.
  • Seite 61: Milieu En Recycling

    Instelling waterhoeveelheid controleren laten De waterdruk is te laag (zie fig. 9), haakse afsluiter verder openzet- Het apparaat schakelt niet ten, CLAGE straalregelaar plaatsen hoorbaar aan en het water blijft koud Vervuiling in de toe- of afvoerleiding verwij- Vuil in de leiding...
  • Seite 62 +31 592-40 55 98 Fon: +32 (0)494 39 13 32 E-mail: info@absalestrade.nl Email: tiktalik@skynet.be Internet: www.absalestrade.nl www.clage.nl Bij een fabricagefout of een gebrek aan het toestel: retourneer het toestel met een begelei- dende brief en het aankoopbewijs voor nazicht of reparatie.
  • Seite 63 CLAGE Zawartość 1. Prezentacja poglądowa ..............64 2.
  • Seite 64: Prezentacja Poglądowa

    MCX 3..7 SMARTRONIC ® 1. Prezentacja poglądowa Przy zamawianiu części zawsze podawać typ urządzenia i numer seryjny! Poz. Nazwa Śruba do regulacji ilości wody Okapu z panelem obsługi Element grzejny Zabezpieczenie termiczne (STB) Sitko filtrujące Nypel przyłącza wody Uchwyt ścienny Zacisk bezpiecznika uziemiającego Tulejka przepustu kabla...
  • Seite 65: Opis Urządzenia

    CLAGE 2. Opis urządzenia Ten mały przepływowy podgrzewacz wody (rys. 1) służy do oszczędnego doprowadzania ciepłej wody do pojedynczego punktu poboru, w szczególności umywalek, który można zain- stalować na armaturze sanitarnej. Otwarcie zaworu ciepłej wody armatury powo- duje automatyczne włączenie przepływowego podgrzewacza po przekroczeniu ilości włącza-...
  • Seite 66: Dane Techniczne

    MCX 3..7 SMARTRONIC ® 3. Dane techniczne MCX 3 MCX 4 MCX 6 MCX 6-220 MCX 7 Numer artykułu 15003 15004 15006 15005 15007 Pojemność znamionowa Liter Nadciśnienie znamionowe MPa (bar) 1 (10) 1 (10) 1 (10) 1 (10) 1 (10) System grzewczy Grzałka nieosłonięta IES ®...
  • Seite 67: Przykłady Instalacji

    CLAGE 4. Przykłady instalacji Instalacja bezciśnieniowa (otwarta) Zastosować specjalny regulator strumienia: z armaturą do bezciśnieniowych urządzeń do wody ciepłej MCX 3/4: CSP 3 MCX 6/7: CSP 6 Przyłącze sieciowe z prze- wodem zasilającym (w razie potrzeby skrócić) Wyjście zaworu kątowego G⅜" Wymiary w mm Instalacja ciśnieniowa (zamknięta)
  • Seite 68: Wskazówki Montażowe

    Montaż odbywa się bezpośrednio na rurach przyłączeniowych armatury sanitarnej w pomiesz- czeniu zabezpieczonym przed zamarzaniem. Prawidłowe działanie gwarantujemy wyłącznie w przypadku stosowania armatur i akcesoriów firmy CLAGE. Podczas instalacji należy prze- strzegać: • normy DIN VDE 0100 oraz EN 806, jak również przepisów prawnych obowiązujących w danym kraju i postanowień...
  • Seite 69: Elastyczne Węże Połączeniowe

    CLAGE 6. Elastyczne węże połączeniowe Wytyczne dotyczące montażu: Wąż DN zewn. 8 mm 12 mm 20 bar 27 mm Uwzględnić wystarczające wyrównanie potencjałów! • Nie wolno przekraczać dopuszczalnego promienia zgina- nia Rmin = 27 mm — zarówno podczas transportu, mon- tażu, jak i w stanie wbudowanym.
  • Seite 70: Montaż I Podłączenie Wody

    MCX 3..7 SMARTRONIC ® 7. Montaż i podłączenie wody • Urządzenie zainstalować tak, aby przyłącza wody były ustawione pionowo do góry i było możliwe ich bezpośrednie podłączenie do przyłączy armatury sanitarnej. • Uchwyt ścienny zamocować przy użyciu śrub i kołków (rys. 5). • Założyć urządzenie na uchwycie ściennym i zablokować (rys. 6). Urządzenie można użytko- wać...
  • Seite 71: Podłączenie Elektryczne

    CLAGE 7. Montaż i podłączenie wody snąć wkrętak w górę (1), pochylić urządzenie o maksymalnie 15° do przodu (2) i zdjąć je do góry (3). 8. Podłączenie elektryczne Tylko przez specjalistę! Przed wykonaniem podłączenia elektrycznego należy całkowicie napełnić urządzenie wodą i je odpowietrzyć, kilkakrotnie otwierając i zamykając zawór ciepłej wody armatury.
  • Seite 72: Odpowietrzanie

    3. Ustawić żądaną temperaturę na urządzeniu i w razie potrzeby dostosować ilość wody, np. jeśli temperatura nie została osiągnięta. 4. Wyjaśnić użytkownikowi zasadę działania urządzenia i zapoznać go z zasadami użytkowa- nia. Przekazać użytkownikowi niniejszą instrukcję w celu przechowania. 5. Zarejestrować urządzenie w dziale obsługi klienta lub online na stronie internetowej www. clage.de, używając karty rejestracyjnej.
  • Seite 73: Osłona Tabliczki Znamionowej

    Gerät an Schutzleiter MCX 3 1500-15003 anschließen! 012345-012345 nia (1) znajdują się Appliance must be earthed! także numer seryjny CLAGE GmbH 21337 Lueneburg GERMANY urządzenia (2) oraz MADE IN GERMANY numer artykułu (3). Zakładanie osłony 1. Wsunąć osłonę na płasko, skierowaną w stronę uchwytu ściennego, pod krawędzie złączek wody.
  • Seite 74: Ustawianie Ilości Wody

    MCX 3..7 SMARTRONIC ® 12. Ustawianie ilości wody Wykonanie poniższych czynności należy zlecić fachowcowi. Zdjąć osłonę (patrz rys. 10), poluzować znajdującą się pod nią śrubę z kapturkiem, a następnie zdjąć kapturek. Zmniejszanie natężenia przepływu: Obrót śruby regulacyjnej w kierunku ruchu wskazówek zegara powoduje zmniejszenie natęże- nia przepływu, co pozwala na uzyskanie wyższej temperatury na wylocie.
  • Seite 75: Blokada Przycisku I Temperatury

    CLAGE 13. Eksploatacja Blokada przycisku i temperatury Aktualnie wybraną temperaturę można zablokować przed przypadkowym przestawieniem. Nie jest wówczas możliwa jej zmiana przez naciśnięcie przycisku. Włączanie / wyłączanie blokady przycisku Nacisnąć i przytrzymać przycisk z czujnikiem (ok. 5 sekund), aż aktywna dioda LED zgaśnie, a następnie zwolnić...
  • Seite 76: Czyszczenie I Pielęgnacja

    MCX 3..7 SMARTRONIC ® 15. Czyszczenie i pielęgnacja • Urządzenie i armatury czyścić wyłącznie przy użyciu wilgotnej szmatki. Nie używać środków do czyszczenia o właściwościach szorujących, zawierających rozpuszczalniki lub chlor. • Obszar panelu obsługi utrzymywać w suchym stanie! • Regularnie czyścić i wymieniać regulator strumienia. •...
  • Seite 77: Samopomoc W Razie Problemów I Obsługa Klienta

    Zbyt mały przepływ tłumienie zaworu kątowego Sprawdzić ustawienie ilości wody, zmniejszyć Zbyt małe ciśnienie tłumienie zaworu kątowego, zastosować bieżącej wody regulator strumienia CLAGE, sprawdzić Woda pozostaje zimna ciśnienie wody Zanieczyszczenia Usunąć zanieczyszczenia z dopływu i odpływu Wahania napięcia Sprawdzić napięcie...
  • Seite 78 (dostępny jako część zamienna). Jeżeli urządzenie wciąż nie będzie działać prawidłowo, skontaktować się z Biurem Obsługi Klienta. Jeżeli urządzenie wciąż nie będzie działać prawidłowo, skontaktować się z: CLAGE Polska Spółka z o.o. Biuro obsługi klienta ul. Wichrowa 4 PL-60-449 Poznań...
  • Seite 79 CLAGE Obsah 1. Přehledné zobrazení ..............80 2.
  • Seite 80: Přehledné Zobrazení

    MCX 3..7 SMARTRONIC ® 1. Přehledné zobrazení Při objednávkách náhradních dílů vždy uvádějte typ přístroje a sériové číslo! Poz. Název Šroub k nastavení množství vody Kryt s ovládacím panelem Topný díl Bezpečnostní omezovač teploty (STB) Filtrační sítko Tvarovky k připojení vody Nástěnný držák Zemnicí...
  • Seite 81: Popis Přístroje

    CLAGE 2. Popis přístroje Tento malý průtokový ohřívač (obr. 1) je určen k dodávce vody pro jednotlivé odběrné místo, především pak k umyvadlům a může být insta- lován s běžnou vodovodní armaturou. Otevřením ventilu teplé vody na baterii se prů- tokový...
  • Seite 82: Technické Údaje

    MCX 3..7 SMARTRONIC ® 3. Technické údaje Type MCX 3 MCX 4 MCX 6 MCX 6-220 MCX 7 Číslo zboží 15003 15004 15006 15005 15007 Jmenovitý objem Liter Jmenovitý přetlak MPa (bar) 1 (10) 1 (10) 1 (10) 1 (10) 1 (10) Topný...
  • Seite 83: Příklady Instalace

    CLAGE 4. Příklady instalace Beztlaká (otevřená) instalace s třícestnou Použijte speciální regulátor vodního proudu: armaturou pro přípravu teplé vody MCX 3/4: CSP 3 MCX 6/7: CSP 6 Elektrická přípojka přívodním kabelem (příp. zkraťte) Rohový ventil výstup G ⅜" Rozměry v mm Tlaková...
  • Seite 84: Montážní Pokyny

    Montáž je provedena přímo na přívodním potrubí k baterii ve vyhřívané místnosti. Zaručujeme bezvadnou funkci pouze při použití armatur a příslušenství CLAGE. Při instalaci dodržujte: • DIN VDE 0100 a EN 806 a legislativní předpisy příslušné země a ustanovení místních doda- vatelů...
  • Seite 85: Flexibilní Spojovací Hadice

    CLAGE 6. Flexibilní spojovací hadice Instalační směrnice: DN hadice vnější 8 mm 12 mm 20 barů 27 mm Pamatujte na dostatečné vyrovnání potenciálů! • Dovolený poloměr ohybu Rmin = 27 mm nesmí být menší, jak při přepravě, montáži, tak i po instalaci. Pokud nemů- vnější...
  • Seite 86: Montáž A Vodovodní Přípojka

    MCX 3..7 SMARTRONIC ® 7. Montáž a vodovodní přípojka • Instalujte přístroj tak, aby směřovaly vodovodní přípojky svisle nahoru a mohly být připoje- ny přímo k přípojkám sanitární armatury. • Upevněte nástěnný držák pomocí šroubů a hmoždinek (obr. 5). • Nasaďte přístroj na nástěnný držák a zajistěte (obr. 6). Přístroj je dovoleno používat pouze po řádném upevnění...
  • Seite 87: Odebrání Přístroje Z Nástěnného Držáku

    CLAGE 7. Montáž a vodovodní přípojka Odebrání přístroje z nástěnného držáku Nasaďte hrot šroubováku až na doraz do pojistky mezi díly vodovodní přípojky a mírně zatlačte šroubovákem nahoru (1), přístroj vyklopte maximálně o 15° dopředu (2) a vyjměte směrem nahoru (3). 8. Elektrická přípojka Pouze odborníkem!
  • Seite 88: Odvzdušnění

    3. Nastavte na přístroji požadovanou teplotu a podle potřeby upravte množství vody, pokud např. není dosaženo teploty. 4. Vysvětlete uživateli funkce přístroje a seznamte jej s přístrojem. Tento návod předejte uživateli k úschově. 5. Registrujte přístroj pomocí registrační karty u zákaznického servisu nebo online na stránkách www.clage.de.
  • Seite 89: Kryt Typového Štítku

    Na spodní straně krytu Gerät an Schutzleiter MCX 3 1500-15003 jsou kromě označení anschließen! 012345-012345 Appliance must be earthed! typu přístroje (1) také CLAGE GmbH 21337 sériové číslo přístroje Lueneburg GERMANY MADE IN (2) a číslo výrobku (3). GERMANY Nasazení krytu 1.
  • Seite 90: Nastavení Množství Vody

    MCX 3..7 SMARTRONIC ® 12. Nastavení množství vody Smí provádět pouze odborník. Odmontujte zástěnu (viz obr. 10), uvolněte šroub krytu, který se nachází pod ní, a sundejte kryt. Snížení průtokového množství: Šroubováním seřizovacího šroubu ve směru hodinových ručiček snižujete průtok, čímž může být dosaženo vyšší...
  • Seite 91: Blokování Tlačítek A Teploty

    CLAGE 13. Použití Blokování tlačítek a teploty Aktuální vybranou teplotu můžete zablokovat proti nechtěné změně nastavení. Nelze ji pak změnit jednoduchým stisknutím tlačítka. Aktivace / deaktivace blokování tlačítek: Stiskněte a podržte tlačítko snímače (cca 5 vteřin), dokud nezhasne aktivní kontrolka LED, potom uvolněte tlačítko snímače.
  • Seite 92: Životní Prostředí A Recyklace

    Zkontrolujte množství vody, otevřete více rohový Tlak vody je příliš nízký ventil, použijte regulátor proudu vody CLAGE, Voda zůstává stu- zkontrolujte tlak vody dená Znečištění Odstraňte nečistoty z přítoku a výtoku Kolísá...
  • Seite 93 Poškozené vedení musí být vyměněno za originální přívodní kabe- ly (dodáváme formou náhradního dílu). Pokud přístroj ani nadále správně nefunguje, kontaktujte zákaznický servis. Pokud přístroj ani nadále správně nefunguje, kontaktujte: CLAGE CZ s.r.o. Trojanovice 644 744 01 Frenštát pod Radhoštěm Česká Republika...
  • Seite 94: Erläuterungen

    Produktdatenblatt / Product data sheet / Fiche technique de produit / Product- informatieblad / Karta danych produktu / Technický list podle Produktdatenblatt nach Vorgabe der EU Verordnungen - 812/2013 814/2013 η °C dB(A) CLAGE MCX3 CLAGE MCX4 CLAGE MCX6 CLAGE MCX7 Erläuterungen...
  • Seite 95 CLAGE Produktdatenblatt / Product data sheet / Fiche technique de produit / Product- informatieblad / Karta danych produktu / Technický list podle > en Product data sheet in accordance with EU regulation (a) Brand name or trademark, (b.1) Model, (b.2) Type, (c) Specified load profile, (d) Energy-efficiency class, (e) Energy-efficiency, (f) Annual power consumption, (g) Additional load profile, the appropriate energy-efficiency...
  • Seite 96 CLAGE GmbH Pirolweg 1–5 21337 Lüneburg Deutschland Telefon: +49 4131 8901-0 Telefax: +49 4131 83200 E-Mail: service@clage.de Internet: www.clage.de Technische Änderungen, Änderungen der Ausführung und Irrtum vorbehalten. Subject to technical changes, design changes and errors. Sauf modifications techniques, changements constructifs et erreur ou omission.

Diese Anleitung auch für:

Smartronic mcx 7Smartronic mcx 4Smartronic mcx 6Smartronic mcx 6-220Mcx 3Mcx 4 ... Alle anzeigen

Inhaltsverzeichnis