Herunterladen Inhalt Inhalt Diese Seite drucken
Inhaltsverzeichnis

Werbung

Verfügbare Sprachen
  • DE

Verfügbare Sprachen

  • DEUTSCH, seite 19
Floor / Tabletop type
Boden- / Tischgerät
Type mobile
De instalación en el suelo / mesa
Tipo da pavimento / tavola
Vloermodel / tafelmodel
L L L L L
"Plasmacluster" is trademark of
Sharp Corporation.
R
AIR PURIFIER
OPERATION MANUAL
LUFTREINIGER
BEDIENUNGSANLEITUNG
PURIFICATEUR D'AIR
MANUEL D'UTILISATION
PURIFICADOR DE AIRE
MANUAL DE USO
PURIFICATORE DELL'ARIA
MANUALE OPERATIVO
LUCHTREINIGER
GEBRUIKSAANWIJZING
FU-55SE

Werbung

Inhaltsverzeichnis
loading

Inhaltszusammenfassung für Sharp FU-55SE

  • Seite 1 FU-55SE AIR PURIFIER OPERATION MANUAL LUFTREINIGER BEDIENUNGSANLEITUNG PURIFICATEUR D'AIR MANUEL D'UTILISATION PURIFICADOR DE AIRE MANUAL DE USO PURIFICATORE DELL’ARIA MANUALE OPERATIVO Floor / Tabletop type Boden- / Tischgerät LUCHTREINIGER Type mobile De instalación en el suelo / mesa GEBRUIKSAANWIJZING Tipo da pavimento / tavola...
  • Seite 3: Inhaltsverzeichnis

    In this case, purchase an exchange filter FZ-60SEF of the option goods, and replace the filters. Thank you for purchasing the SHARP FU-60SE. Please read this manual carefully for the cor- rect operation. Before using this product, be sure to read The section: “Safety Precautions.”...
  • Seite 4: Safety Precautions

    Fire, electrical shock and/or bodily injury may occur if not. For repair, contact your dealer of purchase or the nearest Sharp Service Centre. • Periodically remove dust from the power plug Accumulated dust on the power plug may cause bad insulation from humidity, etc.
  • Seite 5: Cautions Concerning The Operation Of This Product

    CAUTIONS CONCERNING THE OPERATION OF THIS PRODUCT • Do not block the intake and Air Outlet. • Do not use the unit near or on hot objects, such as a stove, etc. Also, do not use the unit where it may come into contact with steam. •...
  • Seite 6: Names Of Parts

    NAMES OF PARTS MAIN UNIT DISPLAY AUTO operation lamp Fan level lamps OFF timer display lamps (set using remote control) Filter lamp If the Filter lamp is lit, it indicates filter replacement period. CLUSTER ION LAMP Cluster ion operation is selected using the remote control. Blue light When the cluster ion operation is in Clean mode or AUTO cluster ion mode and the air in the room is dirty, this light...
  • Seite 7 Pollen mode operation lamp CLEAN-SIGN The color changes when the air is dirty. Clean (green) Slightly dirty (orange) Very dirty (red) ABOUT THE CLEAN-SIGN • The sensor displays a CLEAN-SIGN lamp depending on relative changes to the environment from the time the power plug is inserted into the wall outlet and thereafter.
  • Seite 8: Back

    Power cord Power plug ACCESSORIES Remote control Battery (1 unit) (R6(AA) battery X 2) Attached leaflet • Operation Manual SPECIFICATIONS Model FU-55SE Power supply 220-240V / 50Hz Fan level adjustment High Medium Silent Fan level Rated power 19 W 43 W...
  • Seite 9: Preparation

    PREPARATION INSERTING BATTERIES IN THE REMOTE CONTROL Remove the back cover Press and slide the back cover to re- move. Insert batteries Insert batteries with shown below. Close the back cover About the batteries • The battery life is about 1 year. •...
  • Seite 10: Installing The Filters

    PREPARATION • Be sure to remove the power plug from the wall outlet. Be sure to remove the power plug from the wall outlet. INSTALLING THE FILTERS To maintain the quality of the filters, they are installed in the main unit within plastic bags.
  • Seite 11 outlet. Install the filter Tabs Remove the HEPA filter from the plastic bag and mount it within the Filter frame with the “FRONT” sign facing up. HEPA filter Insert so that the tabs on the HEPA filter Filter frame are facing toward you. Proper operation cannot be achieved when installing the filter backwards.
  • Seite 12: Operation

    For the first 30 seconds after the power plug is in- OPERATION serted into the wall outlet, the unit will check the con- dition of the air. If operation is set to ON during this time, the CLEAN-SIGN lamp will alternately flash green, orange and red.
  • Seite 13: Remote Control Operation

    Operations available with remote control • AUTO operation (fan level) • MANUAL operation (fan level) • Pollen mode operation REMOTE CONTROL OPERATION • OFF timer setting • DISPLAY ON/OFF • Cluster ion mode selection • To start operation, press the POWER ON/OFF button. A short beep will sound and operation will start in AUTO opera- •...
  • Seite 14: Guide For Operation

    GUIDE FOR OPERATION GUIDE FOR ODOR SENSOR • In addition to odor such as cigarette smoke and pet odor, the odor sensor also responds to the following. • Insecticide, cosmetics, spray, alcohol. • Sudden changes in temperature or humidity. • When the unit is in automatic operation and cosmetics or the like are used in a closed room, it is normal for the sensor to respond by increasing the air flow.
  • Seite 15: Care And Maintenance

    CARE AND MAINTENANCE (To maintain the best performance of this product, please clean the unit periodically.) When cleaning, be sure to remove the power plug from the wall outlet. In addition, never handle the power plug with wet hands. Electrical shock and/or bodily injury may occur as a result. MAIN UNIT DUST SENSOR ODOR SENSOR...
  • Seite 16: Guide For Life Of Filters

    CARE AND MAINTENANCE GUIDE FOR LIFE OF FILTERS The filter replacement period is indicated by the Filter lamp. (The lamp will light up in about 5 years, when using the unit for 12 hours daily.) • The operation hours are saved in memory even when removing the power plug for transpor- tation to another room, etc.
  • Seite 17: Troubleshooting

    TROUBLESHOOTING Before calling for repair, check the symptoms below for possible remedies, since the problem may not be a malfunction of the unit. SYMPTOM REMEDY (not a malfunction) • Have the batteries been depleted? The remote control does not • Are the batteries inserted correctly? work •...
  • Seite 18 FU-55SE_Eng.6.5 03.7.17, 8:53 AM...
  • Seite 19 Vielen Dank, dass Sie sich für den FU-60SE Kaufen Sie sich in diesem Fall den von SHARP entschieden haben. Bitte lesen Sie Ersatzfilter FZ-60SEF aus der Liste der sich für die richtige Bedienung des Geräts diese Zubehörteile und tauschen Sie die Filter...
  • Seite 20: Vorsichtsmassnahmen

    • Modifizieren Sie nichts. Reparaturarbeiten und der Auseinanderbau des Gerätes darf nur von einem autorisierten Kundendienst ausgeführt werden. Anderenfalls könnten ein Brand, ein elektrischer Schlag und/oder Personenschäden verursacht werden. Wenden Sie sich zwecks Reparaturarbeiten an Ihren Verkaufshändler oder an den Sharp-Kundendienst in Ihrer Nähe. • Entfernen Sie regelmäßig Staub vom Netzstecker.
  • Seite 21: Sicherheitshinweise Für Die Gerätebedienung

    SICHERHEITSHINWEISE FÜR DIE GERÄTEBEDIENUNG • Blockieren Sie nicht die Einsaug- und Auslassöffnungen. • Verwenden Sie das Gerät nicht in der Nähe oder auf heißen Gegenständen, wie z.B. auf einem Ofen usw. Verwenden Sie das Gerät nicht dort, wo es mit Dampf in Kontakt kommen kann. •...
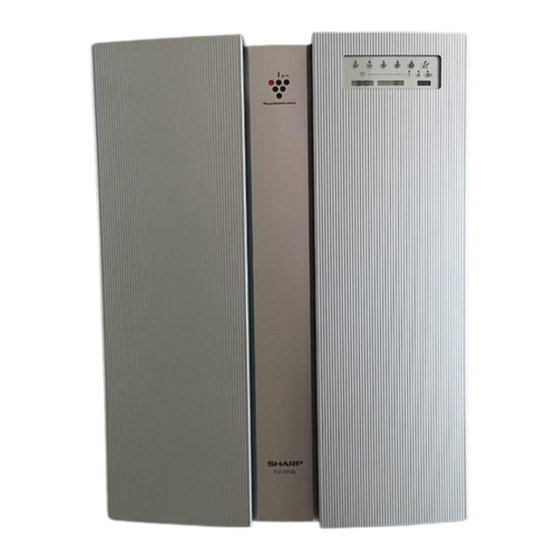
  • Seite 22: Bezeichnung Der Bedienungselemente

    BEZEICHNUNG DER BEDIENUNGSELEMENTE Gebläseleistungs- DISPLAY DES HAUPTGERÄTS AUTO-Betriebslampe Lampen Displaylampen OFF-Timer (mit der Fernbedienung einstellen) Filterlampe Falls die Filterlampe leuchtet, zeigt diese den Zeitraum für den Austausch des Filters an. CLUSTER-IONEN-LAMPE Der Cluster-Ionen-Betrieb wird mit der Fernbedienung eingestellt. Blaues Licht Wenn sich der Cluster-Ionen-Betrieb im Reinigungsmodus oder im AUTO-Cluster-Ionen-Modus befindet und die Luft im Zimmer verschmutzt ist, wird dieses Licht eingeschaltet und der Reinigungs-...
  • Seite 23 Pollenmodus-Betriebslampe REINIGUNGSANZEIGE Die Farbe ändert sich, wenn die Luft verschmutzt ist. Rein (grün) Etwas verschmutzt (orange) Sehr verschmutzt (rot) ÜBER DIE REINIGUNGSANZEIGE • Der Sensor zeigt je nach relativer Umgebungsänderung bei Einstecken des Netzsteckers in die Steckdose eine REINIGUNGSANZEIGE - Lampe an.
  • Seite 24: Rückseite

    Netzkabel Netzstecker ZUBEHÖR Fernbedienung Batterie (1 Einheit) (R6 (AA) Batterie x 2) Beiliegende Broschüre • Bedienungsanleitung TECHNISCHE DATEN Modell FU-55SE Stromversorgung 220 - 240 V/50 Hz Gebläseleistungs-Einstellung Hoch Mittel Ruhe Max. Gebläse- Nennleistung 19 W leistungs- 43 W betrieb Gebläseleistung...
  • Seite 25: Vorbereitung

    VORBEREITUNG EINLEGEN DER BATTERIEN IN DIE FERNBEDIENUNG Nehmen Sie den Deckel des Batteriefachs ab. Drücken Sie auf den Deckel und schieben Sie ihn, um ihn abzunehmen. Legen Sie die Batterien ein. Legen Sie die Batterien mit der Polarität wie neben stehend gezeigt ein. Schließen Sie das Batteriefach.
  • Seite 26: Installieren Der Filter

    VORBEREITUNG • Ziehen Sie unbedingt den Netzstecker aus der Steckdose heraus. INSTALLIEREN DER FILTER Damit die Qualität der Filter aufrechterhalten bleibt, wurden sie in Plastikbeuteln verpackt in das Hauptgerät installiert. Entfernen Sie vor Inbetriebnahme des Geräts unbedingt die Plastikbeutel. Nehmen Sie die Filter heraus Stellen Sie das Gerät mit der Vorderseite nach...
  • Seite 27: Installieren Sie Die Filter

    Installieren Sie die Filter Halteklemmen Entfernen Sie den Plastikbeutel vom HEPA-Filter und installieren Sie den Filter im Filterrahmen, wobei die Anzeige “FRONT” nach HEPA-Filter oben zeigt. Filterrahmen Setzen Sie den Filter so ein, dass die Halteklemmen am HEPA-Filter auf Sie gerichtet sind.
  • Seite 28: Betrieb

    In den ersten 30 Sekunden nach Einstecken des BETRIEB Netzsteckers in die Steckdose prüft das Gerät die Luftbedingungen. Wenn der Betrieb in dieser Zeit aktiviert wird (ON), blinkt die REINIGUNGSANZEIGE- Lampe abwechselnd grün, orange und rot. BETRIEB Verfügbare Betriebsarten DES HAUPTGERÄTS dieses Geräts •...
  • Seite 29: Betrieb Der Fernbedienung

    Verfügbare Fernbedienungsfunktionen • AUTO-Betrieb (Gebläseleistung) • MANUELLER-Betrieb BETRIEB DER FERNBEDIENUNG (Gebläseleistung) • Pollenmodus-Betrieb • OFF-Timer-Einstellung • Drücken Sie die POWER ON/OFF-Taste, um den Betrieb zu starten. • DISPLAY ON/OFF Ein kurzer Piepton wird ausgegeben und der Betrieb startet im AUTO- •...
  • Seite 30: Richtlinien Für Den Betrieb

    RICHTLINIEN FÜR DEN BETRIEB RICHTLINIEN FÜR DEN GERUCHSSENSOR • Der Geruchssensor reagiert außer auf Gerüche, wie Zigarettenrauch oder Tiergerüche, auf Folgendes: • Insektizide, Kosmetik, Spray, Alkohol. • Plötzliche Temperatur- oder Feuchtigkeitsschwankungen. • Wenn sich das Gerät im AUTO-Betrieb befindet und Kosmetik oder Ähnliches in einem geschlossenen Raum verwendet wird, reagiert der Sensor normalerweise durch Erhöhen der Luftansaugung.
  • Seite 31: Pflege Und Wartung

    PFLEGE UND WARTUNG (Reinigen Sie das Gerät bitte regelmäßig, damit die bestmögliche Leistung dieses Produkts aufrechterhalten bleibt.) Wenn Sie das Gerät reinigen wollen, ziehen Sie unbedingt den Netzstecker aus der Steckdose. Fassen Sie außerdem den Netzstecker niemals mit nassen Händen an. Anderenfalls könnten ein Brand, ein elektrischer Schlag und/oder Personenschäden verursacht werden.
  • Seite 32: Richtlinien Für Die Lebensdauer Der Filter

    PFLEGE UND WARTUNG RICHTLINIEN FÜR DIE LEBENSDAUER DER FILTER Die Filteraustauschperiode wird anhand der Filterlampe angezeigt. (Wenn das Gerät 12 Stunden täglich in Betrieb ist, leuchtet die Lampe in etwa 5 Jahren auf.) • Die Betriebsstunden sind im Speicher gespeichert, auch wenn der Netzstecker für den Trans- port in einen anderen Raum, usw.
  • Seite 33: Störungsbeseitigung

    STÖRUNGSBESEITIGUNG Prüfen Sie vor Benachrichtigung des Kundendienstes die nachstehenden Symptome auf mögliche Abhilfe- maßnahmen, da das aufgetretene Problem nicht unbedingt auf eine Gerätefehlfunktion hinweisen muss. SYMPTOM ABHILFE (keine Fehlfunktion) • Sind die Batterien leer? Die Fernbedienung arbeitet • Wurden die Batterien richtig herum eingelegt? nicht.
  • Seite 34 FU-55SE_Ger.6.5 03.7.17, 8:55 AM...
  • Seite 35 Merci de vous être porté acquéreur du FU-60SE Dans ce cas, remplacez les filtres par le de SHARP. Veuillez lire ce manuel avec atten- filtre de rechange FZ-60SEF proposé tion afin d’utiliser ce produit correctement. Avant comme consommables en option.
  • Seite 36: Precautions De Securite

    Dans le cas contraire, cela peut provoquer un incendie, une électrocution et/ou des blessures corporelles. Pour toute réparation, contactez votre revendeur ou le centre SAV Sharp le plus proche. • Nettoyez périodiquement la prise du secteur pour la débarrasser de toute poussière.
  • Seite 37: Precautions Concernant D'utilisation De Cet Appareil

    PRECAUTIONS CONCERNANT L’UTILISATION DE CET APPAREIL • Ne pas obturer les ouïes d’entrée et d’évacuation. • Ne pas utiliser cet appareil à proximité, ou sur une source de chaleur telle qu’un chauffage, etc. Ne pas non plus utiliser cet appareil à proximité d’une source de vapeur d’eau. •...
  • Seite 38: Designations Des Pieces

    DESIGNATIONS DES PIECES Voyant de Voyants de vitesse VOYANTS INDICATEURS DE L’UNITE PRINCIPALE fonctionnement AUTO de ventilation Voyants indicateurs de temporisation d’arrêt (à régler en utilisant la télécommande) Voyant indicateur de filtre Si la lampe de filtre est allumée, cela indique que le filtre doit être remplacé.
  • Seite 39 Voyant indicateur d’élimination de pollen VOYANT INDICATEUR D’ETAT DE PROPRETE Sa couleur change lorsque l’air est sale. Propre (vert) Légèrement sale (orange) Très sale (rouge) A PROPOS DU VOYANT INDICATEUR DE PROPRETE • Le capteur de saleté affiche l’indication propre suivant l’état de l’environnement au moment du branchement du câble d’alimentation dans une prise du secteur et ce qu’il détecte ensuite.
  • Seite 40: Dos De L'appareil

    ACCESSOIRES Télécommande Piles (1 unité) (R6 (AA) x 2) Feuillet joint • Manuel d’Utilisation CARACTERISTIQUES Modèle FU-55SE Alimentation 220-240 V/50 Hz Fonctionnement Réglage de la vitesse du ventilateur Fort Moyen Silencieux Maxi. avec changement Puissance nominale 19 W...
  • Seite 41: Preparation

    PREPARATION MISE EN PLACE DES PILES DANS LA TELECOMMANDE Retirez le couvercle arrière Pressez et faites glisser le couvercle arrière pour le retirer. Introduisez les piles Introduisez les piles en positionnant comme illustré ci-dessous. Refermez le couvercle arrière Au sujet des piles •...
  • Seite 42: Installation Des Filtres

    PREPARATION • Ne pas oublier de débranchez d’abord la prise du secteur. INSTALLATION DES FILTRES Pour protéger les filtres, ceux-ci sont placés dans l’unité principale à l’intérieur de sacs en plastique. Ne pas oublier de retirer les filtres des sacs avant d’utiliser l’appareil. Retirez les filtres Placez l’appareil avec la façade vers le haut.
  • Seite 43 Installez le filtre Languettes Retirez le filtre HEPA du sac en plastique et installez-le dans l’unité principale avec le repère “FRONT” dirigée vers le haut. Filtre HEPA Le mettre en place avec les languettes Cadre de filtre du filtre HEPA dirigées vers vous. L’appareil ne pourra fonctionner correc- tement si le filtre est placé...
  • Seite 44: Fonctionnement

    Pendant les premières 30 secondes suivant le branchement FONCTIONNEMENT du câble d’alimentation dans une prise du secteur murale, l’appareil vérifie les conditions de l’air. Si l’appareil est en marche sur ON pendant cette période, le voyant indicateur d’état de propreté clignote alternativement en vert, en orange et en rouge.
  • Seite 45: Fonctionnement De La Telecommande

    Fonctions disponibles avec la télécommande • Fonctionnement AUTO (vitesse de ventilation) • Fonctionnement manuel (vitesse de ventilation) FONCTIONNEMENT DE LA TELECOMMANDE • Fonctionnement en mode d’élimination de pollen • Réglage de minuterie de • Pour mettre l’appareil en marche, appuyez sur le bouton Marche/ désactivation Arrêt.
  • Seite 46: Guide D'utilisation

    GUIDE D’UTILISATION GUIDE POUR CAPTEUR D’ODEUR • En plus des odeurs telles que celles de la fumée de tabac ou d’animal domestique, le capteur d’odeur est aussi sensible aux produits et facteurs suivants : • Insecticide, cosmétiques, aérosols, alcool. • Brusques changements de température ou d’humidité. •...
  • Seite 47: Soins Et Entretien

    SOINS ET ENTRETIEN (Pour obtenir les meilleures performances de cet appareil, veuillez le nettoyer périodiquement.) Lors du nettoyage de l’appareil, débranchez d’abord la prise du secteur. De plus, ne jamais manipuler la prise du secteur avec les mains mouillées. Car vous vous exposez à une électrocution. UNITE PRINCIPALE CAPTEUR DE POUSSIERE CAPTEUR D’ODEUR...
  • Seite 48: Guide De Duree D'utilisation Des Filtres

    SOINS ET ENTRETIEN GUIDE DE DUREE D’UTILISATION DES FILTRES La période de remplacement du filtre est indiqué par le voyant de filtre (le voyant s’allumera dans 5 ans environ pour une utilisation de l’appareil de 12 heures par jour). • Les heures d’utilisation sont enregistrées en mémoire, même si l’appareil est débranché pour être transporté...
  • Seite 49: Resolution Des Problemes

    RESOLUTION DES PROBLEMES Avant de faire appel au sav, vérifiez les symptômes ci-dessous pour déterminer une solution possi- ble, car le problème n’est peut être pas un dysfonctionnement de l’appareil. SYMPTOME SOLUTION (pas un dysfonctionnement) La télécommande • Est-ce que les piles sont à plat ? ne fonctionne pas.
  • Seite 50 FU-55SE_Fre.6.5 03.7.17, 8:55 AM...
  • Seite 51 Gracias por adquirir el purificador de aire FU- y la salida de aire puede producir olor. 60SE de SHARP. Por favor lea cuidadosa- Si esto sucediera, adquiera el filtro de reemplazo FZ-60SEF (accesorio) y mente este manual para aprender a utilizar reemplace los filtros.
  • Seite 52: Precauciones De Seguridad

    La modificación del producto puede ocasionar incendios, descargas eléctricas y/o lesiones corporales. Para reparaciones, tome contacto con el distribuidor donde adquirió el aparato o con el centro de servicio Sharp más cercano. • Quite periódicamente el polvo de la clavija de alimentación La acumulación de polvo en la clavija de alimentación puede reducir la aislación contra la humedad, etc.
  • Seite 53: Precauciones Concernientes Al Uso De Este Producto

    PRECAUCIONES CONCERNIENTES AL USO DE ESTE PRODUCTO • No bloque la entrada ni la salida de aire. • No use el aparato cerca o encima de objetos calientes, tales como estufas, etc. Asimismo, tampoco use el aparato en lugares donde pueda entrar en contacto con vapor. •...
  • Seite 54: Nombre De Los Componentes

    NOMBRE DE LOS COMPONENTES Lámpara Lámparas de nivel PANTALLA DE VISUALIZACIÓN de modo AUTO de ventilador DE LA UNIDAD PRINCIPAL Lámparas indicadoras del temporizador de desactivación (se programa con el mando a distancia) Lámpara de filtro Si el filtro de la lámpara está encendido, esto indica que es el momento de reemplazar el filtro.
  • Seite 55 Lámpara de modo SIGNO DE LIMPIEZA de eliminación de polen El color cambia cuando el aire está sucio. Limpio (verde) Ligeramente sucio (naranja) Muy sucio (rojo) ACERCA DEL SIGNO DE LIMPIEZA • El sensor de suciedad mostrará un lámpara del SIGNO DE LIMPIEZA dependiendo del cambio relativo del ambiente en el momento en que se inserta la clavija de alimentación en la toma de corriente mural y después de esto.
  • Seite 56: Parte Posterior

    ACCESORIOS Mando a distancia Pilas (1 unidad) (pila R6 (AA) x 2) Folleto incluido • Manual de uso ESPECIFICACIONES Modelo FU-55SE Fuente de alimentación 220-240 V/50 Hz Ajuste del nivel del ventilador Silencioso Máximo Alto Medio Funcionamiento Potencia nominal...
  • Seite 57: Preparativos

    PREPARATIVOS INSTALACIÓN DE LAS PILAS EN EL MANDO A DISTANCIA Retire la cubierta trasera Presione y deslice la cubierta trasera para retirarla. Instale las pilas Instale las pilas con los signos como se indica a continuación. Cierre la cubierta trasera Acerca de las pilas •...
  • Seite 58: Instalación De Los Filtros

    PREPARATIVOS • Asegúrese de desconectar la clavija de alimentación de la toma de corriente mural. INSTALACIÓN DE LOS FILTROS Para mantener la calidad de los filtros, éstos vienen instalados en la unidad principal dentro de bolsas plásticas. Asegúrese de retirar los filtros de las bolsas plásticas antes de usar el aparato.
  • Seite 59: Instale El Filtro

    ción Instale el filtro Lengüetas Saque el filtro HEPA de la bolsa plástica e instálelo en el bas- tidor de filtro con el signo “FRONT” de cara hacia arriba. Filtro HEPA Inserte el filtro HEPA de manera tal que Bastidor las lengüetas del mismo queden de cara de filtro hacia usted.
  • Seite 60: Funcionamiento

    Cuando se conecta la clavija de alimentación a la toma de FUNCIONAMIENTO corriente mural, el aparato comprueba durante los 30 segundos iniciales las condiciones del aire. Si se selecciona el modo ON en el transcurso de estos 30 segundos, el lámpara del SIGNO DE LIMPIEZA parpadeará...
  • Seite 61: Control Del Aparato Con El Mando A Distancia

    Operaciones que se pueden controlar con el mando a distancia • Modo AUTO (nivel de ventilador) • Funcionamiento MANUAL (nivel de ventilador) CONTROL DEL APARATO CON EL MANDO A DISTANCIA • Modo de eliminación de polen • Programación del temporizador •...
  • Seite 62: Guía De Uso

    GUÍA DE USO SENSOR DE OLORES • Además de ser sensible a olores tales como humo de cigarrillo u olor de mascotas, el sensor de olores también responde a lo siguiente. • Insecticidas, cosméticos, aerosoles, alcohol. • Cambios repentinos de temperatura o humedad. •...
  • Seite 63: Cuidado Y Mantenimiento

    CUIDADO Y MANTENIMIENTO (Para mantener las altas prestaciones de este producto, limpie el aparato periódicamente.) Al limpiar el aparato, asegúrese de desconectar la clavija de alimentación de la toma de corriente mural. Asimismo, nunca manipule la clavija de alimentación con las manos mojadas. De lo contrario, podrá...
  • Seite 64: Duración De Los Filtros

    CUIDADO Y MANTENIMIENTO DURACIÓN DE LOS FILTROS El período de reemplazo de los filtros es indicado por la lámpara de filtro. (La lámpara se encenderá al cabo de aproximadamente 5 años si se utiliza el aparato durante 12 horas diarias.) •...
  • Seite 65: Antes De Solicitar Reparaciones

    ANTES DE SOLICITAR REPARACIONES Antes de solicitar reparaciones, compruebe los síntomas que se describen a continuación y su posible solución, ya que el problema puede no deberse a un error de funcionamiento del aparato. SÍNTOMA SOLUCIÓN (cuando no hay ningún desperfecto) El mando a distancia •...
  • Seite 66 FU-55SE_Spa.6.5 03.7.17, 8:56 AM...
  • Seite 67 Grazie per aver acquistato il modello FU-60SE può emettere cattivi odori. della SHARP. Leggete attentamente questo In tal caso, acquistate il filtro di ricam- manuale per un funzionamento corretto. Prima bio FZ-60SEF e sostituite i filtri.
  • Seite 68: Norme Di Sicurezza

    Altrimenti si possono verificare incendi, scosse elettriche e/o lesioni alle persone. Per i lavori di servizio, rivolgetevi al vostro rivenditore o al più vicino centro di servizio Sharp. • Spolverate regolarmente la spina del cavo di alimentazione.
  • Seite 69: Precauzioni Riguardanti Il Funzionamento Di Questo Prodotto

    PRECAUZIONI RIGUARDANTI IL FUNZIONAMENTO DI QUESTO PRODOTTO • Non bloccate le porte di aspirazione e emissione. • Non usate l’unità vicino o sopra oggetti caldi, ad esempio una stufa, ecc. Inoltre, non usate l’unità in luoghi dove verrà in contatto con il vapore. •...
  • Seite 70: Nomenclatura

    NOMENCLATURA Spia del funzionamento Lampade del livello DISPLAY DELL’UNITA’ PRINCIPALE automatico del ventilatore Spie di visualizzazione del timer di spegnimento (effettuate l’impostazioni usando il telecomando) Spia del filtro Se la lampada del filtro è accesa, significa che è stato raggiunto il periodo di sostituzione del filtro LAMPADA CON INSIEMI DI IONI L’operazione di insiemi di ioni viene selezionata usando il telecomando.
  • Seite 71 l livello Spia del modo operativo del polline Segnalazione pulizia Il colore cambia quando l’aria è sporca. Pulito (verde) Leggermente sporco (arancione) Molto sporco (rosso) INFORMAZIONI SUL SIMBOLO DI PULIZIA • Il sensore visualizza una spia di segnalazione pulizia a seconda della carica relativa dell’ambiente nel momento in cui viene inserita la spina del cavo di alimentazione nella presa murale e successivamente.
  • Seite 72: Retro

    Spina di alimentazione ACCESSORI Telecomando Batteria (1 unità) (R6 (AA) batteria x 2) Foglietto allegato • Manuale operativo SPECIFICHE Modello FU-55SE Alimentazioni 220-240 V/50 Hz Regolazione del livello del ventilatore Alto Medio Silenzioso Massimo Operazione del livello Corrente nominale 19 W...
  • Seite 73: Preparativi

    PREPARATIVI INSTALLAZIONE DELLE BATTERIE NEL TELECOMANDO Rimuovete il coperchio posteriore Premete e fate scorrere il coperchio posteriore per rimuovere lo stesso. Installate le batterie Installate le batterie con come nell’indicazione qui sotto. Chiudete il coperchio posteriore Sulle batterie • La durata delle batterie è di circa 1 anno. •...
  • Seite 74: Installazione Dei Filtri

    PREPARATIVI • Assicuratevi di rimuovere la spina del cavo di alimentazione dalla presa murale. INSTALLAZIONE DEI FILTRI Per mantenere alta la qualità dei filtri, sono stati installati nell’unità principale all’interno di buste in plastica. Assicuratevi di rimuovere i filtri dalle buste in plastica prima di usare l’unità.
  • Seite 75 Installate il filtro Linguette Togliete il filtro HEPA dalla busta di plastica ed installa- telo nell’unità principale con il Filtro HEPA segno anteriore “FRONT” ri- volto verso l’alto. Telaio del Inserite il filtro in modo tale che le linguette filtro sul filtro HEPA siano rivolte verso di voi.
  • Seite 76: Funzionamento

    Durante i primi 30 secondi dopo aver inserito la spina del FUNZIONAMENTO cavo di alimentazione nella presa murale, l’unità controlla le condizioni dell’aria. Se l’operazione viene impostato su ON in questo momento, la spia di segnalazione pulizia alternativamente in verde, arancione e rosso. FUNZIONAMENTO DELL’UNITA’...
  • Seite 77: Funzionamento Del Telecomando

    Operazioni disponibili con il telecomando • Operazione automatica (livello del ventilatore) • Operazione manuale (livello del ventilatore) FUNZIONAMENTO DEL TELECOMANDO • Modo operativo del polline • Impostazioni dello spegnimento del timer • Accensione/spegnimento del • Per iniziare l’operazione, premete il tasto di accensione/spegnimento. display Si sente un breve segnale acustico e l’operazione ha inizio nel •...
  • Seite 78: Guida All'uso

    GUIDA ALL’USO GUIDA AL SENSORE DEGLI ODORI • Oltre agli odori quale il fumo delle sigarette e degli animali domestici, il sensore degli odori risponde anche a quanto segue. • Insetticidi, cosmetici, spray, alcool. • Improvvisi cambiamenti della temperatura o del tasso di umidità. •...
  • Seite 79: Cura E Manutenzione

    CURA E MANUTENZIONE (Per mantenere le migliori prestazioni di questo prodotto, pulite regolarmente l’unità.) Quando pulite l’unità, assicuratevi di rimuovere la spina del cavo di alimentazioni dalla presa murale. Inoltre, non maneggiate mai la spina del cavo di alimentazioni con le mani bagnate. Altrimenti si possono verificare scosse elettriche e/o lesioni personali.
  • Seite 80: Guida Per La Durata Dei Filtri

    CURA E MANUTENZIONE GUIDA PER LA DURATA DEI FILTRI Il periodo di sostituzione del filtro è indicato dalla spia del Filtro. (La spia si illumina dopo 5 anni circa, se usate l’unità per 12 ore al giorno.) • Le ore operative rimangono memorizzate, anche se scollegate la spina del cavo di alimentazione per trasportare l’unità...
  • Seite 81: Localizzazioni Dei Guasti

    LOCALIZZAZIONI DEI GUASTI Prima di richiedere del servizio, controllate i sintomi qui sotto per scoprire eventuali rimedi, poiché il problema può non essere un malfunzionamento dell’unità. SINTOMO RIMEDIO (non un malfunzionamento) Il telecomando non funziona. • Sono scariche le batterie? •...
  • Seite 82 FU-55SE_Ita.6.5 03.7.17, 8:55 AM...
  • Seite 83 Dank u voor de aankoop van de SHARP FU- In dit geval koopt u het optionele 60SE. Lees deze gebruiksaanwijzing zorgvuldig vervangfilter FZ-60SEF en vervangt u door voor een juist gebruik.
  • Seite 84: Voorzorgsmaatregelen Voor De Veiligheid

    Zo niet bestaat er gevaar voor brand, een elektrische schok en/of lichamelijk letsel. Neem voor reparatie contact op met uw verkoper of de dichtstbijzijnde Sharp onderhoudsdienst. • Verwijder geregeld het stof van de stekker. Opgehoopt stof op de stekker kan slechte isolatie tegen vocht, enz. veroorzaken.
  • Seite 85: Voorzorgsmaatregelen Voor Het Gebruik Van Dit Toestel

    VOORZORGSMAATREGELEN VOOR HET GEBRUIK VAN DIT TOESTEL • Blokkeer de inlaat en luchtuitlaat niet. • Plaats het toestel niet in de nabijheid van of op warme voorwerpen zoals een kachel, enz. Gebruik het toestel evenmin op plaatsen waar het in contact kan komen met stoom. •...
  • Seite 86: Namen Van De Onderdelen

    NAMEN VAN DE ONDERDELEN Lampje voor Lampjes voor DISPLAY VAN HET HOOFDTOESTEL AUTOMATISCHE functie ventilatieniveau Displaylampjes voor UIT-tijdschakelaar (ingesteld met afstandsbediening) Filterlampje Een brandend filterlampje geeft aan dat het filter moet worden vervangen. LAMPJE VAN CLUSTERIONENFUNCTIE De clusterionenfunctie wordt gekozen met de afstandsbediening. Blauw lampje Wanneer de clusterionenfunctie in de luchtreinigingsfunctie of in de AUTOMATISCHE functie staat en de lucht in de...
  • Seite 87 Lampje voor REINIGINGSSYMBOOL iveau pollenfunctie De kleur verandert als de lucht vuil is. Zuiver (groen) Een beetje vuil (oranje) Erg vuil (rood) OVER HET REINIGINGSSYMBOOL • De sensor toont een REINIGINGSSYMBOOL afhankelijk van de relatieve veranderingen in de omgeving op het ogenblik dat de stekker in het stopcontact wordt gestoken en daarna.
  • Seite 88: Achterkant

    Netsnoer Stekker ACCESSOIRES Afstandsbediening Batterij (1 stuk) (R6 (AA) batterij x 2) Bijgevoegde folder • Gebruiksaanwijzing SPECIFICATIES Model FU-55SE Voeding 220-240 V / 50 Hz Instelling van het ventilatieniveau Hoog Gemiddeld Stil Maximum Ventilatie- Nominaal vermogen niveau- 19 W 43 W...
  • Seite 89: Voorbereiding

    VOORBEREIDING PLAATSEN VAN DE BATTERIJEN IN DE AFSTANDSBEDIENING Verwijder het deksel aan de achterkant Druk op het deksel en schuif het eruit. Plaats de batterijen Plaats de batterijen met zoals hieronder getoond. Sluit het deksel aan de achterkant Meer over de batterijen •...
  • Seite 90: Installatie Van De Filters

    VOORBEREIDING • Trek de stekker uit het stopcontact. Trek de stekker uit het stopcontact. INSTALLATIE VAN DE FILTERS Om de kwaliteit van de filters te vrijwaren, zitten ze in het hoofdtoestel verpakt in plastic zakken. Haal de filters uit de plastic zakken alvorens het toestel te gebruiken. Verwijderen van de filters Plaats het toestel met de voorkant naar boven.
  • Seite 91 Installeer het filter Lipjes Haal het HEPA-filter uit de plas- tic zak en plaats het in het filterframe met de aanduiding “FRONT” naar boven gericht. HEPA-filter Breng de filter zo in dat de lipjes op de Filterframe HEPA-filter naar u gericht zijn. Correcte bediening is niet mogelijk als de filter omgekeerd geïnstalleerd wordt.
  • Seite 92: Bediening

    Gedurende de eerste dertig seconden nadat de stekker BEDIENING in het stopcontact is gestoken, controleert het toestel de toestand van de lucht. Als u op dit ogenblik de bediening op AAN zet, zal de REINIGINGSSYMBOOL-lampje afwisselend groen, oranje en rood knipperen. BEDIENING VAN HET HOOFDTOESTEL Beschikbare functies met het hoofdtoestel •...
  • Seite 93: Afstandsbediening

    Beschikbare functies met afstandsbediening • AUTOMATISCHE bediening (ventilatieniveau) • HANDMATIGE bediening AFSTANDSBEDIENING (ventilatieniveau) • Pollenfunctie • Om het toestel te starten, drukt u op de toets SPANNING AAN/UIT. • Instelling UIT-tijdschakelaar U hoort een korte pieptoon en de bediening start in de •...
  • Seite 94: Richtlijn Voor De Bediening

    RICHTLIJN VOOR DE BEDIENING RICHTLIJN VOOR DE GEURSENSOR • De geursensor reageert op de geur van o.a. sigarettenrook en huisdieren en daarnaast ook op het volgende. • Insecticiden, cosmetica, sprays, alcohol. • Plotse veranderingen in temperatuur of vochtigheid. • Wanneer het toestel in de automatische bediening staat en in een gesloten kamer cosmetica of dergelijke worden gebruikt, is het normaal dat de sensor hierop reageert door het verhogen van de luchtstroom.
  • Seite 95: Behandeling En Onderhoud

    BEHANDELING EN ONDERHOUD (Om de optimale werking van dit toestel te vrijwaren, moet u dit toestel regelmatig schoonmaken.) Zorg ervoor dat u voor het schoonmaken de stekker uit het stopcontact trekt. Raak tevens de stekker nooit met natte handen aan. Dit houdt gevaar in voor een elektrische schok en/of lichamelijk letsel.
  • Seite 96: Richtlijn Voor De Levensduur Van De Filters

    BEHANDELING EN ONDERHOUD RICHTLIJN VOOR DE LEVENSDUUR VAN DE FILTERS Het tijdstip voor filtervervanging wordt aangeduid door het filterlampje. (Dit lampje zal oplichten na ongeveer 5 jaar, indien u het toestel 12 uur per dag gebruikt.) • De werkingsuren worden opgeslagen in het geheugen, zelfs wanneer het netsnoer wordt uitgetrokken voor verplaatsing van het toestel naar een andere kamer, enz.
  • Seite 97: Oplossen Van Problemen

    OPLOSSEN VAN PROBLEMEN Controleer de onderstaande symptomen alvorens hulp in te roepen voor reparatie. Het probleem is mogelijk niet te wijten aan een storing van het toestel. SYMPTOOM OPLOSSING (geen storing) De afstandsbediening werkt • Zijn de batterijen leeg? niet. •...
  • Seite 98 FU-55SE_Dut.6.5 03.7.17, 8:54 AM...
  • Seite 99 !"#$ !"#$ !"#$ !"#$ !"#$ !"#$%&'()*+,-.* !"# ! ! ! ! ! ! ! ! ! ! KKKKKKKKKKKKKKKKKKKKKKKKKKKKKKKKKKKKKKKKKKKKKKK • KKKKKKKKKKKKKKKKKKKKKKKKKKKKKKKKKKKKKKKKKKKKKKK KKKKKKKKKKKKKKKKKKKKKKKKKKKKKKKKKKKKKKKKKKKKKKK KKKKKKKKKKKKKKKKKKKKKKKKKKKKKKKKKKKKKKKKKKKKKKK KKKKKKKKKKKKKKKKKKKKKKKKKKKKKKKKKKKKKKKKKKKKKKK `JO !"# !$%&'()*+,- !"#$%& KKKKKKKKKKKKKKKKKKKKKKKKKKKKKKKKKKKKKKKKKKKKKKKKK `JP • !"#$%&'()*+,&-./ !"# KKKKKKKKKKKKKKKKKKKKKKKKKKKKKKKKKKKKKKKKKKKKKKKKKKKKKKKKKKKKKKK `JP • !"#$ !"#$ !"#$ !"#$ !"#$ •...
  • Seite 100 ! ! ! ! ! ! " # $ % & ' ( ! " # $ % & ' ( ! " # $ % & ' ( ! " # $ % & ' ( ! " # $ % & ! "...
  • Seite 101 !"#$%& !"#$%& !"#$%& !"#$%& !"#$%& ! " # $ % & ' ( ) $ * ! " # $ % & ' ( ) $ * ! " # $ % & ' ( ) $ * ! " # $ % & ' ( ) $ * ! "...
  • Seite 102 ! ! ! ! ! !"#$%& !"#$%& !"#$%& !"#$%& !"#$%& ! " ! " ! " ! " ! " ! ! ! ! ! !"#$ !"#$ !"#$ !"#$ !"#$ !"#F ! ! ! ! ! !"# !"# !"# !"# !"# !"#$%&'() !"#$%&'()*+,()-./0123...
  • Seite 103 !"#$%& !"#$%& !"#$%& !"#$%& !"#$%& !"#$ !"#$ !"#$ !"#$ !"#$ !"#$%&'!()*+,-. ! ! ! ! !E E E E E ! ! ! ! !E E E E E E E E E E F F F F F F F F F F F F F F F !"#$ !"#$...
  • Seite 104 !"#$%&'()*+ • ! " ! " ! " ! " ! " !"#$% !"#$%&' • ! ! ! ! ! EoSE^^FO • FU-55SE OOMJOQM=s=L=RM=eò 43 W 19 W 43 m 330m 218m ~42 m !" OKR= QNR= EtFñ=OPU= EaFñ=RTO= !"#$%&'()*+,-./012 !3 !"#$%&'()* gbjNQSTF...
  • Seite 105 ! ! ! ! ! !"#$% !"#$% !"#$% !"#$% !"#$% ! ! ! ! ! !"#$%&'() ! ! ! ! ! !"#====== ====== !"# ! ! ! ! ! ! ! ! ! ! !"#$%& !"#$%& !"# • !"#$%&'()*+,-./ !"#$%& !"#$ !"#$ %&'()* •...
  • Seite 106 ! ! ! ! ! ! " # $ % & ' ( ) # * + ! " # $ % & ' ( ) # * + ! " # $ % & ' ( ) # * + ! "...
  • Seite 107 !" !" !" !" !" !" N N N N N ! " # $ ! " # $ ! " # $ ! " # $ ! " # $ e b m ^ e b m ^ e b m ^ e b m ^ e b m ^ ! "...
  • Seite 108 !"!# !$%&'% PM !"#$%&' !"#$%&'() !"#$%&'()*+)*,)-./01 ! ! ! ! ! ! " # $ % & ' ( ! " # $ % & ' ( ! " # $ % & ' ( ! " # $ % & ' ( ! "...
  • Seite 109 ! " # $ % & ! " # $ % & ! " # $ % & ! " # $ % & ! " # $ % & • • !" !" !" !" !" !"# • !" •...
  • Seite 110 ! ! ! ! ! !"#$ !"#$ !"#$ !"#$ !"#$ !"#$ !%&'&() !"#$ !"#$%&' • •= = = = = !"#$%&$' •= = = = = !"#$%&'()*+,-./012345+6 !"# !$% • !"# !"#$%&' !"# !$% !"#$ !"#$ !"#$ !"#$ !"#$ !"#$%&'()* ! "#$%!&'() •...
  • Seite 111 !" !" !" !" !" !"#$%&'( !"#$% F !" !"#$%&'!() !"#$%&'() !"#$%&'()*+, !" !" !" !" !" !" !" !" !" !" !"# $%&'( !"#$%&#'( !"#$% !"&'() !"#$%&'()* !"#$%&'()*"+,-. !"#$%&' !"#$% ! " ! " ! " ! " ! " !"#$% !"...
  • Seite 112 !" !" !" !" !" !"#$%&' !"#$%&' !"#$%&' !"#$%&' !"#$%&' !"#$% !"#$% !"#$% !"#$% !"#$% &'(& &'(& &'(& &'(& &'(& !" NO !"# !"#$%&'()*+,- F !"#$%&#'( !"#$%&'()*+,-./0123456 • !"#$ !"#$%&' ()*+,-. !"#$%&'()* !"# !"#$ !"#$ !"#$ !"#$ !"#$ !" R •...
  • Seite 113 ! ! ! ! ! !"#$% !"#$%&'()*+,- !"#$%&'()*+,- !"#$ !"#$ !"#$F F F F F !"#$ !"#$ E E E E E ! " # $ ! " # $ ! " # $ ! " # $ ! " # $ !"#$%&...
  • Seite 116 SHARP CORPORATION OSAKA, JAPAN Printed in Japan TINS-A085KKRZ 03GO 1...

Inhaltsverzeichnis