Herunterladen Inhalt Inhalt Diese Seite drucken
Sharp FU-21SE Bedienungsanleitung
Vorschau ausblenden Andere Handbücher für FU-21SE:
Inhaltsverzeichnis

Werbung

Verfügbare Sprachen
  • DE

Verfügbare Sprachen

  • DEUTSCH, seite 15
Tabletop type
Tischgerät
Type de table
De sobremesa
Tipo da tavolo
Tafelmodel
Настольный тип
R
AIR PURIFIER
OPERATION MANUAL
LUFTREINIGER
BEDIENUNGSANLEITUNG
PURIFICATEUR D'AIR
MANUEL D'UTILISATION
PURIFICADOR DE AIRE
MANUAL DE USO
PURIFICATORE DELL'ARIA
MANUALE OPERATIVO
LUCHTREINIGER
GEBRUIKSAANWIJZING
ВОЗДУХООЧИСТИТЕЛЬ
РУКОВОДСТВО ПО ЭКСПЛУАТАЦИИ
MODEL
FU-21SE

Werbung

Inhaltsverzeichnis
loading

Inhaltszusammenfassung für Sharp FU-21SE

  • Seite 1 MODEL FU-21SE AIR PURIFIER OPERATION MANUAL LUFTREINIGER BEDIENUNGSANLEITUNG PURIFICATEUR D’AIR MANUEL D’UTILISATION PURIFICADOR DE AIRE MANUAL DE USO PURIFICATORE DELL’ARIA MANUALE OPERATIVO LUCHTREINIGER Tabletop type Tischgerät GEBRUIKSAANWIJZING Type de table De sobremesa Tipo da tavolo ВОЗДУХООЧИСТИТЕЛЬ Tafelmodel Настольный тип РУКОВОДСТВО ПО ЭКСПЛУАТАЦИИ...
  • Seite 3: Inhaltsverzeichnis

    In this case, purchase the exchange filter FZ-21SEF of the option goods, and replace the filters. Thank you for purchasing the SHARP FU-21SE. Please read the instruction manual carefully for the correct usage. Before using this product, This equipment complies with the be sure to read “Safety precautions.”...
  • Seite 4: Safety Precautions

    Fire, electrical shock and/or bodily injury may occur as a result. For repair, contact your dealer of purchase or the nearest Sharp Service Center. • Periodically remove dust from the power plug Accumulated dust on the power plug may cause bad insulation from humidity, etc.
  • Seite 5: Cautions Concerning The Usage Of This Product

    CAUTIONS CONCERNING THE USAGE OF THIS PRODUCT • Do not block the intake and exhaust ports. • Do not use the unit near or on hot objects, such as a stove, etc. Also, do not use the unit where it unit may come into contact with steam.
  • Seite 6: Names Of Parts

    NAMES OF PARTS MAIN UNIT DISPLAY Tobacco smoke removal operation lamp OFF timer display lamps Power lamp Fan level lamps (set using remote control) (Lights when the power plug is Pollen removal operation lamp AUTO operation lamp inserted into the wall outlet) Plasmacluster Silent High...
  • Seite 7: Accessories

    CLUSTER ION LAMP Cluster ion operation is selected using the remote control. Blue light When the cluster ion operation is in the Clean mode or AUTO cluster ion mode and the air in the room is dirty, the light turns on and the unit will operate in the Clean mode. Green light When the cluster ion operation is in the Refresh mode or AUTO cluster ion mode and the air in the room is dirty, the light turns on and the unit will operate in the Refresh...
  • Seite 8: Preparation

    PREPARATION Be sure to remove the power plug from the wall outlet. INSTALLING THE FILTERS To maintain the quality of the filters, they are installed in the main unit within polyvinyl bags. Be sure to remove the filters from the polyvinyl bags before using the unit. Front panel Remove the filters Place the unit facing up and...
  • Seite 9: Using The Remote Control

    Tabs Install the filter Remove the HEPA filter from the polyethylene bag and install it in the main unit with the display facing up. Insert so that the tabs on the HEPA filter are fac- HEPA filter ing toward you. Proper operation cannot be achieved when install- Deodorization filter ing the filter backwards.
  • Seite 10: Operation

    OPERATION For the first 2 minutes after the power plug is inserted into the wall outlet, the unit will check the conditions of the air. If operation is set to ON during this time, the Clean sign lamp will alternately flash in green, orange and red.
  • Seite 11: Remote Control Operation

    Operations available with remote control • Fan level manual opera- tion • Fan level AUTO operation • Silent operation REMOTE CONTROL • High operation OPERATION • Tobacco smoke removal operation • Pollen removal operation • OFF timer setting • To start operation, press the ON/OFF button. •...
  • Seite 12: Care And Maintenance

    CARE AND MAINTENANCE (To maintain the best performance of this product, please clean the unit periodically.) When cleaning, be sure to remove the power plug from the wall outlet. In addition, never handle the power plug with wet hands. Electrical shock and/or bodily injury may occur as a result. MAIN UNIT FILTERS For soiling on the main unit and the installed...
  • Seite 13: Replacing The Filters

    REPLACING THE FILTERS Guide for replacing the filters • HEPA filter About 2 years after opening • Deodorization filter About 2 years after opening The replacement period is defined as when smoking 10 cigarettes per day and the dust collec- tion/deodorization power is reduced by half than that of new filters.
  • Seite 14: Trouble Shooting

    TROUBLE SHOOTING Before calling for repair, check the symptoms below for possible remedies, since the problem may not be a malfunction of the unit. SYMPTOM REMEDY (not a malfunction) • Has the batteries depleted? The remote control does not • Are the batteries inserted with correct polarity? work •...
  • Seite 15 FZ-21SEF aus der Liste der Zubehörteile, und tauschen Sie die Fil- ter aus. Vielen Dank, dass Sie sich für den FU-21SE von SHARP entschieden haben. Bitte lesen Sie das Bedienungshandbuch sorgfältig durch, um das Gerät ordnungsgemäß zu verwenden. Lesen Sie unbedingt den Abschnitt “Vorsichtsmaßnahmen”,...
  • Seite 16: Vorsichtsmassnahmen

    • Modifizieren Sie nichts. Reparaturarbeiten und der Auseinanderbau des Gerätes darf nur von einem autorisierten Kundendienst ausgeführt werden. Es könnte ein Brand, ein elektrischer Schlag und/oder Personenschäden verursacht werden. Wenden Sie sich zwecks Reparaturarbeiten an Ihren Verkaufshändler oder an den Sharp-Kundendienst in Ihrer Nähe. • Entfernen Sie regelmäßig Staub vom Netzstecker.
  • Seite 17: Massnahmen Betreffend Der Gerätebedienung

    MASSNAHMEN BETREFFEND DER GERÄTEBEDIENUNG • Blockieren Sie nicht die Einsaug- und Auslassöffnungen. • Nehmen Sie das Gerät nicht in Betrieb, wenn es neben oder auf heißen Gegenständen, wie z. B. einem Ofen, usw., steht. Verwenden Sie das Gerät auch nicht dort, wo es in Kontakt mit Dampf kommen könnte.
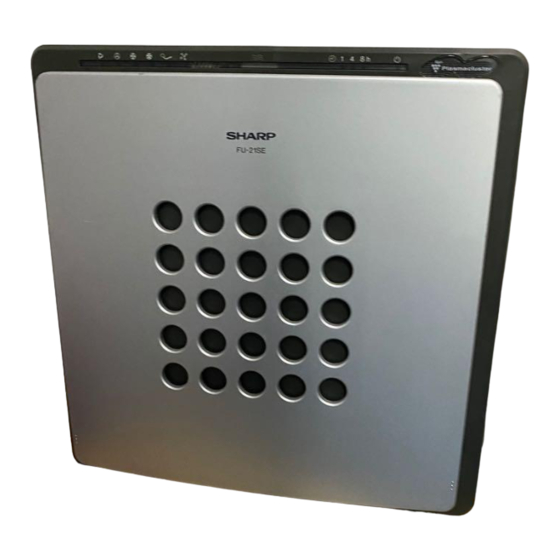
  • Seite 18: Bezeichnung Der Bedienungselemente

    BEZEICHNUNG DER BEDIENUNGSELEMENTE DISPLAY DER HAUPTEINHEIT Tabakrauchentfernung-Betriebslampe Displaylampen OFF-Timer Netzlampe Gebläseleistungs-Lampen (mit der Fernbedienung einstellen) (Leuchtet, wenn der Netzstecker AUTO-Betriebslampe Pollenentfernung-Betriebslampe in eine Steckdose gesteckt wird) Plasmacluster Ruhe Hoch Fernbedienungs- Reinigungs-Anzeigelampe empfänger Die Farbe ändert sich, wenn die Luft Niedrig verschmutzt ist Staubsensor Reinigen...
  • Seite 19: Zubehör

    CLUSTER-ION-LAMPE Der Cluster-Ion-Betrieb wird mit der Fernbedienung eingestellt. Blaues Licht Wenn sich der Cluster-Ion-Betrieb im Reinigungsmodus oder im AUTO-Cluster-Ion-Modus befindet und die Luft im Zimmer verschmutzt ist, wird das Licht eingeschaltet und der Reinigungsmodus aktiviert. Grünes Licht Wenn sich der Cluster-Ion-Betrieb im Auffrischmodus oder im AUTO-Cluster-Ion-Modus befindet und die Luft im Zimmer verschmutzt ist, wird das Licht eingeschaltet und der Auffrischmodus aktiviert.
  • Seite 20: Vorbereitung

    VORBEREITUNG Ziehen Sie unbedingt den Netzstecker aus der Steckdose heraus. INSTALLIEREN DER FILTER Damit die Qualität der Filter aufrechterhalten bleibt, wurden sie in Polyvinyl-Beutel verpackt in der Haupteinheit installiert. Entfernen Sie vor Inbetriebnahme des Geräts unbedingt die Polyvinyl-Beutel. Frontgehäuse Nehmen Sie die Filter heraus Stellen Sie das Gerät mit der Front nach oben weisend auf und entfernen Sie das Frontgehäuse...
  • Seite 21: Installieren Sie Die Filter

    Halteklauen Installieren Sie die Filter Entfernen Sie den Polyethylen-Beutel vom HEPA-Filter und installieren Sie ihn in der Haupteinheit, wobei die Anzeige nach oben zeigt. Setzen Sie ihn so ein, dass die Halteklauen am HEPA-Filter HEPA-Filter auf Sie gerichtet sind. Einwandfreier Betrieb ist nicht möglich, wenn der Filter umgekehrt installiert wird.
  • Seite 22: Betrieb

    BETRIEB In den ersten 2 Minuten nach Einstecken des Netzste- ckers in die Steckdose prüft das Gerät die Luftbedin- gungen. Wenn der Betrieb in dieser Zeit aktiviert (ON) wird, blinkt die Reinigungs-Anzeigelampe abwechselnd grün, orange und rot. Verfügbare Betriebsarten dieses Geräts BETRIEB DER •...
  • Seite 23: Fernbedienungsbetrieb

    Verfügbare Fernbedienungs- funktionen • Manueller Betrieb der Ge- bläseleistung • AUTO-Betrieb der Gebläse- leistung FERNBEDIENUNGS- • Ruhe-Betrieb BETRIEB • Hoher Betrieb • Tabakrauchentfernung • Pollenentfernung • Drücken Sie die ON/OFF-Taste, um den Betrieb zu starten. • OFF-Timer-Einstellung Ein kurzer Piepton wird ausgegeben und der Betrieb •...
  • Seite 24: Pflege Und Wartung

    PFLEGE UND WARTUNG (Reinigen Sie bitte das Gerät regelmäßig, damit die bestmögliche Leistung dieses Produktes aufrechterhalten bleibt.) Wenn Sie das Gerät reinigen wollen, ziehen Sie unbedingt den Netzstecker aus der Steckdose. Fassen Sie außerdem den Netzstecker niemals mit nassen Händen an. Es könnte ein Brand, ein elektrischer Schlag und/oder Personenschäden verursacht werden.
  • Seite 25: Austausch Der Filter

    AUSTAUSCH DER FILTER Richtlinien für den Austausch der Filter • HEPA-Filter Etwa 2 Jahre nach Inbetriebnahme • Desodorierungsfilter Etwa 2 Jahre nach Inbetriebnahme Die Austauschperiode bezieht sich auf 10 gerauchte Zigaretten am Tag und die Reduzierung der Staubansaug-/Desodorisierungsleistung um die Hälfte die der neuen Filter. Die Austauschperiode unterscheidet sich je nach Betriebsstunden und Aufstellungsort.
  • Seite 26: Störungsbeseitigung

    STÖRUNGSBESEITIGUNG Prüfen Sie vor Benachrichtigung des Kundendienstes die nachstehenden Symptome auf mögliche Abhilfemaßnahmen, da das aufgetretene Problem nicht unbedingt eine Gerätefehlfunktion bedeuten muss. SYMPTOM ABHILFE (keine Fehlfunktion) Die Fernbedienung arbeitet • Sind die Batterien leer? • Sind die Batterien richtig herum eingelegt? nicht.
  • Seite 27 Merci de vous être porté acquéreur du FU-21SE désagréable. de SHARP. Veuillez lire attentivement le manuel Dans ce cas, remplacez les filtres par pour une utilisation correcte. Prenez le filtre de rechange FZ-21SEF proposé...
  • Seite 28: Precautions De Securite

    Dans le cas contraire, cela peut provoquer une électrocution, un court-circuit et/ou déclencher un incendie. Pour toute réparation, contactez votre revendeur ou le centre SAV Sharp le plus proche. • Nettoyez périodiquement la prise du secteur pour la débarrasser de toute poussière.
  • Seite 29: Precautions D'utilisation De Cet Appareil

    PRECAUTIONS D’UTILISATION DE CET APPAREIL • Ne pas obturer les orifices d’entrée et d’évacuation. • Ne pas utiliser cet appareil près ou sur un objet chaud tel qu’un poêle, etc. Eviter aussi toute exposi- tion à la vapeur. • Ne pas utiliser cet appareil en le plaçant sur le côté. Une déformation, un dysfonctionnement et/ou une surchauffe du moteur risque de se produire.
  • Seite 30: Designations Des Pieces

    DESIGNATIONS DES PIECES ECRAN D’AFFICHAGE DE L’UNITE PRINCIPALE Voyant indicateur d’élimination de fumée de tabac Voyants indicateurs de temporisation d’arrêt Voyants de niveau de ventilation (à régler en utilisant la télécommande) Voyant d’alimentation Voyant de fonctionnement Voyant indicateur d’élimination de pollen (s’allume lorsque l’appareil est alimenté) AUTO Plasmacluster...
  • Seite 31: Accessoires

    LAMPE DE GROUPES D’IONS Le fonctionnement en groupes d’ions est sélectionné en utilisant la télécommande. Voyant bleu Lorsque le fonctionnement en groupes d’ions est en mode nettoyage ou AUTO et que l’air de la pièce est sale, le voyant s’allume et l’appareil fonctionne en mode de nettoyage. Voyant vert Lorsque le fonctionnement en groupes d’ions est en mode de rafraîchissement ou AUTO et que l’air de la pièce est sale, le voyant s’allume et l’appareil fonctionne en...
  • Seite 32: Preparation

    PREPARATION Ne pas oublier de débrancher d’abord la prise du secteur. INSTALLATION DES FILTRES Pour protéger les filtres, ceux-ci sont placés dans l’unité principale à l’intérieur de sacs en polyvinyle. Ne pas oublier de retirer les filtres des sacs en polyvinyle avant d’utiliser l’appareil. Panneau avant Retirez les filtres Placez l’appareil face vers le...
  • Seite 33: Utilisation De La Telecommande

    Languettes Installez le filtre Retirez le filtre HEPA du sac en polyéthylène et installez-le dans l’unité principale avec l’affichage vers le haut. Positionnez-le avec les languettes du filtre HEPA Filtre HEPA dirigées vers vous. L’appareil ne pourra pas fonctionner correctement Filtre désodorisant si le filtre est placé...
  • Seite 34: Fonctionnement

    FONCTIONNEMENT Pendant les 2 premières minutes après le branchement du câble d’alimentation dans une prise murale, l’unité vérifie les conditions de l’air. Si l’appareil est en marche sur ON pendant cette période, le voyant Clean clignote alternativement en vert, en orange et en rouge. Fonctions disponibles avec l’unité...
  • Seite 35: Fonctionnement De La Telecommande

    Fonctions disponibles avec la télécommande • Fonctionnement avec niveau de ventilation manuel • Fonctionnement avec niveau de ventilation automatique FONCTIONNEMENT • Fonctionnement silencieux • Fonctionnement de niveau DE LA TELECOMMANDE élevé • Fonctionnement en élimi- • Pour mettre l’appareil en marche, appuyez sur le bou- nation de la fumée de tabac ton ON/OFF.
  • Seite 36: Soins Et Entretien

    SOINS ET ENTRETIEN (Pour obtenir les meilleures performances de cet appareil, veuillez le nettoyer périodiquement.) Lors du nettoyage de l’appareil, débranchez d’abord la prise du secteur. De plus, ne jamais manipuler la prise du secteur avec les mains mouillées car vous vous exposez à une électrocution.
  • Seite 37: Remplacement Des Filtres

    REMPLACEMENT DES FILTRES Guide de remplacement des filtres • Filtre HEPA Environ 2 ans après ouverture • Filtre désodorisant Environ 2 ans après ouverture La période de remplacement est définie en se basant sur une consommation de 10 cigarettes par jour et lorsque la récupération de poussière/puissance de désodorisation est réduite de moitié...
  • Seite 38: Resolutions Des Problemes

    RESOLUTIONS DES PROBLEMES Avant de faire appel au SAV, vérifiez les symptômes ci-dessous pour déterminer une solution possible, puisque le problème n’est peut être (pas de dysfonctionnement) de l’appareil. SYMPTOME SOLUTION (pas un dysfonctionnement) • Est-ce que les piles sont usagées ? La télécommande ne fonction- •...
  • Seite 39: Características

    FZ-21SEF (accesorio) Gracias por adquirir el purificador de aire FU-21SE y reemplace los filtros. de SHARP . Para el uso correcto del aparato, lea detenidamente el manual de instrucciones. Antes de usar el producto, asegúrese de leer la sección Este equipo cumple con los “Precauciones de seguridad”.
  • Seite 40: Precauciones De Seguridad

    La modificación del producto puede ocasionar incendios, descargas eléctricas y/o lesiones corporales. Para reparaciones, tome contacto con el distribuidor donde adquirió el aparato o con el Centro de Servicio Sharp más cercano. • Quite periódicamente el polvo de la clavija de alimentación.
  • Seite 41: Al Uso De Este Producto

    PRECAUCIONES CONCERNIENTES AL USO DE ESTE PRODUCTO • No bloque las lumbreras de entrada y salida. • No use el aparato cerca o encima de objetos calientes, tales como estufas, etc. Asimismo, tampoco use el aparato en lugares donde pueda entrar en contacto con vapor. •...
  • Seite 42: Nombre De Los Componentes

    NOMBRE DE LOS COMPONENTES PANTALLA DE VISUALIZACIÓN DE LA UNIDAD PRINCIPAL Lámpara de modo de eliminación Lámpara indicadora Lámparas indicadoras del de humo de tabaco de alimentación temporizador de desactivación (OFF) (Se enciende cuando se inserta la clavija (se programa con el mando a distancia) Lámparas de nivel de ventilador de alimentación en la toma de corriente Lámpara de modo AUTO...
  • Seite 43: Parte Posterior

    LÁMPARA DE “IONES AGRUPADOS” El modo de “iones agrupados” se selecciona con el mando a distancia. Luz de color azul Cuando la función de “iones agrupados” se encuentra en el modo Limpiar o en el modo AUTO y el aire de la habitación está sucio, la lámpara se enciende y el aparato funciona en el modo Limpiar.
  • Seite 44: Preparativos

    PREPARATIVOS Asegúrese de desconectar la clavija de alimentación de la toma de corriente mural. INSTALACIÓN DE LOS FILTROS Para mantener la calidad de los filtros, éstos vienen instalados en la unidad principal dentro de bolsas de polivinilo. Asegúrese de retirar los filtros de las bolsas de polivinilo antes de usar el aparato. Panel delantero Retire los filtros.
  • Seite 45: Instale El Filtro

    Lengüetas Instale el filtro Saque el filtro HEPA de la bolsa de polietileno e instálelo en la unidad principal con la indicación de cara hacia arriba. Filtro HEPA Inserte el filtro HEPA de manera tal que las lengüetas del mismo queden de cara hacia usted. Filtro de desodorización El filtro no funcionará...
  • Seite 46: Funcionamiento

    Cuando se conecta la clavija de alimentación a la toma FUNCIONAMIENTO de corriente mural, el aparato comprueba durante los 2 minutos iniciales las condiciones del aire. Si se selecciona el modo ON en el transcurso de este tiempo, la lámpara Limpiar parpadeará alternadamente en color verde, naranja y rojo.
  • Seite 47: El Mando A Distancia

    Operaciones que se pueden controlar con el mando a distancia • Control manual del nivel del ventilador • Control AUTO del nivel del CONTROL DEL ventilador • Funcionamiento silencioso APARATO CON EL • Funcionamiento a nivel alto • Modo de eliminación de MANDO A DISTANCIA humo de tabaco •...
  • Seite 48: Cuidado Y Mantenimiento

    CUIDADO Y MANTENIMIENTO (Para mantener las altas prestaciones de este producto, limpie el aparato periódicamente.) Al limpiar el aparato, asegúrese de desconectar la clavija de alimentación de la toma de corriente mural. Asimismo, nunca manipule la clavija de alimentación con las manos mojadas. De lo contrario, podrá...
  • Seite 49 REEMPLAZO DE LOS FILTROS Guía para el reemplazo de los filtros • Filtro HEPA Aproximadamente 2 años después de la apertura • Filtro de desodorización Aproximadamente 2 años después de la apertura El período de reemplazo se define como un período equivalente a cuando se fuman 10 cigarrillos al día y la capacidad de captación de polvo/desodorización se reduce en la mitad respecto a la de los filtros nuevos.
  • Seite 50: Antes De Solicitar Reparaciones

    ANTES DE SOLICITAR REPARACIONES Antes de solicitar reparaciones, compruebe los síntomas que se describen a continuación y su posible solución, ya que el problema puede no deberse a un error de funcionamiento del aparato. SÍNTOMA SOLUCIÓN (cuando no hay ningún desperfecto) •...
  • Seite 51 SPECIFICHE ........... I-12 In tal caso, acquistate il filtro di ricambio FZ-21SEF e sostituite i filtri. Grazie per aver acquistato il modello FU-21SE della SHARP. Leggete attentamente il manuale delle istruzioni per l’uso corretto. Prima di usare questo prodotto, assicuratevi di leggere le Questo componente è...
  • Seite 52: Norme Di Sicurezza

    Altrimenti si possono verificare incendi, scosse elettriche e/o lesioni personali. Per i lavori di servizio, rivolgetevi al vostro rivenditore o al più vicino Centro di Servizio Sharp. • Spolverate regolarmente la spina del cavo di alimentazione.
  • Seite 53: L'utilizzo Di Questo Prodotto

    PRECAUZIONI RIGUARDANTI L’UTILIZZO DI QUESTO PRODOTTO • Non bloccate le porte di aspirazioni e scarico. • Non usate l’unità vicino o sopra unità calde, ad esempio una stufa, ecc. Inoltre, non usate l’unità se c’è rischio che venga in contatto con il vapore. •...
  • Seite 54: Nomenclatura

    NOMENCLATURA DISPLAY DELL’UNITA’ PRINCIPALE Spie di visualizzazione del timer di Spie di rimozione del fumo di tabacco spegnimento (OFF) Spia di accensione Lampade del livello del ventilatore (effettuate l’impostazioni usando il telecomando) (Si illumina quando inserite la Spia del funzionamento Spia di rimozioni polline spina del cavo di alimentazione nella presa murale)
  • Seite 55 LAMPADA CON INSIEMI DI IONI L’operazione di insiemi di ioni viene selezionata usando il telecomando. Luce blu Quando l’operazione degli insiemi di ioni è nel modo di Pulizia o nel modo automatico (AUTO) e l’aria nella stanza è sporca, si accende la spia e l’unità funziona nel modo di Pulizia.
  • Seite 56: Preparativi

    PREPARATIVI Assicuratevi di rimuovere la spina del cavo di alimentazione dalla presa murale. INSTALLAZIONE DEI FILTRI Per mantenere il alta la qualità dei filtri, essi sono stati installati nell’unità principale all’interno di buste in polivinile. Assicuratevi di rimuovere i filtri dalle buste in polivinile prima di usare l’unità. Pannello posteriore Rimuovete i filtri Posizionate l’unità...
  • Seite 57: Utilizzo Del Telecomando

    Linguette Installate il filtro Rimuovete il filtro HEPA dalla busta in polietilene ed installatelo nell’unità principale con il display rivolto verso l’alto. Inserite il filtro in modo tale che le linguette sul Filtro HEPA filtro HEPA siano rivolte verso di voi. Non è...
  • Seite 58: Funzionamento

    FUNZIONAMENTO Durante i primi 2 minuti dopo aver inserito la spina del cavo di alimentazione nella presa murale, l’unità controlla le condizioni dell’aria. Se avete attivato l’operazione su ON, la spia del segno di Pulizia lampeggia alternativamente nei colori verde, arancione e rosso. Operazioni disponibili con l’unità...
  • Seite 59: Funzionamento Del Telecomando

    Operazioni disponibili con il telecomando • Operazione manuale del livello del ventilatore • Operazione automatica (AUTO) del livello del FUNZIONAMENTO ventilatore DEL TELECOMANDO • Operazione silenziosa • Operazione ad alto livello • Rimozione del fumo di tabacco • Per iniziare l’operazioni, premete il tasto ON/OFF. •...
  • Seite 60: Cura E Manutenzione

    CURA E MANUTENZIONE (Per mantenere le migliori prestazioni di questo prodotto, pulite regolarmente l’unità.) Quando pulite l’unità, assicuratevi di rimuovere la spina del cavo di alimentazioni dalla presa murale. Inoltre, non maneggiate mai la spina del cavo di alimentazioni con le mani bagnate. Altrimenti si possono verificare scosse elettriche e/o lesioni personali.
  • Seite 61: Sostituzione Dei Filtri

    SOSTITUZIONE DEI FILTRI Guida per la sostituzione dei filtri • Filtro HEPA Circa 2 anni dopo l’apertura • Filtro deodorante Circa 2 anni dopo l’apertura Il periodo di sostituzione è indicato per il fumo di 10 sigarette al giorno, mentre la potenza di raccolta polvere/deodorizzazione viene ridotta della metà...
  • Seite 62: Localizzazioni Dei Guasti

    LOCALIZZAZIONI DEI GUASTI Prima di richiedere del servizio, controllate i sintomi qui sotto per scoprire eventuali rimedi, poiché il problema può non essere un malfunzionamento dell’unità. SINTOMO RIMEDIO (non malfunzionamento) • Sono scariche le batterie? Il telecomando non funziona • Sono state installate le batterie con la corretta polarità? •...
  • Seite 63 In dit geval koopt u het wisselfilter FZ- 21SEF van de optionele producten en vervangt u de filters. Dank u voor de aankoop van de SHARP FU-21SE. Gelieve de gebruiksaanwijzing aandachtig te lezen voor het juiste gebruik. Voordat u dit toestel gebruikt, raden wij u aan de “Voorzorgsmaatregelen voor...
  • Seite 64: Voorzorgsmaatregelen Voor De Veiligheid

    Zo niet bestaat er gevaar voor brand, een elektrische schok of lichamelijk letsel. Neem voor reparatie contact op met uw verkoper of de dichtstbijzijnde Sharp onderhoudsdienst. • Verwijder geregeld het stof van de stekker. Opgehoopt stof op de stekker kan slechte isolatie tegen vocht, enz. veroorzaken.
  • Seite 65: Voorzorgsmaatregelen Voor Het Gebruik Van Dit Toestel

    VOORZORGSMAATREGELEN VOOR HET GEBRUIK VAN DIT TOESTEL • Blokkeer de inlaat- en uitlaatpoorten niet. • Plaats het toestel niet in de nabijheid van of op warme voorwerpen zoals een kachel, enz. Gebruik het toestel evenmin op plaatsen waar het in contact kan komen met stoom. •...
  • Seite 66: Namen Van De Onderdelen

    NAMEN VAN DE ONDERDELEN DISPLAY VAN HET HOOFDTOESTEL Lampje voor tabaksrookverwijdering Displaylampjes voor UIT-tijdschakelaar Spanningslampje Lampjes voor ventilatieniveau (ingesteld met afstandsbediening) (licht op wanneer het netsnoer Lampje voor AUTOMATISCHE in het stopcontact steekt) Lampje voor pollenverwijdering functie Plasmacluster Hoog Ontvanger van de Stil Lampje voor zuiverheidsaanduiding afstandsbediening...
  • Seite 67: Accessoires

    LAMPJE VAN CLUSTERIONENFUNCTIE De clusterionenfunctie wordt gekozen met de afstandsbediening. Blauw lampje Wanneer de clusterionenfunctie in de luchtreinigingsmodus of in de automatische modus staat en de lucht in de kamer vuil is, gaat het lampje aan en werkt het toestel in de luchtreinigingsmodus.
  • Seite 68: Voorbereiding

    VOORBEREIDING Trek de stekker uit het stopcontact. INSTALLATIE VAN DE FILTERS Om de kwaliteit van de filters te vrijwaren, zitten ze in het toestel verpakt in polyvinyl zakken. Zorg ervoor dat u de filters uit de polyvinyl zakken haalt alvorens het toestel te gebruiken. Voorpaneel Verwijderen van de filters Plaats het toestel met de...
  • Seite 69: Gebruik Van De Afstandsbediening

    Klepjes Installeer het filter Haal het HEPA-filter uit de polyethyleenzak en plaats het in het hoofdtoestel met de aanduiding naar boven. Breng het filter zo in dat de klepjes op het HEPA- HEPA-filter filter naar u gericht zijn. Correcte bediening is niet mogelijk als het filter Ontgeuringsfilter achterwaarts geïnstalleerd wordt.
  • Seite 70: Bediening

    BEDIENING Nadat de stekker in het stopcontact is gestoken, zal het toestel gedurende de eerste 2 minuten de luchttoestand controleren. Als u het toestel op dat moment inschakelt, zal het lampje voor de zuiverheidsaanduiding afwisselend groen, oranje en rood worden. Beschikbare functies met het hoofdtoestel BEDIENING VAN HET HOOFDTOESTEL...
  • Seite 71: Afstandsbediening

    Beschikbare functies met afstandsbediening • Handmatige functie voor ventilatieniveau • Automatische functie voor ventilatieniveau • Stille werking AFSTANDSBEDIENING • Hoge werking • Functie voor tabaksrook- verwijdering • Functie voor pollenverwij- • Om het toestel te starten, drukt u op de AAN/UIT-toets. dering U hoort een korte pieptoon en het toestel begint te •...
  • Seite 72: Behandeling En Onderhoud

    BEHANDELING EN ONDERHOUD (Om de optimale werking van dit toestel te vrijwaren, moet u dit toestel regelmatig schoonmaken.) Zorg ervoor dat u voor het schoonmaken de stekker uit het stopcontact trekt. Raak tevens de stekker nooit met natte handen aan. Dit houdt gevaar in voor een elektrische schok en/of lichamelijk letsel.
  • Seite 73: Vervanging Van De Filters

    VERVANGING VAN DE FILTERS Richtlijn voor filtervervanging • HEPA-filter Ongeveer 2 jaar na opening • Ontgeuringsfilter Ongeveer 2 jaar na opening Het vervangingstijdstip wordt bepaald als het tijdstip waarop bij het roken van 10 sigaretten per dag de stofopvang/ontgeuring verminderd is tot de helft in vergelijking met nieuwe filters. Het vervangingstijdstip verschilt naargelang van het aantal werkingsuren en de plaats van de installatie.
  • Seite 74: Oplossen Van Problemen

    OPLOSSEN VAN PROBLEMEN Controleer de onderstaande symptomen alvorens hulp in te roepen voor reparatie. Het probleem is mogelijk niet te wijten aan een storing van het toestel. SYMPTOOM OPLOSSING (geen storing) • Zijn de batterijen leeg? De afstandsbediening werkt • Zijn de batterijen met de polen in de juiste richting geplaatst? niet •...
  • Seite 75: Service Procedure / Service Vorgehensweise

    SERVICE PROCEDURE - ONLY EFFECTIVE IN GERMANY Dear SHARP customer, SHARP machines are proprietary articles which are produced with precision and care according to most modern production methods. In case of proper handling and with considering of the instruction book, this machine will serve you well for a long time.
  • Seite 76 BZAJHVFWBY J CTHNBABRFWBB GHJLERWBB FU-21SE VJLTKM IFHG F: &$ cthnbabwbhjdfzf Rjvgfzbtq HJCNTCN 2 VJCRDF6 jabwbfkmzsv ghtlcnfdbntktv UJCCNFZLFHNF Hjccbb FU-21SE Vjltkm IFHG gj ,tpjgfczjcnb 2 UJCN H VÄR 335-1-94 cjjndtncndetn nht,jdfzbyv gj ÄVC 2 zjhvfnbdzsü ljrevtznjd5 UJCN "§%!!2/)6 UJCN H %==§§2)"...

Inhaltsverzeichnis