Herunterladen Diese Seite drucken

Nice D-Pro Automatic Installierungs-Und Gebrauchsanleitungen Und Hinweise

Vorschau ausblenden Andere Handbücher für D-Pro Automatic:

Werbung

Verfügbare Sprachen
  • DE

Verfügbare Sprachen

  • DEUTSCH, seite 1
Industrial
D-Pro Automatic
Control unit
DE - Installierungs-und Gebrauchsanleitungen und Hinweise
Original Bedienungsanleitung auf Deutsch: Diese Bedienungsanleitung
deckt die Geräte der Serie R01 ab. (Siehe Typenschild)
EN - Instructions and warnings for installation and use
Original operating instructions in German: these operating instructions cover series R01 devices (see nameplate)
IT - Istruzioni ed avvertenze per l'installazione e l'uso
Istruzioni per l'uso originali in tedesco: le presenti istruzioni per l'uso riguardano i dispositivi della serie R01
(vedere targhetta di identificazione)
FR - Instructions et avertissements pour l'installation et l'utilisation
Mode d'emploi original en allemand : les présentes instructions concernent les dispositifs de la série R01
(voir plaque signalétique)
ES - Instrucciones y advertencias para la instalación y el uso
Instrucciones de uso originales en alemán: estas instrucciones de uso conciernen a los dispositivos de la serie R01
(ver la placa de identificación)
PL - Instrukcje i ostrzeżenia do instalacji i użytkowania
Oryginalna instrukcja obsługi w języku niemieckim: niniejsza instrukcja obsługi odnosi się do urządzeń serii R01
(patrz tabliczka znamionowa)
NL - Aanwijzingen en aanbevelingen voor installatie en gebruik
Originele gebruiksaanwijzing in het Duits: deze gebruiksaanwijzing betreft de bepalingen van de
reeks R01 (zie typeplaatje)

Werbung

loading

Inhaltszusammenfassung für Nice D-Pro Automatic

  • Seite 1 Industrial D-Pro Automatic Control unit DE - Installierungs-und Gebrauchsanleitungen und Hinweise Original Bedienungsanleitung auf Deutsch: Diese Bedienungsanleitung deckt die Geräte der Serie R01 ab. (Siehe Typenschild) EN - Instructions and warnings for installation and use Original operating instructions in German: these operating instructions cover series R01 devices (see nameplate) IT - Istruzioni ed avvertenze per l’installazione e l’uso...
  • Seite 3 EINSTELLUNG MECHANISCHER ENDSCHALTER .........5 Beschreibung und Einsatz EINSTELLUNG DIGITALER ENDSCHALTER ...........6 Die D-PRO Automatic ist eine Torsteuerung für drei- und einphasige Sektional-, Schnellauf- und Rolltorantriebe, 230 sowie 400V, mit mechanischen- oder BETRIEBSFUNKTIONEN ................7 elektronischem Endschalter. Alle üblichen Sicherheits- und Kontrollelemente SCHEMATISCHE ÜBERSICHT D-PRO AUTOMATIC - 2,2 kW ......8...
  • Seite 4 Montage der Steuerung D-PRO Automatic Montage der Steuerung D-PRO Automatic Zur Befestigung der Steuerung verfahren Sie bitte wie im folgenden beschrieben: 01. Öffnen Sie den Gehäusedeckel des Steuerungsgehäuses: lösen Sie die Deckel-Befestigungsschrauben; 02. Bereiten Sie sowohl die Löcher zur Kabeldurchführung der elektrischen Anschlusskabel als auch der Signalkabel an der Steuerung vor.
  • Seite 5 Steckplatz auf D-PRO X8 ACHTUNG: Umschaltbrücke 230/400V auf der Unterseite der Platine muß auf 230V gelötet sein ! Die D-Pro Automatic Steuerungen Codenummer NDCC1200 bis NDCC1299 sind im Werk auf 230V umgerüstet und kommen mit vormontierter Platine auf X8 zum Anschluss der Kondensatoren.
  • Seite 6 Für den Fall, dass die Schaltleiste auf den Boden aufgepresst werden Bei der D-PRO Automatic ist es möglich bei der Verwendung von mechanischen Endschaltern am Antrieb einen zweiten Zusatzendschalter für die AUF-Richtung soll, wird die Reversierfunktion durch Anschließen eines Vorendschalters anzuschließen (J33/X6) und dann über einen (optionalen) Positionsschalter...
  • Seite 7 Parameterliste Par. 100 bis 103 beschrieben. 3 weiß Endschalter ZU Anschluss Funkfernsteuerung (Funkmodul) Auf dem Steckplatz (Receiver OXI) 10 PINS - kann der Nice Empfänger OXI 2 rot Sicherheitsendschalter AUF oder OXIFM aus der OPERA Serie aufgesteckt werden. 1 grün Endschalter AUF Hierbei muss die Seite mit der LED/Programmiertaste zur Gehäuse-Innenseite...
  • Seite 8 DIP 3 und 4 auf ON + Taste AB = In den folgenden Abschnitten werden die Hauptfunktionen zur Programmierung Drehrichtungsänderung in die andere Richtung. der Steuerung D-PRO Automatic beschrieben, die über DIP-Switch zugänglich Die Zählrichtung des Encoders kann auch sind.
  • Seite 9 Automatischer Zulauf BETRIEBSFUNKTIONEN Ist die Funktion Automatischer Zulauf aktiviert, fährt das Tor aus der Endlage, nach der in Parameter 41 eingestellten Zeit wieder zu. Siehe Parameterliste. Im normalen Betriebszustand wird in Durch Betätigen der Stopp-Funktion wird der automatische Zulauf angehalten. der Anzeige der Torzustand bzw.
  • Seite 10 Schematische Übersicht - 2,2kW D-PRO Automatic 8 – Deutsch...
  • Seite 11 Grundplatine - 2,2kW D-PRO Automatic Anschluss für Drahtantenne bzw. externe Steckplatz Antenne Anschluss über Auswahl OXI Empfänger Koax-Kabel UK - Leiste Stecklemmen Endschalter 1/2 AUF Stecklemmen Kontaktleiste Controllerkarte Stecklemmen Durchfahrt Lichtschranke Stecker Schlüsselschalter Steckklemmen POT-FREI AB N.O. Taster Steckklemmen digit.Endschalter POT-FREI IMPULS N.O.
  • Seite 12 
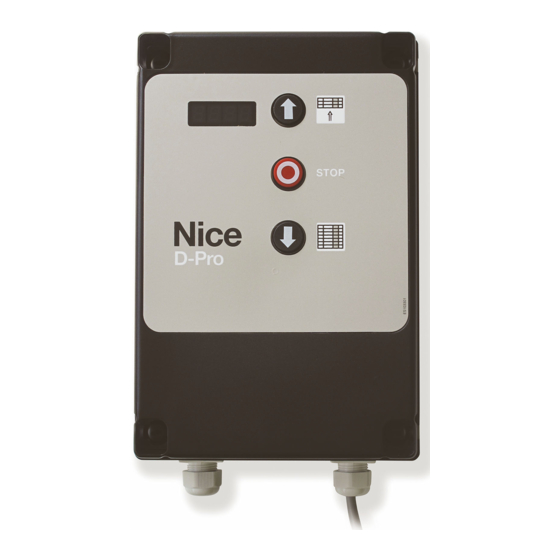
Deckelplatine - 2,2kW D-PRO Automatic DIP-Schalter Verbindungskabel zur Taster - AUF Controller-Platine Taster - AB Gehäuse D-PRO Frontansicht Deckelplatine mit Display 10 – Deutsch...
  • Seite 13 HINWEISE • Alle angegebenen technischen Merkmale beziehen sich auf eine Temperatur von 20°C (± 5°C). • Nice behält sich das Recht vor, jederzeit als nötig betrachtete Änderungen am Produkt vorzunehmen, wobei die Funktionalitäten und der Einsatzzweck beibehalten werden. • Die Gesamt-Bedienungsanleitung besteht aus der BA des Antriebes und der dazugehörigen BA der Steuerung.
  • Seite 15 CONTENTS ..................Page The D-PRO Automatic is a control unit for three-phase and single-phase drives for sectional, rapid and roller doors, running on 230 and 400V power, with mechanical or electronic limit switches. It is compatible with all usual safety and GENERAL SAFETY PRECAUTIONS ...............1...
  • Seite 16 Assembling the D-PRO Automatic control unit Assembling the D-PRO Automatic control unit Proceed follows when installing the control unit: 01. open the cover of the control unit's housing: slacken off the mounting bolts; 02. configure the holes for the cable clamp for the hookup and signal cables on the control unit.
  • Seite 17 Slot on D-PRO X8 CAUTION: The 230/400V jumper at the bottom of the board must be soldered to 230V! D-Pro Automatic control units numbered NDCC1200 to NDCC1299 are factory set to 230V and supplied with a board pre-installed to X8 for the condenser connection.
  • Seite 18 OPEN positions (e.g. summer/winter positions) The pre-limit switch must be set to around 5 cm off the ground. with a position switch (optional) on the cover of the D-PRO Automatic's housing. With electronic limit switches, the second OPEN position is adjusted when the limit switch itself is being programmed.
  • Seite 19 100 to 103. 3 white limit switch CLOSE Hooking up a radio control unit (radio module) The 10 pin slot (OXI receiver) is used for inserting Nice OXI or OXIFM OPERA 2 red safety limit switch OPEN series receivers.
  • Seite 20 75. The subsequent paragraphs highlight the main programming functions of the D-PRO Automatic control unit accessible through the dip-switches. All dipswitches to OFF = display STOP For further details on the available functions, please consult the 'D-PRO Automatic parameters and error list' addendum accompanying this manual.
  • Seite 21 Automatic Closing OPERATING FUNCTIONS If the automatic close function is enabled, the door closes after the time set in parameter 41 has expired with the door in the end position. Refer to the In normal operation, the display shows the parameters list.
  • Seite 22 Schematic overview - 2.2kW D-PRO Automatic 8 – English...
  • Seite 23 Motherboard - 2.2kW D-PRO Automatic Connection for wire antenna or external antenna Connection with Select lower coax cable. OXI receiver slot sensitive edge Limit switch 1/2 OPEN terminal clamps Sensitive edge terminal clamps Controller Transit photocell board terminal clamps Key switch connector Terminal clamps N.O.
  • Seite 24 Front board - 2.2kW D-PRO Automatic Dipswitch Controller board cable OPEN button CLOSE button D-PRO housing, front view, front board with display 10 – English...
  • Seite 25 Declaration of conformity with the following directives: 2006/95/EC (LVD) EN 60335-1:2012, 2004/108/EC (EMC), 2006/42/EC (MRL) Note: The contents of this declaration correspond to declarations in the official document filed in the offices of Nice S.p.a. and, in particular, the latest ver- sion thereof available prior to the printing of this manual.
  • Seite 27 Descrizione ed impiego CONOSCENZA DEL SISTEMA E PREPARAZIONE DELL'INSTALLAZIONE ..1 D-PRO Automatic è una centrale di comando per azionamenti trifase e monofase di porte sezionali, rapide e ad avvolgimento, da 230 e 400V, con MONTAGGIO DELLA CENTRALE DI COMANDO D-PRO AUTOMATIC ...2 finecorsa meccanici o elettronici.
  • Seite 28 Montaggio della centrale di comando D-PRO Automatic Montaggio della centrale di comando D-PRO Automatic Per il montaggio della centrale di comando procedere come descritto di seguito: 01. aprire il coperchio dell'alloggiamento della centrale di comando: allentare le viti di fissaggio;...
  • Seite 29 ATTENZIONE: Il jumper 230/400V sul lato inferiore della scheda deve essere saldato su 230V! Le centrali di comando D-Pro Automatic con numero di serie da NDCC1200 a NDCC1299 sono impostate di fabbrica su 230V e vengono fornite con una scheda premontata su X8 per il collegamento dei condensatori.
  • Seite 30 A questo scopo il pre-finecorsa viene regolato a ca. 5 cm dal suolo. Le regolazioni dei finecorsa devono essere effettuate a uomo presente! Se si utilizzano i cavi Nice, i relativi morsetti sono già premontati. Con la regolazione dei finecorsa d'esercizio vengono stabilite le posizioni di disattivazione superiore ed inferiore della porta.
  • Seite 31 è descritta nell'elenco parametri par. 100 fino a 103. 3 bianco Finecorsa CHIUDI Collegamento del radiocomando (modulo radio) Sullo slot (ricevitore OXI) 10 PINS - è possibile inserire il ricevitore Nice OXI o 2 rosso Finecorsa di sicurezza APRI OXIFM della serie OPERA.
  • Seite 32 Nei paragrafi successivi sono riportate le principali funzioni di programmazione In alternativa, il senso del conteggio della centrale D-PRO Automatic accessibili tramite i DIP-switch. dell'encoder può essere modificato anche Per approfondimenti sulle funzionalità vedere l'addendum "Parametri e lista attraverso il parametro 75.
  • Seite 33 Chiusura automatica FUNZIONI OPERATIVE Se la funzione Chiusura automatica è attivata, la porta in posizione finale si richiude una volta trascorso il tempo impostato al parametro 41. Si veda In condizioni d'esercizio normali lo l'elenco parametri. Azionando la funzione Stop la chiusura automatica viene schermo visualizza lo stato della porta o i arrestata.
  • Seite 34 Panoramica schematica - 2,2kW D-PRO Automatic 8 – Italiano...
  • Seite 35 Scheda madre - 2,2kW D-PRO Automatic Collegamento per antenna Selezione filare o antenna esterna costa sul Collegamento tramite cavo Slot ricevitore bordo coass. inferiore Morsetti ad innesto finecorsa 1/2 APRI Morsetti ad innesto costa di sicurezza Scheda Morsetti ad innesto...
  • Seite 36 Scheda anteriore - 2,2kW D-PRO Automatic DIP-switch Cavo di collegamento Pulsante APRI scheda controller Pulsante CHIUDI Alloggiamento D-PRO vista frontale scheda anteriore con display 10 – Italiano...
  • Seite 37 Dichiarazione in conformità con le seguenti direttive: 2006/95/CE (LVD) EN 60335-1:2012, 2004/108/CE (EMC), 2006/42/CE (MRL) Nota: il contenuto di questa dichiarazione corrisponde a quanto dichiarato nel documento ufficiale depositato presso la sede di Nice S.p.A. e, in particolare, alla sua ultima revisione disponibile prima della stampa di questo manuale. Il testo qui presente è stato riadattato per motivi editoriali. Copia della dichiarazione originale può...
  • Seite 39 ÉLÉMENTS DE COMMANDE ET BRANCHEMENTS ........4 Description et utilisation RÉGLAGE DES FIN DE COURSE MÉCANIQUES ...........5 D-PRO Automatic est une centrale de commande pour les systèmes RÉGLAGE DES FIN DE COURSE NUMÉRIQUES ...........6 d'actionnement triphasés ou monophasés de portes sectionnelles, rapides et roulantes, de 230 et 400 V, avec fins de course mécaniques ou électroniques.
  • Seite 40 Montage de la centrale de commande D-PRO Automatic Montage de la centrale de commande D-PRO Automatic Pour le montage de la centrale de commande, procéder comme suit : 01. Ouvrir le couvercle du boîtier de la centrale de commande : desserrer les vis de fixation ;...
  • Seite 41 Slot sur D-PRO X8 ATTENTION : Le cavalier 230/400 V sur le côté inférieur de la carte doit être soudé sur 230 V ! Les centrales de commande D-Pro Automatic dont le numéro de série est compris entre NDCC1200 et NDCC1299 sont configurées en usine sur 230 V et sont fournies avec une carte pré-montée sur X8 pour le branchement des condensateurs.
  • Seite 42 8,2 k Pour permettre la commande depuis l'extérieur, il est possible de raccorder à la centrale D-PRO Automatic un clavier à trois touches qui sera connecté au bornier X4. Les deux touches OUVERTURE et FERMETURE devront être connectées comme des contacts de fermeture.
  • Seite 43 à tirette 5 blanc Fin de course supplémentaire Dans la centrale de commande D-PRO Automatic, il est possible de connecter 1 FERMETURE des dispositifs de commande au bornier X4. La fonction de ces entrées pour dispositifs de commande est décrite dans la liste des paramètres figurant aux 4 rouge Fin de course de sécurité...
  • Seite 44 Les paragraphes suivants décrivent les principales fonctions de programma- En alternative, le sens de décompte de l'encodeur tion de la logique de commande D-PRO Automatic, accessibles à l'aide des peut aussi être modifié à l'aide du paramètre 75. DIP-switch.
  • Seite 45 Fermeture automatique FONCTIONS OPÉRATIONNELLES Si la fonction Fermeture automatique est activée, la porte en position finale se referme une fois écoulé le délai configuré au paramètre 41. Voir la liste des Dans des conditions de fonctionnement paramètres. Si l'on actionne la fonction Stop, la fermeture automatique est normales, l'écran affiche l'état de la porte arrêtée.
  • Seite 46 Panorama schématique de la centrale - 2,2 kW D-PRO Automatic 8 – Français...
  • Seite 47 Carte mère - 2,2 kW D-PRO Automatic Branchement pour antenne filaire ou antenne extérieure Sélection Branchement par câble du bord sur Slot pour coaxial. le chant récepteur OXI inférieur Bornes enfichables fin de course 1/2 OUVERTURE Bornes enfichables bord de sécurité...
  • Seite 48 Carte antérieure - 2,2 kW D-PRO Automatic DIP-switch Câble de connexion carte Touche contrôleur OUVERTURE Touche FERMETURE Boîtier D-PRO vue frontale de la carte antérieure avec écran 10 – Français...
  • Seite 49 Déclaration conforme aux directives suivantes : 2006/95/CE (LVD) EN 60335-1:2012, 2004/108/CE (EMC), 2006/42/CE (MRL) Note : le contenu de cette déclaration correspond à ce qui a été déclaré dans le document officiel déposé au siège social de Nice S.p.A. et, en particulier, à...
  • Seite 51 ELEMENTOS DE MANDO Y CONEXIONES ............4 Descripción y empleo REGULACIÓN DE LOS TOPES MECÁNICOS ..........5 D-PRO Automatic es una central de mando para transmisiones trifásicas y monofásicas de puertas seccionales, rápidas y enrollables, de 230 y 400V, con REGULACIÓN DE LOS TOPES DIGITALES ............6 topes mecánicos o electrónicos.
  • Seite 52 Montaje de la central de mando D-Pro Automatic Montaje de la central de mando D-Pro Automatic Para el montaje de la central de mando, proceder de la siguiente manera: 01. abrir la tapa del alojamiento de la central de mando: aflojar los tornillos de fijación;...
  • Seite 53 Ranura en D-PRO X8 ATENCIÓN: El jumper 230/400V del lado inferior de la tarjeta debe estar soldado en 230V. Las centrales de mando D-Pro Automatic con número de serie de NDCC1200 a NDCC1299 están ajustadas de fábrica en 230V y se suministran con una tarjeta premontada en X8 para la conexión de los condensadores.
  • Seite 54 NDA010, es necesario conectar también el menos del CERRAR. cable espiralado al borne X6. Para el mando desde el exterior, es posible conectar a D-PRO Automatic 8,2 k una botonera de tres teclas en el bloque de bornes X4. Las teclas ABRIR y CERRAR se deben realizar como contactos de cierre.
  • Seite 55 P 100 a 103. 3 blanco Tope CERRAR Conexión del mando a distancia (módulo radio) En la ranura (receptor OXI) 10 PINS es posible introducir el receptor Nice OXI o 2 rojo Tope de seguridad ABRIR OXIFM de la serie OPERA.
  • Seite 56 En los apartados siguientes se indican las principales funciones de programa- la otra dirección ción de la central D-PRO Automatic accesibles mediante los DIP-switch. El sentido del recuento del encoder se puede Para más información sobre las funciones ver el addendum "Parámetros y cambiar también por medio del parámetro 75.
  • Seite 57 Cierre automático FUNCIONES OPERATIVAS Si la función Cierre automático está activada, la puerta en posición final se cierra una vez transcurrido el tiempo programado en el parámetro 41. Ver En condiciones de funcionamiento la lista de parámetros. Si se activa la función Stop, el cierre automático se normales, la pantalla muestra el estado de detiene.
  • Seite 58 Esquema general - 2,2kW D-PRO Automatic 8 – Español...
  • Seite 59 Tarjeta madre - 2,2kW D-PRO Automatic Conexión para antena cable o antena exterior Selección Conexión mediante cable de la banda coaxial Ranura receptor en el borde inferior Bornes con conector topes 1/2 ABRIR Bornes con conector banda de seguridad Tarjeta...
  • Seite 60 Tarjeta frontal - 2,2kW D-PRO Automatic Microinterruptores Cable de conexión tarjeta controller Tecla ABRIR Tecla CERRAR Alojamiento D-PRO vista frontal tarjeta frontal con pantalla 10 – Español...
  • Seite 61 Declaración de conformidad con las Directivas: 2006/95/CE (LVD) EN 60335-1:2012, 2004/108/CE (EMC), 2006/42/CE (MRL) Nota: el contenido de esta declaración corresponde a lo declarado en el documento oficial depositado en la sede de Nice S.p.A. y, en particular, a la última revisión disponible antes de la impresión de este manual.
  • Seite 63 Projekt i wykonanie urządzeń wchodzących w skład centrali sterujących przypadku wprowadzenia zmian konstrukcji lub wykonania instalacji w sposób do bram D-PRO Automatic oraz informacje zawarte w niniejszej instrukcji niezgodny lub sprzeczny z określonymi wytycznymi na temat montażu. obsługi są zgodne z obowiązującymi przepisami w zakresie bezpieczeństwa.
  • Seite 64 Montaż centrali sterującej D-PRO Automatic Montaż centrali sterującej D-PRO Automatic W celu dokonania montażu centrali sterującej, należy postępować w następujący sposób: 01. otworzyć pokrywę obudowy centrali sterującej: poluzować śruby mocujące; 02. przygotować otwory na przepust kabli połączeniowych i kabli sygnału na centrali sterującej.
  • Seite 65 Slot na D-PRO X8 UWAGA: Zworka 230/400V w dolnej części płyty musi być przylutowana do 230V! Centrale sterujące D-Pro Automatic o numerze seryjnym od NDCC1200 do NDCC1299 są ustawione fabrycznie na 230V i dostarczane z płytą wstępnie zamontowaną na X8 do podłączenia kondensatorów.
  • Seite 66 Podłączenie nadajników sterujących OTWÓRZ, STOP, 8,2 k ZAMKNIJ. W celu sterowania zewnętrznego możliwe jest podłączenie w D-PRO Automatic klawiatury z trzema przyciskami do bloku zacisków X4. Dwa przyciski OTWÓRZ i ZAMKNIJ muszą być wykonane jako styki zamykające. Ponieważ przycisk STOP jest podłączony do obwodu bezpieczeństwa, należy go podłączyć...
  • Seite 67 Podłączenie sterowania radiowego (moduł radiowy) zielony Ogranicznik krańcowy OTWÓRZ Slot (odbiornik OXI) 10 PINS - możliwe jest umieszczenie odbiornika Nice OXI lub OXIFM serii OPERA. Podczas tego działania, strona z diodą LED/przyciskiem programującym musi być zwrócona w kierunku wewnętrznej strony obudowy.
  • Seite 68 W celu uzyskania dodatkowych informacji na temat dostępnych funkcji, DIP 3 i 4 na ON + przycisk ZAMKNIJ = zmiana należy się zapoznać z dodatkiem „Parametry i lista błędów D-PRO Automatic” kierunku obrotów w przeciwnym kierunku dołączonym do niniejszej instrukcji.
  • Seite 69 Zamknięcie automatyczne FUNKCJE ROBOCZE Jeżeli jest włączona funkcja Zamykania automatycznego, brama w pozycji końcowej zostanie zamknięta po upływie czasu ustawionego dla parametru W normalnych warunkach roboczych, 41. Patrz lista parametrów. Po włączeniu funkcji Stop, zostanie zatrzymane ekran wyświetla stan bramy lub numer zamknięcie automatyczne.
  • Seite 70 Przegląd schematyczny - 2,2kW D-PRO Automatic 8 – Polski...
  • Seite 71 Płyta macierzysta - 2,2kW D-PRO Automatic Podłączenie anteny kablowej lub anteny zewnętrznej Podłączenie przy użyciu Slot odbiornika Wybór listwy kabla współosiowego na krawędzi dolnej Zaciski ogranicznika 1/2 OTWÓRZ Zaciski listwy bezpieczeństwa Płyta Zaciski fotokomórki sterownika Złącze wyłącznika kluczykowego Zaciski wtykowe STYK NO BEZPOTENCJAŁOWY...
  • Seite 72 Płyta przednia 2,2kW D-PRO Automatic - DIP-switch Kabel połączeniowy płyty sterownika Przycisk OTWÓRZ Przycisk ZAMKNIJ Obudowa D-PRO widok z przodu płyty przedniej z wyświetlaczem 10 – Polski...
  • Seite 73 • Wszystkie podane parametry techniczne odnoszą się do temperatury otoczenia wynoszącej 20°C (± 5°C). • Nice zastrzega sobie prawo do wprowadzania koniecznych zmian do produktu przy jednoczesnym zachowaniu funkcjonalności i przeznaczenia. • Kompletna instrukcja obsługi składa się z instrukcji obsługi napędu i instrukcji centrali sterującej.
  • Seite 75 MONTAGE VAN DE BESTURING D-PRO AUTOMATIC ........2 AANSLUITING VOEDINGSKABEL ..............3 Beschrijving en gebruik De D-PRO Automatic is een industriële deurbesturing voor drie- en eenfasige BEDIENINGSELEMENTEN EN AANSLUITINGEN ...........4 sectionele, snelloop- en roldeuraandrijvingen, 230 alsmede 400 V, met MECHANISCHE EINDSCHAKELAAR INSTELLEN ..........5 mechanische of elektronische eindschakelaar.
  • Seite 76 Montage van de besturing D-PRO Automatic Montage van de besturing D-PRO Automatic Ga als volgt te werk voor de bevestiging van de besturing: 01. Open het deksel van de besturingsbehuizing: maak de bevestigingsschroeven los. 02. Bereid zowel de gaten voor de kabeldoorvoer van de elektrische aansluitkabel als voor de signaalkabel op de besturing voor.
  • Seite 77 WAARSCHUWING: De omschakelbrug 230/400 V aan de onderzijde van de printplaat moet op 230  V zijn vastgesoldeerd! Codenummers NDCC1200 tot NDCC1299 van de besturingen D-Pro Automatic zijn in de fabriek naar 230  V omgezet en worden geleverd met voorgemonteerde printplaat op X8 voor de aansluiting van de condensators.
  • Seite 78 Jumper J1 op opto aangesloten = gereed voor bedrijf voor optische lijst Bij de D-PRO Automatic is het mogelijk om bij het gebruik van mechanische Voor het geval de onderloopbeveiliging op de vloer dient te worden gedrukt, eindschakelaars op de aandrijving een tweede, aanvullende eindschakelaar...
  • Seite 79 Extra eindschakelaar 2 OPEN Extern bedienkastje bijv. trekknop aansluiten Bij de regeling D-PRO Automatic is het mogelijk om externe bedienkastjes op Extra eindschakelaar 1 DICHT klemmenblok X4 aan te sluiten. De functie van deze ingangen van de externe bedienkastjes is in de parameterlijst par. 100 tot 103 beschreven.
  • Seite 80 75 te wijzigen. zijn. Zie voor meer informatie over de functies het addendum "Parameters en de lijst Alle DIP-schakelaars op OFF = weergave met fouten D-PRO Automatic" dat bij deze handleiding is gevoegd. STOP 6 – Nederlands...
  • Seite 81 Automatisch sluiten BEDRIJFSFUNCTIES Als de functie Automatisch sluiten is ingeschakeld, gaat de industriële deur uit de eindpositie conform de in parameter 41 ingestelde tijd weer dicht. Zie In de normale modus wordt in de weergave parameterlijst. Door het bedienen van de functie Stop wordt de automatische de industriële deurtoestand resp.
  • Seite 82 Schematisch overzicht - 2,2 kW D-PRO Automatic 8 – Nederlands...
  • Seite 83 Basisprintplaat - 2,2 kW D-PRO Automatic Aansluiting via draadantenne resp. externe antenne Aansluiting via coaxkabel Aansluitplaats Selectie UK- OXI-ontvanger lijst Aansluitklemmen eindschakelaar 1/2 OMHOOG Aansluitklemmen contactlijst Controllerprintplaat Aansluitklemmen doorrijdfotocel Stekker sleutelschakelaar Aansluitklemmen. POT-VRIJ OMLAAG NO Aansluitklemmen Druktoets digit. POT-VRIJ IMPULS NO...
  • Seite 84 Dekselprintplaat - 2,2 kW D-PRO Automatic DIP-schakelaar Aansluitkabel Druktoets controllerprintplaat OMHOOG Druktoets OMLAAG Behuizing D-PRO vooraanzicht dekselprintplaat met display 10 – Nederlands...
  • Seite 85 • Alle vermelde technische kenmerken hebben betrekking op een temperatuur van 20 °C (± 5 °C). • Nice behoudt zich het recht voor om te allen tijde, als dat nodig is, het product te wijzigen, waarbij de functionaliteiten en het gebruiksdoel blijven behouden.
  • Seite 88 Nice SpA Oderzo TV Italia www.niceforyou.com info@niceforyou.com...