Horizon Hobby HANGAR 9 Aermacchi MB-339 Bedienungsanleitung
Vorschau ausblenden
Andere Handbücher für HANGAR 9 Aermacchi MB-339:
- Bedienungsanleitung (96 Seiten)
Inhaltsverzeichnis
Werbung
Verfügbare Sprachen
Verfügbare Sprachen
Quicklinks
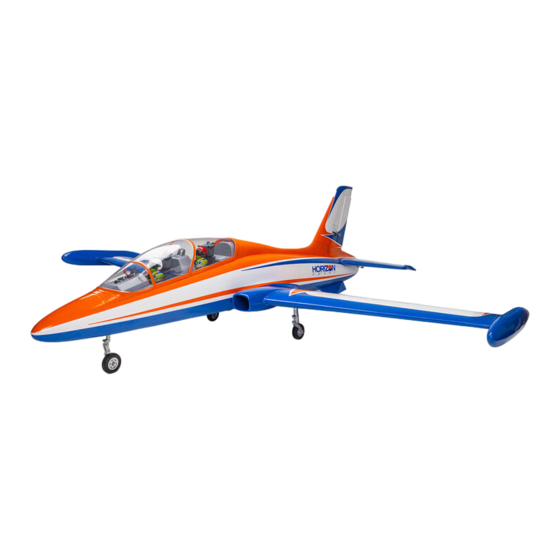
Aermacchi MB-339
Scan the QR code and select the Manuals and Support quick links from the product
page for the most up-to-date manual information.
Scannen Sie den QR-Code und wählen Sie auf der Produktseite die Quicklinks
Handbücher und Unterstützung, um die aktuellsten Informationen zu Handbücher.
Scannez le code QR et sélectionnez les liens rapides Manuals and Support sur la
page du produit pour obtenir les informations les plus récentes sur le manuel.
Scannerizzare il codice QR e selezionare i Link veloci Manuali e Supporto dalla
pagina del prodotto per le informazioni manuali più aggiornate.
HAN3390
Instruction Manual
Bedienungsanleitung
Manuel d'utilisation
Manuale di Istruzioni
Werbung
Inhaltsverzeichnis

Verwandte Anleitungen für Horizon Hobby HANGAR 9 Aermacchi MB-339


Inhaltszusammenfassung für Horizon Hobby HANGAR 9 Aermacchi MB-339
- Seite 1 Aermacchi MB-339 Instruction Manual Bedienungsanleitung Manuel d’utilisation Manuale di Istruzioni Scan the QR code and select the Manuals and Support quick links from the product page for the most up-to-date manual information. Scannen Sie den QR-Code und wählen Sie auf der Produktseite die Quicklinks Handbücher und Unterstützung, um die aktuellsten Informationen zu Handbücher.
-
Seite 2: Notice
• For a computer radio, create a model memory for this particular model. of Horizon Hobby, LLC. This manual contains instructions for safety, operation and maintenance. It is essential to • Bind your transmitter and receiver, using your radio system’s instructions. -
Seite 3: Inhaltsverzeichnis
TABLE OF CONTENTS REPLACEMENT PARTS Notice ..................................2 Item # Description Meaning of Special Language ..........................2 HAN339001 Fuselage Safety Warnings and Precautions ..........................2 HAN339002 Wing Set Safe Operating Recommendations ...........................2 HAN339003 Fin and Rudder Before Starting Assembly ............................2 Important Federal Aviation Administration (FAA) Information ..................2 HAN339004 Stab and Elev Set Replacement Parts ..............................3... -
Seite 4: Required Adhesives
REQUIRED ADHESIVES REMOVING WRINKLES The covering of your model may develop wrinkles during shipping and will require the use of a heat gun (HAN100) Description and covering glove (HAN150) or covering iron with a sealing iron sock (HAN141) to remove them. Use caution while 15-minute epoxy working around areas where the colors overlap to prevent separating the colors. -
Seite 5: Flap Control Horn Installation
FLAP CONTROL HORN INSTALLATION Place 2–3 drops of thin CA in each hole. Allow the CA to fully cure before proceeding. Remove the flap and flap hinges from the wing panel. Î The hinges are not glued to the wing or flap. Use a hobby knife and covering iron to seal the covering Secure the flap control horn to the flap using two M2 x 14 against the flap in the location for the flap control horn. - Seite 6 11. Use a paper towel and isopropyl alcohol to remove any oils 16. Slide the remaining control horn on the M3 x 15 button head or debris from the control horn. Prepare all the aileron control machine screw. Secure the assembly using an M3 washer horns.
-
Seite 7: Flap Hinging
21. Apply epoxy to all the surfaces of the control horns that will 26. Remove the flap and hinges. Inject adhesive into each of the contact the exposed wood of the aileron. hinge pockets of the flap. Î Deluxe Materials Aero Tech Epoxy (DLMAD64) was used in the construction of the Aermacchi MB-339. -
Seite 8: Aileron Hinging
AILERON HINGING RUDDER HINGING 31. Hinge the ailerons using the same technique outlined for the 36. Separate the rudder from the fin. Set the hinges aside. flap hinges. Make sure the aileron is aligned with the flap. 32. Make sure hinge gap is consistent along the entire length of 37. - Seite 9 41. Place the aileron servo on the cover and use a felt-tipped 46. When connecting the clevis to the servo arm, use the hole pen to mark the locations for the mounting screws. The servo that is 5/8 inch (16mm) from the center of the servo arm. output will face forward.
-
Seite 10: Flap Servo Installation
51. Place the aileron servo cover in position and drill through the 56. Remove the ball from the aileron control horn. Assemble the mounting locations and into the wing using a pin vise and linkage so the overall length is 3 inches (95mm). - Seite 11 61. Attach the ball end the servo arm using an M3 x 15 machine 65. Center the servo using the radio system. Place the servo arm screw, M3 washer and M3 locknut. Tighten the hardware on the servo so it is one spline toward the trailing edge of the using a 2mm hex wrench and 5.5mm nut driver.
-
Seite 12: Rudder Servo Installation
ELEVATOR SERVO INSTALLATION 73. Use a hobby knife and #11 blade to remove the covering for the elevator servo arm. 69. Attach the servo cover to the wing using four M2 x 8mm self- 74. Mount the elevator servo in the stabilizer with the servo tapping screws. -
Seite 13: Nose Gear Retract Installation
78. Remove the covering from the retract well on the bottom 83. Check the operation of the retract using the retract module. of the wing using a hobby knife with a #11 blade. Use a A test button is located on the module, or the module can be covering iron to seal the covering around the opening. -
Seite 14: Battery, Receiver And Retract Module Installation
88. Fit the retract into the forward fuselage. Make sure all the 93. Mount the receiver switch in a convenient location in the leads are inside the fuselage and not between the retract fuselage. One of the remote receivers can be secured in the frame and fuselage. - Seite 15 98. Check the bend in the tubing to make sure it does not touch 103. Fit the stopper in the tank and check that the clunk can move the top of the tank. freely in the tank. Adjust if necessary. Secure the stopper using the M3 x 25 socket head cap screw.
-
Seite 16: Turbine Installation
108. Slide the fuel tank into the fuselage. Use a small amount of 113. Slide the exhaust tube into the rear fuselage from the front of silicone adhesive between the tray and tank to keep it from the fuselage. sliding on the tray during flight. 109. -
Seite 17: Fin Installation
118. Mount the fuel pump in the fuselage and connect any fuel 123. Fit the fin into position. Place a small piece of plastic in the lines necessary for the operation of the turbine. Mount the hinge line and along the bottom of the rudder to prevent vent fitting in the bottom of the fuselage and connect the vent gluing the rudder to the fuselage. -
Seite 18: Joining The Fuselage
128. Insert the stabilizer screw grommet using a small amount of 133. Mount the remote receiver above the fuel tank using hook silicone adhesive. and loop tape. Connect any extensions for the flaps, ailerons, retracts and brakes and route them back in the fuselage. JOINING THE FUSELAGE 134. -
Seite 19: Intake Installation
138. Use the two 1/4-20 x 2-inch nylon bolts to secure the wing to SCALE ACCESSORIES the fuselage. 142. Prepare the wing tip tank bolts by sliding a 4mm lockwasher on the M4 x 220 socket head cap screws. 139. Connect the leads for the retract and brake inside the 143. -
Seite 20: Center Of Gravity
CENTER OF GRAVITY CONTROL THROWS An important part of preparing the aircraft for flight is properly balancing the model. The Center of Gravity range Turn on the transmitter and receiver of your model. Check the movement of the rudder using the transmitter. supplied here is a guideline based on testing. -
Seite 21: Mixing
(iii) modification of or to any part of the Product, (iv) attempted service by anyone other than a Horizon Hobby authorized service center, (v) Product With full flap set at 2... -
Seite 22: Warranty And Service Contact Information
Hanskampring 9 Union D 22885 Barsbüttel, Germany Sales: Horizon Hobby GmbH +49 (0) 4121 2655 100 NOTICE: Do not ship LiPo batteries to Horizon. If you have any issue with a LiPo battery, please contact the appropriate Horizon Product Support office. -
Seite 23: Academy Of Model Aeronautics National Model Aircraft Safety Code
ACADEMY OF MODEL AERONAUTICS NATIONAL MODEL AIRCRAFT SAFETY CODE BUILDING NOTES Effective January 1, 2018 A model aircraft is a non-human-carrying device capable of sustained flight within visual line of sight of the pilot or spotter(s). It may not exceed limitations of this code and is intended exclusively for sport, recreation, education and/or competition. -
Seite 24: Hinweis
HINWEIS Befolgen Sie alle im Handbuch für Ihre spezielle Turbine beschriebenen Sicherheitsvorkehrungen für Turbinen. Weitere Alle Anweisungen, Garantien und andere Begleitdokumente können von Horizon Hobby, LLC nach eigenem Ermessen Einzelheiten finden Sie auf der Website von AMA. (https://www.modelaircraft.org/system/files/documents/510-A.pdf) geändert werden. Um aktuelle Produktinformationen zu erhalten, besuchen Sie horizonhobby.com oder www. -
Seite 25: Ersatzteile
INHALTSVERZEICHNIS ERSATZTEILE Hinweis .................................24 Artikel Nr. Beschreibung Spezielle Bedeutungen ............................24 HAN339001 Rumpf Warnungen und Sicherheits-vorkehrungen ......................24 HAN339002 Tragflächen Empfehlungen zum sicheren Betrieb ........................24 HAN339003 Finne u. Seitenruder Vor dem Zusammenbau ............................24 Ersatzteile ................................25 HAN339004 Höhenruderset Zur Fertigstellung erforderlich ..........................25 HAN339005 Einzieh-Fahrwerkset Werkzeuge erforderlich ............................26 HAN339006... -
Seite 26: Werkzeuge Erforderlich
WERKZEUGE ERFORDERLICH ERFORDERLICHE KLEBEMITTEL Beschreibung Beschreibung 15 Minuten Epoxy Ring- oder Maulschlüssel: 10 mm, 11 mm (7/16 Zoll), 13 mm (1/2 Zoll) 30 Minuten Epoxy Schraubzwinge Sekundenkleber mittel Folienbügeleisen Sekundenkleber dünnflüssig Trennscheibe Bohrer Gewindesicherung, hohe und niedrige Festigkeit Bohrer- und Gewindebohrersatz, metrisch FALTEN ENTFERNEN Pinsel Faserstift Beim Versand können an der Abdeckung Ihres Modells Falten entstehen. -
Seite 27: Montage Klappe Des Steuerhorns
MONTAGE KLAPPE DES STEUERHORNS 2 bis 3 Tropfen dünnen CA-Klebstoff in jedes der Löcher auftragen. Der CA-Klebstoff muss vor dem Fortfahren Klappe und Klappenaufhängungen von der Tragfläche vollständig ausgehärtet sein. entfernen. Î Die Aufhängungen sind nicht an Tragfläche oder Klappe festgeklebt. Mit einem Hobbymesser und einem Heißsiegelgerät die Die Klappe des Steuerhorns mit zwei Abdeckung an der Klappe am Anbringungsort der Klappe des... - Seite 28 11. Mit einem Papiertuch und Isopropylalkohol Öl- oder 16. Das verbleibende Steuerhorn auf die M3 x 15 Rundkopf- Schmutzrückstände vom Steuerhorn entfernen. Alle Maschinenschraube schieben. Die Baugruppe mit einer M3 Querruder-Steuerhörner vorbereiten. Unterlegscheibe und einer M3 Kontermutter sichern. 12. Das Querruder-Steuerhorn probeweise einsetzen. Sie müssen 17.
-
Seite 29: Klappenaufhängung
21. Epoxid auf alle Oberflächen auftragen, an denen die 26. Klappe und Aufhängungen entfernen. Jede Steuerhörner das freigelegte Holz des Seitenruders berühren. Aufhängungsaufnahme an der Klappe mit Klebstoff versehen. Î Deluxe Materials Aero Tech Epoxy (DLMAD64) wurde zum Bau von Aermacchi MB-339 benutzt. 22. -
Seite 30: Querruder-Aufhängung
QUERRUDER-AUFHÄNGUNG AUFHÄNGUNG SEITENRUDER 31. Die Querruder mit der gleichen Technik wie für die 36. Das Seitenruder vom Seitenleitwerk trennen. Die Aufhängungen der Klappe angegeben einhängen. Aufhängungen zur Seite legen. Sicherstellen, dass das Querruder mit der Rückplatte ausgerichtet ist. 32. Sicherstellen, dass der Abstand der Aufhängung entlang der 37. - Seite 31 41. Querruder-Servo auf der Abdeckung positionieren und mit 46. Beim Anschließen des Gabelkopfes am Servoarm das Loch im einem Filzstift die Positionen der Befestigungsschrauben Arm verwenden, das 16 mm (5/8 Zoll) von der Mitte des Arms markieren. Die Servoausgabe weist nach außen. entfernt liegt.
-
Seite 32: Montage Des Klappen-Servos
51. Die Abdeckung des Querruder-Servos positionieren 56. Den Kugelkopf vom Steuerhorn des Querruders entfernen. und mit einem 1,5 mm (1/16 Zoll) Stiftschraubstock die Montieren Sie das Gestänge so, dass die Gesamtlänge 95mm 95mm (3 Zoll Anbringungsstellen durchbohren und in die Tragfläche Zoll) beträgt. - Seite 33 60. Jegliches Klebeband von Flügel und Klappe entfernen. 64. Die Servoleitung für Klappe und Querruder durch die Das Klappengestänge mit zwei vorbereiteten Kugelköpfen Tragfläche bis zur Tragflächenwurzel führen. 108mm (4 Zoll) und einer Gewindestange von 80mm zusammenbauen. Die Kugelenden gleichmäßig auf die Gewindestange aufschrauben, bis die Gesamtlänge ungefähr 108 mm (4 Zoll) beträgt.
-
Seite 34: Montage Des Servos Des Seitenruders
68. Den Ausschlag auf dem Sender so einstellen, dass ein 72. Montieren des Gestänges des Querruder-Servos gemäß den Ausschlag von 70 mm Angaben in der Installation des Klappe-Servos. Mit einer 35 mm Gewindestange die Verbindung auf eine Gesamtlänge Zoll) erreicht wird. von 65 mm einstellen. -
Seite 35: Einbau Des Bugfahrwerks
77. Mit einem Hobbymesser oder mit Schleifpapier eine leichte 82. Die Einfahrvorrichtung mit den vier im Schritt zuvor Spitze an jedem der Anschlüsse am Adapter schleifen (im vorbereiteten Schrauben und einem 3 mm Sechskant sichern. Einfahrmodul enthalten) der mit dem Empfänger mit dem Î... -
Seite 36: Montage Von Akku, Empfänger Und Einziehmodul
86. Montieren Sie das Lenkgestänge und befestigen Sie es mit 91. Das Einziehmodul kann hinter der Hinterkante des einer M3 x 15-Kopfschraube, M3-Unterlegscheibe und M3- Bugabschnitts montiert werden. Sicherstellen, dass der Kontermutter am Servoarm. Einen 2mm Sechskant und einen Zugriff auf die Verbindungsschrauben nicht blockiert ist. 5,5 mm Steckschlüssel verwenden. - Seite 37 96. Eine langes Rohr und ein kurzes Rohr durch den 101. Mit einem Kabelbinder die Kraftstoffleitung an der Messing- Gummianschlag schieben. (Die mittlere Öffnung ist für die Kraftstoffleitung sichern. Schraube zur Sicherung des Zusammenbaus im Tank.) Rückplatte aus Aluminium an den Rohren vom flanschlosen Ende des Anschlags einpassen.
-
Seite 38: Turbineninstallation
106. Die Halterung des Kraftstofftanks von unten mit Hilfe der vier 111. Die Abdeckung der Füll- und Entlüftungs-Fittings mit einem Rändelschrauben im Rumpf befestigen. Hobbymesser und einer Nr. 11 Klinge entfernen. Fittings anbringen und die Leitungen vom Tank anschließen. Î Es kann nötig sein, die Löcher zu verbreitern, um die Fittings anzubringen. -
Seite 39: Montage Des Seitenleitwerks
116. Die Turbine in den Rumpf einpassen. Der Kegel der 121. Die Schnur verwenden, um die Verlängerung durch das Abgasturbine wird sich circa 13 mm (1/2 Zoll) vom Rohr zu ziehen. Vorsichtig vorgehen, um die Schnur nicht Auspuffrohr entfernt befinden. zu zerreißen. -
Seite 40: Zusammenführen Des Rumpfs
126. Das Rohr des Stabilisators (A) in die Buchse im hinteren 131. Den vorderen Rumpf auf dem hinteren Rumpf in Position Rumpf stecken. Zentrieren Sie das Rohr im Rumpf. schieben. Sie lassen sich einander eng einpassen. 127. Die Leitung des Höhenruder-Servos und die Verlängerung 132. -
Seite 41: Installation Des Einlasses
136. Das Rohr in die Lasche des Rumpfs schieben. Die Leitungen von Querruder und Klappe an den Verlängerungen anschließen. Die Leitungen von Einfahrvorrichtungen und Bremsen in den Flügel führen. 137. Den Flügel fest gegen den Rumpf schieben. 141. Mit einem Feilkloben und einem 1,5 mm (1/16 Zoll) Bohrer die Anbringungsorte am Einlass in der Tragfläche durchbohren. -
Seite 42: Schwerpunkt
145. Zur Befestigung an der Stabilisierungsflosse eine M4- SCHWERPUNKT Sicherungsscheibe und eine M4-Unterlegscheibe auf die Ein wichtiger Teil bei der Vorbereitung des Flugzeugs für den Flug ist das ordnungsgemäße Ausbalancieren des M4 x 20 Zylinderkopfschrauben schieben. Alle vier Schrauben Modells. Der hier aufgeführte Schwerpunktbereich dient basierend auf Tests als Richtlinie. Abweichungen von vorbereiten. -
Seite 43: Ruderausschlag
RUDERAUSSCHLAG MISCHEN Klappe-zu-Höhenruder-Ausgleich Den Sender und Empfänger des Modells einschalten. Die Bewegung des Seitenruders mit dem Empfänger prüfen. Für den Fall, dass die Klappen angelegt sind, besteht keine genaue Angabe für die Trimmung. Dies kann von Flugzeug Wird der Hebel nach rechts bewegt, sollte sich auch das Seitenruder nach rechts bewegen. Die Richtung auf dem zu Flugzeug und je nach Einstellung leicht variieren. -
Seite 44: Garantie Und Service Informationen
Garantiezeitraum Umgang verhindert und Unfälle mit Verletzungen und Beschädigungen vermieden werden. Exklusive Garantie Horizon Hobby LLC (Horizon) garantiert, dass dasgekaufte Produkt frei von Material- und Fragen, Hilfe und Reparaturen Montagefehlern ist. Der Garantiezeitraum entspricht den gesetzlichen Bestimmung des Landes, in dem das Produkt Ihr lokaler Fachhändler und die Verkaufstelle können eine Garantiebeurteilung ohne Rücksprache mit Horizon nicht... -
Seite 45: Garantie Und Service Kontaktinformationen
D 22885 Barsbüttel, Germany service@horizonhobby.de Horizon Hobby GmbH EU Konformitätserklärung WEEE-HINWEIS: Hiermit erklärt Horizon Hobby, LLC, dass das Dieses Gerät ist gemäß der Europäischen Gerät den folgenden Richtlinien entspricht: Richtlinie 2012/19/EU über Elektro- und Elektronik-Altgeräte (WEEE) gekennzeichnet. Dieses Symbol weist Öko-Design-Richtlinie 1275/2008;... -
Seite 46: Remarque
être utilisé par des enfants sans la surveillance directe d’un adulte. N’essayez pas de modifier ou d’utiliser ce produit avec des composants incompatibles hors des instructions fournies par Horizon Hobby, LLC. Ce manuel comporte des • Si un élément est endommagé, contactez votre revendeur. -
Seite 47: Han339003 Han339004
TABLE DES MATIÈRES PIÈCES DE RECHANGE Remarque ................................46 Pièce Description Signification de certains termes spécifiques ......................46 HAN339001 Fuselage Avertissements relatifs à la sécurité ........................46 HAN339002 Ailes Consignes de sécurité concernant l’utilisation ......................46 HAN339003 Dérive et sa gouverne Avant de commencer l’assemblage ........................46 Pièces de rechange ...............................47 HAN339004 Set Plan horizontal et Gouverne de profondeur... -
Seite 48: Outils Nécessaires
OUTILS NÉCESSAIRES COLLES REQUISES Description Description Époxy 15 minutes Boîtier ou clé plate : 10 mm (7/16 po, 1/2 po) Époxy 30 minutes Serre joint Colle cyano moyenne Fer à entoiler Colle cyano fine Disque à découper Mini-perceuse Frein-filet, force faible et élevée Ensemble de mèches, impériales ou métriques Pinceau Epoxy RETRAIT DES FAUX-PLIS Feutre fin effaçable... -
Seite 49: Installation Du Guignol De Commande Du Volet
INSTALLATION DU GUIGNOL DE COMMANDE DU Appliquez quelques gouttes de colle cyanoacrylate fine dans chaque trou. Avant de continuer, laissez la colle sécher VOLET complètement. Retirez le volet et les charnières de volet du panneau d’aile. Î Les charnières ne sont pas collées à l’aile ou au volet. À... - Seite 50 11. Imprégnez du papier absorbant d’alcool isopropylique pour 16. Faites glisser le guignol de commande restant sur la vis enlever toute trace d’huile ou d’impuretés des guignols de mécanique à tête bombée M3 x 15. Fixez l’ensemble à l’aide commande. Préparez tous les guignols de commande de d’une rondelle M3 et d’un contre-écrou M3.
-
Seite 51: Charnières Des Volets
21. Appliquez de la colle époxy sur toutes les surfaces des 26. Retirez le volet et les charnières. Injectez de la colle dans guignols de commande qui entreront en contact avec le bois chaque encoche de charnière du volet. exposé de l’aileron. Î... -
Seite 52: Charnière Des Ailerons
CHARNIÈRE DES AILERONS CHARNIÈRES DE LA GOUVERNE DE DIRECTION 31. Posez les charnières des ailerons en utilisant la même 36. Séparez la gouverne de direction de la dérive. Mettez les technique que celle décrite pour les charnières des volets. charnières de côté. Assurez-vous que l’aileron est bien aligné... - Seite 53 41. Placez le servo d’aileron sur le cache et utilisez un stylo- 46. Lorsque vous connectez la manille au bras de servo, utilisez feutre pour marquer l’emplacement des vis de montage. La le trou qui se trouve à 16 mm (5/8 po) du centre du bras de sortie du servo doit être orientée vers l’avant.
-
Seite 54: Installation Du Servo Du Volet
51. Placez le cache du servo d’aileron en position et percez les 56. Retirez la bille du guignol de commande d’aileron. Assemblez emplacements de montage et l’aile à l’aide d’un porte-foret la tringlerie de sorte que la longueur totale soit de 95 mm 95mm (3 po) et d’une mèche de 1, 5 mm (1/16 po). - Seite 55 60. Retirez le ruban adhésif de l’aile et du volet. Assemblez 64. Guidez le câble du servo pour le volet et l’aileron à travers la tringlerie du volet en utilisant deux extrémités à bille l’aile jusqu’à l’emplanture. 108mm (4 po) préparées et une tige filetée de 80 mm.
-
Seite 56: Installation Du Servo De La Gouverne De Direction
68. Réglez le débattement sur l’émetteur pour obtenir un 72. Assemblez la tringlerie du servo de gouverne de direction en suivant les instructions de l’installation du servo du volet. débattement de 70 mm (2 po). Utilisez une tige filetée de 35mm et ajustez la tringlerie à une longueur totale de 65mm. -
Seite 57: Installation Du Système De Rentrée Du Train Avant
77. À l’aide d’un couteau ou de papier de verre, poncez 82. Fixez le système de rentrée dans l’aile à l’aide des quatre vis légèrement chacune des fiches de l’adaptateur (fournies avec préparées à l’étape précédente et d’une clé à six pans de 3 le module de rentrée) qui reliera le récepteur au module de rentrée. -
Seite 58: Installation De La Batterie, Du Récepteur Et Du Module De Rentrée
86. Assemblez l’articulation de direction, puis fixez-là au bras 91. Le module de rentrée peut être monté derrière le bord arrière de servo à l’aide d’une vis à tête bombée M3 x 15, d’une de la partie avant. Veillez à ce que l’accès aux boulons de rondelle M3 et d’un contre-écrou M3. - Seite 59 96. Faites glisser un tube long et un tube court à travers le 101. Utilisez un serre-câble pour fixer la conduite de carburant à la bouchon en caoutchouc. (Le trou central est réservé à la conduite de carburant en laiton. vis qui fixe l’ensemble dans le réservoir).
-
Seite 60: Installation De La Turbine
106. Montez le support du réservoir de carburant dans le fuselage 111. Retirez l’entoilage des raccords de remplissage et de par le bas à l’aide des quatre vis moletées. ventilation à l’aide d’un couteau et d’une lame n° 11. Montez les raccords et connectez les conduites du réservoir. -
Seite 61: Installation De La Dérive
116. Positionnez la turbine dans le fuselage. Le cône 121. Utilisez la ficelle pour tirer la rallonge à travers le tube. Faites d’échappement de la turbine sera à environ 13 mm (1/2 po) attention à ne pas casser la ficelle. Connectez le câble du du tube d’échappement. -
Seite 62: Assemblage Du Fuselage
126. Insérez le tube du stabilisateur dans la prise située à l’arrière 131. Faites glisser le fuselage avant en position sur le fuselage du fuselage. Placez le tube au centre du fuselage. arrière. Les deux éléments s’emboîteront parfaitement. 127. Connectez le câble du servo de la gouverne de profondeur 132. -
Seite 63: Installation De L'admission
136. Glissez le tube dans le fuselage de l’aile. Connectez les câbles pour les ailerons et les volets aux rallonges. Guidez les câbles de la rentrée et du frein dans l’aile. 137. Faites glisser l’aile de sorte à bien la serrer contre le fuselage. 141. -
Seite 64: Centre De Gravité
145. Faites glisser une rondelle de blocage et une rondelle de 4 CENTRE DE GRAVITÉ mm sur la vis d’assemblage creuse de la dérive ventrale M4 Le maintien de la maquette en équilibre est une étape importante de la préparation du vol de l’avion. La plage du x 20. -
Seite 65: Débattements
DÉBATTEMENTS MIXAGE Flap to Elevator Compensation (compensation volet vers élévateur) Mettez l’émetteur et le récepteur de votre maquette sous tension. Vérifiez le mouvement de la dérive à l’aide Il n’existe pas de chiffres précis pour la compensation requise vers le bas lorsque les volets sont appliqués. Cela peut de l’émetteur. -
Seite 66: Garantie Et Réparations
Durée de la garantie responsable d’une utilisation ne respectant pas les lois, les règles ou règlementations en vigueur. Garantie exclusive - Horizon Hobby, LLC (Horizon) garantit que le Produit acheté (le « Produit ») sera exempt de défauts Questions, assistance et réparations matériels et de fabrication à... -
Seite 67: Coordonnées De Garantie Et Réparations
INFORMATIONS DE CONFORMITÉ POUR DIRECTIVE DEEE L’étiquette de cet appareil respecte la L’UNION EUROPÉENNE directive européenne 2012/19/UE en Par la présente, Horizon Hobby, LLC déclare matière de déchets des équipements que cet appareil est conforme aux directives électriques et électroniques (DEEE). Cette suivantes : étiquette indique que ce produit ne doit... -
Seite 68: Avviso
Non usare componenti non compatibili • Caricare il trasmettitore e la batteria di volo. o alterare il prodotto in nessuna maniera al di fuori delle istruzioni fornite da Horizon Hobby, LLC. Questo manuale • Centrare stick e trim sul trasmettitore. -
Seite 69: Fuselage
INDICE PARTI DI RICAMBIO Avviso ..................................68 Item # Descrizione Significato dei termini particolari ..........................68 HAN339001 Fusoliera HAN339001 Fuselage Avvertimenti E Precauzioni Per La Sicurezza ......................68 HAN339002 Set ala HAN339002 Wing Set Raccomandazioni per operare in sicurezza ......................68 HAN339003 Direzionale e timone HAN339003 Fin and Rudder Prima di iniziare il montaggio ..........................68... -
Seite 70: Attrezzi Necessari
ATTREZZI NECESSARI ADESIVI NECESSARI Descrizione Descrizione Colla epossidica 15 minuti Chiave a tubo o a forcella doppia: 10 mm, 7/16", 1/2" Colla epossidica 30 minuti Morsetto a C Medio CA Ferro da stiro per film di copertura Sottile CA Coltello rotativo Trapano Frenafiletti, bassa e alta resistenza Set punte e maschi, metrico... -
Seite 71: Installazione Delle Squadrette Dei Flap
INSTALLAZIONE DELLE SQUADRETTE DEI FLAP Applicare 2-3 gocce di colla cianoacrilica fine in ognuno dei fori. Prima di procedere, lasciare che la colla si asciughi del Rimuovere il flap e le sue cerniere dal pannello alare. tutto. Î Le cerniere non sono incollate all’ala o al flap. Con un taglierino e un ferro da stiro per modellismo, sigillare Fissare la squadretta del flap al flap utilizzando due viti il rivestimento contro il flap nella posizione della squadretta... - Seite 72 11. Con un panno di carta e alcool isopropilico, rimuovere 16. Far scorrere l’altra squadretta sulla vite a testa tonda M3 x eventuali oli e residui dalla squadretta. Preparare le 15. Fissare il gruppo con una rondella M3 e un controdado squadrette dell’alettone.
-
Seite 73: Incernieramento Dei Flap
21. Applicare la colla su tutta la superficie delle squadrette che 26. Rimuovere flap e cerniere. Iniettare colla epossidica in entra in contatto con la parte esposta del legno dell’alettone. ciascuna delle tasche delle cerniere del flap. Î Per la costruzione dell’Aermacchi MB-339 è stata utilizzata la colla Deluxe Materials Aero Tech (DLMAD64). -
Seite 74: Incernieramento Degli Alettoni
INCERNIERAMENTO DEGLI ALETTONI INCERNIERAMENTO DEL TIMONE 31. Incernierare gli alettoni seguendo la stessa procedura già 36. Separare il timone dalla deriva. Mettere le cerniere da parte. vista per le cerniere dei flap. Assicurarsi che l’alettone sia allineato con il flap. 32. - Seite 75 41. Posizionare il servo dell’alettone sulla copertura e con un 46. Per collegare la forcella al braccio del servo, usare il foro che pennarello a feltro segnare le posizioni delle viti di montaggio. si trova a 16 mm dal centro del braccio del servo. L’uscita del servo sarà...
-
Seite 76: Installazione Dei Servo Dei Flap
51. Posizionare la copertura del servo dell’alettone e forare 56. Rimuovere la sfera dalla squadretta di controllo dell’alettone. attraverso le sedi di montaggio e nell’ala utilizzando un Assemblare il leveraggio in modo che la lunghezza 95 mm minitrapano con punta da 1,5 mm (1/16"). complessiva sia di 95 mm (3 pollici). - Seite 77 60. Rimuovere l’eventuale nastro da ala e flap. Assemblare il 64. Far passare il cavo del servo per il flap e l’alettone attraverso leveraggio utilizzando due snodi a sfera e un’asta filettata l’ala fino alla radice dell’ala. da 80 mm. Avvitare in maniera uniforme i due snodi a sfera sull’asta filettata fino a raggiungere una lunghezza complessiva di circa 108 mm (4 pollici).
-
Seite 78: Montaggio Del Servo Del Timone
68. Impostare la corsa sulla trasmittente in modo da ottenere una 72. Assemblare il leveraggio del servo del timone seguendo le istruzioni per l’installazione dei servo dei flap. Utilizzare corsa di 70 mm (2 pollici). un’asta filettata da 35 mm e regolare il leveraggio a una lunghezza complessiva di 65 mm. -
Seite 79: Montaggio Del Carrello Anteriore Retrattile
77. Con un taglierino o della carta abrasiva, levigare per 82. Fissare il carrello nell’ala avvitando le quattro viti preparate produrre una leggera rastrematura su ciascuno degli nella fase precedente con una chiave esagonale da 3 mm. spinotti dell’adattatore (incluso nel modulo di retrazione) che Î... -
Seite 80: Installazione Di Batteria, Ricevitore Emodulo Di Retrazione
86. Assemblare il rinvio dello sterzo e fissarlo al braccio del servo 91. Il modulo di retrazione può essere montato dietro il bordo con una vite a testa bombata M3 x 15, una rondella M3 e un posteriore della sezione del muso. Assicurarsi che l’accesso controdado M3. - Seite 81 96. Far passare un tubo lungo e un tubo corto attraverso il tappo 101. Utilizzare una fascetta metallica per fissare il tubo del di gomma. (Il foro centrale serve per la vite che fissa il gruppo carburante al tubo in ottone. nel serbatoio).
-
Seite 82: Installazione Della Turbina
106. Montare il vassoio del serbatoio del carburante nella fusoliera 111. Con un taglierino e una lama n. 11, rimuovere il rivestimento dal basso utilizzando le quattro viti zigrinate. per i raccordi di rabbocco e sfiato. Montare i raccordi e collegare le linee dal serbatoio. -
Seite 83: Montaggio Della Deriva
116. Posizionare la turbina nella fusoliera. Il cono di scarico della 121. Utilizzare il cordino per tirare la prolunga attraverso il tubo. turbina si trova a circa 13 mm dal tubo di scarico. Fare attenzione a non rompere il cordino. Collegare il cavo del servo del timone e la prolunga utilizzando un fermo Î... -
Seite 84: Assemblaggio Della Fusoliera
126. Far scorrere il tubo dello stabilizzatore nella tasca sul retro 131. Far scorrere la fusoliera anteriore in posizione sulla fusoliera della fusoliera. Centrare il tubo nella fusoliera. posteriore. Le due parti si incastreranno perfettamente. 127. Collegare il cavo del servo dell’equilibratore e la prolunga 132. -
Seite 85: Montaggio Delle Prese D'aria
136. Far scorrere il tubo nella tasca nella fusoliera. Collegare i cavi di alettoni e flap alle prolunghe. Instradare i cavi per la retrazione dei carrelli e i freni dentro l’ala. 137. Far scorrere l’ala fino a serrarla contro la fusoliera. 141. -
Seite 86: Baricentro (Cg)
145. Inserire una rondella di sicurezza da 4 mm e una rondella da BARICENTRO (CG) 4 mm sulla vite a esagono incassato M4 x 20 per l’attacco Una fase importante della preparazione al volo è quella della individuazione di un bilanciamento accurato. La gamma di della pinna ventrale. -
Seite 87: Corse Dei Comandi
CORSE DEI COMANDI MISCELAZIONE Compensazione flap-elevatore Accendere la trasmittente e la ricevente del modello. Controllare il movimento del timone con il radiocomando. Non c’è un valore preciso per il trim in basso necessario quando si applicano i flap. Questo può variare leggermente da Quando si sposta lo stick a destra il timone si deve spostare verso destra. -
Seite 88: Garanzia
Se il prodotto non verrà Garanzia esclusiva - Horizon Hobby, LLC (Horizon) garantisce che il prodotto acquistato (il “Prodotto”) sarà privo di manipolato in maniera sicura e responsabile potrebbero risultare delle lesioni, dei gravi danni a persone, al prodotto o difetti relativi ai materiali e di eventuali errori di montaggio alla data di acquisto. -
Seite 89: Contatti Per La Garanzia E L'assistenza
Horizon Hobby GmbH Dichiarazione di Conformità EU AVVISO RAEE: Con la presente, Horizon Hobby, LLC dichiara Questo dispositivo è marcato ai sensi della che il dispositivo è conforme a quanto segue: Direttiva europea 2012/19/UE riguardante i rifiuti di apparecchiature elettriche ed elettroniche (RAEE). -
Seite 90: Turbine 60-85N
(565 mm) 84 in (2133 mm) EN Remove ventral fins for transport DE Stabilisierungsflosse zum Transport entfernen 7 in FR Retirez les dérives ventrales pour le transport (178 mm) IT Rimuovere le pinne ventrali per il trasporto (248 mm) 79 in (2003 mm) SPECIFICATIONS •... - Seite 91 Aermacchi MB-339...
- Seite 92 © 2022 Horizon Hobby, LLC. Hangar 9, AS3X, Avian, IC3, and the Horizon Hobby logo are trademarks or registered trademarks of Horizon Hobby, LLC. The Spektrum trademark is used with permission of Bachmann Industries, Inc. All other trademarks, service marks and logos are the property of their respective owners.