Herunterladen Inhalt Inhalt Diese Seite drucken

Becker Centronic TimeControl TC52 Bedienungsanleitung

Zeitschaltuhr für lichtsensor
Vorschau ausblenden Andere Handbücher für Centronic TimeControl TC52:
Inhaltsverzeichnis

Werbung

Verfügbare Sprachen

Verfügbare Sprachen

Centronic TimeControl TC52
Bedienungsanleitung
Operating Instructions
Notice d'utilisation
Gebruiksaanwijzing
Zeitschaltuhr für Lichtsensor
Light Sensor Timer
Horloge pour capteur
de luminosité
Tijdschakelklokvoor lichtsensor
Bitte bewahren Sie die Anleitung auf!
Please keep these instructions in a safe place!
Prière de conserver ces instructions d'utilisation!
De handleiding goed bewaren!
DE
GB
FR
NL
Reset
M
-
+
U30
OK

Werbung

Inhaltsverzeichnis
loading

Inhaltszusammenfassung für Becker Centronic TimeControl TC52

  • Seite 1 Centronic TimeControl TC52 Bedienungsanleitung Operating Instructions Notice d’utilisation Gebruiksaanwijzing Zeitschaltuhr für Lichtsensor Light Sensor Timer Horloge pour capteur de luminosité Reset Tijdschakelklokvoor lichtsensor Bitte bewahren Sie die Anleitung auf! Please keep these instructions in a safe place! Prière de conserver ces instructions d’utilisation!
  • Seite 2: Inhaltsverzeichnis

    Inhaltsverzeichnis Gewährleistung ............................4 Sicherheitshinweise ........................... 5 Anzeigen- und Tastenerklärung ......................6 Allgemeines ..............................7 Bestimmungsgemäße Verwendung ...................... 7 Montage/Anschluss ............................ 7 Lichtsensor ..............................10 Erklärungen ..............................10 Einstellungen .............................. 15 Inbetriebnahme ............................18 Werkseinstellung ............................18 Programmierung ............................19 Technische Daten ............................
  • Seite 3 Sommaire Prestation de Garantie ..........................68 Consignes de sécurité ..........................69 Explication des textes d’affichage et des touches ............... 70 Généralités ..............................71 Utilisation conforme à la destination ....................71 Montage/Branchement ........................... 71 Capteur de luminosité ..........................74 Explications ..............................74 Réglages ...............................
  • Seite 4: Gewährleistung

    Allgemeine Konformitätserklärung ....................34 Was tun, wenn...? ............................. 35 Gewährleistung Becker-Antriebe GmbH ist von der gesetzlichen und vertraglichen Gewährleistung für Sachmängel und Produkthaftung befreit, wenn ohne unsere vorherige Zustimmung eige- ne bauliche Veränderungen und/oder unsachgemäße Installationen gegen unsere vorge- gebenen Montagerichtlinien vorgenommen, ausgeführt oder veranlasst werden.
  • Seite 5: Sicherheitshinweise

    Räume nach VDE 100, sind beim Anschluss einzuhalten. • Nur in trockenen Räumen verwenden. • Verwenden Sie nur unveränderte Becker Originalteile. • Halten Sie Personen aus dem Fahrbereich der Anlagen fern. • Halten Sie Kinder von Steuerungen fern.
  • Seite 6: Anzeigen- Und Tastenerklärung

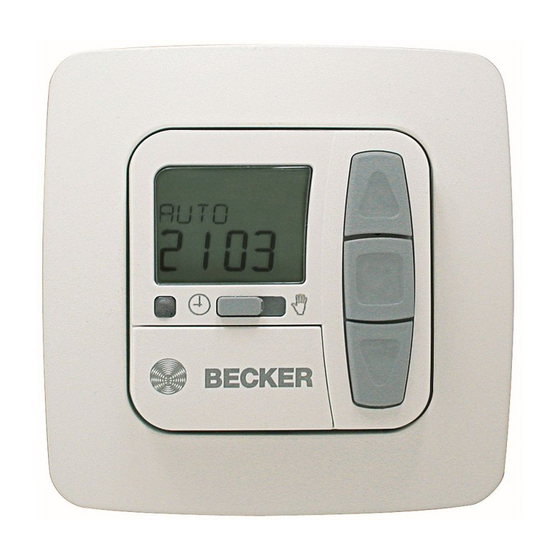
    Bedienungsanleitung Anzeigen- und Tastenerklärung Hand- / Automatik- Schiebeschalter AUF-Taste STOPP-Taste Notsignal- kontrollleuchte AB-Taste Abdeckklappe Tasten unter der Abdeckklappe RESET-Taste Reset MENUE-Taste OK-Taste TC52 - Taste + Taste Displaysymbolik Einstellung Programm Funktion Uhr/Datum Astro Textzeile Auffahrt Ziffernanzeige Abfahrt Wochentage (Mo.-So.) 1 2 3 4 5 6 7...
  • Seite 7: Allgemeines

    Bedienungsanleitung Allgemeines Die vom Werk mit aktuellem Datum und Uhrzeit (MEZ) ausgelieferte TC52, steuert den Antrieb automatisch zu den Astrozeiten (Sonnenauf- und Untergangszeiten). Eine manu- elle Bedienung die TC52 ist jederzeit möglich. Durch den Batteriebetrieb ist auch bei abgezogenen Bedienteil eine Programmierung möglich, da die Anzeige erhalten bleibt.
  • Seite 8: Anschluss Als Antriebssteuergerät

    • Wird mehr als ein Antrieb über die TC52 angesteuert, müssen die Antriebe durch Relaissteuerungen entkoppelt werden. Diese Entkopplung entfällt bei Becker-Antrieben mit elektronischer Endabschaltung. Beachten Sie den Schaltstrom des Gerätes. 1. Schließen Sie das Netzteil der TC52 wie folgt an: Rohrantrieb grün-gelb...
  • Seite 9: Anschluss Als Gruppensteuergerät

    Bedienungsanleitung Anschluss als Gruppensteuergerät Achtung Wird die Steuerung z.B. als Gruppensteuergerät verwendet, darf keine Brücke zwi- schen den Klemmen L und C eingelegt sein! 1. Schließen Sie das Netzteil der TC52 wie folgt an: Rohrantrieb grün-gelb blau braun/schwarz schwarz/braun Brücke EINZEL ZENTRAL Zentral- Leitung...
  • Seite 10: Lichtsensor

    Bedienungsanleitung Lichtsensor Hinweis Es kann am Gerät ein Lichtsensor angeschlossen werden, siehe Bedienungsan- leitung Centronic SensorControl SC43. Erklärungen Hand/Auto Schiebeschalter In der Schiebeschalterstellung „Hand“ werden nur manuelle Fahrbefehle ausgeführt (z.B.: AUF, STOP, AB per Tastendruck). In der Schiebeschalterstellung „Auto“ werden automatische Fahrbefehle ausgeführt (z.B. Beschattungsfunktion, Dämmerungsfunktion, Zeit, Astrofunktion,...) Notsignalkontrollleuchte Ein Notsignal wird durch das Aufleuchten der Notsignalkontrollleuchte signalisiert.
  • Seite 11: Reset-Taste

    Bedienungsanleitung +/- Tasten Folgende Bedienungen sind über + und - möglich: • Menü Wert verändern • Auto-Betrieb Informationen abfragen • + Taste Nächste automatische Schaltzeit • - Taste Nächste automatische Schaltzeit • + Taste und OK Taste Astrozeit • - Taste und OK Taste Astrozeit MENUE-Taste Durch Drücken der MENUE-Taste gelangen Sie in die Menüübersicht oder in den...
  • Seite 12 Bedienungsanleitung ASTRO Die TC52 steuert automatisch den Rollladen oder die Jalousie zu den Sonnenauf- und Sonnenuntergangszeiten. Diese Zeiten gelten als Richtwerte. Winterzeit Sommerzeit Winterzeit Sonnenaufgang 05:00 Uhr 07:00 Uhr 9:00 Uhr Astro-Funktion Jan. Feb. Mär. Apr. Jun. Jul. Aug. Sep. Okt.
  • Seite 13 Bedienungsanleitung WOCHE Mit dem Menü WOCHE legen Sie gleiche Fahrzeiten von Montag - Sonntag (1-7) fest. BLOCK Mit dem Menü BLOCK stellen Sie zwei Blöcke ein. Block 1: legt die Fahrzeiten für Montag - Freitag (1-5) fest. Block 2: legt die Fahrzeiten für Samstag und Sonntag (6,7) fest. EINZEL Mit dem Menü...
  • Seite 14 Bedienungsanleitung OFFSET Mit dem Menü OFFSET kann eine zusätzliche Schaltzeit programmiert werden. Diese ist abhängig von der PROG1 Schaltzeit (max. +/- 240 Min.). Beispiel: Astrozeit : 20:00 Offset : +60 Min. Der Rollladen fährt um 20.00 Uhr in Lüftungsposition und um 21.00 Uhr in die untere Endlage.
  • Seite 15: Einstellungen

    Bedienungsanleitung Einstellungen EINSTELLUNG Im Menü EINSTELLUNG haben Sie folgende Möglichkeiten: • URLAUB • SONNE (bei angeschlossenem Sensor) • DAEMMER (bei angeschlossenem Sensor) • ZWISCHENPOSITION • LUEFTUNG/WENDUNG • PROG1 (ENDLAGE, ZWISCHENPOSITION, LUEFTUNG/WENDUNG) • PROG2 (ENDLAGE, ZWISCHENPOSITION, LUEFTUNG/WENDUNG) • TEST MODUS (bei angeschlossenem Sensor) •...
  • Seite 16 Bedienungsanleitung LUEFTUNG/WENDUNG Die Lüftungs-/Wendeposition ist eine frei wählbare Position des Rollladens/Jalousie, zwischen der unteren und oberen Endlage. Mit dieser Funktion können Sie den Rollladen aus der unteren Endlage soweit wieder auffahren, bis die Lüftungsschlitze geöffnet sind. Bei der Jalousie erfolgt die Lamellenwendung. Dazu drücken Sie die AUF-Taste zweimal kurz nacheinander.
  • Seite 17 Bedienungsanleitung LAENGE/BREITE/ZEITZONE (nur bei EXPERTEN MODUS ON) Ihre Koordinaten ermitteln Sie z.B. mit Hilfe eines Atlas. SO/WI SO/WI bezeichnet die automatische Sommer-/Winterzeitumschaltung. Werkseinstellung ist ON; die Zeitschaltuhr passt sich automatisch an. FUNKTION Dieser Modus ist nur für ausgebildetes Fachpersonal bestimmt! (Erscheint nur bei abgezogenem Bedienteil) Im Menü...
  • Seite 18: Inbetriebnahme

    Bedienungsanleitung Inbetriebnahme Mit dem ersten Tastendruck „wecken“ Sie die Uhr auf. Sie können nun mit den +/- Tasten die Sprache wählen und diese mir der OK Taste übernehmen. Die Uhr befindet sich im Automatikmodus. Werkseinstellung UHR/DAT: aktuelle MEZ und aktuelles Datum PROGRAMM: ASTRO BLOCK...
  • Seite 19: Menüübersicht

    Bedienungsanleitung Programmierung Menüübersicht Betriebsmodus UHR/DAT PROGRAMM EINSTELLUNG FUNKTION PROG1 PROG2 1. Drücken Sie die MENUE-Taste UHR/DAT erscheint. 2. Um weitere Menüs auszuwählen, drücken Sie die +/- Tasten. 3. Drücken Sie die MENUE-Taste, um in den Betriebsmodus zu gelangen. UHR/DAT (Uhrzeit und Datum einstellen) UHR/DAT UHRZEIT JAHR...
  • Seite 20 Bedienungsanleitung PROGRAMM PROG1/ ASTRO WOCHE (Astrofunktion für Woche + Sperrzeiten PROG1/ ASTRO BLOCK (Astrofunktion für Block1/2 + Sperrzeiten PROG1/ ASTRO EINZEL (Astrofunktion für Einzel + Sperrzeiten PROG1 ASTRO WOCHE SPERRZEIT SPERRZEIT PROGRAMM 1. Drücken Sie die MENUE-Taste. 2. Um das Menü PROGAMM auszuwählen, drücken Sie die + Taste bis PROGAMM er- scheint.
  • Seite 21 Bedienungsanleitung PROGRAMM PROG1/ ASTRO ABEND WOCHE (Astrofunktion Abend für Woche + Schaltzeit + Sperrzeit PROG1/ ASTRO ABEND BLOCK (Astrofunktion Abend für Block1/2 + Schaltzeit + Sperrzeit PROG1/ ASTRO ABEND EINZEL (Astrofunktion Abend für Einzel + Schaltzeit + Sperrzeit PROG1 ASTRO WOCHE SCHALTZEIT ABEND...
  • Seite 22 Bedienungsanleitung PROGRAMM PROG1/ INDIVIDUELL WOCHE (Individuelle Schaltzeit für Woche) PROG1/ INDIVIDUELL BLOCK (Individuelle Schaltzeit für Block1/2) PROG1/ INDIVIDUELL EINZEL (Individuelle Schaltzeit für Einzel) PROG1 INDIVIDUELL WOCHE SCHALTZEIT SCHALTZEIT PROGRAMM 1. Drücken Sie die MENUE-Taste. 2. Um das Menü PROGAMM auszuwählen, drücken Sie die + Taste bis PROGAMM er- scheint.
  • Seite 23 Bedienungsanleitung PROGRAMM PROG2/ INDIVIDUELL WOCHE (Individuelle Schaltzeit für Woche) PROG2/ INDIVIDUELL BLOCK (Individuelle Schaltzeit für Block1/2) PROG2/ INDIVIDUELL EINZEL (Individuelle Schaltzeit für Einzel) PROG2 INDIVIDUELL WOCHE SCHALTZEIT SCHALTZEIT PROGRAMM 1. Drücken Sie die MENUE-Taste. 2. Um das Menü PROGAMM auszuwählen, drücken Sie die + Taste bis PROGAMM er- scheint.
  • Seite 24 Bedienungsanleitung PROGRAMM PROG2/OFFSET (z.B. Abfahrzeit Abend auf Lüftungsposition) PROG2 OFFSET OFFSET PROGRAMM 1. Drücken Sie die MENUE-Taste. 2. Um das Menü PROGAMM auszuwählen, drücken Sie die + Taste bis PROGAMM er- scheint. 3. Bestätigen Sie mit OK. 4. Drücken Sie die + Taste PROG2 erscheint. 5.
  • Seite 25: Einstellung

    Bedienungsanleitung EINSTELLUNG URLAUB, LICHTSENSOR (Urlaub OFF/ON, Sonne/Dämmerung) LICHT- EINSTELLUNG URLAUB OFF SENSOR VORHANDEN? URLAUB ON SONNE DAEMMER 1. Drücken Sie die MENUE-Taste. 2. Um das Menü EINSTELLUNG auszuwählen, drücken Sie die + Taste bis EINSTELLUNG erscheint. 3. Bestätigen Sie mit OK. 4.
  • Seite 26 Bedienungsanleitung EINSTELLUNG ZWISCHENPOSITION, LUEFTUNG/WENDUNG, Prog1 ENDLAGE (Zeit/Lageprogrammierung) ZWISCHEN- LUEFTUNG PROG1 POSITION (WENDUNG) ENDLAGE PROG1 ZWISCHEN- POSITION PROG1 LUEFTUNG 1. Sie haben die Menüpunkte URLAUB/LICHTSENSOR bestätigt. ZWISCHENPOSITION er- scheint. 2. Mit der +/- Taste können Sie die Fahrzeit zur ZWISCHENPOSITION einstellen. Die An- gabe der Fahrzeit erfolgt in Sekunden oder Sie fahren die ZWISCHENPOSITION mit der AB-/AUF-Taste aus der oberen Endlage an.
  • Seite 27 Bedienungsanleitung EINSTELLUNG Prog2 ENDLAGE (Zeit/Lageprogrammierung) PROG2 ENDLAGE PROG2 ZWISCHEN- POSITION PROG2 LUEFTUNG Hinweis Nur wenn in PROG2 eine Zeit eingestellt ist, wird Ihnen dieses Dialogfenster ange- zeigt. 1. Sie haben den Menüpunkt PROG1 ENDLAGE bestätigt. PROG2 ENDLAGE erscheint. 2. Mit der +/- Taste können Sie zwischen PROG 2 ENDLAGE, PROG 2 ZWISCHEN- POSITION und PROG 2 LUEFTUNG/WENDUNG auswählen.
  • Seite 28 Bedienungsanleitung EINSTELLUNG DEUTSCH/ ASTROVERSCHIEBUNG (Sprachauswahl, Astroverschiebung) TEST MODUS ASTROVER- ASTROVER- DEUTSCH ON/OFF SCHIEBUNG SCHIEBUNG Hinweis Nur wenn ein Lichtsensor im Gerät eingesteckt ist, wird Ihnen der Menüpunkt TEST MODUS angezeigt. 1. Sie haben den Menüpunkt PROG2 ENDLAGE bestätigt. TEST MODUS ON/OFF er- scheint.
  • Seite 29 Bedienungsanleitung EINSTELLUNG (Städteauswahl, EXPERTEN MODUS (LAENGE, BREITE, ZEITZONE) EXPERTEN KASSEL MODUS ON/OFF LAENGE BREITE ZEITZONE 1. Sie haben die Funktion ASTROVERSCHIEBUNG bestätigt. Stadtauswahl (KASSEL) erscheint. 2. Mit der +/- Taste können Sie die nächstgelegene Stadt einstellen. 3. Betätigen Sie mit OK. Hinweis Diese Dialogfenster werden nur angezeigt, wenn im Funktionsmenü...
  • Seite 30 Bedienungsanleitung EINSTELLUNG SO/WI (Automatische Sommer-/Winterzeitumstellung) SO/WI EINSTELLUNG SO/WI 1. Sie haben die Funktion ZEITZONE bestätigt. SO/WI erscheint. 2. Mit der +/- Taste können Sie SO/WI ein- oder ausschalten. 3. Bestätigen Sie Ihre Auswahl mit OK. 4. Drücken Sie die MENUE-Taste, um in den Betriebsmodus zu gelangen.
  • Seite 31 Bedienungsanleitung FUNKTION (nur bei abgezogenem Bedienteil, nur für Fach- personal) ROLLLADEN/JALOUSIE, ANTRIEBSSTEUERGERAET/GRUPPENSTEUERGERAET, LAUF- ZEIT (Auswahl des Behanges, Auswahl als Antriebssteuergerät/Gruppensteuergerät, Laufzeit des Rollladens/Jalousie) ANTRIEBSSTEUER ROLLLADEN/ FUNKTION LAUFZEIT GERAET/GRUPPEN JALOUSIE STEUERGERAET 1. Drücken Sie die MENUE-Taste. 2. Um das Menü FUNKTION auszuwählen, drücken Sie die + Taste bis FUNKTION er- scheint.
  • Seite 32 Bedienungsanleitung FUNKTION (nur bei abgezogenem Bedienteil, nur für Fach- personal) EXTERN ON/OFF/SCHALTER, NOTSIGNAL ON/OFF (Verarbeitung externer Signale, Verarbeitung von Notsignalen) Antriebssteuer- EXTERN ON gerät ? EXTERN OFF NOTSIGNAL ON EXTERN NOTSIGNAL OFF SCHALTER 1. Sie haben die Funktion LAUFZEIT bestätigt. EXTERN ON erscheint. (EXTERN ON/ OFF/ SCHALTER bezeichnet die externen Steuersignale.
  • Seite 33 Bedienungsanleitung FUNKTION (nur bei abgezogenem Bedienteil, nur für Fach- personal) ERSTINBETRIEBNAHME, RELAIS, GES-ZEIT EXPERTEN ERSTIN- MODUS RELAIS GES-ZEIT BETRIEBNAHME OFF/ON FUNKTION (Datum der Erstinbetriebnahme, Relaisschalthäufigkeit, Gesamtlaufzeit) 1. Sie haben die Funktion NOTSIGNAL ON/OFF bestätigt EXPERTEN MODUS OFF/ON er- scheint. 2. Mit der +/- Taste können Sie die gewünschte Einstellung auswählen. 3.
  • Seite 34: Technische Daten

    Reinigen Sie das Gerät nur mit einem feuchten Tuch. Verwenden Sie kein Reinigungs- mittel, da dieses den Kunststoff angreifen kann. Allgemeine Konformitätserklärung Hiermit erklärt die Firma Becker-Antriebe GmbH, dass sich das Gerät Centronic TimeControl TC52 in Übereinstimmung mit den grundlegenden Anforderungen und den anderen relevanten Vorschriften der Richtlinie 1999/5/EG befindet.
  • Seite 35: Was Tun, Wenn

    Bedienungsanleitung Was tun, wenn...? ö t e f l e i r u ä . t h . s s ü r e i r u ä . s s h ä l i e c s l t l a .
  • Seite 36: Warranty

    What to do if...? ............................67 Warranty Becker-Antriebe GmbH will be released from all warranty and product liability obliga- tions if the customer modifies the equipment without prior approval from Becker- Antriebe GmbH or if the equipment is installed incorrectly and/or contrary to the speci- fied installation instructions, by the customer or a third party.
  • Seite 37: Safety Instructions

    VDE 100 are to be observed when the system is connected. • Use in dry rooms only. • Use only unmodified Becker original parts. • Keep persons away from the systems guide track. • Keep away from controls.
  • Seite 38: Explanation Of Displays And Buttons

    Operating Instructions Explanation of displays and buttons Manual / automatic sliding switch UP button STOP button alarm signal control light DOWN button cover Buttons under the cover RESET-button Reset MENU button OK-button TC52 - button + button Display symbols Setting Programme Function Time/date...
  • Seite 39: General Information

    Operating Instructions General Information The TC52, delivered from the factory with the current date and time (GMT), automatically controls the drive at the astro times (sunrise and sunset). It is possible to manually operate the TC52 at any time. Battery operation makes it also possible to programme the drive when the operating device is disconnected since the display is maintained.
  • Seite 40 • Terminal connections must be carried out by an authorised electrician! • If more than one drive is controlled using the TC52, the drives must be decoupled by relay controls. This decoupling is not applicable to Becker drives with electronic limit stop.
  • Seite 41 Operating Instructions Connection as a group controller Attention If the control is used as a group control device, for example, no bridge can be inserted between the L and C terminals! 1. Connect the power supply unit to the TC52 as follows: Tubular drive green/yellow blue...
  • Seite 42: Light Sensor

    • Terminal connections must be carried out by an authorised electrician! • If more than one drive is controlled using the TC52, the drives must be decoupled by relay controls. This decoupling is not applicable to Becker drives with electronic limit stop.
  • Seite 43: Menu Button

    Operating Instructions +/- buttons The following operations are possible using the + and - buttons: • Menu change value • Auto mode request information • + button next automatic switching time • - button next automatic switching time • + button and OK Taste astro time •...
  • Seite 44 Operating Instructions ASTRO The TC52 automatically controls the roller shutters or blinds at sunrise and sunset. These times are used as guidelines. winter time summer time winter time sun rise 05:00 h 07:00 h 09:00 h astro shift Mar. Jan. Feb.
  • Seite 45 Operating Instructions WEEK Using the WEEK menu, you can set the same switching times from Monday - Sunday (1-7). BLOCK Using the BLOCK menu, you can set two blocks. Block 1: sets the switching times for Monday - Friday (1-5). Block 2: sets the switching times for Saturday and Sunday (6,7).
  • Seite 46 Operating Instructions OFFSET An additional switching time (OK) can be programmed using the OFFSET menu. This depends on the PROG 1 switching time (max. +/- 240 mins.). For example: astro time : 20:00 Offset : +60 mins. The roller shutter moves to the intermediate position at 20.00 and to the lower end limit at 21.00.
  • Seite 47: Settings

    Operating Instructions Settings SETTING The SETTING menu gives you the following options: • HOLIDAY SETTING • SUN (when sensor is connected) • TWILIGHT SETTING (when sensor is connected) • INTERMEDIATE POSITION • VENTILATION/REVERSE • PROG 1 (END LIMIT, INTERMEDIATE POSITION, VENTILATION/REVERSE) •...
  • Seite 48 Operating Instructions VENTILATION/REVERSE The ventilation/reversing position is a position of the roller shutter/blind between the upper and lower limits that can be freely selected. Using this function, you can raise the shutter from the lower end limit until the ventilation slits are open. The slats of the blind will be turned.
  • Seite 49 Operating Instructions LONGITUDE/LATITUDE/TIME ZONE (only when EXPERT MODE is ON) You can find out your coordinates, for example, with the aid of an atlas. SUMMER/WINTER SUMMER/WINTER describes the automatic clock adjustment for daylight saving changes. If the default setting is ON, the time switch adjusts automatically. FUNCTION This mode is only intended for qualified electricians! (Will only appear when the operating device is disconnected)
  • Seite 50: Initial Operation

    Operating Instructions Initial operation Press the button once to „wake up“ the timer. Now you can select the language with the +/- buttons and accept it with the OK button. The clock is in automatic mode. Default setting TIME/DATE: current GMT and current date PROGRAMME: ASTRO BLOCK...
  • Seite 51: Programming

    Operating Instructions Programming Operating mode Overview of the menu Operating mode TIME/DAT PROGRAMME SETTING FUNCTION PROG1 PROG2 1. Press the MENU button until TIME/DATE appears. 2. To select further menus, press the +/- buttons. 3. Press the MENU button to switch to operating mode. TIME/DATE (to set the time and date) TIME/DAT TIME...
  • Seite 52 Operating Instructions PROGRAMME PROG1/ ASTRO WEEK (Astro function for week + idle period PROG1/ ASTRO BLOCK (Astro function for block1/2 + idle period PROG1/ ASTRO INDIVIDUAL (Astro function for individual + idle period PROG1 ASTRO WEEK IDLE PERIOD IDLE PERIOD PROGRAMME 1.
  • Seite 53 Operating Instructions PROGRAMME PROG1/ ASTRO EVENING WEEK (Astro function evening for week + switching time + idle period PROG1/ ASTRO EVENING BLOCK (Astro function evening for block 1/2 + switching time + idle period PROG1/ ASTRO EVENING INDIVIDUAL (Astro function evening for individual + switching time + idle period PROG1 ASTRO...
  • Seite 54 Operating Instructions PROGRAMME PROG1/INDIVIDUAL WEEK (Individual switching time for week) PROG1/INDIVIDUAL BLOCK (Individual switching time for block1/2) PROG1/INDIVIDUAL INDIVIDUAL (Individual switching time for individual day) PROG1 SWITCHING SWITCHING INDIVIDUAL WEEK TIME TIME PROGRAMME 1. Press the MENU button. 2. To select the PROGAMME menu, press the + button until PROGAMME appears.
  • Seite 55 Operating Instructions PROGRAMME PROG1/ INDIVIDUAL WEEK (Individual switching time for week) PROG1/ INDIVIDUAL BLOCK (Individual switching time for block1/2) PROG1/ INDIVIDUAL INDIVIDUAL (Individual switching time for individual day) PROG2 SWITCHING SWITCHING INDIVIDUAL WEEK TIME TIME PROGRAMME 1. Press the MENU button. 2.
  • Seite 56 Operating Instructions PROGRAMME PROG2/OFFSET (e.g. Time shutters are lowered to ventilation position in the evening) PROG2 OFFSET OFFSET PROGRAMME 1. Press the MENU button. 2. To select the PROGAMME menu, press the + button until PROGAMME appears. 3. Confirm by pressing OK. 4.
  • Seite 57 Operating Instructions SETTING HOLIDAY, LIGHT SENSOR (Holiday OFF/ON, sun/twilight setting) LIGHT SETTING HOLIDAY OFF SENSOR CONNECTED? HOLIDAY ON TWILIGHT SETTING 1. Press the MENU button. 2. To select the SETTING menu, press the + button until SETTING appears. 3. Confirm by pressing OK. 4.
  • Seite 58 Operating Instructions SETTING INTERMEDIATE POSITION, VENTILATION/REVERSE, Prog1 END LIMIT (Time/ position programming) INTERMEDIATE VENTILATION PROG1 POSITION (REVERSE) END LIMIT PROG1 INTERMEDIATE POSITION PROG1 VENTILATION 1. You have confirmed the HOLIDAY/LIGHT SENSOR menu levels. INTERMEDIATE POSI- TION will appear. 2. You can set the switching time to move to the INTERMEDIATE POSITION using the +/- button.
  • Seite 59 Operating Instructions SETTING Prog2 END LIMIT (Time/position programming) PROG2 END LIMIT PROG2 INTERMEDIATE POSITION PROG2 VENTILATION Note This dialog window will only be displayed if a time is set in PROG2. 1. You have confirmed the PROG1 END LIMIT menu level. PROG2 END LIMIT will appear. 2.
  • Seite 60 Operating Instructions SETTING ENGLISH GB/ ASTRO SHIFT (Language, astro shift) TEST MODE ENGLISH GB ASTRO SHIFT ASTRO SHIFT ON/OFF Note The TEST MODE menu level will only be displayed if a light sensor is connected to the device. 1. You have confirmed the PROG2 END LIMIT menu level. TEST MODE ON/OFF will ap- pear.
  • Seite 61 Operating Instructions SETTING (City, EXPERT MODE (LONGITUDE, LATITUDE, TIME ZONE) EXPERT LONDON MODE ON/OFF LONGITUDE LATITUDE TIME ZONE 1. You have confirmed the function ASTRO SHIFT . The city selected (LONDON) will appear. 2. You can set the nearest town using the +/- button. 3.
  • Seite 62 Operating Instructions SETTING SUMMER/WINTER (Automatic clock adjustment for daylight saving changes) SUMMER/WINTER SETTING SUMMER/WINTER 1. You have confirmed the TIME ZONE function. SUMMER/WINTER will appear. 2. You can switch SUMMER/WINTER on or off using the +/- button. 3. Confirm your selection by pressing OK. 4.
  • Seite 63 Operating Instructions FUNCTION (only when the operating device is disconnected, only for qualified electricians) ROLLER SHUTTER/BLIND, DRIVE CONTROLLER/ GROUP CONTROLLER, RUNNING TIME (Selection of shutter/blind, selection of the drive controller/ group controller, running time of the roller shutter/blind) DRIVE CON- ROLLER SHUTTER/ FUNCTION TROLLER/GROUP...
  • Seite 64 Operating Instructions FUNCTION (only when the operating device is disconnected, only for qualified electricians) EXTERNAL ON/OFF/SWITCH, ALARM SIGNAL ON/OFF (Processing external signals, processing alarm signals) Drive EXTERNAL ON controller ? EXTERNAL OFF ALARM SIGNAL EXTERNAL SWITCH ALARM SIGNAL 1. You have confirmed the RUNNING TIME function. EXTERNAL ON will appear. (EXTER- NAL ON/ OFF/ SWITCH describes the external control signals.
  • Seite 65 Operating Instructions FUNCTION (only when the operating device is disconnected, only for qualified electricians) INITIAL OPERATION, RELAY, TOTAL RUNNING TIME (Date of initial operation, relay switching rate, total running time) EXPERT INITIAL TOTAL RUNNING MODE RELAY OPERATION TIME OFF/ON FUNCTION 1.
  • Seite 66: Technical Data

    Clean the device with a damp cloth only. Do not use a cleansing agent since this could damage the plastic. General declaration of conformity The company Becker hereby declares that the Centronic TimeControl TC52 is in conform- ity with the basic requirements and other relevant provisions of the Directive 1999/5/EC.
  • Seite 67: What To Do If

    Operating Instructions What to do if...? i t c y t l i l B y t l e r i . t i . t c . e t i t c i d r c t i y t i y t i t i t l / e...
  • Seite 68: Prestation De Garantie

    Que faire quand...? ........................... 99 Prestation de Garantie Becker-Antriebe GmbH est dégagé de la garantie et de la responsabilité du fait du pro- duit si, sans notre autorisation préalable, des modifications de construction sont effec- tuées et/ou des installations inadéquates sont exécutées ou engagées, à l'encontre de nos directives de montage prescrites.
  • Seite 69: Consignes De Sécurité

    VDE 100. • A utiliser uniquement dans des locaux secs. • Utilisez uniquement des pièces originales de Becker qui n’ont subi aucune mo- dification. • Veillez à ce que personne ne se tienne dans la zone de déploiement des installa- tions.
  • Seite 70: Explication Des Textes D'affichage Et Des Touches

    Notice d’utilisation Explication des textes d’affichage et des touches Curseur Manuel/Automatique Touche MONTEE Touche STOP Témoin de contrôle signal d'urgence Touche DESCENTE Couvercle rabattable Touches sous le couvercle rabattable Touche RESET Reset Touche MENU Touche OK TC52 - Touche + Touche Pictogrammes de l'affichage Réglage Programme...
  • Seite 71: Généralités

    Notice d’utilisation Généralités La TC52, livrée par l’usine avec la date et l’heure actuelles (heure de l’Europe centrale), pilote le moteur automatiquement aux heures astro (heures de lever et de coucher du soleil). Une commande manuelle de la TC52 est toujours possible. La programmation est possible même lorsque l’élément de commande est enlevé...
  • Seite 72 • Si la TC42 commande plus d’un moteur, les moteurs doivent être découplés par des commutations à relais. Ce découplage n’est pas nécessaire pour les moteurs Becker avec fin de course électronique. Observez le courant de commutation de l’appareil. 1. Pour brancher le bloc d’alimentation de la TC52, procédez comme suit :...
  • Seite 73 Notice d’utilisation Branchement comme appareil de commande de groupe Attention Si la commande est par exemple utilisée comme appareil de commande de groupe, il convient de ne pas mettre de pont en place entre les bornes L et C ! 1.
  • Seite 74: Capteur De Luminosité

    Notice d’utilisation Capteur de luminosité Remarque Un capteur de luminosité peut être connecté à l’appareil, voir à ce sujet les ins- tructions d’utilisation Centronic SensorControl SC43. Explications Curseur Manuel / Auto Lorsque le curseur est en position « Manuel », seules les commandes de marche manuel- les sont exécutées (p.
  • Seite 75: Touche Menu

    Notice d’utilisation Touches +/- Les touches + et - permettent les actions suivantes : • Menu Modification de la valeur • Service Auto Demande d’informations • Touche + horaire automatique suivant • Touche - horaire automatique suivant • Touche + et touche OK temps astro •...
  • Seite 76 Notice d’utilisation ASTRO La TC52 pilote automatiquement le volet roulant ou le store aux heures de lever et de coucher du soleil. Il s’agit de valeurs indicatives. Heure d’hiver Heure d’été Heure d’hiver Coucher du soleil 05 00 07h00 09h00 Fonction astro Mar.
  • Seite 77 Notice d’utilisation SEMAINE Le menu SEMAINE vous permet de régler les mêmes horaires de marche du lundi au dimanche (1-7). BLOC Le menu BLOC vous permet de régler deux blocs. Bloc 1 : définit les horaires de marche du lundi au vendredi (1-5). Bloc 2 : définit les horaires de marche du samedi et du dimanche (6,7).
  • Seite 78 Notice d’utilisation OFFSET Le menu OFFSET vous permet de régler un horaire (OK) supplémentaire. Celui-ci dé- pend de l’horaire PROG1 (maxi +/- 240 minutes). Exemple : Horaire astro : 20h00 Offset : +60 minutes Le volet descend à 20h00 en position d’aération et à 21h00 en fin de course inférieure.EINSTELLUNG Jan.
  • Seite 79: Réglages

    Notice d’utilisation Réglages Le menu REGLAGE vous offre les possibilités suivantes : • VACANCES • SOLEIL (avec capteur connecté) • CREPUSCULE (avec capteur connecté) • POS. INTERM • AERATION/INVERSION • PROG1 (POSITION FINALE, POS. INTERM, AERATION/INVERSION) • PROG2 (POSITION FINALE, POS. INTERM, AERATION/INVERSION) •...
  • Seite 80 Notice d’utilisation AERATION/INVERSION La position aération/inversion est une position du volet roulant/store qui peut être libre- ment sélectionnée entre la position finale supérieure et la position finale inférieure. Cette fonction vous permet de remonter le volet roulant à partir de la position finale inférieure jusqu’à...
  • Seite 81 Notice d’utilisation LONGITUDE/LATITUDE/ZONE HORAIRE (seulement avec MODE EXPERT ON) Vous pouvez déterminer vos coordonnées, p. ex., à l’aide d’un atlas. ETE/HIVER ETE/HIVER désigne la commutation automatique entre les heures d’été et d’hiver. Le réglage usine est ON ; l’horloge s’adapte automatiquement. FONCTION Ce mode est réservé...
  • Seite 82: Mise En Service

    Notice d’utilisation Mise en service En appuyant une première fois sur la touche, vous « réveillez » l’horloge. Vous pouvez maintenant sélectionner la langue avec les touches +/- et la confirmer avec la touche OK. L’horloge est en mode Automatique. Paramétrage usine HEURE/DATE : heure de l’Europe centrale actuelle et date actuelle...
  • Seite 83: Vue D'ensemble Du Menu

    Notice d’utilisation Programmation Vue d’ensemble du menu Mode de service HEURE/DATE PROGRAMME REGLAGE FONCTION PROG1 PROG2 1. Appuyez sur la touche MENU, HEURE/DATE apparaît. 2. Pour sélectionner d’autres menus, appuyez sur les touches +/-. 3. Appuyez sur la touche MENU pour accéder au mode de service. HEURE/DATE (régler l’heure et la date) HEURE/DATE HEURE...
  • Seite 84 Notice d’utilisation PROGRAMME PROG1/ ASTRO SEMAINE (fonction astro pour semaine + horaire de blocage PROG1/ ASTRO BLOC (fonction astro pour BLOC1/2 + horaire de blocage PROG1/ ASTRO SEUL (fonction astro pour seul + horaire de blocage PROG1 HORAIRE HORAIRE ASTRO SEMAINE DE BLOCAGE DE BLOCAGE...
  • Seite 85 Notice d’utilisation PROGRAMME PROG1/ ASTRO SOIR SEMAINE (fonction astro soir pour semaine + horaire + horaire de blocage PROG1/ ASTRO SOIR BLOC (fonction astro soir pour bloc1/2 + horaire + horaire de blocage PROG1/ ASTRO SOIR SEUL (fonction astro soir pour seul + horaire + horaire de blocage PROG1 ASTRO...
  • Seite 86 Notice d’utilisation PROGRAMME PROG1/ INDIVIDUEL SEMAINE (horaire individuel pour semaine) PROG1/ INDIVIDUEL BLOC (horaire individuel pour bloc 1/2) PROG1/ INDIVIDUEL SEUL (horaire individuel pour seul) PROG1 HORAIRE HORAIRE SEMAINE INDIVIDUEL DE BLOCAGE DE BLOCAGE PROGRAMME 1. Appuyez sur la touche MENU. 2.
  • Seite 87 Notice d’utilisation PROGRAMME PROG2/ INDIVIDUEL SEMAINE (horaire individuel pour semaine) PROG2/ INDIVIDUEL BLOC (horaire individuel pour bloc 1/2) PROG2/ INDIVIDUEL SEUL (horaire individuel pour seul) PROG2 HORAIRE HORAIRE SEMAINE INDIVIDUEL DE BLOCAGE DE BLOCAGE PROGRAMME 1. Appuyez sur la touche MENU. 2.
  • Seite 88 Notice d’utilisation PROGRAMME PROG2/OFFSET (p. ex. temps de descente soir sur position d’aération) PROG2 OFFSET OFFSET PROGRAMME 1. Appuyez sur la touche MENU. 2. Pour sélectionner le menu PROGRAMME, appuyez sur la touche + jusqu’à ce que PRO- GRAMME apparaisse. 3.
  • Seite 89 Notice d’utilisation REGLAGE VACANCES, CAPTEUR DE LUMINOSITE (Vacances OFF/ON, Soleil/Crépuscule) CAPTEUR DE REGLAGE VACANCES OFF LUMINOSITE EXISTANT ? VACANCES ON SOLEIL CREPUSCULE 1. Appuyez sur la touche MENU. 2. Pour sélectionner le menu REGLAGE, appuyez sur la touche + jusqu’à ce que RE- GLAGE apparaisse.
  • Seite 90 Notice d’utilisation REGLAGE POS. INTERM, AERATION/INVERSION, Prog1 POSITION FINALE (programmation de l’horaire /de la position) POS. AERATION PROG1 INTERM (INVERSION) POS. FINALE PROG1 POS. INTERM PROG1 AERATION 1. Vous avez confirmé les points de menu VACANCES/CAPTEUR DE LUMINOSITE. POS. INTERM apparaît. 2.
  • Seite 91 Notice d’utilisation REGLAGE Prog2 POSITION FINALE (programmation du temps/de la position) PROG2 POSITION FINALE PROG2 POS. INTERM PROG2 AERATION Remarque Cette fenêtre de dialogue s’affiche seulement lorsqu’un temps est réglé dans PROG2. 1. Vous avez confirmé le point de menu PROG1 POSITION FINALE. PROG2 POSITION FI- NALE apparaît.
  • Seite 92 Notice d’utilisation REGLAGE FRANÇAIS/ DECALAGE ASTRO (sélection de la langue, décalage astro) TEST MODE DECALAGE DECALAGE FRANÇAIS ON/OFF ASTRO ASTRO Remarque Le point de menu MODE TEST s’affiche seulement lorsqu’un capteur de luminosité est connecté à l’appareil. 1. Vous avez confirmé le point de menu PROG2 POSITION FINALE. MODE TEST ON/OFF apparaît.
  • Seite 93 Notice d’utilisation REGLAGE (Sélection de la ville, MODE EXPERT (LONGITUDE, LATITUDE, ZONE HORAIRE) MODE PARIS EXPERT ON/OFF LONGITUDE LATITUDE ZONE HORAIRE 1. Vous avez confirmé la fonction DECALAGE ASTRO . Sélection de la ville (PARIS) apparaît. 2. Vous pouvez régler la ville la plus proche avec la touche +/-. 3.
  • Seite 94 Notice d’utilisation REGLAGE ETE/HIVER (commutation automatique été/hiver) ETE/HIV REGLAGE ETE/HIV 1. Vous avez confirmé la fonction ZONE HORAIRE. ETE/HIVER apparaît. 2. Vous pouvez activer ou désactiver ETE/HIVER avec les touches +/-. 3. Confirmez votre sélection avec OK. 4. Appuyez sur la touche MENU pour accéder au mode de service.
  • Seite 95 Notice d’utilisation FONCTION (seulement lorsque l’élément de commande est enlevé, seulement pour le personnel spécialisé) VOLET ROULANT/STORE, APP. COMM MOT / APP. COMM GROUPE, TEMPS DE MAR- (sélection du tablier, sélection comme appareil de commande d’entraînement / d’appareil de commande de groupe, temps de marche du volet roulant/store) VOLET ROULANT/ ENTR/APP.
  • Seite 96 Notice d’utilisation FONCTION (seulement lorsque l’élément de commande est enlevé, seulement pour le personnel spécialisé) EXTERNE ON/OFF/COMMUTATEUR, SIGNAL SECOURS ON/OFF (traitement des signaux externes, traitement des signaux de secours) App. commande EXTERNE ON MOT ? EXTERNE OFF SIGNAL SECOURS COMMUTATEUR SIGNAL SECOURS 1.
  • Seite 97 Notice d’utilisation FONCTION (seulement lorsque l’élément de commande est enlevé, seulement pour le personnel spécialisé) 1e MISE EN SERVICE, RELAIS, TEMPS TOTAL (date de la 1e mise en service, fréquence de commutation des relais, temps de marche total) MODE 1e MISE TEMPS TOT EXPERT RELAIS...
  • Seite 98: Caractéristiques Techniques

    Déclaration de conformité générale La société Becker-Antriebe GmbH, déclare par la présente que l’appareil Centronic TimeControl TC52 est en conformité avec les exigences fondamentales et les autres pres- criptions pertinentes de la directive 1999/5/CE.
  • Seite 99: Que Faire Quand

    Notice d’utilisation Que faire quand...? e i l à . t c ô r r e l . t n . s a L t e M . t c s l i l a ’ . . n e ’ .
  • Seite 100: Garantieverlening

    Algemene conformiteitsverklaring ....................130 Wat te doen, als ...? ..........................131 Garantieverlening Becker-Antriebe GmbH is van de garantieverlening en de productaansprakelijkheid be- vrijd, wanneer zonder onze voorafgaande toestemming eigen bouwkundige constructie-wijzigingen zijn aangebracht en/of onvakkundige installaties worden door- gevoerd of in opdracht worden gegeven, die in strijd zijn met onze voorgeschreven montagerichtlijnen.
  • Seite 101: Aanwijzingen Voor De Veiligheid

    VDE 100 te worden aangehouden. • Uitsluitend in droge ruimte gebruiken. • Gebruik uitsluitend niet veranderde originele onderdelen van Becker. • Houd personen buiten het werkgebied van de installatie. • Houd kinderen op afstand van besturingsapparaten.
  • Seite 102: Verklaring Van Displays En Toetsen

    Gebruiksaanwijzing Verklaring van displays en toetsen Hand / Automatisch schuifschakelaar OP toets STOP-toets Noodsignaal controlelampje NEER toets Afdekklep Toetsen onder de afdekklep Reset-toets Reset MENU-toets OK-toets TC52 - Taste + toets Displaysymbolen Instelling Programma Functie Tijd/Datum Astro Tekstregel Cijferweergave Neer Wochentage (Mo.-So.) 1 2 3 4 5 6 7...
  • Seite 103: Algemeen

    Gebruiksaanwijzing Algemeen De door de fabriek van actuele datum en tijd voorziene (MET) TC52 stuurt de aandrijving automatisch op de astrotijden (tijd van zonsopgang en zonsondergang). Handmatige bediening van de TC52 is altijd mogelijk. Dankzij de werking op batterijen is, bij een uit de houder getrokken bedieningsgedeelte, programmering mogelijk, aangezien het display behouden blijft.
  • Seite 104: Aansluiting Als Individuele Bediening

    • Aansluiting uitsluitend door een geautoriseerde vakman! • Wanneer meer dan één aandrijving via de TC52 wordt geregeld, ontkoppel dan aandrijvingen dan d.m.v. relais. Deze ontkoppeling vervalt bij Becker aandrijvin- gen met elektronische eindschakelaar. Let op de schakelstroom van het apparaat.
  • Seite 105: Aansluiten Als Groepsbediening

    Gebruiksaanwijzing Aansluiten als groepsbediening Waarschuwing Wanneer de besturing bijv. als groepsbesturing wordt gebruikt, mag er geen brug tussen de klemmen L en C zijn geplaatst! 1. Sluit de voeding van de TC52 als volgt aan: Buisaandrijving groen-geel blauw bruin/zwart zwart/bruin brug INDIVIDUEEL CENTRAAL centrale-...
  • Seite 106: Lichtsensor

    Gebruiksaanwijzing Lichtsensor Aanwijzing Er kan een lichtsensor op het apparaat worden aangesloten, zie gebruiksaanwij- zing van de Centronic SensorControl SC43. Verklaringen Hand/ Auto schuifschakelaar In de stand „Hand“ van de schuifschakelaar worden uitsluitend handmatige commando’s uitgevoerd (bijv.: OP, STOP, NEER met een druk op de toets). In de stand „Auto“...
  • Seite 107 Gebruiksaanwijzing +/- toetsen De volgende bediening is met + en - mogelijk: • Menu Waarde veranderen • Auto-stand Informatie opvragen • +-toets Volgende automatische schakeltijd • - toets Volgende automatische schakeltijd • + toets en OK toets Astrotijd • - toets en OK -toets Astrotijd MENU-toets Door het indrukken van de MENU-toets komt men in het menuoverzicht of de bedrijfs-...
  • Seite 108 Gebruiksaanwijzing ASTRO De TC52 bestuurt automatisch de rolluiken of de jaloezie op de tijden van zonsopgang of zonsondergang. Deze tijden gelden als richtwaarden. Wintertijd Zomertijd Wintertijd Zonsopgang 05:00 uur 07:00 uur 9:00 uur Astro-Funktion Jan. Feb. Mrt. Apr. Jun. Jul. Aug.
  • Seite 109 Gebruiksaanwijzing WEEK Gebruik het menu WEEK om dezelfde schakeltijden voor maandag - zondag (1-7) vast te leggen. BLOK Gebruik het menu BLOK om de twee blokken in te stellen. BLOK 1: legt de schakeltijden voor maandag - vrijdag (1-5) vast. BLOK 2: legt de schakeltijden voor zaterdag en zondag (6,7) vast.
  • Seite 110 Gebruiksaanwijzing OFFSET Gebruik het menu OFFSET om een extra schakeltijd te programmeren. Deze is afhanke- lijk van de PROG 1 schakeltijd (max. +/- 240 Min.). Voorbeeld: Astrotijd : 20:00 Offset : +60 min. Het rolluik loopt om 20.00 uur in ventilatiepositie en om 21.00 uur in de onderste eind- stand.
  • Seite 111: Instellingen

    Gebruiksaanwijzing Instellingen INSTELLING In het menu INSTELLING zijn de volgende mogelijkheden: • VAKANTIE • ZON (bij aangesloten sensor) • SCHEMER (bij aangesloten sensor) • TUSSENPOSITIE • VENTILATIE/KANTELEN • PROG 1 (EINDSTAND, TUSSENPOSITIE, VENTILATIE/KANTELEN) • PROG 2 (EINDSTAND, TUSSENPOSITIE, VENTILATIE/KANTELEN) • TESTMODUS (bij aangesloten sensor) •...
  • Seite 112 Gebruiksaanwijzing VENTILATIE/KANTELEN De ventilatie-/kantelstand is een vrij te kiezen stand van het rolluik/de jaloezie tussen de bovenste en onderste eindstand. Gebruik deze functie om het rolluik uit de onderste stand zo ver omhoog te laten lopen dat de ventilatiespleet wordt geopend. Bij de jaloezie worden de lamellen gedraaid.
  • Seite 113 Gebruiksaanwijzing LENGTE/BREEDTE/TIJDZONE (alleen in EXPERT MODUS ON) De coördinaten zijn bijvoorbeeld in een atlas te vinden. ZO/WI ZO/WI geeft de automatische zomer-/wintertijdomschakeling aan. Fabrieksinstelling is ON; de tijdschakelklok past zich automatisch aan. FUNCTIE Deze modus is uitsluitend bedoeld voor geschoold personeel! (Verschijnt alleen bij afgetrokken bedieningsgedeelte) In het menu FUNCTIE bestaat de mogelijkheid de volgende functies in te stellen: •...
  • Seite 114: Ingebruikname

    Gebruiksaanwijzing Ingebruikname Met de eerste druk op de toets wordt de klok „gewekt“. Kies met de+/- toetsen de taal en neem deze over met de OK toets. De klok bevindt zich in de automatische modus. Fabrieksinstelling TIJD/DAT: actuele MET en actuele datum PROGRAMMA: ASTRO BLOK SPERTIJUD (1-5)
  • Seite 115: Menuoverzicht

    Gebruiksaanwijzing Programmering Menuoverzicht Bedrijfsmodus TIJD/DAT PROGRAMMA INSTELLING FUNCTIE PROG1 PROG2 1. Druk op de MENU-toets TIJD/DAT verschijnt. 2. Druk op de +/- toetsen om meer menu’s te selecteren. 3. Druk op de MENU-toets, om in de bedrijfsmodus terecht te komen. TIJD/DAT (tijd en datum instellen) TIJD/DAT TIJD...
  • Seite 116 Gebruiksaanwijzing PROGRAMMA PROG 1/ ASTRO WEEK (astrofunctie voor Week + Spertijden PROG 1/ ASTRO BLOK (astrofunctie voor BLOK1/2 + Spertijden PROG 1/ ASTRO AFZONDERLIJK (astrofunctie voor Afzonderlijk + Spertijden PROG1 ASTRO WEEK SPERTIJD SPERTIJD PROGRAMMA 1. Druk op de MENU-toets. 2.
  • Seite 117 Gebruiksaanwijzing PROGRAMMA PROG 1/ ASTRO AVOND WEEK (astrofunctie Avond voor Week + Schakeltijd + Spertijd PROG 1/ ASTRO AVOND BLOK (astrofunctie Avond voor BLOK1/2 + Schakeltijd + Spertijd PROG 1/ ASTRO AVOND AFZONDERLIJK (astrofunctie Avond voor Afzonderlijk + Schakeltijd + SPERTIJD PROG1 ASTRO WEEK...
  • Seite 118 Gebruiksaanwijzing PROGRAMMA PROG 1/ INDIVIDUEEL WEEK (individuele schakeltijd voor week) PROG 1/ INDIVIDUEEL BLOK (individuele schakeltijd voor BLOK1/2) PROG 1/ INDIVIDUEEL AFZONDERLIJK (individuele schakeltijd voor Afzonderlijk) PROG1 INDIVIDUEEL WEEK SPERTIJD SPERTIJD PROGRAMMA 1. Druk op de MENU-toets. 2. Om het nieuwe PROGAMMA te selecteren, op de +-toets drukken tot PROGRAMMA verschijnt.
  • Seite 119 Gebruiksaanwijzing PROGRAMMA PROG 2/ INDIVIDUEEL WEEK (individuele schakeltijd voor week) PROG 2/ INDIVIDUEEL BLOK (individuele schakeltijd voor BLOK 1/2) PROG 2/ INDIVIDUEEL AFZONDERLIJK (individuele schakeltijd voor Afzonderlijk) PROG2 INDIVIDUEEL WEEK SPERTIJD SPERTIJD PROGRAMMA 1. Druk op de MENU-toets. 2. Om het nieuwe PROGAMMA te selecteren, op de +-toets drukken tot PROGRAMMA verschijnt.
  • Seite 120 Gebruiksaanwijzing PROGRAMMA PROG 2/OFFSET (bijv. vertrektijd avond naar ventilatiestand) PROG2 OFFSET OFFSET PROGRAMMA 1. Druk op de MENU-toets. 2. Om het nieuwe PROGAMMA te selecteren, op de +-toets drukken tot PROGRAMMA verschijnt. 3. Bevestig met OK. 4. Druk op de + toets PROG 2 verschijnt. 5.
  • Seite 121 Gebruiksaanwijzing INSTELLING VAKANTIE, LICHTSENSOR (Vakantie OFF/ON, Zon/Schemering) LICHTSENSOR INSTELLING VAKANTIE OFF AANWEZIG? VAKANTIE ON SCHEMER 1. Druk op de MENU-toets. 2. Om het menu INSTELLING te selecteren, op de + toets drukken tot INSTELLING ver- schijnt. 3. Bevestig met OK 4.
  • Seite 122 Gebruiksaanwijzing INSTELLING TUSSENPOSITIE, VENTILATIE/KANTELEN, Prog1 EINDSTAND (Tijd/ Standprogrammering) TUSSEN- VENTILATIE PROG 1 STAND (WENDING) EINDSTAND PROG 1 TUSSEN- STAND PROG 1 VENTILATIE 1. De menu-items VAKANTIE/LICHTSENSOR zijn bevestigd. TUSSENPOSITIE verschijnt. 2. Met de +/- toets kan de looptijd naar de TUSSENPOSITIE worden ingesteld. De opgave van de looptijd vindt plaats in seconden of u loopt naar de TUSSENPOSITIE met de NEER-/OP-toets vanuit de bovenste eindstand.
  • Seite 123 Gebruiksaanwijzing INSTELLING PROG 2 EINDSTAND (Tijd/ Standprogrammering) PROG 2 EINDSTAND PROG 2 TUSSEN- STAND PROG 2 VENTILATIE Aanwijzing Alleen wanneer in PROG 2 een tijd is ingesteld, wordt het dialoogvenster weerge- geven. 1. Het menu-item VENTILATIE/KANTELEN is bevestigd. PROG 2 EINDSTAND verschijnt. 2.
  • Seite 124 Gebruiksaanwijzing INSTELLING NEDERLANDS/ ASTROVERSCHUIVING (Taalkeuze, Astroverschuiving) TEST MODUS ASTROVER- ASTROVER- NEDERLANDS ON/OFF SCHUIVING SCHUIVING Aanwijzing Het MENU-item TEST MODUS verschijnt alleen wanneer er een lichtsensor in het apparaat gestoken is. 1. Het menu-item VENTILATIE/KANTELEN is bevestigd. TEST MODUS ON/OFF verschijnt. 2.
  • Seite 125 Gebruiksaanwijzing INSTELLING (Stadkeuze, EXPERT MODUS (LENGTE, BREEDTE, TIJDZONE)) EXPERT AMSTERDAM MODUS ON/OFF LENGTE BREEDTE TIJDZONE 1. De functie ASTROVERSCHUIVING is bevestigd. Stadkeuze (AMSTERDAM) ver- schijnt. 2. Gebruik de +/- toets om de dichtst bij gelegen stad in te stellen. 3. Bevestig met OK. Aanwijzing Deze dialoogvensters worden alleen getoond, wanneer in het functiemenu de EX- PERT MODUS op ON staat.
  • Seite 126 Gebruiksaanwijzing INSTELLING ZO/WI (Automatische zomer-/wintertijd omschakeling) ZO/WI INSTELLING ZO/WI 1. De functie TIJDZONE is bevestigd. ZO/WI verschijnt. 2. Gebruik de +/- toets om ZO/WI in- of uit te schakelen. 3. Bevestig de keuze met OK. 4. Druk op de MENU-toets, om in de bedrijfsmodus terecht te komen.
  • Seite 127 Gebruiksaanwijzing FUNCTIE (uitsluitend bij afgetrokken bedieningsgedeelte, uitsluitend voor vakkundig personeel) ROLLUIKEN/JALOEZIE, INDIVIDUELE BESTURING/ GROEPSBESTURING, LOOPTIJD (Keuze van het type, keuze als individuele besturing/ groepsbesturing, looptijd van het rolluik/de jaloezie) INDIVIDUELE BE- ROLLUIK / FUNCTIE LOOPTIJD STURING/GROEPS- JALOEZIE BESTURING 1. Druk op de MENU-toets. 2.
  • Seite 128 Gebruiksaanwijzing FUNCTIE (uitsluitend bij afgetrokken bedieningsgedeelte, uitsluitend voor vakkundig personeel) EXTERN ON/OFF/SCHAKELAAR, NOODSIGNAAL ON/OFF (Verwerking van externe signalen, verwerking van noodsignalen) Aandrijfregel- EXTERN ON apparaat ? EXTERN OFF NOODSIGNAAL ON EXTERN NOODSIGNAAL OFF SCHAKELAAR 1. De functie LOOPTIJD is bevestigd. EXTERN ON verschijnt. (EXTERN ON/ OFF/ SCHAKE- LAAR geeft de externe besturingssignalen aan.
  • Seite 129 Gebruiksaanwijzing FUNCTIE (uitsluitend bij afgetrokken bedieningsgedeelte, uitsluitend voor vakkundig personeel) EERSTE INGEBRUIKNAME, RELAIS, TOT-TIJD EXPERT EERSTE MODUS RELAIS TOT-TIJD INGEBRUIKNAME OFF/ON FUNCTIE (Datum van de eerste ingebruikname, relaisschakelfrequentie, totale looptijd) 1. De functie NOODSIGNAAL ON/OFF is bevestigd EXPERT MODUS OFF/ON verschijnt. 2.
  • Seite 130: Technische Gegevens

    Reinig het apparaat uitsluitend met een vochtige doek. Gebruik geen reinigingsmiddelen aangezien deze kunststof kunnen aantasten. Algemene conformiteitsverklaring Hiermee verklaart de firma Becker-Antriebe GmbH, dat het apparaat Centronic TimeControl TC52 in overeenstemming is met de basisvereisten en andere relevante voorschriften volgens richtlijn 1999/5/EG.
  • Seite 131: Wat Te Doen, Als

    Gebruiksaanwijzing Wat te doen, als ...? i r o v j i t e i i t i i t i r e l v j i i t i c i r . t e e l l t l e t e i .
  • Seite 132 Becker-Antriebe GmbH 35764 Sinn/Germany...

Inhaltsverzeichnis