Herunterladen Inhalt Inhalt Diese Seite drucken
Becker Centronic TC42 Montage- Und Betriebsanleitung

Becker Centronic TC42 Montage- Und Betriebsanleitung

Vorschau ausblenden Andere Handbücher für Centronic TC42:

Werbung

Verfügbare Sprachen

Verfügbare Sprachen

Centronic
TimeControl TC42
Montage- und Betriebsanleitung
de
Zeitschaltuhr
Wichtige Informationen für:
• den Monteur / • die Elektrofachkraft / • den Benutzer
Bitte entsprechend weiterleiten!
Diese Anleitung ist vom Benutzer aufzubewahren.
Assembly and Operating Instructions
en
Timer
Important information for:
• Fitters / • Electricians / • Users
Please forward accordingly!
These instructions must be kept for future reference.
Notice de montage et d'utilisation
fr
Horloge
Informations importantes pour:
• l'installateur / • l'électricien / • l'utilisateur
À transmettre à la personne concernée !
Cette notice doit être conservée par l'utilisateur.
Montage- en gebruiksaanwijzing
nl
Tijdschakelklok
Belangrijke informatie voor:
• de monteur / • de elektricien / • de gebruiker
Aan de betreffende personen doorgeven!
De gebruiker dient deze gebruiksaanwijzing te bewaren.
Becker-Antriebe GmbH
35764 Sinn/Germany
www.becker-antriebe.com

Werbung

Inhaltsverzeichnis
loading

Inhaltszusammenfassung für Becker Centronic TC42

  • Seite 1 Cette notice doit être conservée par l’utilisateur. Montage- en gebruiksaanwijzing Tijdschakelklok Belangrijke informatie voor: • de monteur / • de elektricien / • de gebruiker Aan de betreffende personen doorgeven! De gebruiker dient deze gebruiksaanwijzing te bewaren. Becker-Antriebe GmbH 35764 Sinn/Germany www.becker-antriebe.com...
  • Seite 2: Inhaltsverzeichnis

    Inhaltsverzeichnis Allgemeines ....................4 Gewährleistung ..................4 Sicherheitshinweise .................. 5 Bestimmungsgemäße Verwendung ............5 Anzeigen- und Tastenerklärung ..............6 Montage/Anschluss .................. 7 Erklärungen ....................9 Einstellungen ...................12 Inbetriebnahme ..................14 Werkseinstellung ..................14 Programmierung ..................15 Batteriewechsel ..................24 Reinigung ....................24 Technische Daten ................... 24 Was tun, wenn...? ..................
  • Seite 3 Sommaire Généralités ..................... 48 Prestation de Garantie ................48 Instructions de sécurité ................49 Utilisation prévue ..................49 Explication des textes d’affichage et des touches ........50 Montage / Branchement ................51 Explications .................... 53 Réglages ....................56 Mise en service ..................58 Paramétrage usine ..................
  • Seite 4: Allgemeines

    Montage- und Betriebsanleitung Allgemeines Die vom Werk mit aktuellem Datum und Uhrzeit (MEZ) ausgelieferte TC42 steuert den Antrieb morgens zur programmierten Schaltzeit und abends zur Astrozeit (Sonnenuntergangszeit). Eine manuelle Bedienung der TC42 ist jederzeit möglich. Durch den Batteriebetrieb ist bei abgezogenem Bedienteil eine Programmie- rung möglich, da die Anzeige erhalten bleibt.
  • Seite 5: Sicherheitshinweise

    • Verletzungsgefahr durch Stromschlag. • Anschlüsse an 230 V Netz müssen durch eine Elektrofachkraft erfol- gen. • Schalten Sie vor der Montage die Anschlussleitung spannungsfrei. • Die Vorschriften der örtlichen Energieversorgungsunternehmen so- wie die Bestimmungen für nasse und feuchte Räume nach VDE 100, sind beim Anschluss einzuhalten. • Nur in trockenen Räumen verwenden. • Verwenden Sie nur unveränderte Becker Originalteile. • Halten Sie Personen aus dem Fahrbereich der Anlagen fern. • Halten Sie Kinder von Steuerungen fern. • Beachten Sie Ihre landesspezifischen Bestimmungen. • Verbrauchte Batterien fachgerecht entsorgen. Batterien nur durch identischen Typ (CR 2032) ersetzen. • Wird die Anlage durch ein oder mehrere Geräte gesteuert, muss der Fahrbereich der Anlage während des Betriebes einsehbar sein. • Für den Anschluss von Steuerleitungen (Schutzkleinspannungen) dürfen nur Leitungstypen mit ausreichender Spannungsfestigkeit...
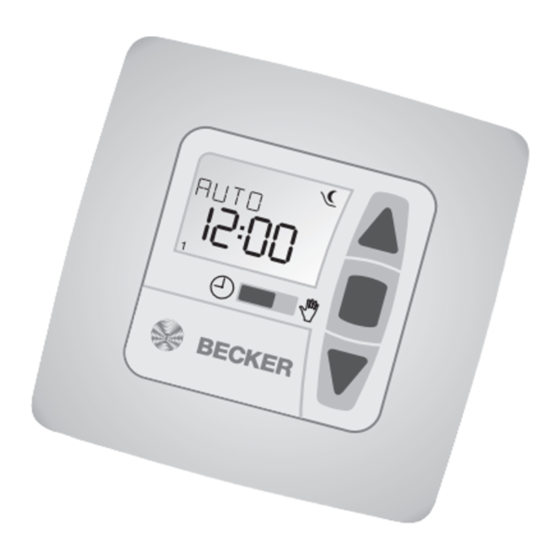
  • Seite 6: Anzeigen- Und Tastenerklärung

    Montage- und Betriebsanleitung Anzeigen- und Tastenerklärung Hand- / Automatik- Schiebeschalter AUF-Taste STOPP-Taste AB-Taste Abdeckklappe Tasten unter der Abdeckklappe RESET-Taste MENUE-Taste OK-Taste -Taste + Taste Displaysymbolik Einstellung Programm Funktion Uhr/Datum Astro Abend Textzeile Auffahrt Ziffernanzeige Abfahrt Wochentage (Mo.-So.)
  • Seite 7: Montage/Anschluss

    Montage/Anschluss...
  • Seite 8: Anschluss Als Antriebssteuergerät

    • Anschluss nur durch eine Elektrofachkraft! • Wird mehr als ein Antrieb über die TC42 angesteuert, müssen die Antriebe durch Relaissteuerungen entkoppelt werden. Diese Ent- kopplung entfällt bei Becker-Antrieben mit elektronischer Endab- schaltung. Beachten Sie den Schaltstrom des Gerätes. 1. Schließen Sie das Netzteil der TC42 wie folgt an: Rohrantrieb grün-gelb...
  • Seite 9: Erklärungen

    Erklärungen Rollladen-Auswahl Bei der Rollladen-Funktion fährt der Rollladen nach Betätigung einer Fahrtaste in Selbsthaltung. Jalousie-Auswahl Bei der Jalousie-Funktion fährt die Jalousie im Tippbetrieb, um eine genaue Positionierung der Lamellen zu ermöglichen. Drücken Sie eine Fahrtaste länger als 1 Sekunde, fährt die Jalousie in Selbsthaltung. Nach Anfahren der programmierten Zwischen- und Endlagenposition wird auto- matisch eine Wendung der Lamellen durchgeführt (wenn die Wendeposition programmiert wurde).
  • Seite 10 Montage- und Betriebsanleitung Uhrzeit/Datum UHR/DAT In diesem Menü stellen Sie die Uhrzeit und das Datum ein. Programm PROGRAMM Im Menü Programm haben Sie die Möglichkeit, zwei verschiedene Funktionen einzustellen: • Astro Abend (1-5 und 6,7) • Individuell (1-5 und 6,7) ASTRO ABEND Steuert die Auffahrt nach der eingestellten Schaltzeit.
  • Seite 11 SPERRZEIT Verhindert ein zu frühes Abfahren des Rollladens durch die ASTROABEND Funktion. Beispiel: Astrozeit t: 17:00 Sperrzeit t: 18:00 Der Rollladen fährt nicht vor 18:00 ab. Jan. Feb. Mär. Apr. Jun. Jul. Aug. Sep. Okt. Nov. Dez. 15:00 Uhr Sperrzeit 18:30 Uhr 22:00 Uhr Sonnenuntergang...
  • Seite 12: Einstellungen

    Montage- und Betriebsanleitung Einstellungen EINSTELLUNG Im Menü EINSTELLUNG haben Sie folgende Möglichkeiten: • URLAUB • ZWISCHENPOSITION • LUEFTUNG/WENDUNG • PROG (ENDLAGE, ZWISCHENPOSITION, LUEFTUNG/WENDUNG) • Sprachauswahl (DEUTSCH) • ASTROVERSCHIEBUNG t • Städteauswahl (KASSEL) • LAENGE (Erscheint nur bei EXPERT-MOD ON) • BREITE (Erscheint nur bei EXPERT-MOD ON) •...
  • Seite 13 ASTROVERSCHIEBUNG Durch die Einstellung der Astroverschiebung kann die Astrozeit t verschoben werden (max. +/- 120 Min.). Jan. Feb. Mär. Apr. Jun. Jul. Aug. Sep. Okt. Nov. Dez. Astro-Verschiebung 15:00 Uhr Schließen z.B. 1 Stunde vor Sonnenuntergang bei Astroverschiebung von -1 h 18:30 Uhr 22:00 Uhr Sonnenuntergang...
  • Seite 14: Inbetriebnahme

    Montage- und Betriebsanleitung Inbetriebnahme Mit dem ersten Tastendruck „wecken“ Sie die Uhr auf. Sie können nun mit den +/- Tasten die Sprache wählen und diese mir der OK Taste übernehmen. Die Uhr befindet sich im Automatikmodus. Werkseinstellung UHR/DAT: aktuelle MEZ und aktuelles Datum PROGRAMM: ASTRO ABEND ->...
  • Seite 15: Programmierung

    Programmierung Menüübersicht Betriebsmodus EINSTELLUNG UHR/DAT PROGRAMM FUNKTION 1. Drücken Sie die MENUE-Taste UHR/DAT erscheint. 2. Um weitere Menüs auszuwählen, drücken Sie die +/- Tasten. 3. Drücken Sie die MENUE-Taste, um in den Betriebsmodus zu gelangen. UHR/DAT (Uhrzeit und Datum einstellen) UHR/DAT UHRZEIT JAHR MONAT UHR/DAT 1.
  • Seite 16 Montage- und Betriebsanleitung PROGRAMM ASTRO ABEND (Auffahrt -> Schaltzeit, Abfahrt -> Sonnenuntergang) PROGRAMM ASTRO SCHALTZEIT SPERRZEIT ABEND SCHALTZEIT SPERRZEIT PROGRAMM Drücken Sie die MENUE-Taste. Um das Menü PROGAMM auszuwählen, drücken Sie die + Taste bis PRO- GAMM erscheint. Bestätigen Sie mit OK. + Taste erneut drücken, bis ASTRO ABEND erscheint.
  • Seite 17 PROGRAMM INDIVIDUELL (Auf-/Abfahrt -> Schaltzeiten) PROGRAMM SCHALTZEIT SCHALTZEIT INDIVIDUELL SCHALTZEIT SCHALTZEIT PROGRAMM 1. Drücken Sie die MENUE-Taste. 2. Um das Menü PROGAMM auszuwählen, drücken Sie die + Taste bis PRO- GAMM erscheint. 3. Bestätigen Sie mit OK. 4. + Taste erneut drücken, bis INDIVIDUELL erscheint. 5.
  • Seite 18 Montage- und Betriebsanleitung EINSTELLUNG URLAUB (Urlaub OFF/ON) EINSTELLUNG URLAUB OFF URLAUB ON 1. Drücken Sie die MENUE-Taste. 2. Um das Menü EINSTELLUNG auszuwählen, drücken Sie die + Taste bis EIN- STELLUNG erscheint. 3. Bestätigen Sie mit OK. URLAUB ON/OFF erscheint. 4.
  • Seite 19 EINSTELLUNG ZWISCHENPOSITION, LUEFTUNG/WENDUNG, Prog ENDLAGE (Zeit/Lageprogrammierung) ZWISCHEN− LUEFTUNG PROG POSITION (WENDUNG) ENDLAGE PROG ZWISCHEN− POSITION PROG LUEFTUNG 1. Sie haben die Funktion URLAUB bestätigt. ZWISCHENPOSITION erscheint. 2. Mit der +/- Taste können Sie die Fahrzeit zur ZWISCHENPOSITION einstellen. Die Angabe der Fahrzeit erfolgt in Sekunden oder Sie fahren die ZWISCHEN- POSITION mit der AB-/AUF-Taste aus der oberen Endlage an.
  • Seite 20 Montage- und Betriebsanleitung EINSTELLUNG DEUTSCH/ASTROVERSCHIEBUNG t (Sprachauswahl, Astroverschiebung) Sie haben die Funktion PROG ENDLAGE bestätigt. DEUTSCH erscheint. ASTROVER− DEUTSCH SCHIEBUNG 1. Mit der +/- Taste können Sie die gewünschte Sprache einstellen. 2. Bestätigen Sie Ihre Sprachauswahl mit OK. 3. ASTROVERSCHIEBUNG t erscheint. 4.
  • Seite 21 EINSTELLUNG (Städteauswahl, EXPERTEN MODUS (LAENGE, BREITE, ZEITZONE) EXPERTEN KASSEL MODUS ON/OFF LAENGE BREITE ZEITZONE Sie haben die Funktion ASTROVERSCHIEBUNG t bestätigt. Stadtauswahl (KASSEL) erscheint. Mit der +/- Taste können Sie die nächstgelegene Stadt einstellen. Betätigen Sie mit OK. Hinweis Diese Dialogfenster werden nur angezeigt, wenn im Funktionsmenü der EXPERTEN MODUS auf ON steht.
  • Seite 22 Montage- und Betriebsanleitung EINSTELLUNG SO/WI (Automatische Sommer-/Winterzeitumstellung) SO/WI EINSTELLUNG SO/WI 1. Sie haben die Funktion ZEITZONE bestätigt. SO/WI erscheint. 2. Mit der +/- Taste können Sie SO/WI ein- oder ausschalten. 3. Bestätigen Sie Ihre Auswahl mit OK. 4. Drücken Sie die MENUE-Taste, um in den Betriebsmodus zu gelangen.
  • Seite 23 FUNKTION (nur bei abgezogenem Bedienteil, nur für Fachpersonal) ROLLLADEN/JALOUSIE, ERSTINBETRIEBNAHME (Auswahl des Behanges, Datum der Erstinbetriebnahme) FUNKTION ROLLLADEN/ EXPERTEN ERSTINBETRIEB− JALOUSIE MODUS OFF/ON NAHME RELAIS GES-ZEIT FUNKTION Drücken Sie die MENUE-Taste. Um das Menü FUNKTION auszuwählen, drücken Sie die + Taste bis FUNK- TION erscheint. Bestätigen Sie mit OK. ROLLLADEN/JALOUSIE erscheint. Mit der +/- Taste können Sie zwischen Rollladen/Jalousie auswählen.
  • Seite 24: Batteriewechsel

    Montage- und Betriebsanleitung Batteriewechsel 1. Ziehen Sie das Bedienteil ab. 2. Entnehmen Sie die Batterie. 3. Setzen neue Batterie lagerichtig ein. 4. Stellen Sie die Uhrzeit neu ein. Hinweis Die eingestellten Werte bleiben erhalten. Reinigung Reinigen Sie das Gerät nur mit einem feuchten Tuch. Verwenden Sie kein Reini- gungsmittel, da dieses den Kunststoff angreifen kann.
  • Seite 25: Was Tun, Wenn

    Was tun, wenn...? Störung Ursache Abhilfe Antrieb läuft nicht. Falscher Anschluss. Anschluss prüfen. Antrieb läuft in die Falscher Anschluss. Drähte s und t am falsche Richtung. Netzteil tauschen. Astroprogramm schaltet 1. Datum stimmt nicht. 1. Richtiges Datum ein- nicht genau. stellen. 2. Falsche Stadt oder 2.
  • Seite 26: General

    Assembly and Operating Instructions General The TC42, which is pre-programmed with factory date and time settings (CET), operates the roller shutter drive in the morning at the programmed switching time and in the evening at the set astro time (sunset time). The TC42 can be operated manually at any time.
  • Seite 27: Safety Information

    • Risk of injury through an electric shock. • Terminal connections to a 230 V network must be carried out by an authorised electrician. • Before assembly, disconnect the power lead from the supply. • The provisions of the local public utilities and stipulations for wet and damp rooms in accordance with VDE 100 are to be observed when the system is connected. • Use in dry rooms only. • Use unmodified Becker original parts only. • Keep persons away from the systems guide track. • Keep away from controls. • Please comply with national stipulations. • Dispose of used battery properly. Replace batteries with an identical type (CR 2032) only. • If the system is controlled by one or several devices, the system guide track must be visible during operation. • Only types of cable with sufficient electric strength can be used for connecting control cables (protective low voltages).
  • Seite 28: Explanation Of Displays And Buttons

    Assembly and Operating Instructions Explanation of displays and buttons...
  • Seite 29: Assembly/Connection

    Assembly/connection...
  • Seite 30 • Risk of injury by electric shock. • Terminal connections must be carried out by an authorised electri- cian! • If more than one drive is controlled using the TC42, the drives must be decoupled by relay controls. This decoupling is not applicable to Becker drives with electronic limit stop. Always observe the switched current of the device. 1. Connect the power supply unit to the TC42 as follows: 2. Put the protective cap back on the power supply unit. 3. Fix the power supply unit in the box.
  • Seite 31: Explanations

    Explanations Selecting roller shutter When the roller shutter function is used, the roller shutter remains locked after a control button has been activated. Selecting venetian blind When the venetian blind function is being used, the venetian blind moves in non¬maintained command mode in order to allow the slats to be positioned more precisely.
  • Seite 32: Reset Button

    Assembly and Operating Instructions RESET button When the RESET button is pressed (with a ballpoint pen or similar), the TC42 reverts to the default setting. Exception: menu levels of function, language and city. Time/date TIME/DATE This menu is used to set the time and the date. Programme PROGRAMME Two different functions can be set in the PROGRAMME menu:...
  • Seite 33 BLOCKING TIME The ASTRO EVENING function prevents the roller shutter from closing too early. Example: Astro time t: 17:00 Blocking time t: 18:00 The roller shutter will not close before 18:00 hrs. SWITCHING TIME Automatic switching times for roller shutters and venetian blinds to be raised and lowered.
  • Seite 34: Settings

    Assembly and Operating Instructions Settings SETTINGS The following settings can be made via the SETTING menu: • HOLIDAY • INTERMEDIATE POSITION • VENTILATION/REVERSE • PROG (END LIMIT, INTERMEDIATE POSITION, VENTILATION/REVERSE) • Select language (ENGLISH) • ASTRO SHIFT t • Select town/city (LONDON) •...
  • Seite 35 ASTRO SHIFT With the astro shift setting, the astro time s and astro time t can be shifted independently of one another (max. +/- 120 mins.). City (LONDON when the language is set to GB ENGL) It is important to select a city for the astro function. Select the city nearest to where you are located.
  • Seite 36: Initial Operation

    Assembly and Operating Instructions Initial operation Press the button once to „wake up“ the timer. Now you can select the language with the +/- buttons and accept it with the OK button. The clock is in automatic mode. Factory settings TIME/DATE: Current CET and current date PROGRAMME: ASTRO EVENING -> Switching times Mon-Fri (1-5) s 7.00 a.m.
  • Seite 37: Programming

    Programming Overview of menu 1. Press the MENU button until TIME/DATE appears. 2. To select further menus, press the +/- buttons. 3. Press the MENU button to switch to operating mode. TIME/DATE (to set the time and date) 1. Press the MENU button until TIME/DATE appears. 2. By pressing OK, you get to the time menu level. 3.
  • Seite 38 Assembly and Operating Instructions PROGRAMME ASTRO EVENING (UP -> switching time, DOWN -> sunset) Press the MENU button. To select the PROGAMME menu press the + button until PROGAMME ap- pears. Press OK to confirm. Press the + button again until ASTRO EVENING appears. Press OK to confirm.
  • Seite 39 PROGRAMME SEPARATE (UP/DOWN command -> switching times) 1. Press the MENU button. 2. To select the PROGAMME menu press the + button until PROGAMME ap- pears. 3. Press OK to confirm. 4. Press the + button again until SEPARATE appears. 5. Press OK to confirm. 6.
  • Seite 40 Assembly and Operating Instructions SETTING HOLIDAY (Holiday OFF/ON) 1. Press the MENU button. 2. To select the SETTING menu press the + button until SETTING appears. 3. Press OK to confirm. HOLDAY ON/OFF appears. 4. The holiday function can be set to ON or OFF using the +/- buttons. 5.
  • Seite 41 SETTING INTERMEDIATE POSITION, VENTILATION/REVERSE, PROG END LIMIT (Time/position programming) 1. You have confirmed the HOLIDAY function. INTERMEDIATE POSITION ap- pears. 2. The switching time for the INTERMEDIATE POSITION can be set using the +/- buttons. The switching time can be set in a few seconds. Alternatively, you can move the shutter from the upper end limit into the INTERMEDIATE POSI- TION using the UP/DOWN buttons.
  • Seite 42 Assembly and Operating Instructions SETTING GB ENGL/ ASTRO SHIFT t (Language selection, astro shift) You have confirmed the PROG END LIMIT function. GB ENGL appears. 1. You can select the desired language using the +/- buttons. 2. Confirm your language selection by pressing OK. 3.
  • Seite 43 SETTING (City, EXPERT MODE (LONGITUDE, LATITUDE, TIME ZONE)) You have confirmed the function ASTRO SHIFT t. The city selected (LON- DON) will appear. You can set the nearest town using the +/- button. Confirm by pressing OK. Note These dialogne windows are only displayed when the EXPERT MODE in the function menu is ON. LONGITUDE will appear.
  • Seite 44 Assembly and Operating Instructions SETTING SUMMER/WINTER (Automatic clock adjustment for daylight saving changes) 1. You have confirmed the TIME ZONE function. SUMMER/WINTER will appear. 2. The SUMMER/WINTER setting can be switched on or off using the +/- button. 3. Confirm your selection by pressing OK. 4.
  • Seite 45 FUNCTION (The operating element must be removed. For experts only.) ROLLER SHUTTER/BLIND, INITIAL OPERATION (Shutter/blind selection, date of initial operation) Press the MENU button. To select the FUNCTION menu press the + button until FUNCTION appears. Press OK to confirm. ROLLER SHUTTER/BLIND appears. You can choose between roller shutter/blind using the +/- button. Press OK to confirm.
  • Seite 46: Changing The Battery

    Assembly and Operating Instructions Changing the battery 1. Disconnect the operating device. 2. Remove the battery. 3. Insert the new battery properly. 4. Reset the time. Note The values set remain stored. Cleaning Clean the device with a damp cloth only. Do not use a cleansing agent as doing so may damage the plastic.
  • Seite 47: What To Do If

    What to do if...? Problem Cause Remedy Drive is not functioning. Faulty connection. Check the connection. Blind or shutter moves in Faulty connection. Exchange s and t the wrong direction. wires in the power sup- ply unit. Astro programme does 1. Date is incorrect. 1.
  • Seite 48: Généralités

    Notice de montage et d’utilisation Généralités La TC42, livrée par l’usine avec la date et l’heure actuelles (heure de l’Europe centrale), pilote le moteur au temps de déclenchement programmé le matin et le soir au temps astro (heure de coucher du soleil). Une commande manuelle de la TC42 est toujours possible.
  • Seite 49: Instructions De Sécurité

    • Les branchements au réseau 230 V doivent obligatoirement être effectués par un électricien spécialisé autorisé. • Coupez l’alimentation du câble de branchement avant de procéder au montage. • Observez pour le branchement les prescriptions des entreprises d’approvisionnement en énergie locales ainsi que les directives pour locaux humides et immergés selon VDE 100. • A utiliser uniquement dans des locaux secs. • Utilisez uniquement des pièces originales de Becker qui n’ont subi aucune modification. • Veillez à ce que personne ne se tienne dans la zone de déploiement des installations. • Tenez les enfants à l’écart des commandes. • Observez les directives spécifiques des pays. • Eliminez les piles usagées conformément aux prescriptions écolo- giques.
  • Seite 50: Explication Des Textes D'affichage Et Des Touches

    Notice de montage et d’utilisation Explication des textes d’affichage et des touches...
  • Seite 51: Montage / Branchement

    Montage / Branchement...
  • Seite 52 • Le branchement doit obligatoirement être effectué par un électricien spécialisé autorisé ! • Si la TC42 commande plus d’un moteur, les moteurs doivent être découplés par des commutations à relais. Ce découplage n’est pas nécessaire pour les moteurs Becker avec fin de course électronique. Observez le courant de commutation de l’appareil. 1. Pour brancher le bloc d’alimentation de la TC42 , procédez comme suit: 2. Replacez le capuchon de protection sur le bloc d’alimentation.
  • Seite 53: Explications

    Explications Sélection volet roulant Pour la fonction volet roulant, le volet roulant se déplace en position de maintien après activation d’une touche de marche. Sélection store Lorsque la fonction store est active, le store se déplace par impulsion pour permettre un positionnement exact des lamelles. Appuyez sur une touche de marche pendant plus d’1 seconde pour amener le store en position de maintien.
  • Seite 54 Notice de montage et d’utilisation Touche RESET Lorsque vous appuyez sur la touche RESET (avec un stylo bille ou autre), la TC42 est remise au réglage d’usine. Exception : point de menu fonction, sélection de la langue et sélection de la ville. Heure/date HEURE/DATE Dans ce menu, vous pouvez régler l’heure et la date.
  • Seite 55 TEMPS DE BLOCAGE Empêche la descente trop tôt du volet roulant par la fonction ASTRO SOIR. Exemple : Horaire astro t: 17h00 Horaire de blocage t: 18h00 Le volet roulant ne descend pas avant 18h00. HORAIRES Horaires de montée et de descente automatiques pour VOLET ROULANT et STORE.
  • Seite 56: Réglages

    Notice de montage et d’utilisation Réglages REGLAGE Le menu REGLAGE vous offre les possibilités suivantes : • VACANCES • POS. INTERM. • AERATION/INVERSION • PROG1 (FIN DE COURSE, POS. INTERM, AERATION/INVERSION) • Sélection de la langue (FRANÇAIS) • DECALAGE ASTRO t •...
  • Seite 57 DECALAGE ASTRO Le paramétrage du décalage astro permet de décaler le temps astro t et le temps astro ( indépendamment l’un de l’autre (maxi +/- 120 minutes). Sélection de la ville (PARIS lorsque la langue réglée est FRANÇAIS) La sélection de la ville est importante pour la fonction astro. Sélectionnez ici la ville la plus près de votre domicile.
  • Seite 58: Mise En Service

    Notice de montage et d’utilisation Mise en service En appuyant une première fois sur la touche, vous « réveillez » l’horloge. Vous pouvez maintenant sélectionner la langue avec les touches +/- et la confirmer avec la touche OK. L’horloge est en mode Automatique. Paramétrage usine HEURE/DATE : heure de l’Europe centrale actuelle et date actuelle PROGRAMME : ASTRO SOIR -> Horaires lundi-vendredi (1-5)
  • Seite 59: Programmation

    Programmation Vue d’ensemble du menu 1. Appuyez sur la touche MENU, HEURE/DATE apparaît. 2. Pour sélectionner d’autres menus, appuyez sur les touches +/-. 3. Appuyez sur la touche MENU pour accéder au mode de service. HEURE/DATE (régler l’heure et la date) 1. Appuyez sur la touche MENU, HEURE/DATE apparaît. 2.
  • Seite 60 Notice de montage et d’utilisation PROGRAMME ASTRO SOIR (montée -> horaire, descente -> coucher du soleil) Appuyez sur la touche MENU. Pour sélectionner le menu PROGAMME, appuyez sur la touche + jusqu’à ce que PROGRAMME apparaisse. Confirmez avec OK. Appuyez une nouvelle fois sur la touche + jusqu’à ce qu’ASTRO SOIR appa- raisse.
  • Seite 61 PROGRAMME INDIVIDUEL (montée/descente -> horaires) 1. Appuyez sur la touche MENU. 2. Pour sélectionner le menu PROGAMME, appuyez sur la touche + jusqu’à ce que PROGRAMME apparaisse. 3. Confirmez avec OK. 4. Appuyez une nouvelle fois sur la touche + jusqu’à ce qu’INDIVIDUEL appa- raisse.
  • Seite 62 Notice de montage et d’utilisation REGLAGE VACANCES (Vacances OFF/ON) 1. Appuyez sur la touche MENU. 2. Pour sélectionner le menu REGLAGE, appuyez sur la touche + jusqu’à ce que REGLAGE apparaisse. 3. Confirmez avec OK. VACANCES ON / OFF apparaît. 4. Vous pouvez mettre la fonction Vacances sur ON ou OFF avec les touches +/-. 5.
  • Seite 63 REGLAGE POS. INTERM., AERATION/INVERSION, PROG FIN DE COURSE (programmation temps/position) 1. Vous avez confirmé la fonction VACANCES. POS. INTERM. apparaît. 2. Vous pouvez régler le temps de marche pour la POS. INTERM. avec les touches +/-. Le temps de marche est donné en secondes. Vous pouvez éga- lement atteindre la POS.
  • Seite 64 Notice de montage et d’utilisation REGLAGE FRANÇAIS/ DECALAGE ASTRO t (sélection de la langue, décalage astro) Vous avez confirmé la fonction PROG FIN DE COURSE. FRANÇAIS apparaît. 1. Vous pouvez régler la langue désirée avec les touches +/-. 2. Confirmez le choix de la langue en appuyant sur OK. 3.
  • Seite 65 REGLAGE (Sélection de la ville, MODE EXPERT (LONGITUDE, LATITUDE, ZONE HORAIRE) Vous avez confirmé la fonction DECALAGE ASTRO t. Sélection de la ville (PARIS) apparaît. Vous pouvez régler la ville la plus proche avec la touche +/-. Confirmez avec OK. Remarque Cette fenêtre de dialogue ne s’ouvre que lorsque le MODE EXPERT est sur ON dans le menu fonction...
  • Seite 66 Notice de montage et d’utilisation REGLAGE ETE/HIVER (commutation automatique été/hiver) 1. Vous avez confirmé la fonction ZONE HORAIRE. ETE/HIVER apparaît. 2. Vous pouvez activer ou désactiver ETE/HIVER avec les touches +/-. 3. Confirmez votre sélection avec OK. 4. Appuyez sur la touche MENU pour accéder au mode de service.
  • Seite 67 FONCTION (seulement lorsque l’élément de commande est enlevé, seulement pour le personnel spécialisé) VOLET ROULANT/STORE, 1e MISE EN SERVICE (sélection du tablier, date de la 1e mise en service) Appuyez sur la touche MENU. Pour sélectionner le menu FONCTION, appuyez sur la touche + jusqu’à ce que FONCTION apparaisse. Confirmez avec OK. VOLET ROULANT/STORE apparaît. Vous pouvez choisir entre volet roulant/store avec les touches +/-. Confirmez avec OK.
  • Seite 68: Remplacement De La Pile

    Notice de montage et d’utilisation Remplacement de la pile 1. Enlevez l’élément de commande. 2. Enlevez la pile. 3. Mettez la pile neuve en place dans la bonne position. 4. Réglez l’heure. Remarque Les valeurs réglées sont conservées. Nettoyage Nettoyez l’appareil seulement avec un chiffon humide. N’utilisez pas de produit de nettoyage, celui-ci pouvant avoir un effet agressif sur la matière plastique.
  • Seite 69: Que Faire Quand

    Que faire quand...? Anomalie Cause Mesures à prendre Le moteur ne marche Branchement incorrect. Contrôler le branche- pas. ment. Le moteur marche dans Branchement incorrect. Remplacer les fils s le mauvais sens. et t du bloc d’alimen- tation. Le programme Astro 1. La date n’est pas 1.
  • Seite 70: Algemeen

    Montage- en gebruiksaanwijzing Algemeen De door de fabriek van actuele datum en tijd voorziene (MET) TC42 stuurt de aandrijving ‘s morgens op de geprogrammeerde schakeltijd en ‘s avonds op astrotijd (tijd van zonsondergang). Handmatige bediening van de TC42 is altijd mogelijk. Dankzij de werking op batterijen is, bij een uit de houder getrokken bedienings- gedeelte, programmering mogelijk, aangezien het display behouden blijft.
  • Seite 71: Veiligheidsrichtlijnen

    Veiligheidsrichtlijnen Voorzichtig • Gevaar voor verwonding door elektrische schok. • Aansluitingen op het 230 V elektriciteitsnet moeten door een geau- toriseerd vakman worden uitgevoerd. • Haal voor de montage de spanning van de aansluitkabel. • Bij het aansluiten dienen de voorschriften van het plaatselijke ener- giebedrijf alsmede de bepalingen voor natte en droge ruimten vol- gens VDE 100 te worden aangehouden. • Uitsluitend in droge ruimte gebruiken. • Gebruik uitsluitend niet veranderde originele onderdelen van Bec- ker. • Houd personen buiten het werkgebied van de installatie. • Houd kinderen op afstand van besturingsapparaten. • Neem de bepalingen in acht die specifiek voor uw land van toepas- sing zijn.
  • Seite 72: Verklaring Van Displays En Toetsen

    Montage- en gebruiksaanwijzing Verklaring van displays en toetsen...
  • Seite 73: Montage/Aansluiting

    Montage/Aansluiting...
  • Seite 74: Aansluiting Als Individuele Bediening

    Voorzichtig • Gevaar voor verwonding door elektrische schok. • Aansluiting uitsluitend door een geautoriseerde vakman! • Wanneer meer dan één aandrijving via de TC42 wordt geregeld, ont- koppel de aandrijvingen dan d.m.v. relais. Deze ontkoppeling vervalt bij Becker-aandrijvingen met elektronische eindschakelaar. Let op de schakelstroom van het apparaat. 1. Sluit het voedingsgedeelte van de TC42 als volgt aan: 2. Plaats de beschermkap weer over de voeding. 3. Bevestig het voedingsgedeelte in de inbouw/opbouwdoos. 4. Bevestig het bedieningsgedeelte in het frame en steek vervolgens dit geheel...
  • Seite 75: Verklaringen

    Verklaringen Selectie rolluik Bij de rolluikfunctie loopt het rolluik na het activeren van een richtingstoets zelf- standig. Selectie jaloezie Bij de jaloeziefunctie gaat de jaloezie in de tipstand om een nauwkeurige positi- onering van de lamellen mogelijk te maken. Wanneer een richtingstoets langer dat 1 seconde wordt ingedrukt dan loopt de jaloezie zelfstandig.
  • Seite 76 Montage- en gebruiksaanwijzing Tijd/Datum TIJD/DAT In dit menu kunnen tijd en datum worden ingesteld. Programma PROGRAMMA In het menu Programma bestaat de mogelijkheid twee verschillende functies in te stellen: • Astro avond (1-5 en 6,7) • Individueel (1-5 en 6,7) ASTRO AVOND Stuurt het omhoog lopen na de ingestelde schakeltijd.
  • Seite 77 SPERTIJD Voorkomt een te vroeg Neerwaarts sturen van het rolluik door de astro-avond- functie. Voorbeeld: Astrotijd t: 17:00 Spertijd t: 18:00 Het rolluik loopt niet voor 18:00 naar beneden. SCHAKELTIJD Automatische op en neer schakeltijden voor rolluiken en jaloezie. De programmering wordt niet geactiveerd als het teken “--:--“ (tussen 23:59 en 00:00) op het display verschijnt.
  • Seite 78: Instellingen

    Montage- en gebruiksaanwijzing Instellingen In het menu INSTELLING zijn de volgende mogelijkheden: • VAKANTIE • TUSSENPOSITIE • VENTILATIE/KANTELEN • PROG (EINDSTAND, TUSSENPOSITIE, VENTILATIE/KANTELEN) • Taalkeuze (NEDERLANDS) • ASTROVERSCHUIVING t • Stadkeuze (AMSTERDAM) • LENGTE (Verschijnt alleen bij EXPERT-MOD ON) • BREEDTE (Verschijnt alleen bij EXPERT-MOD ON) •...
  • Seite 79 ASTROVERSCHUIVING Door de instelling van de astroverschuiving kan de astrotijd t onafhankelijk van elkaar worden verschoven (max. +/- 120 Min.). Stadkeuze (AMSTERDAM bij taalinstelling NEDERL) De Stadkeuze is belangrijk voor de astrofunctie. Kies hier de stad die voor uw verblijfplaats het dichtste bij ligt. LENGTE/BREEDTE/TIJDZONE (alleen in EXPERT MODUS ON) De coördinaten zijn bijvoorbeeld in een atlas te vinden.
  • Seite 80: Ingebruikname

    Montage- en gebruiksaanwijzing Ingebruikname Met de eerste druk op de toets wordt de klok „gewekt“. Kies met de +/- toetsen de taal en neem deze over met de OK toets. De klok bevindt zich in de automa- tische modus. Fabrieksinstelling TIJD/DAT: actuele MET en actuele datum PROGRAMMA: ASTRO AVOND ->...
  • Seite 81: Programmering

    Programmering Menuoverzicht 1. Druk op de MENU-toets TIJD/DAT verschijnt. 2. Druk op de +/- toetsen om meer menu’s te selecteren. 3. Druk op de MENU-toets, om in de bedrijfsmodus terecht te komen. TIJD/DAT (tijd en datum instellen) 1. Druk op de MENU-toets en TIJD/DAT verschijnt. 2.
  • Seite 82 Montage- en gebruiksaanwijzing PROGRAMMA ASTRO AVOND (Op -> Schakeltijd, Neer -> Zonsondergang) Druk op de MENU-toets. Om het nieuwe PROGAMMA te selecteren, op de + toets drukken tot PROGRAMMA verschijnt. Bevestig met OK. + toets opnieuw indrukken tot ASTRO AVOND verschijnt. Bevestig met OK.
  • Seite 83 PROGRAMMA INDIVIDUEEL (Op-/Neer -> schakeltijden) 1. Druk op de MENU-toets. 2. Om het nieuwe PROGAMMA te selecteren, op de + toets drukken tot PRO- GRAMMA verschijnt. 3. Bevestig met OK. 4. + toets opnieuw indrukken tot INDIVIDUEEL verschijnt. 5. Bevestig met OK. 6.
  • Seite 84 Montage- en gebruiksaanwijzing INSTELLING VAKANTIE (Vakantie OFF/ON) 1. Druk op de MENU-toets. 2. Om het menu INSTELLING te selecteren, op de + toets drukken tot INSTEL- LING verschijnt. 3. Bevestig met OK. VAKANTIE ON / OFF verschijnt. 4. Met de +/- toets kan de vakantiefunctie op ON of OFF worden gezet. 5.
  • Seite 85: Tussenpositie, Ventilatie/Kantelen, Prog Eindstand

    INSTELLING TUSSENPOSITIE, VENTILATIE/KANTELEN, PROG EINDSTAND (Tijd/ Standprogrammering) 1. De functie VAKANTIE is bevestigd. TUSSENPOSITIE verschijnt. 2. Gebruik de +/- toets om de looptijd naar de TUSSENPOSITIE in te stellen. De opgave van de looptijd vindt plaats in seconden of u loopt naar de TUS- SENPOSITIE met de NEER-/OP-toets vanuit de bovenste eindstand.
  • Seite 86 Montage- en gebruiksaanwijzing INSTELLING NEDERL/ ASTROVERSCHUIVING t (Taalkeuze, Astroverschuiving) De functie PROG EINDSTAND is bevestigd. NEDERL verschijnt. 1. Gebruik de +/- toets om de gewenste taal in te stellen. 2. Bevestig de taalkeuze met OK. 3. ASTROVERSCHUIVING t verschijnt. 4. Gebruik de +/- toets om de gewenste Astroverschuiving t in te stellen (max. +/- 120 min.) 5.
  • Seite 87 INSTELLING (Stadkeuze, EXPERT MODUS (LENGTE, BREEDTE, TIJDZONE)) De functie ASTROVERSCHUIVING t is bevestigd. Stadkeuze (AMSTER- DAM) verschijnt. Gebruik de +/- toets om de meest nabij gelegen stad in te stellen. Bevestig met OK. Aanwijzing Deze dialoogvensters worden alleen getoond, wanneer in het functie- menu de EXPERT MODUS op ON staat. LENGTE verschijnt. (Voor het nauwkeurige bepalen van uw vestigings- plaats, kan deze via de lengte-/breedtegraad worden ingesteld.) Gebruik de +/- toets om de gewenste LENGTEgraad in te stellen.
  • Seite 88 Montage- en gebruiksaanwijzing INSTELLING ZO/WI (Automatische zomer-/wintertijd omschakeling) 1. De functie TIJDZONE is bevestigd. ZO/WI verschijnt. 2. Gebruik de +/- toets om ZO/WI in- of uit te schakelen. 3. Bevestig de keuze met OK. 4. Druk op de MENU-toets, om in de bedrijfsmodus terecht te komen.
  • Seite 89 FUNCTIE (uitsluitend bij afgenomen bedieningsgedeel- te, uitsluitend voor vakkundig personeel) ROLLUIKEN/JALOEZIE, EERSTE INGEBRUIKNAME (Selectie type raambekleding, de datum van de eerste ingebruikname) Druk op de MENU-toets. Om het menu FUNCTIE te selecteren, op de + toets drukken tot FUNCTIE verschijnt. Bevestig met OK. ROLLUIKEN/JALOEZIE verschijnt. Gebruik de +/- toets om tussen rolluiken/jaloezie te kiezen. Bevestig met OK.
  • Seite 90: Batterij Vervangen

    Montage- en gebruiksaanwijzing Batterij vervangen 1. Trek het bedieningsgedeelte er af. 2. Haal de batterij er uit. 3. Plaats de nieuwe batterij in de juiste positie. 4. Stel de tijd opnieuw in. Aanwijzing De ingestelde waarden blijven behouden. Reiniging Reinig het apparaat uitsluitend met een vochtige doek. Gebruik geen reinigings- middelen aangezien deze kunststof kunnen aantasten.
  • Seite 91: Wat Te Doen, Als

    Wat te doen, als ...? Storing Oorzaak Verhelpen Aandrijving loopt niet. Verkeerde aansluiting. Aansluiting controleren. Aandrijving loopt in de Verkeerde aansluiting. Bedrading s en t aan verkeerde richting. voeding omwisselen. Astroprogramma scha- 1. Datum klopt niet. 1. Correcte datum kelt niet nauwkeurig. instellen. 2. Verkeerde stad of 2.

Inhaltsverzeichnis