Herunterladen Inhalt Inhalt Diese Seite drucken

Hauff-Technik MSH PolySafe Montageanleitung

Mehrspartenhauseinführung für gebäude mit keller
Inhaltsverzeichnis

Werbung

Verfügbare Sprachen

Verfügbare Sprachen

Immer. Sicher. Dicht.
Montageanleitung MSH PolySafe
Mehrspartenhauseinführung für Gebäude mit Keller
Installation Instructions MSH PolySafe
Multi-line building entry for buildings with a basement
Vor Beginn der Montage Anleitung lesen und gut aufbewahren!
Read the instructions prior to installation and keep them in a safe place!
DE
EN
www.hauff-technik.de
  

Werbung

Inhaltsverzeichnis
loading

Inhaltszusammenfassung für Hauff-Technik MSH PolySafe

  • Seite 1 Immer. Sicher. Dicht. Montageanleitung MSH PolySafe Mehrspartenhauseinführung für Gebäude mit Keller Installation Instructions MSH PolySafe Multi-line building entry for buildings with a basement Vor Beginn der Montage Anleitung lesen und gut aufbewahren! Read the instructions prior to installation and keep them in a safe place!   ...
  • Seite 2 MSH PolySafe Art. Nr.: 5090033075 Rev.: 05/2022-11-02...
  • Seite 3 MSH PolySafe Art. Nr.: 5090033075 Rev.: 05/2022-11-02...
  • Seite 4 MSH PolySafe Art. Nr.: 5090033075 Rev.: 05/2022-11-02...
  • Seite 5 MSH PolySafe Art. Nr.: 5090033075 Rev.: 05/2022-11-02...
  • Seite 6 MSH PolySafe Art. Nr.: 5090033075 Rev.: 05/2022-11-02...
  • Seite 7 MSH PolySafe 1 2 1 Art. Nr.: 5090033075 Rev.: 05/2022-11-02...
  • Seite 8 MSH PolySafe Anwendungsbeispiele Art. Nr.: 5090033075 Rev.: 05/2022-11-02...
  • Seite 9 (FBVB) angeschlossen werden. mit Innenabdichtung in 30 mm Dichtbreite und Grundvariante 2 mit Innenabdich- • Für die Reinigung der MSH PolySafe keine lösungsmittelhaltigen Reiniger ver- tung 60 mm Dichtbreite für unterkellerte Gebäude. Die Außenabdichtung ist wenden. Wir empfehlen den Kabelreiniger KRMTX.
  • Seite 10 Es dürfen nur unbeschädigte Teile montiert werden. Improper installation can result in damage. • Die Lagerung der MSH PolySafe muss so erfolgen, dass diese keinen zu niede- • Wall sleeves are to be used for all wall types except for concrete and water- ren Temperaturen (<5 °C) und höheren Temperaturen (>30 °C) sowie keiner di-...
  • Seite 11 • The MSH PolySafe is to be protected from damage, damp and soiling prior to installation. Only intact components may be installed. • The MSH PolySafe must be stored in such a way that it is not exposed to low temperatures (< 5 °C), high temperatures (> 30 °C) or direct sunlight.
  • Seite 12: Inhaltsverzeichnis

    Technische Änderungen jederzeit und ohne jede Voran- Beschreibung ............12 kündigung vorbehalten. Montage vorbereiten..........13 Diese Montageanleitung ist Bestandteil des Produkts. MSH PolySafe Grundvariante 1 montieren ....13 Gedruckt in der Bundesrepublik Deutschland. Außendichtelemente montieren ......13 Außendichtelement Modul 1 montieren....14 2 Symbolerklärung Außendichtelement Modul 1.2 (Modul 1 +...
  • Seite 13: Montage Vorbereiten

    Frontplatte abschließen oder ein Drehmo- Kernbohrung/Futterrohr reinigen. ment von max.12 Nm erreicht ist (siehe Abb.: 7 und Abb.: 8). Für die MSH PolySafe wird eine saubere und glatte Anlagefläche benötigt. Eventuell vorhan- Legende zu Abb.: 8 dene Ausbrüche müssen nachbearbeitet werden.
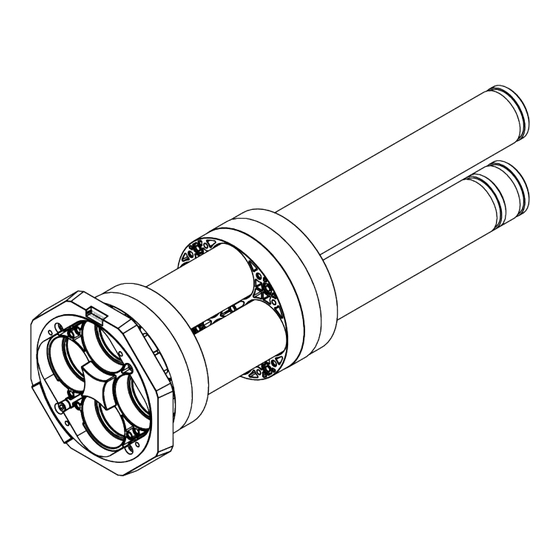
  • Seite 14: Außendichtelement Modul 1 Montieren

    MSH PolySafe Außendichtelement Modul 1 montieren Legende zu Abb.: 17 Abstandshalter Zur leichteren Montage können die Mantelrohre so- Innensechskantschraube wie die Innendichtfläche vom Außendichtelement (Modul 1) reichlich mit Gleitmittel eingestrichen wer- Gebäudeaußenseite: den (siehe Abb.: 9 und Abb.: 10). Mantelrohre sowie die Innendichtfläche vom Außen- Die Außendichtfläche des Außendichtelements...
  • Seite 15: Außendichtelement Modul

    Prüfdruck über die Kapillare zwischen den unterschiedlichen Betonarten entweichen. Legende zu Abb.: 29 Wenn die MSH PolySafe Grundvariante 2 mit den Modul 6 Außendichtelementen Modul 6/6.2 montiert Modul 2 wird, ist eine Wandstärke von mind. 240 mm bis Abstandshalter max.
  • Seite 16: Schutzrohranschluss Montieren

    14.1 Betonierte Wand (WU-Beton) mit Perimeter- dämmung Danach kann der Schutzrohrgraben sofort wieder MSH PolySafe Grundvariante 1 mit Modul 1 und Modul 3 nach den geltenden Richtlinien verfüllt werden. (siehe Abb.: 45). Legende zu Abb.: 45 11 Doppel-/Elementwand mit Außenabdich- Betonwand (WU-Beton) tung nach DIN 18533 W2.1-E und Peri-...
  • Seite 17: Doppel-/Elementwand Mit Außenabdichtung Nach Din 18533 W2.1-E Und Perimeterdämmung Außen

    MSH PolySafe Perimeterdämmung 14.4 Doppel-/Elementwand mit Außenabdichtung nach DIN 18533 W2.1-E und Perimeterdäm- mung außen MSH PolySafe Grundvariante 1 mit Modul 6.2 und Modul 3 (siehe Abb.: 48). Legende zu Abb.: 48 Doppel-/Elementwand Modul 6.2 (Modul 6 und Modul 2)
  • Seite 18: Publishing Notes

    Subject to technical alterations at any time and without Preparing for assembly ..........19 prior announcement. Assembly of MSH PolySafe basic variant 1 ....19 These installation instructions form part of the product. Assembly of external sealing elements ....19 Printed in the Federal Republic of Germany.
  • Seite 19: Preparing For Assembly

    Given a "one-man installation", the external seal- 7 Assembly of external sealing elements ing elements module 1 and module 6 (without outer flange) can be slid onto the MSH PolySafe Overview assembly basic variant 1 before the MSH is pushed into the wall opening (wall sleeve/core drill hole).
  • Seite 20: Assembly Of External Sealing Element Module 1.2 (Module 1 + Module 2)

    MSH PolySafe Then push the external sealing element (module 1) Do not spread lubricant on the external sealing into the opening/wall sleeve from the outside of the surface of the external sealing element. The latter building over the sleeve pipe until it is fl ush with the must be clean, dry and free of grease.
  • Seite 21: Assembly Of External Sealing Element Module 6.2 (Module 6 + Module 2)

    35). yellow control pins can no longer be pushed If the pressure still drops: back. ► Dismantle the MSH PolySafe and check drill hole dia- meter. Further installation „Duct connection“, see chapter ► Clean core drill hole/wall sleeve. ► Check core drill hole for blowholes in the sealing area and rework if necessary.
  • Seite 22: Installation Of Duct Connection

    MSH PolySafe or a torque of 12 Nm is reached (see fig.: 44). Afterwards, the duct trench can immediately be refil- led according to the applicable guidelines.
  • Seite 23: Double/Element Wall With External Sealing According To Din 18533 W2.1-E And Perimeter Insulation, Outside

    1! 14.6 Concreted wall with external sealing accord- ing to DIN 18533 W2.2-E (e.g. bitumen shee- ting) and perimeter insulation MSH PolySafe basic variant 1 with module 4 (see fig.: 50). Legend for fig.: 50 Concreted wall Module 4...
  • Seite 24 Hauff-Technik GmbH & Co. KG Robert-Bosch-Straße 9 89568 Hermaringen, GERMANY Tel. +49 7322 1333-0 Fax + 49 7322 1333-999 office@hauff-technik.de    www.hauff-technik.de...

Inhaltsverzeichnis