Herunterladen Inhalt Inhalt Diese Seite drucken
Kratki SIMPLE BOX Bedienungsanleitung
Vorschau ausblenden Andere Handbücher für SIMPLE BOX:

Werbung

Verfügbare Sprachen

Verfügbare Sprachen

!!! WARUNKIEM OTRZYMANIA GWARANCJI
jest rejestracja produktu na stronie www.kratki.com
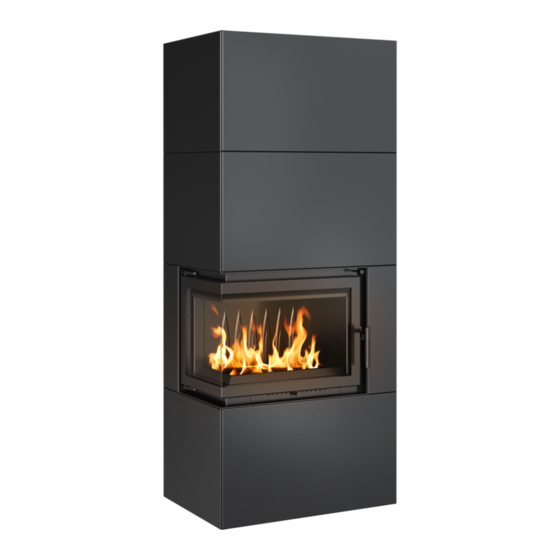
SIMPLE BOX
Instrukcja instalacji i obsługi
SIMPLE BOX / Instructions (EN)
SIMPLE BOX / Bedienungsanleitung (DE)
SIMPLE BOX / Návod k instalaci a provozu (CZ)
Producent:
www.kratki.com
Kratki.pl Marek Bal
ul. W. Gombrowicza 4
26-660 Wsola/Jedlińsk

Werbung

Inhaltsverzeichnis
loading

Inhaltszusammenfassung für Kratki SIMPLE BOX

  • Seite 1 SIMPLE BOX Instrukcja instalacji i obsługi SIMPLE BOX / Instructions (EN) SIMPLE BOX / Bedienungsanleitung (DE) SIMPLE BOX / Návod k instalaci a provozu (CZ) Producent: www.kratki.com Kratki.pl Marek Bal ul. W. Gombrowicza 4...
  • Seite 3 Skład zestawu - elementy zabudowy / Kit composition - built-in elements / Bausatz- Zusammensetzung - eingebaute Elemente / Sestava-prvky sestavy (1 szt.) (1 szt.) (1 szt.) (1 szt.) EZ10 (3 szt. (3 szt.) (1 szt.) EZ12 (1 szt.) (1 szt.) EZ16 (10 szt.)
  • Seite 4 (1 szt.) (1 szt.) EZ18 (1 szt.) EZ11 (1 szt.) EZ10 EZ19 (3 szt.) (1 szt.) EZ20 (1 szt.) EZ15 EZ12 EZ13 (1 szt.) EZ14 (1 szt.) (2 szt.) (2 szt.) EZ17 EZ16 (4 szt.) (10 szt.)
  • Seite 5 EZ11 (1 szt.) EZ19 EZ18 (1 szt.) EZ19 (1 szt.) (1 szt.) EZ20 (1 szt.) EZ20 (1 szt.) EZ19 EZ15 EZ13 (1 szt.) (1 szt.) EZ14 (2 szt.) (2 szt.) EZ22 EZ21 (1 szt.) (1 szt.) EZ23 (1 szt.) EZ20 EZ17 (1 szt.) (4 szt.)
  • Seite 6 Wspieramy kampanię Nie Rób Dymu www.nierobdymu.com, fb/nierobdymu DLA INSTALATORA: Zostawić instrukcję razem z urządzeniem. WŁAŚCICIEL (KONSUMENT): Zachowaj niniejszą instrukcję do przyszłego użytku.
  • Seite 7 Przeczytaj instrukcję do końca i udostępnij ją każdemu ewentualnemu użytkownikowi urzą- dzenia zanim podejmie się jego obsługi, montażu lub demontażu. Dziękujemy za zaufanie i wybór naszego urządzenia SIMPLE BOX. To urządzenie zostało zapro- jektowane z myślą o Państwa bezpieczeństwie i komforcie. Wyrażamy pewność, że będą Pań- stwo zadowoleni ze swojego wyboru ze względu na zaangażowanie jakie włożyliśmy w pracę...
  • Seite 8: Ogólne Informacje

    INSTALACJA UWAGA: UCHYLENIE SIĘ OD ZALECEŃ NINIEJSZEJ INSTRUKCJI W ODNIESIENIU DO INSTA- LACJI, OBSŁUGI LUB UCHYLENIE SIĘ OD ZALECEŃ DOTYCZĄCYCH DOZWOLONYCH CZĘŚCI I AKCESORIÓW DLA TEGO URZĄDZENIA MOŻE SKUTKOWAĆ POWAŻNYMI URAZAMI LUB USZKODZENIEM MIENIA. KAŻDY MODEL ZABUDOWY JEST MODELEM DEDYKOWANYM, TO ZNACZY, ŻE JEST PRZEZNA- CZONY DO INTUICYJNEGO I SZYBKIEGO ZABUDOWANIA TYLKO TEGO MODELU KOMINKA, KTÓRY JEST SPRZEDAWANY W ZESTAWIE Z ZABUDOWĄ.
  • Seite 9 INSTALACJA Instalację wkładu kominkowego należy przeprowadzić zgodnie z postanowieniami obowią- zujących w tym zakresie norm, wymogami prawa budowlanego i obowiązującymi w tym zakresie normami przeciwpożarowymi. Szczegółowe przepisy dotyczące bezpieczeństwa konstrukcji, bezpieczeństwa pożarowego oraz bezpieczeństwa użytkowania zawierają roz- porządzenia oraz przepisy budowlane obowiązujące na terenie danego kraju. Instalacja i uruchomienie wkładu kominkowego powinny być...
  • Seite 10: Informacje Dotyczące Bezpieczeństwa

    UWAGA: Wszystkie powierzchni urządzenia i dedykowanej zabudowy SIMPLE BOX, zwłaszcza w wersji ze stalowymi panelami, traktować należy jako powierzchni robocze! Oznacza to, że podczas pracy urządzenia, wszystkie widoczne elementy urządzenia i zabudowy mogą...
  • Seite 11: Montaż Urządzenia

    INSTALACJA – WPROWADZENIE UWAGI ODNOŚNIE PRZEMIESZCZANIA URZĄDZENIA: To urządzenie zostało zaprojektowane z myślą o łatwej instalacji i montażu z możliwością umiej- scowienia go praktycznie w dowolnym miejsce, tj. wszędzie tam, gdzie można wyprowadzić komin zgodny z wymogami instalacyjnymi instrukcji kominka oraz z wymogami prawa budowlanego. OSTRZEŻENIE: NIE PRÓBUJ PRZEMIESZCZAĆ...
  • Seite 12 Krok 2. Wzorując się na czynnościach wykonanych w kroku pierwszym należy przykręcić przednie nogi konstrukcji nośnej zgodnie ze schematem poniżej. Krok 3. Zamontuj panel tylny zabudowy, zgodnie ze schematem poniżej, używając zaczepów na pa- nelu i wsuwając go we wcięcia znajdujące w szkielecie konstrukcji nośnej. Krok 3.2 (Opcja z dolotem) W przypadku podłączenia dolotu powietrza, w następnej kolejności należy ustawić...
  • Seite 13 SIMPLE BOX jest wyłącznie dodatkiem. Jeśli brak jest lokalnych wytycznych dotyczących instalacji urzą- dzenia wraz z jego instalacją kominową, należy kierować się w tym założeniami instrukcji urządzenia i jego podłączenia, dołączonymi do zakupionego kominka.
  • Seite 14 For the INSTALLER: Leave the manual with the device. CONSUMER: Keep this manual for future reference.
  • Seite 15 Thank you for trusting us and choosing our SIMPLE BOX. This device was designed with your sa- fety and comfort in mind. We are confident that you will be satisfied with your choice due to the commitment we have put into the design and production of this device.
  • Seite 16: Background Information

    INSTALLATION NOTE: FAILURE TO FOLLOW THE INSTRUCTIONS IN THIS MANUAL WITH RESPECT TO INSTAL- LATION, OPERATION, OR FAILURE TO FOLLOW THE INSTRUCTIONS FOR PERMITTED PARTS AND ACCESSORIES FOR THIS DEVICE MAY RESULT IN SERIOUS INJURY OR DAMAGE TO PRO- PERTY. EACH BUILT-IN MODEL IS A DEDICATED MODEL, THAT IS TO SAY, IT IS DESIGNED FOR INTU- ITIVE AND QUICK INSTALLATION ONLY OF THE FIREPLACE MODEL THAT IS SOLD WITH THE BUILT-IN MODEL.
  • Seite 17 Installation The installation of the fireplace insert must be carried out in accordance with the provisions of the applicable standards, the requirements of the construction law and the applicable fire standards. Detailed rules on structural safety, fire safety and safety of use are contained in the regulations and building regulations in force in the country.
  • Seite 18: Safety Information

    NOTE: All surfaces of the device and dedicated installation of the SIMPLE BOX, especially in the version with steel panels, should be treated as working surfaces! This means that during operation...
  • Seite 19: Installation Rules

    INSTALLATION - INTRODUCTION NOTES ON THE MOVEMENT OF THE DEVICE: This device has been designed for easy installation and assembly with the possibility to place it practically in any place, i.e. anywhere where the chimney can be brought out in accordance with the installation requirements of the fireplace manual and the building law.
  • Seite 20 Step 2: Following the steps of step 1, screw the front legs of the superstructure in accordance with the diagram below. Step 3: Install the back panel, as shown in the diagram below, using the hooks on the panel and inser- ting it into the notches in the substructure frame.
  • Seite 21 The connection of the fireplace to the chimney installation should respect the local construction law and the guidelines contained in the manual of the device itself, for which the SIMPLE BOX is only an accessory. If there are no local guidelines for the installation of the appliance and its chimney installa- tion, follow the instructions for the appliance and its connection included with the purchased fireplace.
  • Seite 22 Für den INSTALLATEUR: Lassen Sie das Handbuch bei dem Gerät. VERBRAUCHER: Bewahren Sie dieses Handbuch zum späteren Nachschlagen auf.
  • Seite 23 Verfügung, bevor Sie es in Betrieb nehmen, installieren oder demontieren. Danke, dass Sie uns vertrauen und unsere SIMPLE BOX gewählt haben. Dieses Gerät wurde im Hinblick auf Ihre Sicherheit und Ihren Komfort entwickelt. Wir sind zuversichtlich, dass Sie mit Ihrer Wahl aufgrund des Engagements, das wir in das Design und die Produktion dieses Geräts...
  • Seite 24: Einrichtung

    EINRICHTUNG HINWEIS: DIE NICHTBEACHTUNG DER ANWEISUNGEN IN DIESEM HANDBUCH IN BEZUG AUF INSTALLATION, BETRIEB ODER DIE NICHTBEACHTUNG DER ANWEISUNGEN FÜR ZULÄSSIGE TEILE UND ZUBEHÖR FÜR DIESES GERÄT KANN ZU SCHWEREN VERLETZUNGEN ODER SACH- SCHÄDEN FÜHREN. JEDES EINGEBAUTE MODELL IST EIN DEDIZIERTES MODELL, D.H. ES IST NUR FÜR DIE INTUITI- VE UND SCHNELLE INSTALLATION DES KAMINMODELLS VORGESEHEN, DAS ZUSAMMEN MIT DEM EINGEBAUTEN MODELL VERKAUFT WIRD.
  • Seite 25: Sicherheitshinweise

    Kontakt mit dem Gerät vermeiden, um Verbrennungen und Entzün- dungen der Kleidung zu vermeiden. HINWEIS: Alle Oberflächen des Geräts und die spezielle Installation der SIMPLE BOX, insbesondere in der Ausführung mit Stahlplatten, sollten als Arbeitsflächen behandelt werden! Das bedeutet, dass während des Betriebs des Geräts alle sichtbaren Elemente des Geräts und seines Gehäuses...
  • Seite 26: Installationsregeln

    INSTALLATION - EINFÜHRUNG NOTIZEN ÜBER DIE BEWEGUNG DES GERÄTS: Dieses Gerät wurde für eine einfache Installation und Montage konzipiert, mit der Möglichkeit, es praktisch an jedem Ort zu platzieren, d.h. überall dort, wo der Schornstein gemäß den Installation- sanforderungen des Kaminhandbuchs und des Baurechts herausgebracht werden kann. WARNUNG: VERSUCHEN SIE NICHT, DAS GERÄT WÄHREND DES BETRIEBS ZU BEWEGEN! INSTALLATIONSREGELN Die Installation sollte in Übereinstimmung mit den Anforderungen des nationalen oder regionalen...
  • Seite 27 INSTALLATIE De installatie van de haard insert moet worden uitgevoerd in overeenstemming met de be- palingen van de geldende regelgeving in dit verband, de eisen van de bouwwetgeving en de brandbeveiliging regelgeving in dit verband. De specifieke regels met betrekking tot de bouwveiligheid, brandveiligheid en gebruiksveiligheid omvatten de regels en bouwvoor- schriften die van kracht zijn in uw land.
  • Seite 28 Schritt 1: Schrauben Sie zunächst die hinteren Beine der Aufbaustruktur wie in der Abbildung unten dargestellt, indem Sie sie an den angegebenen Punkten zu M6-Bolzen und Muttern drehen. Schrauben Sie auch die mitgelieferten verstellbaren Füße für die spätere Nivellierung der gesamten Struktur ein.
  • Seite 29 Der Anschluss des Kamins an die Schornsteinanlage sollte die örtlichen Bauvorschriften und die in der Anleitung des Gerätes selbst enthaltenen Richtlinien beachten, für die die SIMPLE BOX nur ein Zubehörteil ist. Wenn es keine lokalen Richtlinien für die Installation des Geräts und des Schornsteins gibt, befolgen Sie die Bestimmungen des Gerätehandbuchs und des Anschlusses, die dem gekauften...
  • Seite 30 ACHTUNG!!!! Die Wartung des Geräts darf nur von einem qualifizierten Servicetechniker durchgeführt werden. Es sollte auch daran erinnert werden, dass für jedes Heizgerät Schornsteinfeger nach den Richtlinien der örtlichen Bauordnung, mindestens aber einmal im Jahr, erforderlich sind. • Das Gerät sollte regelmäßig, mindestens einmal pro Jahr, überprüft werden. •...
  • Seite 31 Pro instalační program: nechte příručku spolu s přístrojem. Majitel (spotřebitel): uložte tuto příručku pro budoucí použití.
  • Seite 32: Nastavení

    Přečtěte si příručku až do konce a sdílejte ji s jakýmkoli možným uživatelem zařízení, než začnete s jeho provozem, montáží nebo demontáží. Děkujeme za vaši důvěru a výběr našeho zařízení SIMPLE BOX. Toto zařízení je navrženo s ohle- dem na vaši bezpečnost a pohodlí. Vyjadřujeme důvěru, že budete spokojeni s vaší volbou kvůli závazku, který...
  • Seite 33: Obecné Informace

    POZNÁMKA: Všechny povrchy zařízení a speciální instalace SIMPLE BOX, zejména ve verzi s oce- lovými panely, by měly být považovány za pracovní plochy! To znamená, že během práce zařízení, všechny viditelné...
  • Seite 34 doby, dokud jeho podchlazení. POZNÁMKA: Zařízení a viditelné instalační prvky mohou být velmi horké i během několika hodin od jeho splatnosti. Veškeré činnosti související s náplní nebo odstraněním popela by měly být pro- váděny v rukavicích odolných proti teplu! Małe dzieci, niemowlęta, osoby niedołężne i inne osoby wymagające szczególnej uwagi, przeby- wające w przestrzeni urządzenia powinny być...
  • Seite 35 NASTAVENÍ Instalace Krbové vložky musí být provedena v souladu s předpisy platnými v tomto ohledu, požadavky stavebního zákona a protipožárními předpisy platnými v tomto ohledu. Zvláštní pravidla týkající se bezpečnosti konstrukce, požární bezpečnosti a bezpečnosti použití zahr- nují pravidla a stavební předpisy platné ve vaší zemi. Instalace a uvedení Krbové vložky do provozu musí...
  • Seite 36: Instalace Zařízení

    Toto zařízení bylo testováno na kvalitu a bezpečnost a ověřen oprávněným vědecko-výzkumný ústav, a kryt byl testován na pevnost a bezpečnost je pouze dodávaný s tímto přístrojem! UPEVŇOVACÍ PRVKY SADY Součástí prvku jsou následující upevňovací prvky: Šestihranná Šroub s šestih- matice s rannou hlavou kuželovou...
  • Seite 37 Krok 5. Poté nastavte opačný boční panel-spodní podle pokynů v kroku 4. Krok 6. V souladu s níže uvedeným schématem nastavte přední a spodní panel tak, že jej vložíte po- mocí háčků do výklenku v bočních a spodních panelech Krok 7. Pokud nechcete nastavit vstupní kanál, to znamená, že přístroj ještě není nastaven na nosnou konstrukci instalace, takže v dalším kroku umístěte přístroj na nosnou platformu zabydowy v souladu se schématem níže.
  • Seite 38 Připojení krbu k instalaci komín musí být provedeno v souladu s místní stavební předpisy a pokyny, obsažené v příručce samotný přístroj, jehož instalace SIMPLE BOX je pouze doplňkem. Pokud nejsou k dispozici místní pokyny pro instalaci spotřebiče spolu s instalací komína, postupujte podle předpokla- dů...
  • Seite 39 WYMIARY ZABUDOWY / INSTALLATION DIMENSIONS / EINBAUMAßE / ROZMĚRY INSTALACE SIMPLE BOX BSP...
  • Seite 40 SIMPLE BOX BSL...
  • Seite 41 Krok 1. / Step 1 / Schritt 1 Śruba M6 x12 Screw M6x12 Śruba M6x12 Schraube M6x12 Šroub M6 x12 Stopka STOPKA Footer Fußzeile Výstupní údaje Nakrętka M6 Nakrętka M6 M6 nut Nuss M6 Šroub M6...
  • Seite 42 Krok 2. / Step 2 / Schritt 2...
  • Seite 43 Krok 3. / Step 3 / Schritt 3...
  • Seite 44 W przypadko podłączenia dolotu powietrza, kominek należy ustawić na konstrukcji np. na cegłach, Krok 3.2. / Step 3.2 / Schritt 3.2 zamontować dolne panele i usunąć podstawki.
  • Seite 45 Krok 4. / Step 4 / Schritt 4 śruba M5x10 - poziomowanie osłony screw M5x10 - levelling of the protection structure Śruba M5x10 - poziomowanie osłony Schraube M5x10 - Nivellierung der Schutzvorrichtung šroub M5x10-vyrovnání krytu śruba M5x10 - mocowanie zaczepu Śruba M5x10 - mocowanie zaczepu screw M5x10 - fixing the hook Schraube M5x10 - Befestigung des Hakens...
  • Seite 46 Krok 5. / Step 5 / Schritt 5 1x śruba M5x10 - mocowanie zaczepu 1x śruba M5x10 - mocowanie zaczepu 1x screw M5x10 - fixing the hook 1x Schraube M5x10 - Befestigung des Starters 1x šroub M5x10 - upevnění pro upevnění...
  • Seite 47 Krok 6. / Step 6 / Schritt 6 EZ10 Krok 7. / Step 7 / Schritt 7...
  • Seite 48 Krok 8. / Step 8 / Schritt 8 Śruba M5x10 Screw m5x10 Śruba M5x10 Schraube m5x10 Šroub M5x10...
  • Seite 49 Krok 9. / Step 9 / Schritt 9 śruba M5x10 screw m5x10 Śruba M5x10 Schraube m5x10 Šroub M5x10...
  • Seite 50 Krok 10. / Step 10 / Schritt 10 EZ11 zaczep EZ16 hook Clip śruba M5x10 háček screw M5x10 Schraube m5x10 Šroub M5x10...
  • Seite 51 Krok 11. / Step 11 / Schritt 11 EZ15 zaczep hook Clip ZACZEP háček...
  • Seite 52 Krok 12. / Step 12 / Schritt 12 Panel mniejszy z wieszakami w wersji BSL / Smaller panel with hangers in BSL design / Kleineres Paneel mit Aufhängern in BSL-Ausführung / Menší panel s věšáky BSL śruba M4x6 Śruba M4x6 screw M4x6 Schraube M4x6 šroub 44x6...
  • Seite 53 Panel mniejszy z wieszakami w wersji BSP / Smaller panel with hangers according to GNP / Kle- ineres Paneel mit Aufhängern in BSP-Ausführung / Menší panel s věšáky BSP śruba M4x6 Śruba M4x6 screw M4x6 Schraube m4x6 šroub 44x6 EZ14 EZ12 Wieszak do kominka z przeszleniem Wieszak do kominka...
  • Seite 54 Krok 13. / Step 13 / Schritt 13...
  • Seite 55 Krok 14. / Step 14 / Schritt 14 Panel lewy w wersji BSL Panel lewy w wersji BSP Left panel in the BSL version Left panel in the BSP version Linke Tafel in der BSL-Version Linke Tafel in der BSP-Version Levý...
  • Seite 56 Krok 15. / Step 15 / Schritt 15 1x zaczep 1 x ZACZEP 1x hook 1x Clip 1x háček 2x zaczep 2x hook 2 x ZACZEP 2x Clip 2x háček...
  • Seite 57 F ( 1 : 3 ) Zawiesić tylny i boczny ekran Zawiesic tylny i boczny ekran w odpowiednich wycięciach. w odpowiednich wycięciach. EZ22 EZ21 Hang the rear and side screens in the appropriate cut-outs. Hängen Sie die Rück- und Seitenscheiben ein in den entspre- chenden Ausschnitten.
  • Seite 58 Widok z założonymi ekranami Poluzować 4 śruby M5 View with screens attached Lösen Sie 4 Schrauben Ansicht mit angeschlossenen Bildschirmen M5 Loosen 4 M5 screws Widok z założonymi ekranami. Poluzować 4 śruby M5 Povolte 4 šrouby M5 Pohled se složenými obrazovkami EZ24 EZ23 Wsunąć...
  • Seite 59 Krok 16. / Step 16 / Schritt 16 EZ10 śruba M5x10 Śruba M5x10 screw M5x10 Schraube M5x10 šroub M5x10 śruba M6x12 Śruba M6x12 screw M6x12 Schraube M6x12 šroub M6x12 nakrętka M6 M6-Mutter Nakrętka M6 M6-Mutter matice M6...
  • Seite 60 Krok 17. / Step 17 / Schritt 17...
  • Seite 61 Krok 18. / Step 18 / Schritt 18 EZ18 śruba M5x10 screw M5x10 Śruba M5x10 Schraube M5x10 šroub M5x10...
  • Seite 62 Krok 19. / Step 19 / Schritt 19 EZ20 śruba M5x10 Śruba M5x10 screw M5x10 Schraube M5x10 šroub M5x10 EZ19...
  • Seite 63 Gotowa zabudowa wraz z urządzeniem / Ready to install with the unit / Bereit zur Installation mit dem Gerät / Hotová sestava se zařízením...
  • Seite 64 SIMPLE/BOX Rys. Zachowanie bezpiecznej minimalnej odległości od ściany niepalnej 100 mm. Fig.maintaining a safe minimum distance of 100 mm from the non-combustible wall. Fig. Het behouden van een veilige minimumafstand van een onbrandbare wand van 100 mm. Rýže. udržování bezpečné minimální vzdálenosti od nehořlavé stěny 100 mm.
  • Seite 66 (PL) SPRZEDAJĄCY Nazwa: Pieczęć i podpis sprzedawcy; Adres: Tel/fax: Data sprzedaży: NABYWCA WKŁADU Wkład kominkowy powinien być zainstalowany zgodnie Data i czytelny podpis nabywcy; z obowiązującymi w kraju przepisami i regułami, z postano- wieniami instrukcji obsługi przez instalatora posiadającego stosowne uprawnienia. Oświadczam, iż...
  • Seite 67 (PL) REJESTR PRZEGLĄDÓW PRZEWODU DYMOWEGO Przegląd przy instalacji wkładu Data, podpis i pieczęć kominiarza Data, podpis i pieczęć kominiarza Data, podpis i pieczęć kominiarza Data, podpis i pieczęć kominiarza Data, podpis i pieczęć kominiarza Data, podpis i pieczęć kominiarza Data, podpis i pieczęć kominiarza Data, podpis i pieczęć...
  • Seite 68 SELLER Seller’s seal and signature; Name: Address: Tel/fax: Date of sale: INSERT BUYER The fireplace insert should be installed in accordance with Date and legible signature of the Buyer; the rules and regulations valid in the country, the manual provisions by the installer having required qualifications. I hereby declare that having read the operating manual and the guarantee conditions in case of failure to observe the provisions included there the producer bears no liability for...
  • Seite 69 REGISTER OF SMOKE DUCT INSPECTIONS Inspection during the insert installation Date, signature and seal of the chimney sweeper Date, signature and seal of the chimney sweeper Date, signature and seal of the chimney sweeper Date, signature and seal of the chimney sweeper Date, signature and seal of the chimney sweeper Date, signature and seal of the chimney sweeper Date, signature and seal of the chimney sweeper...
  • Seite 70: Verkäufer

    VERKÄUFER Der Name: Stempel und Unterschrift des Verkäufers; Die Adresse: Tel/fax: Datum des Verkaufs: STOCKER EINFÜGEN Der Kaminofen muss gemäß den folgenden Vorschriften in- Datum und leserliche Unterschrift des Käufers; stalliert werden mit den geltenden nationalen Vorschriften und Regeln, mit den Bestimmungen der Betriebsanleitung durch einen autorisierten Installateur.
  • Seite 71 RAUCHKANAL-INSPEKTIONSREGISTER Datum, Unterschrift und Siegel Übersicht bei der Installation der Patrone des Schornsteinfegers Datum, Unterschrift und Siegel Datum, Unterschrift und Siegel des Schornsteinfegers des Schornsteinfegers Datum, Unterschrift und Siegel Datum, Unterschrift und Siegel des Schornsteinfegers des Schornsteinfegers Datum, Unterschrift und Siegel Datum, Unterschrift und Siegel des Schornsteinfegers des Schornsteinfegers...
  • Seite 72 Kratki.pl Marek Bal ul. Gombrowicza 4, Wsola 26-660 Jedlińsk, Poland tel. 00 48 48 389 99 00 www.kratki.com www.facebook.com/kratkipl www.youtube.com/kratkipl www.instagram.com/kratkipl V6/AP/11/06/2021...

Inhaltsverzeichnis