Inhaltsverzeichnis
Werbung
Verfügbare Sprachen
Verfügbare Sprachen
AUSSENLEUCHTE MIT BEWEGUNGSSENSOR /
OUTDOOR LIGHT WITH MOTION SENSOR / LAMPE
EXTÉRIEURE AVEC DÉTECTEUR DE MOUVEMENTS
AUSSENLEUCHTE MIT
BEWEGUNGSSENSOR
Montage-, Bedienungs- und Sicherheitshinweise
LAMPE EXTÉRIEURE AVEC
DÉTECTEUR DE MOUVEMENTS
Instructions de montage, d'utilisation et
consignes de sécurité
LAMPA ZEWNĘTRZNA Z
CZUJNIKIEM RUCHU
Wskazówki montażu, obsługi i bezpieczeństwa
EXTERIÉROVÉ SVIETIDLO S
POHYBOVÝM SENZOROM
Pokyny pre montáž, obsluhu a bezpečnostné pokyny
IAN 355393_2004
OUTDOOR LIGHT WITH
MOTION SENSOR
Assembly, operating and safety instructions
BUITENLAMP MET
BEWEGINGSSENSOR
Montage-, bedienings- en veiligheidsinstructies
VENKOVNÍ SVÍTIDLO S
POHYBOVÝM SENZOREM
Pokyny k montáži, obsluze a bezpečnostní pokyny
Werbung
Inhaltsverzeichnis

Verwandte Anleitungen für LIVARNO LUX HG06726A


Inhaltszusammenfassung für LIVARNO LUX HG06726A
- Seite 1 AUSSENLEUCHTE MIT BEWEGUNGSSENSOR / OUTDOOR LIGHT WITH MOTION SENSOR / LAMPE EXTÉRIEURE AVEC DÉTECTEUR DE MOUVEMENTS AUSSENLEUCHTE MIT OUTDOOR LIGHT WITH BEWEGUNGSSENSOR MOTION SENSOR Montage-, Bedienungs- und Sicherheitshinweise Assembly, operating and safety instructions LAMPE EXTÉRIEURE AVEC BUITENLAMP MET DÉTECTEUR DE MOUVEMENTS BEWEGINGSSENSOR Instructions de montage, d‘utilisation et Montage-, bedienings- en veiligheidsinstructies...
- Seite 2 DE / AT / CH Montage-, Bedienungs- und Sicherheitshinweise Seite GB / IE Assembly, operating and safety instructions Page FR / BE Instructions de montage, d‘utilisation et consignes de sécurité Page NL / BE Montage-, bedienings- en veiligheidsinstructies Pagina 42 Wskazówki montażu, obsługi i bezpieczeństwa Strona 53...
- Seite 3 HG06726A HG06726B...
- Seite 4 HG06726A HG06726B HG06726A HG06726B...
-
Seite 5: Inhaltsverzeichnis
Legende der verwendeten Piktogramme ............Seite Einleitung ..............Seite Bestimmungsgemäße Verwendung ......... Seite Teilebeschreibung ............Seite Technische Daten ............. Seite Lieferumfang ..............Seite Allgemeine Sicherheitshinweise ....Seite Vor der Montage ........... Seite 10 Montage ................ Seite 10 Bewegungssensor einstellen ..........Seite 12 Leuchtdauer einstellen ............ -
Seite 6: Legende Der Verwendeten Piktogramme
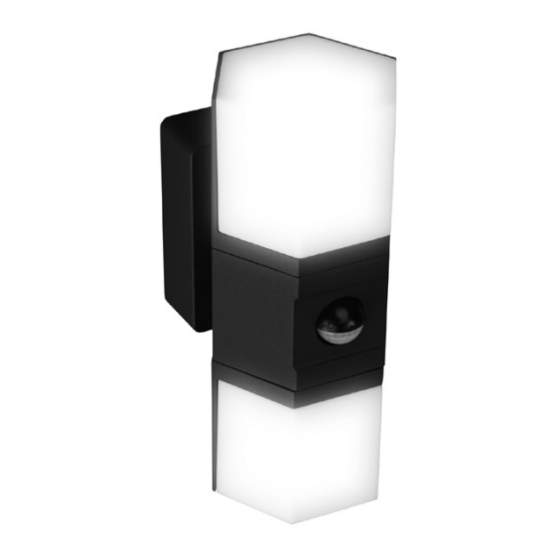
Legende der verwendeten Piktogramme Erfassungsbereich des Bewegungssensors: ca. 5–8 m Erfassungswinkel des Bewegungssensors: ca. 90 ° Staub- und spritzwassergeschützt Wechselstrom / -spannung Nicht dimmbar Schutzklasse I LED-Lebensdauer Außenleuchte mit Bewegungssensor Einleitung Wir beglückwünschen Sie zum Kauf Ihres neuen Produkts. Sie haben sich damit für ein hochwertiges Produkt entschieden. -
Seite 7: Bestimmungsgemäße Verwendung
Bestimmungsgemäße Verwendung Das Produkt ist zur Anwendung im Außenbereich bestimmt. Dieses Produkt ist nur für den privaten und nicht für den gewerblichen Gebrauch bestimmt oder für andere Anwendungen geeignet. Teilebeschreibung Innensechskantschlüssel LED-Außenleuchte Fixierschraube Sensorabdeckung Lampenkörper Bewegunssensor Lüsterklemme Drehregler LUX Anschlussgehäuse (Lichtempfindlichkeit) Dübel Drehregler SENS... -
Seite 8: Lieferumfang
Lieferumfang 1 Außenleuchte mit Bewegungssensor 2 Dübel (Ø 6 mm) 2 Befestigungsschrauben 1 Innensechskantschlüssel 1 Montage- und Bedienungsanleitung Allgemeine Sicherheitshinweise MACHEN SIE SICH VOR DER ERSTEN BENUTZUNG DES PRODUKTS MIT ALLEN BEDIEN- UND SICHERHEITSHINWEISEN VERTRAUT! HÄNDIGEN SIE ALLE UNTERLAGEN BEI WEITER- GABE DES PRODUKTS AN DRITTE EBENFALLS MIT AUS! LEBENS- UND UNFALLGEFAHR FÜR KLEIN- KINDER UND KINDER! Lassen Sie Kinder nie-... -
Seite 9: Lebensgefahr Durch Elektrischen Schlag
ERSTICKUNGSGEFAHR! Kinder können mitgelieferte Kleinteile (z. B. Schrauben) verschlucken und daran ersticken. Halten Sie Kinder während der Montage vom Arbeitsbereich fern. Lebensgefahr durch elektrischen Schlag Überprüfen Sie vor jedem Netzanschluss das Produkt auf etwaige Beschädigungen. Benutzen Sie das Produkt niemals, wenn Sie irgendwelche Beschädigungen feststellen. -
Seite 10: Vor Der Montage
Vor der Montage Hinweis: Entfernen Sie sämtliches Verpackungsmaterial vom Produkt. Wichtig: Der elektrische Anschluss muss durch einen ausgebildeten Elektriker oder eine für Elektroinstallationen eingewiesene Person erfolgen. Diese muss Kenntnis über die Eigenschaften des Produkts und Anschlussbestimmungen haben. S tellen Sie vor der Installation sicher, dass an der Leitung, an der das Produkt angeschlossen werden soll, keine Spannung vorliegt. - Seite 11 Stellen Sie sicher, dass der Bewegungssensor den ge- wünschten Bereich erfasst. Der Bewegungssensor einen Erfassungsbereich von max. 8 m, bei einem Erfassungs- winkel von ca. 90 °(abhängig von der Montagehöhe – ideal ist eine Höhe von 1,8–2,2 m). A chten Sie darauf, dass der Bewegungssensor nachts nicht von Straßenbeleuchtung angestrahlt wird.
-
Seite 12: Bewegungssensor Einstellen
V erbinden Sie nun den Erdungsleiter (grün-gelb) mit der Masseklemme (siehe Abb. F). Setzen Sie nun vorsichtig den Lampenkörper auf das Anschlussgehäuse und befestigen Sie ihn mithilfe der Fixierschrauben . Ziehen Sie die Fixierschrauben dem Innensechskantschlüssel fest (siehe Abb. G). Setzen Sie die Sicherung wieder ein oder schalten Sie den Lei- tungsschutzschalter wieder ein. -
Seite 13: Empfindlichkeit Des Sensors Einstellen
Empfindlichkeit des Sensors einstellen D rehen Sie den Drehregler SENS im Uhrzeigersinn, um die Empfindlichkeit des Sensors zu erhöhen. Hinweis: Der Bewegungssensor erfasst Wärmestrahlung. Er reagiert bei niedrigen Außentemperaturen empfindlicher auf Körperwärme als bei warmen Außentemperaturen. Achten Sie darauf, ggf. die Empfindlichkeit des Sensors im Laufe der Jahreszeiten zu regulieren. -
Seite 14: Garantie
Beachten Sie die Kennzeichnung der Verpackungsma- terialien bei der Abfalltrennung, diese sind gekenn- zeichnet mit Abkürzungen (a) und Nummern (b) mit folgender Bedeutung: 1–7: Kunststoffe / 20–22: Papier und Pappe / 80–98: Verbundstoffe. Das Produkt und die Verpackungsmaterialien sind recy- celbar, entsorgen Sie diese getrennt für eine bessere Abfallbehandlung. -
Seite 15: Abwicklung Im Garantiefall
Tritt innerhalb von 3 Jahren ab dem Kaufdatum dieses Produkts ein Material- oder Fabrikationsfehler auf, wird das Produkt von uns – nach unserer Wahl – für Sie kostenlos repariert oder ersetzt. Diese Garantie verfällt, wenn das Produkt beschädigt, nicht sachgemäß benutzt oder gewartet wurde. -
Seite 16: Service
Service Service Deutschland Tel.: 0800 5435 111 E-Mail: owim@lidl.de Service Österreich Tel.: 0800 292726 E-Mail: owim@lidl.at Service Schweiz Tel.: 0800562153 E-Mail: owim@lidl.ch 16 DE/AT/CH... - Seite 17 List of pictograms used ........Page 18 Introduction ..............Page 18 Intended use ..............Page 19 Parts description ............... Page 19 Technical data ..............Page 19 Scope of delivery ............. Page 20 General safety instructions ......Page 20 Before installation ..........
-
Seite 18: List Of Pictograms Used
List of pictograms used Motion sensor range: approx. 5–8 m Detection angle of motion sensor: approx. 90 ° Dust protected + splash-proof Alternating current / voltage Not dimmable Protection class I LED lifespan Outdoor light with motion sensor Introduction We congratulate you on the purchase of your new product. You have chosen a high quality product. -
Seite 19: Intended Use
Intended use This product is suitable for outdoor use. This product is only in- tended for private use and is not suitable for commercial use or for use in other applications. Parts description Allen key LED outdoor light Fixing screw Sensor cover Lamp body Motion sensor... -
Seite 20: Scope Of Delivery
Scope of delivery 1 Outdoor light with motion sensor 2 Wall plugs (Ø 6 mm) 2 Mounting screws 1 Allen key 1 Assembly instructions and safety notes General safety instructions BEFORE USING THE PRODUCT, PLEASE FAMILIARISE YOUR- SELF WITH ALL OF THE SAFETY INFORMATION AND IN- STRUCTIONS FOR USE! WHEN PASSING THIS PRODUCT ON TO OTHERS, PLEASE ALSO INCLUDE ALL THE DOCUMENTS! DANGER TO LIFE AND ACCIDENT HAZARD... -
Seite 21: Before Installation
Danger to life by electric shock Always check the product for damage before connecting it to the mains. Never use the product if it shows any signs of damage. Prior to installation, verify that the mains voltage on site corre- sponds with the operating voltage required for the product (230 V∼... -
Seite 22: Installation
or switch off the circuit breaker in the fuse box (0 position) (see fig. A). Use the voltage tester to verify the de-energised status. The included mounting material is suitable for ordinary solid concrete or masonry construction. Check which mounting material is suitable for your chosen mounting surface. -
Seite 23: Adjusting The Motion Sensor
Now drill the fixing holes (Dia. approx. 6 mm, depth approx. 30 mm). Ensure that you do not damage the electrical supply line. Now place the wall plugs into the drill holes (see fig. D). Slide the mains cable (external) through the membrane (see fig. -
Seite 24: Setting The Lighting Duration
Note: After the adjustment, rotate the sensor cover back to the original position (cover the controllers), otherwise it will influence the sensor function. Setting the lighting duration Turn the rotary control TIME clockwise to increase the duration of the illumination. The lighting duration can be adjusted within a time window of approx. -
Seite 25: Disposal
Clean the product with a lint-free, slightly moist cloth and mild cleaning agent. Re-install the fuse for this circuit or switch on at the circuit breaker in the fuse box. Disposal The packaging is made entirely of recyclable materials, which you may dispose of at local recycling facilities. -
Seite 26: Warranty
Warranty The product has been manufactured to strict quality guidelines and meticulously examined before delivery. In the event of product defects you have legal rights against the retailer of this product. Your legal rights are not limited in any way by our warranty detailed below. -
Seite 27: Service
You will find the item number on the rating plate, an engraving on the front page of the instructions for use (bottom left), or as a sticker on the rear or bottom of the product. If functional or other defects occur, please contact the service department listed either by telephone or by e-mail. - Seite 28 Légende des pictogrammes ......Page 29 Introduction ..............Page 29 Utilisation conforme ............Page 30 Descriptif des pièces ............Page 30 Données techniques ............Page 30 Contenu de la livraison ............ Page 31 Instructions générales de sécurité ..Page 31 Avant le montage ..........
-
Seite 29: Légende Des Pictogrammes
Légende des pictogrammes Zone de détection du détecteur de mouvement : env. 5–8 m Angle de détection du détecteur de mouvement : env. 90 ° Protégé contre la poussière et les projections d'eau Courant alternatif / Tension alternative Intensité non réglable Classe de protection I Durée de vie des LED Lampe extérieure avec détecteur... -
Seite 30: Utilisation Conforme
Utilisation conforme Le produit est conçu pour être utilisé en plein air. Ce produit est uni- quement destiné à une utilisation privée, et non à une utilisation commerciale ou à d‘autres domaines d‘utilisation. Descriptif des pièces Clé pour vis à six pans creux Applique extérieure LED Vis de fixation Plaque de recouvrement... -
Seite 31: Contenu De La Livraison
Contenu de la livraison 1 applique d‘extérieur avec capteur de mouvement 2 chevilles (Ø 6 mm) 2 vis de fixation 1 clé pour vis à six pans creux 1 notice de montage et d‘utilisation Instructions générales de sécurité PRENEZ CONNAISSANCE DE TOUTES LES INDICATIONS DE MANIEMENT ET DE SÉCURITÉ... -
Seite 32: Danger De Mort Par Électrocution
Toujours tenir les enfants à l‘écart de la zone de travail lors du montage. Danger de mort par électrocution Avant chaque branchement sur secteur, contrôlez le bon état du produit. Ne jamais utiliser le produit si vous détectez le moindre endommagement. Avant le montage, vérifiez que la tension secteur corresponde à... -
Seite 33: Avant Le Montage
Avant le montage Remarque : Veuillez retirer l‘ensemble des matériaux compo- sant l‘emballage du produit. Important : L‘installation électrique doit être effectuée par un électricien ou par une personne dûment formée à cet effet. Cette personne doit connaître les caractéristiques du produit et des conditions de raccordement. - Seite 34 (selon la hauteur à laquelle il est installé. Une hauteur de 1,8–2,2 m est idéale). L a nuit, le détecteur de mouvement ne doit pas être éclairé par l‘éclairage de la voie publique. Ceci risquerait d‘entraver son bon fonctionnement. Retirez les vis de fixation à...
-
Seite 35: Réglage Du Capteur De Mouvement
fixation . Serrez ensuite les vis de fixation avec la clé pour vis à six pans creux (voir Fig. G). Remettez le fusible en place ou remettez en service le disjoncteur. Votre produit est maintenant prêt à fonctionner (voir Fig. H et I). Remarque : Vous pouvez régler l‘angle des appliques extérieures , en tournant la partie supérieure et inférieure du boîter dans la position souhaitée (voir Fig. -
Seite 36: Régler Le Niveau De Lumière Du Jour
chaleur du corps lorsqu‘il fait froid que lorsqu‘il fait chaud en extérieur. Modifiez le cas échéant le réglage de la sensibilité du détecteur au cours des saisons. Régler le niveau de lumière du jour T ournez le bouton de réglage LUX dans le sens des ai- guilles d‘une montre pour augmenter le niveau de lumière du jour : dans la position -, le détecteur de mouvement... -
Seite 37: Garantie
Veuillez respecter l‘identification des matériaux d‘em- ballage pour le tri sélectif, ils sont identifiés avec des abbréviations (a) et des chiffres (b) ayant la significa- tion suivante : 1–7 : plastiques / 20–22 : papiers et cartons / 80–98 : matériaux composite. Le produit et les matériaux d’emballage sont recyclables, mettez-les au rebut séparément pour un meilleur traite- ment des déchets. -
Seite 38: Article L217-5 Du Code De La Consommation
cause, si cette mise à disposition est postérieure à la demande d‘intervention. Indépendamment de la garantie commerciale souscrite, le vendeur reste tenu des défauts de conformité du bien et des vices rédhibi- toires dans les conditions prévues aux articles L217-4 à L217-13 du Code de la consommation et aux articles 1641 à... -
Seite 39: Article L217-12 Du Code De La Consommation
recherché par l‘acheteur, porté à la connaissance du vendeur et que ce dernier a accepté. Article L217-12 du Code de la consommation L‘action résultant du défaut de conformité se prescrit par deux ans à compter de la délivrance du bien. Article 1641 du Code civil Le vendeur est tenu de la garantie à... -
Seite 40: Faire Valoir Sa Garantie
Si un problème matériel ou de fabrication devait survenir dans 3 ans suivant la date d‘achat de ce produit, nous assurons à notre dis- crétion la réparation ou le remplacement du produit sans frais sup- plémentaires. La garantie prend fin si le produit est endommagé suite à... -
Seite 41: Service Après-Vente
Service après-vente Service après-vente France Tél. : 0800904879 E-Mail : owim@lidl.fr Service après-vente Belgique Tél. : 080071011 Tél. : 80023970 (Luxembourg) E-Mail : owim@lidl.be FR/BE... - Seite 42 Legenda van de gebruikte pictogrammen ............Pagina 43 Inleiding ..............Pagina 43 Correct gebruik .............Pagina 44 Beschrijving van de onderdelen ........Pagina 44 Technische gegevens ............Pagina 44 Omvang van de levering ..........Pagina 45 Algemene veiligheidsinstructies ....Pagina 45 Voor de montage ..........Pagina 46 Montage ..............Pagina 47 Bewegingssensor instellen ..........Pagina 48 Verlichtingsduur instellen ..........Pagina 49...
-
Seite 43: Legenda Van De Gebruikte Pictogrammen
Legenda van de gebruikte pictogrammen Detectiebereik van de bewegingssensor: ca. 5–8 m Detectiehoek van de bewegingssensor: ca. 90 ° Stof- en spatwaterdicht Wisselstroom / -spanning Niet dimbaar Beschermingsklasse I Led-levensduur Buitenlamp met bewegingssensor Inleiding Hartelijk gefeliciteerd met de aankoop van uw nieuwe product. U heeft voor een hoogwaardig product gekozen. -
Seite 44: Correct Gebruik
Correct gebruik Dit product is bedoeld voor gebruik buitenshuis. Dit product is al- leen bedoeld voor privégebruik en niet voor commerciële of an- dere toepassingen. Beschrijving van de onderdelen Binnenzeskantsleutel Led-buitenverlichting Fixeerschroef Sensorafdekking Lampbehuizing Bewegingssensor Kroonsteentje Draairegelaar LUX Aansluitbehuizing (lichtgevoeligheid) Plug Draairegelaar SENS Bevestigingsschroef... -
Seite 45: Omvang Van De Levering
Omvang van de levering 1 buitenverlichting met bewegingssensor 2 pluggen (Ø 6 mm) 2 bevestigingsschroeven 1 binnenzeskantsleutel 1 montagehandleiding en gebruiksaanwijzing Algemene veiligheidsinstructies MAAK U VOOR DE EERSTE INGEBRUIKNAME VAN HET PRODUCT MET ALLE BEDIENINGS- EN VEILIGHEIDSVOOR- SCHRIFTEN VERTROUWD! GEEF ALLE DOCUMENTEN MEE WANNEER U HET PRODUCT AAN DERDEN DOORGEEFT! LEVENSGEVAAR EN KANS OP ONGEVAL- LEN BIJ KLEUTERS EN KINDEREN! Laat... -
Seite 46: Voor De Montage
Levensgevaar door elektrische schok Controleer het product altijd op eventuele beschadigingen voordat u het aan de stroom aansluit. Gebruik het product nooit wanneer u een beschadiging heeft geconstateerd. Controleer voor de montage, of de ter beschikking staande spanning overeen komt met de benodigde bedrijfsspanning van het product (230 V ~ 50 Hz). -
Seite 47: Montage
C ontroleer voor de installatie of op de leiding waarop het product wordt aangesloten geen spanning staat. Verwijder hiervoor de zekering of schakel het betreffende stroomcircuit in de zekeringskast uit (0-stand) (zie afb. A). C ontroleer hiervoor de spanningsvrijheid met een spanning- zoeker. -
Seite 48: Bewegingssensor Instellen
G ebruik de voor de bevestigingsschroeven bestemde ga- ten in de aansluitbehuizing om de boorgaten te markeren (zie afb. C). Controleer of de pijl op de binnenkant van de aansluitbehuizing tijdens het bevestigen naar boven wijst. B oor vervolgens de bevestigingsgaten (Ø ca. 6 mm, diepte ca. -
Seite 49: Verlichtingsduur Instellen
vooraf ingestelde waarden worden met behulp van de drie draai- regelaars onder de sensorafdekking ingesteld. Draai de sensorafdekking met de hand 180°, om de drie draairegelaars te zien. Het symbool van de betreffende functie wordt weergegeven op de sensorafdekking (zie afb. J en K). Opmerking: draai na het instellen de sensorafdekking terug in de oorspronkelijke positie (dek de draairegelaars af), omdat dit... -
Seite 50: Reiniging En Onderhoud
Reiniging en onderhoud Verwijder voor de reiniging de zekering of schakel de hoofdzekering in de zekeringskast uit. D ompel het product nooit onder in water of in andere vloeistoffen. Anders kan het product beschadigd raken. R einig het product met een pluisvrije, licht vochtige doek en een mild reinigingsmiddel. -
Seite 51: Garantie
Gooi het afgedankte product omwille van het milieu niet weg via het huisvuil, maar geef het af bij het daar- voor bestemde depot of het gemeentelijke milieupark. Over afgifteplaatsen en hun openingstijden kunt u zich bij uw aangewezen instantie informeren. Garantie Het product wordt volgens strenge kwaliteitsrichtlijnen zorgvuldig geproduceerd en voor levering grondig getest. -
Seite 52: Afwikkeling In Geval Van Garantie
Afwikkeling in geval van garantie Om een snelle afhandeling van uw reclamatie te waarborgen dient u de volgende instructies in acht te nemen: Houd bij alle vragen alstublieft de kassabon en het artikelnummer (bijv. IAN 123456_7890) als bewijs van aankoop bij de hand. Het artikelnummer vindt u op de typeplaat, ingegraveerd, op het titelblad van uw handleiding (linksonder) of als sticker op de ach- ter- of onderzijde. - Seite 53 Legenda zastosowanych piktogramów ............Strona 54 Wstęp ................Strona 54 Zastosowanie zgodne z przeznaczeniem ....Strona 55 Opis części ..............Strona 55 Dane techniczne ............Strona 55 Zawartość ...............Strona 56 Ogólne wskazówki bezpieczeństwa ............Strona 56 Przed montażem ..........Strona 58 Montaż .................Strona 58 Ustawianie czujnika ruchu ..........Strona 60 Ustawianie czasu świecenia .........Strona 60 Ustawienie czułości czujnika .........Strona 60 Ustawianie poziomu światła dziennego ......Strona 61...
-
Seite 54: Legenda Zastosowanych Piktogramów
Legenda zastosowanych piktogramów Zakres wykrywania czujnika ruchu: ok. 5–8 m Kąt wykrywania czujnika ruchu: ok. 90 ° Ochrona przed pyłem i pryskającą wodą Prąd zmienny / napięcie zmienne Bez możliwości ściemniania Klasa ochrony I Żywotność diod LED Lampa zewnętrzna z czujnikiem ruchu Wstęp Gratulujemy Państwu zakupu nowego produktu. -
Seite 55: Zastosowanie Zgodne Z Przeznaczeniem
Zastosowanie zgodne z przeznaczeniem Produkt jest przeznaczony do używania na zewnątrz. Niniejszy produkt przeznaczony jest wyłącznie do użytku prywatnego, nie zaś do zastosowania komercyjnego lub innych zastosowań. Opis części Klucz trzpieniowy Membrana sześciokątny Lampa zewnętrzna LED Śruba mocująca Pokrywa czujnika Korpus lampy Czujnik ruchu Złączka zaciskowa... -
Seite 56: Zawartość
Zawartość 1 lampa zewnętrzna z czujnikiem ruchu 2 kołek (Ø 6 mm) 2 śruby mocujące 1 klucz trzpieniowy sześciokątny 1 instrukcja montażu i obsługi Ogólne wskazówki bezpieczeństwa PRZED PIERWSZYM UŻYCIEM PRODUKTU NALEŻY ZAPOZNAĆ SIĘ ZE WSZYSTKIMI WSKAZÓWKAMI DOTYCZĄCYMI OB- SŁUGI I BEZPIECZEŃSTWA! W PRZYPADKU PRZEKAZANIA PRODUKTU INNEJ OSOBIE NALEŻY DOŁĄCZYĆ... - Seite 57 NIEBEZPIECZEŃSTWO UDUSZENIA SIĘ! Dzieci mogą połknąć załączone małe elementy (np. śruby) i zadławić się. Podczas montażu należy pilnować, aby w pobliżu miejsca pracy nie było dzieci. Zagrożenie życia przez porażenie prądem elektrycznym Przed każdym podłączeniem produktu do sieci upewnić się, że nie został...
-
Seite 58: Przed Montażem
Przed montażem Wskazówka: Należy całkowicie usunąć materiał opakowania z produktu. Ważne: Wykonanie podłączenia elektrycznego należy zlecić wykwalifikowanemu elektrykowi lub osobie przeszkolonej w zakre- sie wykonywania instalacji elektrycznych. Osoba ta musi posiadać wiedzę na temat właściwości produktu i przepisów dotyczących podłączania. P rzed instalacją... - Seite 59 U pewnić się, że produkt będzie oświetlał żądany obszar. U pewnić się, że czujnik ruchu obejmie zasięgiem żądany obszar. Obszar wykrywania czujnika ruchu to maks. 8 m przy kącie wykrywania wynoszącym ok. 90 ° (w zależności od wysokości zamontowania–idealna wysokość to 1,8–2,2 m). Zwrócić...
-
Seite 60: Ustawianie Czujnika Ruchu
Ostrożnie nałożyć korpus lampy na obudowę połącze- niową i przymocować go za pomocą śrub mocujących Przykręcić śruby mocujące kluczem trzpieniowym sześcio- kątnym (patrz rys. G). Ponownie nałożyć zabezpieczenie lub ponownie uruchomić włącz- nik instalacyjny. Produkt jest gotowy do użycia (patrz rys. H i I). Wskazówka: kąt nachylenia zewnętrznej lampy LED można regulować... -
Seite 61: Ustawianie Poziomu Światła Dziennego
Wskazówka: czujnik ruchu wykrywa promieniowanie cieplne. Przy niskiej temperaturze otoczenia jego czułość na ciepło ciała jest większa niż przy wysokiej temperaturze oto- czenia. Należy pamiętać o ewentualnej regulacji czułości czujnika w zależności od pory roku. Ustawianie poziomu światła dziennego Przekręcić pokrętło LUX w kierunku zgodnym z ruchem wskazówek zegara, aby zwiększyć... -
Seite 62: Gwarancja
Przy segregowaniu odpadów prosimy zwrócić uwagę na oznakowanie materiałów opakowaniowych, ozna- czone są one skrótami (a) i numerami (b) o następują- cym znaczeniu: 1–7: Tworzywa sztuczne / 20–22: Papier i tektura / 80–98: Materiały kompozytowe. Produkt i materiał opakowania nadają się do ponow- nego przetworzenia, należy je zutylizować... -
Seite 63: Sposób Postępowania W Przypadku Naprawy Gwarancyjnej
W przypadku wystąpienia w ciągu 3 lat od daty zakupu wad ma- teriałowych lub fabrycznych, dokonujemy – według własnej oceny – bezpłatnej naprawy lub wymiany produktu. Świadczenie gwarancyjne obejmuje wady materiałowe i fabryczne. Gwarancja nie obejmuje części produktu ulegających normalnemu zużyciu, uznawanych za części zużywalne (np. -
Seite 64: Serwis
Serwis Serwis Polska Tel.: 008004911946 E-Mail: owim@lidl.pl 64 PL... - Seite 65 Legenda použitých piktogramů .....Strana 66 Úvod ................Strana 66 Použití ke stanovenému účelu........Strana 67 Popis dílů ................Strana 67 Technické údaje .............Strana 67 Obsah dodávky .............Strana 68 Všeobecná bezpečnostní upozornění ...............Strana 68 Před montáží ............Strana 69 Montáž .................Strana 70 Nastavení pohybového senzoru ........Strana 71 Nastavení...
-
Seite 66: Legenda Použitých Piktogramů
Legenda použitých piktogramů Dosah snímání pohybového senzoru: cca 5–8 m Úhel snímání pohybového senzoru: cca 90 ° Chráněno před prachem a stříkající vodou Střídavý proud / střídavé napětí Nelze stmívat Třída ochrany I Životnost LED Venkovní svítidlo s pohybovým senzorem Úvod Blahopřejeme Vám ke koupi nového výrobku. -
Seite 67: Použití Ke Stanovenému Účelu
Použití ke stanovenému účelu Výrobek je určen k použití ve venkovním prostoru. Tento výrobek je určen pouze k soukromému použití, není určen k živnostenskému podnikání nebo jinému způsobu použití. Popis dílů Klíč na vnitřní šestihran Venkovní osvětlení LED Fixační šroub Kryt senzoru Těleso svítidla Pohybový... -
Seite 68: Obsah Dodávky
Obsah dodávky 1 venkovní svítidlo s pohybovým senzorem 2 hmoždinky (Ø 6 mm) 2 připevňovací šrouby 1 klíč na vnitřní šestihran 1 návod k montáži a použití Všeobecná bezpečnostní upozornění PŘED PRVNÍM POUŽITÍM VÝROBKU SE SEZNAMTE SE VŠEMI BEZPEČNOSTNÍMI POKYNY A POKYNY K OBSLUZE! PŘI PŘEDÁVÁNÍ... -
Seite 69: Před Montáží
Nebezpečí ohrožení života úrazem elektrickým proudem Před každým připojením na rozvod elektrického proudu zkont- rolujte výrobek jestli není poškozený. Nepoužívejte výrobek pokud jste zjistili že je poškozený. Před montáží se ujistěte, že se místní síťové napětí shoduje s provozním napětím výrobku (230 V∼ 50 Hz). Neinstalujte výrobek, jestliže se napětí... -
Seite 70: Montáž
P řiložený montážní materiál je vhodný pro běžné, pevné zdivo. Informujte se, jaký montážní materiál je vhodný pro vámi zvolený podklad. Podle potřeby se informujte u odborníka. Montáž Ujistěte se, že při vrtání do stěny nenarazíte na vodiče proudu, plynové nebo vodovodní potrubí. Použijte k tomu návod k obsluze vrtačky a řiďte se všemi bezpečnostními pokyny. -
Seite 71: Nastavení Pohybového Senzoru
P rotáhněte síťový připojovací kabel (externí) membránou (viz obr. E). U pevněte připojovací krabici přiloženými připevňovacími šrouby (viz obr. E). S pojte spojovací kabel výrobku lustrové svorky se síťovým připojovacím kabelem (externí) (viz obr. F). D bejte přitom na spojení vodičů se stejnou barvou (L = černý nebo hnědý... -
Seite 72: Nastavení Doby Svícení
Nastavení doby svícení K prodloužení doby svícení pootočte regulátor TIME směru hodinových ručiček. Dobu svícení můžete nastavit v rozmezí od 8 vteřin do 8 minut. Nastavení citlivosti senzoru K e zvýšení citlivosti senzoru otočte regulátor SENS směru hodinových ručiček. Upozornění: Pohybový senzor snímá tepelné záření. Za nízkých venkovních teplot reaguje citlivěji na tělesné... -
Seite 73: Zlikvidování
Zlikvidování Obal se skládá z ekologických materiálů, které můžete zlikvidovat prostřednictvím místních sběren recyklovatelných materiálů. Při třídění odpadu se řiďte podle označení obalových materiálů zkratkami (a) a čísly (b), s následujícím významem: 1–7: umělé hmoty / 20–22: papír a lepenka / 80–98: složené látky. Výrobek a obalové... -
Seite 74: Postup V Případě Uplatňování Záruky
stvrzenky. Tuto stvrzenku budete potřebovat jako doklad o zakou- pení. Pokud se do 3 let od data zakoupení tohoto výrobku vyskytne vada materiálu nebo výrobní vada, výrobek Vám – dle našeho rozhodnutí – bezplatně opravíme nebo vyměníme. Tato záruka zaniká, jestliže se výrobek poškodí, neodborně použil nebo neob- držel pravidelnou údržbu. -
Seite 75: Servis
Servis Servis Česká republika Tel.: 800600632 E-Mail: owim@lidl.cz... - Seite 76 Legenda použitých piktogramov ..Strana 77 Úvod ................Strana 77 Používanie v súlade s určeným účelom ......Strana 78 Popis častí ...............Strana 78 Technické údaje .............Strana 78 Obsah dodávky .............Strana 79 Všeobecné bezpečnostné upozornenia ............Strana 79 Pred montážou ............Strana 80 Montáž .................Strana 81 Nastavenie senzora pohybu .........Strana 82 Nastavenie doby svietenia ..........Strana 83 Nastavenie citlivosti senzora .........Strana 83...
-
Seite 77: Legenda Použitých Piktogramov
Legenda použitých piktogramov Dosah senzora pohybu: cca. 5–8 m Zachytávací uhol senzora pohybu: cca. 90 ° S ochranou proti striekajúcej vode Striedavý prúd / napätie Nestmievateľné Trieda ochrany I Životnosť LED Exteriérové svietidlo s pohybovým senzorom Úvod Blahoželáme Vám ku kúpe Vášho nového výrobku. Rozhodli ste sa pre veľmi kvalitný... -
Seite 78: Používanie V Súlade S Určeným Účelom
Používanie v súlade s určeným účelom Výrobok je určený na používanie vo vonkajších priestoroch. Tento výrobok je určený iba na súkromné používanie a nie na komerčné účely alebo iné používanie. Popis častí Kľúč s vnútorným šesťhranom LED exteriérové svietidlo Fixačná skrutka Kryt senzora Telo lampy Senzor pohybu... -
Seite 79: Obsah Dodávky
Obsah dodávky 1 exteriérové svietidlo so senzorom pohybu 2 hmoždinky (Ø 6 mm) 2 upevňovacie skrutky 1 kľúč s vnútorným šesťhranom 1 návod na montáž a používanie Všeobecné bezpečnostné upozornenia SKÔR, AKO ZAČNETE VÝROBOK POUŽÍVAŤ, OBOZNÁMTE SA SO VŠETKÝMI POKYNMI TÝKAJÚCIMI SA OVLÁDANIA A BEZPEČNOSTI! PRI PREDANÍ... -
Seite 80: Pred Montážou
Nebezpečenstvo ohrozenia života zásahom elektrickým prúdom Pred každým zapojením do siete skontrolujte prípadné poško- denia výrobku. Ak zistíte akékoľvek poškodenie výrobku, nikdy ho nepoužívajte. Pred montážou sa uistite, že sa prítomné sieťové napätie zho- duje s potrebným prevádzkovým napätím výrobku (230 V∼ 50 Hz). -
Seite 81: Montáž
Priložený montážny materiál je vhodný pre bežné pevné mu- rivo. Informujte sa i o tom, ktorý montážny materiál je vhodný pre Vami zvolený montážny podklad. Informujte sa o tom u kvalifikovaného odborníka. Montáž Uistite sa, že pri vŕtaní do steny nenarazíte na rozvody elektrického prúdu, plynu alebo vody. -
Seite 82: Nastavenie Senzora Pohybu
Z asuňte sieťový pripojovací kábel (externý) cez membránu (pozri obr. E). Upevnite pripojovaciu schránku pomocou priložených upevňovacích skrutiek (pozri obr. E). Spojte spojovací kábel produktu pomocou svorky svietidla so sieťovým pripojovacím káblom (externý) (pozri obr. F). Dbajte na farebné prepojenie pripojených vedení (L = čierne alebo hnedé, N = modré... -
Seite 83: Nastavenie Doby Svietenia
Nastavenie doby svietenia O táčajte otočným regulátorom TIME v smere hodinových ručičiek, aby sa doba svietenia zvýšila. Dobu svietenia môžete nastavovať v časovom okne od cca. 8 sekúnd do 8 minút. Nastavenie citlivosti senzora O táčajte otočný regulátor SENS v smere hodinových ručičiek, aby ste citlivosť... -
Seite 84: Likvidácia
Likvidácia Obal pozostáva z ekologických materiálov, ktoré môžete odo- vzdať na miestnych recyklačných zberných miestach. Všímajte si prosím označenie obalových materiálov pre triedenie odpadu, sú označené skratkami (a) a číslami (b) s nasledujúcim významom: 1–7: Plasty / 20–22: Papier a kartón / 80–98: Spojené látky. Výrobok a obalové... -
Seite 85: Postup V Prípade Poškodenia V Záruke
Na tento produkt poskytujeme 3-ročnú záruku od dátumu nákupu. Záručná doba začína plynúť dátumom kúpy. Starostlivo si prosím uschovajte originálny pokladničný lístok. Tento doklad je potrebný ako dôkaz o kúpe. Ak sa v rámci 3 rokov od dátumu nákupu tohto výrobku vyskytne chyba materiálu alebo výrobná... -
Seite 86: Servis
nedostatok a kedy sa vyskytol, bezplatne odoslať na Vám ozná- menú adresu servisného pracoviska. Servis Servis Slovensko Tel.: 0800 008158 E-pošta: owim@lidl.sk 86 SK... - Seite 87 HG06726A HG06726B HG06726A HG06726B...
- Seite 88 OWIM GmbH & Co. KG Stiftsbergstraße 1 74167 Neckarsulm GERMANY Model-No.: HG06726A / HG06726B Version: 12 / 2020 Stand der Informationen · Last Information Update · Version des informations · Stand van de informatie · Stan informacji · Stav informací · Stav informácií: 11 / 2020 Ident.-No.: HG06726A / B112020-8...