Herunterladen Inhalt Inhalt Diese Seite drucken
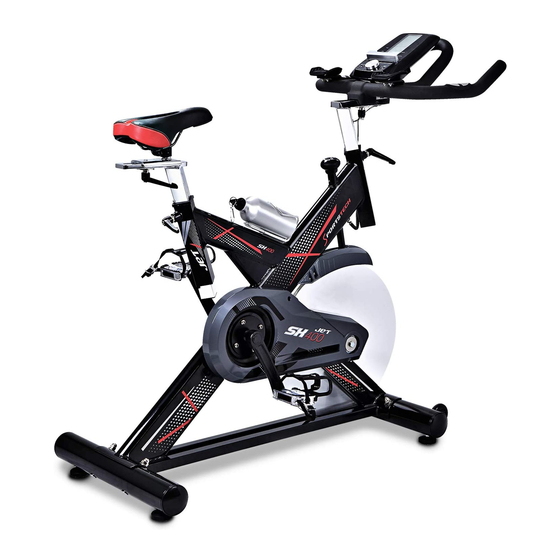
SPORTSTECH SX400 Benutzerhandbuch
Vorschau ausblenden Andere Handbücher für SX400:

Werbung

Verfügbare Sprachen
  • DE

Verfügbare Sprachen

  • DEUTSCH, seite 1
SPORTSTECH
SX
400
DE
EN
ES
FR
IT

Werbung

Inhaltsverzeichnis
loading

Inhaltszusammenfassung für SPORTSTECH SX400

  • Seite 1 SPORTSTECH...
  • Seite 3: Video Tutorials

    Video Tutorials Unsere für dich! Aufbau Benutzung Abbau In 3 einfachen Schritten zum schnellen und sicheren Start: 1. QR-Code scannen 2. Videos anschauen 3. schnell und sicher starten Link zu den Videos: www.sportstech.de/qr/sx400.html...
  • Seite 4 Sehr geehrter Kunde Wir freuen uns, dass Sie sich für ein Gerät aus der SPORTSTECH Produktpalette entschieden haben. SPORTSTECH Sportgeräte bieten Ihnen höchste Qualität und neueste Technologie. Um die Leistungsfähigkeit des Gerätes voll nutzen zu können und viele Jahre Freude an Ihrem Gerät zu haben, lesen Sie bitte vor der Inbetriebnahme und dem Beginn des Trainings dieses Benutzerhandbuch sorgfältig durch und verwenden Sie das Gerät den Anweisungen entsprechend.
  • Seite 5: Inhaltsverzeichnis

    INHALT Inhalt WICHTIGE SICHERHEITSHINWEISE ..............6 TEILELISTE .......................7 EXPLOSIONSZEICHNUNG ...................9 AUFBAUANLEITUNG ..................11 ANPASSEN ..................... 13 DEHNUNGSÜBUNGEN ..................14 TRAININGSANLEITUNG ..................15 KONSOLEN-BEDIENUNGSANLEITUNG ............... 17 BENUTZUNGSABLAUF ..................18 KOMPATIBLE FITNESS APPS ................22...
  • Seite 6: Wichtige Sicherheitshinweise

    WICHTIGE SICHERHEITSHINWEISE Diese allgemeinen Sicherheitsinformationen müssen unbedingt für die Benutzung dieses Produkt beachtet werden. Lesen Sie alle Hinweise, bevor Sie das Produkt in Benutzung nehmen. ACHTUNG: Konsultieren Sie einen Arzt, bevor Sie trainieren. Dieser Hinweis ist unbedingt für Ältere oder gesundheitlich eingeschränkte Personen zu beachten. Lesen Sie alle Sicherheits- hinweise dieser Anleitung sorgfältig, bevor Sie das Gerät benutzen.
  • Seite 7: Teileliste

    TEILELISTE Beschreibung Anz. Beschreibung Anz. Pedal KUGELLAGER ENDKAPPE 1 RECHTER PEDALARM Passbolzen GEWINDESTANGE Standfuss hinten UNTERLEGSCHEIBE 2 Unterlegscheibe flach PLASTIK EINSCHUB 1 Hutmutter BOLZEN 10 FLASCHE SCHRAUBE 2 BOLZEN SCHAFT KUGELLAGER SCHRAUBE 3 10 SATTELSTÜTZE KETTENGEHÄUSE AUSSEN 11 ENDKAPPE 2 KUGELLAGER 12 SATTELHALTERUNG ACHSE...
  • Seite 8 Beschrei Anz. 69 BOZEN8 70 EINSTELL-BLECH 71 BREMSBLOCK 72 BREMSBELAG 73 BOLZEN 9 74 FEDERSCHEIBE 1 75 FEDERSCHEIBE 2 76 KLEINES RIEMENRAD 77 BEFESTIGUNGSMUTTER 78 PULSMESSER KABEL 79 SENSOR 80 PULSMESSER-KABEL 81 PULSMESSER 82 SCHRAUBE 5...
  • Seite 9: Explosionszeichnung

    EXPLOSIONSZEICHNUNG...
  • Seite 11: Aufbauanleitung

    AUFBAUANLEITUNG Beachten Sie: • Vor der Montage ist darauf zu Achten, genug Platz um die Aufbaustelle frei zu halten. • Nutzen Sie im Lieferumfang enthaltenes Werkzeug zur Montage • Überprüfen Sie vor dem Aufbau, alle benötigten Teile auf Vollständigkeit (auf den vorherigen Sei- ten sehen Sie eine Explosionszeichnung mit allen Einzelteilen (durchnummeriert) aus denen das Speedbike aufgebaut ist).
  • Seite 12 Schieben Sie die Lenkerstange(#17) in die Len- ker-stangenhalterung des Hauptrahmens(#16). Lockern Sie den geriffelten Teil des L-Griffs(#26), ziehen diesen zurück und stellen die gewünschte Höhe ein. Schieben Sie den L-Griff wieder hinein und ziehen ihn wieder fest. Dann fixieren Sie den Lenker (#18) mit einer flachen Unterlegscheibe 1 (#20) und dem L-Griff (#19).
  • Seite 13: Anpassen

    Widerstand anpassen: Sie können die Spannung des Laufra- des anpassen, indem Sie den Wider- standswert des Rades beein-flussen. Um die Spannung und den Wider- stand zu erhöhen (erfordert mehr Kraft beim trainieren), drehen Sie die Notbremse und den Spannungsknauf (#30) nach rechts. Um die Spannung und den Widerstand zu verringern, drehen Sie die Notbremse und den Spannungsknauf (#30) nach links.
  • Seite 14: Dehnungsübungen

    DEHNUNGSÜBUNGEN Bevor Sie das Laufband benutzen, ist es am besten, 5 bis 10 Minuten zum Aufwärmen Stretching-Übungen durchzuführen. Dehnen vor dem Training wird hilft die Flexibilität zu verbessern und das Verletzungsrisiko zu mindern. QUADRIZEPS-DEHNUNG Mit einer Hand an der Wand abstützen, um das Gleichgewicht besser zu halten, nach hinten greifen und den rechten Fuss nach oben ziehen.
  • Seite 15: Trainingsanleitung

    TRAININGSANLEITUNG In diesem Schritt zahlen Sich Ihre Bemühungen aus. Durch regelmässiges Training stärken Sie Ihre Beinmuskulatur. Strengen Sie sich an, versuchen Sie dabei jedoch beim Workout ein gleichmässiges Tempo aufrecht zu erhalten. Die Anstrengungsintensität sollte dabei ausreichen um Ihren Puls in den Zielbereich zu heben, wie er in der der Grafik unterhalb abgebildet ist.
  • Seite 16 Muskelaufbau: Falls Sie auf Ihrem SPEED BIKE Muskulatur aufbauen wollen, werden Sie den Widerstand sehr hoch stellen müs- sen. Das bedeutet mehr Belastung für Ihre Beinmuskulatur und Sie werden möglicherweise nicht so lange trainieren können, wie gewohnt. Falls Sie gleichzeitig Ihre Fitness verbessern wollen müssen Sie das Training ändern. Sie sollten während der Aufwärm- und Erholungs-Phase ganz normal trainieren, zum Ende der Trainings-Phase dann aber den Widerstand steigern um Ihren Beinen mehr als üblich abzuverlangen.
  • Seite 17: Displayanzeige

    KONSOLEN-BEDIENUNGSANLEITUNG Displayanzeige: Rubrik Beschreibung Zeigt die vergangene Trainingszeit an. Time Anzeigebereich 0:00 ~ 99:59 Zeigt die aktuelle Trainingsgeschwindigkeit an. Speed Anzeigebereich 0.0 ~ 99.9 Zeigt die virtuell vom Nutzer zurückgelegte Strecke an. Distance Anzeigebereich 0.0 ~ 99.9 Zeigt die virtuell vom Nutzer zurückgelegte Strecke an. Calories Anzeigebereich 0.0 ~ 99.9 Zeigt den gemessenen Puls, während des Workouts.
  • Seite 18: Benutzungsablauf

    BENUTZUNGSABLAUF Power On: Setzen Sie 4 AA Batterien ein (oder drücken Sie die RESET Taste für 2s), der Monitor wird sich, begleitet von einem 1-sekündigem Piepsen einschalten. Das Display zeigt 2s lang alle darstellbaren Segmente. dann den Strecken-Durchschnittswert 1s lang. Danach wechseln es in den USER setting Modus.
  • Seite 19: Schnellstart

    User data setting: Nutzen Sie den Drehknopf um eine von 4 Benutzergruppen (U1-U4 ) zu wählen. Drücken Sie MODE zum bestätigen. Stellen Sie Geschlecht / Alter / Körpergrösse / Gewicht ein um in das Workout-Menü zu gelangen. Workout mode selection: Nutzen Sie den Drehknopf um aus einem der Workout Modi zu wählen : Target Time->...
  • Seite 20 Zielzeit 1. Wählen Sie mit dem Drehknopf Target TIME aus (voreingestellte Wert=10:00),und drücken START/ STOP um im Zielzeit-Modus zu trainieren. 2. TIME bekinnt vom Zielzeit-Wert anfangen herunter zu zählen DISTANCE/ CALORIES/ RPM/ SPEED & HEART RATE werden entsprechend angezeigt. 3. Die Charakteranimation zeigt nur USER. Das nächs- te Bild wird nach einem Fünftel der vergangenen,- voreingestellten Zeit angezeigt.
  • Seite 21 Ziel-Kalorienverbrauch 1. Wählen Sie mit dem Drehknopf Target CALORIES aus (voreingestellte Wert=10:00),und drücken START/ STOP um im Kalorienverbrauch-Modus zu trainieren. 2. CALORIES bekinnt vom Zielzeit-Wert anfangen herun- ter zu zählen DISTANCE/ CALORIES/ RPM/ SPEED & HEART RATE werden entsprechend angezeigt. 3.
  • Seite 22: Kompatible Fitness Apps

    KOMPATIBLE FITNESS APPS Sie können die App "iBiking+" über den hier abgebildeten QR-Code herunterladen. Voraussetzung für mobiles Gerät: Android 2.3 oder höher mit Bluetooth 4.0, iOS 8.0 oder höher. Bitte schalten Sie zuerst Ihre Bluetooth-Funktion auf Ihrem Gerät an. Android Android: Sie können im Google Play Store nach "iBiking+"suchen, oder es über den QR-Code herunterladen.
  • Seite 23 Europäische Entsorgungsrichtlinie 2002/96/EG Entsorgen Sie Ihr Trainingsgerät in keinem Fall über den normalen Hausmüll. Entsorgen Sie das Gerät ausschließlich über einen kommunalen oder zugelassenen Entsorgungsbetrieb.Beachten Sie hierbei die aktuell geltenden Vorschriften.Erkundigen Sie sich im Zweifelsfall bei Ihrer Stadt- bzw. Gemeindeverwal- tung nach einer sach- und umweltgerechten Entsorgungsmöglichkeit.
  • Seite 25 3 simple steps for a fast and safe start: 1. scan the QR code 2. watch videos 3. start fast and safely Link to the videos: www.sportstech.de/qr/sx400.html...
  • Seite 26 Dear customer, We are pleased you chose a device from the SPORTSTECH product range. With sports equipment from SPORTSTECH you get the highest quality and latest technology. In order to fully use the potential of your device and be able to enjoy it for many years, please read this manual carefully before starting up and beginning of training, and use the device according to the instructions.
  • Seite 27 INDEX Inhalt IMPORTANT SAFETY INSTRUCTIONS ..............28 PARTS LIST ....................29 EXPLODE VIEW ....................31 ASSEMBLY INSTRUCTIONS ................33 ADJUSTMENT ....................35 STRETCHING EXCERCISE .................36 EXERCISE INSTRUCTIONS ................37 CONSOLE OPERATION MANUAL ...............39 OPERATION PROCEDURE .................40 COMPATIBLE FITNESS APPS ................44...
  • Seite 28: Important Safety Instructions

    IMPORTANT SAFETY INSTRUCTIONS Basic precautions should always be followed, including the following safety instructions when using the crosstrainer: Read all instructions before using this equipment. WARNING: Before beginning any exercise program consult your physician. This is especially important for people who are over 35 years old or who have pre-existing health problems.
  • Seite 29: Parts List

    PARTS LIST NAME QTY. NAME QTY. PEDAL BEARING END CAP 1 RIGHT CRANK CARRIAGE BOLT SCREW ROD REAR STABILIZER WASHER 2 ARC WASHER PLASTIC SLEEVE 1 DOMED NUT BOLT 10 BOTTLE SCREW 2 BOLT BEARING BEARING RIGHT CRANK VERTICAL SEAT POST SCREW ROD END CAP 2 WASHER 2...
  • Seite 30 NAME QTY. BOLT 8 ADJUSTING METAL BLOCK WOOLLY BLOCK BOLT 9 SPRING WASHER 1 SPRING WASHER 2 LITTLE BELT WHEEL FIXING NUT PULSE WIRE SENSOR PULSE WIRE PULSE SCREW 5...
  • Seite 31: Explode View

    EXPLODE VIEW...
  • Seite 33: Assembly Instructions

    ASSEMBLY INSTRUCTIONS Preparation • Before assembling make sure that you will have enough space around the item. • Use the present tooling for assembling. • Before assembling please check whether all needed parts are available (at the above of this inst- ruction sheet you will find an explosion drawing with all single parts (marked with numbers) which this item consists of.
  • Seite 34 Slide the Handlebar Post (pt.17) into the handlebar post housing on the main frame(pt.16). You will have to slacken the knurled section of the L Shape Knob (pt.26) and pull the knob back and then select the desired height. Release the knob and retighten the knurled portion.
  • Seite 35: Adjustment

    Adjusting the Tension: Increasing or decreasing the tension allows you to add variety to your workout sessions by adjusting the resistance level of the bike. To increase tension and increase resistance (requiring more strength to pedal), turn the Emergency Brake & Tension Control Knob (#30) to the right. To decrease tension and increase resistance (requiring less strength to pedla), turn the Emergency Brake &...
  • Seite 36: Stretching Excercise

    STRETCHING EXCERCISE No matter how you do sports, please do some stretch at first, The warm muscle will extend easily, so warm up yourself with 5-10minutes, Then We suggest the following stretch exercise, five times.10counts for each time or longer do these exercise again after sports. QUADRICEPS STRETCH With one hand against a wall for balance, reach behind you and pull your right foot up.
  • Seite 37: Exercise Instructions

    EXERCISE INSTRUCTIONS This is the stage where you put the effort in. After regular use , the muscles in your legs will become Stronger. Work to your but it is very important to maintain a steady tempo throughout. The rate of work should be sufficient to raise your heart beat into the target zone shown on the graph below.
  • Seite 38 MUSCLE TONING: To tone muscle while on your Speed BIKE you will need to have the resistance set quite high. This will put more strain on our leg muscles and may mean you cannot train for as long as you would like. If you are also trying to improve your fitness you need to alter your training program.
  • Seite 39: Display Function

    CONSOLE OPERATION MANUAL Display function: Item Description Display user workout time. Time Display range 0:00 ~ 99:59 Display user workout speed. Speed Display range 0.0 ~ 99.9 Display user workout distance. Distance Display range 0.0 ~ 99.9 Display calories consumption during workout. Calories Display range 0 ~ 999 Display user pulse during workout.
  • Seite 40: Operation Procedure

    OPERATION PROCEDURE Power On: Install 4PCS AA batteries (or press RESET KEY for 2s), monitor will power on along with BUZZER sound 1s, LCD will show all segments 2s then display wheel diameter and unit 1s. Then go to USER setting mode.
  • Seite 41: Quick Start

    User data setting: Use joggle wheel to select USER group from U1~U4, press MODE to confirm. Set Gender/ Age/ Height/ Weight, them come to workout page. Workout mode selection: Use joggle wheel to select workout mode as: Target Time-> Target Distance-> Target Calories-> Target H.R. Quick start 1.
  • Seite 42 Target Time 1. Use joggle wheel to set Target TIME (preset value=10:00), press STRAT/STOP to workout in Target Time mode. 2. TIME begins to count down from Target value, DIS- TANCE/ CALORIES/ RPM/ SPEED & HEART RATE will display value accordingly. 3.
  • Seite 43 Target Calories 1. Use joggle wheel to set Target CALORIES (preset value=100), press STRAT/STOP workout in Target Calories mode. 2. CALORIES begins to count down from Target value, TIME/DISTANCE/RPM/SPEED & HEART RATE will display value accordingly. 3. The character animation only show USER, it will skip to next figure as per one fifth of the preset Calories.
  • Seite 44: Compatible Fitness Apps

    COMPATIBLE FITNESS APPS You can download the app "iBiking+"via the QR code shown here. Mobile device requirement: And- roid 2.3 or higher with Bluetooth 4.0, iOS 8.0 or higher. Please turn on the Bluetooth function on your device first. Android Android: You can search in the Google Play Store for "iBiking+", or download via the QR Code.
  • Seite 45 European Disposal Directive 2002/96/EG Never dispose your training device in your regular household waste. Dispose the device only at a local or approved disposal. Take care of the currently applicable regulations. If you have doubts contact your local authorities for information about a correct and environment friendly disposal option.
  • Seite 47 Nuestros para usted! Construcción Utilizar Reducción En 3 sencillos pasos para un arranque rápido y seguro: 1. Escanear el código QR 2. Ver vídeos 3. Comienza rápido y seguro Enlace a los videos: www.sportstech.de/qr/sx400.html...
  • Seite 48 Estimado cliente, Nos complace que haya elegido un dispositivo de la línea de productos SPORTSTECH. Con el equipo deportivo de SPORTSTECH usted obtiene la más alta calidad y la mejor tecnología. Con el fin de usar todo el potencial de su dispositivo y para que pueda disfrutarlo durante muchos años, por favor lea este manual cuidadosamente antes de comenzar a ejercitarse, y use el dispositivo...
  • Seite 49 CONTENIDOS Inhalt INSTRUCCIONES DE SEGURIDAD IMPORTANTES ..........50 LISTA DE PIEZAS ....................51 VISTA EN DESPIECE ..................53 INSTRUCCIONES DE ENSAMBLAJE ..............55 AJUSTE ......................57 EJERCICIOS DE ESTIRAMIENTO ................58 INSTRUCCIONES PARA EJERCICIOS ..............59 FUNCIONAMIENTO DE LA CONSOLA ..............61 PROCEDIMIENTO DE FUNCIONAMIENTO ............62 APLICACIONES DEPORTIVAS COMPATIBLES ............66...
  • Seite 50: Instrucciones De Seguridad Importantes

    INSTRUCCIONES DE SEGURIDAD IMPORTANTES Al usar la caminadora siempre se deben seguir las precauciones básicas, incluyen- do las siguientes instrucciones de seguridad importantes. Lea todas las instruccio- nes antes de usar este producto. ADVERTENCIA: Antes de comenzar cualquier programa de ejercicios consulte a su médico. Esto es especialmente importante para personas mayores de 35 años o para quienes tienen problemas prexistentes de salud.
  • Seite 51: Lista De Piezas

    LISTA DE PIEZAS NOMBRE Qty. NOMBRE Qty. PEDAL RODAMIENTO TAPA DE EXTREMO 1 BIELA DERECHA VARILLA ROSCADA TORNILLO DE CABEZA REDONDA ESTABILIZADOR TRASERO ARANDELA 2 ARANDELA EN ARCO FUNDA PLASTICA 1 TUERCA ESFERICA TORNILLO 10 BOTELLA TORNILLO 2 TORNILLO RODAMIENTO EJE TORNILLO 3 10 TIJA DE SILLIN VERTICAL TAPA EXTERIOR DE CADENA...
  • Seite 52 Nombre Qty. 69 TORNILLO 8 70 METAL AJUSTABLE 71 BLOQUE 72 BLOQUE DE LANA 73 TORNILLO 9 74 ARANDELA ELASTICA 1 75 ARANDELA ELASTICA 2 RUEDA PEQUEÑA DE LA CACORREA 77 TUERCA DE FIJACIÓN 78 CABLE DE PULSO 79 SENSOR 80 CABLE DE PULSO 81 PULSO 82 TORNILLO 5...
  • Seite 53: Vista En Despiece

    VISTA EN DESPIECE...
  • Seite 55: Instrucciones De Ensamblaje

    INSTRUCCIONES DE ENSAMBLAJE Preparación: • Antes del ensamblaje asegúrese de tener suficiente espacio alrededor del objeto. • Use las herramientas existentes para el ensamblaje. • Antes del ensamble por favor revise si todas las partes necesarias están disponibles (en la parte superior de esta hoja de instrucciones encontrará...
  • Seite 56 Deslice el poste del manillar (pz.17) en el orificio para el poste del manillar en el mar- co principal (pz.16). Tendrá que aflojar la sección estriada de la perilla en L (pz.26) y jalar la perilla hacia atrás y luego selec- cionar la altura deseada.
  • Seite 57: Ajuste

    Ajustar la tensión: Aumentar o reducir la tensión le permite ag- regar variedad a sus sesiones de ejercicio al ajustar el nivel de resistencia de la bicicleta. Para aumentar la tensión y la resistencia (necesitando más fuerza para pedalear), gire el freno de emergencia & la perilla de control de tensión (pz.30) hacia la derecha.
  • Seite 58: Ejercicios De Estiramiento

    EJERCICIOS DE ESTIRAMIENTO No importa cómo se ejercite, siempre haga algo de estiramiento primero. El calentamiento muscular hará que sus músculos se extiendan fácilmente, así que caliente al menos 5-10 minutos. Luego le sugerimos hacer los siguientes ejercicios de estiramiento cinco veces. El estiramiento antes del ejercicio le ayuda a mejorar la flexibilidad y reduce los riesgos de lesiones.
  • Seite 59: Instrucciones Para Ejercicios

    INSTRUCCIONES PARA EJERCICIOS Esta es la fase en donde pondrá todo su esfuerzo. Después de un uso constante, los músculos en sus piernas serán más fuertes. Es muy importante mantener un tempo constante de principio a fin. El ritmo de trabajo debe ser suficiente para aumentar su frecuencia cardiaca en la zona objetivo most- rada en el siguiente gráfico.
  • Seite 60 TONIFICACIÓN MUSCULAR: Para tonificar músculos mientras estás en su BICICLETA ESTATICA necesitará tener el nivel de re- sistencia bastan- te alto. Esto pondrá más esfuerzo en los músculos de sus piernas y puede dejarlo sin entrenar el tiempo que le gustaría. Si también está intentando mejorar su estado físico necesita modificar su programa de ejercicios.
  • Seite 61: Funciones En Pantalla

    FUNCIONAMIENTO DE LA CONSOLA Funciones en pantalla: Item Descripción Muestra el tiempo de ejercicio del usuario. Time Rango 0:00 ~ 99:59 Muestra la velocidad de ejercicio del usuario. Speed Rango 0.0 ~ 99.9 Muestra la distancia de ejercicio del usuario. Distance Rango 0.0 ~ 99.9 Muestra las calorías consumidas durante el ejercicio.
  • Seite 62: Procedimiento De Funcionamiento

    PROCEDIMIENTO DE FUNCIONAMIENTO Encendido: Instale 4 baterías AA (o presione el botón RESET por 2s), la pantalla se encenderá junto con un sonido de 1s. La pantalla LCD mostrará todos los segmentos por 2 segundos luego mostrará el diámetro de la rueda y de la unidad por 1s. Luego vaya al modo de ajuste USER. Sin tener ninguna señal de entrada por 4 minutos, la pantalla entrará...
  • Seite 63 Ajuste de datos del usuario: Use la rueda para seleccionar el grupo USER de U1~U4, presione MODE para confirmar. Ingrese Gender(género)/ Age(edad)/ Height(estatura)/ Weight(peso), luego vaya a la página de ejercicio. Selección del modo de ejercicio: Use la rueda para seleccionar el modo de ejercicio como: Target Time->...
  • Seite 64 Tiempo objetivo 1. 1. Use la rueda para fijar Target TIME (valor prede- finido=10:00), presione START/STOP para ejer- citarse en el modo Target Time. 2. TIME comenzará a contar hacia atrás desde el valor objetivo, DISTANCE/ CALORIES/ RPM/ SPEED & HEART RATE mostrarán sus valores correspondien- tes.
  • Seite 65 Calorías objetivo 1. Use la rueda para fijar Target CALORIES (valor predefi- nido=100), presione START/STOP para ejercitarse en modo Target Calories. 2. CALORIES comenzará a contar hacia atrás desde el valor objetivo, TIME/DISTANCE/RPM/SPEED & HEART RATE mostrarán sus valores correspondientes. 3.
  • Seite 66: Aplicaciones Deportivas Compatibles

    APLICACIONES DEPORTIVAS COMPATIBLES Puede descargar la aplicación "iBiking+" a través del código QR que se muestra aquí. Requisitos de dispositivos móviles: Android 2.3 o superior con Bluetooth 4.0, iOS 8.0 o superior. Primero active el Bluetooth en su dispositivo. Android Android: iOS: puede buscar "iBiking+"...
  • Seite 67 Directiva Europea de Residuos 2002/96/EG Nunca elimine su dispositivo de entrenamiento en su basura doméstica ordinaria. Elimine el dispositivo únicamente en un sitio de eliminación aprobado. Tenga en cuenta las normativas aplicables actualmen- te. Si tiene dudas contacte a las autoridades locales para conseguir información sobre una opción de eliminación adecuada y ecológica.
  • Seite 68 MANUEL FRANÇAIS...
  • Seite 69 3 étapes simples pour un démarrage ra- pide et sécurisé: 1. Scannez le code QR 2. Regarder les vidéos 3. Démarrez rapidement et en toute sécurité. Lien vers les vidéos: www.sportstech.de/qr/sx400.html...
  • Seite 70 Cher client, Nous sommes ravis que vous ayez choisi un appareil de la gamme de produits SPORTSTECH. Avec les équipements sportifs de SPORTSTECH, vous obtenez la plus haute qualité et la meilleure technologie. Afin d'utiliser pleinement le potentiel de votre appareil et de pouvoir l'apprécier pendant de nombreuses années, lisez attentivement ce manuel avant l'utilisation et le début de votre entraînement et utilisez...
  • Seite 71 CONTENU Inhalt CONSIGNES DE SÉCURITÉ IMPORTANTES ............72 LISTE DES PIECES ...................73 VUE EXPLOSEE ....................75 INSTRUCTIONS D’ASSEMBLAGE ...............77 MISE AU POINT ....................79 EXCERCICE D'ÈTIREMENT ................80 DIRECTIVE D’ENTRAINEMENT ................81 MODE D’EMPLOI CONSOLE ................83 PROCÈDURE OPÈRATOIRE ................84 APPLICATIONS DE FITNESS COMPATIBLES ............88...
  • Seite 72: Consignes De Sécurité Importantes

    CONSIGNES DE SÉCURITÉ IMPORTANTES Les précautions de base, y compris les consignes de sécurité importantes suivantes doivent toujours être respectées lorsque vous utilisez ce tapis roulant. Lisez toutes les instructions avant d'utiliser cette appareil. AVERTISSEMENT: Avant de commencer un programme d'exercice, consultez votre médecin. Ceci est particulièrement important pour les personnes qui ont plus de 35 ans ou qui ont des problèmes de santé...
  • Seite 73: Liste Des Pieces

    LISTE DES PIECES Qty. Qty. Pédales SUPPORT EMBOUT 1 MANIVELLE DROITE BOULON STABILISATION ARRIÈRE LAVEUSE 2 LAVEUSE MANCHE PLASTIQUE 1 ÉCROU dôme BOULON 10 BOUTEILLE VIS 2 BOULON PUIT SUPPORT VIS 3 10 SIEGE VERTICAL Couverture chaine extérieur 11 EMBOUT 2 SUPPORT 12 POSTE 13 SIEGE...
  • Seite 74 Qty. 69 BOULON 8 70 Ajusteur de métal 71 OBSTACLE 72 OBSTACLE LAINEUX 73 BOULON 9 74 LAVEUSE DE RESSORT 1 75 LAVEUSE DE RESSORT 2 76 Petite ceinture de roue 77 FIXEUR 78 Appareil de pulsation 79 CAPTEUR 80 Appareil de pulsation 81 Battements 82 VIS 5...
  • Seite 75: Vue Explosee

    VUE EXPLOSEE...
  • Seite 77: Instructions D'assemblage

    INSTRUCTIONS D’ASSEMBLAGE PRÉPARATION: • Avant d‘assembler assurez-vous que vous aurez assez d‘espace autour de l‘appareil. • Utilisez le présent outillage pour l‘assemblage • Avant d‘assembler veuillez vérifier si toutes les pièces nécessaires sont disponibles ( au -dessus de ces instructions, vous trouverez un schéma détaillé avec toutes les pièces détachées ( identi- fiées par des numéros ) Instruction d’assemblage: Attachez le Stabilisateur avant ( pt.15 ) au chas-...
  • Seite 78 Faites glisser la poignée de la barre Post (pt.17) dans le poste de logement de la poignée sur le cadre prin-cipal (PT.16). Vous aurez à relâcher la section moletée du poignée (pt.26) et tirez sur le bouton de retour, puis sélectionnez la hauteur désirée.
  • Seite 79: Mise Au Point

    Ajuster la tension: L‘augmentation ou la diminution de la tension vous permet d‘ajouter de la variété à vos séances d‘entraîne-ment en ajustant le niveau de résistance du vélo. Pour aug- menter la tension et augmenter la résistance (nécessitant plus de force à la pédale) , tournez le frei-nage d‘urgence et le bouton de commande de tension ( # 30 ) à...
  • Seite 80: Excercice D'ètirement

    EXCERCICE D'ÈTIREMENT Peu importe comment vous pratiquez le sport, Veuillez faire quelques étirements avant de commencer votre entraî- nement, le muscle chaud s’étendra facilement, donc réchauffez vous durant 5-10minutes, nous suggérons l'exercice d'étirement suivant : 5 fois ,10 comptes pour chaque fois ou plus, faire ces exercices à nouveau après le sport. ETIREMENT DU QUADRICEPS D'une seule main contre un mur pour l'équilibre, essayez d'atteindre votre derrière et etendez votre pied droit.
  • Seite 81: Directive D'entrainement

    DIRECTIVE D’ENTRAINEMENT Ceci est l‘étape où vous faites un effort. Après une utilisation régulière, les muscles de vos jambes vont devenir plus fort. Travailler à votre rythme mais il est très important de maintenir un tempo régu- lier tout au long. Le taux de travail devrait être suffisant pour augmenter votre rythme cardiaque dans la zone cible indiquée sur le graphique ci-dessous.
  • Seite 82 TONIFICATION MUSCULAIRE: Pour tonifier les muscles pendant l‘exercice, vous aurez besoin d‘avoir la résistance réglée assez élevé. Cela mettra plus de pression sur les muscles de la jambe et peut signifier que vous ne pouvez pas vous entrainer aussi longtemps que vous le souhaitez. Si vous essayez aussi d‘améliorer votre condition physique, vous devez modifier votre programme de formation.
  • Seite 83: Mode D'emploi Console

    MODE D’EMPLOI CONSOLE Fonction: Eléments Description Affichage du temps d’entrainement. Time Plage d’affichage 0:00 ~ 99:59 Afficher la vitesse. Speed Plage d’affichage 0.0 ~ 99.9 Afficher la distance de l’exercice. Distance Plage d’affichage 0.0 ~ 99.9 Afficher la consommation calorique pendant l‘entraînement. Calories Plage d’affichage 0 ~ 999 Afficher la fréquence cardiaque pendant l’entrainement.
  • Seite 84: Procèdure Opèratoire

    PROCÈDURE OPÈRATOIRE Démarage Installez 4 pcs piles AA (ou appuyez sur le bouton de réinitialisation 2s), le moniteur se met sous tension avec son BUZZER de 1s, la LCD affichera tous les segments durant 2s, après, le diamètre de la roue et de l‘unité s’affiche pendant 1s. Ensuite, allez au réglage de l’utilisateur. Après 4 minutes d’inactivité, le moniteur passe en mode veille.
  • Seite 85 Données utilisateur: Utilisez la roue joggle pour sélectionner le groupe USER de U1 ~ U4, appuyez sur MODE pour con- firmer. Demandez sexe / âge / taille / poids afin de se déplacer dans le menu d‘entraînement. Sélection du mode d‘entraînement: Utilisez la roue joggle pour sélectionner le mode d‘entraînement comme: Temps Cible ->...
  • Seite 86 Temps cible 1. Utilisez la roue joggle pour régler le temps cible (valeur prédéfinie = 10: 00), appuyez sur START / STOP pour s‘entraîner en mode Temps cible. 2. Le compte à rebours commence à partir de la valeur cible DISTANCE/CALORIES/RPM/SPEE- D&RYTHME CARDIAQUE affiche la valeur consé- quente: 3.
  • Seite 87 Calories cibles 1. Utilisez la roue joggle pour définir les CALORIES cibles (valeur prédéfinie = 100), appuyez sur START / STOP pour s’entraîner avec la cible en mode Calories. 2. Le compte à rebours des calories commence à partir de la valeur cible, TIME / DISTANCE / RPM / SPEED & RYTHME CARDIAQUE affiche la valeur conséquente.
  • Seite 88: Applications De Fitness Compatibles

    APPLICATIONS DE FITNESS COMPATIBLES Vous pouvez télécharger l'application "iBiking+" via le code QR affiché ici Condition préalable pour appareil mobile: Android 2.3 ou supérieur avec Bluetooth 4.0, iOS 8.0 ou supérieur. Veuillez d'abord activer le Bluetooth sur votre appareil. Android Android: Vous pouvez rechercher "iBiking+"...
  • Seite 89 Directive européenne n° 2002/96/EG relative aux déchets Ne jeter en aucun cas l‘appareil avec les ordures ménagères. Ne disposez de l‘appareil que dans les décharges publiques (Gestion des déchets communaux de la ville). Pour leur élimination respectez les réglementations en vigueur locales. Renseignez-vous à la mairie ou à la commune de votre ville sur les possibilités offertes pour éliminer votre appareil correctement et en respectant l‘environnement.
  • Seite 90 MANUALE D’USO ITALIANO...
  • Seite 91 Video Tutorial Il nostro per te! Montaggio Utilizzo Smontaggio 3 semplici passaggi per un inizio veloce e sicuro: 1. Scannerizza il QR-Code 2. Guarda il Video 3. Inizia ad allenarti! Link per il Video: www.sportstech.de/qr/sx400.html...
  • Seite 92 Gentile cliente Siamo lieti che abbiate scelto un dispositivo della gamma SPORTSTECH. Con le attrezzature sportive di SPORSTECH potrete usufruire della più alta qualità e della più recente tecnologia. Per sfruttare a pieno il potenziale del dispositivo e poterlo utilizzare per molti anni, raccomandiamo di leggere attentamente questo manuale prima di iniziare l’allenamento e di utilizzare il dispositivo...
  • Seite 93 INDICE Inhalt IMPORTANTI ISTRUZIONI DI SICUREZZA ............94 LISTA DEI COMPONENTI ..................95 DISEGNO ESPLOSO ..................97 ISTRUZIONI PER L’ASSEMBLAGGIO ..............99 REGOLAZIONE ....................101 ESERCIZI DI STRETCHING ................102 ISTRUZIONI PER ALLENAMENTO ..............103 FUNZIONAMENTO DELLA CONSOLE ............... 105 PROCEDURA DI OPERAZIONE ................106 APPLICAZIONI PER IL FITNESS ...............
  • Seite 94: Importanti Istruzioni Di Sicurezza

    IMPORTANTI ISTRUZIONI DI SICUREZZA Precauzioni minime, incluse importanti istruzioni di sicurezza incluse nel presente manual dovrebbero essere sempre seguite durante l’uso del tapisroulant. Leggere tutte le istruzioni prima di utilizzare il dispositivo. ATTENZIONE: Prima di iniziare qualsiasi programma di esercizio consultare il proprio medico. Questo è...
  • Seite 95: Lista Dei Componenti

    LISTA DEI COMPONENTI NOME Qty. NOME Qty. PEDALE SOSTEGNO CAPPUCCIO MANOVELLA DESTRA BULLONE CARRELLO ASTA VITE STABILIZZATORE RETRO RONDELLA 2 RONDELLA AD ARCO CUSTODIA PLASTICA 1 DADO A CUPOLA BULLONE BOTTIGLIA VITE 2 BULLONE ASTA SOSTEGNO VITE 3 10 PALO SEDILE VERTICALE COPERTURA CATENA 11 CAPPUCCIO SOSTEGNO...
  • Seite 96 Nome Qty. 69 BULLONE 8 70 METALLO REGOLABILE 71 BLOCCO 72 BLOCCO LANOSO 73 BULLONE 9 74 RONDELLA MOLLA 1 75 RONDELLA MOLLA 2 76 RUOTA PICCOLA CINGHIA 77 DADO 78 CAVO BATTITO POLSO 79 SENSORE 80 CAVO BATTITO POLSO 81 BATTITO 82 VITE 5...
  • Seite 97: Disegno Esploso

    DISEGNO ESPLOSO...
  • Seite 99: Istruzioni Per L'assemblaggio

    ISTRUZIONI PER L’ASSEMBLAGGIO Preparazione: • Prima dell’assemblaggio assicurarsi di avere abbastanza spazio intorno. • Usare gli attrezzi necessari all’assemblaggio. • Prima di assemblare, controllare se tutte le parti necessarie sono a disposizione (alla fine di ques- to foglio di istruzioni troverai un disegno esploso con tutte le singole parti (distinte con numeri) che formano la macchina completa.) Istruzioni per l’assemblaggio: Fissare lo stabilizzatore frontale (pt.15) alla...
  • Seite 100 Infilare il palo del manubrio (pt.17) nel foro per il palo del manubrio nella struttu- ra principale. (pt.16). Dovrai allentare la sezione zigrinata della maniglia a L (pt.26) e reinserire la maniglia e poi selezionare l’altezza desiderata. Rilasciare la maniglia e stringere La parte zigrinata.
  • Seite 101: Regolazione

    Regolare la resistenza: Aumentare o diminuire la resistenza ti permetterà di aggiungere varietà ai tuoi allenamenti regolando il livello di resis- tenza della bici. Per aumentare la ten- sione e la resistenza (richiede più forza per muovere il pedale), girare il freno di emergenza e l’asta per il controllo della tensione (#30)verso destra.
  • Seite 102: Esercizi Di Stretching

    ESERCIZI DI STRETCHING Non importa la ragione per cui fai sport, fai in modo di fare sempre esercizi di stretching prima di cominciare. Il uscolo riscaldato si allungherà facilmente, quindi scaldati con degli esercizi per 5-10 minuti. Ti suggeriamo di eseguire i seguenti esercizi cinque volte conta fino a dieci ogni volta o anche più...
  • Seite 103: Istruzioni Per Allenamento

    ISTRUZIONI PER ALLENAMENTO Questa è la fase di sforzo. In seguito ad un uso regolare, i muscoli delle tue gambe diventeranno più forti. Fai del tuo meglio, ma ricorda che è importante mantenere un ritmo regolare durante l’esercizio. La durata dell’esercizio dovrebbe essere sufficiente a far aumentare il tuo battito cardiaco nella zona target del grafico qui sotto.
  • Seite 104 TONIFICARE I MUSCOLI: Per tonificare I muscoli sulla tua SPEED BIKE dovrai impostare un livello alto di resistenza. Questo farà in modo che i tuoi muscoli delle gambe aumentino lo sforzo e può significare che non potrai allenarti molto a lungo come vorresti. Se stai anche cercando di aumentare il tuo livello di fitness è necessario modificare il tuo programma di allenamento.
  • Seite 105: Funzioni Del Display

    FUNZIONAMENTO DELLA CONSOLE Funzioni del display: funzione descrizione mostra il tempo di allenamento dell’utente. Time Il display varia da 0:00 ~ 99:59 mostra la velocità di allenamento dell’utente. Speed Il display varia da 0.0 ~ 99.9 mostra la distanza di allenamento dell’utente. Distance Il display varia da 0.0 ~ 99.9 mostra le calorie bruciate durante l’...
  • Seite 106: Procedura Di Operazione

    PROCEDURA DI OPERAZIONE Accendere: Inserire 4 batterie AA (o premi il pulsante RESET per 2s), il monitor si accenderà con un suono BUZ- ZER di 1s, lo schermo LCD mostrerà tutti i segmenti per 2s poi il diametro della ruota e l’unità per 1s.
  • Seite 107: Inizio Rapido

    Impostazione dati utente: Usa il pulsante a rotella per selezionare il gruppo UTENTE da U1~U4, premi MODE per confermare. Seleziona il Sesso/ Eta’/ Altezza/ Peso, poi passa al display dell’allenamento. Workout mode selection: Usa il pulsante a rotella per selezionare il modo di allenamento: Target Time (tempo)->...
  • Seite 108 Tempo Obiettivo 1. Usa il pulsante a rotella per impostare il tempo TIME (valore automatico=10:00), premi START/ STOP per allenarti nella modalità Target Time. 2. Il tempo TIME inizia il conto alla rovescia dal valore inserito, DISTANCE/ CALORIES/ RPM/ SPEED & HEART RATE si calcoleranno sul display.
  • Seite 109 Calorie Obiettivo 1. Usa il pulsante a rotella per inserire le calorie CALO- RIES (valore automatico=100), premi START/STOP per iniziare l’allenamento in questa modalità. 2. LE CALORIE iniziano il conto alla rovescia dal valore Target, TIME/DISTANCE/RPM/SPEED & HEART RATE e mostreranno il valore corrispondente sullo schermo.
  • Seite 110: Applicazioni Per Il Fitness

    APPLICAZIONI PER IL FITNESS l'app "iBiking+" è scaricabile qui col codice QR-Code mostrato in figura. Dovete però disporre di un apparecchio mobile quale: Android 2.3 oppure maggiore che possieda la funzione Bluetooth 4.0, iOS 8.0 o maggiore. In primo luogo attivate la funzione Bluetooth sul vostro telefono. Android Android: Potete cercare l'applicazione "iBiking+"...
  • Seite 111 Direttive Europee 2002/96/EG per lo smaltimento Non gettare mai il tuo attrezzo sportivo nell’immondizia normale. Smaltisci l’attrezzo solo tramite un siste- ma locale o approvato. Tieni in conto le regole applicabili correntemente. Se hai dubbi contatta le autorità locali per informazioni circa le opzioni per uno smaltimento corretto ed ecosostenibile. Batterie / Batterie ricaricabili In accordo con il regolamento per le batterie, sei obbligato legalmente a ritornare tutte le batterie usate ed esaurite.
  • Seite 112 Verkauf durch / Distributed by / Distribuido por / Distribué / Distribuito da InnovaMaxx GmbH Potsdamer Platz 11 10785 Berlin +49 30 220 663 569 service@innovamaxx.de http://www.sportstech.de...

Inhaltsverzeichnis