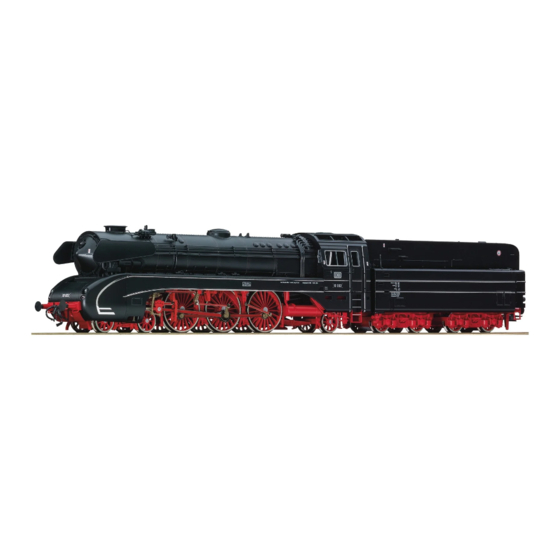
Herunterladen Inhalt Inhalt Diese Seite drucken
Inhaltsverzeichnis

Werbung

Verfügbare Sprachen

Verfügbare Sprachen

Dampflokomotive
Steam locomotive
Locomotive vapeur
70190.indd 1
70190.indd 1
BR 10 002, DB
BR 10 002, DB
BR 10 002, DB
70190
PluX
22
70191
78191
Handbuch
Manual
Manuel
www.roco.cc
10.03.2022 12:57:42
10.03.2022 12:57:42

Werbung

Inhaltsverzeichnis
loading

Inhaltszusammenfassung für roco BR 10 002 DB

  • Seite 1 Dampflokomotive BR 10 002, DB Steam locomotive BR 10 002, DB Locomotive vapeur BR 10 002, DB 70190 PluX 70191 78191 Handbuch Manual Manuel www.roco.cc 70190.indd 1 70190.indd 1 10.03.2022 12:57:42 10.03.2022 12:57:42...
  • Seite 2 Auspacken des Modells! / Unwrap model!/ Déballage du modèle! 70190.indd 2 70190.indd 2 10.03.2022 12:57:42 10.03.2022 12:57:42...
  • Seite 3 Auspacken des Modells! / Unwrap model!/ Déballage du modèle! 70190.indd 3 70190.indd 3 10.03.2022 12:57:42 10.03.2022 12:57:42...
  • Seite 4: Inhaltsverzeichnis

    Inhaltsverzeichnis Einleitung ................5 Montage der beiliegenden Ätzschilder ......18-19 Inbetriebnahme ihrer Lokomotive Der Sounddecoder (nur für 70191 / 78191) ▪ Vor der ersten Inbetriebnahme ..........7 ▪ Funktionstastenbelegung (Werkszustand) ....20-21 ▪ Einfahren des Modells ............8 ▪ Lokeinstellungen ............... 22 ▪...
  • Seite 5: Einleitung

    Wichtiger Hinweis! Der Motor dieses Modells ist konstruktionsbedingt eng verbaut. Ein eventueller Ausbau des Motors erfordert feinmechanische und elektronische Kenntnisse! Um Beschädigungen durch unsachgemäße Handhabung zu vermeiden, wenden Sie sich diesbezüglich an Ihren Roco-Fachhändler oder an eine Fachwerkstätte! Achtung! Gilt für Sound-Ausführung! Bei Verwendung eines anderen Sounddecoders anstatt des werkseitig eingebauten ZIMO-Sounddecoders ist zu be- achten, dass die Decoder-Ausgangsspannung am Kondensator ausgang maximal 15V betragen darf.
  • Seite 6 Zum Vorbild BR 10 - Der schwarze Schwan der Bundesbahn. Obwohl man bei der Deutschen Bundesbahn (DB) die Dampftraktion als Auslaufmodell betrachtete, erteilte man 1953 der Firma Krupp in Essen den Auftrag zur Entwicklung einer neuen Pacific-Schnellzuglokomotive. Im Jahr 1957 wurden unter der Baureihen- nummer 10 zwei elegante, 26.503 mm lange und teilverkleidete Exemplare der Bauart 2‘C1‘...
  • Seite 7: Inbetriebnahme Ihrer Lokomotive

    Inbetriebnahme Ihrer Lokomotive ▪ Vor der ersten Inbetriebnahme Um schlechte Laufeigenschaften oder Schäden zu vermeiden müssen die Kuppelstangenlager vor der ersten Inbetriebnahme an Ihrer Lokomo- tive geölt werden. Hierzu empfehlen wir den ROCO-Öler 10906. kleben cement coller wahlweise optional à choisir 70190.indd 7...
  • Seite 8: Einfahren Des Modells

    Rundlauf und beste Zugkraft bekommt. ▪ Betriebsbedingungen Der kleinste befahrbare Radius für dieses Modell ist R3 (419,6 mm) des ROCO-Gleissystems. Der einwandfreie Lauf Ihrer Lokomotive ist nur auf sauberen Schienen gewährleistet. Hierzu empfehlen wir den ROCO-Schienenreinigungswagen Art. Nr. 46400 und bei etwas stärkerer Verschmutzung den ROCO-Schienen-Reinigungsgummi Art.
  • Seite 9: Aufrüstung

    ▪ Aufrüstung Sie können für ihren Fahrbetrieb unter verschiedenen Kupplungen wählen. Wir empfehlen den Einsatz der ROCO-Kurzkupplung. Im beigelegten Zurüstbeutel finden Sie auch kleine vorbildgetreue Steckteile für eine erweiterte Aufrüstung Ihrer Lokomo- tive, die Sie bitte vorsichtig montieren. Kleben nur mit ausdrücklichen...
  • Seite 10: Nachrüsten Eines Plux Decoders (Nur F. Artikel 70190)

    ▪ Nachrüsten eines PluX Decoder (nur für Artikel 70190) Zuerst das Tendergehäuse abnehmen. Danach den Brückenstecker aus der Schnittstelle entfernen (sorg- sam Aufbewahren). Zuletzt den Stecker des Steuer- bausteines lagerichtig einsetzen. 70190.indd 10 70190.indd 10 10.03.2022 12:57:43 10.03.2022 12:57:43...
  • Seite 11: Wartung Und Pflege Des Modells

    Wartung und Pflege des Modells Damit Ihnen Ihre Lokomotive lange Freude bereitet, sind regelmäßig (ca. alle 30 Betriebsstunden) gewisse Servicearbeiten zweckmäßig. ▪ Entkuppeln von Lok und Tender Fig. 1 70190.indd 11 70190.indd 11 10.03.2022 12:57:43 10.03.2022 12:57:43...
  • Seite 12: Reinigung Der Radstromkontakte

    ▪ Reinigung der Radstromkontakte Radstromkontakte können auf unsauberen Schienen leicht verschmutzen. Bitte entfernen Sie vorsichtig mit einem kleinen Pinsel den Schmutz an den gekennzeichneten Stellen. 70190.indd 12 70190.indd 12 10.03.2022 12:57:43 10.03.2022 12:57:43...
  • Seite 13: Schmierung

    ▪ Schmierung Versehen Sie die im Schmierplan gekennzeichneten Stellen mit nur kleinen Öltropfen. Wir empfehlen den ROCO-Öler Art. Nr 10906. Zur Schmierung der Getriebeteile (Zahnräder, Schnecke) empfehlen wir das ROCO-Spezialfett 10905. Im Falle der Schmierung diese Teile bitte nicht ölen.
  • Seite 14: Dampfdestillat Einfüllen (Nur Für 70191 / 78191)

    ▪ Dampfdestillat einfüllen (nur für Artikel 70191 und 78191) Bitte den Dampföltank nicht überfüllen! Zum Nachfüllen verwenden Sie bitte ausschließlich die Dosierspritze aus dem Dampföl-Set Art.- Nr. 10908. Ausgetretenes Dampföl umgehend mit einem trockenen und saugfähigen Tuch aufnehmen. 70190.indd 14 70190.indd 14 10.03.2022 12:57:44 10.03.2022 12:57:44...
  • Seite 15 Das Dampfsystem ist ein offenes System, deshalb die Lok bitte nicht drehen, kippen oder umlegen. Andernfalls kann Dampföl auslaufen und Verschmutzungen der Lokomotive verursachen. Die offene Konstruktion des Dampfsystems ist produktionsbedingt und stellt keinen Mangel dar. Achtung für Dampfbetrieb! Wir empfehlen, das Dampföl im Betrieb vollständig zu verbrauchen und danach das Dampfsystem auszuschalten. Oder die Reste gleich nach dem Betrieb mittels einer Spritze aus dem Dampföl-Tank zu entfernen.
  • Seite 16: Nachrüsten Eines Seuthe Dampfgenerators (Nur Für Artikel 70190)

    ▪ Nachrüsten eines Seuthe Dampfgenerators (nur für Artikel 70190) Zuerst den Rauchfang abnehmen und dann den Seuthe Dampfgenerator Nr. 10 (für den analogen DC-Betrieb) oder Nr. 11 (für Digitalen DC-Betrieb) einbauen. Bei einem eingebauten Dampfgenerator im Digitalbetrieb mit einem nachgerüsteten Decoder 10895 oder 10896 ist mit der Taste F1 das Ein- und Ausschalten des Dampf- generators möglich.
  • Seite 17: Haftreifenwechsel

    ▪ Haftreifenwechsel Die Haftreifen mit einer Nadel oder mit einem feinen Schraubendreher abziehen. Beim Aufziehen der neuen Haftreifen bitte darauf achten, dass dieser sich nicht verdreht. ▪ Schleiferwechsel (nur für 78191) 70190.indd 17 70190.indd 17 10.03.2022 12:57:44 10.03.2022 12:57:44...
  • Seite 18: Montage Der Beiliegenden Ätzschilder

    1. Ohne sie aus dem Ätzrahmen zu entfernen, die Schilder mit ihrer Rückseite auf eine harte und völlig ebene Oberfläche legen. 2. Mit dem ROCO-Rubber (Art.-Nr. 10002), mit einem scharfen Messer mit gerader Klinge oder mit einem ähnlichen Gerät die Farbe von der Oberfläche der Zeichen vorsichtig und sauber abziehen.
  • Seite 19 Bw Kassel Wahlweise Kleben 70190.indd 19 70190.indd 19 10.03.2022 12:57:44 10.03.2022 12:57:44...
  • Seite 20: Der Sounddecoder (Nur Für 70191 / 78191)

    Der Sounddecoder ▪ Funktionstastenbelegung der BR 10 002 (Auslieferungszustand) Die Lok ist ab Werk auf die Adresse 03 eingestellt F-Taste Funktion für 70191 / 78191 Licht vorne weiß Sound Dynamischer Raucherzeuger Zweitonpfeife lang Schaffnerpfiff An- / Abkuppeln Rangiergang und halbe Geschwindigkeit Kurvenquietschen (nur mit F1 und bei Fahrt) Umlaufbeleuchtung Führerstandsbeleuchtung...
  • Seite 21 F-Taste Funktion für 70191 / 78191 Schlusslicht Lichtmaschine Entwässern (nur wenn F1 EIN) Mute - Taste Injektor Speisepumpe Luftpumpe Pfiff doppelt Pfeife lang Ansage Abschlammen Wasserfassen Zylinder entwässern Sanden Lautstärke + Lautstärke - 70190.indd 21 70190.indd 21 10.03.2022 12:57:44 10.03.2022 12:57:44...
  • Seite 22: Lokeinstellungen

    ▪ Lokeinstellungen Der in dieser Lok enthaltene Sounddecoder der Firma ZIMO wurde optimal auf die Lok eingestellt. Dennoch können Sie viele Decoder-Eigenschaf- ten Ihren Wünschen anpassen. Dazu lassen sich bestimmte Parameter (die so genannten CVs – Configuration Variable – oder Register) verändern. Prüfen Sie aber vor jeder Programmierung, ob diese tatsächlich notwendig ist.
  • Seite 23: Einstellungen

    Mittengeschwindigkeit (bei mittlerer Fahrstufe) - Wert 1 entspricht 1/3 von Vmax. (CV5) 00 – 252 Decoderversionsnummer (nur lesen! Lesbar nur an lesefähigen Verstärkern/Zentralen). Wichtig! Für die Nutzung der MULTIMAUS zum Erreichen von CV´s größer als CV255: Mit der kurzfristigen Programmierung der CV7 wird nur der anschließende Programmierzugriff mit dem Wert 10 um 100 CV-Plätze erhöht (also CV166 greift dann z.B.
  • Seite 24: Betrieb Mit Dcc-Zentrale (Multimaus)

    ▪ Betrieb mit DCC-Zentrale (MULTIMAUS) Da die multiMAUS (ab Firmware Version V1.05) über 28 Funktionstasten und einer Lichttaste verfügt, ist die Bedienung damit besonders komfortabel. Für kabellose Freiheit verbunden mit den Vorteilen der praktischen multiMAUS, können Sie Ihre Lokomotive auch per WLANMAUS steuern. Eine weitere Variante der einfachen Bedienung ist die Z21 App über Ihr Smartphone oder Tablet.
  • Seite 25 Table of Content Introduction ................ 26 Mounting of the enclosed etched labels ....39-40 The Sounddecoder (only for 70191 / 78191) Starting locomotive operation ▪ Prior to initial commissioning ..........28 ▪ Function key allocation (delivery state) ......41-42 ▪ Locomotive Settings ............43 ▪...
  • Seite 26: Introduction

    Important Instructions! The motor of this model is tightly installed due to the construction. The motor changing requires knowledge of precision mechanics and electrical engineering! Please contact your Roco stockist or a specialised workshop in this regard in order to avoid damage being caused by incorrect handling! 70190.indd 26 70190.indd 26...
  • Seite 27 The Original Class 10 - The Black Swan of the Bundesbahn. Although the Deutsche Bundesbahn (DB) considered steam traction outdated, it commissioned the company Krupp in Essen to develop a new Pacific express train locomotive in 1953. In 1957 two elegant, 26,503 mm long, partially guarded locomotives with the serial number 10 of the type 2‘C1‘...
  • Seite 28: Starting Locomotive Operation

    ▪ Prior to initial commissioning In order to prevent poor running characteristics or damage from occurring, the coupling rod bearings on your locomotive must be oiled prior to undertaking the initial commissioning. We recommend using the ROCO oiler 10906. kleben...
  • Seite 29: Running The Model In

    ▪ Operating instructions The smallest radius this model should run is R3 (419,6 mm) of the ROCO track system. Your locomotive will run smoothly on clean tracks only. For this purpose we recommend using item no. 46400, Roco track cleaning van, or item no. 10002, Roco track cleaning rubber, for removing heavy dirt.
  • Seite 30: Fittings

    ▪ Fittings Operation is possible with different couplings. We recommend using the ROCO close coupling. In the enclosed accessory bag you will find small kits to be fitted on your locomotive. please mount them cautiously. Use glue only if Optional...
  • Seite 31: Retrofitting A Plux (Only For 70190)

    ▪ Retrofitting a PluX decoder (only for Item 70190) First remove loco body. Remove the jumper from the interface. Finally put the plug of the chip into the inter- face. 70190.indd 31 70190.indd 31 10.03.2022 12:57:45 10.03.2022 12:57:45...
  • Seite 32: Maintenance Of The Model

    Maintenance of the model In order to ensure that your locomotive provides you with many years of pleasure, certain service work at regular intervals (approx. every 30 operating hours) is advisable. ▪ Decoupling of locomotive and tender Fig. 1 70190.indd 32 70190.indd 32 10.03.2022 12:57:45 10.03.2022 12:57:45...
  • Seite 33: Cleaning Of Wheel Contact

    ▪ Cleaning of wheel contacts Wheel contacts easily get dirty on tracks which are not entirely clean. Use a small brush to remove dirt fom spots marked. 70190.indd 33 70190.indd 33 10.03.2022 12:57:45 10.03.2022 12:57:45...
  • Seite 34: Lubrication

    ▪ Lubrication Only apply small oil droplets onto the positions as marked in the lubrication plan. We recommend ROCO oiler Art. No. 10906. In order to lubricate the transmission parts (gear wheel, screw), we recommend using ROCO special grease 10905. If lubricated, do not oil these parts.
  • Seite 35: Fill Steam Smoke Distillate (Only For 70191 / 78191)

    ▪ Fill steam smoke distillate (only for 70191 and 78191) Please ensure that you do not overfill the steam oil tank. When refilling, please only use the dosing syringe included in the steam oil set Art. No. 10908. Immediately wipe leaking steam oil with a dry and absorbent cloth.
  • Seite 36 The steam system is an open system. Therefore, please do not rotate, tilt or turn the locomotive upside down. Steam oil may otherwise leak from the system and soil the locomotive. The open design of the steam system is production-related and does not constitute a fault.
  • Seite 37: Retrofitting A Seuthe Steam Generator (Only For 70190)

    ▪ Retrofitting a Seuthe steam generator (only for 70190) First remove the chimney hood and then install the Seuthe steam generator no. 10 (for analogue DC operation) or no. 11 (for digital DC operation). When dealing with a steam generator installed in digital mode complete with a retrofitted 10895 or 10896 decoder, it is possible to switch the steam generator on and off via the F1 key.
  • Seite 38: Replacement Of Traction Tyres

    ▪ Replacement of traction tyres Remove the traction tyres using a needle or a thin screwdriver. When applying the new traction tyres, please ensure that they do not rotate. ▪ AC pick up (only for 78191) 70190.indd 38 70190.indd 38 10.03.2022 12:57:46 10.03.2022 12:57:46...
  • Seite 39: Mounting Of The Enclosed Etched Labels

    1. Before removing the labels from the etched frame place them with their backs on a firm and completely level surface. 2. Remove the paint from the surface of the characters carefully either with the ROCO rubber (art. no. 10002) a sharp knife having a straight edge or similar object (e.g.
  • Seite 40 Bw Kassel Optional Cement Cement 70190.indd 40 70190.indd 40 10.03.2022 12:57:46 10.03.2022 12:57:46...
  • Seite 41: The Sounddecoder (Only For 70191 / 78191)

    The Sounddecoder ▪ BR 10 002 function key allocation (delivery state) The factory-set default adress of the lok is 03. F-Key Function for 70191 / 78191 Front light, white Sound Dynamic smoke generator Two tone whistle, long Conductor whistle Coupling / Decoupling Shunting gear and half speed Curve squeaking (only with F1 and whilst driving) Circulation lighting...
  • Seite 42 Rear light Generator Drainage (only if F1 ON) Mute key Injector Feed pump Airpump Whistle double Whistle long Announcement Slagging Water drum Cylinder drainage Sanding Volume + Volume - 70190.indd 42 70190.indd 42 10.03.2022 12:57:46 10.03.2022 12:57:46...
  • Seite 43: Locomotive Settings

    ▪ Locomotive Settings The Sounddecoder has been optimally adjusted to this locomotive. You can still adapt numerous decoder properties to your wishes however. Certain parameters (referred to as CVs – Configuration Variable – or register) can be amended. Please check before each programming if this is really necessary. Incorrect settings can result in the decoder not reacting correctly. The decoder is preprogrammed with 28/128 speed steps at the factory for a high level of comfort.
  • Seite 44 Medium speed (at medium running step) - Value 1 corresponds to 1/3 of Vmax. (CV 5) 00 – 252 Decoder Version Number (only read! Readable only on reading-capable amplifiers/centres). Important! Please note when using the MULTIMAUS® in order to achieve CVs greater than CV255: when undertaking a short-term programming of CV7, only the subsequent programming access with the value 10 is increased by 100 CV places (meaning CV166 then accesses CV266 for example).
  • Seite 45: Operation With A Dcc Command Station (Multimaus)

    ▪ Operation with a DCC Command Station (MULTIMAUS) Because the multiMAUS (from Firmware Version V1.05) has over 28 function keys and a light sensor, it is particularly convenient to operate. You can also control your locomotives via WLANMAUS for wireless freedom combined with the advantages of the practical multiMAUS. A further variation for easy operation is the Z21 app via your smartphone or tablet.
  • Seite 46 Table des matières ▪ Fotteur pour Systeme (pour rèf. 78191) ......59 Introduction ................ 47 Préparation et montage des plaques d’immatriculation Mise en service de votre locomotive photogravées ..............60-61 ▪ Avant la première mise en marche ........49 Le décodeur (pour rèf. 70191 / 78191) ▪...
  • Seite 47: Introduction

    Le moteur de ce modèle est de conception étroitement équipée. Changer le moteur exige des connaissances en électronique et en mécanique de précision! Afin d‘éviter tout endommagement suite à une manipulation in correcte, adressez- vous à votre commerçant spécialisé Roco ou à un atelier spécialisé.
  • Seite 48 La série 10 002 Série 10 - Le « schwarze Schwan der Bundesbahn » (le cygne noir des Chemins de fer allemands). Bien que les Chemins de fer fédéraux allemands (DB) considéraient la traction à vapeur comme un modèle dépassé, ils prièrent la société Krupp en 1953 de développer une nouvelle locomotive rapide Pacific.
  • Seite 49: Mise En Service De Votre Locomotive

    ▪ Avant la première mise en marche Pour éviter les mauvaises propriétés de fonctionnement ou les vices, il s’impose d’huiler les paliers des tiges d’accouplement avant la première mise en marche. Pour ce faire nous conseillons l’huileur ROCO 10906. kleben...
  • Seite 50: Rodage Du Modèle

    Le rayon minimal admissible du modèle present est fixé à soit 419,6 mm, soit le rayon R3 des voies ROCO. Une marche impeccable de votre modèle n‘est réalisable que sur des voies vraiment propres. A ces fins nous vous recommandons notre wagonnettoyeur Roco réf.
  • Seite 51: Les Attelages

    ▪ Les attelages En vue d‘une exploitation pratique sur votre rèseau vous pouvez choisir parmi plusieurs types d‘attelages conformes aux différents systémes d‘attelage pratiqués en H0. Nous vous recommandons l‘emploi de l‘attelage court ROCO. Le sachet joint comprend entre autres des petites pièces de finition conformes à...
  • Seite 52: Post-Montage D'un Décodeur Plux (Pour Rèf. 70190)

    ▪ Post-montage d’un décodeur PluX (pour rèf. 70190) Démontez la caisse. Enlevez la fiche de shuntage de l‘interface (à conserver!) et enfichez finalement la fiche du module de télécommande aux prises de l‘interface. Veillez à la position correcte de la fiche. 70190.indd 52 70190.indd 52 10.03.2022 12:57:47...
  • Seite 53: Maintenance Et Entretien Du Modèle

    Maintenance et entretien du modèle Pour que vous profitiez longtemps de votre locomotive, certains travaux de service réguliers (environ toutes les 30 heures de fonctionne- ment) sont indispensables. ▪ Découplage de la locomotive et du tender Fig. 1 70190.indd 53 70190.indd 53 10.03.2022 12:57:47 10.03.2022 12:57:47...
  • Seite 54: Nettoyage Des Contacts D'alimentation Des Roues

    ▪ Nettoyage des contacts d’alimentation des roues Les lames de contact risquent de s‘encrasser rapidement sur des voies poussiéreuses. Veuillez enlever la poussiére aux endroits marqués à laide d‘un petit pinceau. 54 54 70190.indd 54 70190.indd 54 10.03.2022 12:57:48 10.03.2022 12:57:48...
  • Seite 55: Lubrification

    ▪ Lubrification Appliquez uniquement de petites gouttes d’huile aux endroits marqués sur le plan de lubrification. Nous conseillons l’huileur ROCO, art. n° 10906. Pour lubrifier les éléments de l’entraînement (pig- nons, vis sans fin) nous vous conseillons la graisse spéciale ROCO 10905. En cas de lubrification, ne pas huiler ces éléments.
  • Seite 56: Remplir De Liquide Fumigène (Pour Rèf. 70191 / 78191)

    ▪ Remplir de liquide fumigène (pour rèf. 70191 and 78191) Ne pas trop remplir le réservoir de liquide fumigène ! Pour le remplir, utilisez uniquement la seringue de dosage du kit fumigène art. n° 10908. Absorber immédiatement l’excès de liquide fumigène avec un chiffon sec et absorbant.
  • Seite 57 Le système de vapeur est un système ouvert, veillez ainsi à ne pas tourner la locomotive, ne la faites pas basculer ni pivoter. Sinon, le liquide fumigène pourrait s’échapper et encrasser la locomotive. La construction ouverte du système de vapeur est due à la production et n’est pas à considérer comme un défaut.
  • Seite 58: Post-Montage D'un Générateur De Vapeur Seuthe (Pour Rèf. 70190)

    ▪ Post-montage d’un générateur de vapeur Seuthe (pour rèf. 70190) Tout d’abord ôter la hotte puis monter le générateur de vapeur Seuthe n°10 (pour le mode analogique DC) ou n°11 (pour le mode numérique DC). Si le générateur de vapeur est monté en mode numérique avec un décodeur post-monté du type10895 ou 10896, la touche F1 permet d’éteindre et d’allumer le générateur de vapeur.
  • Seite 59: Changement Des Pneus Superadhérents

    ▪ Èchange des bandages d‘adhérence Démontez d‘abord les flancs de bogies. Elevez les bandages d‘adhérence à l‘aide d‘une aiguille ou d‘un tourne-vis fin. Lors du montage des nouveaux bandages veuillez veiller à ce que les bandages ne soient pas tordues. ▪...
  • Seite 60: Préparation Et Montage Des Plaques D'immatriculation Photogravées

    1. Poser l’ensemble des plaques (sans les détacher de leur cadre) sur une surface dure et bien plane. 2. Gratter soigneusement la couche supérieure de la peinture des caractères de préférence avec la gomme ROCO (réf. 10002) ou un couteau bien aiguisé...
  • Seite 61 Bw Kassel à choisir coller coller 61 61 70190.indd 61 70190.indd 61 10.03.2022 12:57:48 10.03.2022 12:57:48...
  • Seite 62: Affectation Des Touches De Fonction (À La Livraison)

    Le décodeur-son ▪ Affectation des touches de fonction de la BR 10 002 (à la livraison) Le dècodeur a été programmé, en usine, à l’adresse «03» F-Goût Fonction pour 70191 / 78191 Éclairage avant blanc Bruitage Générateur de fumée dynamique Siffet deux sons long Sifflement du contrôleur Attelage / Détalage...
  • Seite 63 F-Goût Fonction pour 70191 / 78191 Dynamo Élimination d’eau (seulement si F1 activé) Touche muette Injecteur Pompe d’alimentation Pompe à air Double sifflet Sifflet long Annonce Décrassage Plein d’eau Cylindre élimination d’eau Sabler Volume + Volume - 70190.indd 63 70190.indd 63 10.03.2022 12:57:49 10.03.2022 12:57:49...
  • Seite 64: Réglages De La Locomotive

    ▪ Réglages de la locomotive Le décodeur-son contenu dans cette locomotive a été ajusté de façon optimale sur la locomotive. Cependant, vous pouvez modifier de nom- breuses caractéristiques du décodeur selon vos désirs. Pour cela, il est possible de modifier certains paramètres (appelés aussi CV – Configu- ration Variable- ou registres).
  • Seite 65 Valeurs Valeurs ajustables standard Vitesse maximale 00 – 252 Vitesse moyenne (Définition de la vitesse moyene entre seuil de démarrage et vitesse maximale) 00 – 252 La valeur 1 équivaut à 1/3 de Vmax. (CV5) N° de la version du logiciel du décodeur (uniquement en lecture! Possible uniquement avec des centrales et amplificateurs bidirectionnels) Important ! Pour l’utilisation de la MULTIMAUS afin d’atteindre des CV supérieures à...
  • Seite 66: Système Avec Centrale Dcc (Multimaus)

    Adresse longue (Condition préalable : l’adresse longue est activée conformément au réglage CV29) 100 – 9999 Réglages Réglage globale de l‘intensité de tous les bruits (prière de bien vérifier la programmation des variables CV 00 – 255 121 à 123!) Seuil d’activation du bruit de freinage (Plus la valeur est élevée, plus le bruit de freinage commence tôt lors 00 –...
  • Seite 67: Ausgangsbelegung

    Ausgangsbelegung / Decoder interface / Interface électrique GPIO/C Aux. 3 Führerstandsbeleuchtung / Driver‘s cab lighting / Féclairage cabine Zugbus-Clock / GPIO/B GPIO/A / Zugbus-Data Masse GND DC (+) Elko Stirnlicht vorne / Front light, front / Avant la lumière, devant Motor rechts (+) / Engine right (+) / Droit du moteur (+) V (+) Motor links (-) / Engine left (-) / Gauche du moteur (-)
  • Seite 68: Ersatzteilliste

    Symbolische Darstellung / Symbolic Illustration / Illustration figurative 70190.indd 68 70190.indd 68 10.03.2022 12:57:51 10.03.2022 12:57:51...
  • Seite 69 Pos. Nr. / Pos.no. Beschreibung / Description Art.-Nr. / Art.no. cket Preisgruppe /Price bra GF-Schraube M2x5 / GF-Screw M2x5 / GF-Vis M2x5 114966 TS - Fenster + Lichtleiter Lok u. Tender / Part set window a. lens / Jeu de fenêtre, fibre optique 130768 TS - Rauchfang...
  • Seite 70 Symbolische Darstellung / Symbolic Illustration / Illustration figurative 70190.indd 70 70190.indd 70 10.03.2022 12:57:52 10.03.2022 12:57:52...
  • Seite 71 Pos. Nr. / Pos.no. Beschreibung / Description Art.-Nr. / Art.no. Preisgruppe /Price bracket 108137 Schraube 1,5x5 / Screw 1,5x5 / Vis 1,5x5 114944 GF-Schraube M2x12 / GF-Screw M2x12 / GF-Vis 2x12 115062 GF-Schraube M2x18 / GF-Screw M2x18 / GF-Vis M2x18 130765 Rauchkammer-Deckel analog / Smoke chamber-cover analog / couvercle de la chambre de fumée 147978...
  • Seite 72 14 13 Symbolische Darstellung / Symbolic Illustration / Illustration figurative 70190.indd 72 70190.indd 72 10.03.2022 12:57:53 10.03.2022 12:57:53...
  • Seite 73 Pos. Nr. / Pos.no. Beschreibung / Description Art.-Nr. / Art.no. Preisgruppe /Price bracket GF-Schraube M1,6x5 / GF-Screw M1,6x5 / GF-Vis M1,6x5 115269 Lokplatine kpl. mit LED Platine / Printed circuit ass. w. LED printed circuit / La cpl. carte principale avec LED 130767 TS - Luftpumpe, Tenderleitung.
  • Seite 74 12 18 12 18 9 15 10 16 11 17 12 18 Symbolische Darstellung / Symbolic Illustration / Illustration figurative 70190.indd 74 70190.indd 74 10.03.2022 12:57:54 10.03.2022 12:57:54...
  • Seite 75 Pos. Nr. / Pos.no. Beschreibung / Description Art.-Nr. / Art.no. Preisgruppe /Price bracket Druckfeder / Spring / Le ressort de compression 86271 Ansatzschraube M2x8 / Screw / Vis 100101 TS - Bremsbacken / Part set brake shoes / Jeu de mâchoires de frein 105939 Bremsbackensatz Vorlaufgestell / Part set / Jeu de mâchoires de frein 111828...
  • Seite 76 Symbolische Darstellung / Symbolic Illustration / Illustration figurative 70190.indd 76 70190.indd 76 10.03.2022 12:57:55 10.03.2022 12:57:55...
  • Seite 77 Pos. Nr. / Pos.no. Beschreibung / Description Art.-Nr. / Art.no. Preisgruppe /Price bracket Lokboden / Loco bottom / Base de locomotive 105938 Bremsgestänge / Brake rod / Timonerie de frein 105945 GF-Schraube M2x5 / GF-Screw M2x5 / GF-Vis M2x5 114966 GF-Schraube M1,6x4 / GF-Srew M1,6x4 / GF-Vis M1,6x4 114850 GF-Schraube M1,6x8 / GF-Srew M1,6x8 / GF-Vis M1,6x8...
  • Seite 78 Symbolische Darstellung / Symbolic Illustration / Illustration figurative 70190.indd 78 70190.indd 78 10.03.2022 12:57:56 10.03.2022 12:57:56...
  • Seite 79 Pos. Nr. / Pos.no. Beschreibung / Description Art.-Nr. / Art.no. Preisgruppe /Price bracket Motor / Motor / Moteur 85149 Zugfeder / Spring / Tension 86249 Schneckenzahnrad doppelt / Worm gear doubled / Réducteur à deux reprises 86419 GF-Schraube M2x4 / GF-Srew M2x4 / GF-Vis M2x4 114877 GF-Schraube M2x12 / GF-Srew M2x12 / GF-Vis M2x12 114944...
  • Seite 80 o. Abb. / no ill. Tafelsatz lackiert Board set coated Ensemble de panneaux pas malade 10 14 6 12 6 12 7 13 o. Abb. / no ill. o. Abb. / no ill. o. Abb. / no ill. Glasbox Oberteil Box Unterteil Fixierungen Glass box upper part...
  • Seite 81 Pos. Nr. / Pos.no. Beschreibung / Description Art.-Nr. / Art.no. Preisgruppe /Price bracket Haftrings.10 Stk.10,5-13,5mm / Set w. traction tieres 10 pcs / Ensemble d‘anneau de liaison 10 pcs 133238 Kegeldruckfeder / Spring / Ressort conique 86234 Standardkupplung / Standard coupling / Couplage standard 89246 Steckteilesatz / Part set / Jeu de 107808...
  • Seite 82 Notizen / Notes 70190.indd 82 70190.indd 82 10.03.2022 12:57:57 10.03.2022 12:57:57...
  • Seite 83 Notizen / Notes 70190.indd 83 70190.indd 83 10.03.2022 12:57:57 10.03.2022 12:57:57...
  • Seite 84 Cela implique le risque de perte de ces composants. Dans ce cas, vous pouvez commander ces pièces aux S.A.V. ROCO; nous ne pouvons cependant pas donner suite à une réclamation èventuelle à cause de ces pièces perdues. Attention! II y a danger de blessure à...

Diese Anleitung auch für:

701907019178191

Inhaltsverzeichnis