Herunterladen Inhalt Inhalt Diese Seite drucken
Hitachi YUTAKI M-Serie Bedienungsanleitung
Vorschau ausblenden Andere Handbücher für YUTAKI M-Serie:
Inhaltsverzeichnis

Werbung

Verfügbare Sprachen
  • DE

Verfügbare Sprachen

  • DEUTSCH, seite 71
INSTRUCTION MANUAL
MANUAL DE INSTRUCCIONES
BEDIENUNGSANLEITUNG
MANUEL D'UTILISATION
MANUALE DI ISTRUZIONI
YUTAKI M SERIES
RASM-(3-6)(V)NE
All manuals and user guides at all-guides.com
MANUAL DE INSTRUÇÕES
BRUGSANVISNING
INSTALLATIEHANDLEIDING
INSTALLATIONSHANDBOK
ΕΓΧΕΙΡΊΔΙΟ ΟΔΗΓΙΏΝ

Werbung

Inhaltsverzeichnis
loading

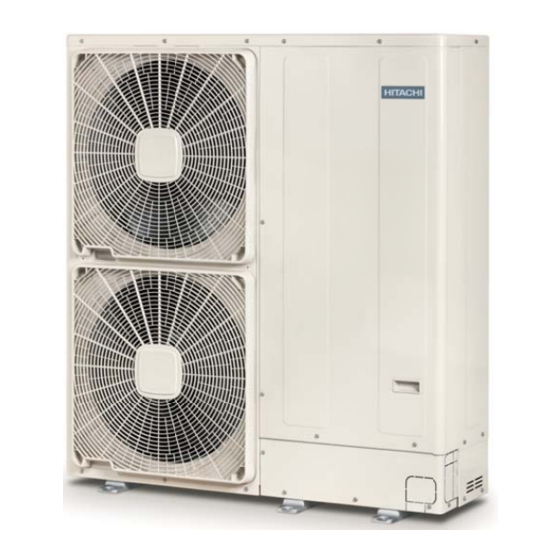
Inhaltszusammenfassung für Hitachi YUTAKI M-Serie

  • Seite 1 All manuals and user guides at all-guides.com MANUAL DE INSTRUÇÕES INSTRUCTION MANUAL BRUGSANVISNING MANUAL DE INSTRUCCIONES INSTALLATIEHANDLEIDING BEDIENUNGSANLEITUNG INSTALLATIONSHANDBOK MANUEL D’UTILISATION MANUALE DI ISTRUZIONI ΕΓΧΕΙΡΊΔΙΟ ΟΔΗΓΙΏΝ YUTAKI M SERIES RASM-(3-6)(V)NE...
  • Seite 2 All manuals and user guides at all-guides.com...
  • Seite 3 Specifikationerna i den här handboken kan ändras utan föregående meddelande för att HITACHI ska kunna leverera de senaste innovationerna till kunderna. Vi på Hitachi gör allt vi kan för att se till att alla specifikationer stämmer, men vi har ingen kontroll över tryckfel och kan därför inte hållas ansvariga för den typen av fel.
  • Seite 4 All manuals and user guides at all-guides.com C A U T I O N This product shall not be mixed with general house waste at the end of its life and it shall be retired according to the appropriated local or national regulations in a environmentally correct way. Due to the refrigerant, oil and other components contained in heat pump, its dismantling must be done by a professional installer according to the applicable regulations.
  • Seite 5 All manuals and user guides at all-guides.com English Following Regulation EU No. 517/2014 on Certain Fluorinated Greenhouse gases, it is mandatory to fill in the label attached to the unit with the total amount of refrigerant charged on the installation. Do not vent R410A into the atmosphere: R410A are fluorinated greenhouse gases covered by the Kyoto protocol global warming potential (GWP) R410A: = 2088.
  • Seite 6 All manuals and user guides at all-guides.com Protection Plastic Film Peel-off Paper Adhesive Surface Figure 1. F-Gas Label with Protection Plastic Film Figure 2. Protection Plastic Film English Instructions to fill in the “F-Gas Label”: 1.- Fill in the Label with indelible ink the refrigerant amounts:  - Factory Charge,  - Additional Charge &  - Total Charge. 2.- Stick the Protection Plastic Film on the F-Gas Label (delivered in a plastic bag with the Manual).
  • Seite 7 All manuals and user guides at all-guides.com Important note: Please, check, according to the model name, which is your heat pump type, how it is abbreviated and referred to in this instruction manual. This MODELS CODIFICATION Installation and Operation Manual is only related to RASM-(V)NE Outdoor Units. Nota importante: compruebe, de acuerdo con el nombre del modelo, el tipo de bomba de calor, su abreviatura y su referencia en el presente manual de CODIFICACIÓN DE MODELOS...
  • Seite 8 All manuals and user guides at all-guides.com MONOBLOC AIR TO WATER HEAT PUMP MODELS ) ( ) ( ) ( ) ( ) 1~ 230V 50Hz 3N~ 400V 50Hz Unit Unit Unit RASM-3VNE RASM-4VNE RASM-4NE RASM-5VNE RASM-5NE RASM-6VNE RASM-6NE N O TA N O T E Ícones entre parênteses representam possíveis operações adicio- Icons between brackets mean possible extra operations to the fac-...
  • Seite 9: Inhaltsverzeichnis

    All manuals and user guides at all-guides.com INDEX ÍNDICE 1 GENERAL INFORMATION 1 INFORMAÇÃO GERAL 2 SAFETY 2 SEGURANÇA 3 TRANSPORTATION AND HANDLING 3 TRANSPORTE E MANUSEAMENTO 4 BEFORE OPERATION 4 ANTES DE UTILIZAR A UNIDADE 5 GENERAL DIMENSIONS 5 DIMENSÕES GERAIS 6 UNIT INSTALLATION 6 INSTALAÇÃO DA UNIDADE 7 REFRIGERANT AND WATER PIPING...
  • Seite 10 All manuals and user guides at all-guides.com English Original version Español Versión traducida Deutsch Übersetzte Version Français Version traduite Italiano Versione tradotta Português Versão traduzidal Dansk Oversat version Nederlands Vertaalde versie Svenska Översatt version Ελληνικα Μεταφρασμένη έκδοση...
  • Seite 11: General Information

    HITACHI makes every effort to offer correct, up-to-date HITACHI Air Conditioning Products Europe, S.A.U. documentation. Despite this, printing errors cannot be controlled Within the policy of continuous improvement of its products, by HITACHI and are not its responsibility.
  • Seite 12: Important Notice

    In case that the CD-ROM is missing Pressure Vessel and Safety Device: This heat pump is equipped or it is not readable, please contact your HITACHI dealer or with a high pressure vessel under PED (Pressure Equipment distributor.
  • Seite 13: Transportation And Handling

    All manuals and user guides at all-guides.com TRANSPORTATION AND HANDLING 3 TRANSPORTATION AND HANDLING When hanging the unit, ensure a balance of the unit, check RASM-3VNE RASM-(4-6)(V)NE safety and lift it up smoothly > 60º Do not remove any packing materials. Hang the unit under packing condition with two ropes.
  • Seite 14: General Dimensions

    All manuals and user guides at all-guides.com GENERAL DIMENSIONS 5 GENERAL DIMENSIONS 5.1 SERVICE SPACE RASM-3VNE Front view Top view Air inlet Air outlet Units in mm. RASM-(4-6)(V)NE Front view Top view Air inlet Air outlet Units in mm. PMML0342B rev.1 - 03/2016...
  • Seite 15 All manuals and user guides at all-guides.com GENERAL DIMENSIONS 5.2 NAME OF PARTS AND DIMENSIONAL DATA RASM-3VNE Top view Side view Front view Bottom view Units in mm. XEKS 1720 Number Part name Number Part name Compressor Refrigerant strainer (x4) Water side heat exchanger Stop valve for gas line - Ø15.88 (5/8”) Air side heat exchanger...
  • Seite 16 All manuals and user guides at all-guides.com GENERAL DIMENSIONS RASM-(4-6)(V)NE Top view Front view Side view Bottom view Units in mm. XEKS 1721 Number Part name Number Part name Compressor Refrigerant strainer (x4) Water side heat exchanger Stop valve for gas line - Ø25.4 (1”) Air side heat exchanger Stop valve for liquid line - Ø9.52 (3/8”) Electrical box...
  • Seite 17: Unit Installation

    All manuals and user guides at all-guides.com UNIT INSTALLATION 6 UNIT INSTALLATION • Install the unit in a location where noise emitted by the unit does not C A U T I O N disturb neighbours. • Transport the products as close to the installation location as possible •...
  • Seite 18 All manuals and user guides at all-guides.com UNIT INSTALLATION (Unit: mm) Around sides are open Around sides are open with obstacles above 0<L≤1/2H→A≥350 1/2H<L≤H→A≥450 0<L≤1/2H→A≥600 H=1380 1/2H<L≤H→A≥1200 H=1380 6.2 PLACE PROVISION  Concrete foundation Nº Description • Foundation shall be on a level surface and it is ...
  • Seite 19: Refrigerant And Water Piping

    All manuals and user guides at all-guides.com REFRIGERANT AND WATER PIPING 2 The foundation shall be strong enough to avoid any deformation and vibration. 3 In order to prevent vibration transfer to the building, place rubber material between the stay and the wall. C A U T I O N Pay attention to the following for installation: •...
  • Seite 20: Refrigerant Circuit

    All manuals and user guides at all-guides.com DRAIN PIPING • Cap the end of the pipe when pipe is to be inserted through connections in order to avoid heat loss and dew a wall hole. condensation on the surface of the pipes or accidental injures due to excessive heat on piping surfaces.
  • Seite 21 All manuals and user guides at all-guides.com DRAIN PIPING 8.2 SPACE HEATING AND DHW D A N G E R Do not connect the power supply to the unit prior to filling the space heating circuit (and DHW circuit if it were the case) with water and checking water pressure and the total absence of any water leakage.
  • Seite 22 1 Recirculation water pump (field supplied): this water pump (3) will help to correctly recirculate the hot water to the DHW inlet. • 1 Water check valve (ATW-WCV-01 accessory): this Hitachi accessory (3) is connected after the recirculation water pump (4) in order to ensure the non-return of water. •...
  • Seite 23 All manuals and user guides at all-guides.com DRAIN PIPING 8.2.4 Requirements and recommendations for the hydraulic circuit • The maximum piping length depends on the maximum Try to avoid long runs of water piping between the tank pressure availability in the water outlet pipe. Please check and the DHW installation in order to decrease possible the pump curves.
  • Seite 24: Water Filling

    All manuals and user guides at all-guides.com DRAIN PIPING 8.2.5 Water filling 1 Check that a water check valve (ATW-WCV-01 accessory) 8 If a little quantity of air is still remaining in the water circuit, with a shut-off valve (field supplied) is connected to the it will be removed by the automatic air purger of the unit water filling point (water inlet connection) for filling the space during the first hours of operation.
  • Seite 25 All manuals and user guides at all-guides.com DRAIN PIPING 8.3 MINIMUM WATER VOLUME DESCRIPTION While defrosting is taking place, the unit is not providing the The following part shows how to calculate the minimum water heat required to cover the heat demand from the installation. volume in the system for product protection (anti-hunting) and This value can be obtained in 2 ways: temperature drop at defrosting.
  • Seite 26 All manuals and user guides at all-guides.com DRAIN PIPING 8.4 WATER CONTROL It is necessary to analyse the quality of water by checking pH, electrical conductivity, ammonia ion content, sulphur content, and others. The following is the recommended standard water quality. Chilled Water System Tendency Item...
  • Seite 27: Power Supply

    All manuals and user guides at all-guides.com ELECTRICAL AND CONTROL SETTINGS 9 ELECTRICAL AND CONTROL SETTINGS 9.1 GENERAL CHECK • Make sure that the following conditions related to power supply installation are satisfied: The power capacity of the electrical installation is large enough to support the power demand of the YUTAKI system (outdoor unit + DHW tank (if apply)).
  • Seite 28 All manuals and user guides at all-guides.com ELECTRICAL AND CONTROL SETTINGS 9.2 ELECTRICAL WIRING CONNECTION FOR OUTDOOR UNITS  The electrical wiring connection for the outdoor unit is shown in figure below RASM-(3-6)VNE RASM-(4-6)(V)NE Power supply Control cable Power supply Control 1~ 230V 50Hz (5V)
  • Seite 29 All manuals and user guides at all-guides.com ELECTRICAL AND CONTROL SETTINGS 9.3 WIRING SIZE AND MINIMUM REQUIREMENTS OF THE PROTECTION DEVICES C A U T I O N • Check to ensure that the field supplied electrical components (mains power switches, circuit breakers, wires, connectors and wire terminals) have been properly selected according to the electrical data indicated on this chapter and they comply with national and local codes.
  • Seite 30 All manuals and user guides at all-guides.com ELECTRICAL AND CONTROL SETTINGS 9.4 OPTIONAL UNIT WIRING (ACCESSORIES)  Summary of the terminal board connections Mark Part name Description TERMINAL BOARD 2 (TB2) The H-LINK transmission has to be done between the unit and the terminals 1-2 of either outdoor H-LINK commutation unit, ATW-RTU-04 or any other central device.
  • Seite 31 All manuals and user guides at all-guides.com ELECTRICAL AND CONTROL SETTINGS Mark Part name Description When there is a second temperature application, a secondary pump is the circulating pump for 27(L) Water Pump 2 (WP2) the secondary heating circuit. Terminals intended for the connection of the Aquastat security accessory (ATW-AQT-01) for Aquastat security for circuit 2 (WP2) controlling water temperature of the circuit 2.
  • Seite 32 All manuals and user guides at all-guides.com ELECTRICAL AND CONTROL SETTINGS   DSW4 / RSW1 Function of DIP switches and rotary switches DSW4 RSW1 N O T E • The mark “■” indicates the dip switches positions. Factory setting •...
  • Seite 33: Led Indication

    All manuals and user guides at all-guides.com ELECTRICAL AND CONTROL SETTINGS  DSW6: Not used Unit and installation pipes antifreeze protection Factory setting (Do not change) Standard / ECO water pump operation  DSW7: Additional setting 4 Electric heater or boiler emergency mode Factory setting DHW tank’s heater operation Defrost for the water electric heater...
  • Seite 34: Preliminary Check

    All manuals and user guides at all-guides.com COMMISSIONING 10 COMMISSIONING 10.1 BEFORE OPERATION C A U T I O N • Supply electrical power to the system for approximately 12 hours • Turn OFF the main switch when the system is to be stopped for a before start-up after a long shut-off.
  • Seite 35: Commissioning Procedure

    After test run is completed, start the entire unit or the condition is not performed and heating is performed by Heat Pump. selected circuit by pressing the OK button. HITACHI is not responsible for its operation.  Initial start-up at low outdoor ambient...
  • Seite 36: Unit Controller

    All manuals and user guides at all-guides.com UNIT CONTROLLER • When the test starts, the user controller will exit from the installer mode. • If “favourite action button” is pressed during test run, this function will be executed until the user presses the cancel option (this is not-limited by time).
  • Seite 37: Main Screen

    All manuals and user guides at all-guides.com UNIT CONTROLLER 11.2 MAIN SCREEN Depending on the working mode of the user controller, the main screen is shown in a different way. When the user controller is working as a master unit controller, a comprehensive view with all the elements is shown, whereas when the user controller is working as a room thermostat (located in one of the controlled zones), the main screen appears with simplified information.
  • Seite 38 All manuals and user guides at all-guides.com UNIT CONTROLLER 11.2.2 Room thermostat view           Time and date Next circuit   The current time/date information is displayed. This It informs that there is a room thermostat view for a second information can be changed on the configuration menu circuit and it is possible to access by pressing the right key.
  • Seite 39 All manuals and user guides at all-guides.com UNIT CONTROLLER 11.3 DESCRIPTION OF THE ICONS 11.3.1 Common icons 11.3.2 Icons for the comprehensive view Icon Name Values Explanation Icon Name Values Explanation This icon informs about pump Circuit I or II is in Demand-OFF operation.
  • Seite 40: Main Safety Devices

    All manuals and user guides at all-guides.com MAIN SAFETY DEVICES 11.3.3 Icons for the room thermostat view Icon Name Values Explanation Manual mode Manual/Auto Auto mode with timer setting mode Auto mode without timer setting Setting temperature Setting/Room temperature Room temperature End of timer The end hour of the timer period is period...
  • Seite 41: Información General

    Pese a ello, los errores permiso de HITACHI Air Conditioning Products Europe, S.A.U. de impresión están fuera del control de HITACHI, que no se hace responsable de ellos. En el marco de una política de mejora continua de la calidad de sus productos, HITACHI Air Conditioning Products Europe, En consecuencia, algunas de las imágenes o algunos de...
  • Seite 42 Esta unidad está diseñada para uso comercial y en industria ligera. Si se • HITACHI sigue una política de continua mejora del diseño instala en una vivienda, podría causar interferencias electromagnéticas. y rendimiento de los productos. Se reserva, por lo tanto, el Puesta en marcha y funcionamiento: Asegúrese de que...
  • Seite 43: Transporte Y Manipulación

    All manuals and user guides at all-guides.com TRANSPORTE y MANIPULACIÓN 3 TRANSPORTE Y MANIPULACIÓN Cuando suspenda la unidad, equilíbrela, compruebe la RASM-3VNE RASM-(4-6)(V)NE seguridad y elévela con suavidad. > 60º No deseche ningún material de embalaje. Suspenda la unidad con su embalaje utilizando dos cuerdas. 0.7 -1.0 m Por razones de seguridad, asegúrese de izar la unidad suavemente y evite que se incline.
  • Seite 44: Dimensiones Generales

    All manuals and user guides at all-guides.com DIMENSIONES GENERALES 5 DIMENSIONES GENERALES 5.1 ESPACIO PARA MANTENIMIENTO RASM-3VNE Vista frontal Vista superior Entrada de aire Salida de aire Unidades en mm. RASM-(4-6)(V)NE Vista frontal Vista superior Entrada de aire Salida de aire Unidades en mm.
  • Seite 45 All manuals and user guides at all-guides.com DIMENSIONES GENERALES 5.2 NOMBRE DE LOS COMPONENTES Y DATOS DIMENSIONALES RASM-3VNE Vista superior Vista lateral Vista frontal Vista inferior Unidades en mm. XEKS 1720 Nº Nombre del componente Nº Nombre del componente Compresor 15 Filtro refrigerante (x4) Intercambiador de calor del lado del agua 16 Válvula de servicio para la línea de gas-Ø15,88 (5/8”)
  • Seite 46 All manuals and user guides at all-guides.com DIMENSIONES GENERALES RASM-(4-6)(V)NE Vista superior Vista frontal Vista lateral Vista inferior Unidades en mm. XEKS 1721 Nº Nombre del componente Nº Nombre del componente Compresor 15 Filtro refrigerante (x4) Intercambiador de calor del lado del agua 16 Válvula de servicio para la línea de gas-Ø25,4 (1”) Intercambiador de calor del lateral del aire 17 Válvula de servicio para la línea de líquido-Ø9.52 (3/8”) Caja eléctrica...
  • Seite 47: Instalación De La Unidad

    All manuals and user guides at all-guides.com INSTALACIÓN DE LA UNIDAD 6 INSTALACIÓN DE LA UNIDAD • Instale la unidad en un lugar donde el ruido que genera no moleste P R E C A U C I Ó N a los vecinos.
  • Seite 48 All manuals and user guides at all-guides.com INSTALACIÓN DE LA UNIDAD (Unidades: mm) Sin obstáculos en los laterales Sin obstáculos en los laterales con obstáculos encima 0<L≤1/2H→A≥350 1/2H<L≤H→A≥450 0<L≤1/2H→A≥600 H=1380 1/2H<L≤H→A≥1200 H=1380 6.2 ESPACIO PARA LA INSTALACIÓN  Cimentación de hormigón Nº...
  • Seite 49 All manuals and user guides at all-guides.com TUBERÍAS DE AGUA y DE REFRIGERANTE evitar deformaciones y vibraciones. 3 Coloque material de caucho entre el soporte y la pared para evitar que las vibraciones se transmitan al edificio. P R E C A U C I Ó N Preste atención a los siguientes aspectos para la instalación: •...
  • Seite 50: Tubería De Desagüe

    All manuals and user guides at all-guides.com TUBERÍA DE DESAGÜE • Tape el extremo de la tubería cuando deba introducirla a conexiones para evitar pérdidas de calor y condensación través de un orificio en la pared. de rocío o daños provocados por un exceso de calor en la superficie de las tuberías.
  • Seite 51 All manuals and user guides at all-guides.com TUBERÍA DE DESAGÜE 8.2 CALEFACCIÓN Y ACS P E L I G R O Antes de conectar la unidad a la alimentación eléctrica llene el circuito de calefacción (y el de ACS si es el caso) con agua y compruebe la presión de agua y la ausencia total de fugas.
  • Seite 52 ACS. • Una válvula de retención de agua (accesorio ATW-WCV-01): este accesorio Hitachi (3) está conectado después de la bomba de recirculación de agua (4) para garantizar el no-retorno del agua. •...
  • Seite 53 All manuals and user guides at all-guides.com TUBERÍA DE DESAGÜE 8.2.4 Requisitos y recomendaciones para el circuito hidráulico • La longitud máxima de las tuberías depende de la presión Evite instalar tramos de tubería de agua demasiado máxima disponible en la tubería de salida de agua. largos entre el depósito y la instalación de ACS para Compruebe las curvas de la bomba.
  • Seite 54: Llenado De Agua

    All manuals and user guides at all-guides.com TUBERÍA DE DESAGÜE 8.2.5 Llenado de agua 1 Compruebe que la válvula de retención (accesorio ATW- 8 Si quedara una pequeña cantidad de aire en el circuito de WCV-01) con válvula de cierre (suministrada por el agua se expulsaría con el purgador automático de la unidad instalador) está...
  • Seite 55 All manuals and user guides at all-guides.com TUBERÍA DE DESAGÜE 8.3 DESCRIPCIÓN DEL VOLUMEN MÍNIMO DE AGUA Durante el descarche, la unidad no proporciona el calor A continuación se describe cómo calcular el volumen mínimo de necesario para hacer frente a la demanda de calor de la agua del sistema para proteger el producto y el descenso de la instalación.
  • Seite 56 All manuals and user guides at all-guides.com TUBERÍA DE DESAGÜE 8.4 CONTROL DEL AGUA Se debe analizar la calidad del agua comprobando el pH, la conductividad eléctrica, el contenido de ión amonio, el contenido de sulfuro y otros. A continuación se indica la calidad de agua estándar recomendada. Sistema de agua enfriada Tendencia Elemento...
  • Seite 57: Comprobaciones Generales

    All manuals and user guides at all-guides.com AJUSTES ELÉCTRICOS y DE CONTROL 9 AJUSTES ELÉCTRICOS Y DE CONTROL 9.1 COMPROBACIONES GENERALES • Asegúrese de que se cumplen las siguientes condiciones relacionadas con la instalación de alimentación: La capacidad de la instalación eléctrica es lo suficientemente grande como para soportar la demanda del sistema YUTAKI (unidad exterior + depósito de ACS (si aplica)).
  • Seite 58 All manuals and user guides at all-guides.com AJUSTES ELÉCTRICOS y DE CONTROL 9.2 CONEXIÓN DEL CABLEADO ELÉCTRICO DE LAS UNIDADES EXTERIORES  A continuación se muestra la conexión del cableado eléctrico de la unidad exterior RASM-(3-6)VNE RASM-(4-6)(V)NE Fuente de alimentación Cable de control Fuente de alimentación Cable de control...
  • Seite 59 All manuals and user guides at all-guides.com AJUSTES ELÉCTRICOS y DE CONTROL 9.3 TAMAÑO DEL CABLEADO Y REQUISITOS MÍNIMOS DE LOS DISPOSITIVOS DE PROTECCIÓN P R E C A U C I Ó N • Asegúrese de que los componentes eléctricos suministrados por el instalador (interruptores de alimentación, disyuntores, cables, conectores y terminales de cables) han sido correctamente seleccionados según los datos eléctricos indicados en este capítulo y que cumplen con la normativa local y nacional.
  • Seite 60 All manuals and user guides at all-guides.com AJUSTES ELÉCTRICOS y DE CONTROL 9.4 CABLEADO DE LA UNIDAD OPCIONAL (ACCESORIOS)  Resumen de las conexiones del cuadro de terminales Marca Nombre del componente Descripción CUADRO DE TERMINALES 2 (TB2) La transmisión H-LINK se debe realizar entre la unidad y los terminales 1-2 de cada unidad Comunicación H-LINK exterior, ATW-RTU-04 o cualquier otro dispositivo central.
  • Seite 61 All manuals and user guides at all-guides.com AJUSTES ELÉCTRICOS y DE CONTROL Marca Nombre del componente Descripción Cuando exista una segunda temperatura, la bomba secundaria es la bomba de circulación para 27(L) Bomba de agua 2 (WP2) el segundo circuito de calefacción. Aquastat de seguridad para el circuito Terminales destinados a la conexión del Aquastat de seguridad (accesorio ATW-AQT-01) para 2 (WP2)
  • Seite 62 All manuals and user guides at all-guides.com AJUSTES ELÉCTRICOS y DE CONTROL  DSW4 / RSW1 9.5.4 Funciones de los conmutadores DIP y de los interruptores giratorios DSW4 RSW1 N O TA • La marca “■” indica la posición de los conmutadores DIP. Ajuste de fábrica •...
  • Seite 63: Indicaciones Led

    All manuals and user guides at all-guides.com AJUSTES ELÉCTRICOS y DE CONTROL  DSW6: No se utiliza Protección contra la congelación de las tuberías de la unidad y de la instalación Ajuste de fábrica (No cambiar) Funcionamiento Estándar/ECO de la bomba de agua ...
  • Seite 64: Puesta En Marcha

    All manuals and user guides at all-guides.com PUESTA EN MARCHA 10 PUESTA EN MARCHA 10.1 ANTES DEL FUNCIONAMIENTO P R E C A U C I Ó N • Suministre alimentación eléctrica al sistema durante aproximadamente • Cuando el sistema se inicie después de haber estado parado 12 horas antes de ponerlo en marcha si ha estado parado durante durante más de 3 meses, se recomienda una revisión por parte de su mucho tiempo.
  • Seite 65: Procedimiento De Puesta En Servicio

    La función opcional adicional se puede utilizar calefacción la realiza la bomba de calor. HITACHI no es responsable de para ponerlo en marcha en condiciones de baja temperatura del su funcionamiento.
  • Seite 66 All manuals and user guides at all-guides.com CONTROLADOR DE LA UNIDAD • Cuando inicia la prueba, el controlador abandona el modo instalador. • Si durante la prueba de funcionamiento se pulsa el botón "acción favorita", se ejecutará esta función hasta que el usuario pulse la opción para cancelar (no tiene límite de tiempo).
  • Seite 67: Pantalla Principal

    All manuals and user guides at all-guides.com CONTROLADOR DE LA UNIDAD 11.2 PANTALLA PRINCIPAL En función del modo de funcionamiento del controlador, la pantalla principal se muestra de una forma u otra. Si está funcionando como controlador de una unidad maestra, se muestra una vista integral con todos los elementos, mientras que si lo hace como termostato de ambiente (ubicado en una de las zonas controladas), muestra información resumida.
  • Seite 68 All manuals and user guides at all-guides.com CONTROLADOR DE LA UNIDAD 11.2.2 Vista termostato de ambiente           Fecha y hora Siguiente circuito   Se muestran la fecha y la hora actuales. Se puede modificar Informa que hay una ventana de termostato de ambiente desde el menú...
  • Seite 69: Descripción De Los Iconos

    All manuals and user guides at all-guides.com CONTROLADOR DE LA UNIDAD 11.3 DESCRIPCIÓN DE LOS ICONOS 11.3.1 Iconos comunes 11.3.2 Iconos de la vista integral Icono Nombre Valores Explicación Icono Nombre Valores Explicación El icono informa del funcionamiento El Circuito I o II se encuentra en condición de demanda apagada de la bomba.
  • Seite 70: Principales Dispositivos De Seguridad

    All manuals and user guides at all-guides.com PRINCIPALES DISPOSITIVOS DE SEGURIDAD 11.3.3 Iconos de la vista de termostato ambiente Icono Nombre Valores Explicación Modo manual Modo Manual/Auto Modo auto con temporizador ajustado Modo auto sin temporizador ajustado Temperatura de ajuste Temperatura de ajuste/de la habitación...
  • Seite 71: Allgemeine Informationen

    Verantwortlichkeit von HITACHI. Qualitätsverbesserung ihrer Produkte anstrebt, behält sich Daher kann es vorkommen, dass bestimmte Bilder oder Daten, HITACHI Air Conditioning Products Europe, S.A.U. das Recht die zur Illustrierung dieses Dokuments verwendet werden, vor, jederzeit Veränderungen ohne vorherige Ankündigung auf spezifische Modelle nicht anwendbar sind. Für Daten,...
  • Seite 72 Informationen vorhanden sind. Wenn dies Dieses Gerät wurde für die kommerzielle Nutzung und die Nutzung in der Leichtindustrie entwickelt. In Haushalten kann es elektromagnetische nicht der Fall ist, wenden Sie sich an Ihren Hitachi-Händler. Störungen verursachen. • HITACHI hat sich zum Ziel gesetzt, das Produktdesign und Leistungskapazitäten kontinuierlich zu verbessern.
  • Seite 73: Transport Und Bedienung

    All manuals and user guides at all-guides.com TRANSPORT uND BEDIENuNG 3 TRANSPORT UND BEDIENUNG Wenn das Gerät aufgehängt werden soll, stellen Sie sicher, RASM-3VNE RASM-(4-6)(V)NE dass es im Gleichgewicht ist, überprüfen Sie die Sicherheit und heben Sie es langsam hoch. >...
  • Seite 74: Allgemeine Abmessungen

    All manuals and user guides at all-guides.com ALLGEMEINE ABMESSuNGEN 5 ALLGEMEINE ABMESSUNGEN 5.1 WARTUNGSBEREICH RASM-3VNE Vorderansicht Draufsicht Lufteinlass Luftauslass Einheiten in mm. RASM-(4-6)(V)NE Vorderansicht Draufsicht Lufteinlass Luftauslass Einheiten in mm. PMML0342B rev.1 - 03/2016...
  • Seite 75: Teilebezeichnung Und Abmessungen

    All manuals and user guides at all-guides.com ALLGEMEINE ABMESSuNGEN 5.2 TEILEBEZEICHNUNG UND ABMESSUNGEN RASM-3VNE Draufsicht Seitenansicht Vorderansicht Ansicht von unten Einheiten in mm. XEKS 1720 Teilebezeichnung Teilebezeichnung Kompressor Kältemittelsieb (x4) Wärmetauscher Wasserseite Absperrventil für die Gasleitung - Ø 15,88 (5/8”) Wärmetauscher Luftseite Absperrventil für die Flüssigkeitsleitung - Ø...
  • Seite 76: Teilebezeichnung

    All manuals and user guides at all-guides.com ALLGEMEINE ABMESSuNGEN RASM-(4-6)(V)NE Draufsicht Vorderansicht Seitenansicht Ansicht von unten Einheiten in mm. XEKS 1721 Teilebezeichnung Teilebezeichnung Kompressor Kältemittelsieb (x4) Wärmetauscher Wasserseite Absperrventil für die Gasleitung - Ø 25,4 (1”) Wärmetauscher Luftseite Absperrventil für die Flüssigkeitsleitung - Ø 9,52 (3/8”) Schaltkasten Überdruckventil Lüfter (x2)
  • Seite 77: Geräteinstallation

    All manuals and user guides at all-guides.com GERÄTEINSTALLATION 6 GERÄTEINSTALLATION • Installieren Sie das Gerät an einem Standort, an dem die vom Gerät V O R S I C H T verursachten Geräusche keine Nachbarn stören. • Packen Sie die Produkte so nahe wie möglich am Installationsort aus. •...
  • Seite 78: Voraussetzungen Am Installationsort

    All manuals and user guides at all-guides.com GERÄTEINSTALLATION (Maßeinheit: mm) Offen zu den Seiten Offen zu den Seiten, oben geschlossen 0<L≤1/2H→A≥350 1/2H<L≤H→A≥450 0<L≤1/2H→A≥600 H=1380 1/2H<L≤H→A≥1200 H=1380 6.2 VORAUSSETZUNGEN AM INSTALLATIONSORT  Betonfundament Beschreibung • Das Fundament muss sich auf einer ebenen Fläche ...
  • Seite 79: Kältemittel- Und Wasserleitungen

    All manuals and user guides at all-guides.com KÄLTEMITTEL- uND WASSERLEITuNGEN 2 Das Fundament muss ausreichend stabil sein, um Verformungen und Vibrationen zu vermeiden. 3 Bringen Sie zwischen Befestigungsmaterial und Wand Gummimaterial an, um die Übertragung von Schwingungen auf Gebäudeteile zu vermeiden. V O R S I C H T •...
  • Seite 80: Abflussleitungen

    All manuals and user guides at all-guides.com ABFLuSSLEITuNGEN • Verschließen Sie das Rohrende mit einer Kappe, wenn es Kondenswasserbildung an der Oberfläche der Leitungen durch eine Wandbohrung geführt werden soll. oder Verletzungen durch sehr heiße Leitungsoberflächen zu vermeiden. • Die Rohrleitungen ohne Kappe oder Vinylband am Rohrleitungsende nicht direkt auf dem Boden ablegen.
  • Seite 81: Heizung Und Warmwasser

    All manuals and user guides at all-guides.com ABFLuSSLEITuNGEN 8.2 HEIZUNG UND WARMWASSER G E FA H R Schließen Sie die Stromversorgung nicht an das Gerät an, bevor der Heizkreislauf (und der Warmwasserkreislauf, wenn er vorhanden ist) mit Wasser gefüllt, der Wasserdruck geprüft wurde und Sie kontrolliert haben, dass keine Wasserlecks vorhanden sind. 8.2.1 Zusätzlich erforderliche Hydraulikelemente für die Heizung Liefereigenschaft Teilebezeichnung...
  • Seite 82: Zusätzliche Hydraulische Optionale Elemente (Für Warmwasser)

    1 Wasserumwälzpumpe (nicht mitgeliefert): Diese Wasserpumpe (3) hilft bei der korrekten Warmwasserrückführung zum Warmwassereinlass. • 1 Wasser-Absperrventil (ATW-WCV-01 Zubehör): Dieses Hitachi-Zubehör (3) wird nach der Wasserumwälzpumpe (4) angeschlossen, um den Rückfluss des Wassers zu vermeiden. • 2 Absperrventile (nicht mitgeliefert) (5): Eines nach der Wasserumwälzpumpe (4) und das andere nach dem Wasserabsperrventil-Zubehör (3).
  • Seite 83: Anforderungen Und Empfehlungen Für Den Warmwasserkreislauf

    All manuals and user guides at all-guides.com ABFLuSSLEITuNGEN 8.2.4 Anforderungen und Empfehlungen für den Warmwasserkreislauf • Die maximale Leitungslänge hängt von dem möglichen Vermeiden Sie lange Wasserleitungen zwischen dem Maximaldruck in der Wasserauslassleitung ab. Überprüfen Speicher und der Warmwasser-Installation, um mögliche Sie die Pumpkurve.
  • Seite 84: Wasserbefüllung

    All manuals and user guides at all-guides.com ABFLuSSLEITuNGEN 8.2.5 Wasserbefüllung 1 Überprüfen Sie, dass ein Wasser-Absperrventil (Zubehör 8 Wenn eine geringe Menge noch im Wasserkreislauf ATW-WCV-01) mit einem Absperrventil (nicht mitgeliefert) vorhanden ist, wird diese durch den automatischen für die Befüllung des Heizungs-Hydraulikkreislaufs an Luftablass des Geräts während der ersten Betriebsstunden den Wasserbefüllungspunkt (Wassereinlassanschluss) entfernt.
  • Seite 85: Beschreibung Der Mindestwassermenge

    All manuals and user guides at all-guides.com ABFLuSSLEITuNGEN 8.3 BESCHREIBUNG DER MINDESTWASSERMENGE Während des Entfrostens stellt das Gerät nicht die Im Folgenden wird dargestellt, wie die Mindestwassermenge erforderliche Wärme zur Abdeckung des Wärmebedarfs im System zum Geräteschutz (Nachlaufschutz) und bei der Installation zur Verfügung.
  • Seite 86: Anschlussgröße

    All manuals and user guides at all-guides.com ABFLuSSLEITuNGEN 8.4 WASSERKONTROLLE Es ist erforderlich, die Wasserqualität zu analysieren, indem der pH-Wert, die spezifische elektrische Leitfähigkeit, der Ammoniakgehalt, der Schwefelgehalt u. ä. überprüft werden. Im Folgenden ist die empfohlene Standard-Wasserqualität aufgeführt. Kühlwassersystem Tendenz Element Umlaufwasser...
  • Seite 87: Elektrische Und Steuerungs-Einstellungen

    All manuals and user guides at all-guides.com ELEKTRISCHE uND STEuERuNGS-EINSTELLuNGEN 9 ELEKTRISCHE UND STEUERUNGS-EINSTELLUNGEN 9.1 ALLGEMEINE PRÜFUNG • Stellen Sie sicher, dass die folgenden Bedingungen hinsichtlich der Stromversorgungsinstallation erfüllt werden. Die Stromleistung der elektrischen Installation ist hoch genug, um den Strombedarf des YUTAKI-Systems (Außengerät + Warmwasserspeicher (falls vorhanden)) abzudecken.
  • Seite 88: Kabelanschlüsse Der Aussengeräte

    All manuals and user guides at all-guides.com ELEKTRISCHE uND STEuERuNGS-EINSTELLuNGEN 9.2 KABELANSCHLÜSSE DER AUSSENGERÄTE  Die Kabelanschlüsse des Außengeräts sind in nachfolgender Abbildung dargestellt RASM-(3-6)VNE RASM-(4-6)(V)NE Stromversorgung Steuerkabel Stromversorgung Steuerkabel 1~ 230V 50Hz (5V) 3N~ 400V 50 Hz (5V) 9.2.1 Anschluss von Strom- und V O R S I C H T Übertragungskabeln •...
  • Seite 89: Kabelgrösse Und Mindestanforderungen Der Schutzvorrichtungen

    All manuals and user guides at all-guides.com ELEKTRISCHE uND STEuERuNGS-EINSTELLuNGEN 9.3 KABELGRÖSSE UND MINDESTANFORDERUNGEN DER SCHUTZVORRICHTUNGEN V O R S I C H T • Vergewissern Sie sich, dass die vor Ort beschafften elektrischen Komponenten (Netzschalter, Stromkreisunterbrecher, Kabel, Stecker und Kabelanschlüsse) gemäß...
  • Seite 90: Optionale Gerätekabel (Zubehör)

    All manuals and user guides at all-guides.com ELEKTRISCHE uND STEuERuNGS-EINSTELLuNGEN 9.4 OPTIONALE GERÄTEKABEL (ZUBEHÖR)  Zusammenfassung der Anschlussleisten-Anschlüsse Mark. Teilebezeichnung Beschreibung ANSCHLUSSLEISTE 2 (TB2) Die H-LINK-Übertragung muss zwischen dem Gerät und den Anschlüssen 1-2 des Außengeräts H-LINK-umschaltung oder des ATW-RTU-04 oder einer anderen zentralen Vorrichtung erfolgen. H-LINK-Kommunikation für Anschlüsse für den Anschluss der YUTAKI-Gerätesteuerung.
  • Seite 91: Einstellung Der Dip-Schalter Und Dreh-Schalter

    All manuals and user guides at all-guides.com ELEKTRISCHE uND STEuERuNGS-EINSTELLuNGEN Mark. Teilebezeichnung Beschreibung Aquastat-Sicherheit für Kreislauf 2 Anschlüsse, die für den Anschluss des Aquastat-Sicherheitszubehörs (ATW-AQT-01) zur (WP2) Steuerung der Wassertemperatur des Kreislaufs 2 bestimmt sind. Wenn sich im Warmwasserspeicher ein elektrischer Heizer befindet, kann die Luft-Wasser- 30(N) Elektrischer Heizer Warmwasser- Wärmepumpe diesen aktivieren, wenn die Wärmepumpe allein nicht die gewünschte...
  • Seite 92: Funktionen Der Dip- Und Dreh-Schalter

    All manuals and user guides at all-guides.com ELEKTRISCHE uND STEuERuNGS-EINSTELLuNGEN  DSW4 / RSW1 9.5.4 Funktionen der DIP- und Dreh-Schalter DSW4 RSW1 H I N W E I S Werksseitige • Das Zeichen “■” gibt die Position der DIP-Schalter an. Einstellung •...
  • Seite 93: Led-Anzeige

    All manuals and user guides at all-guides.com ELEKTRISCHE uND STEuERuNGS-EINSTELLuNGEN  DSW6: Nicht verwendet Antifrostschutz für Geräte- und Installationsleitungen Werksseitige Einstellung (Nicht ändern) Standard / ECO Wasserpumpenbetrieb  DSW7: Zusätzliche Einstellung 4 Elektrischer Heizer- oder Heizkesselnotbetrieb Werksseitige Einstellung Heizerbetrieb für Warmwasserspeicher Entfrosten des elektrischen Wasserheizers Warmwasser-3-Wegeventil ...
  • Seite 94: Inbetriebnahme

    All manuals and user guides at all-guides.com INBETRIEBNAHME 10 INBETRIEBNAHME 10.1 VOR DER INBETRIEBNAHME V O R S I C H T • Schließen Sie das System ca. 12 Stunden vor der Inbetriebnahme des • Setzen Sie den Hauptschalter in die Position AUS wenn das System Systems nach einem längerem Stillstand an die Stromversorgung an.
  • Seite 95: Überprüfung Des Kältemittelkreislaufs

    DIP- Wenn die Wassertemperatur während der Inbetriebnahme Schaltereinstellung) wird diese Funktion nicht ausgeführt und das Heizen wird von der Wärmepumpe übernommen. HITACHI übernimmt keine sehr niedrig ist, muss das Wasser allmählich erwärmt werden. Verantwortung für diesen Betrieb. Eine zusätzliche optionale Funktion kann beim Start mit niedrigen Wassertemperatur-Bedingungen ausgeführt werden:...
  • Seite 96: Gerätesteuerung

    All manuals and user guides at all-guides.com GERÄTESTEuERuNG • Wenn der Test beginnt, verlässt die Benutzersteuerung den Installermodus. • Wenn die „Taste Favoriten-Vorgang“ während des Testlaufs gedrückt wird, wird diese Funktion so lange ausgeführt, bis der Benutzer die Abbruchoption drückt (diese ist nicht zeitlich begrenzt).
  • Seite 97: Hauptbildschirm

    All manuals and user guides at all-guides.com GERÄTESTEuERuNG 11.2 HAUPTBILDSCHIRM Abhängig von der Betriebsart der Benutzersteuerung wird der Hauptbildschirm auf unterschiedliche Art angezeigt. Wenn die Benutzersteuerung als eine Hauptgerätesteuerung funktioniert, wird eine Gesamtübersicht mit allen Elementen dargestellt. Funktioniert die Benutzersteuerung dagegen als ein Raumthermostat (in einem der gesteuerten Bereiche), erscheint der Hauptbildschirm mit vereinfachter Information.
  • Seite 98: Raumthermostatansicht

    All manuals and user guides at all-guides.com GERÄTESTEuERuNG 11.2.2 Raumthermostatansicht           Zeit und Datum Nächster Kreislauf   Die aktuellen Daten zu Uhrzeit/Datum werden angezeigt Informiert darüber, dass es für den zweiten Kreislauf eine Diese Information kann im Menü...
  • Seite 99: Beschreibung Der Symbole

    All manuals and user guides at all-guides.com GERÄTESTEuERuNG 11.3 BESCHREIBUNG DER SYMBOLE 11.3.1 Gängige Symbole 11.3.2 Symbole für die Gesamtübersicht Symbol Name Werte Erläuterung Symbol Name Werte Erläuterung Dieses Symbol informiert über Kreislauf I oder II in Bedarf-AUS den Pumpenbetrieb. Es gibt drei verfügbare Pumpen Kreislauf I oder II ist auf Thermo- Pumpe...
  • Seite 100: Symbole Für Die Raumthermostatansicht

    All manuals and user guides at all-guides.com GRuNDLEGENDE SICHERHEITSVORRICHTuNGEN 11.3.3 Symbole für die Raumthermostatansicht Symbol Name Werte Erläuterung Manuelle Betriebsart Manuelle/Auto- Auto-Betriebsart mit Timer-Einstellung Betriebsart Auto-Betriebsart ohne Timer-Einstellung Einstelltemperatur Einstelltemperatur/ Raumtemperatur Raumtemperatur Die Endzeit der Timerzeit wird unter diesem Ende der Timerzeit Symbol angezeigt Die Endzeit der Ferienzeit wird unter diesem Ende der Ferienzeit...
  • Seite 101: Informations Générales

    à jour. Malgré cela, les erreurs d’impression ne sation de HITACHI Air Conditioning Products Europe, S.A.U. peuvent pas être contrôlées par HITACHI et ne relèvent pas de sa responsabilité. Dans le cadre de la politique d'amélioration continue de ses produits, HITACHI Air Conditioning Products Europe, S.A.U.
  • Seite 102: Remarque Importante

    Cette unité est conçue pour des applications en industrie légère et dans de leurs performances. HITACHI se réserve ainsi le droit de des espaces commerciaux. Si vous l'installez en tant qu'un équipement modifier les caractéristiques de ses produits sans préavis.
  • Seite 103: Transport Et Manipulation

    All manuals and user guides at all-guides.com TRANSPORT ET MANIPULATION 3 TRANSPORT ET MANIPULATION Avant de soulever l'appareil, assurez-vous que la charge est RASM-3VNE RASM-(4-6)(V)NE bien répartie, vérifiez la sécurité de l'ensemble et levez l'appareil doucement. > 60º Ne retirez pas le matériel d'emballage. 0.7 -1.0 m Suspendez l'unité...
  • Seite 104: Dimensions Générales

    All manuals and user guides at all-guides.com DIMENSIONS GÉNÉRALES 5 DIMENSIONS GÉNÉRALES 5.1 ESPACE DE MAINTENANCE RASM-3VNE Vue de face Vue de dessus Prise d'air Sortie d'air Unités en mm. RASM-(4-6)(V)NE Vue de face Vue de dessus Prise d'air Sortie d'air Unités en mm.
  • Seite 105 All manuals and user guides at all-guides.com DIMENSIONS GÉNÉRALES 5.2 NOMENCLATURE DES PIÈCES ET DIMENSIONS RASM-3VNE Vue de dessus Vue latérale Vue de face Vue du bas Unités en mm. XEKS 1720 Nº Nom de la pièce Nº Nom de la pièce Compresseur Filtre de frigorigène (x4) Côté...
  • Seite 106 All manuals and user guides at all-guides.com DIMENSIONS GÉNÉRALES RASM-(4-6)(V)NE Vue de dessus Vue de face Vue latérale Vue du bas Unités en mm. XEKS 1721 Nº Nom de la pièce Nº Nom de la pièce Compresseur Filtre de frigorigène (x4) Côté...
  • Seite 107: Installation Des Unités

    All manuals and user guides at all-guides.com INSTALLATION DES UNITÉS 6 INSTALLATION DES UNITÉS • Installez l'unité à un endroit où le bruit produit par l'unité ne dérangera AT T E N T I O N pas les voisins. • Transportez les produits le plus près possible du site d’installation •...
  • Seite 108: Emplacement Pour L'installation

    All manuals and user guides at all-guides.com INSTALLATION DES UNITÉS (Unité : mm) Aucun obstacle sur les côtés Aucun obstacle sur les côtés et obstacles au-dessus 0<L≤1/2H→A≥350 1/2H<L≤H→A≥450 0<L≤1/2H→A≥600 H=1380 1/2H<L≤H→A≥1200 H=1380 6.2 EMPLACEMENT POUR L’INSTALLATION  Socle en béton Nº...
  • Seite 109: Tuyauterie Frigorifique Et D'eau

    All manuals and user guides at all-guides.com TUYAUTERIE FRIGORIFIQUE ET D'EAU 3 Pour éviter que les vibrations s’étendent au bâtiment, placez une plaque en caoutchouc entre la fixation et le mur. AT T E N T I O N Prêtez attention aux points suivants lors de l'installation : •...
  • Seite 110: Circuit Frigorifique

    All manuals and user guides at all-guides.com TUYAU D'ÉVACUATION • Avant de passer un tuyau par un orifice dans un mur, de condensation, ou des dégâts dûs à un excès de chaleur bouchez-en l'extrémité. sur la surface de la tuyauterie. •...
  • Seite 111 All manuals and user guides at all-guides.com TUYAU D'ÉVACUATION 8.2 CHAUFFAGE ET ECS D A N G E R Ne raccordez pas la source d'alimentation à l'unité intérieure avant de remplir en eau les circuits de chauffage (et, le cas échéant les circuits d’ECS) et de vérifier la pression de l'eau ainsi que l'absence totale de fuite d'eau.
  • Seite 112 1 pompe de recirculation d’eau (fournie sur site) : cette pompe à eau (3) aidera à correctement redistribuer l'eau chaude à l'arrivée d'ECS. • 1 clapet anti-retour d’eau (accessoire ATW-WCV-01) : cet accessoire d'HITACHI (3) est connecté après la pompe de recirculation d’eau (4) afin d'empêcher le retour d'eau. •...
  • Seite 113 All manuals and user guides at all-guides.com TUYAU D'ÉVACUATION 8.2.4 Conditions et recommandations pour le circuit hydraulique • La longueur maximale de la tuyauterie dépend de la Évitez les grandes longueurs de tuyauteries d’eau entre pression maximale possible dans le tuyau de sortie de l’eau. le réservoir et l'installation d'ECS afin de réduire les Consultez les courbes des pompes.
  • Seite 114 All manuals and user guides at all-guides.com TUYAU D'ÉVACUATION 8.2.5 Remplissage en eau 1 Vérifiez qu'un clapet anti-retour d'eau (accessoire ATW- 8 Si une faible quantité d'air est toujours dans le circuit d'eau, WCV-01) avec une soupape d'arrêt (fournie sur site) est elle sera retirée par la purge d'air automatique de l'unité...
  • Seite 115 All manuals and user guides at all-guides.com TUYAU D'ÉVACUATION 8.3 DESCRIPTION DU VOLUME D’EAU MINIMUM Lors du dégivrage, l’unité ne fournit pas la chaleur requise La section ci-dessous indique comment calculer le volume d'eau pour couvrir la demande en chauffage de l’installation. Cette minimal dans le système pour la protection du produit (anti- valeur peut être obtenue de 2 façons : battement) et la chute de température lors du dégivrage.
  • Seite 116 All manuals and user guides at all-guides.com TUYAU D'ÉVACUATION 8.4 CONTRÔLE DE L'EAU Il est nécessaire d'analyser la qualité de l'eau en vérifiant le pH, la conductivité électrique, sa teneur en ammoniac, en sulfure, et autres. Il est conseillé d’utiliser de l’eau répondant aux caractéristiques standard suivantes : Système d’eau réfrigérée Tendance Élément...
  • Seite 117: Réglages De Commande Et Électriques

    All manuals and user guides at all-guides.com RÉGLAGES DE COMMANDE ET ÉLECTRIQUES 9 RÉGLAGES DE COMMANDE ET ÉLECTRIQUES 9.1 VÉRIFICATION GÉNÉRALE • Assurez-vous que les conditions suivantes concernant l'installation de la source d'alimentation sont suivies : La puissance de l'installation électrique est suffisante pour supporter la demande énergétique du système YUTAKI (groupe extérieur + réservoir ECS (le cas échéant)).
  • Seite 118 All manuals and user guides at all-guides.com RÉGLAGES DE COMMANDE ET ÉLECTRIQUES 9.2 CONNEXION DU CÂBLAGE ÉLECTRIQUE DES GROUPES EXTÉRIEURS  Le câblage électrique du groupe extérieur est décrit à la figure ci-dessous RASM-(3-6)VNE RASM-(4-6)(V)NE Source Câble de commande Source d’alimentation de Câble de d’alimentation de (5V)
  • Seite 119 All manuals and user guides at all-guides.com RÉGLAGES DE COMMANDE ET ÉLECTRIQUES 9.3 DIAMÈTRE DE CÂBLE ET CONDITIONS MINIMALES DES ORGANES DE PROTECTION AT T E N T I O N • Assurez-vous que les composants électriques fournis sur site (interrupteurs d'alimentation principale, disjoncteurs, câbles, connecteurs de câbles et bornes) ont été...
  • Seite 120 All manuals and user guides at all-guides.com RÉGLAGES DE COMMANDE ET ÉLECTRIQUES 9.4 CÂBLAGE D'UNITÉ OPTIONNEL (ACCESSOIRES)  Résumé des connexions du bornier Symb. Nom de la pièce Description BORNIER 2 (TB2) La transmission H-Link doit se faire entre l’unité et les bornes 1-2 de l’unité extérieure ATW- Commutation H-Link RTU-04 ou tout autre dispositif central.
  • Seite 121 All manuals and user guides at all-guides.com RÉGLAGES DE COMMANDE ET ÉLECTRIQUES Symb. Nom de la pièce Description Lorsqu'il y a une deuxième application de température, la pompe secondaire est la pompe de 27(L) Pompe à eau 2 (WP2) circulation pour le circuit de chauffage secondaire. Aquastat de sécurité...
  • Seite 122 All manuals and user guides at all-guides.com RÉGLAGES DE COMMANDE ET ÉLECTRIQUES  DSW4 / RSW1 9.5.4 Fonctions des commutateurs DIP et rotatifs DSW4 RSW1 R E M A R Q U E • La marque « ■ » indique les positions des commutateurs DIP. Réglage d'usine •...
  • Seite 123 All manuals and user guides at all-guides.com RÉGLAGES DE COMMANDE ET ÉLECTRIQUES  DSW6 : non utilisé Protection antigel des tuyaux d'installation et de l'unité Réglage d'usine (Ne pas modifier) Fonctionnement de la pompe à eau  Standard/ECO DSW7 : réglage supplémentaire 4 Mode d’urgence du chauffage électrique ou Réglage d'usine de la chaudière...
  • Seite 124: Mise En Service

    All manuals and user guides at all-guides.com MISE EN SERVICE 10 MISE EN SERVICE 10.1 AVANT LE FONCTIONNEMENT AT T E N T I O N • Mettez le système sous tension environ 12 heures avant son • Éteignez l'interrupteur principal quand le système doit être arrêté démarrage après un arrêt prolongé.
  • Seite 125: Test Et Vérification

    Pendant la mise en service et lorsque la température d'eau du commutateur dip), cette condition n'est pas effective et le chauffage s'effectue par le biais de la pompe à chaleur. HITACHI n'est pas est vraiment basse, il est important de chauffer l'eau de façon responsable de ce fonctionnement.
  • Seite 126: Contrôleur D'unité

    All manuals and user guides at all-guides.com CONTRÔLEUR D’UNITÉ • Lorsque le test débute, le contrôleur de l’utilisateur quittera le mode installateur. • Si vous appuyez sur la touche « touche d’action favorite », cette fonction se réalisera tant que l’utilisateur n’appuie pas sur l’option «...
  • Seite 127: Écran Principal

    All manuals and user guides at all-guides.com CONTRÔLEUR D’UNITÉ 11.2 ÉCRAN PRINCIPAL L’écran principal s’affiche de différentes façons en fonction du mode de fonctionnement du contrôleur de l’utilisateur. Lorsque le contrôleur d’utilisateur fonctionne en tant que contrôleur maître d’unité, une vue générale de tous les éléments s’affiche, alors que lorsque le contrôleur de l’utilisateur fonctionne en tant que thermostat d’ambiance (dans l’une des zones contrôlées), l’écran principal affiche des informations simplifiées.
  • Seite 128 All manuals and user guides at all-guides.com CONTRÔLEUR D’UNITÉ 11.2.2 Vues du thermostat d'ambiance           Date et heure Circuit suivant   La date et l'heure sont affichées. Vous pouvez modifier les Informe qu'il existe une fenêtre de thermostat d’ambiance informations qui s'affichent à...
  • Seite 129: Description Des Icônes

    All manuals and user guides at all-guides.com CONTRÔLEUR D’UNITÉ 11.3 DESCRIPTION DES ICÔNES 11.3.1 Icônes communes 11.3.2 Icônes de la vue générale Icône Valeurs Explication Icône Valeurs Explication Cette icône donne des informations Le circuit I ou II est en Demand- sur le fonctionnement de la pompe.
  • Seite 130: Pricipaux Dispositifs De Sécurité

    All manuals and user guides at all-guides.com PRICIPAUX DISPOSITIFS DE SÉCURITÉ 11.3.3 Icônes de la vue thermostat d’ambiance Icône Valeurs Explication Mode manuel Mode manuel/ Mode auto avec configuration du auto programmateur Mode auto sans configuration du programmateur Température de consigne Température de consigne/ ambiante...
  • Seite 131: Informazioni Generali

    Nonostante ciò, gli errori il consenso di HITACHI Air Conditioning Products Europe, S.A.U. di stampa sono al di fuori del controllo di HITACHI che pertanto non ne può essere considerata responsabile. In una politica di miglioramento continuo della qualità dei propri prodotti, HITACHI Air Conditioning Products Europe, S.A.U.
  • Seite 132 Avvio e funzionamento: Verificare che tutte le valvole di • HITACHI non può prevedere tutte le possibili circostanze che arresto siano aperte e che non siano presenti ostruzioni potrebbero comportare un potenziale pericolo. nell’entrata e nell’uscita prima di avviare il sistema e durante il •...
  • Seite 133: Trasporto E Movimentazione

    All manuals and user guides at all-guides.com TRASPORTO E MOVIMENTAZIONE 3 TRASPORTO E MOVIMENTAZIONE Durante la sospensione, assicurarsi che l’unità sia bilanciata, RASM-3VNE RASM-(4-6)(V)NE verificare le condizioni di sicurezza e sollevare con cautela. > 60º Non rimuovere l’imballaggio. Sospendere l’unità imballata con due funi. 0.7 -1.0 m Per motivi di sicurezza, controllare che l'unità...
  • Seite 134: Dimensioni Generali

    All manuals and user guides at all-guides.com DIMENSIONI GENERALI 5 DIMENSIONI GENERALI 5.1 SPAZIO DI SERVIZIO RASM-3VNE Vista anteriore Vista dall'alto Ingresso dell'aria Uscita dell'aria Unità in mm. RASM-(4-6)(V)NE Vista anteriore Vista dall'alto Ingresso dell'aria Uscita dell'aria Unità in mm. PMML0342B rev.1 - 03/2016...
  • Seite 135: Nome Dei Componenti E Dimensioni

    All manuals and user guides at all-guides.com DIMENSIONI GENERALI 5.2 NOME DEI COMPONENTI E DIMENSIONI RASM-3VNE Vista dall'alto Vista laterale Vista anteriore Vista dal basso Unità in mm. XEKS 1720 Nº Nome del componente Nº Nome del componente Compressore Filtro del refrigerante (x4) Scambiatore di calore lato acqua Valvola di arresto della linea del gas - Ø15,88 (5/8”) Scambiatore di calore sul lato aria...
  • Seite 136 All manuals and user guides at all-guides.com DIMENSIONI GENERALI RASM-(4-6)(V)NE Vista dall'alto Vista anteriore Vista laterale Vista dal basso Unità in mm. XEKS 1721 Nº Nome del componente Nº Nome del componente Compressore Filtro del refrigerante (x4) Scambiatore di calore lato acqua Valvola di arresto della linea del gas - Ø25.4 (1”) Scambiatore di calore sul lato aria Valvola di arresto della linea del liquido - Ø9,52 (3/8”)
  • Seite 137: Installazione Dell'unità

    All manuals and user guides at all-guides.com INSTALLAZIONE DELL’UNITÀ 6 INSTALLAZIONE DELL’UNITÀ • Installare l'unità in una posizione in cui il rumore da questa emesso AV V E R T E N Z A non disturbi i vicini. • Si consiglia di lasciare l’apparecchio nell’imballaggio originale il più •...
  • Seite 138 All manuals and user guides at all-guides.com INSTALLAZIONE DELL’UNITÀ (Unità: mm) Senza ostacoli nei lati Senza ostacoli nei lati con ostacoli sopra 0<L≤1/2H→A≥350 1/2H<L≤H→A≥450 0<L≤1/2H→A≥600 H=1380 1/2H<L≤H→A≥1200 H=1380 6.2 CONDIZIONI DEL PIANO DI UBICAZIONE  Piano di appoggio in cemento Nº...
  • Seite 139: Linee Dell'acqua E Del Refrigerante

    All manuals and user guides at all-guides.com LINEE DELL'ACQUA E DEL REFRIGERANTE 2 Controllare che la base d’appoggio sia sufficientemente robusta per evitare deformazioni e vibrazioni. 3 Nel caso in cui risulti necessario prevenire la trasmissione delle vibrazioni all'edificio, collocare della gomma tra il supporto e la parete.
  • Seite 140: Linea Di Drenaggio

    All manuals and user guides at all-guides.com LINEA DI DRENAGGIO • Tappare l’estremità del tubo prima di farlo passare attraverso superficie dei tubi o lesioni accidentali dovute al calore un foro nella parete. eccessivo sulla superficie delle tubazioni • Non posizionare i tubi direttamente sul suolo senza un tappo •...
  • Seite 141 All manuals and user guides at all-guides.com LINEA DI DRENAGGIO 8.2 RISCALDAMENTO E ACD P E R I C O L O Non collegare l'alimentazione all'unità prima di aver riempito d'acqua il circuito del riscaldamento (ed eventualmente il circuito di ACD) e di aver controllato la pressione dell'acqua e l'assenza totale di perdite d'acqua.
  • Seite 142 1 pompa d'acqua di ricircolo (non in dotazione): questa pompa (3) aiuterà il corretto ricircolo dell'acqua calda verso l'ingresso dell'acqua calda domestica. • 1 valvola di ritegno dell'acqua (accessorio ATW-WCV-01): questo accessorio Hitachi (3) deve essere collegato dopo la pompa d'acqua di ricircolo (4), per evitare un'inversione del flusso dell'acqua. •...
  • Seite 143 All manuals and user guides at all-guides.com LINEA DI DRENAGGIO 8.2.4 Requisiti e consigli per il circuito idraulico • La lunghezza massima della linea dipende dalla pressione Cercare di evitare lunghi tratti di tubi dell'acqua tra massima disponibile nel tubo di uscita dell’acqua. il serbatoio e l'impianto sanitario, in modo da ridurre Controllare le curve della pompa.
  • Seite 144 All manuals and user guides at all-guides.com LINEA DI DRENAGGIO 8.2.5 Riempimento d'acqua 1 Verificare che una valvola di ritegno dell'acqua (accessorio 8 Se una piccola quantità di aria rimane ancora nel circuito ATW-WCV-01) con rubinetto di intercettazione (non in dell'acqua, questa sarà...
  • Seite 145 All manuals and user guides at all-guides.com LINEA DI DRENAGGIO 8.3 DESCRIZIONE DEL VOLUME MINIMO D'ACQUA Durante lo sbrinamento, l'unità non è in grado di fornire Il paragrafo successivo mostra come calcolare il volume minimo il calore necessario per coprirne la richiesta da parte d’acqua nel sistema in grado di proteggere il prodotto (anti- dell'installazione.
  • Seite 146 All manuals and user guides at all-guides.com LINEA DI DRENAGGIO 8.4 CONTROLLO DELL’ACQUA È necessario analizzare la qualità dell’acqua, controllando il pH, la conduttività elettrica, il contenuto di ione ammonio, il contenuto di zolfo, ecc. La tabella seguente riporta le caratteristiche standard consigliate per l’acqua utilizzata. Impianto d’acqua refrigerata Tendenza Acqua in...
  • Seite 147: Impostazioni Elettriche E Di Controllo

    All manuals and user guides at all-guides.com IMPOSTAZIONI ELETTRICHE E DI CONTROLLO 9 IMPOSTAZIONI ELETTRICHE E DI CONTROLLO 9.1 CONTROLLI GENERALI • Assicurarsi che le seguenti condizioni inerenti all'alimentazione siano soddisfatte: La potenza dell'impianto elettrico è sufficiente da sopportare la richiesta di potenza del sistema YUTAKI (unità esterna + serbatoio di ACD (se necessario)).
  • Seite 148 All manuals and user guides at all-guides.com IMPOSTAZIONI ELETTRICHE E DI CONTROLLO 9.2 COLLEGAMENTO DELLO SCHEMA ELETTRICO DELLE UNITÀ ESTERNE  I collegamenti elettrici dell’unità esterna sono illustrati nella figura in basso RASM-(3-6)VNE RASM-(4-6)(V)NE Alimentazione Cavo di controllo Alimentazione elettrica Cavo di elettrica (5 V)
  • Seite 149 All manuals and user guides at all-guides.com IMPOSTAZIONI ELETTRICHE E DI CONTROLLO 9.3 DIMENSIONI DEI CAVI E REQUISITI MINIMI DEI DISPOSITIVI DI PROTEZIONE AV V E R T E N Z A • Accertarsi che i componenti elettrici non in dotazione (interruttori di alimentazione, interruttori di circuito, cavi, connettori e morsetti) siano stati scelti accuratamente tenendo presente quanto precisato nei dati elettrici indicati nel presente capitolo e che siano conformi alle normative nazionali e locali in vigore.
  • Seite 150 All manuals and user guides at all-guides.com IMPOSTAZIONI ELETTRICHE E DI CONTROLLO 9.4 CABLAGGIO OPZIONALE DELL'UNITÀ (ACCESSORI)  Riassunto dei collegamenti della morsettiera Simbolo Nome del componente Descrizione MORSETTIERA 2 (TB2) La trasmissione H-LINK deve essere eseguita tra l'unità ed i morsetti 1 e 2 dell'unità esterna, di Commutazione H-LINK ATW-RTU-04 o di qualsiasi altro dispositivo centrale.
  • Seite 151 All manuals and user guides at all-guides.com IMPOSTAZIONI ELETTRICHE E DI CONTROLLO Simbolo Nome del componente Descrizione Aquastat di sicurezza per il circuito 2 Morsetti per il collegamento dell'accessorio di sicurezza Aquastat (ATW-AQT-01) per il controllo (WP2) della temperatura dell'acqua del circuito 2. Se il serbatoio dell'ACD contiene un riscaldatore elettrico, la pompa di calore aria-acqua può...
  • Seite 152 All manuals and user guides at all-guides.com IMPOSTAZIONI ELETTRICHE E DI CONTROLLO  DSW4 / RSW1 9.5.4 Funzioni degli interruttori DIP e dei commutatori rotanti DSW4 RSW1 N O TA Impostazione di • Il simbolo “■” indica la posizione degli interruttori DIP. fabbrica •...
  • Seite 153: Indicazione Led

    All manuals and user guides at all-guides.com IMPOSTAZIONI ELETTRICHE E DI CONTROLLO  DSW6: Non utilizzato Protezione antigelo dei tubi dell'unità e dell'impianto Impostazione di fabbrica (Non cambiare) Funzionamento della pompa dell'acqua  standard / economico DSW7: Impostazione aggiuntiva 4 Modalità...
  • Seite 154: Messa In Servizio

    All manuals and user guides at all-guides.com MESSA IN SERVIZIO 10 MESSA IN SERVIZIO 10.1 PRIMA DEL FUNZIONAMENTO AV V E R T E N Z A • Fornire alimentazione elettrica al sistema per circa 12 ore prima • Spegnere l’interruttore generale quando il sistema non viene utilizzato dell’avvio dopo un lungo periodo di inattività.
  • Seite 155: Procedura Di Messa In Servizio

    DIP opzionale) questa operazione non è effettuata è molto bassa, è importante che l'acqua sia riscaldata in modo ed il riscaldamento è erogato dalla pompa di calore. HITACHI non è graduale. Una funzione opzionale aggiuntiva può essere responsabile di questa operazione.
  • Seite 156: Dispositivo Di Controllo Dell'unità

    All manuals and user guides at all-guides.com DISPOSITIVO DI CONTROLLO DELL'UNITÀ • Quando viene avviata la prova, il dispositivo di controllo dell'utente esce dalla modalità installatore. • Se si preme il tasto "Azione preferita" durante la prova, questa funzione viene eseguita fino a quando l'utente preme l'opzione Annulla (non ci sono limiti di tempo).
  • Seite 157: Schermata Principale

    All manuals and user guides at all-guides.com DISPOSITIVO DI CONTROLLO DELL'UNITÀ 11.2 SCHERMATA PRINCIPALE A seconda della modalità di funzionamento del dispositivo di controllo dell'utente, la schermata principale sarà diversa. Quando il dispositivo di controllo dell'utente funziona come dispositivo di controllo dell'unità principale, viene visualizzata una schermata generale con tutti gli elementi, mentre quando funziona come termostato ambientale (situato in una delle zone controllate) sulla schermata principale appaiono informazioni semplificate .
  • Seite 158 All manuals and user guides at all-guides.com DISPOSITIVO DI CONTROLLO DELL'UNITÀ 11.2.2 Schermata del termostato ambientale           Ora e data Circuito seguente   Vengono visualizzate l'ora e la data correnti. Queste Indica che c'è...
  • Seite 159: Descrizione Delle Icone

    All manuals and user guides at all-guides.com DISPOSITIVO DI CONTROLLO DELL'UNITÀ 11.3 DESCRIZIONE DELLE ICONE 11.3.1 Icone comuni 11.3.2 Icone della schermata generale Icona Nome Valori Descrizione Icona Nome Valori Descrizione Questa icona informa riguardo il Il circuito I o II è su richiesta OFF funzionamento della pompa.
  • Seite 160: Principali Dispositivi Di Sicurezza

    All manuals and user guides at all-guides.com PRINCIPALI DISPOSITIVI DI SICUREZZA 11.3.3 Icone della schermata del termostato ambientale Icona Nome Valori Descrizione Modalità manuale Modalità Modalità auto con impostazione del timer manuale/auto Modalità auto senza impostazione del timer Temperatura di impostazione Temperatura ambiente/di impostazione...
  • Seite 161: Informação Geral

    Não obstante, os erros zação da HITACHI Air Conditioning Products Europe, S.A.U. impressos não podem ser controlados pela HITACHI e não são da sua responsabilidade. No âmbito da sua política de melhoramento contínuo dos pro- dutos, a HITACHI Air Conditioning Products Europe, S.A.U.
  • Seite 162 Contacte o seu distribuidor ou revendedor Vaso de pressão e Dispositivo de segurança: Esta bomba de ca- HITACHI, caso o CD-ROM esteja em falta ou seja ilegível. lor está equipada com um recipiente sob alta pressão, em con- •...
  • Seite 163: Transporte E Manuseamento

    All manuals and user guides at all-guides.com TRANSPORTE E MANUSEAMENTO 3 TRANSPORTE E MANUSEAMENTO Quando suspender a unidade, assegure-se de que a mesma RASM-3VNE RASM-(4-6)(V)NE está bem equilibrada e considere a segurança da operação, elevando-a devagar. > 60º Utilize a embalagem e os seus materiais originais. 0.7 -1.0 m Suspenda a unidade embalada com duas cordas.
  • Seite 164: Dimensões Gerais

    All manuals and user guides at all-guides.com DIMENSÕES GERAIS 5 DIMENSÕES GERAIS 5.1 ZONA DE MANUTENÇÃO RASM-3VNE Vista frontal Vista de cima Entrada de ar Saída de ar Unidades em mm RASM-(4-6)(V)NE Vista frontal Vista de cima Entrada de ar Saída de ar Unidades em mm PMML0342B rev.1 - 03/2016...
  • Seite 165 All manuals and user guides at all-guides.com DIMENSÕES GERAIS 5.2 NOME DAS PEÇAS E DADOS DIMENSIONAIS RASM-3VNE Vista de cima Vista de lado Vista frontal Vista de baixo Unidades em mm XEKS 1720 N.º Nome da peça N.º Nome da peça Compressor Filtro de rede do refrigerante (x4) Permutador de calor do lado de água 16...
  • Seite 166 All manuals and user guides at all-guides.com DIMENSÕES GERAIS RASM-(4-6)(V)NE Vista de cima Vista frontal Vista de lado Vista de baixo Unidades em mm XEKS 1721 N.º Nome da peça N.º Nome da peça Compressor Filtro de rede do refrigerante (x4) Permutador de calor do lado de água 16 Válvula de retenção para linha de gás - Ø25,4 (1”) Permutador de calor do lado de ar...
  • Seite 167: Instalação Da Unidade

    All manuals and user guides at all-guides.com INSTALAÇÃO DA UNIDADE 6 INSTALAÇÃO DA UNIDADE • Instale a unidade num local onde o ruído emitido pela unidade não C U I D A D O perturbe os vizinhos. • Transporte os produtos para tão perto quanto possível do local de •...
  • Seite 168 All manuals and user guides at all-guides.com INSTALAÇÃO DA UNIDADE (Unidades: mm) Sem obstáculos nas laterais Sem obstáculos nas laterais, com obstáculos por cima 0<L≤1/2H→A≥350 1/2H<L≤H→A≥450 0<L≤1/2H→A≥600 H=1380 1/2H<L≤H→A≥1200 H=1380 6.2 ESPAÇO PARA A INSTALAÇÃO  Fundação em betão N.º Descrição •...
  • Seite 169: Tubagem De Refrigerante E De Água

    All manuals and user guides at all-guides.com TUBAGEM DE REFRIGERANTE E DE ÁGUA 2 A fundação tem de ser suficientemente resistente para evitar deformações e vibração. 3 Para evitar a transferência de vibrações para o edifício, coloque calços de borracha entre o apoio e a parede. C U I D A D O Preste atenção aos seguintes pontos durante a instalação: •...
  • Seite 170: Tubagem De Descarga

    All manuals and user guides at all-guides.com TUBAGEM DE DESCARGA • Tape a extremidade do tubo quando este tiver de passar ou os acidentes devido a calor excessivo nas superfícies através de um furo da parede. das tubagens. • Não coloque os tubos diretamente sobre o chão sem que as •...
  • Seite 171 All manuals and user guides at all-guides.com TUBAGEM DE DESCARGA 8.2 AQUECIMENTO E DHW P E R I G O Não ligue a fonte de alimentação à unidade antes de encher o circuito de aquecimento (e de água quente sanitária, se for o caso) com água e de verificar a pressão da água e a ausência total de fugas.
  • Seite 172 Uma bomba de recirculação de água (fornecida no local): esta bomba (3) ajuda a recircular corretamente a água quente para a entrada de DHW. • Uma válvula de verificação de água (acessório ATW-WCV-01): este acessório HITACHI (3) é instalado depois da bomba de recirculação de água (4) para garantir que a água não retorna. •...
  • Seite 173 All manuals and user guides at all-guides.com TUBAGEM DE DESCARGA 8.2.4 Requisitos e recomendações para o circuito hidráulico • O comprimento máximo de tubagem depende da pressão Evite tubagens extensas entre o depósito e a instalação máxima de água disponível no tubo de saída de água. de DHW para diminuir as eventuais perdas de Verifique as curvas das bombas.
  • Seite 174 All manuals and user guides at all-guides.com TUBAGEM DE DESCARGA 8.2.5 Enchimento com água 1 Certifique-se de que liga uma válvula de verificação de 8 Se ainda ficar uma pequena quantidade de ar no circuito de água (acessório ATW-WCV-01) com uma válvula de água, ela vai ser removida pelo purgador de ar automático corte (fornecida no local) ao ponto de enchimento de da unidade durante as primeiras horas de funcionamento.
  • Seite 175 All manuals and user guides at all-guides.com TUBAGEM DE DESCARGA 8.3 DESCRIÇÃO DO VOLUME MÍNIMO DE ÁGUA Quando a descongelação estiver a decorrer, a unidade A secção seguinte mostra como calcular o volume de não fornece o aquecimento necessário para satisfazer o água mínimo no sistema de forma a proteger o produto consumo de aquecimento da instalação.
  • Seite 176: Ligação Da Tubagem De Água

    All manuals and user guides at all-guides.com TUBAGEM DE DESCARGA 8.4 CONTROLO DE ÁGUA É também necessário analisar a qualidade da água verificando o pH, a condutividade elétrica, o teor em ião amónio, em enxofre e outros. Abaixo são apresentados os valores padrão recomendados para a qualidade de água. Sistema de água arrefecida Tendência Item...
  • Seite 177: Ajustes De Controlo E Elétricos

    All manuals and user guides at all-guides.com AJUSTES DE CONTROLO E ELÉTRICOS 9 AJUSTES DE CONTROLO E ELÉTRICOS 9.1 VERIFICAÇÃO GERAL • Certifique-se de que os seguintes requisitos na instalação da fonte de alimentação são cumpridos: A potência energética da instalação elétrica é suficiente para satisfazer o consumo do sistema YUTAKI (unidade exterior + depósito de DHW (se aplicável)).
  • Seite 178: Ligação Da Cablagem De Alimentação E De Transmissão

    All manuals and user guides at all-guides.com AJUSTES DE CONTROLO E ELÉTRICOS 9.2 LIGAÇÕES ELÉTRICAS PARA UNIDADES EXTERIORES  As ligações elétricas para a unidade exterior são mostradas na figura abaixo RASM-(3-6)VNE RASM-(4-6)(V)NE Alimentação Cabo de controlo Alimentação Cabo de controlo 1~ 230V 50Hz (5V) 3N~ 400V 50 Hz...
  • Seite 179 All manuals and user guides at all-guides.com AJUSTES DE CONTROLO E ELÉTRICOS 9.3 TAMANHO DOS CABOS E REQUISITOS MÍNIMOS DOS DISPOSITIVOS DE PROTEÇÃO C U I D A D O • Certifique-se de que os componentes elétricos fornecidos no local (interruptores de alimentação principal, disjuntores, cabos, conectores e terminais de cabos) foram selecionados corretamente de acordo com os dados elétricos indicados neste capítulo e de que cumprem as regulamentações locais e nacionais.
  • Seite 180 All manuals and user guides at all-guides.com AJUSTES DE CONTROLO E ELÉTRICOS 9.4 LIGAÇÕES DA UNIDADE OPCIONAL (ACESSÓRIOS)  Resumo das ligações da placa de terminais Marca Nome da peça Descrição PLACA DE TERMINAIS 2 (TB2) A transmissão H-LINK tem de ser realizada entre a unidade e os terminais 1-2 da unidade Comutação H-LINK exterior, do ATW-RTU-04 ou de qualquer outro dispositivo central.
  • Seite 181 All manuals and user guides at all-guides.com AJUSTES DE CONTROLO E ELÉTRICOS Marca Nome da peça Descrição Se existir uma segunda aplicação de temperatura, a bomba de circulação para o ciclo de 27(L) Bomba de água 2 (WP2) aquecimento secundário funciona como bomba secundária. Segurança Aquastat para o circuito 2 Terminais para ligar o acessório de segurança Aquastat (ATW-AQT-01) que controla a (WP2)
  • Seite 182 All manuals and user guides at all-guides.com AJUSTES DE CONTROLO E ELÉTRICOS  DSW4 / RSW1 9.5.4 Funções dos comutadores DIP e dos interruptores rotativos DSW4 RSW1 N O TA • A marca “■” indica as posições dos comutadores DIP. Ajuste de fábrica •...
  • Seite 183: Indicação Led

    All manuals and user guides at all-guides.com AJUSTES DE CONTROLO E ELÉTRICOS  DSW6: Não utilizado Proteção anticongelação dos tubos da unidade e da instalação Ajuste de fábrica (Não alterar) Funcionamento padrão / ECO da bomba de  DSW7: Ajuste adicional 4 água Ajuste de fábrica Modo de emergência da resistência elétrica...
  • Seite 184: Colocação Em Funcionamento

    All manuals and user guides at all-guides.com COLOCAÇÃO EM FUNCIONAMENTO 10 COLOCAÇÃO EM FUNCIONAMENTO 10.1 ANTES DO FUNCIONAMENTO C U I D A D O • Depois de uma paragem prolongada, forneça energia elétrica ao • Desligue a unidade no interruptor principal quando pretender sistema durante aproximadamente 12 horas antes do arranque.
  • Seite 185 água for muito baixa, é importante que esta seja aquecida DIP opcional), esta condição não é realizada e a bomba de calor faz o aquecimento. A HITACHI não é responsável pelo seu funcionamento. gradualmente. Pode ser usada uma outra função opcional para arrancar em condições de baixa temperatura de água: Função...
  • Seite 186: Controlador Da Unidade

    All manuals and user guides at all-guides.com CONTROLADOR DA UNIDADE • Quando o teste começa, o controlador do utilizador sai do modo do instalador. • Se carregar no botão "Ação Favorita" durante o teste de funcionamento, esta função será executada até o utilizador carregar na opção de cancelamento (sem limitação de tempo).
  • Seite 187: Ecrã Principal

    All manuals and user guides at all-guides.com CONTROLADOR DA UNIDADE 11.2 ECRÃ PRINCIPAL A apresentação do ecrã principal varia segundo o modo de funcionamento do controlador do utilizador. Quando este funciona como um controlador de unidade principal, é apresentada uma vista abrangente com todos os elementos, enquanto se estiver a funcionar como um termóstato ambiente, (localizado numa das zonas controladas), o ecrã...
  • Seite 188 All manuals and user guides at all-guides.com CONTROLADOR DA UNIDADE 11.2.2 Vista de termóstato ambiente           Hora e data Próximo circuito   É apresentada a informação da data e hora atuais. Esta Informa que existe uma vista de termóstato ambiente para informação pode ser alterada no menu de configuração um segundo circuito cujo acesso é...
  • Seite 189: Descrição Dos Ícones

    All manuals and user guides at all-guides.com CONTROLADOR DA UNIDADE 11.3 DESCRIÇÃO DOS ÍCONES 11.3.1 Ícones comuns 11.3.2 Ícones da vista geral Ícone Nome Valores Explicação Ícone Nome Valores Explicação Este ícone informa acerca do O circuito I ou o II está em Pedido-OFF funcionamento da bomba.
  • Seite 190: Dispositivos De Segurança Principais

    All manuals and user guides at all-guides.com DISPOSITIVOS DE SEGURANÇA PRINCIPAIS 11.3.3 Ícones da vista de termóstato ambiente Ícone Nome Valores Explicação Modo Manual Modo Auto/ Modo Auto com ajuste do Manual temporizador Modo Auto sem ajuste do temporizador Ajuste de temperatura Ajuste/ Temperatura ambiente...
  • Seite 191: Generel Information

    GENEREL INFORMATION 1 GENEREL INFORMATION Denne publikation, eller dele af den, må ikke reproduceres, HITACHI gør sit bedste for at levere korrekt og ajourført kopieres, arkiveres eller sendes i nogen form uden forudgående dokumentation. Trykfejl kan dog ikke udelukkes, og HITACHI tilladelse fra HITACHI Air Conditioning Products Europe, S.A.U.
  • Seite 192: Vigtig Information

    CD-ROM, som ligger pakket sammen med enheden. I tilfælde af, at CD-ROMMEN mangler, eller Trykenhed og sikkerhedsmekanisme: Denne varmepumpe er hvis den ikke er læsbar, bedes du kontakte din HITACHI udstyret med en højtryksenhed i henhold til PED (direktiv vedr. forhandler eller leverandør.
  • Seite 193: Transport Og Håndtering

    All manuals and user guides at all-guides.com TRANSPORT OG HåNDTERING 3 TRANSPORT OG HÅNDTERING Kontrollér ved ophængning af enheden, at enheden er i RASM-3VNE RASM-(4-6)(V)NE balance, at sikkerheden er i orden, og at der løftes jævnt. Fjern ikke emballagen. > 60º Ophæng enheden emballeret med to reb.
  • Seite 194: Generelle Mål

    All manuals and user guides at all-guides.com GENERELLE MåL 5 GENERELLE MÅL 5.1 PLADS TIL SERVICE RASM-3VNE Set forfra Set ovenfra Luftindtag Luftudtag Enheder i mm. RASM-(4-6)(V)NE Set forfra Set ovenfra Luftindtag Luftudtag Enheder i mm. PMML0342B rev.1 - 03/2016...
  • Seite 195 All manuals and user guides at all-guides.com GENERELLE MåL 5.2 NAVNE PÅ DELE OG TEGNING MED MÅL RASM-3VNE Set ovenfra Set fra siden Set forfra Set fra neden Enheder i mm. XEKS 1720 Delens navn Delens navn Kompressor Kølemiddelsi (4 stk.) Varmeveksler vandside Stopventil til gasledning - ∅15,88 (5/8”) Varmeveksler luftside...
  • Seite 196 All manuals and user guides at all-guides.com GENERELLE MåL RASM-(4-6)(V)NE Set ovenfra Set forfra Set fra siden Set fra neden Enheder i mm. XEKS 1721 Delens navn Delens navn Kompressor Kølemiddelsi (4 stk.) Varmeveksler vandside Stopventil til gasledning - ∅25,4 (1”) Varmeveksler luftside Stopventil til væskeledning - ∅9,52 (3/8”) Elboks...
  • Seite 197: Montering Af Enhed

    All manuals and user guides at all-guides.com MONTERING AF ENHED 6 MONTERING AF ENHED • Monter enheden på et sted, hvor støjen fra enheden ikke generer F O R S I G T I G ! naboerne. • Flyt produkterne så tæt på monteringsstedet som praktisk muligt •...
  • Seite 198 All manuals and user guides at all-guides.com MONTERING AF ENHED (Måleenhed: mm) Frit ved siderne Frit ved siderne, men med forhindringer ovenover 0<L≤1/2H→A≥350 1/2H<L≤H→A≥450 0<L≤1/2H→A≥600 H=1380 1/2H<L≤H→A≥1200 H=1380 6.2 LAVE PLADS  Betonfundament Beskrivelse • Fundamentet skal være på en plan overflade, og det Afløbsvand ...
  • Seite 199: Kølemiddel- Og Vandrør

    All manuals and user guides at all-guides.com KØLEMIDDEL- OG VANDRØR 2 Fundamentet skal være stærkt nok til at undgå enhver form for deformation og vibration. 3 For at undgå, at der overføres vibrationer til bygningen, skal der anbringes gummimateriale mellem stiveren og væggen. F O R S I G T I G ! Sørg for at opfylde følgende krav ved montering: •...
  • Seite 200: Påfyldning Af Kølemiddel

    All manuals and user guides at all-guides.com AFLØBSRØR • Sæt en hætte på enden af røret, når røret skal indsættes overflade eller utilsigtet tilskadekomst pga. for høj varme på gennem et hul i væggen. rørenes overflade. • Anbring ikke rørene direkte på jorden uden en hætte eller •...
  • Seite 201 All manuals and user guides at all-guides.com AFLØBSRØR 8.2 OPVARMNING OG VARMT BRUGSVAND FA R E Strømforsyn ikke enheden, inden der er fyldt vand på varmekredsløbet (og DHW kredsløbet, hvis relevant), og du har kontrolleret vandtrykket, samt at der ikke forekommer nogen form for vandlækage. 8.2.1 Yderligere hydrauliske elementer, der er nødvendige for opvarmning Slags Delens navn...
  • Seite 202 En recirkulationsvandpumpe (medfølger ikke): denne vandpumpe (3) vil hjælpe med at recirkulere det varme vand korrekt til DHW indløbsforbindelsen. • En kontraventil (ATW-WCV-01 tilbehør): dette Hitachi tilbehør (3) skal tilsluttes efter recirkulationsvandpumpen (4) for at sikre, at vandet ikke løber retur. •...
  • Seite 203 All manuals and user guides at all-guides.com AFLØBSRØR 8.2.4 Krav og anbefalinger vedr. det hydrauliske kredsløb • Den maksimale rørlængde afhænger af det maksimale Forsøg af undgå lange rørføringer mellem beholderen og tryk, der findes i vandafløbsrøret. Kontrollér DHW installationen for at mindske mulige varmetab. pumpediagrammerne.
  • Seite 204: Påfyldning Af Vand

    All manuals and user guides at all-guides.com AFLØBSRØR 8.2.5 Påfyldning af vand 1 Kontrollér, at en vandkontraventil (ATW-WCV-01 tilbehør) 8 Hvis der stadig er en smule luft tilbage i vandkredsløbet, med en stopventil (medfølger ikke) er monteret på punktet fjernes det af en automatisk luftudskiller i enheden i løbet af til vandpåfyldning (tilslutning til vandindløb), når der fyldes de første timers drift.
  • Seite 205 All manuals and user guides at all-guides.com AFLØBSRØR 8.3 BESKRIVELSE AF MINIMUM VANDVOLUMEN Under afrimningen leverer enheden ikke den mængde I det følgende er vist, hvordan der foretages beregning af varme, der er nødvendig for at dække varmebehovet i minimumsvandvolumen i systemet for at beskytte produktet installationen.
  • Seite 206 All manuals and user guides at all-guides.com AFLØBSRØR 8.4 VANDKONTROL Det er nødvendigt at analysere vandkvaliteten ved at kontrollere pH, elektrisk ledeevne, indhold af ammoniak-ioner, sulfoindhold og andre forhold. Nedenfor anføres den anbefalede standard vandkvalitet. Kølevandsanlæg Tendens Element Cirkulationsvand Forsyningsvand Korrosion Kalkaflejringer (20ºC mindre end)
  • Seite 207: Elektriske Og Kontrolindstillinger

    All manuals and user guides at all-guides.com ELEKTRISKE OG KONTROLINDSTILLINGER 9 ELEKTRISKE OG KONTROLINDSTILLINGER 9.1 ALMINDELIG KONTROL • Sørg for, at følgende betingelser forbundet med installation af strømforsyning er opfyldt: At den elektriske installations strømkapacitet er tilstrækkelig stor til at kunne klare strømkravet fra YUTAKI anlægget (udendørsenhed + DHW beholder) (om nødvendigt)).
  • Seite 208 All manuals and user guides at all-guides.com ELEKTRISKE OG KONTROLINDSTILLINGER 9.2 ELEKTRISK LEDNINGSFØRING FOR UDENDØRSENHEDER  Nedenstående figur viser, hvordan de elektriske ledninger skal forbindes til udendørsenheden RASM-(3-6)VNE RASM-(4-6)(V)NE Strømforsyning Kontrolkabel Strømforsyning Kontrolkabel 1~ 230 V 50 Hz (5V) 3N~ 400 V 50 Hz (5V) 9.2.1 Tilslutning af strøm- og F O R S I G T I G !
  • Seite 209 All manuals and user guides at all-guides.com ELEKTRISKE OG KONTROLINDSTILLINGER 9.3 LEDNINGSTYKKELSE OG MINIMUMSKRAV TIL BESKYTTELSESINDRETNINGERNE F O R S I G T I G ! • Kontrollér, at de elektriske komponenter, der leveres på stedet, (hovedkontakter, relæer, ledninger, forbindelsesstik og ledningsklemmer) er valgt ud fra de angivne elektriske data, der er angivet i dette kapitel, samt at de overholder nationale og lokale regler.
  • Seite 210 All manuals and user guides at all-guides.com ELEKTRISKE OG KONTROLINDSTILLINGER 9.4 VALGFRI LEDNINGSFORBINDELSE TIL ENHEDEN (TILBEHØR)  Opsummering af klemmebrætforbindelser Mærke Delens navn Beskrivelse KLEMMEBRÆT 2 (TB2) H-LINK transmissionen skal udføres mellem enheden og terminal 1-2 på enten H-LINK kommutering udendørsenheden, ATW-RTU-04 eller enhver anden central enhed.
  • Seite 211 All manuals and user guides at all-guides.com ELEKTRISKE OG KONTROLINDSTILLINGER Mærke Delens navn Beskrivelse Aquastat sikkerhed til kredsløb 2 Terminaler beregnet til tilslutning af Aquastat sikkerhedstilbehør (ATW-AQT-01) til kontrol af (WP2) vandtemperatur i kredsløb 2. 30(N) Elektrisk varmelegeme varmtvands Hvis DHW beholderen har et elektrisk varmelegeme, kan luft til vand varmepumpen aktivere den, udgang hvis varmepumpen ikke kan opnå...
  • Seite 212 All manuals and user guides at all-guides.com ELEKTRISKE OG KONTROLINDSTILLINGER  DSW4 / RSW1 9.5.4 Funktioner af DIP-omskifter og roterende afbryder DSW4 RSW1 B E M Æ R K • Mærket “■” angiver DIP-omskifternes position. Fabriksindstilling • Intet “■” mærke angiver, at kontaktpositionen ikke er påvirket. •...
  • Seite 213 All manuals and user guides at all-guides.com ELEKTRISKE OG KONTROLINDSTILLINGER  DSW6: Ikke anvendt Frostbeskyttelse af enheden og installationsrørene Fabriksindstilling (Må ikke ændres) Standard / ØKO vandpumpedrift  DSW7: Ekstra indstilling 4 Nøddrift af elektrisk varmelegeme eller fyr Fabriksindstilling DHW beholders varmelegeme i drift Afrimning til det elektriske varmelegeme til vand DHWs 3-vejs ventil tvunget ON...
  • Seite 214: Idriftsættelse

    All manuals and user guides at all-guides.com IDRIFTSÆTTELSE 10 IDRIFTSÆTTELSE 10.1 FØR DRIFT F O R S I G T I G ! • Strømforsyn anlægget ca. 12 timer før igangsættelse eller efter en • Sluk for hovedafbryderen, når systemet skal standses i en længere længere driftsstandsning.
  • Seite 215 I tilfælde af varmelegeme tvunget OFF (ved valgfri indstilling af DIP- omskifter) udføres disse forhold ikke og opvarmningen udføres af varmepumpen. HITACHI er ikke ansvarlig for funktionen. Under idriftsættelse og når vandtemperaturen er meget lav, er det vigtigt at vandet opvarmes gradvist. Yderligere...
  • Seite 216: Styreenhed

    All manuals and user guides at all-guides.com STYREENHED • Når testen starter, vil kontrolpanelet forlade installlatørtilstand. • Hvis der trykkes på knappen "foretrukken handling” under testkørslen udføres denne funktion, indtil brugeren trykker på annuller funktion (dette er ikke tidsbegrænset). • Brugeren kan annullere testkørslen, uanset hvor lang til der er tilbage af testkørslen.
  • Seite 217 All manuals and user guides at all-guides.com STYREENHED 11.2 HOVEDSKÆRM Afhængig af kontrolpanelets funktionsmåde, vises hovedskærmen på den eller den anden måde. Når kontrolpanelet fungerer som hovedkontrolpanel ses en omfattende visning af alle elementer. Hvis kontrolpanelet derimod fungerer som rumtermostat (placeret i en af de kontrollerede zoner) vises hovedskærmen med simplificeret information.
  • Seite 218 All manuals and user guides at all-guides.com STYREENHED 11.2.2 Visning af rumtermostat           Tid og dato Næste kreds   Information om aktuel tid og dato. De viste oplysninger kan Informerer om, at der et en visning af rumtermostat for et ændres i indstillingsmenuen sekundært kredsløb, samt at det er muligt at tilgå...
  • Seite 219 All manuals and user guides at all-guides.com STYREENHED 11.3 BESKRIVELSE AF IKONERNE 11.3.1 Fælles ikoner 11.3.2 Ikoner i omfattende visning Ikon Navn Værdier Forklaring Ikon Navn Værdier Forklaring Dette ikon informerer om Kredsløb I eller II er i forespørgsel-Off pumpedrift. Der findes tre tilgængelige pumper Kredsløb I eller II er i termo-Off Pumpe...
  • Seite 220: Primære Sikkerhedsanordninger

    All manuals and user guides at all-guides.com PRIMÆRE SIKKERHEDSANORDNINGER 11.3.3 Ikoner i visning af rumtermostat Ikon Navn Værdier Forklaring Manual driftsmåde Manual/Automatisk Automatisk driftsmåde med indstillet driftsmåde timer Automatisk driftsmåde uden indstillet timer Indstillingstemperatur Indstillings-/ rumtemperatur Rumtemperatur Sluttidspunktet for timerperioden Slut på...
  • Seite 221: Algemene Informatie

    HITACHI Air Conditio- te leveren. Drukfouten kunnen echter niet altijd worden ning Products Europe, S.A.U. vermeden door HITACHI en zij neemt daar dan ook geen In het kader van haar beleid om haar producten continu te verantwoordelijkheid voor.
  • Seite 222: Belangrijke Mededeling

    HITACHI streeft ernaar de uitvoering en prestaties van interferentie optreden. producten voortdurend te verbeteren. Daarom behoudt HITACHI zich het recht voor specificaties te wijzigen zonder Opstarten en gebruik: Controleer voordat het systeem wordt op- voorafgaande kennisgeving. gestart en wanneer het systeem in gebruik is of alle sluitventielen volledig zijn geopend en er geen obstakel in de in-/uitlaat zit.
  • Seite 223: Transport En Hantering

    All manuals and user guides at all-guides.com TRANSPORT EN HANTERING 3 TRANSPORT EN HANTERING Zorg dat de unit tijdens het ophangen in evenwicht is, controleer RASM-3VNE RASM-(4-6)(V)NE de beveiligingen en til de unit gelijkmatig op. > 60º Verwijder geen verpakkingsmaterialen. Hang de unit in de oorspronkelijke verpakking aan twee touwen.
  • Seite 224: Algemene Afmetingen

    All manuals and user guides at all-guides.com ALGEMENE AFMETINGEN 5 ALGEMENE AFMETINGEN 5.1 ONDERHOUDSRUIMTE RASM-3VNE Vooraanzicht Bovenaanzicht Luchtinlaat Luchtuitlaat Eenheden in: mm RASM-(4-6)(V)NE Vooraanzicht Bovenaanzicht Luchtinlaat Luchtuitlaat Eenheden in: mm PMML0342B rev.1 - 03/2016...
  • Seite 225 All manuals and user guides at all-guides.com ALGEMENE AFMETINGEN 5.2 NAAM EN AFMETINGEN VAN ONDERDELEN RASM-3VNE Bovenaanzicht Zijaanzicht Vooraanzicht Onderaanzicht Eenheden in: mm XEKS 1720 Aantal Naam onderdeel Aantal Naam onderdeel Compressor Koelmiddelzeef (x4) Warmtewisselaar waterkant Afsluiter voor gasleiding - Ø 15,88 (5/8”) Warmtewisselaar luchtkant Afsluiter voor vloeistofleiding - Ø...
  • Seite 226 All manuals and user guides at all-guides.com ALGEMENE AFMETINGEN RASM-(4-6)(V)NE Bovenaanzicht Vooraanzicht Zijaanzicht Onderaanzicht Eenheden in: mm XEKS 1721 Aantal Naam onderdeel Aantal Naam onderdeel Compressor Koelmiddelzeef (x4) Warmtewisselaar waterkant Afsluiter voor gasleiding - Ø 25,4 (1”) Warmtewisselaar luchtkant Afsluiter voor vloeistofleiding - Ø 9,52 (3/8”) Elektrische box Veiligheidsklep Ventilator (x2)
  • Seite 227: Installatie Van De Unit

    All manuals and user guides at all-guides.com INSTALLATIE VAN DE UNIT 6 INSTALLATIE VAN DE UNIT • Installeer de unit op een locatie waar buren geen last hebben van het L E T O P geluid dat door de unit wordt voortgebracht. •...
  • Seite 228 All manuals and user guides at all-guides.com INSTALLATIE VAN DE UNIT (Eenheid: mm) Omringende zijden zijn open Omringende zijden zijn open met obstakels erboven 0<L≤1/2H→A≥350 1/2H<L≤H→A≥450 0<L≤1/2H→A≥600 H=1380 1/2H<L≤H→A≥1200 H=1380 6.2 BEPALEN VAN MONTAGEPLAATS  Betonnen fundering Beschrijving • De unit mjoet op een horizontaal vlak worden gemonteerd Afvoerwater ...
  • Seite 229: Koudemiddel- En Waterleidingen

    All manuals and user guides at all-guides.com KOUDEMIDDEL- EN WATERLEIDINGEN 2 De fundering moet sterk genoeg zijn om vervorming en vibratie tegen te gaan. 3 Gebruik een rubbermat tussen de steun en de muur om te voorkomen dat trillingen worden overgebracht op het gebouw. L E T O P Neem de volgende installatie-instructies in acht: •...
  • Seite 230: Afvoerleiding

    All manuals and user guides at all-guides.com AfVOERLEIDING • Plaats een kapje op het uiteinde van de leiding wanneer u dauwvorming op de leidingen of ongevallen door hete de leiding via een gat in de muur moet plaatsen. leidingoppervlakken te voorkomen. •...
  • Seite 231 All manuals and user guides at all-guides.com AfVOERLEIDING 8.2 VERWARMING EN WARM TAPWATER G E VA A R Vul eerst de circuits van de verwarming (en van de warmwaterketel, indien van toepassing) met warm water en controleer de waterdruk en of er geen lekkage is voordat u de unit aansluit op de netvoeding.
  • Seite 232 1 hercirculatiewaterpomp (niet-meegeleverd): deze waterpomp (3) zal het warme tapwater correct doen hercirculeren naar de tapwaterinlaat. • 1 terugslagklep (ATW-WCV-01, meegeleverd): dit Hitachi-accessoire (3) wordt na de hercirculatiewaterpomp (4) aangesloten om ervoor te zorgen dat het water niet terugstroomt. •...
  • Seite 233 All manuals and user guides at all-guides.com AfVOERLEIDING 8.2.4 Vereisten en aanbevelingen voor het hydraulische circuit • De maximale leidinglengte hangt af van de beschikbare Probeer lange leidinglengtes tussen de warmwaterketel maximale druk in de leiding van de wateruitlaat. Controleer en de warmtapwaterinstallatie te voorkomen, om de pompcurven.
  • Seite 234: Water Bijvullen

    All manuals and user guides at all-guides.com AfVOERLEIDING 8.2.5 Water bijvullen 1 Controleer of een terugslagklep (ATW-WCV-01, meegeleverd) 8 Als er nog een beetje lucht in het systeem blijft zitten, zal met afsluitklep (niet-meegeleverd) is aangesloten op het wa- de automatische ontluchtingsklep van de unit dit tijdens de tervulpunt (aansluiting van de waterinlaat), voor het vullen van eerste uren van ingebruikneming verwijderen.
  • Seite 235 All manuals and user guides at all-guides.com AfVOERLEIDING 8.3 BESCHRIJVING VAN HET MINIMALE WATERVOLUME Tijdens het ontdooien levert de unit niet de warmte die nodig Het volgende onderdeel laat zien hoe u het minimale watervo- is om aan de warmtevraag van de installatie te voldoen. lume in het systeem berekent ter bescherming van het product Deze waarde kan op de volgende twee wijzen worden (slingervergrendeling) en temperatuurdaling tijdens ontdooien.
  • Seite 236 All manuals and user guides at all-guides.com AfVOERLEIDING 8.4 WATERREGELING De kwaliteit van het water moet gecontroleerd worden op pH, elektrisch geleidend vermogen, ammoniak-ionen, zwavel en andere stoffen. Hieronder vindt u de aanbevolen standaardkwaliteit voor water. Systeem voor gekoeld water Aanwezigheid Item Circulerend water...
  • Seite 237: Elektrische En Besturingsinstellingen

    All manuals and user guides at all-guides.com ELEKTRISCHE EN BESTURINGSINSTELLINGEN 9 ELEKTRISCHE EN BESTURINGSINSTELLINGEN 9.1 ALGEMENE CONTROLE • Controleer of de stroomvoorziening aan de volgende eisen voldoet: Het vermogen van de elektrische installatie is voldoende groot om te voldoen aan de vraag van het YUTAKI-systeem (buitenunit + warmwaterketel (indien van toepassing)).
  • Seite 238 All manuals and user guides at all-guides.com ELEKTRISCHE EN BESTURINGSINSTELLINGEN 9.2 AANSLUITING VAN ELEKTRISCHE BEDRADING VOOR BUITENUNITS  In de onderstaande afbeelding wordt de aansluiting van de elektrische bedrading voor de buitenunit weergegeven RASM-(3-6)VNE RASM-(4-6)(V)NE Netvoeding Bedieningskabel Netvoeding Bedieningskabel 1~ 230V 50Hz (5V) 3N~ 400V 50 Hz (5V)
  • Seite 239 All manuals and user guides at all-guides.com ELEKTRISCHE EN BESTURINGSINSTELLINGEN 9.3 DRAADDIAMETER EN MINIMUMEISEN VOOR DE BEVEILIGINGSVOORZIENINGEN L E T O P • Controleer of de niet-meegeleverde elektrische onderdelen (hoofdschakelaars, zekeringautomaten, draden, aansluitingen en klemmen) voldoen aan de elektrische specificaties beschreven in dit hoofdstuk en voldoen aan de nationale en lokale reglementen. Neem indien nodig contact op met de plaatselijke autoriteiten voor informatie over normen, regels, reglementen, enz.
  • Seite 240 All manuals and user guides at all-guides.com ELEKTRISCHE EN BESTURINGSINSTELLINGEN 9.4 OPTIONELE BEKABELING VAN DE UNIT (ACCESSOIRES)  Samenvatting van de verbindingen van de aansluitklemplaat Markering Naam onderdeel Beschrijving AANSLUITKLEMPLAAT 2 (TB2) De H-LINK-transmissie moet gebeuren tussen de unit en de aansluitklemmen 1-2 van hetzij de H-LINK-communicatie buitenunit, hetzij de ATW-RTU-04 hetzij enig ander centraal apparaat.
  • Seite 241 All manuals and user guides at all-guides.com ELEKTRISCHE EN BESTURINGSINSTELLINGEN Markering Naam onderdeel Beschrijving Aquastat-beveiliging voor circuit 2 Aansluitklemmen bedoeld voor het aansluiten van de meegeleverde Aquastat-beveiliging (WP2) (ATW-AQT-01) voor het regelen van de watertemperatuur van circuit 2. 30(N) Als de warmwaterketel een elektrisch verwarmingselement bevat, kan de lucht/water-pomp Uitgang elektrisch dit element activeren als de warmtepomp zelf de vereiste temperatuur van warm tapwater niet verwarmingselement tapwater...
  • Seite 242 All manuals and user guides at all-guides.com ELEKTRISCHE EN BESTURINGSINSTELLINGEN  DSW4 / RSW1 9.5.4 Functies van de DIP-switches en draaischakelaars DSW4 RSW1 O P M E R K I N G Fabrieksinstelling • Het symbool “■” geeft de positie van de DIP-switches aan. •...
  • Seite 243 All manuals and user guides at all-guides.com ELEKTRISCHE EN BESTURINGSINSTELLINGEN  DSW6: Niet in gebruik Antivriesbescherming van unit en installatieleidingen Fabrieksinstelling (niet wijzigen) Standaard/ECO-waterpompbediening  DSW7: Aanvullende instelling 4 Elektrisch verwarmingselement of boiler in noodmodus Fabrieksinstelling Verwarmingselement warmwaterketel Ondooien voor elektrisch verwarmingselement 3-wegse klep warmwaterketel geforceerd ...
  • Seite 244: Inbedrijfstelling

    All manuals and user guides at all-guides.com INBEDRIJFSTELLING 10 INBEDRIJFSTELLING 10.1 VOORDAT U HET SYSTEEM IN GEBRUIK NEEMT L E T O P • Laat het systeem ongeveer 12 uur ingeschakeld voordat u het • Als het systeem langere tijd ongebruikt gaat blijven, schakel dan de systeem na een lange stilstandperiode opstart.
  • Seite 245 Tijdens de inbedrijfstelling en wanneer de watertemperatuur erg warmtepomp. In deze gevallen neemt HITACHI geen verantwoordelijkheid op voor de correcte werking. laag is, is het belangrijk dat het water langzaam wordt opge- warmd.
  • Seite 246: Besturing Van Unit

    All manuals and user guides at all-guides.com BESTURING VAN UNIT • Wanneer de test begint, sluit de afstandsbedeining automatisch de installateursmodus. • Als u tijdens het proefdraaien op de "Favoriet"-knop drukt, dan wordt deze functie uitgevoerd totdat u op de optie "Annuleren"...
  • Seite 247: Hoofdscherm

    All manuals and user guides at all-guides.com BESTURING VAN UNIT 11.2 HOOFDSCHERM Afhankelijk van de bedrijfsmodus van de besturing van de unit ziet het hoofdscherm er anders uit. Wanneer de besturing van de unit als hoofdbesturing dient, dan verschijnt een overzicht van alle elementen. Wanneer de besturing van de unit als kamerthermostaat wordt gebruikt (in een van de klimaatbeheerde zones), dan verschijnt een vereenvoudigde versie van de informatie in het scherm.
  • Seite 248: Aanzicht Kamerthermostaat

    All manuals and user guides at all-guides.com BESTURING VAN UNIT 11.2.2 Aanzicht kamerthermostaat           Tijd en datum Volgende circuit   De huidige tijd en datum wordt weergegeven. Deze Dit geeft aan dat er een scherm voor de kamerthermostaat informatie kan worden gewijzigd in het configuratiemenu van een tweede circuit bestaat en dat u dit scherm kunt bereiken door op de rechterknop te drukken.
  • Seite 249 All manuals and user guides at all-guides.com BESTURING VAN UNIT 11.3 BESCHRIJVING VAN DE ICOONTJES 11.3.1 Gemeenschappelijke icoontjes 11.3.2 Icoontjes van het algemene overzicht Pictogram Name Waarden Beschrijving Pictogram Name Waarden Beschrijving Dit icoontje informeert over de Circuit I of II is in de stand Vraag-uit werking van de pomp.
  • Seite 250: Belangrijkste Veiligheidsvoorzieningen

    All manuals and user guides at all-guides.com BELANGRIjKSTE VEILIGHEIDSVOORzIENINGEN 11.3.3 Icoontjes in het scherm van de kamerthermostaat Pictogram Name Waarden Beschrijving Handmatige modus Handmatige/ Automatische Automatische modus met timerinstelling modus Automatische modus zonder timerinstelling Ingestelde temperatuur Ingestelde temperatuur/ kamertemperatuur Kamertemperatuur Einde van Onder dit icoontje verschijnt de eindtijd van de timerperiode...
  • Seite 251: Allmän Information

    1 ALLMÄN INFORMATION Ingen del av denna publikation får reproduceras, kopieras, HITACHI gör sitt yttersta för att erbjuda korrekt aktuell arkiveras eller överföras i någon form utan tillstånd av HITACHI dokumentation. Oaktat detta kan inte HITACHI kontrollera Air Conditioning Products Europe, S.A.U.
  • Seite 252: Viktigt Meddelande

    ändra specifikationer utan föregående meddelande. störningar. • HITACHI kan inte förutse varje möjlig omständighet som kan Start och drift: Kontrollera att alla avstängningsventiler är helt medföra en risk. öppna och att inget hindrar in- och utflödet på sidorna. Detta ska •...
  • Seite 253: Transport Och Hantering

    All manuals and user guides at all-guides.com TRANSPORT OCH HANTERING 3 TRANSPORT OCH HANTERING Kontrollera vid lyft av enheten att den är i balans, att RASM-3VNE RASM-(4-6)(V)NE säkerhetsföreskrifter följs och att den lyfts upp mjukt. > 60º Ta inte bort något förpackningsmaterial. 0.7 -1.0 m Häng enheten i emballerat tillstånd med två...
  • Seite 254: Allmäna Mått

    All manuals and user guides at all-guides.com ALLMÄNA MÅTT 5 ALLMÄNA MÅTT 5.1 SERVICEUTRYMME RASM-3VNE Vy framifrån Vy ovanifrån Luftintag Luftutlopp Enheter i mm. RASM-(4-6)(V)NE Vy framifrån Vy ovanifrån Luftintag Luftutlopp Enheter i mm. PMML0342B rev.1 - 03/2016...
  • Seite 255 All manuals and user guides at all-guides.com ALLMÄNA MÅTT 5.2 NAMN PÅ DELAR OCH MÅTT RASM-3VNE Vy ovanifrån Sett från sidan Vy framifrån Sett nedifrån Enheter i mm. XEKS 1720 Nummer Nummer Kompressor Sil kylmedium (x4) Vattensidan på värmeväxlaren Stoppventil för gasledning - Ø15,88 (5/8”) Luftsidan på...
  • Seite 256 All manuals and user guides at all-guides.com ALLMÄNA MÅTT RASM-(4-6)(V)NE Vy ovanifrån Vy framifrån Sett från sidan Sett nedifrån Enheter i mm. XEKS 1721 Nummer Nummer Kompressor Sil kylmedium (x4) Vattensidan på värmeväxlaren Stoppventil för gasledning - Ø25,4 (1”) Luftsidan på värmeväxlaren Stoppventil för vätskeledning - Ø9,52 (3/8”) Ellåda Säkerhetsventil...
  • Seite 257: Installation Av Enhet

    All manuals and user guides at all-guides.com INSTALLATION AV ENHET 6 INSTALLATION AV ENHET • Se till att ventilationen är tillräcklig där du arbetar. Arbete i ett utrymme VA R N I N G med bristande ventilation kan orsaka syrebrist. Giftig gas kan produceras om rengöringsmedlet värms upp till en hög temperatur, •...
  • Seite 258 All manuals and user guides at all-guides.com INSTALLATION AV ENHET (Enhet: mm) Öppet runt sidorna Öppet runt sidorna med hinder ovanför 0<L≤1/2H→A≥350 1/2H<L≤H→A≥450 0<L≤1/2H→A≥600 H=1 380 1/2H<L≤H→A≥1200 H=1 380 6.2 PLATSPROVISION  Cementgrund Beskrivning • Grunden ska ligga på ett plant underlag och bör vara 100 – Dräneringsvatten ...
  • Seite 259: Kyl- Och Vattenrör

    All manuals and user guides at all-guides.com KYL- OCH VATTENRÖR 2 Grunden måste vara hållbar nog för att förhindra deformering och vibrationer. 3 För att förebygga vibrationsöverföring till byggnaden kan du placera gummimaterial mellan stödet och väggen. VA R N I N G Följ nedanstående installationsprocedur noggrant: •...
  • Seite 260: Dräneringsrör

    All manuals and user guides at all-guides.com DRÄNERINGSRÖR • Täck för röränden när röret ska föras genom vägghål. • Använd inte isoleringsmaterial som innehåller NH3 eftersom det kan skada ledningsmaterialet och orsaka läckage längre • Lägg inga rör direkt på marken utan att först täcka för fram.
  • Seite 261 All manuals and user guides at all-guides.com DRÄNERINGSRÖR 8.2 UPPVÄRMNING OCH DHW FA R A Anslut inte strömförsörjningen till enheten innan kretsen fyllts (och ev. varmvattentankens krets) med vatten och vattentrycket och ev. vattenläckage har kontrollerats. 8.2.1 Extra nödvändiga hydrauliska element för uppvärmning Natur Vatteninlopp (uppvärmning) Röranslutningar...
  • Seite 262 1 Återcirkuleringspump för vatten (medföljer ej): denna pump (4) ser till att varmvattnet återcirkuleras korrekt till DHW- vatteninloppet. • 1 Vattenkontrollventil (tillbehör ATW-WCV-01): detta Hitachi-tillbehör (3) ansluts efter återcirkuleringspumpen (4) för att försäkra att vatten inte rinner tillbaka. • 2 Avstängningsventiler (medföljer ej) (5): en före återcirkuleringspumpen (4) och ytterligare en efter vattenkontrollventilen (3).
  • Seite 263: Krav Och Rekommendationer För Den Hydrauliska Kretsen

    All manuals and user guides at all-guides.com DRÄNERINGSRÖR 8.2.4 Krav och rekommendationer för den hydrauliska kretsen • Maximal rörlängd beror på vattenutloppsrörets maximala Försök att undvika att dra långa rör mellan tanken och tryck. Kontrollera pumpkurvorna. varmvattenanläggningen för att minska eventuella temperaturförluster.
  • Seite 264: Påfyllning Av Vatten

    All manuals and user guides at all-guides.com DRÄNERINGSRÖR 8.2.5 Påfyllning av vatten 1 Kontrollera att det finns en vattenbackventil (tillbehör ATW- 8 Om det fortfarande finns kvar lite luft i vattenkretsen WCV-01) med en avstängningsventil (medföljer ej) ansluten avlägsnas det automatiskt med enhetens avluftare under de till punkten (vatteninloppsanslutning) för påfyllning av vatten första drifttimmarna.
  • Seite 265 All manuals and user guides at all-guides.com DRÄNERINGSRÖR 8.3 MINSTA VATTENVOLYM BESKRIVNING När avfrostning pågår producerar inte enheten den värme Följande del visar hur du beräknar den minsta vattenvolymen som krävs för att täcka värmebehovet för installationen. som krävs i systemet för att skydda produkten (anti-hunting) Detta värde kan fås på...
  • Seite 266 All manuals and user guides at all-guides.com DRÄNERINGSRÖR 8.4 VATTENKONTROLL Det är nödvändigt att analysera vattenkvaliteten genom att mäta pH-värde, elektrisk konduktivitet, ammoniumjoninnehåll, svavelinnehåll o.s.v. Följande är de rekommenderade standarder för vattenkvalitet. Kylvattensystem Tendens Objekt Cirkulerande vatten Vattenförsörjning Korrosion Avlagringar (20ºC mindre än) Standardkvalitet pH (25°C) 6,8 ~ 8,0...
  • Seite 267: El- Och Styrinnställningar

    All manuals and user guides at all-guides.com EL- OCH STYRINNSTÄLLNINGAR 9 EL- OCH STYRINNSTÄLLNINGAR 9.1 ALLMÄN KONTROLL • Se till att följande förhållanden avseende strömförsörjningsinstallationen är tillgodosedda: Elinstallationens effektkapacitet är tillräckligt hög för att försörja YUTAKI-systemets strömbegäran (utomhusenhet + DHW- tank (om sådan finns)).
  • Seite 268 All manuals and user guides at all-guides.com EL- OCH STYRINNSTÄLLNINGAR 9.2 ANSLUTNING AV ELKABLAR FÖR UTOMHUSENHETER  Anslutning av de elektriska ledningarna till utomhusenheten visas här nedan RASM-(3-6)VNE RASM-(4-6)(V)NE Strömförsörjning Kontrollkabel Strömförsörjning Kontrollkabel 1~ 230V 50Hz (5V) 3N~ 400V 50 Hz (5V) 9.2.1 Anslutning av strömförsörjnings- och överföringskablar...
  • Seite 269 All manuals and user guides at all-guides.com EL- OCH STYRINNSTÄLLNINGAR 9.3 KABELSTORLEK OCH MINIMIKRAV FÖR SKYDDSANORDNINGARNA VA R N I N G • Se till att alla ej-medföljande elektriska komponenter (huvudströmbrytare, kretsbrytare, kablar, kontakter och kabelanslutningar) har valts enligt de elektriska uppgifter som angetts i det här kapitlet och att de följer nationella och lokala bestämmelser.
  • Seite 270 All manuals and user guides at all-guides.com EL- OCH STYRINNSTÄLLNINGAR 9.4 EXTRA KABLAR FÖR ENHET (TILLVAL)  Sammanfattning av terminalpanelens anslutningar Märke Beskrivning UTTAGSPANEL 2 (TB2) H-LINK-överföringen måste ske mellan enheten och anslutningar 1-2 på en av H-LINK-omvandling utomhusenheterna, ATW-RTU-04 eller en centralenhet. H-LINK-kommunikation för fjärrkontroll Anslutningskontakter för YUTAKI-enhetens styrmodul.
  • Seite 271 All manuals and user guides at all-guides.com EL- OCH STYRINNSTÄLLNINGAR Märke Beskrivning Kontakter avsedda för anslutning ar Aquastat-säkringen (tillbehör ATW-AQT-01) för kontroll av Aquastat-säkring för krets 2 (WP2) vattentemperatur i krets 2. 30(N) Om DHW-tanken innehåller en elektrisk värmare kan luft/vattenvärmepumpen aktivera den om Utlopp för elektrisk DHW-värmare värmepumpen inte kan uppnå...
  • Seite 272 All manuals and user guides at all-guides.com EL- OCH STYRINNSTÄLLNINGAR  DSW4 / RSW1 9.5.4 Funktioner för DIP-brytare och vridomkopplare DSW4 RSW1 O B S ! Fabriksinställning • Märket “■” anger DIP-brytarnas lägen. • Om märket ”■” inte visas betyder det att stiftens position inte har någon betydelse.
  • Seite 273 All manuals and user guides at all-guides.com EL- OCH STYRINNSTÄLLNINGAR  DSW6: Används ej Värmare forcerad-AV Fabriksinställning (Ändra inte) Frysskydd för enhetens och installationens rör  DSW7: Ytterligare inställning 4 Standard/ECO-vattenpump drift Fabriksinställning Nödläge elektrisk värmare eller brännare Avfrostning för elektrisk vattenvärmare ...
  • Seite 274: Driftsättning

    All manuals and user guides at all-guides.com DRIFTSÄTTNING 10 DRIFTSÄTTNING 10.1 FÖRE ANVÄNDNING VA R N I N G • Koppla in strömförsörjningen ca 12 timmar innan du startar systemet • Stäng av huvudströmmen om systemet inte ska användas under en efter en längre tids avstängning.
  • Seite 275 När provkörningen är färdig, startar du hela enheten eller utförs inte dessa tillstånd och uppvärmning utförs av värmepumpen. den valda kretsen med OK-knappen. HITACHI ansvarar ej för dess drift.  Första uppstart vid låg utomhustemperatur VA R N I N G Under driftsättning och när vattentemperaturen är väldigt låg är...
  • Seite 276: Enhetens Styrmodul

    All manuals and user guides at all-guides.com ENHETENS STYRMODUL • När testet startar så går fjärrkontrollen ur installationsläget. • Om man trycker på knappen "favoritåtgärd" under provkörningen så kommer denna funktion att utföras tills det att användaren avbryter denna (detta är inte tidsbegränsat). •...
  • Seite 277 All manuals and user guides at all-guides.com ENHETENS STYRMODUL 11.2 HUVUDSKÄRM Beroende på styrmodulens arbetsläge så visas huvudskärmen på ett annorlunda sätt. När styrmodulen fungerar som en huvudenhet, så visas en övergripande vy av alla element och när styrmodulen används som termostat (placerad i ett av de kontrollerade områdena), så...
  • Seite 278 All manuals and user guides at all-guides.com ENHETENS STYRMODUL 11.2.2 Rumstermostatsvy           Tid och datum Nästa krets   Aktuell tid/datum visas. Denna information kan ändras via Den informerar om att det finns en vy för rumstermostat för kontrollens konfigurationsmeny en sekundär krets och att den kan tillträdas genom att trycka på...
  • Seite 279: Ikoner För Den Övergripande Vyn

    All manuals and user guides at all-guides.com ENHETENS STYRMODUL 11.3 BESKRIVNING AV IKONERNA 11.3.1 Gemensamma ikoner 11.3.2 Ikoner för den övergripande vyn Ikon Benämning Värden Förklaring Ikon Benämning Värden Förklaring Denna ikon informerar om Krets I eller II är på OFF-begäran pumpdriften.
  • Seite 280: Huvudsakliga Säkerhetsanordningar

    All manuals and user guides at all-guides.com HUVUDSAKLIGA SÄKERHETSANORDNINGAR 11.3.3 Ikoner för rumstermostatvyn Ikon Benämning Värden Förklaring Manuellt läge Manuellt/Auto- Auto-läge med timerinställning läge: Auto-läge utan timerinställning Temperaturinställning Inställnings-/ rumstemperatur Rumstemperatur Slut på Sluttiden för timerperioden anges timerperiod under denna ikon Slut på...
  • Seite 281: Γενικεσ Πληροφοριεσ

    ΓΕΝΙΚΕΣ ΠΛΗΡΟΦΟΡΙΕΣ 1 ΓΕΝΙΚΕΣ ΠΛΗΡΟΦΟΡΙΕΣ Δεν επιτρέπεται η αναπαραγωγή, η αντιγραφή, η συμπλήρωση Η HITACHI καταβάλλει κάθε προσπάθεια για να παρέχει σωστή ή μετάδοση κανενός μέρους της παρούσας έκδοσης και και ενημερωμένη τεκμηρίωση. Παρόλα αυτά, η HITACHI δεν σε οποιαδήποτε μορφή χωρίς την άδεια της HITACHI Air μπορεί...
  • Seite 282: Σημαντικη Παρατηρηση

    των προδιαγραφών χωρίς προειδοποίηση. προκαλέσει ηλεκτρομαγνητική παρεμβολή. • Η HITACHI δεν είναι σε θέση να προβλέψει κάθε πιθανή κατά- σταση που μπορεί να περιέχει κάποιον ενδεχόμενο κίνδυνο. Εκκίνηση και λειτουργία: Βεβαιωθείτε ότι όλες οι βαλβίδες διακοπής είναι τελείως ανοικτές και ότι δεν υπάρχουν εμπόδια...
  • Seite 283: Μεταφορα Και Χειρισμοσ

    All manuals and user guides at all-guides.com ΜΕΤΑΦΟΡΑ ΚΑΙ ΧΕΙΡΙΣΜΟΣ 3 ΜΕΤΑΦΟΡΑ ΚΑΙ ΧΕΙΡΙΣΜΟΣ Κατά την ανάρτηση της μονάδας, βεβαιωθείτε ότι ισορροπεί και RASM-3VNE RASM-(4-6)(V)NE είναι ασφαλής και ανεβάστε την σιγά-σιγά. Μην αφαιρέσετε τα υλικά συσκευασίας. > 60º Αναρτήστε τη μονάδα συσκευασμένη με δύο σχοινιά. 0.7 -1.0 m Για...
  • Seite 284: Γενικεσ Διαστασεισ

    All manuals and user guides at all-guides.com ΓΕΝΙΚΕΣ ΔΙΑΣΤΑΣΕΙΣ 5 ΓΕΝΙΚΕΣ ΔΙΑΣΤΑΣΕΙΣ 5.1 ΧΩΡΟΣ ΣΎΝΤΗΡΗΣΗΣ RASM-3VNE Πρόσοψη Κάτοψη Είσοδος αέρα Έξοδος αέρα Μονάδες σε χιλ. RASM-(4-6)(V)NE Πρόσοψη Κάτοψη Είσοδος αέρα Έξοδος αέρα Μονάδες σε χιλ. PMML0342B rev.1 - 03/2016...
  • Seite 285 All manuals and user guides at all-guides.com ΓΕΝΙΚΕΣ ΔΙΑΣΤΑΣΕΙΣ 5.2 ΟΝΟΜΑΤΑ ΕΞΑΡΤΗΜΑΤΩΝ ΚΑΙ ΣΤΟΙΧΕΙΑ ΔΙΑΣΤΑΣΕΩΝ RASM-3VNE Κάτοψη Πλαϊνή όψη Πρόσοψη Κάτω όψη Μονάδες σε χιλ. XEKS 1720 Αρ. Όνομα εξαρτήματος Αρ. Όνομα εξαρτήματος Συμπιεστής 15 Φίλτρο ψυκτικού (x4) Εναλλάκτης θερμότητας πλευρά νερού 16 Βαλβίδα...
  • Seite 286 All manuals and user guides at all-guides.com ΓΕΝΙΚΕΣ ΔΙΑΣΤΑΣΕΙΣ RASM-(4-6)(V)NE Κάτοψη Πρόσοψη Πλαϊνή όψη Κάτω όψη Μονάδες σε χιλ. XEKS 1721 Αρ. Όνομα εξαρτήματος Αρ. Όνομα εξαρτήματος Συμπιεστής 15 Φίλτρο ψυκτικού (x4) Εναλλάκτης θερμότητας πλευρά νερού 16 Βαλβίδα αναστολής για γραμμή αερίου - Ø 25,4 (1”) Εναλλάκτης...
  • Seite 287: Εγκατασταση Μοναδων

    All manuals and user guides at all-guides.com ΕΓΚΑΤΑΣΤΑΣΗ ΜΟΝΑΔΩΝ 6 ΕΓΚΑΤΑΣΤΑΣΗ ΜΟΝΑΔΩΝ • Εγκαταστήστε τη μονάδα σε μια τοποθεσία όπου ο θόρυβος που Π Ρ Ο Σ Ο Χ Η εκπέμπεται από τη μονάδα δεν διαταράσσει την ησυχία των γειτόνων. •...
  • Seite 288 All manuals and user guides at all-guides.com ΕΓΚΑΤΑΣΤΑΣΗ ΜΟΝΑΔΩΝ (Μονάδες: χιλ) Χωρίς εμπόδια στις πλαϊνές πλευρές Χωρίς εμπόδια στις πλαϊνές πλευρές, με εμπόδια από πάνω 0<L≤1/2H→A≥350 1/2H<L≤H→A≥450 0<L≤1/2H→A≥600 H=1380 1/2H<L≤H→A≥1200 H=1380 6.2 ΠΡΟΕΤΟΙΜΑΣΙΑ ΧΩΡΟΎ  Βάση από τσιμέντο Αριθ. Περιγραφή •...
  • Seite 289: Ψυκτικο Και Σωληνωσεισ Νερου

    All manuals and user guides at all-guides.com ΨΥΚΤΙΚΟ ΚΑΙ ΣΩΛΗΝΩΣΕΙΣ ΝΕΡΟΥ 3 Προκειμένου να αποτραπεί η μετάδοση των κραδασμών στο κτίριο, τοποθετήστε ελαστικό υλικό ανάμεσα στο στήριγμα και τον τοίχο. Π Ρ Ο Σ Ο Χ Η Δώστε ιδιαίτερη προσοχή στις ακόλουθες διαδικασίες εγκατάστασης: •...
  • Seite 290: Σωληνωσεισ Αποχετευσησ

    All manuals and user guides at all-guides.com ΣΩΛΗΝΩΣΕΙΣ ΑΠΟΧΕΤΕΥΣΗΣ σία ή την εισχώρηση ξένων σωματιδίων στους σωλήνες. Σ Η Μ Ε Ι Ω Σ Η • Συνίσταται η μόνωση των σωλήνων νερού, των ενώσεων και Ένα σύστημα χωρίς υγρασία και μόλυνση από λάδια θα έχει μέγιστη των...
  • Seite 291 All manuals and user guides at all-guides.com ΣΩΛΗΝΩΣΕΙΣ ΑΠΟΧΕΤΕΥΣΗΣ 8.2 ΘΕΡΜΑΝΣΗ ΚΑΙ DHW Κ Ι Ν ΔΎ Ν Ο Σ Μην συνδέετε την τροφοδοσία ηλεκτρικού ρεύματος στην εσωτερική μονάδα πριν από την πλήρωση νερού (και στο κύκλωμα DHW αν υπάρχει) και τον έλεγχο για την πίεση νερού και για τυχόν διαρροή νερού. 8.2.1 Προαιρετικά...
  • Seite 292 ζεστού νερού στην είσοδο DHW. • 1 Βαλβίδα ελέγχου νερού (ATW-WCV-01 εξάρτημα): αυτό το εξάρτημα Hitachi (3) συνδέεται μετά την αντλία επανακυκλοφορίας νερού (4) για να διασφαλιστεί η μη επιστροφή νερού. 2 Βαλβίδες διακοπής (μη παρεχόμενο) (5): μια πριν την αντλία επανακυκλοφορίας νερού (4) και μια μετά το εξάρτημα βαλβίδα...
  • Seite 293 All manuals and user guides at all-guides.com ΣΩΛΗΝΩΣΕΙΣ ΑΠΟΧΕΤΕΥΣΗΣ 8.2.4 Απαιτήσεις και προτάσεις για το υδραυλικό κύκλωμα • Το μέγιστο μήκος σωλήνωσης εξαρτάται από τη μέγιστη Μην λειτουργείτε για μεγάλα χρονικά διαστήματα διαθέσιμη πίεση στο σωλήνα εξόδου νερού. Ελέγξτε τις την...
  • Seite 294: Πλήρωση Νερού

    All manuals and user guides at all-guides.com ΣΩΛΗΝΩΣΕΙΣ ΑΠΟΧΕΤΕΥΣΗΣ 8.2.5 Πλήρωση νερού 1 Ελέγξτε ότι η βαλβίδα ελέγχου νερού (ATW-WCV-01 8 Αν υπάρχει ακόμα μια μικρή ποσότητα αέρα μέσα στο εξάρτημα) με μια βαλβίδα διακοπής (μη παρεχόμενο) κύκλωμα νερού, θα απομακρυνθεί με την αυτόματη συνδέεται...
  • Seite 295 All manuals and user guides at all-guides.com ΣΩΛΗΝΩΣΕΙΣ ΑΠΟΧΕΤΕΥΣΗΣ 8.3 ΠΕΡΙΓΡΑΦΗ ΕΛΑΧΙΣΤΟΎ ΟΓΚΟΎ ΝΕΡΟΎ Ενώ γίνεται απόψυξη, η μονάδα δεν παρέχει τη θερμότητα Στο επόμενο μέρος παρουσιάζεται ο τρόπος υπολογισμού που απαιτείται για κάλυψη της ζήτησης θερμότητας από την του ελάχιστου όγκου νερού στο σύστημα για την προστασία εγκατάσταση.
  • Seite 296 All manuals and user guides at all-guides.com ΣΩΛΗΝΩΣΕΙΣ ΑΠΟΧΕΤΕΥΣΗΣ 8.4 ΕΛΕΓΧΟΣ ΝΕΡΟΎ Είναι απαραίτητο να αναλύσουμε την ποιότητα του νερού ελέγχοντας το pH, την ηλεκτρική αγωγιμότητα, την περιεκτικότητα σε ιόντα αμμωνίας, την περιεκτικότητα σε θείο κ.α. Παρακάτω δίνεται η προτεινόμενη τυπική ποιότητα νερού. Σύστημα...
  • Seite 297: Ρυθμισεισ Ηλεκτρικεσ Και Ελεγχου

    All manuals and user guides at all-guides.com ΡΥΘΜΙΣΕΙΣ ΗΛΕΚΤΡΙΚΕΣ ΚΑΙ ΕΛΕΓΧΟΥ 9 ΡΎΘΜΙΣΕΙΣ ΗΛΕΚΤΡΙΚΕΣ ΚΑΙ ΕΛΕΓΧΟΎ 9.1 ΓΕΝΙΚΟΣ ΕΛΕΓΧΟΣ • Βεβαιωθείτε ότι τηρούνται οι παρακάτω συνθήκες σχετικά με την εγκατάσταση της τροφοδοσίας ηλεκτρικού ρεύματος: Η ικανότητα ισχύος της ηλεκτρικής εγκατάστασης είναι αρκετά μεγάλη για να υποστηρίξει την απαιτούμενη ισχύ του συστήματος...
  • Seite 298 All manuals and user guides at all-guides.com ΡΥΘΜΙΣΕΙΣ ΗΛΕΚΤΡΙΚΕΣ ΚΑΙ ΕΛΕΓΧΟΥ 9.2 ΣΎΝΔΕΣΗ ΗΛΕΚΤΡΙΚΩΝ ΚΑΛΩΔΙΩΣΕΩΝ ΓΙΑ ΤΗΝ ΕΞΩΤΕΡΙΚΗ ΜΟΝΑΔΑ  Η σύνδεση των ηλεκτρικών καλωδιώσεων της εξωτερικής μονάδας περιγράφεται στην παρακάτω εικόνα RASM-(3-6)VNE RASM-(4-6)(V)NE Τροφοδοσία ηλεκτρικού ρεύματος Καλώδιο ελέγχου Τροφοδοσία ηλεκτρικού ρεύματος Καλώδιο...
  • Seite 299 All manuals and user guides at all-guides.com ΡΥΘΜΙΣΕΙΣ ΗΛΕΚΤΡΙΚΕΣ ΚΑΙ ΕΛΕΓΧΟΥ 9.3 ΜΕΓΕΘΟΣ ΚΑΛΩΔΙΩΣΗΣ ΚΑΙ ΕΛΑΧΙΣΤΕΣ ΑΠΑΙΤΗΣΕΙΣ ΓΙΑ ΤΙΣ ΣΎΣΚΕΎΕΣ ΠΡΟΣΤΑΣΙΑΣ Π Ρ Ο Σ Ο Χ Η • Βεβαιωθείτε ότι τα μη παρεχόμενα ηλεκτρικά εξαρτήματα (κύριοι διακόπτες τροφοδοσίας, διακόπτες κυκλώματος, καλώδια, συνδέσεις αγωγών και ακροδέκτες...
  • Seite 300 All manuals and user guides at all-guides.com ΡΥΘΜΙΣΕΙΣ ΗΛΕΚΤΡΙΚΕΣ ΚΑΙ ΕΛΕΓΧΟΥ 9.4 ΠΡΟΑΙΡΕΤΙΚΗ ΚΑΛΩΔΙΩΣΗ ΜΟΝΑΔΑΣ (ΕΞΑΡΤΗΜΑΤΑ)  Σύνοψη των συνδέσεων του πίνακα ακροδεκτών Ένδειξη Όνομα εξαρτήματος Περιγραφή ΠΙΝΑΚΑΣ ΑΚΡΟΔΕΚΤΩΝ 2 (ΤΒ2) Η μετάδοση H-LINK πρέπει να πραγματοποιηθεί μεταξύ της μονάδας και τους ακροδέκτες 1-2 μιας Μετατροπή...
  • Seite 301 All manuals and user guides at all-guides.com ΡΥΘΜΙΣΕΙΣ ΗΛΕΚΤΡΙΚΕΣ ΚΑΙ ΕΛΕΓΧΟΥ Ένδειξη Όνομα εξαρτήματος Περιγραφή Ασφάλεια Aquastat για το κύκλωμα 2 Τερματικά που χρησιμοποιούνται για τη σύνδεση του εξαρτήματος ασφάλεια Aquastat (ATW- (WP2) AQT-01) για έλεγχο της θερμοκρασίας νερού στο κύκλωμα 2. Αν...
  • Seite 302 All manuals and user guides at all-guides.com ΡΥΘΜΙΣΕΙΣ ΗΛΕΚΤΡΙΚΕΣ ΚΑΙ ΕΛΕΓΧΟΥ  DSW4 / RSW1 9.5.4 Λειτουργία των διακοπτών εναλλαγής και των περιστροφικών διακοπτών DSW4 RSW1 Σ Η Μ Ε Ι Ω Σ Η Εργοστασιακή ρύθμιση • Η ένδειξη “■” υποδεικνύει τις θέσεις των διακοπτών εναλλαγής. •...
  • Seite 303 All manuals and user guides at all-guides.com ΡΥΘΜΙΣΕΙΣ ΗΛΕΚΤΡΙΚΕΣ ΚΑΙ ΕΛΕΓΧΟΥ Χρησιμοποιείστε τη μέγιστη τιμή Εξαναγκασμένη απενεργοποίηση θερμοκρασίας μεταξύ του Two3 (λέβητα / θερμαντήρα θερμίστορ θερμαντήρα) και του Two (έξοδος νερού θερμίστορ) για τον έλεγχο νερού  DSW6: Δεν χρησιμοποιείται Προστασία...
  • Seite 304: Εναρξη Λειτουργιασ

    All manuals and user guides at all-guides.com ΕΝΑΡΞΗ ΛΕΙΤΟΥΡΓΙΑΣ 10 ΕΝΑΡΞΗ ΛΕΙΤΟΎΡΓΙΑΣ 10.1 ΠΡΙΝ ΑΠΟ ΤΗ ΛΕΙΤΟΎΡΓΙΑ Π Ρ Ο Σ Ο Χ Η • Τροφοδοτήστε με ηλεκτρική ισχύ το σύστημα για 12 ώρες περίπου • Κλείστε τον κύριο διακόπτη γυρίζοντάς τον στη θέση OFF όταν πριν...
  • Seite 305 προαιρετική ρύθμιση διακόπτη εναλλαγής) αυτή η συνθήκη δεν εκτελείται το νερό. Μπορεί να χρησιμοποιηθεί μια επιπλέον προαιρετική και η θέρμανση πραγματοποιείται από την αντλία θερμότητας. Η HITACHI λειτουργία για εκκίνηση σε συνθήκες χαμηλής θερμοκρασίας δεν φέρει ευθύνη για τη λειτουργία του.
  • Seite 306: Χειριστηριο Μοναδασ

    All manuals and user guides at all-guides.com ΧΕΙΡΙΣΤΗΡΙΟ ΜΟΝΑΔΑΣ • Μόλις εκκινηθεί ο έλεγχος, το χειριστήριο χρήστη βγαίνει από την κατάσταση εγκαταστάτη. • Αν πατήσετε το "κουμπί αγαπημένη ενέργεια" κατά τον έλεγχο λειτουργίας, η λειτουργία αυτή εκτελείται μέχρι ο χρήστης να πατήσει την επιλογή ακύρωση (αυτό δεν έχει χρονικό...
  • Seite 307 All manuals and user guides at all-guides.com ΧΕΙΡΙΣΤΗΡΙΟ ΜΟΝΑΔΑΣ 11.2 ΚΎΡΙΑ ΟΘΟΝΗ Αναλόγως της κατάστασης λειτουργίας του χειριστηρίου χρήστη, η κύρια οθόνη έχει την αντίστοιχη εικόνα. Όταν το χειριστήριο χρή- στη λειτουργεί ως χειριστήριο της κύριας μονάδας, παρουσιάζεται μια συνολική εικόνα με όλα τα στοιχεία, ενώ όταν το χειριστήριο λειτουργεί...
  • Seite 308 All manuals and user guides at all-guides.com ΧΕΙΡΙΣΤΗΡΙΟ ΜΟΝΑΔΑΣ 11.2.2 Οθόνη θερμοστάτης δωματίου           Ώρα και Ημερομηνία Επόμενο κύκλωμα   Παρουσιάζονται οι πληροφορίες της τρέχουσας ώρας/ Ενημερώνει ότι υπάρχει μια προβολή θερμοστάτη δωματίου ημερομηνίας.
  • Seite 309 All manuals and user guides at all-guides.com ΧΕΙΡΙΣΤΗΡΙΟ ΜΟΝΑΔΑΣ 11.3 ΠΕΡΙΓΡΑΦΗ ΤΩΝ ΕΙΚΟΝΙΔΙΩΝ 11.3.1 Κοινά εικονίδια 11.3.2 Εικονίδια στην συνολική εικόνα Εικονίδιο Όνομα Τιμές Επεξήγηση Εικονίδιο Όνομα Τιμές Επεξήγηση Το εικονίδιο πληροφορεί για τη Κύκλωμα I ή II σε ζήτηση-OFF λειτουργία...
  • Seite 310: Συσκευεσ Ασφαλειασ

    All manuals and user guides at all-guides.com ΣΥΣΚΕΥΕΣ ΑΣΦΑΛΕΙΑΣ 11.3.3 Εικονίδια στην προβολή του θερμοστάτη δωματίου Εικονίδιο Όνομα Τιμές Επεξήγηση Χειροκίνητη κατάσταση Χειροκίνητη/ Αυτόματη κατάσταση με ρύθμιση Αυτόματη χρονοδιακόπτη κατάσταση Αυτόματη κατάσταση χωρίς ρύθμιση χρονοδιακόπτη Ρύθμιση θερμοκρασίας Ρύθμιση/ θερμοκρασία δωματίου Θερμοκρασία...
  • Seite 311 All manuals and user guides at all-guides.com...
  • Seite 312: Printed In Spain

    All manuals and user guides at all-guides.com Hitachi Air Conditioning Products Europe, SAU Ronda Shimizu, 1 - Políg. Ind. Can Torrella 08233 Vacarisses (Barcelona) Spain © Copyright 2016 HITACHI Air Conditioning Products Europe, S.A.U. – All rights reserved. Printed in Spain...

Inhaltsverzeichnis