
Verwandte Anleitungen für Clatronic AR 760 DVD/TFT


Inhaltszusammenfassung für Clatronic AR 760 DVD/TFT
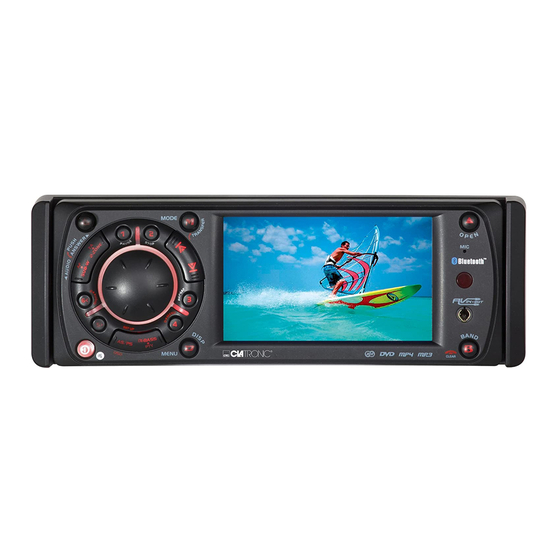
- Seite 1 All manuals and user guides at all-guides.com Bedienungsanleitung/Garantie Instruction Manual/Guarantee AR 760 DVD/TFT...
-
Seite 2: Inhaltsverzeichnis
All manuals and user guides at all-guides.com Deutsch: Inhaltsverzeichnis: 1. SICHERHEITSHINWEISE ................................4 2. UNTERSTÜTZTE DATENTRÄGER UND FORMATE ........................5 3. EINBAU ......................................6 4. ABNEHMBARE BEDIENEINHEIT..............................8 5. SCHALTPLAN: AUDIO- / VIDEOANSCHLÜSSE..........................9 6. SCHALTPLAN: VERSORGUNG / LAUTSPRECHER (ISO + KLEINVERBINDER) ...............10 7. ÖFFNEN / SCHLIEßEN DER ABDECKUNG..........................11 8. - Seite 3 All manuals and user guides at all-guides.com English: Table of Contents 1. SAFETY INFORMATION ................................62 2. DISC AND FORMAT SUPPORTS ..............................63 3. INSTALLATION ..................................... 64 4. DETACHABLE CONTROL PANEL (D.C.P.) ..........................66 5. WIRING DIAGRAM-AUDIO/VIDEO CONNECTIONS ........................67 6.
-
Seite 4: Sicherheitshinweise
All manuals and user guides at all-guides.com SICHERHEITSHINWEISE WÄHREND DER FAHRT Der Lautstärkepegel muss so niedrig sein, dass die Vorgänge des Straßenverkehrs wahrgenommen werden können. Achtung: In einigen Ländern ist es gesetzlich verboten, mit einem Fahrzeug zu fahren, während im Sichtfeld des Fah- rers ein Videobildschirm betrieben wird. -
Seite 5: Unterstützte Datenträger Und Formate
All manuals and user guides at all-guides.com 2. UNTERSTÜTZTE DATENTRÄGER UND FORMATE ABSPIELBARE DATENTRÄGER • Digital Versatile Discs (DVDs) • Video CDs (VCDs) • HDCD • Digital Versatile Discs Recordable (DVD+/-R) • Digital Versatile Discs Rewritable (DVD+/-RW) • Compact Discs (CDs) •... -
Seite 6: Einbau
All manuals and user guides at all-guides.com EINBAU • Alle Leitungen provisorisch anschließen und überprüfen, ob die Verbindungen korrekt sind und ob das Gerät und das System wie gewünscht funktionieren, bevor der endgültige Einbau erfolgt. • Nur die Teile verwenden, die im Lieferumfang des Geräts enthalten sind, um einen korrekten Einbau zu gewährleisten. -
Seite 7: Ausbau Des Geräts
All manuals and user guides at all-guides.com Ausbau des Geräts Rahmen b. Fassen Sie mit zwei Fingern in die Aussparung und ziehen Sie den Rahmen heraus. Beim Wiedereinbau muss die Seite mit der Aussparung unten liegen, damit der Rah- men befestigt werden kann. c. -
Seite 8: Abnehmbare Bedieneinheit
All manuals and user guides at all-guides.com ABNEHMBARE BEDIENEINHEIT Abnehmen der Abnehmbaren Bedieneinheit 1. Gerät ausschalten. 2. Auslöseknopf drücken. AUSLÖSEKNOPF Bedieneinheit 3. Bedieneinheit abnehmen. Einsetzen der Abnehmbaren Bedieneinheit 1. Führen Sie die rechte Seite der abnehmbaren Bedieneinheit in das Hauptgerät ein. ANMERKUNG: Die Bedieneinheit muss in den T-Verbinder eingeführt werden. -
Seite 9: Schaltplan: Audio- / Videoanschlüsse
All manuals and user guides at all-guides.com 5. SCHALTPLAN: AUDIO- / VIDEOANSCHLÜSSE AUSGANG BLAU GELB CAMERA/ EINGANG EINGANG (RECHTS) oder SPIELEKONSOLE WEIß EINGANG (LINKS) GELB AUSGANG GELB AUSGANG... -
Seite 10: Schaltplan: Versorgung / Lautsprecher (Iso + Kleinverbinder)
All manuals and user guides at all-guides.com 6. SCHALTPLAN: VERSORGUNG / LAUTSPRECHER (ISO + KLEINVERBINDER) (NICHT mitgeliefert) ANTENNEN SICHERUNG ANTENNEN- VERLÄNGERUNGS- BUCHSE KABEL 20-PIN AUDIO-/ VERSORGUNGS- STRANG (Siehe Abbildung 1) (NICHT mitgeliefert) RCA/RCA-KABEL GRAU WEIß HINTERER KANAL SCHWARZ VERSTÄRKER SCHWARZ VORDERER KANAL WEIß... -
Seite 11: Öffnen / Schließen Der Abdeckung
All manuals and user guides at all-guides.com 7. ÖFFNEN / SCHLIEßEN DER ABDECKUNG (VERSION MIT AUTOMATISCHER ABDECKUNG) Dieses Gerät ist mit dem modernsten vollautomatisierten Abdecksystem ausgestattet. Zur Nutzung dieser modernen Technologie müssen Sie nur einmal auf die Taste "OPEN" drücken. Bitte lesen Sie die folgenden Bedienhinweise aufmerksam, bevor Sie die Funktion nutzen. -
Seite 12: Funktionen Des Bedienfelds
All manuals and user guides at all-guides.com 8. FUNKTIONEN DES BEDIENFELDS FUNKTIONEN: S Y S T E M R AD I O C D / M P 3 / W M A D V D TASTE Kurz Lange Kurz Kurz Lange Kurz Lange... -
Seite 13: Funktionen Der Fernsteuerung
All manuals and user guides at all-guides.com FUNKTIONEN DER FERNSTEUERUNG FUNKTIONEN: S Y S T E M R A D I O M P 3 D V D TASTE Kurz Lange Kurz Lange Kurz Lange Kurz Lange Kurz Lange Kurz Lange Drücken Drücken... - Seite 14 All manuals and user guides at all-guides.com SYSTEM RADIO CD/MP3/WMA TASTE Kurz Lange Kurz Lange Kurz Lange Kurz Lange Kurz Lange Drücken Drücken Drücken Drücken Drücken Drücken Drücken Drücken Drücken Drücken Speicher Track Nr. Zugang Numerisch 5 Datei Nr. Zugang Speicher Track Nr.
-
Seite 15: Grundfunktionen
All manuals and user guides at all-guides.com 10. GRUNDFUNKTIONEN 3) AUSLÖSEKNOPF DER BEDIENTAFEL (REL) Drücken Sie diesen Knopf, um die Bedientafel abzunehmen. 1) EIN/AUS-TASTE ( ) Drücken Sie die EIN/AUS-Taste lange oder eine beliebige Taste auf der Vorderseite des Geräts (außer O- pen/Eject) kurz, um das Gerät einzuschalten. -
Seite 16: A/V-Eingangsbuchse Auf Der Frontblende
All manuals and user guides at all-guides.com 7) A/V-EINGANGSBUCHSE AUF DER FRONTBLENDE Es ist möglich, externe Audio- / Video-systeme an das Gerät anzuschließen, z. B. Digitalkameras oder Spielkonsolen. Sie können das externe A/V- System über die A/V-Buchse auf der Frontblende anschließen. -
Seite 17: Menüfunktionen
All manuals and user guides at all-guides.com Menüfunktionen 18) LISTE DER MENÜFUNKTIONEN (MENU) Drücken Sie die Taste DISPLAY/MENU für mindestens 3 Sekunden, um in das Menü zu gelangen. Der Nut- zer kann die verschiedenen Menüpunkte anwählen, indem er wiederholt die Taste DISPLAY/ MENU drückt, oder indem er die Tasten Tuning Up bzw. -
Seite 18: Einstellung Des Radioempfängers
All manuals and user guides at all-guides.com Anzeigemodus der Uhrzeit Standardmäßig ist der Modus "12H" eingestellt. Der Nutzer kann mit dem Encoder-Lautstärkeregler den An- zeigemodus der Uhrzeit wählen. Möglich sind "12 Hours" und "24 Hours" (12- bzw. 24-Stunden-Anzeige). AV-Buchse Die AV-Buchse auf der Frontblende ist standardmäßig als "AV In"-Eingang konfiguriert. Mit dem Encoder- Lautstärkeregler lässt sich die Konfiguration "OUT"... -
Seite 19: Dual-Zone-Betrieb
All manuals and user guides at all-guides.com 11. DUAL-ZONE-BETRIEB "2-Zone" Dual A/V Zone Multi-Entertainment-Betrieb: Dieses Gerät verfügt über die hochmoderne "Dual A/V Zone"-Funktion. Mit dieser Funktion lassen sich verschie- dene Modi der Audio- und Videoausgangsquelle (AV) für vordere und hintere Lautsprecher bzw. TFT- Bildschirme wählen. -
Seite 20: Audiobetrieb
All manuals and user guides at all-guides.com 12. AUDIOBETRIEB AUDIO-MENÜ Drücken sie kurz die Taste "AUDIO", um in das Audio-Menü zu gelangen. Durch wiederholtes Drücken der AUDIO-Taste kann man sich innerhalb des Menüs bewegen. Alternativ können die Tasten "Tuning Up" bzw. "Tuning Down"... - Seite 21 All manuals and user guides at all-guides.com MIDDLE (MITTEN) • Middle (Level) Innerhalb von 5 Sekunden kann der Nutzer mit dem Encoder-Lautstärkeregler die gewünschte Mittenlaut- stärke von -6 bis +6 auswählen. • Middle-CFQ (C.Frq) Innerhalb von 5 Sekunden kann der Nutzer mit dem Encoder-Lautstärkeregler die gewünschte Mittenfre- quenz für den Mittenbereich auswählen: 500Hz, 1KHz, 1.5KHz, oder 2.5KHz.
-
Seite 22: Betrieb Des Radios
All manuals and user guides at all-guides.com 13. BETRIEB DES RADIOS 19) BAND-TASTE (BAND) Drücken Sie auf BAND, um zwischen den FM-Frequenzbändern zu wechseln. 20&21) TASTEN TUNING UP/DOWN ( Manuelle Einstellung Drücken Sie die Taste für Suche aufwärts ( ) oder Suche abwärts ( ) länger als 3 Sekunden, um die Radiofrequenz einen Schritt auf- bzw. -
Seite 23: Rds-Betrieb
All manuals and user guides at all-guides.com 14. RDS-BETRIEB RDS-Funktionen Das Gerät verfügt über folgende RDS-Funktionen: AF Alternative Frequenzen CT Clock Time (Uhrzeit) EON Enchanced other Network (Anreicherung durch weitere Sender) PI Programmidentifikation PS Programm-Service PTY Program Type (Programmart) REG Regional Change (Regionaler Wechsel) TA Traffic Announcement (Verkehrshinweise) TP Traffic program (Verkehrsprogramm) 1. -
Seite 24: Bluetooth-Freihandbetrieb
All manuals and user guides at all-guides.com 15. BLUETOOTH-FREIHANDBETRIEB Bedienungsanleitung für Bluetooth-Betrieb Wenn Sie die HEAD UNIT unseres Geräts benutzen, stellen Sie bitte sicher, dass das von Ihnen genutzte Mobiltelefon Bluetooth-Funktionen unterstützt (Headset- oder Freihandprofil oder beide). Bitte stellen Sie sicher, dass Ihr Mobiltelefon und unser Gerät vollständig gepaart sind, bevor Sie die Bluetooth HEAD UNIT einsetzen. -
Seite 25: Übersicht: Kompatibilität Von Bluetooth-Mobiltelefonen
All manuals and user guides at all-guides.com Übersicht: Kompatibilität von Bluetooth-Mobiltelefonen Dieses Gerät unterstützt die Bluetooth-Spezifikation v1.2 und höhere und ist kompatibel mit Bluetooth-Profilen wie z. B. Freihand oder Headset. Allerdings kann die Funktionsfähigkeit durch die speziellen Schnittstellen- spezifikationen einiger Mobiltelefone beschränkt sein. Diese Liste entspricht dem aktuellen Stand zum Zeitpunkt des Drucks. - Seite 26 All manuals and user guides at all-guides.com 2. Nokia 8910 6600 6230 7600 Funktionen Anrufer-ID Paaren Paaren Paaren abbrechen In-Band Ring Tone Klingeln Sprechen Ablehnen Audio Transfer Lautstärke +/- Gespräch Auflegen Audio Transfer Wählen Lautstärke +/- Wahlwiederholung 6111 6230i 7380 Funktionen Anrufer-ID Paaren...
- Seite 27 All manuals and user guides at all-guides.com 3. Motorola V600 E398 V501 Funktionen Anrufer-ID Paaren Paaren Paaren abbrechen In-Band Ring Tone Klingeln Sprechen Ablehnen Audio Transfer Lautstärke +/- Gespräch Auflegen Audio Transfer Wählen Lautstärke +/- Wahlwiederholung 4. Panasonic & Sharp Panasonic GX-T15 GX-T71...
- Seite 28 All manuals and user guides at all-guides.com 5. Siemens & BenQ Funktionen Anrufer-ID Paaren Paaren Paaren abbrechen In-Band Ring Tone Klingeln Sprechen Ablehnen Audio Transfer Gespräch Lautstärke +/- Auflegen Audio Transfer Wählen Lautstärke +/- Wahlwiederholung 6. Dopod & MIO & Blackberry A700 8700 Funktionen...
- Seite 29 All manuals and user guides at all-guides.com 7. Samsung & LG D508 D528 KG320 Funktionen Anrufer-ID Paaren Paaren Paaren abbrechen In-Band Ring Tone Klingeln Sprechen Ablehnen Audio Transfer Lautstärke +/- Gespräch anheben/absenken Auflegen Audio Transfer Wählen Lautstärke +/- Wahlwiederholung...
- Seite 30 All manuals and user guides at all-guides.com BLUETOOTH-FREIHANDBETRIEB: FUNKTIONSMATRIX BEDIENFELD Funktionstaste Bluetooth-Freihandfunktion des Bedienfelds AUDIO Eingehenden Anruf annehmen BAND Eingehenden Anruf ablehnen Kurz Drücken Eingehenden Anruf annehmen MODE Lange Drücken Gespräch wird auf das Mobiltelefon zurückgeleitet Paaren / Wiederverbinden usw. Anmerkung: Siehe MENU Abschnitt "Menüfunktionen"...
-
Seite 31: Paaren Eines Mobiltelefons Und Des Geräts Für Den Bluetooth-Betrieb
All manuals and user guides at all-guides.com PAAREN Paaren eines Mobiltelefons und des Geräts für den Bluetooth-Betrieb • Wählen Sie den Modus "MENU - PAIRING", um das Paaren zu starten. Nähere Informationen zur Bedienung der Menüs finden Sie im Abschnitt "Menüfunktionen" dieses Bedienhandbuchs. - Seite 32 All manuals and user guides at all-guides.com Trennung des Bluetooth-Systems Das Gerät verfügt über eine Funktion, mit der der Nutzer das Bluetooth-System vom Gerät trennen kann. Die Trennung des Systems kann folgendermaßen durchgeführt werden. • Wechseln Sie in den Modus MENU - RECONNECT. Drehen Sie dann den Encoder-Lautstärkeregler, um den Modus "DISCONNECTION"...
-
Seite 33: Ausgehender Anruf
All manuals and user guides at all-guides.com AUSGEHENDER ANRUF • Nutzen Sie das mit diesem Gerät gepaarte Mobiltelefon, um einen ausgehenden Anruf durchzuführen. • Im Gesprächsmodus zeigt das LCD-Display " " an. TAKING … • Sie können die Lautstärke mit den Tasten "Volume up/down" einstellen. •... -
Seite 34: Betrieb Des Cd-Players
All manuals and user guides at all-guides.com 16. BETRIEB DES CD-PLAYERS Abspielen von Audio-CDs - TFT-Bildschirm Wenn eine Audio-CD in den CD-Player eingeführt wird, erscheint die folgende Oberfläche auf dem TFT- Bildschirm. Audiobetrieb - Fernbedienung Abspielen von Audio-CDs - Fernbedienung Folgende Tasten der Fernbedienung dienen zur Steuerung der CD-Funktionen: Play/ Pause Stop... -
Seite 35: Numerische Tasten
All manuals and user guides at all-guides.com 15) SEEK DN ( ◄ ◄ ) ▐ ◄ ◄ Drücken Sie SEEK DN , um zum Anfang des vorherigen Kapitels zu springen. ▐ 8~9) TUNE UP & TUNE DN (► ► , ◄ ◄ ) ►... -
Seite 36: Abspielen Von Audio-Cds - Bedienfeld
All manuals and user guides at all-guides.com ABSPIELEN VON AUDIO-CDS - BEDIENFELD Folgende Funktionen können über das Bedienfeld abgerufen werden. TRACK-AUSWAHL ► ► ◄ ◄ Drücken Sie die T aste TRACK UP ( ) oder TRACK DOWN ( ) kürzer als eine Sekunde, um zum ▌... -
Seite 37: Abspielen Von Mp3/Wma
All manuals and user guides at all-guides.com 17. Abspielen von MP3/WMA Abspielen von MP3/WMA - TFT-Bildschirm Wenn eine MP3/WMA-Disc in den CD-Player eingeführt wird, erscheint die folgende Oberfläche auf dem TFT- Bildschirm. Der Player spielt automatisch den ersten Track ab. In der oberen Zeile wird rechts die abgelaufene Spielzeit des Tracks angezeigt. -
Seite 38: Pause/ Play-Taste
All manuals and user guides at all-guides.com 17) PAUSE/ PLAY-TASTE (► / M1) ▌▌ Drücken Sie PAUSE, um den Abspielvorgang anzuhalten. Das Audiosignal der CD ist dann stummge- schaltet. Drücken Sie PLAY, um den normalen Abspielvorgang fortzusetzen. ■ 18) STOP( Drücken Sie STOP, um den Abspielvorgang abzubrechen und den Logo-Bildschirm anzuzeigen. -
Seite 39: Abspielen Von Mp3/Wma - Bedienfeld
All manuals and user guides at all-guides.com Abspielen von MP3/WMA - Bedienfeld Folgende Funktionen können über das Bedienfeld abgerufen werden. DATEI AUSWÄHLEN Drücken Sie die Taste TRACK UP (20) oder TRACK DOWN (21) kurz (kürzer als eine Sekunde), um zur nächsten bzw. -
Seite 40: Wiedergabe Von Jpeg-Cds
All manuals and user guides at all-guides.com 18. Wiedergabe von JPEG-CDs Laden und Standardabspielvorgang Wenn eine Disc eingeführt wird, sucht und zählt der Player Dateien mit geeigneten Formaten (zurzeit werden nur JPG, MP3 und WMA unterstützt). Das OSD zeigt folgende Mitteilung an: "Searching for files…." CD-R-Madien und die Anzahl der gefundenen Dateien werden auf dem Logo-Bildschirm angezeigt. -
Seite 41: Abspielen Von Dvds
All manuals and user guides at all-guides.com 19. ABSPIELEN VON DVDs Abspielen von DVDs - Fernbedienung 2) OPEN-TASTE ( ) Drücken Sie die OPEN-TASTE, um eine DVD auszuwerfen oder einzuführen. 17) PLAY/PAUSE (► ▌▌ Drücken Sie PAUSE, um den Abspielvorgang anzuhalten. Drücken Sie erneut auf PAUSE, um das nächste Bild des Videos anzusehen (nur DVD und VCD). - Seite 42 All manuals and user guides at all-guides.com 16) OK Mit dieser Taste können Sie eine Auswahl bestätigen. 19~29) NUMERISCHE TASTEN Beim Abspielen von CDs oder MP3/WMA-Dateien kann mit diesen Tasten ein Track oder eine Datei di- rekt angewählt werden. Diese Tasten können auch genutzt werden, wenn eine numerische Auswahl oder Eingabe erforderlich ist, z.
- Seite 43 All manuals and user guides at all-guides.com 35) GOTO-TASTE Wechsel zu einem spezifischen Zeitpunkt, Kapitel/Track oder Titel mit der GOTO-Taste Drücken Sie die GOTO-Taste, um in das GOTO-Menü zu gelangen. Das OSD zeigt Folgendes an: Drücken Sie die AUF/AB-Tasten, um die Suchart auszuwählen: Suche nach Time (Zeitpunkt) oder Chapter/Track/Title (Kapitel/Track/Titel).
-
Seite 44: Subtitle (Untertitel)
All manuals and user guides at all-guides.com Einige Discs unterstützen die Zoom-Funktion nicht. 2) Die Zoom-Funktion hat keine Auswirkung auf Untertitel und Menübildschirme der DVD. 3) Die Vergrößerungsstufe und die Anzahl der verfügbaren Stufen kann je Auswahl des TV-Geräts (TV TYPE) im Setup-Menü unterschiedlich sein. 36) TITLE (TITEL) Drücken Sie die TITLE-Taste, um das TItelmenü... - Seite 45 All manuals and user guides at all-guides.com 39) ANGLE (WINKEL) Drücken Sie während einer Szene, die aus mehreren Blickwinkeln aufgezeichnet wurde, auf die Taste ANGLE, um den Winkel zu wechseln (nur DVD). Im OSD werden der aktuell ausgewählte Winkel sowie die anderen verfügbaren Blickwinkel angezeigt.
-
Seite 46: Abspielen Von Dvds - Bedienfeld
All manuals and user guides at all-guides.com Abspielen von DVDs - Bedienfeld Wenn eine DVD in das Gerät eingeführt wird, startet automatisch die Wiedergabe vom Beginn der DVD. Dann erscheint das DVD-MENÜ bzw. ROOT oder TITLE der DVD auf dem TFT-BIldschirm und auf dem TFT- Bildschirm des Geräts wird "ROOT"... - Seite 47 All manuals and user guides at all-guides.com Wenn das DVD-MENÜ bzw. ROOT oder TITLE auf dem TFT-BIldschirm angezeigt werden: Die Tas- ten Track up / Track down (20 / 21) können als Richtungstasten (LINKS/RECHTS) eingesetzt wer- den. Mit dem Encoder-Lautstärkeregler (6) kann in AUF-/ AB-Richtung navigiert werden. Die Audio- Taste (4) dient als OK-Taste.
-
Seite 48: Bedienung Der Speicherkarte
All manuals and user guides at all-guides.com 20. BEDIENUNG DER SPEICHERKARTE Das Gerät kann Dateien der Formate MP3 / WMA / JPEG und MPEG4 abspielen, die auf einer SD oder MMC Speicherkarteabgespeichert sind. Bitte lesen Sie den folgenden Abschnitt, bevor Sie eine Speicherkarte ver- wenden. -
Seite 49: Wiedergabe Von Mpeg4-Dateien
All manuals and user guides at all-guides.com 21. WIEDERGABE VON MPEG4-DATEIEN Dieses Gerät unterstützt Dateien des Formats MPEG4. Die Bedienfunktionen zur Wiedergabe entsprechen den Funktionen bei der Wiedergabe von CD/MP3/WMA. Die folgenden Funktionen stehen zusätzlich für MPEG4-Dateien zur Verfügung. Externe Untertitel Durch die Einstellung der externen Untertitel (External Subtitle) kann der Sprachraum ausgewählt werden (nur bei MPEG4). -
Seite 50: Menü System-Setup
All manuals and user guides at all-guides.com 22. MENÜ SYSTEM-SETUP Drücken Sie die Taste SETUP, um das Setup-Menü aufzurufen. Wenn Sie die SETUP-Taste drücken, wäh- rend das Menü geöffnet ist, wird das Menü wieder ausgeblendet. Wenn das Setup-Menü geöffnet ist, zeigt das OSD folgende Textfelder an. -
Seite 51: Bevorzugte Sprache Für Untertitel
All manuals and user guides at all-guides.com 2. Bevorzugte Sprache für Untertitel Durch Auswahl der Untertiteleinstellung können Sie eine bevorzugte Sprache für Untertitel einstellen (nur DVD). Bei einigen DVDs ist es nicht möglich, Untertitel in einer anderen Sprache als der vorausgewählten anzuzeigen. -
Seite 52: Videoeinstellungen
All manuals and user guides at all-guides.com Videoeinstellungen Gehen Sie mit den LINKS/RECHTS-Richtungstasten zum Textfeld "Video" und drücken Sie OK. Jetzt erscheinen die Videoeinstellungen des Geräts: Mit den AUF/AB-Richtungstasten können Sie die eine Einstellung auswählen. Drücken Sie OK, um eine Liste der Optionen aufzurufen. Mit dem AUF/AB Richtungstasten können Sie die einzelnen Optionen anwählen. -
Seite 53: Priority Content (Priorität Audio/Video)
All manuals and user guides at all-guides.com View Mode (Videomodus) Sie können eine der folgenden Optionen auswählen: • Fill Das Bild wird horizontal und vertikal angepasst, um die Bildschirm- höhe und -breite auszufüllen. • Original Anpassung an die ursprüngliche Bildschirmgröße. (Nur bei MPEG). -
Seite 54: Digital Output (Einstellung Des Digitalausgangs)
All manuals and user guides at all-guides.com Digital Output (Einstellung des Digitalausgangs) Mit der Option "Digital Output" können Sie den Audioausgang an den S/PDIF-Ports so konfigurieren, dass das Ausgangssignal mit angeschlossenen Audiogeräten (Receiver, Lautsprecher) harmoniert. Folgende Optionen sind verfügbar: • PCM Ein S/PDIF-Ausgang ist einen Receiver angeschlossen, der PCM S/PDIF akzeptiert. -
Seite 55: Auswahl Der Altersfreigabe
All manuals and user guides at all-guides.com Auswahl der Altersfreigabe Mit dieser Funktion können Sie die Altersfreigabe des Players einstellen. Drücken Sie wiederholt auf OK, um die verfügbaren Optionen anzeigen zu lassen. Folgende Optionen sind verfügbar: • Kid Safe Es dürfen nur Titel mit der Altersfreigabe 1 abgespielt werden. •... -
Seite 56: Spezifikation
Einbauwinkel < 30- Technische Änderungen vorbehalten! Konformitätserklärung Hiermit erklärt die Firma Clatronic International GmbH, dass sich das Gerät AR 760 in Übereinstimmung mit den grundlegenden Anforderungen, der europäischen Richtline für elektromagnetische Verträglichkeit (2004/108/EG) und der Niederspannungsrichtlinie (93/68/EWG und 2006/95/EG) befindet. -
Seite 57: Lenkradfernbedienung
All manuals and user guides at all-guides.com 24. LENKRADFERNBEDIENUNG 1. Batterie austauschen Um einen einwandfreien Betrieb der Lenkradfernbedienung zu gewähr- leisten: bitte nutzen Sie ausschließlich Batterien vom Typ AAA (2 Stück). Wenn das zu bedienende Gerät nicht mehr auf das Drücken einer Taste reagiert, selbst wenn die Betriebsumstände günstig sind, oder wenn das zu bedienende Ge- rät anzeigt, dass die Batterie schwach ist, tauschen Sie bitte die Batterie der Fern- bedienung aus. -
Seite 58: Funktionen Der Tasten
All manuals and user guides at all-guides.com 3. Funktionen der Tasten Taste Funktion 1. MUTE Schaltet das Audiosignal stumm. 2. MODE Auswahl verschiedener Modi des Hauptgeräts. 3. EJECT Abbruch der CD-Wiedergabe. CD wird ausgeworfen. Bei einigen Modellen kann mit dieser Taste die automatische Abdeckung hoch- und runtergefahren werden. Unterbrechung der Wiedergabe (Pause). -
Seite 59: Störungsbehebung
All manuals and user guides at all-guides.com 25. STÖRUNGSBEHEBUNG Prüfen sie die Anschlüsse, bevor Sie die Liste durchgehen. Falls ein Problem noch immer besteht, wenn Sie die Liste durchgegangen sind, wenden Sie sich bitte an einen Servicepartner in Ihrer Nähe. Problem Ursache Lösung... -
Seite 60: Garantie
Kleine Probleme lassen sich oft schon telefonisch lösen. Rufen Sie deshalb bitte zunächst unsere Hotline an. Hotline 02152/2006-666 Mo. - Do. 8.30 - 17.00 Uhr 8.30 - 14.00 Uhr Oder per E-Mail: hotline@clatronic.de (* bei entsprechendem Telekommunikationstarif.) Service Anschrift Clatronic International GmbH Industriering Ost 40 D-47906 Kempen/Germany... -
Seite 61: Entsorgung
All manuals and user guides at all-guides.com 27. ENTSORGUNG Bedeutung des Symbols „Mülltonne“ Schonen Sie unsere Umwelt, Elektrogeräte gehören nicht in den Hausmüll. Nutzen Sie die für die Entsorgung von Elektrogeräten vorgesehenen Sammelstellen und geben dort Ihre Elektrogeräte ab, die Sie nicht mehr benutzen werden. Sie helfen damit die potenziellen Auswirkungen, durch falsche Entsorgung, auf die Umwelt und die menschli- che Gesundheit zu vermeiden. -
Seite 62: Safety Information
All manuals and user guides at all-guides.com SAFETY INFORMATION WHEN DRIVING Keep the volume level Iow enough to be aware of the road and traffic conditions. Caution: In some countries, it's unlawful to operate a vehicle while video is displayed in the driver's viewing area. Pls always switch the unit's display to "Font Type Display"... -
Seite 63: Disc And Format Supports
All manuals and user guides at all-guides.com DISC AND FORMAT SUPPORTS A. DISCS CAN PLAY WITH THIS UNIT • Digital Versatile Discs (DVDs) • Video CDs (VCDs) • HDCD • Digital Versatile Discs Recordable (DVD+/-R) • Digital Versatile Discs Rewritable (DVD+/-RW) •... -
Seite 64: Installation
All manuals and user guides at all-guides.com INSTALLATION • Before finally installing the unit, connect the wiring temporarily and make sure it is all connected up properly and the unit and system work properly. • Use only the parts included with the unit to ensure proper installation. The use of unauthorized parts can cause malfunctions. - Seite 65 All manuals and user guides at all-guides.com Removing the unit Frame Insert fingers into the groove in the front of frame and pull out to remove the frame. (When re- attaching the frame, point the side with a groove down wards and attach it.) Insert the levers supplied with the unit into the grooves at both sides of the unit as shown in fig- ure until they click.
-
Seite 66: Detachable Control Panel (D.c.p.)
All manuals and user guides at all-guides.com DETACHABLE CONTROL PANEL (D.C.P.) Removing The Detachable Control Panel (D.C.P.) Turn the Power off. RELEASE Press the Panel Release Button BUTTON D.C.P Remove the D.C.P Attaching the Detachable Control panel (D.C.P.) Insert the right side of the D.C.P. Into the main unit. NOTE: The D.C.P. -
Seite 67: Wiring Diagram-Audio/Video Connections
All manuals and user guides at all-guides.com WIRING DIAGRAM-AUDIO/VIDEO CONNECTIONS BLUE SUB-WOOFER OUTPUT SUB-W OUT WOOFER YELLOW CAMERA/VIDEO INPUT VIDEO IN VCR or DVD AUDIO INPUT (RIGHT) VIDEO IN R GAME CONSOLE AUDIO INPUT (LEFT) WHITE VIDEO IN L YELLOW VIDEO (1) OUTPUT VIDEO OUT (1) YELLOW... -
Seite 68: Wiring Diagram - Power / Speakers (Iso + Small Connector)
All manuals and user guides at all-guides.com WIRING DIAGRAM - POWER / SPEAKERS (ISO + SMALL CONNECTOR) (NOT supplied) ANTENNA ANTENNA FUSE EXTENDER JACK CABLE 20-PIN AUDIO/POWER HARNESS (See Figuer 1) (NOT supplied) RCA-TO-RCA CABLES GREY WHITE REAR CHANNEL BLACK WHITE FRONT CHANNEL... -
Seite 69: Panel Open/Close Operation (Motorized Slide Down Version)
All manuals and user guides at all-guides.com PANEL OPEN/CLOSE OPERATION (MOTORIZED SLIDE DOWN VERSION) This unit is equipped with the most advanced full logic motorized slide down system. You can enjoy this ad- vance technology with just a single press of the “OPEN” button Please read carefully the following operation instruction before operating the unit. -
Seite 70: Control Panel Function
All manuals and user guides at all-guides.com CONTROL PANEL FUNCTION S Y S T E M T U N E R C D / M P 3 / W M A D V D K E Y Long Short Short Long Short Short... -
Seite 71: Remote Function
All manuals and user guides at all-guides.com REMOTE FUNCTION OPERATIONS: S Y S T E M T U N E R M P 3 D V D Short Long Short Long Short Long Short Long Short Long Short Long Press Press Press Press... - Seite 72 All manuals and user guides at all-guides.com S Y S T E M T U N E R C D / M P 3 / W M A D V D K E Y S h o r t L o n g Short Long Short...
-
Seite 73: Basic Operations
All manuals and user guides at all-guides.com 10. BASIC OPERATIONS 3) PANEL RELEASE BUTTON (REL) Press this button to remove the control panel. 1) POWER ON/OFF BUTTON ( ) Long press the POWER button or Short Press any other button on the front of the unit (except the Open/Eject) to turn On the unit. -
Seite 74: Front Panel A/V In Jack
All manuals and user guides at all-guides.com 7) FRONT PANEL A/V IN JACK The unit is allowed to connect with external Audio / Video system such like Digital Camera or Game Console. You can connect the ex- ternal A/V system thru the A/V in jack on front panel. - Seite 75 All manuals and user guides at all-guides.com Menue operations 18) MENU FUNCTION LIST (MENU) Press & hold the DISPLAY/ MENU button for more than 3 seconds to access into the menu. User can navi- gate thru the menu items by pressing the DISPLAY/ MENU button repeatedly, or by pressing the Tuning Up or Tuning Down Buttons to move to the next or previous menu item.
- Seite 76 All manuals and user guides at all-guides.com Time Form "12H" is the default setting. User can use the Encoder Vol Knob to choose the Time Format between "12 Hours” & “24 Hours" AV Jack The panel AV Jack is default as “AV In” source. User can use the Encoder Vol Knob to select “OUT”. Once “OUT”...
-
Seite 77: Dual Zone Operation
All manuals and user guides at all-guides.com 11. DUAL ZONE OPERATION “2-Zone” Dual A/V Zone Multi Entertainment Operation: This unit is equipped with the most advance “Dual A/V Zone” feature. This function is useful if the user would like to select different modes of the Audio and Video (AV) output source for Front and Rear Speakers and TFT Screens. -
Seite 78: Audio Operation
All manuals and user guides at all-guides.com 12. AUDIO OPERATION AUDIO MENU Short Press “AUDIO“ button to access the Audio Menu. User can navigate thru the Audio Menu items by pressing the / “AUDIO” button repeatedly, or by pressing the Tuning Up or Tuning Down Button. Once the desired menu item appears on the display, adjust that option by using the encoder volume knob within 5 sec- onds. - Seite 79 All manuals and user guides at all-guides.com MIDDLE • Middle (Level) User has 5 seconds to use the encoder volume knob to adjust the desired Middle level range from -6 to • Middle-CFQ (C.Frq) User has 5 seconds to use the encoder volume knob to adjust the desired Middle Range Center Fre- quency to 500Hz, 1KHz, 1.5KHz, or 2.5KHz.
-
Seite 80: Tuner Operation
All manuals and user guides at all-guides.com 13. TUNER OPERATION 19) BAND BUTTON (BAND) Press BAND to change between FM bands 20&21) TUNING UP/DOWN BUTON ( Manual Tuning Press the Up Tuning ( ) or Down Tuning ( ) button for more than 3 seconds to move the radio fre- quency number up or down by one step. -
Seite 81: Rds Operation
All manuals and user guides at all-guides.com 14. RDS OPERATION RDS functions The unit is equipped with the following RDS function: AF Alternative Frequencies CT Clock Time EON Enchanced other Network PI Program identifications PS Program service name PTY Program Type REG Regional Change TA Traffic Announcement TP Traffic program... -
Seite 82: Blue Tooth Hand Free Operation
All manuals and user guides at all-guides.com 15. BLUE TOOTH HAND FREE OPERATION USER GUIDE FOR BLUE TOOTH OPERATION 1. When user use our Blue tooth HEAD UNIT, please make sure the mobile phone you use must / does support Blue tooth functions (Headset or Handsfree profiles or both) 2. - Seite 83 All manuals and user guides at all-guides.com BLUETOOTH MOBILE PHONE COMPATIBILITY LIST This unit can support bluetooth specification v1.2 or higher, and compatible with bluetooth profiles such as handsfree or headset profiles. However the functionality may be limited due to some phones' own dedicated interfacing specification.
- Seite 84 All manuals and user guides at all-guides.com 2. Nokia 8910 6600 6230 7600 Features Caller ID Pairing Pairing Pairing cancel In-Band Ring Tone Ringing Talk Reject Audio Transfer Volume up/down Talking Hang up Audio Transfer Dialing Volume up/down Redial last call 6111 6230i 7380...
- Seite 85 All manuals and user guides at all-guides.com 3. Motorola V600 E398 V501 Features Caller ID Pairing Pairing Pairing cancel In-Band Ring Tone Ringing Talk Reject Audio Transfer Talking Volume up/down Hang up Audio Transfer Dialing Volume up/down Redial last call 4.
- Seite 86 All manuals and user guides at all-guides.com 5. Siemens & BenQ Features Caller ID Pairing Pairing Pairing cancel In-Band Ring Tone Ringing Talk Reject Audio Transfer Talking Volume up/down Hang up Audio Transfer Dialing Volume up/down Redial last call 6. Dopod & MIO & Blackberry A700 8700 Features...
- Seite 87 All manuals and user guides at all-guides.com 7. Samsung & LG D508 D528 KG320 Features Caller ID Pairing Pairing Pairing cancel In-Band Ring Ringing Talk Reject Audio Transfer Talking Volume up/down Hang up Audio Transfer Dialing Volume up/down Redial last call...
- Seite 88 All manuals and user guides at all-guides.com BLUE TOOTH HAND FREE PANEL FUNCTION KEY MATRIX Panel Function Button Blue Tooth Hand Free Function AUDIO Answer Incoming call BAND Reject Incoming call Short Press Answer Incoming call MODE Transfer Phone Conversation Long Press backward to Mobile Phone Pairing / Re-Connection etc.
- Seite 89 All manuals and user guides at all-guides.com PAIRING Pairing The Blue Tooth System Between User’s Mobile Phone & The Unit • Access into MENU - PAIRING mode to activates the operation of Pairing. Please see MENU Operation for more details of how to access into MENU mode. •...
-
Seite 90: Incoming Call
All manuals and user guides at all-guides.com The unit will be Auto Re-Connection by following operation. • Every time turn the ignition key from off to on, the unit will Auto re-connect with the mobile phone one. Dis-Connection of the Blue Tooth System The unit have a option function for user to disconnect the Blue tooth system with the unit. -
Seite 91: Call Transfer
All manuals and user guides at all-guides.com OUTGOING CALL • Use the mobile phone which paired with this unit to making an outgoing call. • During the talking mode, the TFT Display will display “ TAKING … ”. • User can use the volume up/down to adjust the volume level. •... -
Seite 92: Cd Operation
All manuals and user guides at all-guides.com 16. CD OPERATION Audio CD Operation - TFT Monitor When a Audio CD is inserted into the player and the following picture will appear on the TFT monitor. Audio CD Operation – Remote Control To operates CD function through the following keys on the remote control. -
Seite 93: Numeric Buttons
All manuals and user guides at all-guides.com 14) SEEK UP ( Press NEXT to skip forward to the beginning of the next chapter. 15) SEEK DN ( Press BACK to skip backward to the beginning of the previous chapter. 8~9) TUNE UP & TUNE DN ( Press TUNE UP to fast forward through the disc. - Seite 94 All manuals and user guides at all-guides.com Audio CD Operation -Control Panel The following function are avaiable operates through the control panel. TRACK SELECT Press the TRACK UP ( ) or TRACK DOWN ( ) button for less than one second to advance to the next track on the CD, The selected track number will appear on the display.
-
Seite 95: Mp3/Wma Operation
All manuals and user guides at all-guides.com 17. MP3/WMA OPERATION MP3/WMA Operation-TFT Monitor When a MP3/WMA disc is inserted into the player and the following picture will appear on the TFT monitor. The player automatically plays the first track. The elapsed time within the track is displayed on the right side of the top line. - Seite 96 All manuals and user guides at all-guides.com 17) PAUSE/ PLAY BUTTON ( / M1) Press PAUSE to pause playback (still mode). The sound from the disc is muted during still mode. Press PLAY to resume normal playback. 18) STOP( Press STOP to stop playback and show the logo screen. The player memorizes the location where playback is stopped.
- Seite 97 All manuals and user guides at all-guides.com MP3/WMA Operation – Control Panel The following function are avaiable operates through the control p anel. FILE SELECT Press the TRACK UP (20 ) or TRACK DOWN (21) button for less than one second to advance to the next FILE on the disc, The selected file number will appear on the display.
-
Seite 98: Jpeg Cd Operation
All manuals and user guides at all-guides.com 18. JPEG CD OPERATION Loading and Default Playback After inserting the DISC the player searches for and counts the files with appropriate formats (currently only JPG, MP3 and WMA are supported). OSD will show the message: “Searching for files….” CD-R media and the number of files found will appear over the logo background. -
Seite 99: Dvd Operation
All manuals and user guides at all-guides.com 19. DVD OPERATION DVD Operation- Remote control 2) OPEN BUTTON ( ) (Eject) Press the OPEN button to eject the disc or loading the disc. 17) PLAY/PAUSE ( Press PAUSE to pause playback. Press PAUSE to single step forward to the next picture in the video (DVD and VCD only). - Seite 100 All manuals and user guides at all-guides.com 10~13) UP/DOWN/LEFT/RIGHT BUTTON Use these buttons to move cursor up/down/left/right. 16) OK Use this button to confirm the selection. 19~29) NUMERIC BUTTONS When playback CD/MP3/WMA use for track number or File number direct access and use when func- tion need numeric Selection or Input, like in the Go to function, etc.
-
Seite 101: Goto Button
All manuals and user guides at all-guides.com 35) GOTO BUTTON Using GOTO to Jump to a Specific Time, Chapter/Track, or Title Press GOTO to enable the GOTO Menu. The OSD will display the following: Press the UP/DOWN direction buttons to select the type of search: time search or Chapter/track/title search. - Seite 102 All manuals and user guides at all-guides.com 37) TITLE Press TITLE to invoke Title Menu (DVD only, dependent on authoring of disc). Press direction buttons to highlight selected Title Menu entry. Press OK or PLAY to select the highlighted entry. If the highlighted entry indicates a title, that title will play from Chapter 1.
- Seite 103 All manuals and user guides at all-guides.com 39) ANGLE Press ANGLE while playing a scene recorded with multiple angles to change the angle (DVD only). The OSD indicates the current angle selected and the total available angles to select, for example: The first press will show the current angle selected.
- Seite 104 All manuals and user guides at all-guides.com DVD Operation – Control panel Once a DVD disc is inserted into the unit, the unit will automatically start the playback from the beginning of the disc, and then the DVD MENU or ROOT or TITLE in the DVD disc will appear on the TFT monitor and “ROOT”...
- Seite 105 All manuals and user guides at all-guides.com 17. DVD AUDIO (6 <) Long press DVD AUDIO button during playback to change the audio language (DVD only). The OSD indicates the current setting by giving the audio track number, language, audio type, and number of channels. For ex- ample: •...
-
Seite 106: Memory Card Operation
All manuals and user guides at all-guides.com 20. MEMORY CARD OPERATION The unit can support playback MP3 / WMA / JPEG / MP4 and Divx format which are stored into SD and MMC Memory Card. Please read below before you start the operation of Memory Card Inserting and Removing a SD or MMC card on the main unit Detach the Front Panel Insert the Memory Card... -
Seite 107: Mpeg4 Operation
All manuals and user guides at all-guides.com 21. MPEG4 OPERATION The unit is support playback MPEG4 files, the details operation as same as CD/MP3/WMA operation. The follow- ing are special function for playback MPEG4 File: External Subtitle External Subtitle setting is used for choosing the language domain, (only for MPEG4). After select one lan- guage domain (alphabet), when playback a MPEG4 with external subtitle, the subtitle display will use this lan- guage alphabet. -
Seite 108: System Set Up Menu
All manuals and user guides at all-guides.com 22. SYSTEM SET UP MENU Press the SETUP button to invoke the Setup Menu. Pressing the SETUP button while the Setup Menu is dis- played will turn off the Setup Menu.When the Setup Menu is invoked, the OSD will display the following row of text “buttons.”... - Seite 109 All manuals and user guides at all-guides.com 2. Preferred Subtitle language Selecting the Subtitle setting allows the user to select a preferred subtitle language (DVD only). Some DVDs may be set to display subtitles in a different language than selected. 3.
-
Seite 110: Video Settings
All manuals and user guides at all-guides.com Video Settings Using the LEFT/RIGHT direction buttons, move to the Video button and press OK. The Player's Video settings will appear: Use the UP/DOWN direction buttons to select the setting. Press the OK to display a list of the options. Press the UP/DOWN direction buttons to move among the displayed options. -
Seite 111: View Mode
All manuals and user guides at all-guides.com View mode The user may select one of the following options: • Fill Scale up/down the image in horizontal and vertical direction respectively to fill the screen height and width. • Original Fit the original screen size. (Only for MPEG) •... -
Seite 112: Digital Output Setting
All manuals and user guides at all-guides.com Digital Output Setting Selecting the Digital Output setting allows the user to adjust the audio output on S/PDIF ports to work in har- mony with the audio equipment (e.g. receiver, speakers) connected to the player. The following options are available: A S/PDIF output is connected to a receiver that accepts PCM S/PDIF. - Seite 113 All manuals and user guides at all-guides.com 1) A password is always four digits. 2) If the password is forgotten, the "back-door" password 8888 will unlock the parental control. 3) See the explanation on Rating to see how locking and unlocking the password has An effect on the parental control.
-
Seite 114: Specification
All manuals and user guides at all-guides.com 23. SPECIFICATION TFT Screen Section Screen Size: 3.5" (Measured Diagonally) Screen Type: TFT Liquid Crystal Display active matrix Resolution: 960 (W) x 324 (H) DVD / CD SECTION Compatible Disc/Format See “Disc Note” for more details description Signal to Noise Ratio >... -
Seite 115: Steering Wheel Remote Control
All manuals and user guides at all-guides.com 24. STEERING WHEEL REMOTE CONTROL 1. Replacing Battery In order to ensure proper functioning of the steering wheel remote con- trol. Please make sure only use 2 x AAA type battery. If the device to be controlled no longer responds to any key press even under fa- vourable circumstances or the device to be controlled indicates a weak battery, please replace the battery of the remote control. -
Seite 116: Key Functions
All manuals and user guides at all-guides.com 3. Key functions Function 1. MUTE Press this button to mute the audio volume 2. MODE Press this button to select different mode of the main unit. 3. EJECT Press this button to stop the CD playback and eject the CD. In some models press this button to activate the motorization up or down of the front panel. -
Seite 117: Trouble Shooting
All manuals and user guides at all-guides.com 25. TROUBLE SHOOTING Before going through the check list, check wiring connection. If any of the problems persist after check list has been made, consult your nearest service dealer. Symptom Cause Solution No power The car ignition is not on. -
Seite 118: Guarantee
All manuals and user guides at all-guides.com 26. GUARANTEE This device supplied by our Company is covered by a 24 month guarantee starting on the date of purchase (receipt). During the live of the guarantee any fault of the device or its accessories ascribable to material or manufactur- ing defects will be eliminated free of charge by reparing or, at our discretion, by replacing it. - Seite 119 All manuals and user guides at all-guides.com...
-
Seite 120: Garantiekarte
• Data kupna, Pieczątka sklepu, Podpis • Datum koupě, Razítko prodejce, Podpis • A vásárlási dátum, a vásárlási hely bélyegzője, aláirás Дата покупки, печать торговца, подпись Industriering Ost 40 · D-47906 Kempen D-47906 Kempen/Germany · Industriering Ost 40 Internet: http://www.clatronic.de · email: info@clatronic.de...