Herunterladen Inhalt Inhalt Diese Seite drucken
Clatronic AR 819 Benutzerhandbuch

Clatronic AR 819 Benutzerhandbuch

Bt/usb/card
Vorschau ausblenden Andere Handbücher für AR 819:
Inhaltsverzeichnis

Werbung

Verfügbare Sprachen
  • DE

Verfügbare Sprachen

  • DEUTSCH, seite 1
AR 819 BT/USB/Card
Deutsch
English
Français
Español
Nederlands
Downloaded from
www.Manualslib.com
manuals search engine
Seite
Page
Page
Página
Pagina
1-23
24-42
43-62
63-82
83-102

Werbung

Inhaltsverzeichnis
loading

Inhaltszusammenfassung für Clatronic AR 819

  • Seite 1 AR 819 BT/USB/Card Deutsch Seite 1-23 English Page 24-42 Français Page 43-62 Español Página 63-82 Nederlands Pagina 83-102 Downloaded from www.Manualslib.com manuals search engine...
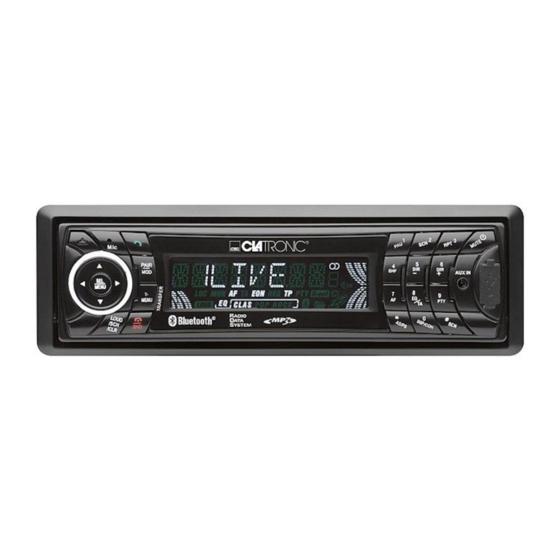
  • Seite 2 BENUTZERHANDBUCH Mobiles Audiosystem AR 819 BT/USB/Card Stereoradio mit PLL-Synthesizer Automatisches Speichern von Sendern RDS-Funktion USB-Port & SD/MMC-Kartenslot Bluetooth-Freisprechfunktion & A2DP-Stereoübertragung Faltbare, abnehmbare Bedientafel Aux-Eingang Downloaded from www.Manualslib.com manuals search engine...
  • Seite 3: Inhaltsverzeichnis

    INHALT Dateiauswahl ....13 Einbau..........3 Herauschrauben der Schrauben vor dem Wiedergabepause ....13 Einbau........... 3 Vorschau aller vorhandenen Dateien ........ 13 DIN-Vordereinbau (Methode A)..... 3 Wiederholung der gleichen Datei ... 14 Einbau des Geräts......3 Zufallswiedergabe ....14 Entfernen des Geräts ......5 SD/MMC-Betrieb........16 DIN-Rückseiteneinbau (Methode B) ..
  • Seite 4: Einbau

    EINBAU Anmerkungen: HERAUSNEHMEN DER SCHRAUBEN VOR Montieren Sie das Gerät an einen DEM EINBAU geeigneten Ort, an dem es nicht die Vor dem Einbau müssen folgende zwei normalen Fahrfunktionen des Fahrers Schrauben entfernt werden. beeinflussen kann. Bevor Gerät einbauen, verbinden Kabel vorübergehend mit dem Gerät, um sicher zu gehen, dass das System...
  • Seite 5 EINBAU die Antennen wieder an. Achten Sie 5. Schieben Sie die beiden mitgelieferten dabei darauf, dass keine Drähte oder Montageschlüssel in den Einbaurahmen, Kabel beschädigt werden. um diesen zu entfernen. Stecken Sie 8. Schieben Gerät die Schlüssel so weit es geht (mit den Einbaurahmen, bis es einrastet.
  • Seite 6: Entfernen Des Geräts

    EINBAU Side View showing Setzen Sie dann den Außenring zurück Screw Holes marked T, N auf das Gerät und befestigen Sie die Bedientafel an der Vorderseite (siehe Screw Anleitung in Abschnitt „Anbringen der Factory Radio Mounting Bracket Bedientafel“). Screw Entfernen des Geräts 1.Vergewissern Sie sich, dass die Zündung Dashboard or Console ausgestellt ist und trennen Sie das Kabel...
  • Seite 7: Benutzung Der Abnehmbaren Bedientafel

    BENUTZUNG DER ABNEHMBAREN BEDIENTAFEL Entfernen der Bedientafel The left side 1. Betätigen Sie den Entriegelungsknopf ) und die Bedientafel klappt nach unten. The right side Front Panel 2. Wenn beide Seite in der richtigen OPEN Position sind, drücken Bedientafel in das Gerät. 2.
  • Seite 8 BENUTZUNG DER ABNEHMBAREN BEDIENTAFEL sauberen, trockenen Tuch entfernt werden. 5. Setzen Sie die Bedientafel niemals hohen Temperaturen oder direktem Sonnenlicht aus. 6. Halten Sie die Bedientafel fern von leicht flüchtigen Substanzen ( z. B.Benzin, Verdünnungsmittel oder Insektizide). 7. Versuchen Sie niemals die Bedientafel auseinander zu bauen.
  • Seite 9: Kabelanschluss

    KABELANSCHLUSS ISO-Anschluss Downloaded from www.Manualslib.com manuals search engine...
  • Seite 10: Bedienung

    BEDIENUNG ANORDNUNG DER BEDIENELEMENTE (Frequenz/Titel vor / zurück, 15. 6 DIR+ Suchen) 16. USB-Port (Entriegelung) 17. 9 PTY 3. Mikrofon 18. SCAN (Abnehmen) 19. 0 DSP/RE-CCN 5. PAIRING/MOD 20. AS/PS/*/+/Navi-SCH 6. T-MENU/TRANSFER 21. 7 AF 7. LCD 22. 8 EQ/TA 8.
  • Seite 11: Grundlegende Bedienung

    BEDIENUNG EQUALIZER GRUNDLEGENDE BEDIENUNG Benutzen Sie die EQ-Taste (22), um die EIN-/AUSSCHALTEN DES GERÄTS Equalizer-Funktion einzuschalten und den Betätigen Sie die Taste (14) auf dem gewünschten Audiomodus auszuwählen. Gerät, um es einzuschalten. Wenn das Gerät Es stehen fünf verschiedene EQ-Arten zur eingeschaltet ist, können Sie es durch Verfügung (siehe unten): Betätigung der Taste...
  • Seite 12: Aux-Eingang

    BEDIENUNG Anzeige erscheint „SEARCH“. 1) SIGNALTON: EIN/AUS Radio sucht dann von der momentanen Frequenz ausgehend bis die Suche Zum Ein- oder Ausschalten des Signaltons, beendet ist. Die jeweils 6 stärksten der bei Tastenbetätigung aktiviert wird. Sender werden dann unter 2) Einschaltlautstärke entsprechenden Speichernummern Das hier eingestellte Lautstärkeniveau wird...
  • Seite 13 BEDIENUNG TP-Informationen beim aktuellen 2) Halten Sie die PTY-Taste (17) gedrückt, Sender verloren gehen, wird ein um in das RDS-Menü zu gelangen. In Alarmsignal ausgegeben. dem Menü können Sie die Tasten Wenn ein neu gefundener über kein (25) zur Auswahl einer Option benutzen. RDS-Signal verfügt, wird PI SEEK Benutzen Sie dann die Tasten etwas beeinträchtigt.
  • Seite 14: Usb-Wiedergabe

    BEDIENUNG TA, etc., die zu Netzwerken gehören, einem anderen Sender im EON-Netz, die nicht momentan empfangen wenn anderen werden Verkehrsnachrichten erkennt. PTY: Programmart-Code Wenn die Lautstärke unter dem hörbaren Programminhalt, liegt, wird sie durch diese Funktion auf ein Nachrichten, Musik, Sport etc. hörbares Niveau gestellt.
  • Seite 15: Wiederholung Des Gleichen Titels

    BEDIENUNG DIR+ (15) keine Funktion. der Anzeige. Betätigen Sie die Taste erneut, um die Intro-Wiedergabe zu stoppen und den MUSIKTITELAUSWAHL jeweiligen Titel wiederzugeben. Direkte Titelsuche Scan-Anzeige verschwindet wieder. Betätigen Sie die AS/PS (D-AUD)-Taste Sie können ebenfalls die SCN-Taste (12) (20). kommen dann gedrückt halten, um jeweils die ersten 10...
  • Seite 16 BEDIENUNG (D-AUD)-Taste viermal. Benutzen Sie - Benutzen Tasten zur Suche einer Datei oder einem TUNE/SEEK/TRACK UP/DOWN zum Verzeichnis momentanen Auflisten aller Musiktitel in diesem Verzeichnis Tasten Verzeichnis und wählen Sie einen Titel TUNE/SEEK/TRACK UP/DOWN. (Das aus. D-DIR-Symbol zeigt an, dass es sich Betätigen Sie die BND/LOU/ENT-Taste Verzeichnis handelt.)
  • Seite 17: Sd/Mmc-Betrieb

    BEDIENUNG Hinweis: : : : Wenn Sie ein SD/MMC-Karte am an der Gerät unterstützt SD/MMC-Schnittstelle anschließen, sucht Standard-USB-Laufwerke, das Gerät automatisch nach MP3- und Microsoft anerkannt werden. WMA-Dateien auf der Karte und startet die USB-MP3-Player folgen keinem Standard, bedeutet, dass verschiedene Wiedergabe.
  • Seite 18: Bluetooth-Benutzung

    BEDIENUNG während der Wiedergabe zur Wiederholung BLUETOOTH-BENUTZUNG des aktuellen Titels. „S-RPT“ erscheint in der VORBEREITUNG Anzeige. Wenn Sie die Taste für ca. 2 Sekunden gedrückt halten, wird dadurch das (i) Wenn Sie die Bluetooth-Funktion gesamte Album wiederholt betnutzen, vergewissern Sie sich „D-RPT“...
  • Seite 19: Verbindungsaufbau

    BEDIENUNG 5) Wenn der Pairing-Vorgang f Gerät weiterleiten. Dazu ehlgeschlagen ist, erscheint „END“ in der erneuter Verbindungsaufbau nötig. Anzeige. Sie können 3) Wenn Sie die Taste (2) auf der dann erneut versuchen die PAIR-Taste Bedientafel betätigen, (10) zu betätigen, um den Vorgang Bedientafel zu entfernen, wird die nochmal zu starten.
  • Seite 20: Anruf Tätigen

    BEDIENUNG automatisch angeschaltet, wenn er Anruf nicht entgegennehmen wollen, zuvor ausgeschaltet wurde. betätigen sie die Taste (24), um den Anruf zurückzuweisen. 2) Ausgehende Anrufe können nicht umgeleitet werden, wenn sie noch ANRUF TÄTIGEN nicht vom Empfänger angenommen wurden. 1) Um einen Anruf zu tätigen, haben Sie BLUETOOTH- - - - AUDIO verschiedene Möglichkeiten.
  • Seite 21: Technische Daten

    TECHNISCHE DATEN ALLGEMEIN Stromversorgungsanforderungen : DC 12V, Negative Erdung Gehäuseabmessungen : 178 (B) x 160 (T) x 50 (H) Tonausgleich Bass (bei 100 Hz) : ±10 dB Treble (bei 10 kHz) : ±10 dB Maximale Ausgangsleistung Version Y : 4 x 40 Watt Stromentnahme Version Y : 15 Ampere (max.)
  • Seite 22: Fehlerbehebung

    FEHLERBEHEBUNG Bevor Sie durch diese Fehlerbehebungstabelle gehen, sollten Sie die Verkabelung überprüfen. Wenn das Problem danach immer noch nicht bewältigt werden kann, wenden Sie sich bitte an Ihren Händler. Symptom Ursache Behebung Die Zündung ist nicht an. Wenn Strom richtig Gerät schaltet angeschlossen ist und der Motor nicht an.
  • Seite 23: Garantie

    Garantiebedingungen 1. Gegenüber Verbrauchern gewähren wir Beispiel Glas oder Kunststoff. bei privater Nutzung des Geräts eine Schließlich sind Garantieansprüche Garantie von 24 Monaten ab Kaufdatum. ausgeschlossen, wenn nicht von uns autorisierte Stellen Arbeiten an dem Ist das Gerät zur gewerblichen Nutzung Gerät vornehmen.
  • Seite 24 Lieferungen entfällt Ihr Anspruch der Ihnen direkt nach Ihrer Anmeldung per auf Garantieleistungen. E-Mail übermittelt wird, können Sie den Bearbeitungsablauf Ihrer Reklamation auf unserem Serviceportal online verfolgen. Clatronic International GmbH Industriering Ost 40 Alternativ können Sie uns den Servicefall D-47906 Kempen E-Mail hotline@clatronic.de oder per Fax 0 21 52 –...
  • Seite 25 OWNER’S MANUAL Mobile Audio System AR 819 BT/USB/Card PLL Synthesizer Stereo Radio Automatic Memory Storing RDS Function USB&SD/MMC Card Interface Bluetooth Hands-free function & A2DP (Advanced Audio Distribution Profile) Stereo Audio Transmission Fold Down Detachable Panel Auxiliary Input Function Downloaded from www.Manualslib.com...
  • Seite 26 CONTENTS Installation...........26 SD/MMC operation ......37 Take out screw before installation ..26 Bluetooth operation......38 DIN Front-Mount (Method A)....26 Preparing for operation......38 Installing the unit ......Pairing ..........38 Removing the unit ......27 Connect ..........T-menu ..........DIN Rear-Mount (Method B) ....28 Answering MANU ANSl ....39 Using the detachable front panel ..29 Making an outgoing call.....39...
  • Seite 27: Installation

    INSTALLATION Notes: DIN FRONT-MOUNT (Method A) Choose the mounting location where Installation Opening the unit will not interfere with the normal This unit can be installed in any dashboard driving function of the driver. having an opening as shown below: Before finally installing the unit, connect the wiring temporarily and make sure it 53mm...
  • Seite 28: Removing The Unit

    NSTALLATION terminal of the mounting bolt to the back 6. Mount the sleeve by inserting the sleeve of the unit and the other long threading into the opening of the dashboard and terminal to the dashboard. bend open the tabs located around the Hex Nut Spring Washer sleeve with a screwdriver.
  • Seite 29: Din Rear-Mount (Method B)

    INSTALLATION DIN REAR-MOUNT (Method B) If your vehicle is a Nissan, Toyota, follow these mounting instructions. Use the screw holes marked T (Toyota), N (Nissan) located on both sides of the unit to fasten the unit to the factory radio mounting brackets supplied with your vehicle.
  • Seite 30: Using The Detachable Front Panel

    USING THE DETACHABLE FRONT PANEL To Detach the Front Panel 2. When the two sides fixed into place, 1. Press the release ( ) button, then the push the front panel into main unit. front panel will be folded down. OPEN 3.
  • Seite 31: Wiring Connection

    WIRING CONNECTION ISO CONNECTION Downloaded from www.Manualslib.com manuals search engine...
  • Seite 32: Location Of Keys

    OPERATION LOCATION OF KEYS (tune/seek/track down/up 15.6 DIR+ buttons) 16.USB interface (release button) 17.9 PTY 3. Mic 18. SCAN (pick up) 19.0 DSP/RE-CCN 5.PAIR/MOD 20. AS/PS/*/+/Navi-SCH 6.T-MENU/TRANSFER 21.7 AF 7.LCD 22.8 EQ/TA 8.5 DIR- 23. reset button 9.4 SHF (hang up) BND/LOUD /CLR 10.1 PAU 25.
  • Seite 33: Basic Operation

    OPERATION RESET FUNCTION BASIC OPERATION RESET button (29) must be activated with SWITCHING ON/OFF THE UNIT either a ballpoint pen or thin metal object. Press button (14) to turn on the unit. The RESET button is to be activated for the When the unit is on, press and hold following reasons: button (14) to turn the unit off.
  • Seite 34: Radio Operation

    OPERATION RDS (RADIO DATA SYSTEM) RADIO OPERATION Setting RDS mode SELECTING THE FREQUENCY BAND Press AF button (21) and release At radio mode, press BND button (24) immediately to switch on or off RDS shortly to select the desired band. mode.
  • Seite 35 OPERATION seconds, it is engaging whether TA b) TA ALARM mode mode on or off. When this mode is selected, any When TA mode, is on and a traffic automatic retune mode is not announcement is transmitted: activated. Only double beep sound When the unit was in CD (MP3) mode (ALARM) is output.
  • Seite 36: Usb Play Operation

    OPERATION REPEATING THE SAME TRACK EON: Enhanced Other Networks Press RPT button (13) to continuously nformation Broadcasting repeat the same file, and “S-RPT” will information on PI, AF, TP, TA, etc, appear on LCD. Press it again to stop relating to networks other than the network used for current reception repeat, and “S-RPT”...
  • Seite 37 OPERATION UP/DOWN buttons to list all songs under this directory and select the Searching Directory or File Name title. Press AS/PS (D-AUD) button (20) for Press BND/LOU/ENT button two times. It enters into “Searching confirm and start the play. Directory or File Name” in Digital Audio Repeat the above steps if the newly selected title is again a directory.
  • Seite 38: Sd/Mmc Operation

    OPERATION When you insert a SD/MMC card in the 3. Depth of folder: 8 layers 4. Size: 2 GB SD/MMC interface, the unit will search the Note: : : : MP3 files or WMA files in the card and start The main unit can only support the to play MP3 files or WMA files automatically.
  • Seite 39: Bluetooth Operation

    OPERATION PAIRING When playing a song, press SHF button (9) 1) In any mode, press and hold shortly, after the current song play to the PAIR(MOD) button (5) on the front end, will play the songs in current category panel, “Pairing……” will appear on the in random order, and “Shuffle”...
  • Seite 40: T-Menu

    OPERATION SPEED DIAL, RECEIVED LIST, DIALED LIST, MISSED LIST, PHONE come back to the unit, reconnection is necessary. BOOK(Mobile Phone) and PHONE BOOK(SIM Card) please refer to the 2) When the mobile phone is out of range from the unit, and there is an T-MENU section.
  • Seite 41 OPERATION M1, M2, M3 button on the front panel unit serves PAUSE/PLAY/STOP control button. (It is up to the mobile phone, the different mobile phone has the different define.) button (1) on the front panel of the unit to choose the previous/next track.
  • Seite 42: Specification

    SPECIFICATION GENERAL Power Supply Requirements : DC 12 Volts, Negative Ground Chassis Dimensions : 178 (W) x 160 (D) x 50 (H) Tone Controls : ±10 dB Bass (at 100 Hz) : ±10 dB Treble (at 10 kHz) Maximum Output Power Version Y : 4x40 watts Current Drain...
  • Seite 43: Trouble Shooting

    TROUBLE SHOOTING Before going through the checklist, check wiring connection. If any of the problems persist after checklist has been made, consult your nearest service dealer. Symptom Cause Solution The car ignition switch is power supply No power. not on. connected to the car accessory circuits, but the engine is not moving, switch the ignition key...
  • Seite 44 MANUEL D’UTILISATION Système audio mobile AR 819 BT/USB/Card Synthétiseur radio stéréo PLL Mémorisation automatique Fonction RDS Interface USB et SD/MMC Fonction Bluetooth mains libres et transmission audio stéréo A2DP (Advanced Audio Distribution Profile) Panneau détachable Fonction d’entrée auxiliaire Downloaded from www.Manualslib.com...
  • Seite 45 SOMMAIRE Installation...........45 Aperçu de tous les fichiers ....55 Retirez les vis avant de procéder à Répétition d’un fichier......55 l’installation ...........45 Lecture aléatoire de tous les fichiers .55 Mode opératoire cartes mémoire Montage avant DIN (Méthode A) ..45 SD/MMC ..........57 Installation de l’unité......
  • Seite 46: Installation

    INSTALLATION Remarques : RETIREZ LES VIS AVANT L’INSTALLATION Installez l’appareil à un endroit où il ne Avant d’installer l’unité, veuillez retirer les gênera pas la conduite. deux vis. Avant d’installer définitivement l’unité, connectez les câbles temporairement et assurez-vous que tout soit bien connecté...
  • Seite 47: Retrait De L'unité

    INSTALLATION les clés au maximum (avec les encoches courroie en métal fournie pour fixer le dos vers le haut) dans les fentes prévues au de l’unité. Utilisez le matériel fourni milieu des côtés gauche et droit de l’unité. (Boulon de fixation (M5mm) et joint ressort) Puis faites glisser le boîtier au dos de pour attacher l’une des extrémités de la l’unité...
  • Seite 48: Montage Arrière Din (Méthode B)

    INSTALLATION Pour attacher l’unité aux crochets usine de 4. Soulevez le dessus de l’anneau de montage de radio. finition extérieur puis retirez-le. Alignez les trous de vis sur le crochet avec 5. Insérez les deux clés fournies dans les les trous de vis de l’unité, puis serrez les fentes au milieu des côté...
  • Seite 49: Fonctionnement Du Panneau Avant

    FONCTIONNEMENT DU PANNEAU AVA 2. Une fois les deux côtés correctement Pour détacher le panneau avant insérés, appuyez sur le panneau avant. 1. Appuyez sur le bouton de relâchement ), le panneau se détache. 3. Remarque que lorsque le panneau avant n’est correctement verrouillé,...
  • Seite 50: Schéma De Raccordement

    SCHEMA DE RACCORDEMENTS RACCORDEMENT ISO Downloaded from www.Manualslib.com manuals search engine...
  • Seite 51: Mode Operatoire

    MODE OPERATOIRE EMPLACEMENT DES COMMANDES 1.Touche (régler/rechercher/piste bas/haut) 15.6 Touche DIR+ (touche d’ouverture) 16. Interface USB 3. Microphone 17.9 Touche PTY 4. Touche (décrocher) 18. Touche SCAN 5. Touche PAIR/MOD 19.0 Touche DSP/RE-CCN 6. Touche T-MENU/TRANSFER 20. Touche AS/PS/*/+/Navi-SCH 7. Ecran LCD 21.7 Touche AF 8.5 Touche DIR- 22.8 Touche EQ/TA...
  • Seite 52: Mode Opératoire Basique

    MODE OPERATOIRE votre choix. 5 égaliseurs sont disponibles : MODE OPERATOIRE BASIQUE MISE EN MARCHE/ARRET DE L’UNITE →FLAT→CLAS→POP M→ROCK→DSP OFF Appuyez sur la touche (14) pour mettre en marche l’unité. Lorsque l’unité est en marche, pressez et maintenez enfoncée la touche (14) pour éteindre l’unité.
  • Seite 53: Entrée Auxiliaire

    MODE OPERATOIRE votre réglage. présélection correspondants. 3) Zone : Europe/Etats-Unis Utilisez la - Recherche de programmes touche (25) pour sélectionner Appuyez brièvement sur la touche Europe ou Etats-Unis. AS/PS (20) pour rechercher présélections. Le numéro de station ENTREE AUXILIAIRE correspondante P1~P6 clignote. L’unité...
  • Seite 54: Activation Du Mode Usb

    MODE OPERATOIRE supérieure à TP.) un élément et appuyez sur la touche Lorsque nouvelle station pour régler l’option sélectionnée diffuse correspondante. d’informations TP pendant un délai RECHERCHE de 5 secondes, le bip retentit. RECHERCHE/ALARME Lorsque informations a) Mode de recherche TA : information sont perdues lors du Lorsqu’une nouvelle...
  • Seite 55: Mode Opératoire Usb

    MODE OPERATOIRE Liste de fréquences des stations en Lorsque vous appuyez sur la touche et cours de diffusion transmettant le maintenez enfoncée pendant même programme quelques secondes, mode TP: Identification du programme de s’active/se désactive. circulation Identification Lorsque le mode TA est actif et que les données d’informations routières informations routières sont transmises : de la station en cours de diffusion...
  • Seite 56: Mise En Pause De La Lecture

    MODE OPERATOIRE SELECTION DU REPERTOIRE démarre lorsque vous relâchez la touche. Appuyez sur la touche DIR- (8) ou DIR+ (15) pour sélectionner le répertoire MISE EN PAUSE DE LA LECTURE précédent ou suivant. Lorsque le disque Appuyez sur la touche PAU (10) pour USB ne contient aucun répertoire, mettre la lecture en pause, “Pause”...
  • Seite 57 MODE OPERATOIRE nouveau un répertoire. Appuyez touche Recherche à partir du répertoire BND/LOU/ENT (24) pour lancer la sélectionné recherche de titre. Appuyez quatre fois sur la touche Lorsque le titre sélectionné est un AS/PS (D-AUD). Recherchez nom de répertoire, l’écran affiche (‘ ‘), fichiers répertoires depuis...
  • Seite 58: Sd/Mmc

    MODE OPERATOIRE 4. Une taille d’espace disque de 2 Go maximale Remarque: : : : L’appareil principal n’accepte que les disques standards agréé Microsoft. Le lecteur USB MP3 n’est pas en soi un standard qui signifie que différentes Lorsque vous insérez une carte SD/MMC marques commerciales ou différents dans l’interface SD/MMC, l’unité...
  • Seite 59: Mode Opératoire Bluetooth

    MODE OPERATOIRE la touche pour lire la piste précédente. En cours de lecture d’une musique, En cours de lecture d’une musique, pressez et maintenez enfoncée la touche appuyez sur la touche PAU (10) pour (1) pendant plusieurs secondes pour mettre en pause la lecture. Appuyez sur la effectuer une avance rapide/rembobinage touche à...
  • Seite 60: Connexion

    MODE OPERATOIRE avant, vous devez effectuer 5) En cas d’échec du pairage, “END” reconnexion. s’affiche à l’écran. Vous pouvez presser et maintenir enfoncée la 4) Lorsque vous éteignez le téléphone touche PAIR (10) à nouveau pour portable lorsque celui-ci est lié à l’unité, lors de la nouvelle mise en tenter le pairage à...
  • Seite 61: Audio Bluetooth (Fonction A2Dp)

    MODE OPERATOIRE AUDIO BLUETOOTH (FONCTION NUMEROS COMPOSES, LISTE DES A2DP) APPELS ABSENCE, L’unité supporte la fonction Audio REPERTOIRE (téléphone portable) et Bluetooth. Lorsque votre téléphone REPERTOIRE (carte SIM) veuillez portable prend en charge le mode audio stéréo et que le pairage est vous référer à...
  • Seite 62: Spécifications

    SPECIFICATIONS GENERAL Alimentation : CC 12 Volts, mise à la terre Dimensions du châssis : 178 (L) x 160 (l) x 50 (H) Commandes de réglage du son Basses (à 100 Hz) : ±10 dB Aigus (à 10 kHz) : ±10 dB Puissance de sortie maximale Version Y : 4x40 watts...
  • Seite 63: Dépannage

    DEPANNAGE Avant de lire cette liste, vérifiez les raccordements des câbles. Si le problème persiste une fois que vous avez vérifié la liste suivante, consulter un centre de réparation. Problème Cause Solution Le contact de la voiture Si l’alimentation électrique est Impossible de n’est pas démarré.
  • Seite 64 MANUAL DEL USUARIO Sistema de audio móvil AR 819 BT/USB/Card Radio estéreo con sintetizador PLL Guardado automático de memoria Función RDS USB e interfaz para tarjetas SD/MMC Función manos libres Bluetooth y transmisión de audio estéreo A2DP (Advanced Audio Distribution Profile) Panel desplegable extraíble...
  • Seite 65 ÍNDICE Instalación ...........65 Uso SD/MMC........77 Quitar tornillos antes de instalar....65 Uso Bluetooth ........78 Montaje frontal DIN (Método A).....65 Preparativos para el uso....78 Instalar la unidad ....... Emparejamiento ........78 Quitar la unidad .........66 Conexión ........... T-menu ..........Montaje trasero DIN (Método B) ...67 Contestar MANU ANSl ......79 Uso del panel frontal extraíble...
  • Seite 66: Instalación

    INSTALACIÓN Notas: Elija la ubicación de montaje donde la unidad no interfiera con la conducción del vehículo. Antes de instalar la unidad, conecte los cables temporalmente y asegúrese de que todo esté bien conectado y que la unidad sistema funcionen correctamente.
  • Seite 67: Quitar La Unidad

    INSTALACIÓN para unir un extremo de la tira al perno unidad. Entonces saque funda de sujeción de la parte trasera de la deslizándola fuera de la unidad. unidad. De ser necesario, doble la tira metálica para que quepa en el área de montaje de su vehículo.
  • Seite 68: Montaje Trasero Din (Método B)

    INSTALACIÓN 3. Pulse el botón liberador para quitar el lados. panel frontal. Nota: El anillo exterior, la funda y la tira 4. Levante la parte superior del anillo metálica no se utilizan en el método de exterior y después jálelo para sacarlo. instalación B.
  • Seite 69: Uso Del Panel Frontal Extraíble

    USO DEL PANEL FRONTAL EXTRAÍBLE 2. Cuando los dos lados quede fijos en sus Para extraer el panel frontal lugares, empuje el panel frontal en la 1. Pulse el botón liberador ( ) y el panel unidad principal. frontal se plegará hacia abajo. 3.
  • Seite 70: Conexiones Eléctricas

    CONEXIONES ELÉCTRICAS CONEXIÓN ISO Downloaded from www.Manualslib.com manuals search engine...
  • Seite 71: Ubicación De Teclas

    FUNCIONAMIENTO UBICACIÓN DE TECLAS 1. / (Botones Sintonizar/Buscar/Pista 15.6 DIR+ siguiente/anterior) 16. Interfaz USB (botón liberador) 17. 9 PTY 3. Mic 18. SCAN (contestar) 19. 0 DSP/RE-CCN 5.PAIR/MOD 20. AS/PS/*/+/Navi-SCH 6.T-MENU/TRANSFER 21. 7 AF 7.LCD 22. 8 EQ/TA 8. 5 DIR- 23.
  • Seite 72: Operaciones Básicas

    FUNCIONAMIENTO para seleccionar: OPERACIONES BÁSICAS ENCENDER/APAGAR LA UNIDAD →FLAT→CLAS→POP M→ROCK→DSP OFF Pulse el botón (14) para encender la unidad. Cuando la unidad esté encendida, pulse y sostenga el botón (14) para apagar la unidad. FUNCIÓN DE REINICIO El botón RESET (23) debe activarse ya sea LIBERAR LA CARÁTULA con un bolígrafo o un objeto metálico Pulse el botón...
  • Seite 73: Entrada Auxiliar

    FUNCIONAMIENTO seleccionar Europe o USA. para sintonizar una preprogramación. La estación correspondiente número P1~P6 ENTRADA AUXILIAR parpadeará en la pantalla LCD. La unidad puede conectarse con un reproductor de audio portátil usando la BÚSQUEDA toma de entrada AUX IN (30) del panel Pulse el botón SCAN (18) para entrar al frontal.
  • Seite 74 FUNCIONAMIENTO únicamente las AF que tenga PI segundos, radio Diferente (DPI).Modo MASK ALL: sintonizará la siguiente estación ocultará las AF que tengan PI que no tenga la misma estación (PI) Diferente y las señales SIN RDS con que la estación anterior, pero que fuerza de campo elevada.
  • Seite 75: Uso Usb

    FUNCIONAMIENTO Uso USB último nivel. En el panel frontal de la unidad, hay una Cuando el modo TA esté encendido, se interfaz USB (16). Podrá conectar una encenderá segmento memoria USB usando esta interfaz (16). individual. Cuando conecte una memoria USB usando Cuando se reciba una estación TP, se la interfaz, la unidad buscará...
  • Seite 76: Reproducción Aleatoria De Archivos

    FUNCIONAMIENTO Pulse y sostenga el botón RPT (13) para Pulse el botón AS/PS (D-AUD) (20) dos repetir todos los archivos de la carpeta veces. Entrará a la búsqueda por actual. “D-RPT” aparecerá en el LCD. nombre de directorio o archivo en un Púlselo de nuevo para salir de este modo.
  • Seite 77 INSTALACIÓN Velocidad Modos Estándar Si el título seleccionado es un directorio, la (kbps) admitidos pantalla mostrará (‘ ‘), y entonces MPEG1 Audio 32,48,64,96, Estéreo botones Layer 3 128,192,256, TUNE/SEEK/TRACK UP/DOWN (44.1kHz) para mostrar todas las canciones de Windows 64,96,128,192 Estéreo ese directorio y elegir el título.
  • Seite 78: Uso Sd/Mmc

    FUNCIONAMIENTO USO SD/MMC Véase abajo, la interfaz SD/MMC está en Cuando reproduzca una canción, pulse el la carcasa de la unidad. botón (10) para pausar reproducción. Púlselo de nuevo para Intefaz SD/MMC reanudar la reproducción. Cuando reproduzca una canción, pulse el botón RPT (13) brevemente para repetir la canción actual, apareciendo “S-RPT”...
  • Seite 79: Uso Bluetooth

    FUNCIONAMIENTO la pista anterior. Cuando reproduzca una canción, pulsar y Podrá pulsar y sostener el botón PAIR sostener el botón (1) más de varios (10) de nuevo para volver a intentar el segundos retrocederá/adelantará emparejamiento. rápidamente la reproducción. Y la pantalla 6) Nota: mostrará...
  • Seite 80: T-Menu

    FUNCIONAMIENTO número que quiera marcar. (Nota: 4) Si apaga el móvil que se emparejó pulse brevemente botón con la unidad, cuando encienda el introducirá el carácter “*”, pulsar y móvil tendrá realizar sostener botón introducirá reconexión. carácter “+”). Entonces pulse el botón T-MENU (4) de nuevo para marcar el Cuando el emparejamiento haya tenido...
  • Seite 81 INSTALACIÓN de la unidad para elegir la pista anterior/siguiente. (Depende teléfono móvil, teléfonos móviles diferentes tienen distintas características.) Nota: Cuando reproduzca música, no podrá realizar ninguna llamada. Cuando haya una llamada entrante podrá elegir contestarla o rechazarla. Downloaded from www.Manualslib.com manuals search engine...
  • Seite 82: Especificaciones

    ESPECIFICACIONES GENERAL Requisitos de suministro eléctrico : DC de 12 voltios, tierra negativa Dimensiones de la carcasa : 178 (An.) x 160 (F.) x 50 (Al.) Controles de tono Graves (a 100 Hz) : ±10 dB Agudos (a 10 kHz) : ±10 dB Potencia máxima de salida Versión Y...
  • Seite 83: Problemas Y Soluciones

    PROBLEMAS Y SOLUCIONES Antes de revisar el cuadro, revise las conexiones de los cables. Si alguno de los problemas persiste después de revisar el cuadro, consulte a su distribuidor de servicio más cercano. Síntoma Causa Solución El coche está apagado. Si el suministro eléctrico está...
  • Seite 84 HANDLEIDING Mobiel Audiosysteem AR 819 BT/USB/Card Stereoradio met PLL synthesizer Automatische geheugenopslag RDS-Functie USB&SD/MMC-kaartinterface Bluetooth Hands-free functie & A2DP (Advanced Audio Distribution Profile) stereo audio-overdracht Neerklapbaar afneembaar paneel Auxiliary invoer-functie Downloaded from www.Manualslib.com manuals search engine...
  • Seite 85: Het Apparaat Verwijderen

    INHOUDSOPGAVE Alle bestanden previewen ....94 Installatie ..........83 Hetzelfde bestand herhalen....94 Haal vóór installatie de schroeven eruit...83 Alle bestanden willekeurig afspelen ..95 DIN-Montage aan voorkant (Methode A) Gebruik van SD/MMC......97 .............. 83 Gebruik van Bluetooth .......98 Het apparaat installeren ....83 Voorbereiden voor gebruik Bluetooth..98 Het apparaat verwijderen ....
  • Seite 86: Installatie

    INSTALLATIE Opmerkingen: HAAL VÓÓR INSTALLATIE DE SCHROEVEN Kies een geschikte monteerpositie, ERUIT waar het apparaat de bestuurder niet Verwijder de twee schroeven vóór de hindert tijdens het besturen. installatie van het apparaat. Sluit vóór het installeren van het apparaat tijdelijk de bedrading aan en zorg er voor dat alles juist verbonden is en dat het systeem juist werkt.
  • Seite 87 INSTALLATIE draden bekneld raken. huls van het apparaat los, zodat u deze 8. Schuif het apparaat in de huls tot hij op kunt verwijderen. Steek de sleutels (met zijn plaats vastklikt. de inkepingen naar boven) zo ver 9. Gebruik om de achterkant van het mogelijk daarvoor bestemde...
  • Seite 88 INSTALLATIE Het apparaat verwijderen 1. Zorg ervoor dat het contactslot van de auto is uitgeschakeld. Maak de kabel los van de negatieve (-) accupool. 2. Verwijder de metalen beugel (indien geïnstalleerd) aan de achterkant van het apparaat los. 3. Druk op de ontgrendelknop om het voorpaneel af te nemen.
  • Seite 89: Het Afneembaar Frontpaneel Gebruiken

    HET AFNEEMBARE FRONPANEEL GEBRUIKEN Het Voorpaneel losmaken 2. Druk voorpaneel 1. Druk op de ontgrendel ( ) knop, het hoofdapparaat als de twee kanten op voorpaneel zal worden neergeklapt. hun plaats vastzitten, OPEN 2. Til het voorpaneel om het te verwijderen op met een kleine hoek en trek eerst de 3.
  • Seite 90: Bekabeling

    BEKABELING ISO AANSLUITING Downloaded from www.Manualslib.com manuals search engine...
  • Seite 91: Plaatsing Van Toetsen

    BEDIENING LOCATIE VAN TOETSEN (tune/zoek/track 15.6 DIR+ knop omlaag/omhoog knoppen) 16.USB-interface (ontgrendelknop) 17.9 PTY-knop 3. Mic 18. SCAN-knop (opnemen) 19.0 DSP/RE-CCN-knop 5.PAIR/MOD-knop 20. AS/PS/*/+/Navi-SCH-knop 6.T-MENU/TRANSFER-knop 21.7 AF-knop 7.LCD 22.8 EQ/TA-knop 8.5 DIR- knop 23. .AUX IN 9.4 SHF-knop (ophangen) BND/LOUD /CLR-knop 10.1 PAU-knop 25.
  • Seite 92: Basis Bediening

    BEDIENING →FLAT→CLAS→POP M→ROCK→DSP UIT BASIS BEDIENING HET APPARAAT AAN-/UITZETTEN Druk op de knop (14) om het apparaat aan te zetten. Druk wanneer het apparaat RESET-FUNCTIE aan staat de knop (14) in en houd deze RESET-knop (29) moet worden ingedrukt om het apparaat uit te zetten. ingedrukt met de een balpen of een dun metalen voorwerp.
  • Seite 93: Auxiliary Invoer

    BEDIENING Staten) te selecteren. Corresponderende zendernummer ,P1~P6, zal knipperen op AUXILIARY INVOER het LCD. De speler kan met behulp van de AUX IN stekkeringang (30) op het voorpaneel SCAN worden verbonden met een draagbare Druk op de SCAN-knop (18) om de audio-speler.
  • Seite 94 BEDIENING TP-informatie (verkeersinformatie), MASK ALL-modus: onderdruk de dan stemt de radio af op de AF’s andere volgende zender met een ander krachtige GEEN RDS signalen. programma die wel TP-informatie REGION: OFF/ON (UIT/AAN) heeft. Regionale-modus AAN: AF switching Als de huidige zender langer dan de of PI SEEK wordt geïmplementeerd ingestelde periode...
  • Seite 95: Gebruik Van Usb

    BEDIENING ingesteld op het laatst ingestelde GEBRUIK VAN USB niveau. Op het voorpaneel van het apparaat zit een Als TA-modus is ingeschakeld, dan USB-interface (16). U kunt met deze wordt TA van het individuele segment interface (16) een USB-schijf aansluiten. ingeschakeld.
  • Seite 96: Tracks Selecteren

    BEDIENING enter-knop drukt. Druk en houd de RPT-knop (13) ingedrukt Map- of Bestandsnaam Zoeken om alle bestanden in de huidige map te Druk twee keer AS/PS herhalen, “D-RPT” (D-AUD)-knop (20). De speler gaat in verschijnen. Druk nogmaals op de knop om “Map- Bestandsnaam de modus te verlaten.
  • Seite 97 BEDIENING Ondersteunde OMHOOG/OMLAAG knoppen en Standaard Bitrate (kbps) Modus BND/LOU/ENT-knop om te bevestigen. MPEG1 Audio 32,48,64,96, Stereo Als de geselecteerde titel een liedje is, Layer 3 128,192,256, dan start het afspelen. (44.1kHz) Als de geselecteerde titel een map is, Windows 64,96,128,192 Stereo dan zal het display (‘...
  • Seite 98: Gebruik Van Sd/Mmc

    BEDIENING te spelen. GEBRUIK VAN SD/MMC Hieronder aangegeven waar SD/MMC-interface in de behuizing zit. Druk onder het afspelen op de PAU-knop (10) om het afspelen te pauzeren. Druk nogmaals om het afspelen te hervatten. Druk tijdens het afspelen kort op de RPT-knop (13) om het huidige nummer te herhalen, er zal “S-RPT”...
  • Seite 99: Gebruik Van Bluetooth

    BEDIENING seconde heeft afgespeeld, dan zal u met PAIR-knop (10) indrukken een druk op naar het vorige nummer ingedrukt houden om het nogmaals te gaan. proberen. Druk en houd de knop (1) onder het 6) Tijdens het koppelen werken alleen afspelen ingedrukt om vooruit- of terug te knop (2), (volume...
  • Seite 100: T-Menu

    BEDIENING u het voorpaneel opnieuw installeert. BOOK(SIM Card). Raadpleeg de 4) Als u de mobiele telefoon die T-MENU sectie. gekoppeld is uitschakelt, dan moet deze na opnieuw ingeschakeld te zijn 2) Een uitgaande oproep plaatsen door opnieuw worden verbonden. het telefoonnummer handmatig in te T-MENU voeren.
  • Seite 101 BEDIENING over te schakelen voordat de oproep is beantwoord. BLUETOOTH AUDIO (A2DP-FUNCTIE) De speler ondersteunt de Bluetooth audio-functie. Als uw mobiele telefoon stereo-audio kan afspelen en het koppelen is gelukt, dan kunt u het apparaat waar u mee heeft gekoppeld de audio laten afspelen.
  • Seite 102: Specificaties

    SPECIFICATIES ALGEMEEN Voeding : DC 12 Volt, Negatieve Aarding Chassis Afmetingen : 178 (B) x 160 (D) x 50 (H) Toonregeling Bass (op 100 Hz) : ±10 dB Treble (op 10 kHz) : ±10 dB Maximaal vermogen Versie Y : 4x40 watt Stroomverbruik Versie Y : 15 Ampere (max.)
  • Seite 103: Problemen Oplossen

    PROBLEMEN OPLOSSEN Controleer de bekabeling vóór u deze checklist doorneemt. Raadpleeg uw dichtstbijzijnde dealer als een probleem zich blijft voordoen nadat u door deze checklist bent heengegaan. Symptoom Oorzaak Oplossing Het contact van de auto is Als de voeding is aangesloten Geen stroom.

Inhaltsverzeichnis