
Verwandte Anleitungen für Atag MX4570G


Inhaltszusammenfassung für Atag MX4570G
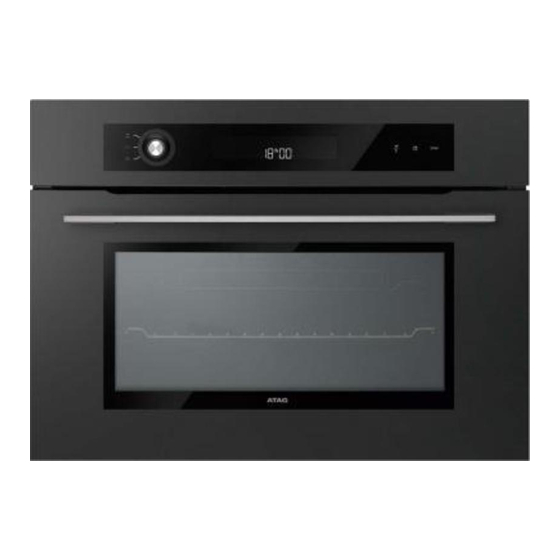
- Seite 1 Gebruiksaanwijzing Combi magnetron Mode d’emploi Micro-onde combiné Bedienungsanleitung Kombi-Mikrowelle Instructions for use Combi microwave MX4570G...
- Seite 2 Handleiding NL 3 - NL 34 Notice dútilisation FR 3 - FR 34 Anleitung DE 3 - DE 34 Manual EN 3 - EN 34 Gebruikte pictogrammen - Pictogrammes utilisés Benutzte Piktogramme - Pictograms used Belangrijk om te weten - Important à savoir Wissenswertes - Important information Tip - Conseil Tipp - Tip...
-
Seite 3: Inhaltsverzeichnis
INHOUD Uw magnetronoven Inleiding Inleiding tot uw oven Inleiding tot de display Toebehoren De oven gebruiken Hoe uw oven werkt De display gebruiken Geprogrammeerd koken (kooktijd en/of eindtijd instellen) De aanbevolen temperatuur aanpassen De timerfunctie Toetsen vergrendelen (kinderslot) De stand-by functie Het displaycontrast aanpassen De demonstratiestand Traditionele kookfuncties... -
Seite 4: Uw Magnetronoven
UW MAGNETRONOVEN Inleiding Gefeliciteerd met de keuze voor een magnetronoven van ATAG. Dit product is ontworpen met het oog op eenvoudige bediening en optimaal gemak. Met de uitgebreide instelmogelijkheden kunt u altijd de juiste bereidingswijze kiezen. In deze handleiding wordt beschreven hoe u optimaal gebruik kunt maken van deze magnetronoven. -
Seite 5: Inleiding Tot Uw Oven
UW MAGNETRONOVEN Inleiding tot uw oven A. Besturingspaneel B. Knop C. Handvat 1. Traditionele kookfuncties 2. Kookfuncties van de magnetron 3. Gecombineerde kookfuncties met de magnetron NL 5... -
Seite 6: Inleiding Tot De Display
UW MAGNETRONOVEN Inleiding tot de display stop Kookfunctiedisplay Kooktijdsymbool Kooktijd/timerdisplay Timersymbool Einde van de kooktijd-symbool Klokdisplay Indicator voor temperatuurstijging Roostersteunindicator Toetsenvergrendelingsymbool (kinderslot) Oventemperatuurdisplay Tiptoets om temperatuur/vermogen in te stellen Tiptoets voor tijd, kooktijd, einde van de kooktijd en timer Stop-tiptoets NL 6... -
Seite 7: Toebehoren
UW MAGNETRONOVEN Toebehoren Het rooster: Rear • Hierop kunt u roosteren, gratineren en grillen. Het rooster mag nooit tegelijk met ander metalen kookgerei worden gebruikt wanneer een van de volgende functies wordt gebruikt: magnetron, magnetron + grill, Front of magnetron + heteluchtcirculatie. U kunt wel voedsel opwarmen in een aluminium bakje als dit van het rooster wordt geïsoleerd met een schaal of bord. -
Seite 8: De Oven Gebruiken
DE OVEN GEBRUIKEN Hoe uw oven werkt De microgolven die worden gebruikt voor koken zijn elektromagnetische golven. Ze worden vaak in onze omgeving aangetroffen in de vorm van radiogolven, licht en infrarode stralen. De frequentie bevindt zich in het 2450 MHz-bereik. De werking: •... -
Seite 9: Geprogrammeerd Koken (Kooktijd En/Of Eindtijd Instellen)
DE OVEN GEBRUIKEN Waarschuwing! Als de instelling niet is bevestigd, wordt de aanpassing na een paar seconden automatisch opgeslagen in het apparaat. Onmiddellijk beginnen met koken De display dient alleen de tijd weer te geven. De tijd dient niet te knipperen. - Seite 10 DE OVEN GEBRUIKEN De BOOST-indicator toont de temperatuurstijging in de oven. De kooktijddisplay stopt met knipperen. Wanneer deze stappen zijn voltooid, wordt de oven opgewarmd. Een reeks piepsignalen geeft aan wanneer de oven de gewenste temperatuur heeft bereikt. Aan het einde van de (geprogrammeerde) kooktijd: •...
-
Seite 11: De Aanbevolen Temperatuur Aanpassen
DE OVEN GEBRUIKEN Aan het einde van de (geprogrammeerde) kooktijd: • De oven stopt en het kooktijdsymbool en '0.00' uur knipperen. • Gedurende een paar minuten klikt een reeks piepsignalen. De piepsignalen kunnen worden gestopt door op een willekeurige knop te drukken. -
Seite 12: Toetsen Vergrendelen (Kinderslot)
DE OVEN GEBRUIKEN Toetsen vergrendelen (kinderslot) U kunt voorkomen dat de oven wordt gebruikt door de bediening als volgt te vergrendelen: • wanneer de oven uit is, drukt u gedurende een paar seconden de toetsen 'STOP' en 'TIME' gelijktijdig in. Vervolgens wordt een slotje weergegeven op het scherm. -
Seite 13: De Demonstratiestand
DE OVEN GEBRUIKEN De demonstratiestand Stel de tijd in op 00.00 uur (zie "De tijd opnieuw instellen") • Druk de knoppen 'TEMPERATUUR', 'TIJD' en 'STOP' gedurende minimaal 10 seconden gelijktijdig in totdat 'DEMO' wordt weergegeven in de display. • Als u wilt terugkeren naar de normale stand, stelt u de tijd in op '00.00' uur en drukt u de knoppen 'TEMPERATUUR', 'TIJD' en 'STOP' opnieuw gelijktijdig in totdat DEMO verdwijnt van de display Opmerking... -
Seite 14: Kookfuncties Van De Magnetron
DE OVEN GEBRUIKEN GRILL (aanbevolen 3 standen, min. 1, max. 3) • De temperatuur wordt geregeld door het bovenste verwarmingselement. • De dubbele grill werkt op het hele roosteroppervlak. Voor kleinere hoeveelheden is de gematigde grill even effectief als de hoge grill. •... -
Seite 15: Magnetron
DE OVEN GEBRUIKEN Magnetron De display dient alleen de tijd weer te geven. De tijd dient niet te knipperen. • Selecteer de vereiste kookfunctie met de knop. - Bijvoorbeeld: Magnetronvermogen 1000 W, • Bevestig door één keer op de knop te drukken. De kooktijd knippert in de display. -
Seite 16: Ontdooien
DE OVEN GEBRUIKEN Ontdooien Met deze oven kunt u twee verschillende programma's gebruiken in de ontdooifunctie. Automatisch ontdooiprogramma P1 of P2. U selecteert eenvoudig het soort programma en voert het gewicht in. P1: Het automatische ontdooiprogramma voor vlees, gevogelte en kant-en-klare maaltijden. -
Seite 17: Handleiding Voor Het Ontdooien
DE OVEN GEBRUIKEN Tijdsduur van het ontdooiprogramma De tijdsduur van ontdooiprogramma's is berekend voor voedingsmiddelen met een temperatuur van -18°C. Dit geeft u een indicatie van de benodigde ontdooitijd, maar de werkelijke tijd hangt ook af van de dikte, vorm, grootte en verpakking van het voedingsmiddel. -
Seite 18: Heteluchtcirculatie + Magnetron
DE OVEN GEBRUIKEN Voedingsmiddel Hoeveelheid Tijd Aardbeien 250 g 7 - 9 min. Frambozen/kersen 250 g 6 - 8 min. Aalbessen/bosbessen/ 250 g 5 - 7 min. zwarte bessen Heteluchtcirculatie + magnetron Met de functie heteluchtcirculatie + magnetron kunt u het koken met de magnetron combineren met koken met heteluchtcirculatie, waardoor u veel tijd bespaart. -
Seite 19: Grill + Magnetron
DE OVEN GEBRUIKEN Programmering Voedingsmiddel Hoeveelheid Magnetron + Tijd (min.) Tips hete lucht Lamsschouder In de braadslee, 1.300 g 200 W + 200 °C 32 - 37 met bot niveau 2 In een schotel op Lendestuk 800 g 200 W + 200 °C 23 - 28 het rooster, niveau 2 In een schotel op... -
Seite 20: Grill
DE OVEN GEBRUIKEN Voedingsmiddel Hoeveelheid Programmering Tijd Lamsschouder (zonder bot en 1.300 g 200 W + Grill hoog 40 - 45 min. opgebonden) Lendestuk 800 g 200 W + Grill hoog 18 - 23 min. Kip, parelhoen 1.200 g 500 W + Grill hoog 25 - 27 min. -
Seite 21: Heteluchtcirculatie
DE OVEN GEBRUIKEN Heteluchtcirculatie Met de functie heteluchtcirculatie kunt u gerechten bereiden en van een bruin korstje voorzien als in een traditionele oven. Tips • De baktemperatuur kan worden ingesteld van 50 tot 220 °C, in stappen van 5 °C. •... - Seite 22 DE OVEN GEBRUIKEN Niveau Tijd in Voedingsmiddel Traditioneel Turbo grill Grill rooster minuten Bereid (goudbrasem, zalm, 35-45 heek) Groenten Gegratineerde 55-60 aardappelschotel Lasagne 40-45 Gevulde tomaten 45-55 Gebak/pastei Savoie-gebak 35-45 Moskovisch gebak 35-45 Rolcake Cake 45-60 Koekjes 18-22 Zandkoekjes 20-25 Room (au bain-marie) 35-40 Madeleines...
-
Seite 23: Handleiding Voor Werken Met Gecombineerde Warmte - Heteluchtcirculatie
DE OVEN GEBRUIKEN Handleiding voor werken met gecombineerde warmte - heteluchtcirculatie Niveau Voedingsmiddel Traditioneel Turbo grill Tijd in minuten rooster Vlees Varkensgebraad (1 kg) 160 °C Kalfsgebraad (1 kg) 180 °C 70-75 Runderbraadstuk (1 kg) Lam (bout, schouder, 1,5 kg) 180 °C 55-60 Varkens- of lamskarbonades... -
Seite 24: Automatische Bereidingsfuncties
DE OVEN GEBRUIKEN Niveau Voedingsmiddel Traditioneel Turbo grill Tijd in minuten rooster Kruimeldeegtaart 200 °C 30-40 Bladerdeegtaart * 220 °C 30-40 Diversen Paté (1 kg) 200 °C 80-90 Pastei/hartige taart in 180 °C 170 °C 40-65 korstdeeg Quiche 205 °C 30-35 Bereidingen in gesloten pan 160 °C... -
Seite 25: Handleiding Voor Automatisch Bereiden
DE OVEN GEBRUIKEN Opmerking Er zijn twee automatische programma's voor het bereiden van groenten: P5 en P6 (zie het hoofdstuk "Handleiding voor automatisch bereiden"). Voor quiches en verse taarten worden automatische bakprogramma's niet berekend op basis van gewicht, maar op basis van een schaaldiameter tussen 27 en 30 cm. - Seite 26 DE OVEN GEBRUIKEN Met deze functie kan een hele kip of kipstukken (poten) van 500 tot 2.000 g worden bereid en van een bruin worden voorzien. Het bereiden gebeurt met de magnetron + heteluchtcirculatie en/of de grill. Gebruik een hittebestendige schaal die geschikt is voor magnetronovens, bij voorkeur van aardewerk (minder vetspatten dan bij glas).
- Seite 27 DE OVEN GEBRUIKEN Met deze functie kunt u kant-en-klare diepvriesgerechten van 250 tot 1.000 g opwarmen en gratineren (lasagne bolognese, gegratineerde aardappels, rundergehakt met puree, gegratineerde vis, etc.). P8: Gratin - Het opwarmen of bereiden gebeurt met de functie grill + magnetron. diepgevroren Haal het product uit de verpakking en plaats het in een magnetron- en hittebestendige schaal.
-
Seite 28: Onderhoud En Reiniging
ONDERHOUD EN REINIGING Reinigen Aanbevolen wordt om uw oven regelmatig te reinigen en voedselresten aan de binnen- en buitenkant van het apparaat te verwijderen. Gebruik een vochtige spons met een zeepoplossing. Als het apparaat niet regelmatig wordt gereinigd, kan het oppervlak beschadigd raken, waardoor de levensduur van het apparaat kan worden bekort en mogelijk een veiligheidsrisico wordt veroorzaakt. -
Seite 29: Problemen Oplossen
Controleer daarom eerst de punten in de onderstaande tabel of ga naar de website www. atag.nl voor meer informatie. Als u denkt dat het apparaat niet goed werkt, hoeft het niet per se defect te zijn. -
Seite 30: Technische Gegevens
PROBLEMEN OPLOSSEN Storingscode Betekenis Defecte sensor Oven is te heet Informatie: stroomonderbreking tijdens cyclus AUTO Automatische stop: kooktijd te lang Technische gegevens Op de identificatiekaart van het apparaat staan de aansluitwaarde (W), de vereiste spanning (V) en de frequentie (Hz). Dit apparaat voldoet aan alle betreffende EU-richtlijnen. -
Seite 31: Installatie
• de stekker van het apparaat is verwijderd uit het stopcontact. Defecte onderdelen mogen alleen worden vervangen door originele ATAG-onderdelen. Alleen van die onderdelen garandeert ATAG dat ze voldoen aan de veiligheidsvoorschriften. Om gevaarlijke situaties door beschadiging van het elektriciteitssnoer te voorkomen, mag dit alleen worden vervangen door de fabrikant, de serviceorganisatie van de fabrikant of door een erkend vakman. -
Seite 32: Inbouwafmetingen
INSTALLATIE Inbouwafmetingen min. min. min. 560 min. min. min. min. Elektrische aansluiting 220–240 V~ - 50 Hz • Stekker en stopcontact moeten altijd bereikbaar zijn. • Voorkom dat het netsnoer in contact komt met delen van de oven die heet kunnen worden. •... -
Seite 33: Inbouwen
INSTALLATIE Inbouwen min. 550 min. 550 • Het apparaat kan worden geïnstalleerd onder een werkblad of in een wandkast (open of gesloten) met de juiste afmetingen voor verzonken installatie (zie inbouwafmetingen). • Gebruik uw apparaat niet onmiddellijk (wacht ongeveer 1 tot 2 uur) nadat u het apparaat hebt verplaatst van een koude naar een warme ruimte, aangezien de condensatie een defect kan veroorzaken. -
Seite 34: Uw Oven En Het Milieu
UW OVEN EN HET MILIEU Weggooien van verpakking en apparaat Tijdens de fabricage van dit apparaat is gebruik gemaakt van duurzame materialen. Gooi het apparaat op een verantwoorde manier weg aan het eind van de levenscyclus. Informeer bij de plaatselijke autoriteiten hoe u dit kunt doen. - Seite 35 SOMMAIRE Votre four à micro-ondes Introduction Présentation de votre four Présentation du programmateur Accessoires Utilisation de votre appareil Comment fonctionne votre four Utilisation du four La cuisine programmée Personnalisation de la température recommandée Utilisation de la fonction minuterie Verrouillage des commandes du four (sécurité enfants) La fonction «...
-
Seite 36: Votre Four À Micro-Ondes
VOTRE FOUR À MICRO-ONDES Introduction Vous avez choisi un four à micro-ondes ATAG. La souplesse et la simplicité de l’utilisation sont les principes qui ont guidé son développement. Ses réglages très divers vous permettent de choisir exactement le mode de préparation que vous envisagez. -
Seite 37: Présentation De Votre Four
VOTRE FOUR À MICRO-ONDES Présentation de votre four A. Panneau de contrôle B. Bouton C. Poignée de porte 1. Modes de cuisson traditionnels 2. Modes de cuisson au micro-ondes 3. Modes de cuisson combinés au micro-ondes FR 5... -
Seite 38: Présentation Du Programmateur
VOTRE FOUR À MICRO-ONDES Présentation du programmateur stop Affichage du mode de cuisson Symbole du temps de cuisson Affichage temps de cuisson / « minuteur » Symbole du « minuteur » Symbole de fin de temps de cuisson Affichage de l’horloge Indicateur de montée en température Indicateur de support de la grille Symbole du clavier de verrouillage (sécurité... -
Seite 39: Accessoires
VOTRE FOUR À MICRO-ONDES Accessoires La grille: Rear • Elle permet de griller, de gratiner ou de dorer. La grille ne doit jamais être utilisée avec d’autres récipients métalliques en mode micro-ondes, gril + micro-ondes ou air pulsé + micro-ondes. Il est Front toutefois possible de réchauffer des aliments dans une barquette en aluminium, à... -
Seite 40: Utilisation De Votre Appareil
UTILISATION DE VOTRE APPAREIL Comment fonctionne votre four Les micro-ondes utilisées pour la cuisson sont des ondes électromagnétiques. On les rencontre fréquemment dans notre environnement sous la forme d’ondes radio, de rayons lumineux et de rayons infrarouges. Leur fréquence est de l’ordre de 2450 MHz. Leur comportement: •... -
Seite 41: La Cuisine Programmée
UTILISATION DE VOTRE APPAREIL Attention Si le réglage n’est pas confirmé, le réglage sera automatiquement enregistré dans l’appareil après quelques secondes. Cuisson immédiate Le programmateur doit seulement afficher l’heure. Il ne doit pas clignoter. • Utilisez le bouton pour sélectionner le réglage de cuisson désiré. •... - Seite 42 UTILISATION DE VOTRE APPAREIL Lorsque ces étapes sont terminées, le four chauffe. Une série de bips retentit lorsque le four a atteint la température désirée. À la fin du temps de cuisson (programmé): • Le four s’arrête, • l’affichage clignote, •...
-
Seite 43: Personnalisation De La Température Recommandée
UTILISATION DE VOTRE APPAREIL Personnalisation de la température recommandée Sélectionnez la fonction: • Appuyez sur le bouton pour confirmer. Si vous souhaitez personnaliser la température recommandée: • Appuyez sur le bouton température jusqu’à ce que la température de l’affichage de la température commence à clignoter. •... -
Seite 44: Verrouillage Des Commandes Du Four (Sécurité Enfants)
UTILISATION DE VOTRE APPAREIL Verrouillage des commandes du four (sécurité enfants) Vous avez la possibilité d’interdire l’accès aux commandes du four en procédant de la façon suivante : • Lorsque le four est éteint, appuyez simultanément sur les boutons « STOP » et « Temps » pendant quelques secondes. Une «... -
Seite 45: Mode Démo
UTILISATION DE VOTRE APPAREIL Mode Démo Réglez l’heure à 0:00 (voir chapitre « Remise à l’heure »). • Appuyez sur les touches « TEMPÉRATURE », « TEMPS » et « STOP » jusqu’à ce que « DEMO » apparaisse à l’écran. •... -
Seite 46: Types De Cuisson Au Micro-Ondes
UTILISATION DE VOTRE APPAREIL GRIL (position préconisée 3 - mini 1 - maxi 3) • La cuisson s’effectue par l’élément supérieur. • Le gril double couvre la surface entière de la grille. Le gril moyen est aussi efficace que le gril fort pour les petites quantités. -
Seite 47: Micro-Ondes
UTILISATION DE VOTRE APPAREIL Micro-ondes Le programmateur doit afficher uniquement l’heure. Il ne doit pas clignoter. • Utilisez le bouton pour sélectionner le réglage de cuisson désiré. - Exemple: Règlage de puissance du micro-ondes1000 W, • Validez en appuyant une fois sur le bouton. Le temps de cuisson clignote à... -
Seite 48: Décongélation
UTILISATION DE VOTRE APPAREIL Décongélation Ce four vous permet d’accéder à deux types de programmes différents en mode de décongélation. Programme automatique de décongélation P1 ou P2. Il vous suffit de sélectionner le type de programme et de saisir le poids. P1: Le mode de décongélation automatique pour la viande, la volaille et les plats préparés. -
Seite 49: Guide De Décongélation
UTILISATION DE VOTRE APPAREIL Durée du programme de décongélation La durée du programme de décongélation est calculée pour des aliments congelés à -18 °C. Cela vous donne une indication du temps de décongélation nécessaire, mais la durée réelle peut varier en fonction de l’épaisseur, de la forme, de la taille et du conditionnement de l’aliment. -
Seite 50: Chaleur Tournante + Micro-Ondes
UTILISATION DE VOTRE APPAREIL Aliments Quantité Temps Fraises 250 g 7 - 9 min Framboises/griottes 250 g 6 - 8 min Groseilles/myrtilles/cassis 250 g 5 - 7 min Chaleur tournante + micro-ondes La fonction chaleur tournante + micro-ondes vous permet de combiner les micro-ondes et la chaleur tournante, pour un gain de temps important. -
Seite 51: Gril + Micro-Ondes
UTILISATION DE VOTRE APPAREIL Programmation Temps Aliments Quantité Conseils MO + CT (min) Épaule d’agneau avec Dans la lèchefrite, 1300 g 200 W + 200 °C 32 - 37 niveau 2 Dans un plat, sur la Faux fi let 800 g 200 W + 200 °C 23 - 28 grille, niveau 2... -
Seite 52: Gril
UTILISATION DE VOTRE APPAREIL Aliments Quantité Programmation Temps Épaule d’agneau 1300 g 200 W + Gril fort 40 - 45 min (sans os et fi celée) Faux fi let 800 g 200 W + Gril fort 18 - 23 min Poulet, pintade 1200 g 500 W + Gril fort... -
Seite 53: Chaleur Tournante
UTILISATION DE VOTRE APPAREIL Chaleur tournante La fonction chaleur tournante vous permet de cuire et dorer les aliments comme dans un four traditionnel. Conseils • La température de cuisson est réglable de 50 °C à 220 °C, par pas de 5 °C. •... - Seite 54 UTILISATION DE VOTRE APPAREIL Niveau de Temps en Aliments Traditionnel Turbo gril Grils la grille minutes Poisson cuisiné (dorade, saumon, 35-45 colin) Légumes Gratin dauphinois 55-60 Lasagnes 40-45 Tomates farcies 45-55 Gâteaux Biscuit de Savoie 35-45 Génoise 35-45 Biscuit roulé Cake 45-60 Cookies...
-
Seite 55: Guide Chaleur Combinée - Chaleur Tournante
UTILISATION DE VOTRE APPAREIL Guide chaleur combinée - chaleur tournante Niveau de Aliments Traditionnel Turbo gril Temps en minutes la grille Viandes Rôti de porc (1 kg) 160 °C Rôti de veau (1 kg) 180 °C 70-75 Rôti de bœuf (1 kg) Agneau (gigot, épaule, 1,5 kg) 180 °C 55-60... -
Seite 56: Fonctions De Cuisson Automatique
UTILISATION DE VOTRE APPAREIL Niveau de Aliments Traditionnel Turbo gril Temps en minutes la grille Gâteau au fromage blanc 170 °C 170 °C 65-75 Kouglof 180 °C 45-50 Pâte à choux 170 °C 30-40 Tarte pâte feuilletée 200 °C 30-40 Tarte pâte brisée * 220 °C 30-40... -
Seite 57: Guide De Cuisson Automatique
UTILISATION DE VOTRE APPAREIL Remarque Il y a deux possibilités de programmes automatiques pour la cuisson des légumes: P5 et P6 (voir chapitre « Guide de cuisson automatique »). Pour les quiches et les tartes fraîches, les programmes de cuisson automatiques ne sont pas calculés en poids, mais sur la base d’un diamètre de plat entre 27 et 30 cm. - Seite 58 UTILISATION DE VOTRE APPAREIL Cette fonction permet de cuire et dorer un poulet entier ou en morceaux (cuisses) de 500 g à 2 000 g. La cuisson se fait en fonction combinée micro-ondes + chaleur tournante et/ou gril. Utilisez un plat adapté aux micro-ondes et résistant aux températures élevées, de préférence en faience (moins de projections de graisse que le verre).
- Seite 59 UTILISATION DE VOTRE APPAREIL Cette fonction vous permet de cuire et dorer les gratins de pommes de terre pesant entre 500 g et 2000 g. La cuisson est effectuée en mode de micro-ondes combiné + gril. Utilisez un plat à gratin pour micro-ondes qui résiste à des températures élevées.
-
Seite 60: Entretien Et Nettoyage
ENTRETIEN ET NETTOYAGE Nettoyage Nous vous recommandons de nettoyer régulièrement votre four et d’enlever les déchets de nourriture à l’intérieur et à l’extérieur de l’appareil. Utilisez une éponge humide et savonneuse. Si l’appareil n’est pas nettoyé régulièrement, sa surface pourrait être endommagée de façon permanente affectant la durée de vie de l’appareil et cela pourrait provoquer un danger pour la sécurité. -
Seite 61: Diagnostic Des Pannes
Vérifiez toujours les points énumérés dans le tableau suivant ou consultez notre site www.atag.nl pour obtenir plus d’informations. Si l’appareil ne fonctionne pas correctement, cela ne signifie pas toujours qu’il est en panne. Vérifiez en tout cas les points suivants :... -
Seite 62: Données Techniques
DIAGNOSTIC DES PANNES Code d’erreur Signifi cation Erreur au niveau de la sonde (en haut à gauche) Four surchauffé Information : Coupure de courant pendant la cuisson AUTO Auto Stop: durée de cuisson trop longue Données techniques La plaque signalétique de l’appareil mentionne la valeur nominale totale, la tension nécessaire et la fréquence. -
Seite 63: Généralités
• la fiche a été débranchée. Les pièces défectueuses ne peuvent être remplacées que pas des pièces ATAG originales. Seules les pièces garanties par ATAG sont conformes aux exigences de sécurité. Afin d’éviter toute situation dangereuse résultant d’un câble de raccordement endommagé, celui-ci peut être remplacé... -
Seite 64: Dimensions D'encastrement
INSTALLATION Dimensions d’encastrement min. min. min. 560 min. min. min. min. Raccordement électrique 220–240 V~ -50 Hz • La fiche et la prise de courant doivent toujours être accessibles. • Veillez à ce que le câble ne puisse toucher les parties du four susceptibles de s’échauffer. -
Seite 65: Encastrement
INSTALLATION Encastrement min. 550 min. 550 • L’appareil peut être installé sous un plan de travail ou dans une unité murale (ouverte ou fermée) ayant les dimensions appropriées pour une installation encastrée (voir les dimensions d’encastrement). • Ne pas utiliser votre appareil immédiatement (attendez environ 1 à... -
Seite 66: Aspects Environnementaux
ASPECTS ENVIRONNEMENTAUX Mise au rebut de l’appareil et de l’emballage Des matériaux durables ont été utilisés dans la fabrication de cet appareil. Veillez à éliminer cet équipement de façon responsable à l’issue de son cycle de service. Demandez à vos autorités locales plus d’informations sur la façon de le faire. - Seite 67 INHALT Ihr mikrowellenofen Einführung Vorstellung des ofens Vorstellung der programmiervorrichtung Zubehör Verwendung des geräts Funktionsweise des ofens Verwendung der programmiervorrichtung Programmiertes garen Anpassen der empfohlenen temperatur Verwendung der timerfunktion Verriegelung der tasten (kindersicherung) Die „standby“-funktion Anpassen des displaykontrasts Demo-modus Garmodi mit ober- und unterhitze Mikrowellen-garmodi Mit mikrowelle kombinierte garmodi Mikrowellen...
-
Seite 68: Ihr Mikrowellenofen
IHR MIKROWELLENOFEN Einführung Sie haben sich für einen ATAG-Mikrowellenofen entschieden. Optimaler Benutzerkomfort und einfache Bedienung standen bei der Entwicklung dieses Produkts im Vordergrund. Die umfangreichen Anpassungsoptionen erlauben es Ihnen, immer die perfekte Zubereitungsart auszuwählen. In dieser Bedienungsanleitung wird beschrieben, wie Sie Ihren Mikrowellenofen optimal verwenden können. -
Seite 69: Vorstellung Des Ofens
IHR MIKROWELLENOFEN Vorstellung des ofens A. Bedienleiste B. Knopf C. Türgriff 1. Garmodi mit Ober- und Unterhitze 2. Mikrowellen-Garmodi 3. Mit Mikrowelle kombinierte Garmodi DE 5... -
Seite 70: Vorstellung Der Programmiervorrichtung
IHR MIKROWELLENOFEN Vorstellung der programmiervorrichtung stop Garmodusdisplay Garzeitsymbol Garzeit-/„Eieruhr“-Display „Eieruhr“-Symbol Symbol Garzeitende Uhr-Display Temperaturanstiegsanzeige Anzeige Einschubleiste Tastenverriegelungssymbol (Kindersicherung) Ofentemperatur-Display Touch-Taste Temperatur-/Leistungseinstellung Zeit, Garzeit, Garzeitende und „Eieruhr“ Touch-Taste Touch-Taste Stopp DE 6... -
Seite 71: Zubehör
IHR MIKROWELLENOFEN Zubehör Der Rost: • Hiermit können Sie toasten, überbacken oder grillen. Der Rost Rear sollte niemals mit anderem metallenem Kochgeschirr im Modus Mikrowelle, Grill + Mikrowelle oder Heißluft + Mikrowelle verwendet Front werden. Sie können jedoch Lebensmittel in einer Aluminiumschale aufwärmen, vorausgesetzt, diese ist durch eine Platte vom Rost isoliert. -
Seite 72: Verwendung Des Geräts
VERWENDUNG DES GERÄTS Funktionsweise des ofens Die zum Garen verwendeten Mikrowellen sind elektromagnetische Wellen. Sie finden sich normalerweise in unserer Umgebung in Form von Radiowellen, Licht und Infrarotstrahlung. Ihre Frequenz liegt im Bereich 2450 MHz. Ihr Verhalten: • Sie werden durch Metalle reflektiert. •... -
Seite 73: Programmiertes Garen
VERWENDUNG DES GERÄTS Achtung Wenn die Einstellung nicht bestätigt wird, wird die Änderung nach einigen Sekunden automatisch im Speicher des Geräts gespeichert. Sofortiges Garen Die Programmiervorrichtung sollte nur die Zeit anzeigen. Sie sollte nicht blinken. • Verwenden Sie den Knopf, um die erforderliche Gareinstellung auszuwählen. - Seite 74 VERWENDUNG DES GERÄTS Am Ende der (programmierten) Garzeit: • hält der Ofen an, • das Display blinkt, • eine Folge von Signaltönen ertönt für einige Minuten. Die Signaltöne können durch Drücken einer beliebigen Taste abgestellt werden. Achtung: Das Garen geschieht immer bei geschlossener Ofentür. Nach einem Garzyklus dreht sich der Kühlventilator eine Zeitlang weiter, um eine optimale Zuverlässigkeit des Ofens zu gewährleisten.
-
Seite 75: Anpassen Der Empfohlenen Temperatur
VERWENDUNG DES GERÄTS Anpassen der empfohlenen temperatur Wählen Sie die Garfunktion: • Drücken Sie den Knopf zur Bestätigung. Wenn Sie die empfohlene Temperatur anpassen möchten: • Drücken Sie den Temperaturschalter, bis die Temperaturanzeige zu blinken beginnt. • Drehen Sie den Bedienknopf, bis die Temperaturanzeige blinkt. •... -
Seite 76: Verriegelung Der Tasten (Kindersicherung)
VERWENDUNG DES GERÄTS Verriegelung der tasten (kindersicherung) Der Zugriff zu den Bedienelementen des Backofens kann folgendermaßen gesperrt werden: • wenn der Ofen abgestellt ist, drücken Sie einige Sekunden lang zugleich die STOPP- und die Zeittaste. Dann wird ein „Vorhängeschloss“ auf dem Bildschirm angezeigt. •... -
Seite 77: Demo-Modus
VERWENDUNG DES GERÄTS Demo-modus Die Uhrzeit auf 00:00 stellen (siehe Kapitel „Neueinstellung der Uhrzeit“) • Drücken Sie die Tasten ‘TEMPERATUR’, ‘ZEIT’ und ‘STOPP’ gleichzeitig, bis ‘DEMO’ auf dem Display erscheint. • Um zum Normalmodus zurückzukehren, stellen Sie die Zeit auf “00:00”... -
Seite 78: Mikrowellen-Garmodi
VERWENDUNG DES GERÄTS GRILL (empfohlene Position 3, mindestens 1, höchstens 3) • Das Garen erfolgt durch Oberhitze. • Der doppelte Grill bedeckt die gesamte Rostfläche. Für kleine Mengen ist Grill mittel ist genauso effektiv wie Grill stark. • Empfohlen zum Grillen von Koteletts, Würsten, Brotscheiben, Garnelen, die auf den Grill gelegt werden. -
Seite 79: Mikrowellen
VERWENDUNG DES GERÄTS Mikrowellen Die Programmiervorrichtung sollte nur die Zeit anzeigen. Sie sollte nicht blinken. • Verwenden Sie den Knopf, um die erforderliche Gareinstellung auszuwählen. - Beispiel: Mikrowellen-Leistungseinstellung 1.000 W, • Bestätigen Sie durch einmaliges Drücken des Knopfs. Die Garzeit blinkt auf dem Display. •... -
Seite 80: Abtauung
VERWENDUNG DES GERÄTS Abtauung Dieser Ofen gibt Ihnen Zugriff auf zwei verschiedene Arten von Programmen im Abtaumodus. Automatisches Abtauprogramm P1 oder P2. Sie wählen einfach die Art des Programms und geben das Gewicht ein. P1: Der automatische Abtaumodus für Fleisch, Geflügel und Fertiggerichte. P2: Der automatische Abtaumodus für Brot und Gebäck. -
Seite 81: Leitfaden Für Das Abtauen
VERWENDUNG DES GERÄTS Dauer des Auftauprogramms: Die Zeit des Auftauprogramms ist für Lebensmittel bei -18 °C berechnet. Dies gibt einen Anhaltspunkt für die erforderliche Auftauzeit, die tatsächliche Zeit kann jedoch nach Dicke, Form, Größe und Verpackung des Lebensmittels variieren. Leitfaden für das abtauen Nahrungsmittel Menge Dauer... -
Seite 82: Heißluft + Mikrowelle
VERWENDUNG DES GERÄTS Nahrungsmittel Menge Dauer Erdbeeren 250 g 7 - 9 Min. Himbeeren / Sauerkirschen 250 g 6 - 8 Min. Rote / schwarze Johannisbeeren / 250 g 5 - 7 Min. Heidelbeeren Heißluft + mikrowelle Durch die Funktion Heißluft + Mikrowelle können Sie Mikrowellengaren mit Heißluftgaren kombinieren und dadurch viel Zeit sparen. -
Seite 83: Grill + Mikrowelle
VERWENDUNG DES GERÄTS Programmierung Dauer Nahrungsmittel Menge Tipp: MW + HL (Min.) Lammschulter mit 1.300 g 200 W + 200 °C 32 - 37 Fettpfanne, Einschubhöhe 2 Knochen In einer Schüssel auf dem Rumpsteak 800 g 200 W + 200 °C 23 - 28 Rost, Einschubhöhe 2 Hähnchen/... -
Seite 84: Grill
VERWENDUNG DES GERÄTS Nahrungsmittel Menge Programmierung Dauer Lammschulter (ohne Knochen 1.300 g 200 W + Grill stark 40 - 45 Min. und ohne Umwicklung) Rumpsteak 800 g 200 W + Grill stark 18 - 23 Min. Hähnchen/Perlhuhn 1.200 g 500 W + Grill stark 25 - 27 Min. -
Seite 85: Heißluft
VERWENDUNG DES GERÄTS Heißluft Mit der Funktion Heißluft kann wie in einem herkömmlichen Ofen gegart und gebräunt werden. Tipp: • Die Gartemperatur ist in 5 °C-Schritten zwischen 50 °C und 220 °C regelbar. • Stellen Sie das Zubehör immer in der 1. oder 2. Einschubhöhe ein. - Seite 86 VERWENDUNG DES GERÄTS Einschub- Ober- und Heißluft- Zeit in Nahrungsmittel Grill leiste Unterhitze Grill Minuten Große Gefl ügelstücke 200 °C Kaninchen 40-45 Fisch Zubereitet (Goldbrasse, Lachs, 35-45 Dorsch) Gemüse Kartoffelgratin 55-60 Lasagne 40-45 Gefüllte Tomaten 45-55 Gebäck Biskuit de Savoie 35-45 Biskuitkuchen 35-45...
-
Seite 87: Gartabelle Kombinierte Hitze - Heißluft
VERWENDUNG DES GERÄTS Gartabelle kombinierte hitze - heißluft Einschub- Ober- und Heißluft- Zeit in Nahrungsmittel leiste Unterhitze Grill Minuten Fleisch Schweinebraten (1 kg) 160 °C Kalbsbraten (1 kg) 180 °C 70-75 Rinderbraten (1 kg) Lamm (Keule, Schulter, 1,5 kg) 180 °C 55-60 Schweinekotelett, Lamm Rinderrippenstück... -
Seite 88: Automatische Garfunktionen
VERWENDUNG DES GERÄTS Einschub- Ober- und Heißluft- Zeit in Nahrungsmittel leiste Unterhitze Grill Minuten Gugelhupf 180 °C 45-50 Windbeutel 170 °C 30-40 Mürbeteig-Tarte 200 °C 30-40 Blätterteig-Tarte * 220 °C 30-40 Sonstiges Fleischpastete in der Terrine (1 kg) 200 °C 80-90 Fleischpastete 180 °C... -
Seite 89: Anleitung Zum Automatischen Garen
VERWENDUNG DES GERÄTS Achtung: Es gibt zwei mögliche automatische Programme zum Garen von Gemüse: P5 und P6 (siehe Kapitel ‘Anleitung zum automatischen Garen’). Für Quiches und Torten werden automatische Garprogramme nicht nach Gewicht berechnet, sondern auf Grundlage eines Bodendurchmessers von 27 und 30 cm. Anleitung zum automatischen haren Diese Funktion dient dem Garen und Bräunen von Puten-, Schweine- oder Kalbsbraten mit einem Gewicht zwischen 500 g und 2.000 g. - Seite 90 VERWENDUNG DES GERÄTS Mit dieser Funktion können ganze Hähnchen oder Hähnchenstücke (Schenkel) von 500 g - 2.000 g gegart und gebräunt werden. Das Garen erfolgt mit der Kombifunktion Mikro-Heißluft und/oder Grill. Hitzebeständige, mikrowellengeeignete Schale, vorzugsweise aus Ton (weniger Fettspritzer als bei Glas) verwenden. Die Hähnchenschenkel können direkt in die P4: Gefl...
- Seite 91 VERWENDUNG DES GERÄTS Mit dieser Funktion können tiefgefrorene Fertiggerichte erhitzt und überbacken werden (Lasagne Bolognese, Kartoffel-Gratin, Hachis Parmentier, Fischaufl auf usw.), deren Gewicht zwischen 250 g und 1.000 g liegt. P8: Gratin - Das Erhitzen oder Garen erfolgt mit der Kombifunktion Mikrowelle + Grill. Entfernen Sie das Produkt aus der Verpackung und legen Sie es in ein gefroren mikrowellengeeignetes und hitzebeständiges Gefäß.
-
Seite 92: Wartung Und Reinigung
WARTUNG UND REINIGUNG Reinigen Es empfiehlt sich, den Ofen regelmäßig zu reinigen und Lebensmittelreste aus dem Inneren und von der Außenseite des Ofens zu entfernen. Verwenden Sie einen feuchten, seifigen Schwamm. Wenn das Gerät nicht regelmäßig gereinigt wird, kann die Oberfläche beschädigt werden, wodurch sich die Lebensdauer des Geräts verringert und möglicherweise Sicherheitsrisiken entstehen. -
Seite 93: Störungen
Defekt vorliegt. Überprüfen Sie zunächst die in der folgenden Tabelle aufgeführten Punkte, oder besuchen Sie unsere Website ‘www.atag.nl’ für weitere Informationen. Wenn Sie den Verdacht haben, dass das Gerät nicht richtig funktioniert, muss es nicht unbedingt defekt sein. Überprüfen Sie auf jeden Fall... -
Seite 94: Technische Daten
STÖRUNGEN Frage Was ist zu tun Das Gerät gründlich reinigen: Fett, Garreste usw. entfernen. Eventuelle Metallgegenstände von den Wänden Das Gerät gibt Funken ab. des Ofens entfernen. Niemals Metallgegenstände mit dem Rost verwenden. Fehlercode Bedeutung Messfehler Überhitzter Ofen Information: Stromunterbrechung während des Garens AUTO Auto-Stopp: Garzeit zu lang... -
Seite 95: Installation
• der Stecker aus der Steckdose gezogen wurde. Defekte Teile dürfen nur durch ATAG-Originalteile ersetzt werden. Nur für diese Teile kann ATAG garantieren, dass sie die Sicherheitsanforderungen erfüllen. Um gefährliche Situationen zu vermeiden, die aus Schäden am... -
Seite 96: Einbaumaße
INSTALLATION Einbaumaße min. min. min. 560 min. min. min. min. Elektroanschluss 220–240 V ~ - 50 Hz • Steckdose und Stecker müssen immer gut zugänglich sein. • Sorgen Sie dafür, dass die Kabel nicht mit Teilen des Ofens, die heiß werden können, in Kontakt kommt. •... -
Seite 97: Einbau
INSTALLATION Einbau min. 550 min. 550 • Das Gerät kann unter einer Arbeitsfläche oder in einer (offenen oder geschlossenen) Wandeinheit mit für versenkten Einbau geeigneten Abmessungen angebracht werden (siehe Einbau-Abmessungen). • Verwenden Sie das Gerät nicht unmittelbar nachdem es aus einer kalten in eine warme Umgebung gebracht wurde (warten Sie etwa 1 - 2 Stunden), da die Kondensation zu Fehlfunktion führen kann. -
Seite 98: Umweltaspekte
UMWELTASPEKTE Entsorgung von gerät und verpackung Bei der Herstellung dieses Geräts wurden dauerhafte Materialien verwendet. Sorgen Sie dafür, die Einheit am Ende ihrer Nutzungsdauer verantwortungsbewusst zu entsorgen. Wenden Sie sich an die örtlichen Behörden für weitere Informationen hierzu. Die Verpackung des Gerätes ist wiederverwertbar. Folgende Materialien können benutzt worden sein: •... - Seite 99 CONTENTS Your microwave oven Introduction Introduction to your oven Introduction to the programmer Accessories Using your appliance How your oven works Using the programmer Programmed cooking Customising the recommended temperture Using the timer function Locking the contols (child safety) oven off The “standby mode”...
-
Seite 100: Your Microwave Oven
YOUR MICROWAVE OVEN Introduction You have chosen a ATAG microwave oven. Optimum user comfort and easy operation were paramount during the development of this product. The extensive adjustment options allow you to always choose the perfect method of preparation. This manual describes how you can make the best possible use of the microwave oven. -
Seite 101: Introduction To Your Oven
YOUR MICROWAVE OVEN Introduction to your oven A. Control panel B. Knob C. Door handle 1. Traditional cooking modes 2. Microwave cooking modes 3. Microwave combined cooking modes EN 5... -
Seite 102: Introduction To The Programmer
YOUR MICROWAVE OVEN Introduction to the programmer stop Cooking mode display Cooking time symbol Cooking time/”minute minder” display “Minute minder” symbol End of cooking time symbol Clock display Temperature rise indicator Shelf support indicator Keypad locking symbol (child safety device) Oven temperature display Temperature/power setting touch button Time, cooking time, end of cooking time and “minute minder”... -
Seite 103: Accessories
YOUR MICROWAVE OVEN Accessories The rack: Rear • This allows you to toast, brown or grill. The rack should never be used with other metal cookware on the microwave, grill + microwave or forced air + microwave modes. However, you can Front reheat food in an aluminium tray providing this is isolated from the rack using a plate. -
Seite 104: Using Your Appliance
USING YOUR APPLIANCE How your oven works The microwaves used for cooking are electromagnetic waves. They are commonly found in our environment in the form of radio waves, light and infrared rays. Their frequency is in the 2450 MHz range. Their behaviour: •... -
Seite 105: Programmed Cooking
USING YOUR APPLIANCE Warning If the setting is not confirmed, the adjustment will automatically be saved in the appliance’s after a few seconds. Immediate cooking The programmer should only display the time. It should not be flashing. • Use the knob to select the required cooking setting. •... - Seite 106 USING YOUR APPLIANCE When these steps have been completed, the oven heats up. A series of beeps sound when the oven has reached the desired temperature. At the end of the (programmed) cooking time: • the oven stops, • display flashes, •...
-
Seite 107: Customising The Recommended Temperture
USING YOUR APPLIANCE Customising the recommended temperture Select the cooking function: • Press the knob to confirm. If you wish to customise the recommended temperature: • Press the temperature key until the temperature display begins flashing. • Set the temperature with the knob. •... -
Seite 108: Locking The Contols (Child Safety) Oven Off
USING YOUR APPLIANCE Locking the controls (child safety) oven off You have the option of preventing access to the oven controls by taking the following steps: • when the oven is off, press the ‘STOP’ and ‘TIME’ buttons simultaneously for a few seconds. A “padlock”... -
Seite 109: Demo Mode
USING YOUR APPLIANCE Demo mode Set the time to 00:00 (see “Resetting the time”) • Press the ‘TEMPERATURE’, ‘TIME’ and ‘STOP’ buttons simultaneously until ‘DEMO’ appears in the display. • To return to normal mode, set the time to “00:00” and press the ‘TEMPERATURE’, ‘TIME’... -
Seite 110: Microwave Cooking Modes
USING YOUR APPLIANCE GRILL (recommended 3 settings - min 1 - max 3) • Cooking controlled by the upper element. • The double grill covers the entire grid surface. The medium grill it is as effective as the high grill for smaller quantities. -
Seite 111: Microwave
USING YOUR APPLIANCE Microwave The programmer should display only the time. It should not be flashing. • Use the knob to select the required cooking setting. - Example: Microwave Power setting 1000 W, • Confirm by pressing the knob once. The cooking time flashes in the display. -
Seite 112: Defrosting
USING YOUR APPLIANCE Defrosting This oven allows you to access two different types of programmes in the defrost mode. Automatic defrost programme P1 or P2. You simply select the type of programme and enter the weight. P1: The automatic defrost mode for meat, poultry and ready-made meals. -
Seite 113: Defrost Guide
USING YOUR APPLIANCE Defrost programme time The defrost programme time is calculated for food frozen at -18 °C. This gives you an indication of the time needed for defrosting but the actual time may vary depending on the thickness, shape, size and packaging of the food. -
Seite 114: Fan Cooking + Microwave
USING YOUR APPLIANCE Food Quantity Time Strawberries 250 g 7 - 9 min Raspberries/cherries 250 g 6 - 8 min Gooseberries / blueberries / 250 g 5 - 7 min blackcurrants Fan cooking + microwave The fan cooking + microwave function lets you combine microwave cooking with fan cooking which will save you a lot of time. -
Seite 115: Grill + Microwave
USING YOUR APPLIANCE Programming Time Food Quantity Tips MW+ CH (min) Shoulder of lamb on the 1300 g 200 W + 200 °C 32 - 37 In the drip tray, level 2 bone In a dish, on the rack, Sirloin 800 g 200 W + 200 °C 23 - 28... -
Seite 116: Grill
USING YOUR APPLIANCE Food Quantity Programming Time Lamb shoulder 1300 g 200 W + High grill 40 - 45 min (boned and tied) Sirloin 800 g 200 W + High grill 18 - 23 min Chicken, guinea fowl 1200 g 500 W + High grill 25 - 27 min Turkey roast... -
Seite 117: Fan Cooking
USING YOUR APPLIANCE Fan cooking The fan cooking function lets you cook and brown foods like in a traditional oven. Tips • The cooking temperature is adjustable between 50 and 220 °C in increments of 5 °C. • Always place the grill or drip tray at level 1 or 2. This will provide optimal heat distribution and the best cooking results. - Seite 118 USING YOUR APPLIANCE Time in Food Shelf level Conventional Turbo grill Grills minutes Fish Cooked (bream, salmon, hake) 35-45 Vegetables Potatoes au gratin 55-60 Lasagne 40-45 Stuffed tomatoes 45-55 Pastries Savoy sponge 35-45 Sponge cake 35-45 Sponge roll Cake 45-60 Cookies 18-22 Biscuits...
-
Seite 119: Combined Heat - Fan Cooking Guide
USING YOUR APPLIANCE Combined heat - fan cooking guide Food Shelf level Conventional Turbo grill Time in minutes Meats Roast pork (1 Kg) 160 °C Roast veal (1 Kg) 180 °C 70-75 Roast beef (1 Kg) Lamb (leg, shoulder, 1.5 Kg) 180 °C 55-60 Pork, lamb chops... -
Seite 120: Automatic Cooking Functions
USING YOUR APPLIANCE Food Shelf level Conventional Turbo grill Time in minutes Choux pastry 170 °C 30-40 Shortcrust pastry tart 200 °C 30-40 Thin fl aky crust tart * 220 °C 30-40 Other Pâté (1 kg) 200 °C 80-90 180 °C 170 °C 40-65 Quiche... -
Seite 121: Guide To Automatic Cooking
USING YOUR APPLIANCE Note There are two possible automatic programmes for cooking vegetables: P5 and P6 (see chapter ‘Guide to automatic cooking’). For quiches and fresh tarts, automatic cooking programmes are not calculated by weight, but based on a dish diameter between 27 and 30 cm. Guide to automatic cooking This function is used to cook and brown turkey, pork or veal roasts from 500 g to 2000 g. - Seite 122 USING YOUR APPLIANCE This function allows you to cook and brown a whole chicken or chicken pieces (legs) weighing between 500 and 2000g. Cooking is done using a combination of microwave plus fan cooking and/or grill mode. Use a heat-resistant, microwave-safe dish, preferably earthenware (fewer splashes than with a glass dish).
- Seite 123 USING YOUR APPLIANCE This function lets you reheat and brown frozen pizzas weighing between 100 and 750 g. P9: Pizza - frozen Defrosting or cooking is carried out using the fan cooking function. Remove the pizza from its packaging and place it on the rack at level 2. This function allows you to cook and brown fresh quiches from 27 to 30 cm in diameter.
-
Seite 124: Maintaining And Cleaning
MAINTAINING AND CLEANING Cleaning It is recommended that you regularly clean your oven and remove any food debris on the inside and outside of the appliance. Use a damp, soapy sponge. If the appliance is not cleaned regularly, its surface could become damaged, permanently affecting the appliance’s lifespan and possibly causing a safety hazard. -
Seite 125: Troubleshooting
When in doubt about the proper operation of your appliance, this does not automatically mean there is a defect. Make sure to check the points mentioned below in the table first, or visit our website ‘www.atag.nl’ for more information. If you suspect that your appliance is not working properly, it may not necessarily be broken. -
Seite 126: Technical Data
TROUBLESHOOTING Error code Meaning Probe error (top centre) Overheated oven Information: Power cut during cooking AUTO Auto Stop: cooking time too long Technical data The appliance identification card lists the total connected load, the required voltage, and the frequency. This appliance meets all relevant CE guidelines. EN 30... -
Seite 127: Installation
• the plug has been pulled out of the socket. Faulty parts may only be replaced by original ATAG parts. Only those parts are guaranteed by ATAG to meet the safety requirements. To avoid dangerous situations resulting from any damage to the connecting cable, this should only be replaced by the manufacturer, the manufacturer’s service organisation or suitably qualified persons. -
Seite 128: Building-In Dimensions
INSTALLATION Building-in dimensions min. min. min. 560 min. min. min. min. Electrical connection 220–240 V~ - 50 Hz • Wall socket and plug must be accessible at all times. • Make sure that the cable does not come into contact with parts of the oven that may become hot. -
Seite 129: Building-In
INSTALLATION Building-in min. 550 min. 550 • The appliance can be installed under a worktop or in a wall unit (open or closed) with the appropriate dimensions for recessed installation (see building-in dimensions). • Do not use your appliance immediately (wait approximately 1 to 2 hours) after moving it from a cold location to a hot location, as the condensation may cause a malfunction. -
Seite 130: Environmental Aspects
ENVIRONMENTAL ASPECTS Disposal of packaging and appliance Durable materials were used in the manufacture of this appliance. Make sure to dispose of the unit responsibly at the end of its life cycle. Ask your local authorities for more information about how to do so. The appliance packaging is recyclable.