HP Color LaserJet CP3505 Serie Leitfaden Zur Inbetriebnahme
Vorschau ausblenden
Andere Handbücher für Color LaserJet CP3505 Serie:
- Benutzerhandbuch (246 Seiten) ,
- Benutzerhandbuch (84 Seiten)

Verwandte Anleitungen für HP Color LaserJet CP3505 Serie


Inhaltszusammenfassung für HP Color LaserJet CP3505 Serie
- Seite 1 HP Color LaserJet CP3505 Series Printers Getting Started Guide Guide de mise en route Leitfaden zur Inbetriebnahme Guida introduttiva Guía de instalación inicial Guia de primers passos Beknopte handleiding Guia de Introdução Lea esto primero...
- Seite 2 Toute modification apportée au produit sans le consentement Hewlett-Packard shall not be liable for any direct, indirect, de HP peut se traduire par la révocation du droit d’exploitation incidental, consequential, or other damage alleged in de l’équipement dont jouit l’utilisateur. Un câble d’interface connection with the furnishing or use of this information.
- Seite 3 • Unpack the printer. • Déballez l’imprimante. • Packen Sie den Drucker aus. • Rimuovere la stampante dalla confezione. • Desembale la impresora. • Desembaleu la impressora. • Pak de printer uit. • Retire a impressora da embalagem. • Select a sturdy, well-ventilated, dust-free area to position the printer. •...
- Seite 4 • Remove all shipping tape. • Retirez toutes les bandes d’expédition. • Rimuovere completamente il nastro di imballaggio. • Entfernen Sie alle Klebestreifen. • Retire toda la cinta de transporte. • Retireu totes les cintes d’embalatge. • Verwijder alle transporttape. •...
- Seite 5 • Remove print cartridge shipping locks and reinstall cartridges. • Retirez les dispositifs de sécurité d’expédition des cartouches d’impression, puis réinstallez les cartouches. • Nehmen Sie die Druckpatronen heraus, entfernen Sie die Transportsicherungen, und setzen Sie die Patronen wieder ein. •...
- Seite 6 • Réglez les guides de papier, puis chargez un support d’impression. • Adjust paper guides, and load print media. • Stellen Sie die Papierführungen ein, und legen Sie Papier ein. • Regolare le guide della carta e caricare i supporti di stampa. •...
- Seite 7 • Attach control panel overlay (if neccessary). • Fixez le cache du panneau de commande (si nécessaire). • Bringen Sie die Bedienfeldblende an (falls erforderlich). • Fissare la mascherina del pannello di controllo (se necessario). • Coloque la plantilla del panel de control (si es necesario). •...
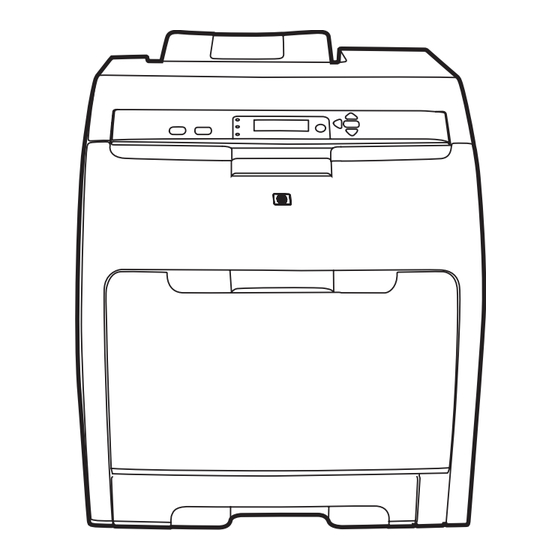
- Seite 8 • Control-panel features. 1) Use the buttons to select the menu options. 2) Press to accept the selection. 3) Press Cancel to return to the Ready screen. • Fonctions du panneau de commande. 1) Utilisez les boutons pour sélectionner les options de menu. 2) Appuyez sur pour accepter la sélection.
- Seite 9 • Set the media size and type. At the control-panel, press Menu, use the buttons to scroll to Paper Handling, and then press to select the tray to configure. Set the Type and Size for each tray by using the buttons.
- Seite 10 • USB Installation. To install software for Windows by using a direct connection (USB), go to step 14. To install software for Macintosh by using a direct connection (USB), go to step 19. • Installation USB. Pour installer le logiciel pour Windows en utilisant une connexion directe (USB), passez à l’étape 14. Pour installer le logiciel pour Macintosh en utilisant une connexion directe (USB), passez à...
- Seite 11 • Network Installation. To install software for Windows by using a network connection, go to step 23. To install software for Macintosh by using a network connection, go to step 29. • Installation réseau. Pour installer le logiciel pour Windows en utilisant une connexion réseau, passez à l’étape 23. Pour installer le logiciel pour Macintosh en utilisant une connexion réseau, passez à...
- Seite 12 • Windows USB installation. Insert the CD, and follow the onscreen instructions. Do not plug in the USB cable until prompted by the software. Note: If New Hardware Found appears, insert the CD and follow the onscreen instructions. • Installation USB sous Windows. Introduisez le CD, puis suivez les instructions à l’écran. Ne branchez pas le câble USB tant que vous n’y êtes pas invité...
- Seite 13 • On the Welcome screen, click Install. If the welcome screen does not appear, click Start, click Run, type x:setup (where x represents the CD-ROM drive letter), and then click OK. • Sur l’écran de bienvenue, cliquez sur Installer. Si l’écran de bienvenue ne s’affiche pas, cliquez sur Démarrer, puis sur Exécuter. Entrez ensuite x:setup (où...
- Seite 14 • When prompted, connect a USB cable that is no longer than 2 meters (6.5 feet) to the printer and the computer. Note: HP does not recommend using USB hubs with this printer. • A l’invite, branchez un câble USB d’une longueur inférieure à 2 mètres entre l’imprimante et l’ordinateur. Remarque : HP déconseille l’utilisation de concentrateurs USB avec cette imprimante.
- Seite 15 • Macintosh USB installation. A) Insert the CD and run the installer. B) Complete an Easy Install. C) Click Quit when the installation is finished. • Installation USB sous Macintosh. A) Introduisez le CD, puis exécutez le programme d’installation. B) Exécutez une installation standard.
- Seite 16 • Schließen Sie das USB-Kabel an. A) Schließen Sie ein USB-Kabel von höchstens 2 m Länge an den Drucker und an den Computer an. B) Starten Sie den Computer neu. Hinweis: HP rät davon ab, für den Anschluss dieses Druckers einen USB-Hub zu verwenden.
- Seite 17 • Go to the HD/Applications/Utilities/Printer Setup Utility or the Print Center. If the printer name appears in the Printer List, the installation is complete. If the printer name does not appear in the Printer List, go to the next step. •...
- Seite 18 • Add the printer. A) In the HD/Applications/Utilities/Printer Setup Utility or Print Center, click Add. Click the drop-down menu, and select USB. B) In the Printer Model drop-down list, select HP. C) Under Printer Name, select the printer, and then click Add.
- Seite 19 Sie ein von HP zertifiziertes Kabel. • Installazione in rete per Windows. Collegare il cavo di rete alla stampante. Nota: verificare che tutti i cavi siano compatibili con HP. • Instalación para Windows con la red. Conecte un cable de red a la impresora. Nota: Asegúrese de que todos los cables son compatibles con HP.
- Seite 20 C) En la página impresa de JetDirect integrado (la segunda página impresa) la dirección IP se muestra dentro de Configuración de HP Direct. Nota: Dependiendo del tipo de red que tenga instalada, es posible que necesite asignar una dirección IP. Vaya al paso 25.
- Seite 21 • Configure an IP address, if necessary. A) At the control panel, press Menu, use the the buttons to scroll to Configure Device, and then press . B) Scroll to IO and press . C) Scroll to Embedded JetDirect and press .
- Seite 22 • Prepare for the software installation. Quit all programs (including terminate-and-stay resident [TSR], antivirus, and firewall programs) on the print server or on each computer that will use the printer. • Préparez l’installation du logiciel. Sur le serveur d’impression ou sur chaque ordinateur qui utilisera l’imprimante, quittez tous les programmes (y compris les logiciels TSR [programmes résidents], antivirus et pare-feu).
- Seite 23 • Install the software. A) Insert the CD. B) On the welcome screen, click Install. If the welcome screen does not appear, click Start, click Run, type x:setup (where x represents the CD-ROM drive letter), and then click OK. C) Follow the onscreen instructions. When prompted, select Through the Network, and then click Next.
- Seite 24 • Go to step 35. • Passez à l’étape 35. • Fahren Sie mit Schritt 35 fort. • Passare al punto 35. • Vaya al paso 35. • Aneu al pas 35. • Ga naar stap 35. • Vá para a etapa 35.
- Seite 25 • Macintosh network installation. Connect the network cable to the printer. Note: Ensure that all cables are HP-compliant • Installation réseau sous Macintosh. Branchez le câble réseau à l’imprimante. Remarque : Assurez-vous que tous les câbles sont compatibles HP. • Installieren der Macintosh-Software (Netzwerkanschluss). Schließen Sie das Netzwerkkabel an den Drucker an.
- Seite 26 C) En la página impresa de JetDirect integrado (la segunda página impresa) la dirección IP se muestra dentro de Configuración de HP Direct. Nota: Dependiendo del tipo de red que tenga instalada, es posible que necesite asignar una dirección IP. Vaya al paso 31.
- Seite 27 • Configure an IP address, if necessary. A) At the control-panel, press Menu, use the the buttons to scroll to Configure Device, and then press . B) Scroll to IO and press . C) Scroll to Embedded JetDirect and press .
- Seite 28 • Prepare for the software installation. Quit all programs (including terminate-and-stay resident [TSR], antivirus, and firewall programs) on the print server or on each computer that will use the printer. • Préparez l’installation du logiciel. Sur le serveur d’impression ou sur chaque ordinateur qui utilisera l’imprimante, quittez tous les programmes (y compris les logiciels TSR [programmes résidents], antivirus et pare-feu).
- Seite 29 • Install the software. Insert the CD, run the installer, and complete an Easy Install. Click Quit when the installation is finished. • Installez le logiciel. Introduisez le CD, exécutez le programme d’installation, puis effectuez une installation standard. Cliquez sur Quitter une fois l’installation terminée.
- Seite 30 • Add the printer. A) Go to the HD/Applications/ Utilities/Printer Setup Utility or the Print Center, and then click Add. B) To add the printer by using the IP address, click IP Printer, type the IP address in the address field, and then click Add. C) To add the printer by using the Bonjour printer name, click the drop-down menu and select Bonjour.
- Seite 31 • Congratulations! The printer is ready to use. The user guide is located on the CD and in the HP ToolboxFX. Save the boxes and the packaging materials in case you need to transport the printer. Register the printer at www.register.hp.com. Online registration is the quickest and easiest way to receive technical support updates, enhanced support options, and ideas and ways to use your HP printer.
- Seite 32 Sie ihn wieder hinein, bis die schwarzen Arretierungen einrasten (3). C) Schalten Sie den Drucker ein. Wenn das Problem immer noch auftritt, wenden Sie sich an den HP Support. • Display vuoto dopo l’avvio. A) Spegnere la stampante. B) Estrarre parzialmente il formatter (figure 1 e 2), quindi reinserirlo, spingendolo finché...
- Seite 33 • Per informazioni sui materiali di consumo, visitare il sito Web “www.hp.com/support/cljcp3505”. all’indirizzo www.hp.com/support/cljcp3505. • Para información sobre consumibles, visite www.hp.com/support/cljcp3505. • Per a consumibles, consulteu www.hp.com/support/cljcp3505. • Ga voor het bestellen van benodigdheden naar www.hp.com/support/cljcp3505. • Para suprimentos, visite www.hp.com/support/cljcp3505. • Numéros de référence • Part numbers • Teilenummern •...
- Seite 34 HP Color LaserJet CP3505 Series printers • Clearing Jams • Suppression de bourrages • Beseitigen von Papierstaus • Eliminazione degli inceppamenti • Eliminación de atascos • Desencallament del paper • Storingen verhelpen • Eliminação de atolamentos • Questions ? • Fragen? •...
- Seite 36 © 2007 Hewlett-Packard Development Company, L.P. www.hp.com *CB441-90901* *CB441-90901* CB441-90901...