Harvia M3 SL Anleitung
Vorschau ausblenden
Andere Handbücher für M3 SL:
- Anleitung (8 Seiten) ,
- Montageanleitung (8 Seiten) ,
- Anleitung für montage und gebrauch (68 Seiten)

Verwandte Anleitungen für Harvia M3 SL


Inhaltszusammenfassung für Harvia M3 SL
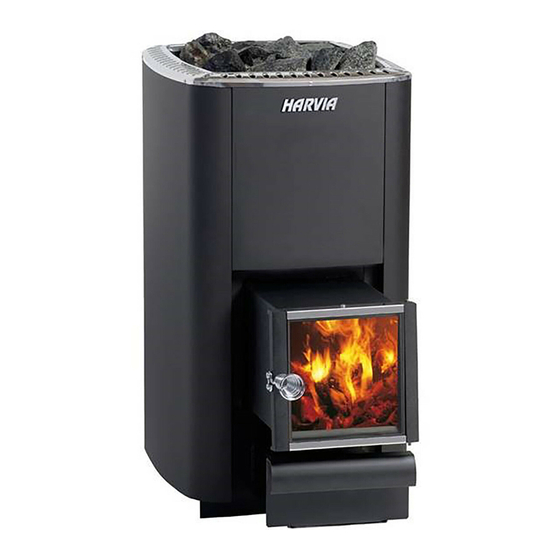
- Seite 1 HARVIA M3 SL, 20 SL, 20 SL Boiler, 20 Duo, 36 Duo, 50 SL Instructions for Installation and Use of Woodburning Stove Anleitung für Montage und Gebrauch des holzbeheizten Saunaofens M3 SL 20 SL 20 SL Boiler 50 SL 20 Duo, 36 Duo...
-
Seite 2: Inhaltsverzeichnis
4.2.2. Anschluss des Ofens an einen gemauerten 4.2.2. Connecting the Stove to a Masonry Flue ..14 Rauchfang ............14 4.2.3. Connecting the Stove to a Harvia Steel 4.2.3. Anschluss des Ofens an einen Harvia- Chimney ............. 14 Edelstahlschornstein ..........14 4.3. -
Seite 3: General
1. GeNeRAL 1. ALLGeMeINeS 1.1. Technical Data 1.1. Technische Daten M3 SL 20 SL 20 SL Boiler 20 Duo 36 Duo 50 SL WKM3SL WK200SL WK200BSL WK200SLUX WK360SLUX WK500SL Rated output (kW) Nennleistung (kW) Sauna room volume (m³) 4,5–13 8–20 8–20... -
Seite 4: Stove Parts
C. Stove door C. Ofentür D. Ash box D. Aschekasten E. Flange (only 20 Duo/36 Duo) E. Manschette (nur 20 Duo/36 Duo) F. Fire chamber extension F. Brennkammerfortsatz M3 SL 20 SL 20 SL Boiler 20 Duo 36 Duo 50SL ZKIP-170 ZKIP-140... -
Seite 5: Preparing The Stove For Use
alcohol, strong medicines or narcotics. menten, Drogen usw.) stehen. Never sleep in a hot sauna. Schlafen Sie nie in einer erhitzten Sauna. • • Sea air and a humid climate may corrode the Meer- und feuchtes Klima können die Metall- •... -
Seite 6: Sauna Stones
2.4. Sauna Stones 2.4. Saunaofensteine The stones should be 10–15 cm in diameter. Die Steine sollten einen Durchmesser von • • Only proper stones meant for the specific 10–15 cm haben. • purpose should be used as sauna stones. Nur speziell für diesen Zweck vorgesehe Steine •... -
Seite 7: Sauna Water
open. This ensures that the fire starts burning die Tür. Der Zug kann durch Öffnen des Asche- properly. kastens geregelt werden. - Excessive draught will cause the stove body - Beim Heizen des Ofens ist es allgemein ratsam, to become red-heated, which will shorten its den Aschekasten zunächst leicht geöffnet zu life span considerably. -
Seite 8: Troubleshooting
they should be rearranged at least once a year die Saunasteine spröde und brüchig. Die Steine or even more often if the sauna is in frequent sollten mindestens einmal jährlich neu aufge- use. At the same time, any pieces of stones schichtet werden, bei starkem Gebrauch öfter. -
Seite 9: Sauna Room
3. SAUNA ROOM 3. SAUNAKABINe 3.1. effects that Heating the Stove has on 3.1. Aufheizen der Saunakabine the Sauna Room Helle Böden werden durch Asche, Steinpartikel und Light-coloured floor materials will become dirty from aus dem Ofen fallende Metallsplitter verunreinigt. the ash, particles of stone and metal flakes that fall Verwenden Sie Bodenabdeckungen aus dunklen Ma- from the stove. -
Seite 10: Instructions For Installation
C. Fliesenboden. Die unter den Fliesen benutzten not resistant to the heat radiation of the stove. Klebstoffe, Mörtel und wasserfesten Materi- Protect the floor with the Harvia protective alien können der Wärmestrahlung des Ofens bedding ( ) or similar heat radiation nicht standhalten. -
Seite 11: Safety Distances
4.1.2. Safety Distances 4.1.2. Sicherheitsabstände See figure 5. Siehe Abbildung 5. A. Ceiling. The minimum safety distance between A. Dach. Der Mindest-Sicherheitsabstand zwi- the stove and the ceiling is 1200 mm. schen Ofen und Dach beträgt 1200 mm. B. Masonry walls. Leave 50 mm between the B. -
Seite 12: Protective Covers
4.1.3. Protective Covers 4.1.3. Schutzabdeckungen See figure 6. The specified safety distances from Siehe Abbildung 6. Die angegebenen Sicherheits- inflammable materials can be reduced to half with abstände zu brennbaren Materialien können durch a single protective cover and to one-fourth with a einen einfachen Schutz um die Hälfte und mit einem double protective cover. -
Seite 13: Installing The Stove
Öffnung in einer Wand aus Beton oder Ziegelstein installiert. M3 SL, 20 SL, 20 SL Boiler, 50 SL Detach the hinge pin and door from the stove M3 SL, 20 SL, 20 SL Boiler, 50 SL •... -
Seite 14: Connecting The Stove To A Masonry Flue
Connecting the stove to a masonry flue (all dimensions in millimeters) Abbildung 8. Anschluss des Ofens an einen gemauerten Rauchfang (alle Abmessungen in Millimetern) 4.2.3. Connecting the Stove to a Harvia Steel 4.2.3. Anschluss des Ofens an einen Harvia-edel- Chimney... -
Seite 15: Changing The Opening Direction Of The Stove Door
upper connection opening of the stove. Ensure that Schließen Sie das Ofenrohr des Stahlschornsteins the smoke pipe fits tightly in place. an die obere Anschlussöffnung des Ofens an. Verge- wissern Sie sich, dass das Ofenrohr fest an seinem Make sure that all safety distance requirements Platz sitzt. -
Seite 16: Accessories
4.4. Accessories 4.4. Zubehör (Models M3 SL, 20 SL, 20 SL Boiler, 20 Duo, 36 (Nur M3 SL, 20 SL, 20 SL Boiler, 20 Duo, 36 Duo only.) Duo.) A. Harvia steel chimney WHP1500. 4.2.3. A. Harvia-Stahlschornstein WHP1500. 4.2.3. B. Water heater VL22l. Installed on the top of the B.