hanseatic BF-6A31E4E1G Gebrauchsanleitung
Einbaubackofen und induktionskochfeld

Verwandte Anleitungen für hanseatic BF-6A31E4E1G


Inhaltszusammenfassung für hanseatic BF-6A31E4E1G
- Seite 1 BF-6A31E4E7G + IB64-72N06C 8 .8 .8 .8 . Gebrauchsanleitung Herd-Set Anleitung/Version: 195530 DE 20181218 Bestell-Nr.: 708 401 Einbaubackofen und Nachdruck, auch aus zugs wei se, nicht ge stat tet! Induktionskochfeld...
-
Seite 2: Inhaltsverzeichnis
Seite DE-2 Inhaltsverzeichnis Inhaltsverzeichnis Netzleitung anschließen ... . DE-32 Lieferung ......DE-3 Backofen einsetzen . -
Seite 3: Lieferung
Seite DE-3 Lieferung Lieferung Lieferumfang (1) 1× Glaskeramik-Kochfeld (2) 1× Backofen (3) 1× Grillrost 8.8 .8. 8. (4) 1× Backblech (5) 1× Fettpfanne (6) 4× Klammer zur Befestigung des Glaskeramik Kochfelds an einer Arbeitsplatte (7) 4× Schraube zur Klammer-Befestigung (8) 4× Schraube zur Backofen-Befestigung (9) 1×... -
Seite 4: Sicherheit
Seite DE-4 Sicherheit Sicherheit Bestimmungsgemäßer Begriffserklärung Gebrauch Folgende Si gnal begriffe fi nden Sie in dieser Gebrauchsanleitung. Das Herd-Set ist zum Kochen, Braten, Backen, Grillen und Warmhalten von WARNUNG Speisen bestimmt. Dieser Signalbegriff bezeichnet eine Zum Auftauen von rohem Fleisch, Ge- Gefährdung mit einem mittleren Risi- fl... -
Seite 5: Risiken Im Umgang Mit Elektrischen Haushaltsgeräten
Seite DE-5 Sicherheit auch für das Tren nen vom Stromnetz WARNUNG und den Aus bau des Altgeräts. Risiken im Umgang mit Da das Gerät nicht über eine zugäng- ■ elektrischen Haushaltsgeräten liche Trennvorrichtung allpolig vom Netz getrennt werden kann, muss Stromschlaggefahr! eine allpolige Trennvorrichtung ge- Berühren... -
Seite 6: Risiken Für Kinder
Seite DE-6 Sicherheit bzw. ausschalten). Dann unseren Ser- Gerät haben, wenn sie unbeaufsich- vice kontaktieren (siehe „Unser Ser- tigt sind. vice“ auf Seite DE-36). Reinigung und Wartung durch den ■ Benutzer dürfen nicht von Kindern durchgeführt werden, es sei denn, sie Risiken für Kinder werden beauf sichtigt. - Seite 7 Seite DE-7 Sicherheit formieren, damit nie mand etwas in Bei Feuer im Backofen: ■ den Back ofen legt. Backofentür nicht öffnen! Im Zeitschaltuhrbetrieb niemals un be- ■ Bei Feuer im Kochgeschirr: ■ auf sich tigt grillen! Sofort Dec kel dar auf! Den Back ofen während des Zeit- ■...
- Seite 8 Seite DE-8 Sicherheit die Rest wärmeanzeige, obwohl noch HINWEIS Rest wärme vorhanden sein kann. Keine Gegenstände aus Metall wie Beschädigungsgefahr! ■ Besteck und Deckel auf dem Glas- Zum Reinigen keine scharfen, abra- ■ keramik-Kochfeld ablegen, weil sie siven Reini gungs- oder Scheu er mit- sich auf heizen und zu Verbrennungen tel, Stahl schwäm me, Metall schaber, führen können.
- Seite 9 Seite DE-9 Sicherheit Die Kochfelder können beschädigt ■ wer den, wenn sie mit leerem Koch ge- schirr betrieben werden. Ble che oder Alufolie nicht di rekt auf ■ den Garraumboden stellen. Da durch staut sich die Hitze und die Emaille des Back ofens wird beschädigt.
-
Seite 10: Bedienelemente Und Geräteteile
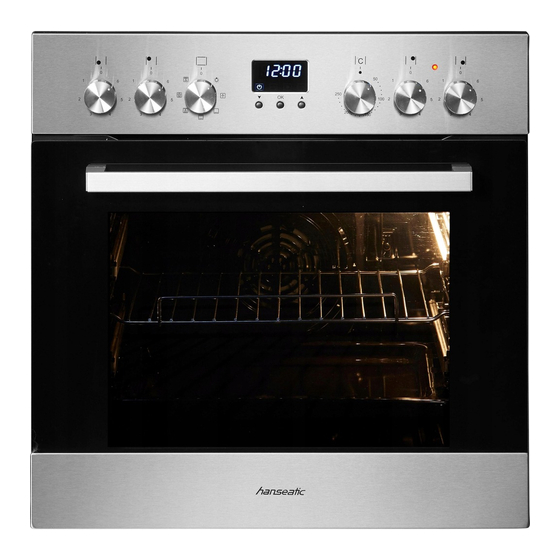
Seite DE-10 Bedienelemente und Geräteteile Bedienelemente und Geräteteile (10) (11) (12) (13) (14) (15) (16) Bedienblende (10) Temperaturregler Kochzone vorne links (11) Temperaturregler Kochzone hinten links 8.8.8.8. (12) Funktionsschalter Backofen (13) Uhr (17) (14) Temperaturregler Backofen (18) (15) Temperaturregler Kochzone hinten rechts (16) Temperaturregler Kochzone vorne rechts (17) OK-Taste (18) Pfeiltasten... -
Seite 11: Das Kochfeld
Seite DE-11 Das Kochfeld Das Kochfeld Glaskeramik-Kochfeld Informationen zur Induktions- Technik Damit die Glaskeramik nicht zu Schaden kommt und lange hält, braucht sie etwas Vor- sicht, Pflege und das geeignete Geschirr. Wirkungsprinzip eines induktiven Kochfelds WARNUNG Unterhalb der Glaskeramik-Oberfläche be- Stromschlaggefahr! findet sich eine Spule, die von Strom durch- Das Berühren spannungsführender... -
Seite 12: Das Richtige Kochgeschirr
Seite DE-12 Das Kochfeld Mögliche Geräusche: sind. Das Geräusch kann durchgängig auf- treten oder in Intervallen. Es kann beim sel- – Tiefes Brummen wie bei einem Trafo ben Topf auf der einen Kochzone auftreten, Dieses Geräusch kann auftreten, wenn eine auf der anderen nicht. -
Seite 13: Kochzonen Und Schalter
Seite DE-13 Das Kochfeld Kochzonen und Schalter Verwenden Sie möglichst nur Kochgeschirr mit dickem Boden oder energie- und zeitspa- rende Dampf drucktöpfe. Die relativ hohen 8.8.8.8. Anschaffungskosten sind schnell wieder ein- gespart. Nicht verwenden sollten Sie (20) – eingedrückte oder ausgebeulte Töpfe (21) –... -
Seite 14: Tipps Zum Garen Und Energiesparen
Seite DE-14 Das Kochfeld Tipps zum Garen und Sobald Sie ein geeignetes Kochgeschirr auf die Kochzone stellen, wird wieder die Energiesparen eingestellte Leistungsstufe angezeigt. 3. Zum Ausschalten drehen Sie den Schalter Schal- Anwendung Beispiele auf „0“ zurück. terstel- lung Restwärmeanzeige Schwaches Weiter- Quellen von kochen / Warmhalten... -
Seite 15: Kochfeld Reinigen
Seite DE-15 Kochfeld reinigen Kochfeld reinigen Feste, eingebrannte VORSICHT! Verschmutzungen Verbrennungsgefahr! Unsachgemäße Reinigung kann zu Ver- brennungen führen. Die Kochzonen vor dem Reinigen voll- ■ ständig abkühlen lassen. Ausnahme: Sie wollen zucker- oder stärkehaltige Speisereste, Kunststoffe oder Alufo- lien entfernen (siehe weiter unten). HINWEIS •... -
Seite 16: Der Backofen
Seite DE-16 Der Backofen Der Backofen Vorbereitung Brennendes Öl oder Fett nie mit ■ Was ser löschen! Zum Löschen eine Bevor Sie den Backofen zum ersten Mal in Löschdecke oder einen geeigneten Betrieb nehmen, ist eine Grundreinigung er- Feuerlöscher mit Kennzeichnung „F“ forderlich. -
Seite 17: Backblechträger Mit Teleskopschienen
Seite DE-17 Der Backofen Backblechträger mit Funktionen/Beheizungsarten Teleskopschienen Aus-Stellung An den Seitenwänden des Garraums befin- Der Backofen ist ausgeschaltet den sich die Backblechträger mit den auszieh- Garraumbeleuchtung baren Teleskopschienen (26). Damit lassen Nur der Garraum ist beleuchtet. sich die Backbleche bequemer herausziehen, Heizung und Gebläse bleiben ausge- z. -
Seite 18: Temperaturregler
Seite DE-18 Der Backofen Temperaturregler Backofen ausschalten 1. Drehen Sie den Temperaturregler gegen den Uhrzeigersinn in Null-Stellung. (14) Das Heizsymbol verschwindet. 2. Drehen Sie den Funktionsschalter eben- falls zurück auf die Null-Stellung. Die Garraumbeleuch tung erlischt. HINWEIS Besonderheiten beim Beschädigungsgefahr! Auftauen Den Temperaturregler (14) nicht mit ■... -
Seite 19: Besonderheiten Beim Ansetzen Von Hefeteig
Seite DE-19 Der Backofen Besonderheiten beim Die Uhr Ansetzen von Hefeteig Ihr Backofen ist mit einer elektronischen Uhr aus ge stat tet, die auch als Zeitschaltuhr zum 1. Heizen Sie den Backofen auf 50 °C vor. Ein- und Ausschalten des Backofens verwen- 2. -
Seite 20: Die Zeitschaltuhr-Funktionen
Seite DE-20 Der Backofen Die Zeitschaltuhr-Funktionen 2. Drücken Sie die OK-Taste (17), um die Einstellung zu bestätigen. Die Minutenanzeige blinkt. WARNUNG 3. Stellen Sie mit den Pfeiltasten (18) die Brandgefahr! Minuten der aktuellen Uhrzeit ein. Zum Im Zeitschaltuhrbetrieb besteht er- schnellen Vor-/Rücklauf halten Sie die je- weilige Pfeiltaste gedrückt. -
Seite 21: Gardauer Oder Ausschaltzeitpunkt Festlegen
Seite DE-21 Der Backofen Gardauer oder Ausschaltzeitpunkt 2b. Wenn Sie den Ausschaltzeitpunkt fest- legen möchten, halten Sie die OK-Taste festlegen drei Sekunden lang gedrückt. Voraussetzungen: Der Backofen schaltet sich aus. – Die aktuelle Uhrzeit muss eingestellt sein. – Es darf nicht bereits ein Automatikbetrieb 12: 0 0 laufen. -
Seite 22: Vollautomatik-Betrieb
Seite DE-22 Der Backofen Vollautomatik-Betrieb 3. Geben Sie mithilfe der Pfeiltasten (18) die Gardauer ein. Bestätigen Sie jede Einga- Hier geben Sie die gewünschte Gardauer ein be durch Drücken der OK-Taste. und legen die Uhrzeit fest, zu der das Gericht 4. -
Seite 23: Tabelle Prüfgerichte
Seite DE-23 Tabelle Prüfgerichte Tabelle Prüfgerichte Diese Gerichte wurden gemäß den Normen DIN 44547 und EN 60350 zubereitet. Anzahl Temperatur Gardauer Speise Einschubhöhe Beheizungsart Bleche in °C in Min. Ober-/Unterhitze 180-200 10-20 Spritzgebäck Umluft mit Ober- 170-180 10-20 und Unterhitze Ober- /Unterhitze 170-180 25-35... -
Seite 24: Backofen Reinigen
Seite DE-24 Backofen reinigen Backofen reinigen Garrraum reinigen VORSICHT! – Schalten Sie zum Reinigen nur die Gar- Verbrennungsgefahr! raumbeleuchtung ein. Den Backofen vollständig abkühlen ■ – Reinigen Sie den Garraum und die Back- lassen, bevor Sie ihn reinigen. blechträger mög lichst nach je dem Ge- Niemals Wasser direkt in den heißen brauch mit war mem Spülwasser. -
Seite 25: Backblechträger Und Teleskopschienen Reinigen
Seite DE-25 Backofen reinigen Backblechträger und Backofentür reinigen Teleskopschienen reinigen HINWEIS Bruch- und Verletzungsgefahr! HINWEIS Die Back ofentür enthält schwere Glas- Beschädigungsgefahr! scheiben, die bei unsachgemäßer Be- Die Backblechträger und Teleskopschie- handlung zerbrechen können. nen können durch unsachgemäße Rei- Die Back ofentür oder einzelne Glas- ■... -
Seite 26: Scheiben Reinigen
Seite DE-26 Backofen reinigen Back ofentür aushängen Scheiben reinigen 1. Öffnen Sie die Back ofentür ganz. Die Back ofentür enthält zwei Glasscheiben, 2. Klappen Sie an beiden Sei ten die Bügel die Sie hin und wieder beidseitig reinigen X ganz nach vorne. Nehmen Sie gegebe- sollten. - Seite 27 Seite DE-27 Backofen reinigen 6. Befestigen Sie den linken Kunststoffhalter und gehen Sie dabei wie folgt vor: 7. Stecken Sie das Gitterblech in den linken Kunststoffhalter. 9. Hängen Sie die Backofentür wieder ein. 8. Stecken Sie den rechten Kunststoffhalter auf das Gitterblech und befestigen Sie ihn an der Tür wie folgt:...
-
Seite 28: Leuchtmittel Der Backofen Beleuchtung Auswechseln
Seite DE-28 Backofen reinigen Leuchtmittel der Backofen- 1. Schalten Sie die Sicherungen aus bzw. drehen Sie sie heraus. beleuchtung aus wech seln 2. Legen Sie ein weiches Tuch in den abge- kühlten Garraum, für den Fall, dass die Als Backofenbeleuchtung benötigen Sie ein Glas ab de c kung oder das Leuchtmittel hitzefestes Back ofen-Leuchtmitttel vom Typ he runterfällt. -
Seite 29: Einbau Und Anschluss
Seite DE-29 Einbau und Anschluss Einbau und Anschluss Transportieren schlussdose muss deshalb eine Un ter- putz do se sein oder außer halb des Ein bau- Ihr Herd-Set wird in einer stabilen Verpackung rau mes lie gen. geliefert und ist so schwer, dass es nicht von •... -
Seite 30: Kochfeld Vorbereiten Und Einsetzen
Seite DE-30 Einbau und Anschluss Kochfeld vorbereiten und 2. Wenn bereits ein Kochfeld eingebaut war, darf dessen Ausschnitt folgende Maße einsetzen nicht überschreiten: 560 bis max. 574 mm breit HINWEIS 490 bis max. 492 mm tief. Bruchgefahr! Kochfeld nicht auf den Glas ke ra mik- ■... -
Seite 31: Netzanschluss - Hinweise Für Den Installateur
Seite DE-31 Einbau und Anschluss Netzanschluss – Hinweise für Anschlussbedingungen den Installateur Das Gerät ist für folgende Wechselspannun- gen ausgelegt: – 220–240 V ~, 50/60 Hz, 50 A WARNUNG – 380–415 V 2N~, 50/60 Hz, 25 A Stromschlag- / Brandgefahr! –... -
Seite 32: Netzleitung Anschließen
Seite DE-32 Einbau und Anschluss Netzleitung anschließen L1 – L3: Phase(n) Der Klemmkasten und die Anschlusspläne Null-Leiter befinden sich hinten auf der Oberseite des Schutzleiter (Erde) Backofens. 220–240 V ~, 50/60 Hz L1 an (gebrückt) N an (gebrückt) ... -
Seite 33: Backofen Einsetzen
Seite DE-33 Einbau und Anschluss Backofen einsetzen sind codiert, ein Verpolen ist daher nicht möglich. HINWEIS Beschädigungsgefahr! Backofen nur an den Tra ge mulden an ■ den Sei ten anheben. Der Türgriff ist dafür nicht geeignet. Folgende Bedingungen müssen erfüllt sein: –... -
Seite 34: Vor Dem Ersten Gebrauch
Seite DE-34 Einbau und Anschluss Vor dem ersten Gebrauch 1. Entfernen Sie alle Transportsicherungen (Pappstreifen etc.) und alle Klebestreifen aus dem Backofen. 2. Drehen Sie alle Schalter des Herdes auf Null-Stellung. 3. Schalten Sie die Sicherungen für den Herdstromkreis ein. 4. -
Seite 35: Fehlersuchtabelle
Seite DE-35 Fehlersuchtabelle Fehlersuchtabelle Bei allen elektrischen Geräten können Störungen auf tre ten. Da bei muss es sich nicht um ei nen Defekt am Gerät handeln. Prüfen Sie des halb bitte an hand der Ta bel le, ob Sie die Störung be sei- ti gen können. -
Seite 36: Unser Service
Seite DE-36 Unser Service Unser Service Damit wir Ihnen schnell helfen können, nennen Sie uns bitte: Gerätebezeichnung Modell Bestellnummer BF-6A31E4E7G + IB64-72N06C 708 401 Herd-Set Beratung, Bestellung und Reparaturen und Ersatzteile Reklamation Kunden in Deutschland Wenden Sie sich bitte an die Produktberatung –... -
Seite 37: Umweltschutz
Seite DE-37 Umweltschutz Umweltschutz Elektro-Altgeräte Tipps zum Energiesparen umweltgerecht entsorgen – Heizen Sie den Backofen nur dann vor, wenn es im Rezept oder in den mitgeliefer- Elektrogeräte enthalten Schadstoffe ten Gartabellen angegeben ist. und wertvolle Ressourcen. – Verwenden Sie möglichst dunkle Backfor- Jeder Verbraucher ist deshalb ge- men und -bleche. -
Seite 38: Technische Daten
Seite DE-38 Technische Daten Technische Daten Produktdatenblatt gemäß VO (EU) Nr. 65/2014 Warenzeichen hanseatic Modellkennung 708401 / BF-6A31E4E7G + IB64-72N06C Energieeffizienzindex 93,7 Energieeffizienzklasse auf einer Skala A+++ (höchste Effizienz) bis D (geringste Effizienz) Energieverbrauch konventionellen Modus 0,81 kWh/Zyklus Energieverbrauch Umluft-Modus 0,74 kWh/Zyklus Anzahl der Garräume... - Seite 39 Seite DE-39 Technische Daten Produktinformation gemäß VO (EU) Nr. 66/2014 Modellkennung 708401 / BF-6A31E4E7G + IB64-72N06C Art der Kochmulde elektrische Kochmulde Anzahl der Kochzonen und/ oder Kochflächen Heiztechnik Induktionskochzonen und -kochflächen Maße Kochzone vorne links Ø 18,0 cm Maße Kochzone hinten links Ø...
- Seite 40 Seite DE-40 Technische Daten Technische Daten Bestellnummer 708401 Gerätebezeichnung Einbau-Herdset mit Induktions- Kochfeld Modell BF-6A31E4E7G + IB64-72N06C Bemessungsspannung 220 - 240 V ~ / 380 - 415 V 3N ~ Frequenz 50 Hz Bemessungsaufnahme Backofen 3100 W Gerätemaße Backofen inkl. Türgriff (H x B x T) 595 mm x 595 mm x 530 mm Nischenmaße Backofen (H x B x T) 600 mm x 560 mm x 560 mm...
-
Seite 81: Herd-Set Mit Glaskeramik-Kochfeld Und Zeitschaltuhr
BF-6A31E4E1G + HB64-VF63G 8 .8 .8 .8 . Gebrauchsanleitung Herd-Set mit Glaskeramik-Kochfeld Anleitung/Version: 195531_DE_20180723 Bestell-Nr.: 783 466 und Zeitschaltuhr Nachdruck, auch aus zugs wei se, nicht ge stat tet! - Seite 82 Seite DE-2 Inhaltsverzeichnis Inhaltsverzeichnis Lieferung ......DE-3 Backofen einsetzen ....DE-32 Verpackungs-Tipps .
-
Seite 83: Lieferung
Seite DE-3 Lieferung Lieferung Lieferumfang (1) 1× Glaskeramik-Kochfeld (2) 1× Backofen (3) 1× Grillrost 8. 8. 8. 8. (4) 1× Backblech (5) 1× Fettpfanne (6) 4× Klammer zur Befestigung des Glaskeramik Kochfelds an einer Arbeitsplatte (7) 4× Schraube zur Klammer-Befestigung (8) 2×... -
Seite 84: Sicherheit
Seite DE-4 Sicherheit Sicherheit Bestimmungsgemäßer Begriffserklärung Gebrauch Folgende Si gnal begriffe fi nden Sie in dieser Gebrauchsanleitung. Das Herd-Set ist zum Kochen, Braten, Backen, Grillen und Warmhalten von WARNUNG Speisen bestimmt. Dieser Signalbegriff bezeichnet eine Zum Auftauen von rohem Fleisch, Ge- Gefährdung mit einem mittleren Risi- fl... - Seite 85 Seite DE-5 Sicherheit auch für das Tren nen vom Stromnetz WARNUNG und den Aus bau des Altgeräts. Risiken im Umgang mit Da das Gerät nicht über eine zugäng- ■ elektrischen Haushaltsgeräten liche Trennvorrichtung allpolig vom Netz getrennt werden kann, muss Stromschlaggefahr! eine allpolige Trennvorrichtung ge- Berühren...
- Seite 86 Seite DE-6 Sicherheit bzw. ausschalten). Dann unseren Ser- Reinigung und Wartung durch den ■ vice kontaktieren (siehe „Unser Ser- Benutzer dürfen nicht von Kindern vice“ auf Seite DE-35). durchgeführt werden, es sei denn, sie werden beauf sichtigt. Kinder vom Türglas fernhalten! Das ■...
- Seite 87 Seite DE-7 Sicherheit Den Back ofen während des Zeit- Bei Feuer im Kochgeschirr: ■ ■ schaltuhrbetriebs überwachen, um Sofort Dec kel dar auf! Überlaufen und An bren nen zu verhin- Brennendes Öl oder Fett nie mit Was- ■ dern. Beachten Sie, dass sich Fette, ser lö...
- Seite 88 Seite DE-8 Sicherheit Keine Gegenstände aus Metall wie druckreiniger ver wen den! Sie kön- ■ Besteck und Deckel auf dem Glas- nen die Oberfläche beschädigen keramik-Kochfeld ablegen, weil sie und das Glas zerstören. sich auf heizen und zu Verbrennungen Hochdruckreiniger können einen führen können.
- Seite 89 Seite DE-9 Sicherheit Ble che oder Alufolie nicht di rekt auf ■ den Garraumboden stellen. Da durch staut sich die Hitze und die Emaille des Back ofens wird beschädigt. Wenn Sie Geschirr direkt auf den Garraum- boden stellen möchten, darf die Back- ofentemperatur 50 °C nicht über- schreiten.
-
Seite 90: Bedienelemente Und Geräteteile
Seite DE-10 Bedienelemente und Geräteteile Bedienelemente und Geräteteile (10) (11) (12) (13) (14) (15) (16) Bedienblende (10) Temperaturregler Kochzone vorne links (11) Temperaturregler Kochzone hinten links 8.8.8.8. (12) Funktionsschalter Backofen (13) Uhr (18) (17) (14) Temperaturregler Backofen (19) (15) Temperaturregler Kochzone hinten rechts (16) Temperaturregler Kochzone vorne rechts (17) Kontroll-Leuchte (21) -
Seite 91: Das Kochfeld
Seite DE-11 Das Kochfeld Das Kochfeld Glaskeramik-Kochfeld Das richtige Kochgeschirr Im Gegensatz zu Gusskochplatten besitzt Ihr HINWEIS Herd eine flaches Kochfeld aus Glaskeramik, mit deutlich erkennbaren Kochzonen. Damit Beschädigungsgefahr! die Glaskeramik nicht zu Schaden kommt und Glas ist ein schlechter Wärmeleiter. lange hält, braucht sie etwas Vorsicht, Pflege Deshalb kann es zu Tem pe ra tur span- und das geeignete Geschirr. -
Seite 92: Kochzonen Und Schalter
Seite DE-12 Das Kochfeld Sehr gut geeignet sind auch (17) – energie- und zeit spa rende Dampf- drucktöpfe. Die re la tiv hohen An schaf- 8.8.8.8. fungs ko sten sind schnell wie der eingespart. – Stahl töp fe und -pfannen so wie be schich te- tes und unbeschichtetes Alu mi ni um ge schirr mit star kem Boden. -
Seite 93: Tipps Zum Garen Und Energie Sparen
Seite DE-13 Das Kochfeld Tipps zum Garen und Energie sparen Schal- Anwendung Beispiele terstel- lung Schwaches Weiter- Quellen von kochen / Warmhalten Reis Weiterkochen für die Für Suppen meisten Gerichte und Gemüse Schwaches Braten / Für Paniertes starkes Weiter kochen Für Bratkar- Normales Braten toffeln... -
Seite 94: Kochfeld Reinigen
Seite DE-14 Kochfeld reinigen Kochfeld reinigen Feste, eingebrannte VORSICHT! Verschmutzungen Verbrennungsgefahr! Unsachgemäße Reinigung kann zu Ver- brennungen führen. Die Kochzonen vor dem Reinigen voll- ■ ständig abkühlen lassen. Ausnahme: Sie wollen zucker- oder stärkehaltige Speisereste, Kunststoffe oder Alufo- lien entfernen (siehe weiter unten). HINWEIS •... -
Seite 95: Der Backofen
Seite DE-15 Der Backofen Der Backofen Vorbereitung Brennendes Öl oder Fett nie mit ■ Was ser löschen! Zum Löschen eine 1. Entfernen Sie alle vorhandenen Styropor-, Löschdecke oder einen geeigneten Papp- und Kunststoffsicherungsteile aus Feuerlöscher mit Kennzeichnung „F“ dem Backofen und von den Backblech en. 2. -
Seite 96: Funktionsschalter
Seite DE-16 Der Backofen Backblechträger mit Funktionen/Beheizungsarten Teleskopschienen Aus-Stellung An den Seitenwänden des Garraums befin- Der Backofen ist ausgeschaltet den sich die Backblechträger mit den auszieh- Garraumbeleuchtung baren Teleskopschienen (27). Damit lassen Nur der Garraum ist beleuchtet. sich die Backbleche bequemer herausziehen, Heizung und Gebläse bleiben ausge- z. -
Seite 97: Temperaturregler
Seite DE-17 Der Backofen Temperaturregler Backofen ausschalten 1. Drehen Sie den Temperaturregler gegen den Uhrzeigersinn in Null-Stellung. (14) Das Heizsymbol verschwindet. 2. Drehen Sie den Funktionsschalter eben- falls zurück auf die Null-Stellung. Die Garraumbeleuch tung erlischt. HINWEIS Besonderheiten beim Beschädigungsgefahr! Auftauen Den Temperaturregler (14) nicht mit ■... -
Seite 98: Besonderheiten Beim Ansetzen Von Hefeteig
Seite DE-18 Der Backofen Besonderheiten beim Die Uhr Ansetzen von Hefeteig Ihr Backofen ist mit einer elektronischen Uhr aus ge stat tet, die auch als Zeitschaltuhr zum 1. Heizen Sie den Backofen auf 50 °C vor. Ein- und Ausschalten des Backofens verwen- 2. - Seite 99 Seite DE-19 Der Backofen 2. Drücken Sie die OK-Taste (18), um die Die Zeitschaltuhr-Funktionen Einstellung zu bestätigen. Die Minutenanzeige blinkt. WARNUNG 3. Stellen Sie mit den Pfeiltasten (19) die Brandgefahr! Minuten der aktuellen Uhrzeit ein. Zum Im Zeitschaltuhrbetrieb besteht er- schnellen Vor-/Rücklauf halten Sie die je- weilige Pfeiltaste gedrückt.
- Seite 100 Seite DE-20 Der Backofen Halbautomatik-Betrieb 2b. Wenn Sie den Ausschaltzeitpunkt fest- legen möchten, halten Sie die OK-Taste Im Halbautomatik-Betrieb legen Sie während drei Sekunden lang gedrückt. des Betriebs die gewünschte Gardauer oder Der Backofen schaltet sich aus. den Ausschaltzeitpunkt fest. Der Backofen schaltet dann nach Ablauf der Gardauer bzw.
- Seite 101 Seite DE-21 Der Backofen Vollautomatik-Betrieb 3. Geben Sie mithilfe der Pfeiltasten (19) die Gardauer ein. Bestätigen Sie jede Einga- Hier geben Sie die gewünschte Gardauer ein be durch Drücken der OK-Taste. und legen die Uhrzeit fest, zu der das Gericht 4.
-
Seite 102: Tabelle Prüfgerichte
Seite DE-22 Tabelle Prüfgerichte Tabelle Prüfgerichte Diese Gerichte wurden gemäß den Normen DIN 44547 und EN 60350 zubereitet. Anzahl Temperatur Gardauer Speise Einschubhöhe Beheizungsart Bleche in °C in Min. Ober-/Unterhitze 180-200 10-20 Spritzgebäck Heißluft 170-180 10-20 Ober- /Unterhitze 170-180 25-35 Wasserbiskuit Heißluft 150-160... -
Seite 103: Backofen Reinigen
Seite DE-23 Backofen reinigen Backofen reinigen Garrraum reinigen VORSICHT! – Schalten Sie zum Reinigen nur die Gar- Verbrennungsgefahr! raumbeleuchtung ein. Den Backofen vollständig abkühlen ■ – Reinigen Sie den Garraum und die Back- lassen, bevor Sie ihn reinigen. blechträger mög lichst nach je dem Ge- Niemals Wasser direkt in den heißen brauch mit war mem Spülwasser. -
Seite 104: Backblechträger Und Teleskopschienen Reinigen
Seite DE-24 Backofen reinigen Backblechträger und Backofentür reinigen Teleskopschienen reinigen HINWEIS Bruch- und Verletzungsgefahr! HINWEIS Die Back ofentür enthält schwere Glas- Beschädigungsgefahr! scheiben, die bei unsachgemäßer Be- Die Backblechträger und Teleskopschie- handlung zerbrechen können. nen können durch unsachgemäße Rei- Die Back ofentür oder einzelne Glas- ■... - Seite 105 Seite DE-25 Backofen reinigen Back ofentür aushängen Scheiben reinigen 1. Öffnen Sie die Back ofentür ganz. Die Back ofentür enthält zwei Glasscheiben, 2. Klappen Sie an beiden Sei ten die Bügel die Sie hin und wieder beidseitig reinigen X ganz nach vorne. Nehmen Sie gegebe- sollten.
- Seite 106 Seite DE-26 Backofen reinigen 6. Befestigen Sie den linken Kunststoffhalter und gehen Sie dabei wie folgt vor: 7. Stecken Sie das Gitterblech in den linken Kunststoffhalter. 9. Hängen Sie die Backofentür wieder ein. 8. Stecken Sie den rechten Kunststoffhalter auf das Gitterblech und befestigen Sie ihn an der Tür wie folgt:...
-
Seite 107: Leuchtmittel Der Backofen Beleuchtung Auswechseln
Seite DE-27 Backofen reinigen Leuchtmittel der Backofen- 1. Schalten Sie die Sicherungen aus bzw. drehen Sie sie heraus. beleuchtung aus wech seln 2. Legen Sie ein weiches Tuch in den abge- kühlten Garraum, für den Fall, dass die Als Backofenbeleuchtung benötigen Sie ein Glas ab de c kung oder das Leuchtmittel hitzefestes Back ofen-Leuchtmitttel vom Typ he runterfällt. -
Seite 108: Einbau Und Anschluss
Seite DE-28 Einbau und Anschluss Einbau und Anschluss Transportieren schlussdose muss deshalb eine Un ter- putz do se sein oder außer halb des Ein bau- Ihr Herd-Set wird in einer stabilen Verpackung rau mes lie gen. geliefert und ist so schwer, dass es nicht von •... - Seite 109 Seite DE-29 Einbau und Anschluss 2. Wenn bereits ein Kochfeld eingebaut war, Kochfeld vorbereiten und darf dessen Ausschnitt folgende Maße einsetzen nicht überschreiten: 560 bis max. 574 mm breit HINWEIS 490 bis max. 492 mm tief. Bruchgefahr! Kochfeld nicht auf den Glas ke ra mik- ■...
-
Seite 110: Netzanschluss - Hinweise Für Den Installateur
Seite DE-30 Einbau und Anschluss Netzanschluss – Hinweise für Anschlussbedingungen Das Gerät ist für folgende Wechselspannun- den Installateur gen ausgelegt: – 220–240 V ~, 50/60 Hz, 50 A WARNUNG – 380–415 V 2N~, 50/60 Hz, 25 A Stromschlag- / Brandgefahr! –... -
Seite 111: Netzleitung Anschließen
Seite DE-31 Einbau und Anschluss Netzleitung anschließen L1 – L3: Phase(n) Der Klemmkasten und die Anschlusspläne Null-Leiter befinden sich hinten auf der Oberseite des Schutzleiter (Erde) Backofens. 220–240 V ~, 50/60 Hz L1 an (gebrückt) N an (gebrückt) ... -
Seite 112: Backofen Einsetzen
Seite DE-32 Einbau und Anschluss Backofen einsetzen ist codiert, ein Verpolen ist daher nicht mög- lich. HINWEIS Beschädigungsgefahr! Backofen nur an den Tra ge mulden an ■ den Sei ten anheben. Der Türgriff ist dafür nicht geeignet. Folgende Bedingungen müssen erfüllt sein: –... -
Seite 113: Vor Dem Ersten Gebrauch
Seite DE-33 Einbau und Anschluss Vor dem ersten Gebrauch 1. Entfernen Sie alle Transportsicherungen (Pappstreifen etc.) und alle Klebestreifen aus dem Backofen. 2. Drehen Sie alle Schalter des Herdes auf Null-Stellung. 3. Schalten Sie die Sicherungen für den Herdstromkreis ein. 4. -
Seite 114: Fehlersuchtabelle
Seite DE-34 Fehlersuchtabelle Fehlersuchtabelle Bei allen elektrischen Geräten können Störungen auf tre ten. Da bei muss es sich nicht um ei nen Defekt am Gerät handeln. Prüfen Sie des halb bitte an hand der Ta bel le, ob Sie die Störung be sei- ti gen können. -
Seite 115: Unser Service
Seite DE-35 Unser Service Unser Service Damit wir Ihnen schnell helfen können, nennen Sie uns bitte: Gerätebezeichnung Modell Bestellnummer BF-6A31E4E1G + HB64-VF63G 783 466 Herd-Set Beratung, Bestellung und Reparaturen und Ersatzteile Reklamation Kunden in Deutschland Wenden Sie sich bitte an die Produktberatung –... -
Seite 116: Umweltschutz
Seite DE-36 Umweltschutz Umweltschutz Elektro-Altgeräte Tipps zum Energiesparen umweltgerecht entsorgen – Heizen Sie den Backofen nur dann vor, wenn es im Rezept oder in den mitgeliefer- Elektrogeräte enthalten Schadstoffe ten Gartabellen angegeben ist. und wertvolle Ressourcen. – Verwenden Sie möglichst dunkle Backfor- Jeder Verbraucher ist deshalb ge- men und -bleche. -
Seite 117: Technische Daten
Seite DE-37 Technische Daten Technische Daten Herd-Set Marke: Typ/Bezeichnung BF-6A31E4E1G + HB64-VF63G Bestellnummer 783 466 Netzspannung, Absicherung 380–415 V 3N~, 50/60 Hz, 16 A Leistungsaufnahme max. 9,4 kW Backofen Datenblatt für Elektrobacköfen nach der Verordnung (EU) Nr. 65/2014 und Verordnung (EU) Nr. 66/2014... -
Seite 118: Kochfeld
Seite DE-38 Technische Daten Kochfeld Datenblatt für Haushaltskochmulden nach der Verordnung (EU) Nr. 66/2014 Art der Kochmulde Elektrische Kochmulde Anzahl der Kochzonen Heiztechnik Strahlungskochzonen Kochzone vorne links Ø 22,0 cm; 2,1 kW Kochzone hinten links Ø 15,5 cm; 1,2 kW Kochzone vorne rechts Ø...