Herunterladen Inhalt Inhalt Diese Seite drucken
Inhaltsverzeichnis

Werbung

Verfügbare Sprachen
  • DE

Verfügbare Sprachen

  • DEUTSCH, seite 63
Daker DK 1, 2, 3 kVA
®
Manuel d'installation • Installation manual
Part. LE05334AD-09/13-01 GF

Werbung

Inhaltsverzeichnis
loading

Inhaltszusammenfassung für LEGRAND Daker DK 1 kVA

  • Seite 1 Daker DK 1, 2, 3 kVA ® Manuel d’installation • Installation manual Part. LE05334AD-09/13-01 GF...
  • Seite 2 ® Daker DK 1, 2, 3 kVA FRANÇAIS ENGLISH ITALIANO DEUTSCH ESPAÑOL PУСCKИЙ...
  • Seite 3: Inhaltsverzeichnis

    Daker DK 1, 2, 3 kVA Indice 1 Introduction 2 Conditions d’utilisation 3 Panneau LCD 4 Installation 5 Logiciel d’autodiagnostic ups communicator 6 Changement batteries 7 Dysfonctionnements possibles 8 Caractéristiques techniques...
  • Seite 4: Introduction

    ® 1 Introduction Ce manuel contient les informations concernant l’utilisation des modèles Daker DK 1, 2, 3 kVA. Il est recommandé de lire attentivement ce manuel avant de procéder à l’installation de l’onduleur et de respecter scrupuleusement les instructions ci-dessous. Les UPS Daker DK 1, 2, 3 kVA sont conçus pour une utilisation domestique ou industrielle.
  • Seite 5: Panneau Lcd

    Daker DK 1, 2, 3 kVA 3 Panneau LCD Panneau LCD. Le LED vert allumé indique que l’alimentation sur secteur est comprise entre 160 et 288 Vca. 3-4. Les leds verts indiquent que sont présentes les sorties programmables Outlet 1 et Outlet 2. Le LED orange indique que le By-pass est actif.
  • Seite 6 ® 3 Panneau LCD Symboles écran LCD Réf. Symbole Description LINE Alimentation sur secteur Niveau batterie fiable Batterie endommagée Surcharge Erreur de branchement terre Fonctionnement en Service Mode UPS éteint FAIL UPS en alarme Schéma de fonctionnement UPS Visualisation mesures Indique le paramètre mesuré...
  • Seite 7 Daker DK 1, 2, 3 kVA Panneau arrière 230V 3 100 50 AC OUTPUT AC INPUT INPUT DC 36V BREAKER INPUT BREAKER 3 100 51 AC INPUT DC 72V OUTPUT BREAKER INPUT BREAKER 3 100 52 DC 72V 13. Port de communication USB 19.
  • Seite 8: Installation

    ® 4 Installation Contrôler le contenu de l’emballage : • Mode d’emploi • Câble de branchement charges sortie • Câble d’entrée • Câble de communication RS232 • Câble de communication USB • Accessoires de configuration Tower/rack A3 - Optional 1 pcs A2 - Optional 4 pcs 1 pcs...
  • Seite 9 Daker DK 1, 2, 3 kVA Configuration tower Step 1 Step 2...
  • Seite 10 ® 4 Installation UPS + armoire batterie (option) Step 1 Step 2...
  • Seite 11 Daker DK 1, 2, 3 kVA Configuration rack 19” Step 1 Step 2 Step 3 90° Step 4...
  • Seite 12 ® 4 Installation Step 5 Step 6...
  • Seite 13 Daker DK 1, 2, 3 kVA Au dos de l'UPS de continuité sont prévus les branchements suivants : • Prises de sortie [19] et connecteur d’entrée [18] : à ces deux connecteurs, brancher le câble d’alimentation et les câbles de sortie fournis à cet effet. •...
  • Seite 14: Fonctions Spéciales

    Il est possible d’accéder à cette fonction et à d’autres fonctions en téléchargeant gratuitement le logiciel “UPS Setting tool” sur le site www.ups.legrand.com. Données par défaut et fonctions spéciales 1) A l’issue du bon allumage de l’UPS, appuyer sur le bouton Fonctions spéciales pour passer à...
  • Seite 15 Daker DK 1, 2, 3 kVA...
  • Seite 16 ® 4 Installation 3) Appuyer sur la touche “Haut” pour régler les fonctions spéciales. Les fonctions incluent Avertisseur sonore ON (figure P1), Avertisseur sonore OFF (figure P2, alarme désactivée en cas de signaux provenant de l’UPS) et Self-test ON (figure Q1) ou OFF (figure Q2). L’UPS effectue ensuite le test des batteries pendant 10 secondes).
  • Seite 17: Logiciel D'autodiagnostic Ups Communicator

    à l’aide d’un câble RS 232 ou USB. 5 Logiciel d’autodiagnostic UPS communicator Sur le site www.ups.legrand.com, il est possible de télécharger gratuitement un logiciel d’autodia- gnostic pour WINDOWS (16 et 32 bits) et Linux. Ce logiciel fournit les fonctions suivantes : - Visualisation de toutes les données de fonctionnement et de diagnostic en cas de problème.
  • Seite 18: Changement Batteries

    ® 6 Changement batteries Step 1 Step 2...
  • Seite 19 Daker DK 1, 2, 3 kVA Step 3 Step 4 3 100 50 Step 4 3 100 51 3 100 52...
  • Seite 20: Dysfonctionnements Possibles

    ® 7 Dysfonctionnements possibles L’UPS marche toujours avec alimentation batterie : • la tension de secteur n’est pas présente ; • la tension de secteur est hors des limites de la plage de l’UPS ; • le câble d’alimentation n’est pas correctement branché à la prise d’alimentation. •...
  • Seite 21: Caractéristiques Techniques

    Daker DK 1, 2, 3 kVA 8 Caractéristiques techniques SPÉCIFICATIONS DE CONSTRUCTION 3 100 50 3 100 51 3 100 52 Poids 16 Kg 29,5 Kg 30 Kg Dimensions L x H x P en millimètres 440 x 88 x 405 440 x 88 x 650 440 x 88 x 650 Contre les surcharges et les courts-circuits Blocage du fonctionnement dû...
  • Seite 22 ® 8 Caractéristiques techniques SPÉCIFICATIONS DE CONSTRUCTION 3 100 50 3 100 51 3 100 52 Caractéristiques électriques de sortie avec alimentation Tension nominale de sortie 230 V ± 1% Fréquence de sortie 50/60 Hz ± 0.1% Puissance active de sortie 800W 1,6kW 2,4kW...
  • Seite 23 Daker DK 1, 2, 3 kVA Index 1 Introduction 2 Conditions of use 3 LCD Panel 4 Installation 5 UPS communicator self-diagnostic software 6 Battery replacement 7 Possible malfunctioning 8 Technical features...
  • Seite 24: Introduction

    ® 1 Introduction This manual contains information for users of the Daker DK 1, 2, 3 kVA models. You are advised to read this handbook carefully before installing your uninterruptible power sup- ply, meticulously following the instructions given herein. The UPS Daker DK is only been made for civil or industrial use; it is not in conformity with the stan- dards for electro-medical equipment.
  • Seite 25: Lcd Panel

    Daker DK 1, 2, 3 kVA 3 LCD Panel LCD Panel The green LED on steady indicates that the power supply network is within the 160-288 Vac range. 3-4. The green LEDs indicate that the programmable Outlets 1 and 2 are present. The orange LED indicates that the Bypass is active.
  • Seite 26 ® 3 LCD Panel Display LCD symbols Item Symbol Description LINE Line source Low battery level Battery damaged Overload Earth connection error Service Mode operation UPS off FAIL UPS alarm UPS operation diagram Measurements display It indicates which parameter is being measured Er05 Battery insufficient or needing replacing Er06...
  • Seite 27 Daker DK 1, 2, 3 kVA Rear panel 230V 3 100 50 AC OUTPUT AC INPUT INPUT DC 36V BREAKER INPUT BREAKER 3 100 51 AC INPUT DC 72V OUTPUT BREAKER INPUT BREAKER 3 100 52 DC 72V 13. USB Port 19.
  • Seite 28: Installation

    ® 4 Installation Check for the following standard package contents: • User Manual • 2 IEC output cables (for UPS with IEC sockets only) • detached AC Input Power cable (for UPS with IEC sockets only) • RS-232 communication cable •...
  • Seite 29 Daker DK 1, 2, 3 kVA Tower configuration setup Step 1 Step 2...
  • Seite 30 ® 4 Installation UPS + battery cabinet (optional) Step 1 Step 2...
  • Seite 31 Daker DK 1, 2, 3 kVA Step 1 Step 2 Step 3 90° Step 4...
  • Seite 32 ® 4 Installation Step 5 Step 6...
  • Seite 33 Daker DK 1, 2, 3 kVA On the rear of the uninterruptible power supply are the following connections: • Output sockets [19] input connector [18]: connect to these connectors the power cable and the output cables included. • Socket for connecting computer serial interface RS232 (9 female pins) [14]: required when using the diagnostic and shutdown management software.
  • Seite 34: Special Functions

    To access both this and other functions download the “UPS Setting tool” free of charge from the www.ups.legrand.com website. UPS Default Data and Special Function Execution...
  • Seite 35 Daker DK 1, 2, 3 kVA...
  • Seite 36 ® 4 Installation 3) Press the scroll up key to execute special functions. The functions include Buzzer ON (figure P1), Buzzer OFF (figure P2, Alarm silence for UPS warning), and self-test ON (figure Q1) or OFF (figure Q2. The UPS will execute the battery test for ten seconds). If the self-test is successful it will display figure W;...
  • Seite 37: Ups Communicator Self-Diagnostic Software

    UPS using an RS232 or USB cable. 5 UPS communicator self-diagnostic software From the website www.ups.legrand.com it is possible to download free of charge a self-diagnostic software running on WINDOWS (16 e 32 bit) e Linux platforms.
  • Seite 38: Battery Replacement

    ® 6 Battery replacement Step 1 Step 2...
  • Seite 39 Daker DK 1, 2, 3 kVA Step 3 Step 4 3 100 50 Step 4 3 100 51 3 100 52...
  • Seite 40: Possible Malfunctioning

    ® 7 Possible malfunctioning The UPS always operates on batteries: • There is no line voltage • Line voltage is out of allowed UPS range • The power supply cable is not correctly connected to mains socket. • The input circuit breaker has to be reset •...
  • Seite 41: Technical Features

    Daker DK 1, 2, 3 kVA 8 Technical features CONSTRUCTION SPECIFICATIONS 3 100 50 3 100 51 3 100 52 Weights 16 Kg 29,5 Kg 30 Kg Dimensions L x H x P in mm 440 x 88 x 405 440 x 88 x 650 440 x 88 x 650 Electronic protection against overloading and short-circuiting.
  • Seite 42: Battery Operation

    ® 8 Technical features CONSTRUCTION SPECIFICATIONS 3 100 50 3 100 51 3 100 52 Electrical specifications on output with battery operation Rated output voltage 230 V ± 1% Output frequency 50/60 Hz ± 0.1% Active output capacity on non-linear load 800W 1,6kW 2,4kW...
  • Seite 43 Daker DK 1, 2, 3 kVA Indice 1 Introduzione 2 Condizioni d’uso 3 Pannello LCD 4 Installazione 5 Software autodiagnostico Ups communicator 6 Sostituzione batterie 7 Possibili malfunzionamenti 8 Caratteristiche tecniche...
  • Seite 44: Introduzione

    ® 1 Introduzione Questo manuale contiene le informazioni per l’utente relative ai modelli Daker DK 1, 2, 3 kVA. Si consiglia di leggere attentamente questo manuale prima di procedere all’installazione del grup- po di continuità, attenendosi scrupolosamente a quanto di seguito riportato. Gli UPS Daker DK 1, 2, 3 kVA sono realizzati per uso civile o industriale;...
  • Seite 45: Pannello Lcd

    Daker DK 1, 2, 3 kVA 3 Pannello LCD Pannello LCD LED verde acceso fisso indica che la rete di alimentazione è all’interno del range 160-288 VAC. 3-4. Led verdi indicano che sono presenti le uscite programmabili Outlet 1 e Outlet 2. LED arancione indica che il Bypass è...
  • Seite 46 ® 3 Pannello LCD Simboli LCD Display Item Symbol Description LINE Sorgente di linea Livello batteria basso Batteria danneggiata Sovraccarico Errore di collegamento di terra Funzionamento in Service Mode UPS Spento FAIL UPS in allarme Schema di funzionamento UPS Visualizzazione misure Indica quale parametro si sta misurando Er05 Batteria scarsa o da cambiare...
  • Seite 47 Daker DK 1, 2, 3 kVA Pannello posteriore 230V 3 100 50 AC OUTPUT AC INPUT INPUT DC 36V BREAKER INPUT BREAKER 3 100 51 AC INPUT DC 72V OUTPUT BREAKER INPUT BREAKER 3 100 52 DC 72V 13. Porta di comunicazione USB 19.
  • Seite 48: Installazione

    ® 4 Installazione Verificare il corretto contenuto dell’imballo: • Manuale d’uso • Cavi di collegamento carichi uscita • Cavo di ingresso • Cavo di comunicazione RS232 • Cavo di comunicazione USB • Accessori per configurazione Tower/rack A3 - Optional 1 pcs A2 - Optional 4 pcs 1 pcs...
  • Seite 49 Daker DK 1, 2, 3 kVA Configurazione Tower Step 1 Step 2...
  • Seite 50 ® 4 Installazione UPS + armadio batteria (opzionale) Step 1 Step 2...
  • Seite 51 Daker DK 1, 2, 3 kVA Configurazione rack 19” Step 1 Step 2 Step 3 90° Step 4...
  • Seite 52 ® 4 Installazione Step 5 Step 6...
  • Seite 53 Daker DK 1, 2, 3 kVA Nel retro del gruppo di continuità sono predisposti i seguenti collegamenti: • Prese di Uscita [19], connettore di ingresso [18]: collegare a questi connettori il cavo di alimentazione ed i cavi di uscita in dotazione. •...
  • Seite 54: Funzioni Speciali

    E’ possibile accedere a questa funzione e ad altre scaricando gratuitamente il sw “UPS Setting tool” dal sito www.ups.legrand.com . Dati di Default e funzioni speciali 1) Dopo la corretta accensione dell’UPS premere il pulsante Funzioni Speciali per passare alla voce illustrata in figura P1.
  • Seite 55 Daker DK 1, 2, 3 kVA...
  • Seite 56 ® 4 Installazione 3) Premere il tasto “Su” per impostare le funzioni speciali. Le funzioni includono Buzzer ON (figura P1), Buzzer OFF (figura P2, allarme tacitato in caso di segnalazioni dall’UPS), e Self-test ON (figura Q1) o OFF (figura Q2. L’UPS eseguirà il test di batterie per 10 secondi). Se il Self-test darà...
  • Seite 57: Software Autodiagnostico Ups Communicator

    PC alle prese di interfacciamento [Indicare numero riferimento] presente sul retro dell’UPS, tramite un cavo RS 232 o USB. 5 Software autodiagnostico UPS communicator Dal sito www.ups.legrand.com è possibile scaricare gratuitamente un software autodiagnostico per ambienti WINDOWS (16 e 32 bit) e Linux. Questo software implementa le funzioni di: - Visualizzazione di tutti i dati di funzionamento e diagnostica in caso di problemi.
  • Seite 58: Sostituzione Batterie

    ® 6 Sostituzione batterie Step 1 Step 2...
  • Seite 59 Daker DK 1, 2, 3 kVA Step 3 Step 4 3 100 50 Step 4 3 100 51 3 100 52...
  • Seite 60: Possibili Malfunzionamenti

    ® 7 Possibili malfunzionamenti L’UPS funziona sempre a batteria: • la tensione di rete non è presente • la tensione di rete è fuori dal range dell’UPS • il cavo di alimentazione non è correttamente collegato alla presa di alimentazione •...
  • Seite 61: Caratteristiche Tecniche

    Daker DK 1, 2, 3 kVA 8 Caratteristiche tecniche SPECIFICHE COSTRUTTIVE 3 100 50 3 100 51 3 100 52 Pesi 16 Kg 29,5 Kg 30 Kg Dimensioni L x H x P in millimetri 440 x 88 x 405 440 x 88 x 650 440 x 88 x 650 Contro sovraccarichi e cortocircuito Blocco del funzionamento per fine Protezioni Elettroniche...
  • Seite 62 ® 8 Caratteristiche tecniche SPECIFICHE COSTRUTTIVE 3 100 50 3 100 51 3 100 52 Caratteristiche elettriche di uscita in funzionamento a batteria Tensione nominale di uscita 230 V ± 1% Frequenza di uscita 50/60 Hz ± 0.1% Potenza attiva di uscita su carico non lineare 800W 1,6kW 2,4kW...
  • Seite 63 Daker DK 1, 2, 3 kVA Index 1 Einführung 2 Gebrauchsbedingungen 3 LCD-Tafel 4 Installation 5 Software selbstdiagnose ups communicator 6 Batterien auswechseln 7 Mögliche Fehlfunktionen 8 Technische Angaben...
  • Seite 64: Einführung

    ® 1 Einführung Die in diesem Handbuch enthaltenen Informationen beziehen sich auf die Modelle Daker DK 1, 2, 3 kVA Plus. Das Handbuch sollte vor der Installation der USV-Anlage aufmerksam durchgelesen werden. Alle nachstehenden Anweisungen müssen strikt befolgt werden. Die USV-Anlagen Daker DK 1, 2, 3 kVA Plus sind für den zivilen und industriellen Gebrauch bestimmt;...
  • Seite 65: Lcd-Tafel

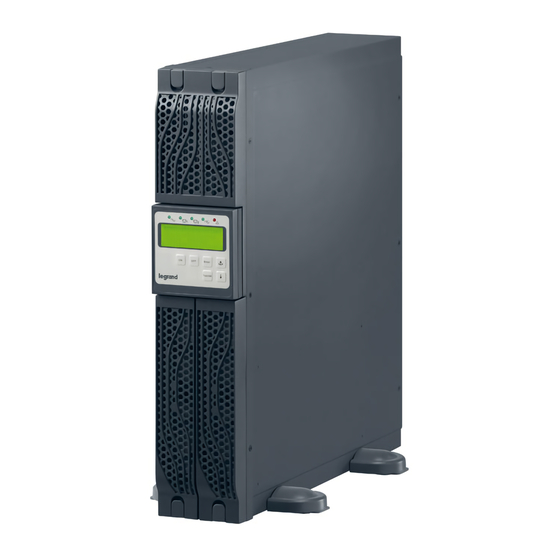
    Daker DK 1, 2, 3 kVA 3 LCD-Tafel LCD-Tafel Grüne LED, wenn sie fest leuchtet liegt die Stromnetzversorgung zwischen 160 und 288 Vac. 3-4. Grüne LEDsbedeuten, dass die programmierbaren Ausgänge Outlet 1 und Outlet 2 vorhanden sind. Die orangefarbene LED bedeutet, dass der Bypass aktiv ist. USV-Alarmleuchte USV-Einschaltetaste / Summer quittieren USV-Ausschaltetaste...
  • Seite 66 ® 3 LCD-Tafel Symbole am LCD-Display Symbol Beschreibung LINE Leitungsquelle Niedriges Batterieniveau Batterie defekt Überlast Falsch geerdet Betriebsmodus Service USV Aus FAIL USV auf Alarm USV-Betriebsschema Anzeige der Messungen Gibt an, welcher Parameter gemessen wird Er05 Batterie erschöpft oder zu ersetzen Er06 Kurzschluss am Ausgang Er10...
  • Seite 67 Daker DK 1, 2, 3 kVA Zurück Bedienungsfeld 230V 3 100 50 AC OUTPUT AC INPUT INPUT DC 36V BREAKER INPUT BREAKER 3 100 51 AC INPUT DC 72V OUTPUT BREAKER INPUT BREAKER 3 100 52 DC 72V 13. USB-Kommunikationsport 20.
  • Seite 68: Installation

    ® 4 Installation Kontrollieren Sie bitte den Verpackungsinhalt: • Gebrauchsanweisungen • Anschlusskabel Ausgangslasten • Eingangskabel • RS232-Kommunikationskabel • USB-Kommunikationskabel • Zubehör für die Konfiguration Tower/Rack A3 - Optional 1 pcs A2 - Optional 4 pcs 1 pcs 1 pcs 2 pcs 2 pcs ±1.0mm ±1.0mm...
  • Seite 69 Daker DK 1, 2, 3 kVA Tower-konfiguration Step 1 Step 2...
  • Seite 70 ® 4 Installation USV + batteriefach (option) Step 1 Step 2...
  • Seite 71 Daker DK 1, 2, 3 kVA Konfiguration rack 19“ Step 1 Step 2 Step 3 90° Step 4...
  • Seite 72 ® 4 Installation Step 5 Step 6...
  • Seite 73: Einschalten

    Daker DK 1, 2, 3 kVA An der Rückseite der USV-Einheit sind folgende Anschlussmöglichkeiten vorgesehen: • Ausgangsbuchse [19], Eingangsverbinder [18]: Schließen Sie das Stromkabel und die mitgelieferten Kabel an diese Steckbuchsen an. • Steckbuchse zum Anschluss der PC-Serienschnittstelle Typ RS232 (9-polige Buchse) [14]: zu verwenden, wenn die Software für Diagnostik und Shutdown eingesetzt werden soll.
  • Seite 74 Diese Steckbuchsen können während des Batteriebetriebs deaktiviert oder zeitgesteuert werden, um die Qualität der Stromversorgung für die Lasten zu gewährleisten, die am meisten kritisch sind. Diese und andere Funktionen können kostenlos von der Webseite www.pus.legrand.com unter „UPS Setting tool“ heruntergeladen werden.
  • Seite 75 Daker DK 1, 2, 3 kVA...
  • Seite 76: Default-Einstellungen Der Usv-Einheit Und Alternative Einstellungen

    ® 4 Installation 3) Taste drücken, um die Sonderfunktionen einzustellen. Zu den Funktionen gehören: Buzzer ON (Abbildung P1), Buzzer OFF (Abbildung P2, quittierter Alarm im Falle von Meldungen durch die USV-Einheit), und Selbsttest ON (Abbildung Q1) oder OFF (Abbildung Q2. Die USV-Einheit testet die Batterien 10 Sekunden lang).
  • Seite 77: Verbindung

    Rückseite der USV-Einheit durch ein Kabel RS 232 oder USB angeschlossen wird. 5 Software selbstdiagnose UPS communicator Von der Seite www.ups.legrand.com können Sie die Software für WINDOWS (16 und 32 bit) und für Linux kostenlos herunterladen. Mit dieser Software können folgende Funktionen implementiert werden: - Anzeige aller Betriebsdaten und Diagnostik im Falle von Störungen...
  • Seite 78: Batterien Auswechseln

    ® 6 Batterien auswechseln Step 1 Step 2...
  • Seite 79 Daker DK 1, 2, 3 kVA Step 3 Step 4 3 100 50 Step 4 3 100 51 3 100 52...
  • Seite 80: Mögliche Fehlfunktionen

    ® 7 Mögliche Fehlfunktionen Die USV ist immer im Batteriebetrieb: • keine Netzspannung vorhanden • die Netzspannung ist außerhalb des eingestellten Bereichs der USV • das Speisekabel ist nicht korrekt mit der Versorgungssteckerbuchse verbunden • der magnetothermische Schalter ist erhoben •...
  • Seite 81: Technische Angaben

    Daker DK 1, 2, 3 kVA 8 Technische Angaben KONSTRUKTIVE ANGABEN 3 100 50 3 100 51 3 100 52 Gewichte 16 Kg 29,5 Kg 30 Kg Abmessungen L x H x P (mm) 440 x 88 x 405 440 x 88 x 650 440 x 88 x 650 Vor Überlastungen und Kurzschlüssen Unterbrechung des Betriebs bei Ablauf Schutzvorrichtungen...
  • Seite 82: Batteriebetrieb

    ® 8 Technische Angaben KONSTRUKTIVE ANGABEN 3 100 50 3 100 51 3 100 52 Elektrische Eigenschaften des Ausgangs bei Batteriebetrieb Nominalausgangsspannung 230 V ± 1% Ausgangsfrequenz 50/60 Hz ± 0.1% Aktive Ausgangsleistung an nicht linearer Last 800W 1,6kW 2,4kW Scheinbare Ausgangsleistung an nicht linearer 1kVA 2kVA...
  • Seite 83 Daker DK 1, 2, 3 kVA Índice 1 Introducción 2 Condiciones de uso 3 Panel LCD 4 Instalación 5 Software de autodiagnóstico ups communicator 6 Cambio de las baterías 7 Posibles funcionamientos anómalos 8 Características técnicas...
  • Seite 84: Introducción

    ® 1 Introducción Este manual contiene las informaciones para el usuario relativas a los modelos Daker DK 1, 2, 3 kVA. Se aconseja leer detenidamente este manual antes de proceder a instalar el grupo de alimentación ininterrumpida (SAI), ajustándose terminantemente a cuanto presentado a continuación. Los SAI Daker DK 1, 2, 3 kVA están fabricados para uso residencial o industrial;...
  • Seite 85: Panel Lcd

    Daker DK 1, 2, 3 kVA 3 Panel LCD Panel LCD El LED verde encendido fijo indica que la red de alimentación se encuentra en el rango 160- 288 Vac. 3-4. Los leds verdes indican que están presentes las salidas programables, Outlet 1 y Outlet 2. El LED naranja indica que el bypass está...
  • Seite 86 ® 3 Panel LCD Símbolos LCD Display ítem Símbolo Descripción LINE Fuente de Línea Nivel batería bajo Batería dañada Sobrecarga Error de conexión de puesta a tierra Funcionamiento en Service Mode SAI apagado FAIL SAI en alarma Esquema de funcionamiento SAI Visualización de medidas Indica qué...
  • Seite 87 Daker DK 1, 2, 3 kVA Panel trasero 230V 3 100 50 AC OUTPUT AC INPUT INPUT DC 36V BREAKER INPUT BREAKER 3 100 51 AC INPUT DC 72V OUTPUT BREAKER INPUT BREAKER 3 100 52 DC 72V 13. Puerto de comunicación USB 19.
  • Seite 88: Instalación

    ® 4 Instalación Comprobar el correcto contenido del embalaje: • Manual de uso • Cables de conexión cargas de salida • Cable de entrada • Cable de comunicación RS232 • Cable de comunicación USB • Accesorios para configurar Tower/rack A3 - Optional 1 pcs A2 - Optional 4 pcs...
  • Seite 89 Daker DK 1, 2, 3 kVA Configuración tower Step 1 Step 2...
  • Seite 90 ® 4 Instalación SAI + armario batería (opcional) Step 1 Step 2...
  • Seite 91 Daker DK 1, 2, 3 kVA Configuración rack 19” Step 1 Step 2 Step 3 90° Step 4...
  • Seite 92 ® 4 Instalación Step 5 Step 6...
  • Seite 93 Daker DK 1, 2, 3 kVA En la parte trasera del SAI se encuentran las siguientes conexiones: • Tomas de salida [19], conector de de entrada [18]: enchufar a estos conectores el cable de alimentación y los cables de salida incluidos. •...
  • Seite 94: Funciones Especiales

    Es posible configurar esta función y a otras más mediante el software “UPS Setting tool” que puede descargarse gratis en el sitio www.ups.legrand.com . UPS Default Data and Special Function Execution 1) Después de encender el SAI, apriete la tecla Funciones especiales para pasar a la opción que...
  • Seite 95 Daker DK 1, 2, 3 kVA...
  • Seite 96 ® 4 Instalación 3) Pulse la tecla para configurar las funciones especiales. Las funciones incluyen Buzzer ON [Zumbador ON] (figura P1), Buzzer OFF [Zumbador OFF] (figura P2, alarma apagada en caso de señales del SAI), y Self-test ON [Autodiagnóstico ON] (figura Q1) y OFF (figura Q2. El SAI ejecutará un test de baterías unos 10 segundos).
  • Seite 97: Software De Autodiagnóstico Ups Communicator

    SAI, mediante un cable RS 232 o USB. 5 Software de autodiagnóstico UPS communicator En el sitio www.ups.legrand.com es posible descargar gratis un software de autodiagnóstico para entorno WINDOWS (16 e 32 bits) y Linux. Este software implementa las funciones de: - Visualización de todos los datos de funcionamiento y diagnóstico en caso de problemas.
  • Seite 98: Cambio De Las Baterías

    ® 6 Cambio de las baterías Step 1 Step 2...
  • Seite 99 Daker DK 1, 2, 3 kVA Step 3 Step 4 3 100 50 Step 4 3 100 51 3 100 52...
  • Seite 100: Posibles Funcionamientos Anómalos

    ® 7 Posibles funcionamientos anómalos El SAI funciona siempre con batería: • Falta tensión de red • La tensión de red está fuera del rango del SAI • El cable de alimentación no está correctamente enchufado en la toma de red •...
  • Seite 101: Características Técnicas

    Daker DK 1, 2, 3 kVA 8 Características técnicas ESPECIFICACIONES CONSTRUCTIVAS 3 100 50 3 100 51 3 100 52 Pesos 16 Kg 29,5 Kg 30 Kg Medidas A x H x P en milímetros 440 x 88 x 405 440 x 88 x 650 440 x 88 x 650 Contra sobrecarga y cortocircuito Bloqueo del funcionamiento por fin de Protecciones Electrónicas...
  • Seite 102 ® 8 Características técnicas ESPECIFICACIONES CONSTRUCTIVAS 3 100 50 3 100 51 3 100 52 Características eléctricas de salida en funcionamiento con batería Tensión nominal en salida 230 V ± 1% Frecuencia en salida 50/60 Hz ± 0.1% Potencia activa en salida con carga no lineal 800W 1,6kW 2,4kW...
  • Seite 103 Daker DK 1, 2, 3 kVA Содержание 1 Введение 2 Указания по безопасной эксплуатации 3 ЖК-панель 4 Монтаж 5 Программное обеспечение для самодиагностики ИБП 6 Замена батареи 7 Возможные неисправности 8 Технические характеристики...
  • Seite 104: Введение

    ® 1 Введение В данном руководстве содержится информация для пользователей источников бесперебойного питания (ИБП) моделей Daker DK 1, 2, 3 кВА. Настоятельно рекомендуется внимательно изучить требования настоящего руководства перед тем, как приступать к монтажу ИБП, и тщательно следовать приведённым в нём инструкциям. ИБП...
  • Seite 105: Жк-Панель

    Daker DK 1, 2, 3 kVA 3 ЖК-панель ЖК-панель Зелёный светодиод: горит ровным светом если напряжение электросети находится в пределах 160 - 288 В пер. тока 3-4. Зелёные светодиоды: горят ровным светом, если на программируемые выходы 1 и 2 подаётся напряжение Оранжевый...
  • Seite 106 ® 3 ЖК-панель Символы ЖК-дисплея № Символ Описание LINE Источник питания – сеть Низкий уровень заряда батареи Батарея повреждена Перегрузка Заземление не подключено, либо подключено неправильно Сервисный режим ИБП отключен FAIL Авария ИБП Схема режимов работы ИБП Отображение результатов измерений Указатель...
  • Seite 107 Daker DK 1, 2, 3 kVA Задняя панель, 230 В 3 100 50 AC OUTPUT AC INPUT INPUT DC 36V BREAKER INPUT BREAKER 3 100 51 AC INPUT DC 72V OUTPUT BREAKER INPUT BREAKER 3 100 52 DC 72V 13. Порт USB 18.
  • Seite 108: Монтаж

    ® 4 Монтаж Проверьте комплект поставки ИБП: • Руководство по эксплуатации • 2 выходных кабеля IEC (только для ИБП с разъёмами стандарта IEC) • съёмный входной кабель для подключения к сети переменного тока (только для ИБП с разъёмами стандарта IEC) •...
  • Seite 109 Daker DK 1, 2, 3 kVA Установка ИБП в конфигурации «башня» Шаг 1 Шаг 2...
  • Seite 110 ® 4 Монтаж ИБП + БАТАРЕЙНЫЙ КАБИНЕТ (ПОСТАВЛЯЕТСЯ ДОПОЛНИТЕЛЬНО) Шаг 1 Шаг 2...
  • Seite 111 Daker DK 1, 2, 3 kVA Подготовка ИБП для монтажа в стойку Шаг 1 Шаг 2 Шаг 3 90° Шаг 4...
  • Seite 112 ® 4 Монтаж Шаг 5 Шаг 6...
  • Seite 113 Daker DK 1, 2, 3 kVA На задней панели ИБП расположены следующие разъёмы: • Выходные разъёмы (розетки) [19], входной разъём [18]: для подсоединения сетевого кабеля и выходных кабелей, входящих в комплект поставки. • 9-контактная розетка RS232 для подключения последовательного кабеля компьютера [4]: требуется...
  • Seite 114: Прекращение Работы

    ® 4 Монтаж Прекращение работы 7) Нажмите кнопку ОТКЛ. [8] и удерживайте её в течение 5 сек. Выход инвертора отключится, а питание нагрузки будет осуществляться через цепь байпаса. 8) Отключите автоматический выключатель сети питания. 9) Теперь ИБП отключен полностью. Специальная функция ИПБ...
  • Seite 115 Daker DK 1, 2, 3 kVA...
  • Seite 116 ® 4 Монтаж 3) Для настройки специальных функций нажмите кнопку прокрутки вверх . Функции включают: зуммер ВКЛ. (экран P1), зуммер ОТКЛ. (на экране P2 отключается звуковая сигнализация ИБП), режим самотестирования ВКЛ. (экран Q1) или режим самотестирования ОТКЛ. (экран Q2). ИБП будет тестировать батарею в течение 10 сек. Если самотестирование будет...
  • Seite 117: Программное Обеспечение Для Самодиагностики Ибп

    5 Программное обеспечение для самодиагностики ИБП Программное обеспечение для самодиагностики, работающее ОС WINDOWS (16 и 32 бит) и Linux, можно бесплатно загрузить с сайта www.ups.legrand.com. Оно может использоваться для выполнения следующих функций: - отображение всех данных о работе и диагностика ИБП в случае возникновения проблем, - установка...
  • Seite 118: Замена Батареи

    ® 6 Замена батареи Шаг 1 Шаг 2...
  • Seite 119 Daker DK 1, 2, 3 kVA Шаг 3 Шаг 4 3 100 50 Шаг 4 3 100 51 3 100 52...
  • Seite 120: Возможные Неисправности

    ® 7 Возможные неисправности ИБП всегда работает в автономном режиме: • Отсутствует напряжение в электросети. • Напряжение в электросети выше или ниже допустимого для ИБП. • Неисправен или неправильно подключён кабель питания. • Сработал входной автоматический выключатель. • Неисправна розетка электросети. ИБП...
  • Seite 121: Технические Характеристики

    Daker DK 1, 2, 3 kVA 8 Технические характеристики НОМЕР ПО КАТАЛОГУ 3 100 50 3 100 51 3 100 52 Масса 16 кг 29,5 кг 30 кг Размеры, Д x В x Г (мм) 440 x 88 x 405 440 x 88 x 650 440 x 88 x 650 Электронная...
  • Seite 122 8 Технические характеристики НОМЕР ПО КАТАЛОГУ 3 100 50 3 100 51 3 100 52 Электрические характеристики на выходе в автономном режиме Номинальное выходное напряжение 230 В ± 1 % Выходная частота 50/60 Hz ± 0.1% Активная выходная мощность при 800 Вт...
  • Seite 124 : 33 5 55 06 87 87 Fax : 33 5 55 06 74 55 www.legrandelectric.com Legrand se réserve le droit de modifier à tout moment le contenu de cet imprimé et de communiquer, sous n’importe quelle forme et modalité, les changements apportés.

Diese Anleitung auch für:

Daker dk 2 kvaDaker dk 3 kva

Inhaltsverzeichnis