AUDIOLINE DECT4000R Bedienungsanleitung
Schnurloses digitales dect-telefon

Verwandte Anleitungen für AUDIOLINE DECT4000R


Inhaltszusammenfassung für AUDIOLINE DECT4000R
- Seite 1 Schnurloses digitales DECT-Telefon Cordless digital DECT telephone Bedienungsanleitung Operating Instructions DECT4000R...
- Seite 2 DECT4000R Bedienungsanleitung____3 Operating Instructions__51...
-
Seite 3: Inhaltsverzeichnis
- Inhaltsverzeichnis - Allgemeine Hinweise ......Bestimmungsgemäße Verwendung ....Stromausfall . - Seite 4 - Inhaltsverzeichnis - Bedienung ........Das Display .
- Seite 5 - Inhaltsverzeichnis - Rufnummernanzeige (CLIP) ....Die Anruferliste ........7.1.1 Rufnummer aus der Anruferliste wählen .
- Seite 6 - Inhaltsverzeichnis - Mehrere Mobilteile ......10.1 An- und Abmelden von Mobilteilen .
-
Seite 7: Allgemeine Hinweise
- Allgemeine Hinweise - Achtung: Das Mobilteil ist spritzwassergeschützt und schmutzunempfindlich. Es ist nicht wasserdicht! Allgemeine Hinweise Bitte lesen Sie diese Bedienungsanleitung sorgfältig durch. Bei eventuell auftretenden Fragen wenden Sie sich bitte an unseren Service unter der Service-Hotline 0180 5 00 13 88 (Kosten Telekom bei Drucklegung: 12ct/min). -
Seite 8: Netzteil
Oberflächen kann es jedoch nicht ausgeschlossen werden, dass durch die Gerätefüße Spuren auf der Abstellfläche entstehen. Netzteil Verwenden Sie nur das mitgelieferte AUDIOLINE Steckernetzteil, da andere Netzteile das Telefon zerstören können. Es besteht Lebensgefahr, wenn das Steckernetzteil geöffnet und nicht vom Stromnetz getrennt wird. -
Seite 9: Laden Des Mobilteils
Durch die große Anzahl verschiedener Nebenstellenanlagen kann eine Funktionsgarantie nicht übernommen werden. Rückgabe von Altgeräten Wenn Sie Ihr Audioline-Gerät entsorgen wollen, bringen Sie es bitte zur Sammelstelle Ihres kommunalen Entsorgungsträgers (z. B. Wertstoffhof). Das nebenstehende Symbol auf Ihrem Telefon bedeutet, dass das Altgerät nicht im Hausmüll entsorgt werden darf. -
Seite 10: Temperatur Und Umgebungsbedingungen
- Allgemeine Hinweise - DECT-Telefone können in Hörgeräten einen unangenehmen Brummton verursachen. 1.10 Temperatur und Umgebungsbedingungen Das Telefon ist für den Betrieb in geschützten Räumen mit einem Temperaturbereich von 10 ˚C bis 30 ˚C ausgelegt. Die Basisstation darf nicht in Feuchträumen wie Bad oder Waschküche aufgestellt werden. Vermeiden Sie die Nähe zu Wärmequellen wie Heizkörpern und setzen Sie das Gerät keiner direkten Sonnenbestrahlung aus. -
Seite 11: Leistungsmerkmale
- Leistungsmerkmale - Leistungsmerkmale Digitaler DECT/GAP Standard Bis zu 8 Stunden Dauergespräch Bis zu 110 Stunden Standby Spritzwassergeschütztes und schmutzunempfindliches Mobilteil Sprachverschlüsselung für eine hohe Sicherheit Tonwahl/Pulswahl (MFV/IWV) Temporäre Umschaltung von Pulswahl (IWV) auf Tonwahl (MFV) Hervorragende Displaydarstellung durch beleuchtetes Display Anrufkennung, kompatibel mit FSK/DTMF (automatisch) Rufnummernanzeige im Display (CLIP) Anruferliste für bis zu 10 Rufnummern... - Seite 12 - Leistungsmerkmale - T-Net geeignet (Hook-Flash 300 ms) Nebenstellentauglich (Flash 100 ms) Mikrofonstummschaltung Tastatursperre Akku- und Reichweitenwarnton DECT: Digital European Cordless Telephone = Standard für kabellose Telefone. GAP: Generic Access Profile = Standard für das Zusammenwirken von Mobilteilen und Basisstationen anderer Hersteller.
-
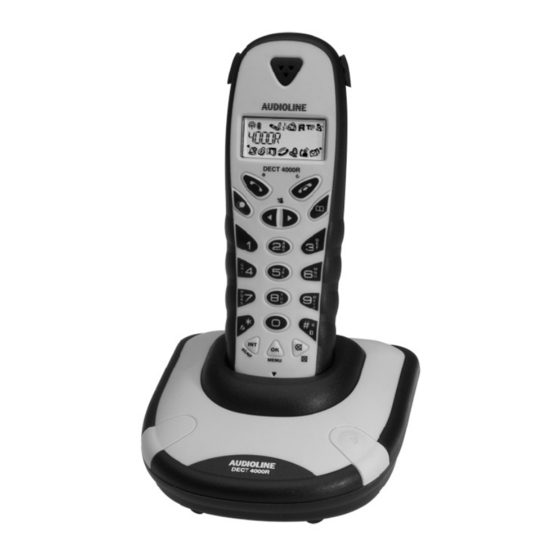
Seite 13: Bedienelemente
- Bedienelemente - Bedienelemente Mobilteil 1. Taste Gespräch beenden / Menü zurück 2. Telefonbuchtaste 3. Anruferliste CLIP / Auswahltaste 4. Tastatursperre / Pause 5. Stummtaste / Löschen 6. Menütaste / OK-Taste 7. Intern- und Konferenzgespräche 8. Tonruf Ein oder Aus 9. -
Seite 14: Inbetriebnahme
- Inbetriebnahme - Inbetriebnahme Sicherheitshinweise Achtung: Lesen Sie vor der Inbetriebnahme unbedingt die allgemeinen Hinweise am Anfang dieser Bedienungsanleitung. Verpackungsinhalt prüfen Zum Lieferumfang gehören: eine Basisstation ein Telefonanschlusskabel ein Mobilteil zwei Standard-Akkus ein Netzanschlusskabel eine Bedienungsanleitung ein Montagewinkel Basisstation anschließen Stellen Sie die Basisstation in der Nähe Ihrer Telefonanschlussdose und einer Netzsteckdose auf. -
Seite 15: Wandmontage
- Inbetriebnahme - Wandmontage 1. Bringen Sie den Montagewinkel auf der Unterseite der Basisstation an (siehe Skizze). 2. Bohren Sie waagerecht angeordnet zwei Löcher im Abstand von 64 mm. 3. Setzen Sie die Dübel in die Bohrlöcher ein. 4. Drehen Sie die Schrauben soweit in die Wand, dass der Abstand zwischen Schraubenkopf und Wand ca. -
Seite 16: Gürtelclip Anbringen
- Inbetriebnahme - Die wiederaufladbaren Standard-Akkus Ihres Mobilteils besitzen eine Standby-Zeit bei Zimmertemperatur von max. 110 Stunden. Die maximale Gesprächsdauer beträgt 8 Stunden. Der aktuelle Akkuladezustand wird im Display angezeigt: Voll Halb Schwach Leer Wenn der Akkuladezustand sehr gering ist, zeigt das Display die Meldung “BATTERIE“. -
Seite 17: Bedienung
- Bedienung - Bedienung Das Display Das Display zeigt Ihnen alle wichtigen Funktionen mit verschiedenen Symbolen an. Bei jedem Tastendruck wird das Display für ca. 10 Sekunden beleuchtet. ldqtumv ÿÿÿÿÿÿÿÿ0)(0 kjieghf Display Beschreibung Die Verbindung zur Basisstation ist gut. Zeigt den aktuellen Akkuladezustand an. Sie befinden sich im Menü... -
Seite 18: Die T-Net Box Oder Andere Externe Anrufbeantworter
- Bedienung - Display Beschreibung Sie führen ein Gespräch oder es blinkt während des Ton- rufs. Das Mikrofon im Mobilteil ist während eines Gesprächs ausgeschaltet. Im Standby: Es sind neue Anrufe in der Anruferliste (CLIP) gespeichert. In der Anruferliste: Die Rufnummer wurde bereits angese- hen. -
Seite 19: Zwei Anrufe Entgegennehmen
- Bedienung - Um das Gespräch zu beenden, stellen Sie das Mobilteil zurück in die Basisstation oder drücken Sie die Taste am Mobilteil. Hinweis: Während das Mobilteil klingelt, können Sie den Tonruf am Mobilteil für diesen einen eingehenden Anruf abschalten. Drücken Sie dazu die Taste Zwei Anrufe entgegennehmen Sie werden durch Signaltöne darauf hingewiesen (Anklopfen), dass... -
Seite 20: Gespeicherte Rufnummern Aus Dem Telefonbuch Wählen
- Bedienung - Hinweis: Sie können auch zuerst die Gesprächstaste drücken und erhalten damit das Freizeichen. Bei Nebenstellenanlagen ist es erforderlich, eine bestimmte Nummer zu wählen (z. B. “9” oder “0“), um ein Freizeichen für eine Amtsleitung zu bekommen (siehe Kapitel 8 Nebenstellenanlagen). Die eingegebenen Zahlen Ihrer gewünschten Rufnummer werden sofort gewählt. -
Seite 21: Einstellen Der Hörerlautstärke
- Bedienung - Einstellen der Hörerlautstärke Ist Ihnen die Hörerlautstärke zu leise oder zu laut, können Sie diese Ihren Bedürfnissen entsprechend ändern. Mit den Tasten können Sie während eines Gesprächs die Lautstärke in drei Stufen anpassen. Wahlwiederholung Die Wahlwiederholung nutzen Sie, wenn der angerufene Teilnehmer besetzt ist oder sich nicht meldet. -
Seite 22: Tastatursperre
- Bedienung - 5.11 Tastatursperre Tragen Sie das Mobilteil öfter bei sich, können Sie die Tastatur sperren, damit nicht ungewollt Tasten gedrückt werden. Bei eingeschalteter Tastatursperre können eingehende Gespräche normal entgegengenommen werden. 5.11.1 Tastatursperre einschalten Drücken Sie am Mobilteil für zwei Sekunden die ldqtumv Taste 4000R... -
Seite 23: Temporäre Tonwahl
- Bedienung - Basisstation nähern, da ansonsten das Gespräch unterbrochen wird. Hat das Mobilteil die Verbindung zur Basisstation verloren, erscheint die Meldung SUCHE BS im Display. 5.14 Temporäre Tonwahl Können Sie Ihr Telefon nur mit dem IMPULS-Wahlverfahren (siehe Kapitel 9.2.2) betreiben, brauchen Sie nicht auf die Vorteile des TON-Wahlverfahrens (z. - Seite 24 - Bedienung - 2. Mit den Tasten können Sie nun Ihre Calling-Card-Nummer auswählen. 3. Drücken Sie nun die Gesprächstaste und die gespeicherte Calling-Card-Nummer wird automatisch gewählt. Hinweis: Die Ansage Ihres Calling-Card-Anbieters fragt Sie nach Ihrer PIN-Nummer. 4. Geben Sie jetzt die dazugehörige ldqtumv PIN-Nummer über das Zahlenfeld ein.
-
Seite 25: Das Telefonbuch
- Das Telefonbuch - Das Telefonbuch In das Telefonbuch können 10 Rufnummern inklusive eines Namens gespeichert werden. Für die Eingabe eines Namens haben Sie 8 Buchstaben zur Verfügung. Die maximale Länge einer Rufnummer beträgt 20 Stellen. Rufnummern in das Telefonbuch eingeben 1. -
Seite 26: Namenseingabe
- Das Telefonbuch - 6.1.2 Namenseingabe Zur Eingabe des Namens sind die Zahlentasten mit Buchstaben beschriftet. Durch mehrmaliges Drücken der entsprechenden Taste können Großbuchstaben sowie Zahlen eingegeben werden. Beispiel: Sie möchten den Namen ”Peter” eingeben. Drücken Sie: 1 x Taste , 2 x Taste , 1 x Taste , 2 x Taste... -
Seite 27: Gespeicherte Einträge Aus Dem Telefonbuch Löschen
- Das Telefonbuch - 8. Möchten Sie weitere Einträge bearbeiten, wiederholen Sie Punkt 1 bis 7. Gespeicherte Einträge aus dem Telefonbuch löschen 1. Drücken Sie die Taste ldqtumv 2. Wählen Sie jetzt über die Tasten JAKOB den Telefonbucheintrag aus, den Sie kjieghf löschen möchten. -
Seite 28: Rufnummernanzeige (Clip)
- Rufnummernanzeige (CLIP) - Rufnummernanzeige (CLIP) Mit der Rufnummernanzeige können Sie bei eingehenden Gesprächen erkennen, wer Sie anruft. Wenn diese Funktion an Ihrer Telefonleitung zur Verfügung steht, zeigt Ihnen das Display bereits die Rufnummer des Anrufers, wenn das Telefon klingelt. Haben Sie diese Rufnummer in Ihrem Telefonbuch gespeichert, wird anstatt der Rufnummer der Name angezeigt. - Seite 29 - Rufnummernanzeige (CLIP) - 2. Mit den Tasten können nun weitere Rufnummern aus der Anruferliste angewählt werden. Sind keine weiteren Rufnummern vorhanden, hören Sie einen Signalton. Zwei Displaysymbole informieren Sie, ob der Eintrag in der Anruferliste schon einmal angesehen wurde oder ob der Eintrag in der Anruferliste neu ist.
-
Seite 30: Rufnummer Aus Der Anruferliste Im Telefonbuch Speichern
- Rufnummernanzeige (CLIP) - 7.1.2 Rufnummer aus der Anruferliste im Telefonbuch speichern Eine in der Anruferliste gespeicherte Rufnummer kann direkt im Telefonbuch gespeichert werden. 1. Drücken Sie die Taste oder . Die ldqtumv zuletzt empfangene Rufnummer wird im 1234567890 Display angezeigt. kjieghf 2. -
Seite 31: Einzelne Rufnummer Aus Der Anruferliste Löschen
- Rufnummernanzeige (CLIP) - 7.1.3 Einzelne Rufnummer aus der Anruferliste löschen 1. Drücken Sie die Taste oder . Die ldqtumv zuletzt empfangene Rufnummer wird im 1234567890 Display angezeigt. kjieghf 2. Mit den Tasten wählen Sie ldqtumv nun die Rufnummer aus, die Sie löschen LOESCH? möchten. -
Seite 32: Nebenstellenanlagen / T-Net
Sie bei dem Händler, bei dem die Anlage gekauft wurde. R-Taste und das T-Net der DEUTSCHEN TELEKOM Ihr AUDIOLINE-Telefon unterstützt die wichtigsten Mehrwertdienste der DEUTSCHEN TELEKOM (z. B. Makeln, Anklopfen, Dreier-Konferenz). Das T-Net arbeitet mit einer Flash-Zeit von 300 ms (Einstellung siehe Kapitel 9.2.1). -
Seite 33: Sonderfunktionen
- Sonderfunktionen - Sonderfunktionen Alle weiteren Programmierfunktionen sind über ein sehr benutzerfreundliches Menü zu erreichen. Hier eine kleine allgemeine Anleitung, wie Sie sich im Menü zurechtfinden können: 1. Mit der Taste wird die Programmierung gestartet. 2. Mit den Tasten können Sie das gewünschte Menü auswählen. -
Seite 34: Tonruf Am Mobilteil Einstellen
- Sonderfunktionen - 9.1.1 Tonruf am Mobilteil einstellen 1. Drücken Sie die Menütaste ldqtumv 2. Drücken Sie die Tasten , um 000000000)(0 das Menü “Tonruf Mobilteil” ( kjieghf auszuwählen. ldqtumv 3. Bestätigen Sie mit der Taste MELODIE 1) 4. Wählen Sie mit den Tasten kjieghf eine Melodie. -
Seite 35: Einstellungen Für Das Mobilteil Und Die Basisstation
- Sonderfunktionen - Einstellungen für das Mobilteil und die Basisstation 9.2.1 Flash-Zeit einstellen Wie Sie im Kapitel 8 bereits erfahren haben, können Sie zwei Flash-Zeiten mit 100 ms oder 300 ms einstellen. 1. Drücken Sie die Menütaste ldqtumv 000000000)(0 2. Drücken Sie die Tasten , um kjieghf das Menü... -
Seite 36: Werkseinstellungen Wieder Herstellen
- Sonderfunktionen - 9.2.3 Werkseinstellungen wieder herstellen Mit dieser Funktion werden das Mobilteil und die Basisstation wieder auf die Werkseinstellungen zurückgesetzt. Werkseinstellungen: Tonrufmelodie Mobilteil: 1 Tonruflautstärke Mobilteil: 3 Tonrufmelodie Basis: 1 Tonruflautstärke Basis: 3 Hörerlautstärke: Mittel Flash-Zeit: 1 (100 ms) Wahlverfahren: Ton Hinweis: Das Telefonbuch, die Anruferliste und die Wahlwiederholung werden beim Resetvorgang nicht gelöscht. -
Seite 37: Übersicht Der Menüstruktur
- Sonderfunktionen - Übersicht der Menüstruktur MELODIE 1 bis 5 LAUTST 1 bis 5 Tonruf Mobilteil ( MELODIE 1 bis 5 LAUTST 1 bis 5 Tonruf Basisstation ( 1 (100 ms) Flash-Zeit ( 2 (300 ms) 1 (Tonwahl) Wahlverfahren ( 2 (Impulswahl) PIN? Mobilteil anmelden (... -
Seite 38: Mehrere Mobilteile
Hinweis: Über den international genormten GAP Standard können AUDIOLINE-Mobilteile und auch Mobilteile von Fremdherstellern in das Telefonsystem integriert werden. Genauso können Sie ein AUDIOLINE-Mobilteil an Basisstationen anderer Hersteller anmelden, sofern diese Geräte nach dem GAP Standard arbeiten. Bei der Benutzung von zwei Mobilteilen erhalten Sie folgende Möglichkeiten:... -
Seite 39: An- Und Abmelden Von Mobilteilen
- Mehrere Mobilteile - 10.1 An- und Abmelden von Mobilteilen 10.1.1 Anmelden von DECT 4000 Mobilteilen 1. Drücken Sie die Taste am Mobilteil. ldqtumv 2. Drücken Sie die Tasten , um 000000000)(0 das Menü “Mobilteil anmelden” ( kjieghf auszuwählen. ldqtumv 3. -
Seite 40: Mobilteil An Eine Dect/Gap Basisstation Eines Fremdherstellers Anmelden
- Mehrere Mobilteile - 10.1.3 Mobilteil an eine DECT/GAP Basisstation eines Fremdherstellers anmelden Um ein AUDIOLINE DECT-GAP Mobilteil an eine Basisstation eines anderen Herstellers anzumelden, gehen Sie wie folgt vor: 1. Drücken Sie die Taste am Mobilteil. ldqtumv 2. Drücken Sie die Tasten... -
Seite 41: Pin-Code Ändern
- Mehrere Mobilteile - Hinweis: Die zu betätigende Zahl wird rechts im Display des abzumeldenden Mobilteils angezeigt. 4. Bestätigen Sie mit der Taste 5. Geben Sie nun über das Zahlenfeld den ldqtumv PIN-Code der Basisstation PIN? (Werkseinstellung: 0000) ein. kjieghf 6. -
Seite 42: Intern Telefonieren
- Mehrere Mobilteile - 6. Geben Sie nun zur Bestätigung den ldqtumv neuen PIN-Code über das Zahlenfeld ein WIEDERH und bestätigen Sie mit der Taste kjieghf Hinweis: Sollten Sie den PIN-Code einmal vergessen haben, können Sie diesen nur mit Hilfe unserer Service-Hotline wieder zurücksetzen. -
Seite 43: Konferenzgespräche Führen
- Mehrere Mobilteile - 1. Rücksprache / Makeln: Sie können nun mit dem internen Teilnehmer sprechen und durch das Drücken der Taste zum externen Gesprächspartner zurückkehren. Sie können so beliebig oft zwischen dem externen und internen Gespräch wechseln. 2. Gespräch übergeben: Durch das Drücken der Taste ersten Mobilteil, wird das externe Gespräch an das gerufene Mobilteil übergeben. -
Seite 44: Fehlerbeseitigung
- Fehlerbeseitigung - Fehlerbeseitigung Haben Sie Probleme mit Ihrem Telefon, kontrollieren Sie bitte zuerst die folgenden Hinweise. Bei technischen Problemen können Sie sich auch an unsere Hotline unter Tel. 0180 5 00 13 88 (Kosten Telekom bei Drucklegung: 12ct/min) wenden. Bei Garantieansprüchen wenden Sie sich bitte an Ihren Fachhändler. - Seite 45 - Fehlerbeseitigung - Fehler Lösungen Das System reagiert nicht Setzen Sie alle Funktionen in den mehr oder befindet sich in Werkszustand zurück. einem undefinierten Zu- Ziehen Sie vorher kurzzeitig das Stek- stand kernetzteil aus der Steckdose. Werkseinstellung siehe Kapitel 9.2.3. Im Display erscheint be- Legen Sie das Mobilteil für 14 Stunden reits nach kurzer Zeit die...
-
Seite 46: Wichtige Informationen
- Wichtige Informationen - Wichtige Informationen 12.1 Technische Daten Merkmal Wert Standard DECT-GAP Kanalzahl 120 Kanäle zwischen 1880 und 1990 MHz Stromversorgung Basisstation 220/230 V, 50 Hz Reichweite (Außen/Innen) 300 m, 50 m Standby bis zu 110 h Max. Gesprächsdauer bis zu 8 h Aufladbare Standard-Akkus 2 x 1.2 V/650 mAh, Größe: AAA... -
Seite 47: Telefonkabel Austauschen
- Wichtige Informationen - 12.2 Telefonkabel austauschen Müssen Sie Ihr Telefonkabel austauschen, finden Sie anhand der folgenden Zeichnung das passende Kabel bei Ihrem Händler. F-Codierung - IMPORT Standard TAE-F Rj11 6/2... -
Seite 48: Garantie
Sollte Ihr Gerät dennoch einen Defekt innerhalb der Garantiezeit aufweisen, wenden Sie sich bitte unter Vorlage Ihrer Kaufquittung ausschließlich an das Geschäft, in dem Sie Ihr AUDIOLINE - Gerät gekauft haben. Alle Gewährleistungsansprüche nach diesen Bestimmungen sind ausschließlich gegenüber Ihrem Fachhändler geltend zu machen. -
Seite 49: Konformitätserklärung
1999/5/EG Richtlinie über Funkanlagen und Telekommunikationsendeinrichtungen und die gegenseitige Anerkennung ihrer Konformität. Die Konformität mit der o. a. Richtlinie wird durch das CE-Zeichen auf dem Gerät bestätigt. Für die komplette Konformitätserklärung nutzen Sie bitte den kostenlosen Download von unserer Website www.audioline.de. 0681... -
Seite 100: Wichtige Garantiehinweise
Wichtige Garantiehinweise Die Garantiezeit für Ihr AUDIOLINE - Produkt beginnt mit dem Kaufdatum. Ein Garantieanspruch besteht bei Mängeln, die auf Material- oder Herstellungsfehler zurückzuführen sind. Der Garantieanspruch erlischt bei Eingriffen durch den Käufer oder durch Dritte. Schäden, die durch unsachgemäße Behandlung oder Bedienung, natürliche Abnutzung, durch falsches Aufstellen oder Aufbewahren, durch unsachgemäßen Anschluss oder Installation sowie durch höhere Gewalt...