Herunterladen Inhalt Inhalt Diese Seite drucken
SPORTSTECH PT300 Benutzerhandbuch
Vorschau ausblenden Andere Handbücher für PT300:

Werbung

Verfügbare Sprachen
  • DE

Verfügbare Sprachen

  • DEUTSCH, seite 1
PT300
DE
EN
ES
FR
IT

Werbung

Inhaltsverzeichnis
loading

Inhaltszusammenfassung für SPORTSTECH PT300

  • Seite 1 PT300...
  • Seite 2 BENUTZERHANDBUCH DEUTSCH...
  • Seite 3: Video Tutorials

    Video Tutorials Unsere für dich! Aufbau Benutzung Abbau In 3 einfachen Schritten zum schnellen und sicheren Start: 1. QR-Code scannen 2. Videos anschauen 3. schnell und sicher starten Link zu den Videos: http://sportstech.de/qr/pt300.html...
  • Seite 4 Sehr geehrter Kunde wir freuen uns, dass Sie sich für ein Gerät aus der SPORTSTECH Produktpalette entschieden haben. SPORTSTECH Sportgeräte bieten Ihnen höchste Qualität und neueste Technologie. Um die Leistungsfähigkeit des Gerätes voll ausnutzen zu können und viele Jahre Freude an Ihrem Gerät zu haben, lesen Sie bitte vor der Inbetriebnahme und dem Beginn des Trainings dieses Benut-...
  • Seite 5: Inhaltsverzeichnis

    INHALTSVERZEICHNIS Wichtige Informationen zu Ihrer Sicherheit ............... 6 Explosionszeichnung ....................7 Teileliste ........................8 Montageanleitung ......................9 Trainingsanleitung ......................15...
  • Seite 6: Wichtige Informationen Zu Ihrer Sicherheit

    WICHTIGE INFORMATIONEN ZU IHRER SICHERHEIT ACHTUNG: Für größtmögliche Wirksamkeit und Sicherheit lesen Sie bitte diese Anleitung und wichtigen Hinweise, bevor Sie das Geräte benutzen. Beachten Sie die folgende Vorsichtsmaßnahme, bevor Sie das Gerät zusammenbau- en und zu benutzen beginnen. Bevor Sie den Power Tower benutzen, wenden Sie sich bitte an Ihren Arzt. Wenn Sie Medikamente einnehmen zur Regulierung von Herzfrequenz, Blutdruck oder Choles- terinspiegel, befolgen Sie bitte den Rat des Arztes.
  • Seite 7: Explosionszeichnung

    EXPLOSIONSZEICHNUNG / TEILELISTE...
  • Seite 8: Teileliste

    TEILELISTE Beschreibung Beschreibung UNTERGESTELL RÜCKENKISSEN FUSSROHRABDECKUNG RÜCKENKISSEN-RAHMEN LIEGESTÜTZ-HOLM M6X20 SCHRAUBEN POLSTERUNG FÜR UNTEREN M6X55 SCHRAUBEN HANDGRIFF VERTIKALE UNTERSTÜTZUNG M10 MUTTER ELLENBOGEN-AUFLAGE RÜCKENSTÜTZE M6X65 SCHRAUBEN M6 MUTTER M10X40 SCHRAUBEN M10X20 SCHRAUBEN POLSTERUNG FÜR MITTLEREN M10X75 SCHRAUBEN HANDGRIFF ROHRABDECKUNG STÜTZRAHMEN GRIFFSTANGE M10X45 SCHRAUBEN SCHAUMSTOFFSTREIFEN PLASTIKABDECKUNG 30X60 ABDECKUNG...
  • Seite 9: Montageanleitung

    MONTAGEANLEITUNG SCHRITT 1: Befestigen Sie die vertikale Stütze (5) am Stütz- rahmen (29) mit Schrauben M10x75, Unterleg- scheiben (beidseitig) und M10 Muttern. SCHRITT 2: Bringen Sie den Haltegriff (11) an der vertikalen Stütze (5) an und befestigen Sie ihn mit M10x40 (8) Schrauben + Unterlegscheiben (jede Schraube mit einer Unterlegscheibe).
  • Seite 10 SCHRITT 3: Befestigen Sie das Untergestell (1) mit vertikaler Stütze (5) und Stützrahmen (29) mit Schrauben M10x45 + Unter- legscheiben (beidseitig, 1 x Große & 1 x Kleine) + M10 Muttern.
  • Seite 11 SCHRITT 4: Befestigen Sie die Liegestütz-Stange (3) auf dem Untergestell (1) für die linke und rechte Seite mit M8x16 Schrauben + Unterlegscheiben. SCHRITT 5: Befestigen Sie beide Verti- kalstützen (5) mit der oberen Traverse (33) mit M10x45 + Unterlegscheiben + Muttern und beide Untergestellen (1) mit der unteren Traverse (37) mit M10x75 Schrauben + Unter-...
  • Seite 12 SCHRITT 6: Befestigen Sie die Rückenstütze (25) an den linken und rechten senkrechten Stützen (5) a. mit Schrauben M10x35 + Unterlegscheiben. b. mit Schrauben M10x45 + Unterlegscheiben (beidseitig, 1 x Große & 1 x Kleine) und M10 Muttern. SCHRITT 7: Entfernen Sie die Schraube der Rückenlehne (20), bringen Sie die Rückenlehne an der...
  • Seite 13 SCHRITT 8: Befestigen Sie die linken und rechten oberen Halterungen (15) an der Klimmzug-Stange (18) mit M8x40 Schrauben + Unterlegscheiben und setzen Sie die Kunststoffmutter auf das Schraubenende. Setzen Sie die obere Halterung (15) in die vertika- le Stütze (5) ein, wählen die gewünschte Höhe (3 Positionen) und verriegeln sie mit dem M10x65 Schraub-Knauf (14).
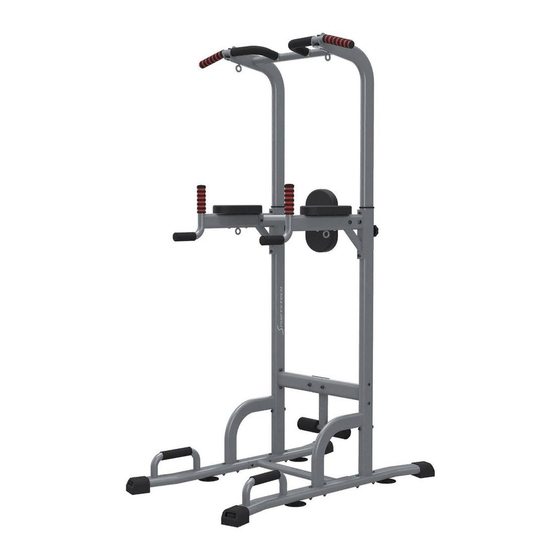
  • Seite 14 KOMPLETT MONTIERTES GERÄT...
  • Seite 15: Trainingsanleitung

    Auf- und Abwärtsbewegung sollte etwa jeweils eine Sekunde dauern. 2. Situps Legen Sie sich vor dem PT300 auf den Boden und klemmen bei- de Füße hinter die Fuß-Halterungen, so dass beide Beine leicht angewinkelt sind. Verschränken Sie die Arme locker vor der Brust.
  • Seite 16 3. Knieheben Stellen Sie sich mit dem Rücken an die Rücken- lehne des PT300 und legen die Unterarme auf die Armpolster. Greifen Sie mit beiden Händen die vorderen Haltegriffe. Achten Sie während der ge- samten Übung auf die Körperspannung. Ziehen Sie mit einer langsamen und kontrollierten Bewe- gung beide Knie soweit wie möglich nach oben...
  • Seite 17 5. Klimmzüge Greifen Sie mit beiden Händen die oberen Hal- tegriffe. Achten Sie darauf, dass die Arme nicht komplett durchgestreckt sind. Die Beine sind entweder gerade ausgestreckt oder angewinkelt. Ziehen Sie sich kontrolliert soweit nach oben, bis Sie mit der Kinnspitze die Höhe der Griffstange erreichen.
  • Seite 18 USER MANUAL ENGLISH...
  • Seite 19 • construction • use • reduction 3 simple steps for a fast and safe start: 1. scan the QR code 2. watch videos 3. start fast and safely Link to the videos: http://sportstech.de/qr/pt300.html...
  • Seite 20 Dear customer We are pleased that you have chosen a device from the SPORTSTECH product range. SPORTSTECH sports equipment offer you the highest quality and latest technology. In order to take full advantage of the device‘s performance, and to have many years of pleasure in your device, please read this manual carefully before commissioning and starting the training and use the device according to the instructions.
  • Seite 21 TABLE OF CONTENTS Important safety notice ....................22 Exploded view ......................23 Parts list ........................24 Assembly instructions ....................25 Workout instructions ....................31...
  • Seite 22: Important Safety Notice

    IMPORTANT SAFETY NOTICE CAUTION: For maximum effectiveness and safety, read these instructions and important tips before using all equipment. Note the following precaution before assem- bling and operating the machine. Before using the power tower, please consult your health care professional. If you‘re on medication for heart rate, blood pressure or cholesterol levels please follow doc- tor‘s advice.
  • Seite 23: Exploded View

    EXPLODED VIEW / PARTS LIST...
  • Seite 24: Parts List

    PARTS LIST N° Description N° Description UNDER FRAME BACK CUSHION FOOT TUBE COVER BACK CUSHION FRAME PUSH UP BAR M6X20 SCREWS DOWN HANDLE FOAM M6X55 SCREWS VERTICAL SUPPORT M10 NUT ELBOW PAD BACK LEVEL M6X65 SCREWS M6 NUT M10X40SCREWS M10X20 SCREWS MIDDLE HANDLE FOAM M10X75 SCREWS TUBE COVER...
  • Seite 25: Assembly Instructions

    ASSEMBLY INSTRUCTIONS STEP 1: Attach vertical support (5) to support frame (29) with M10x75 screws, arc washers (both side) and M10 nuts. STEP 2: Attach grab bar (11) to the vertical support (5) and fix them with M10x40 (8) screws + flat washers (every screw with a flat washer).
  • Seite 26 STEP 3: Attach the underframe (1) to vertical support (5) and support frame (29) with M10x45 screws + flat washers (both side, 1 x big & 1 x small) + M10 nuts.
  • Seite 27 STEP 4: Attach push up bar (3) to underframe (1) for left and right side with M8x16 screws + flat washers. STEP 5: Attach both vertival supports (5) with upper traverse (33) with M10x45 + flat washers + arc washers and both underframes (1) with lower traverse (37) by using M10x75 screws + arc washers + nuts.
  • Seite 28 STEP 6: Attach back support (25) to left and right vertical supports (5) a. with M10x35 screws + flat washers. b. with M10x45 screws, flat washers (both side, 1 x big & 1 x small) and M10 nuts. STEP 7: Remove the screw of the back- rest (20), attach the back rest to the back support (25) and fx it...
  • Seite 29 STEP 8: Attach left and right upper brackets (15) to the pull up bar (18) with M8x40 screws + washers. Insert the Plastic Nut on the screws. Insert the upper bracket (15) into the vertical sup- port (5), select the desired height (3 positions) and lock it with M10x65 knob screw (14).
  • Seite 30 COMPLETELY ASSEMBLED DEVICE...
  • Seite 31: Workout Instructions

    2. Sit ups Lie down on the floor in front of the PT300 and clamp both feet be- hind the foot holders, so both legs are slightly bent. Keep your arms loosely folded in front of your chest. First move the chest towards the knee, then the belly towards the thigh, until the upper body is perpendicular to the ground.
  • Seite 32 3. Knee lifting Stand with your back to the backrest of the PT300 and place the forearms on the arm pads. Grip the front grab bars with both hands. Watch the body tension during the entire exercise. With a slow and controlled movement, pull both knees to the chest as far up as possible.
  • Seite 33 5. Pull-ups With both hands, grip the upper grab bars. Make sure the arms are not fully straightened. The legs are either straight or angled. Pull upwards in a controlled manner until you reach the height level of the handlebar with the tip of your chin. Breathe out slowly.
  • Seite 35 Nuestros para usted! Construcción Utilizar Reducción En 3 sencillos pasos para un arranque rápido y seguro: 1. Escanear el código QR 2. Ver vídeos 3. Comienza rápido y seguro Enlace a los videos: www.sportstech.de/qr/pt300.html...
  • Seite 36 Estimado cliente, Nos complace que haya elegido un dispositivo de la línea de productos SPORTSTECH. Con el equipo deportivo de SPORTSTECH usted obtiene la más alta calidad y la mejor tecnología. Con el fin de usar todo el potencial de su dispositivo y para que pueda disfrutarlo durante muchos años, por favor lea este manual cuidadosamente antes de comenzar a ejercitarse, y use el dispositivo...
  • Seite 37 CONTENIDOS Aviso de seguridad importante ..................38 Vista en despiece ....................... 39 Lista de piezas ......................40 Instrucciones de ensamblaje ..................41 Manual de capacitación ....................47...
  • Seite 38: Aviso De Seguridad Importante

    AVISO DE SEGURIDAD IMPORTANTE PRECAUCIÓN: Para una seguridad y efectividad máxima, lea estas instrucciones y consejos importantes antes de usar cualquier equipo. Tenga en cuenta las siguientes precauciones antes de ensamblar y usar la máquina. Antes de usar la tabla de inversión, por favor consulte a su médico. Si está consumi- endo medicamentos para la frecuencia cardíaca, la presión arterial o para los niveles de colesterol por favor siga los consejos de su médico.
  • Seite 39: Vista En Despiece

    VISTA EN DESPIECE / LISTA DE PIEZAS...
  • Seite 40: Lista De Piezas

    LISTA DE PIEZAS N° Nombre N° Nombre ESTRUCTURA INFERIOR ALMOHADILLA POSTERIOR ESTRUCTURA DE LA ALMOHADILLA CUBIERTA DEL TUBO BASE POSTERIOR BARRA DE DOMINADAS TORNILLOS M6X20 ESPUMA DE AGARRE INFERIOR TORNILLO M6X55 SOPORTE VERTICAL TUERCAS M10 ALMOHADILLA PARA EL CODO NIVEL POSTERIOR TORNILLOS M6X65 TUERCA M6 TORNILLOS M10X40...
  • Seite 41: Instrucciones De Ensamblaje

    INSTRUCCIONES DE ENSAMBLAJE PASO 1: Conecte el soporte vertical (5) a la estructura de soporte (29) con tornillos M10x75, arandelas en arco (ambos lados) y tuercas M10. PASO 2: Conecte la barra de seguridad (11 al soporte vertical (5) y asegúrela con tornillos M10x40 (8) + aran- delas planas (cada tornillo con una arandela plana).
  • Seite 42 PASO 3: Conecte la estructura inferior (1) al soporte vertical (5) y a la estructura de soporte (29) con tornillos M10x45 + arandelas planas (ambos lados, 1 x grande & 1x pequeña) + tuercas M10.
  • Seite 43 PASO 4: Conecte la barra de elevación (3) a la estructura inferior (1) para el lado izquierdo y derecho con tornillos M8x16 + arandelas planas. PASO 5: Conecte ambos soportes verti- cales (5) con el tubo transver- sal superior (3) con M10x45 + arandelas planas + arandelas en arco y ambas estructuras in- feriores (1) con el tubo transver-...
  • Seite 44 PASO 6: Conecte el soporte posterior (25) a los soportes verticales de derecha e izquierda (5) a. con tornillos M10x35 + arandelas planas. b. con tornillos M10x45, aran- delas planas (ambos lados, 1 x grande & 1x pequeña) y tu- ercas M10.
  • Seite 45 PASO 8: Conecte los soportes superiores de la derecha e izquierda (15) a la barra fija (18) con tornillo M8x40 + arandelas. Inserte la tuerca plástica en los tornillos Inserte el soporte superior (15) en el soporte ver- tical (5), seleccione la altura deseada (3 posicio- nes) y asegure con la perilla M10x65 (14).
  • Seite 46 DISPOSITIVO COMPLETAMENTE ENSAMBLADO...
  • Seite 47: Manual De Capacitación

    2. Abdominales Acuéstese sobre el suelo frente a la PT300 y asegure ambos pies detrás de los soportes para pies, así ambas piernas estarán ligera- mente dobladas. Mantenga sus brazos doblados ligeramente frente a su pecho.
  • Seite 48 3. Levantamiento de rodillas Póngase de pie con su espalda hacia el respaldo de la PT300 y ubique los antebrazos sobre las almohadillas para brazos. Vigile la tensión corporal durante todo el ejercicio. Con un movimiento len- to y controlado, jale ambas rodillas hacia el pecho tanto como sea posible.
  • Seite 49 5. Flexiones Con ambas manos, agarre las barras superiores de seguridad. Asegúrese de que los brazos no estén completamente estirados. Las piernas por el contrario estarán rectas o en ángulo. Jale hacia arriba de manera controlada hasta que alcance el nivel de altura del manillar con la punta de su barbilla.
  • Seite 50 MANUEL FRANÇAIS...
  • Seite 51 3 étapes simples pour un démarrage ra- pide et sécurisé: 1. Scannez le code QR 2. Regarder les vidéos 3. Démarrez rapidement et en toute sécurité. Lien vers les vidéos: www.sportstech.de/qr/pt300.html...
  • Seite 52 Cher client, Nous sommes ravis que vous ayez choisi un appareil de la gamme de produits SPORTSTECH. Avec les équipements sportifs de SPORTSTECH, vous obtenez la plus haute qualité et la meilleure technologie. Afin d'utiliser pleinement le potentiel de votre appareil et de pouvoir l'apprécier pendant de nombreuses années, lisez attentivement ce manuel avant l'utilisation et le début de votre entraînement et utilisez...
  • Seite 53 CONTENU Avis de sécurité important ..................... 54 Vue eclatée ........................ 55 Liste des pièces ......................56 Instructions d’assemblage ..................... 61 Manuel de formation ....................67...
  • Seite 54: Avis De Sécurité Important

    AVIS DE SÉCURITÉ IMPORTANT ATTENTION: Pour une efficacité maximale et pour se sen- tir en sécurité, lisez ces instructions et conseils import- ants avant d‘utiliser n‘importe quel équipement. Notez les précautions suivantes avant d‘assembler et d‘utiliser la machine. Avant d‘utiliser la table d‘inversion, veuillez consulter votre médecin. Si vous prenez des médicaments pour la fréquence cardiaque, la pression artérielle ou le taux de cholestérol, suivez les conseils du médecin.
  • Seite 55: Vue Eclatée

    VUE ECLATÉE / LISTE DES PIÈCES...
  • Seite 56: Liste Des Pièces

    LISTE DES PIÈCES N° Description Qté N° Description Qté CHASSIS COUSSIN DE DOS COUVERCLE DU TUBE DE PIED CADRE DE COUSSIN DE DOS POIGNEE POUR POMPES VIS M6X20 MOUSSE DE POIGNÉE VIS M6X55 SUPPORT VERTICAL ECROU M10 COUDIERE NIVEAU ARRIERE VIS M6X65 ECROU M6 VIS M10X40...
  • Seite 57: Instructions D'assemblage

    INSTRUCTIONS D‘ASSEMBLAGE ETAPE 1: Fixez le support vertical (5) sur le cadre de sup- port (29) avec des vis M10x75, des rondelles à arc (des deux côtés) et des écrous M10. ETAPE 2: Fixez la barre d‘appui (11) au support vertical (5) et fixez-les avec des vis M10x40 (8) + rondelles pla- tes (chaque vis avec une rondelle plate).
  • Seite 58 ETAPE 3: Fixez le châssis (1) au support vertical (5) et au cadre de support (29) avec les vis M10x45 + rondelles plates (des deux côtés, 1 x grande & 1 x petite) + écrous M10.
  • Seite 59 ETAPE 4: Fixez la barre (3) au châssis (1) pour les côtés gauche et droit avec des vis M8x16 + des ron- delles plates. ETAPE 5: Fixez les deux supports verticaux (5) avec la traversée supérieure (33) avec M10x45 + rondelles plates + rondelles à...
  • Seite 60 ETAPE 6: Fixez le support arrière (25) aux supports verticaux gauche et droit (5). a. avec vis M10x35 + rondel- les plates. b. avec des vis M10x45, des rondelles plates (des deux côtés, 1 x grande & 1 x petite) et des écrous M10.
  • Seite 61: Instructions D'assemblage

    ETAPE 8: Fixez les supports supérieurs gauche et droit (15) à la barre de traction (18) avec des vis M8x40 + rondelles. Insérer l‘écrou en plastique sur les vis. Insérez le support supérieur (15) dans le support vertical (5), sélectionnez la hauteur souhaitée (3 positions) et verrouillez-le avec la vis à...
  • Seite 62 L‘APPAREIL A ÉTÉ COMPLÉTEMENT ASSEMBLÉE...
  • Seite 63 (descendre et se lever) devrait prendre environ une seconde. 2. Sit-ups Allongez-vous sur le sol devant le PT300 et serrez les deux pieds derrière les supports de pieds, de sorte que les deux jambes soient légèrement penchées. Gardez vos bras pliés en face de votre torse.
  • Seite 64 3. Lever du genou Placez votre dos sur le support dorsal du PT300 et placez les avant-bras sur le protège-bas. Saisis- sez les barres d‘appui avant avec les deux mains. Observez la tension du corps pendant toute la durée de l‘exercice. Avec un mouvement lent et contrôlé, tirez les deux genoux vers le torse aussi...
  • Seite 65 5. Pull-ups Avec les deux mains, saisissez les barres d‘appui supérieures. Veillez à ce que les bras ne soient pas complètement redressés. Les jambes sont droites ou inclinées. Tire vers le haut de manière contrôlée jusqu‘à ce que vous atteigniez le niveau de la hauteur du guidon avec la pointe de votre menton.
  • Seite 66 MANUALE D’USO ITALIANO...
  • Seite 67: Manuel De Formation

    Video Tutorial Il nostro per te! Montaggio Utilizzo Smontaggio 3 semplici passaggi per un inizio veloce e sicuro: 1. Scannerizza il QR-Code 2. Guarda il Video 3. Inizia ad allenarti! Link per il Video: www.sportstech.de/qr/pt300.html...
  • Seite 68 Gentile cliente Siamo lieti che abbiate scelto un dispositivo della gamma SPORTSTECH. Con le attrezzature sportive di SPORSTECH potrete usufruire della più alta qualità e della più recente tecnologia. Per sfruttare a pieno il potenziale del dispositivo e poterlo utilizzare per molti anni, raccomandiamo di leggere attentamente questo manuale prima di iniziare l’allenamento e di utilizzare il dispositivo...
  • Seite 69 INDICE Informazioni importanti di sicurezza ................. 70 Vista esplosa ......................71 Elenco delle parti ......................72 Istruzioni di assemblaggio ..................... 73 Manuale di formazione ....................79...
  • Seite 70: Informazioni Importanti Di Sicurezza

    INFORMAZIONI IMPORTANTI DI SICUREZZA ATTENZIONE: Per la massima efficacia e sicurezza, leg- gere queste istruzioni e questi suggerimenti importanti prima di utilizzare qualsiasi dispositivo. Tenere conto de- lle seguente precauzioni prima di assemblare e utilizzare il dispositivo. Prima di utilizzare la panca ad inversione, si consiglia di consultare il proprio medico. Se vengono assunti dei farmaci per regolare la frequenza cardiaca, la pressione sanguigna o i livelli di colesterolo, seguire i consigli del medico.
  • Seite 71: Vista Esplosa

    VISTA ESPLOSA / ELENCO DELLE PARTI...
  • Seite 72: Elenco Delle Parti

    ELENCO DELLE PARTI Nome Qta‘ Nome Qta‘ TELAIO INFERIORE CUSCINO PER SCHIENA TUBO COPRI PIEDI CUSCINO PER SCHIENA SBARRA PER PUSH UP VITI M6X20 SPUGNA INFERIORE PER MANI VITI M6X55 SUPPORTO VERTICALE M10 RONDELLA CUSCINETTO APPOGGIAGOMITI LIVELLO POSTERIORE VITI M6X65 M6 RONDELLA VITI M10X40 VITI M10X20...
  • Seite 73: Istruzioni Di Assemblaggio

    ISTRUZIONI DI ASSEMBLAGGIO FASI 1: Fissare il supporto verticale (5) al telaio di sup- porto (29) con viti M10x75, rondelle ad arco (entrambi i lati) e dadi M10. FASI 2: Fissare la maniglia (11) al supporto verticale (5) e fissare con viti M10x40 (8) + rondelle piatte (ogni vite con una rondella piatta).
  • Seite 74 FASI 3: Fissare il telaio inferiore (1) al supporto verticale (5) e al telaio di supporto (29) con viti M10x45 + rondelle piatte (entrambi i lati, 1 x grande & 1 x piccola) + dadi M10.
  • Seite 75 FASI 4: Attaccare la barra per push up (3) al telaio (1) per il lato sinistro e destro con viti M8x16 + rondelle piatte. FASI 5: Collegare entrambi i supporti verticali (5) con la traversa su- periore (33) con M10x45 + rondelle piatte + rondelle ad arco e entrambi i telai (1) con la traversa inferiore (37) utilizzan-...
  • Seite 76 FASI 6: Collegare il supporto posteriore (25) ai supporti verticali sinistro e destro (5) a. con viti M10x35 + rondelle piatte. b. con viti M10x45, rondelle piatte (entrambi i lati, 1 x grande & 1 x piccola) e dadi M10. FASI 7: Rimuovere la vite dello schiena- le (20), fissare il supporto schie-...
  • Seite 77 FASI 8: Fissare le staffe superiori (15) alla barra per pull up (18) con viti M8x40 + rondelle. Inserire il dado in plastica sulle viti. Inserire la staffa superiore (15) nel supporto verti- cale (5), selezionare l‘altezza desiderata (3 posizi- oni) e bloccarla con la vite M10x65 (14).
  • Seite 78 DISPOSITIVO COMPLETAMENTE ASSEMBLATO...
  • Seite 79: Manuale Di Formazione

    2. Situps Sdraiarsi sul pavimento davanti al PT300 e bloccare entrambi i piedi nel poggiapiedi, in modo che entrambe le gambe sono leg- germente piegate. Tenere le braccia liberamente piegate davanti al petto.
  • Seite 80 3. Sollevamento delle ginocchia Appoggiare la schiena sullo schienale del PT300 e posizionare gli avambracci sui braccioli. Af- ferrare le barre anteriori con entrambe le mani. Osservare la tensione del corpo durante l‘intero esercizio. Con un movimento lento e controllato, tirare entrambe le ginocchia al petto il più...
  • Seite 81 5. Pull-ups Con entrambe le mani, afferrare le barre supe- riori. Assicurarsi che le braccia non siano com- pletamente raddrizzate. Le gambe sono dritte o angolate. Tirare in alto in modo controllato fino a raggiungere il livello di altezza del manubrio con la punta del mento.
  • Seite 82 Verkauf durch / Distributed by / Distribuido por / Distribué / Distribuito da InnovaMaxx GmbH Potsdamer Platz 11 10785 Berlin +49 30 220 663 569 service@innovamaxx.de http://www.sportstech.de...

Inhaltsverzeichnis