
Verwandte Anleitungen für PARKZONE NIGHT VAPOR


Inhaltszusammenfassung für PARKZONE NIGHT VAPOR
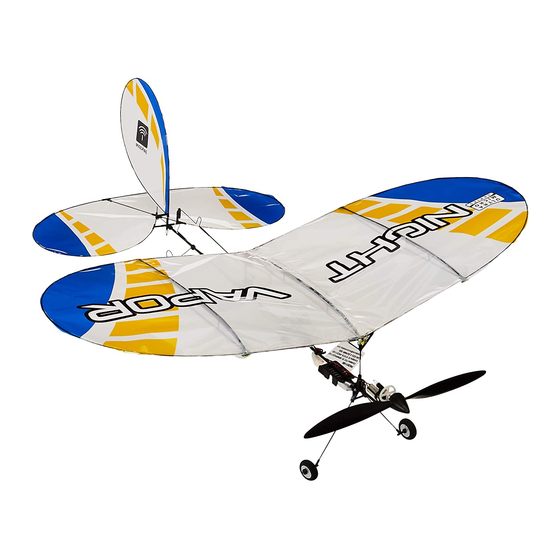
- Seite 1 Instruction Manual | Bedienungsanleitung Manuel d’utilisation | Manuale di istruzioni...
-
Seite 2: Meaning Of Special Language
NOTICE All instructions, warranties and other collateral documents are subject to change at the sole discretion of Horizon Hobby, LLC. For up-to-date product literature, visit www.horizonhobby.com and click on the support tab for this product. Meaning of Special Language The following terms are used throughout the product literature to indicate various levels of potential harm when operating this product: WARNING: Procedures, which if not properly followed, create the probability of property damage, collateral damage, and serious injury OR create a high probability of superficial injury. -
Seite 3: Battery Charging Warnings
Safety Precautions and Warnings, continued • Always keep transmitter powered on while aircraft is powered. • Always remove batteries before disassembly. • Always keep moving parts clean. • Always keep parts dry. • Always let parts cool after use before touching. • Always remove batteries after use. -
Seite 4: Inhaltsverzeichnis
Night Vapor RTF Contents ........ -
Seite 5: Night Vapor Rtf Contents
• 70mAh 3.7V 14C Li-Po battery • 1S 3.7V DC Li-Po battery charger, 0.3A charge rate A DSM2/DSMX-compatible aircraft transmitter is required to complete your Night Vapor. First Flight Preparation Please note this checklist is not intended to be a replacement for the content included in this manual. -
Seite 6: Battery Charging
As the battery nears full charge, the LED begins to blink. When the battery is fully charged, the LED light blinks approximately every 20 seconds or goes out entirely. Note: The Li-Po battery included with your Night Vapor arrives partially charged, so the initial charge may only take 15–20 minutes. -
Seite 7: Installing The Flight Battery In The Airplane
Transmitter and Receiver Binding Your Night Vapor RTF comes pre-bound to the included DSM2/DSMX transmitter. If you should need to re- bind your airplane follow the simple directions below. Setting the Airplane for Binding 1. -
Seite 8: Transmitter Specific Binding Instructions
Transmitter Specific Binding Instructions MLP4DSM Transmitter 1. When you see the LED on the receiver begin to flash rapidly, push the left stick on the transmitter inward into the case (NOT pulling down on throttle stick) until you hear it click. 2. -
Seite 9: Transmitter Control Identification
Transmitter Control Identification Note: Before each flight you should ALWAYS turn the transmitter on before connecting the flight battery to the receiver unit. After each flight, be sure you always disconnect the flight battery from the receiver unit before powering the transmitter off. Mode 2 Rudder/Elevator Functions Throttle Function... -
Seite 10: Led Identification
LED Identification The Night Vapor is equipped with six LED lights. Below is a description of what each individual light looks like. • There are 3 LED lights on the leading edge of the wing. These lights are a bright white color and remain solid. -
Seite 11: Reversing The Flight Controls
Reversing the Flight Controls The transmitter included with the Night Vapor is the same transmitter included in the PKZ Ember 2, Vapor, and Ultra Micro RTF versions. It also functions identically to the transmitter included with the E-flite mCX and mSR (MLP4DSM). -
Seite 12: Control Centering
10–12mm behind the front wing mount. The Night Vapor will fly at a wide range of CG positions, allowing you to alter the flying characteristics of the aircraft. You may also experiment and add a little “trim” to the elevator to bring the nose up slightly in flight. -
Seite 13: Flying Checklist
The following checklist contains the steps to ensure proper arming and operation of the receiver unit, as well as the proper motor response. • The throttle stick MUST be set in the lowest possible position, and for most transmitters, the throttle trim must also be set to the lowest possible position in order for the receiver unit to arm. -
Seite 14: Replacing/Removing The Landing Gear
Replacing/Removing the Landing Gear To remove the landing gear, follow these steps: 1. Gently grasp the landing gear base and pull the landing gear out of the mounts. Note: It may be difficult to remove the landing gear the first time. 2. -
Seite 15: Replacing The Vertical Fin
Replacing the Vertical Fin To replace the vertical fin on your Night Vapor, follow the steps listed below. 1. Gently remove the clear pressure fitting tube located on the bottom of the aircraft. 2. Gently disconnect the pushrod from the control horn. -
Seite 16: Replacing The Wing
Replacing the Wing All LEDs on the wing are permanently attached. The new wing will include a new set of LEDs. To replace the wing follow the steps below: 1. Disconnect the main LED wire from the receiver board. 2. Remove the LED that is attached to the tail of the aircraft. Note: The LED is tack glued to the fuselage and it will be necessary to very carefully break the glue joint loose. -
Seite 17: Replacing The Propeller
Replacing the Propeller The propeller is threaded onto the shaft of the gearbox. 1. To remove the propeller, use needle-nose pliers or hemostats to grip the shaft. 2. Spin the propeller counterclockwise to remove the old propeller. 3. Thread the new 140mm x 45mm prop and spinner clockwise onto the gearbox shaft. Replacing the Prop Shaft You may need to replace the prop shaft in the gearbox should it become damaged. - Seite 18 2. While holding the nylon nut, rotate the spur gear clockwise. The prop shaft will thread out of the nut. 3. Gently pull on the spur gear and the prop shaft will slide out of the gearbox. 4. Thread the 140mm x 45mm prop and spinner onto the new prop shaft by holding the spur gear and turning the prop clockwise.
-
Seite 19: Replacement Parts
PKZ3327....Gearbox without Motor: Vapor/Night Vapor PKZ3328....Prop Shaft with Gear (2): Vapor/Night Vapor PKZ3341. -
Seite 20: Troubleshooting Guide
Troubleshooting Guide If you have any problems with setup or programming that cannot be fixed by the Troubleshooting Guide, please see page 23 and call the appropriate Horizon Product Support office. Problem Possible Solutions Lower throttle trim and/or throttle stick to their lowest settings Aircraft will not “throttle up”... -
Seite 21: Limited Warranty
Limited Warranty What this Warranty Covers – Horizon Hobby, LLC, legal rights, and you may also have other rights which vary from (Horizon) warrants to the original purchaser that the product state to state. Horizon reserves the right to change or modify purchased (the “Product”) will be free from defects in materials this warranty at any time without notice. -
Seite 22: Contact Information
ATTENTION: Horizon service is limited to estimates are available upon request. You must include this Product compliant in the country of use and request with your item submitted for service. Non-warranty ownership. If received, a non-compliant Product service estimates will be billed a minimum of ½ hour of will not be serviced. -
Seite 23: Fcc Information
FCC Information This device complies with part 15 of the FCC Rules. Operation is subject to the following two conditions: (1) This device may not cause harmful interference, and (2) this device must accept any interference received, including interference that may cause undesired operation. -
Seite 24: Begriffserklärung
HINWEIS Allen Anweisungen, Garantien und anderen zugehörigen Dokumenten sind Änderungen nach Ermessen von Horizon Hobby, LLC vorbehalten. Aktuelle Produktliteratur finden Sie unter www.horizonhobby.com im Support-Abschnitt für das Produkt. Begriffserklärung Die folgende Begriffe werden in der gesamte Produktliteratur verwendet, um die Gefährdungsstufen im Umgang mit dem Produkt zu defiieren: WARNUNG: Verfahren können bei nicht ordnungsgemäßer Durchführung womöglich Schäden an Eigentum, Kollateralschäden UND schwere Verletzungen ODER höchstwahrscheinlich oberfl ächliche Verletzungen... -
Seite 25: Warnungen Zum Laden
Sicherheitsmaßnahmen und Warnungen, Fortsetzung • Nehmen Sie niemals ein Element des Modells in Ihren Mund, da dies zu schweren Verletzungen oder sogar zum Tod führen könnte. • Betreiben Sie Ihr Modell niemals mit schwachen Senderbatterien. • Halten Sie das Fluggerät stets unter Blickkontakt und Kontrolle. • Fliegen Sie nur mit vollständig aufgeladenen Akkus. -
Seite 26: Spezifikationen
Night Vapor RTF Lieferumfang ........ -
Seite 27: Night Vapor Rtf Lieferumfang
Night Vapor RTF Lieferumfang • Night Vapor • 8 AA Batterien • 70mAh 3,7V 14C LiPO Akku • 2,4 GHz DSM2/DSMX Sender • 1S 3,7 DC LiPO Akku Ladegerät 0,3A Ladestrom Night Vapor RTF Lieferumfang • Night Vapor • 8 AA Batterien • 70mAh 3,7V 14C LiPo Akku... -
Seite 28: Aufladen Der Batterie
Wenn der Akku vollständig aufgeladen ist, blinkt die LED-Leuchte ungefähr alle 20 Sekunden und geht dann ganz aus. Hinweis: Der mit in Ihrem Night Vapor gelieferte LiPo-Akku ist teilaufgeladen. Daher dauert die Erstau- fladung nur ungefähr 15 bis 20 Minuten. -
Seite 29: Einbau Des Flugakkus
Hinweis: T rennen Sie nach dem Fliegen immer den Akku vom Empfänger. Sollten Sie dieses nicht tun, wird der Akku dadurch tiefentladen und ist nicht mehr zu verwenden. Binden von Sender und Empfänger Ihr Night Vapor ist bereits mit dem mitgelieferten Sender gebunden. Sollten Sie den Sender und Empfänger neu binden wollen, folgen Sie bitte den unten stehenden Anweisungen. Vorbereitung des Flugzeuges zur Bindung 1. -
Seite 30: Senderspezifische Bindeanweisungen
Senderspezifische Bindeanweisungen MLP4DSM Sender 1. Drücken Sie bitte wenn die LED auf dem Sender anfängt zu blinken den linken Stick in den Sender ein (Eindrücken NICHT Runter) bis Sie ein Klick hören. 2. Schalten Sie den Sender mit eingedrückten Knüppel ein. Lassen Sie danach den Knüppel los. Der Sender piept und die LED auf dem Sender blinkt. -
Seite 31: Sender Kontroll Identifikation
Sender Kontroll Identifikation Hinweis: Schalten Sie vor dem Fliegen immer erst den Sender ein und verbinden dann den Flugakku. Nach dem Flug trennen Sie immer erst den Flugakku und schalten dann den Empfänger aus. Mode 2 Seiten / Höhenruder Funktion Gas Funktion Seitenruder Trimmung Gas Trimmung... -
Seite 32: Led Beleuchtung
LED Beleuchtung Der Night Vapor ist mit sechs LED ausgerüstet. • Vorne am Flügel befinden sich 3 LEDs. Diese LEDs leuchten weiss. • An den Außenseiten der Tragflächen befinden sich 2 weitere LEDs. Die LED auf der rechten Seite (von vorne betrachtet) blinkt Rot , die LED auf der linken Seite blinkt Grün. -
Seite 33: Reversieren (Umdrehen) Der Steuerfunktion
Reversieren (Umdrehen) der Steuerfunktion Der Sender der mit Ihrer Night Vapor geliefert wird ist der gleiche Sender der mit der PKZ Ember2, Vapor und den Ultra Micro RTF Flugzeugen geliefert wird. Von den Funktionen her identisch sind auch die Sender die mit den E-flite mCX und mSR geliefert werden. -
Seite 34: Zentrieren Der Ruderflächen
Die vordere Flügebefestigung sollte sich ca 28 - 30mm hinter dem Ende des Hauptträgers befinden und der Akkuträger ca. 10 - 12mm hinter der vorderen Flügebefestigung. Die Night Vapor erlaubt Ihnen einen weiten Einstellungsbereich des Schwerpunktes. Sie können das Höhenruder auch etwas nach oben trimmen um die Flugzeugnase etwas zu heben. -
Seite 35: Checkliste Zum Fliegen
Die folgende Checkliste beinhaltet die Schritte, die Sie befolgen sollten, um einen einwandfreien Betrieb des Empfängers sicher zu stellen. • Der Gasstick muß in der Motor AUS / Leerlaufposition stehen, die Gastrimmung sollte ebenfalls in der untersten möglichen Postion stehen, um der Empfangseinheit ein Scharfschalten zu ermöglichen. Fliegen Sie das Modell zum ersten Mal oder nach einer Reparatur, zentrieren Sie bitte auch die Trim- mungen von Höhen-, Seiten- und Querruder. -
Seite 36: Austausch Des Fahrwerkes
Austausch des Fahrwerkes Um das Fahrwerk auszuwechseln gehen Sie bitte wie folgt vor: 1. Fassen Sie vorsichtig ein Fahrwerksbein an und ziehen es aus dem Halter. Hinweis: D as Herausziehen des Fahrwerkdrahtes könnte bei dem ersten Wechsel etwas schwerer sein. 2. -
Seite 37: Austausch Des Seitenruders
Austausch des Seitenruders Um das Seitenruder auszutauschen gehen Sie bitte wie folgt vor: 1. Entfernen Sie bitte vorsichtig das klare Stück Schlauch am unteren Ende des Ruders. 2. Stecken sie das Rudergestänge vorsichtig vom Ruderhorn ab. 3. Schieben Sie das Seitenruder aus der Halterung. 4. -
Seite 38: Austausch Der Tragfläche
Austausch der Tragfläche Die LEDs sind dauerhaft mit der Tragfläche verbunden. Wenn Sie die Tragfläche austauschen tauschen Sie die LEDs mit aus. Um die Tragfläche zu wechseln gehen Sie bitte wie folgt vor: 1. Trennen Sie bitte den LED Stecker vom Empfänger. 2. -
Seite 39: Austausch Des Propellers
Austausch des Propellers 1. Um den Propeller auszuwechseln benötigen Sie eine Zange oder Pinzette. Halten Sie damit die Propel- lerwelle fest. 2. Drehen Sie den Propeller zum Lösen gegen den Uhrzeigersinn 3. Drehen Sie den neuen 140 x 45mm Propeller mit Spinner im Uhrzeigersinn auf die Welle. Austausch der Propellerwelle Im Fall einer Beschädigung kann es sinnvoll sein, die Propellerwelle zu wechseln. - Seite 40 2. Drehen Sie mit gehaltener Nylon Schraube den Propeller im Uhrzeigersinn. Die Welle dreht sich aus der Schraube. 3. Ziehen Sie vorsichtig die Welle aus der Halterung. 4. Drehen Sie den 140mm x 45mm Propeller und Spinner auf die neue Propellerwelle. Halten Sie dabei die Welle am Zahnrad fest und drehen den Propeller im Uhrzeigersinn.
-
Seite 41: Ersatzteile
PKZUA1152 ....3-Ch Rx/ESC with LED port, DSM2/DSMX PKZU1161 ....Rumpf mit Elektronik: Night Vapor PKZU1170 . -
Seite 42: Hilfestellung Zur Fehlersuche Und Behebung
Hilfestellung zur Fehlersuche und Behebung Sollten Sie ein Problem haben , dass nicht durch diese Hilfestellung gelöst werden kann, ersehen Sie bitte auf Seite 48 die Adresse des technischen Service. Problem Mögliche Lösung Bringen Sie den Gasstick und die Trimmung in die unterste Flugzeug nimmt kein Gas an, alle mögliche Position anderen Funktionen arbeiten ein-... -
Seite 43: Garantie Und Service Informationen
Garantie und Service Informationen Warnung – Ein ferngesteuertes Modell ist kein Spielzeug. Rücksendungen durch den Käufer direkt an Horizon oder Es kann, wenn es falsch eingesetzt wird, zu erheblichen eine seiner Landesvertretung bedürfen der Schriftform. Verletzungen bei Lebewesen und Beschädigungen Schadensbeschränkung – Horizon ist nicht für direkte an Sachgütern führen. -
Seite 44: Kontakt Informationen
Kostenpflichtige Reparaturen – Liegt eine kostenpfli- Serviceportal unter www. Horizonhobby.de oder telefonisch bei dem technischen Service von Horizon. chtige Reparatur vor, erstellen wir einen Kostenvoranschlag, den wir Ihrem Händler übermitteln. Die Reparatur wird Packen Sie das Produkt sorgfältig ein. Beachten Sie, erst vorgenommen, wenn wir die Freigabe des Händlers dass der Originalkarton in der Regel nicht ausreicht, um erhalten. -
Seite 45: Précautions Et Avertissements Liés À La Sécurité
REMARQUE Toutes les instructions, garanties et autres documents de garantie sont sujets à la seule discrétion de Horizon Hobby, LLC. Veuillez, pour une littérature produits bien à jour, visiter www.horizonhobby.com et cliquer sur l’onglet de support de ce produit. Signification de certains mots Les termes suivants servent, dans toute la documentation des produits, à... -
Seite 46: Avertissements De Charge
Précautions et avertissements liés à la sécurité, suite • Ne léchez ni ne mettez jamais en bouche quelque partie de votre modèle que ce soit - risque de blessures graves voire de danger de mort. • Ne faites jamais fonctionner votre modèle lorsque les batteries de l’émetteur sont faibles. • Gardez toujours l’aéronef à... -
Seite 47: Caractéristiques
Contenu du Night Vapor RTF ........ -
Seite 48: Contenu Du Night Vapor Rtf
• Batterie LiPo 70 mAh 3,7 V 14C • Chargeur de batterie LiPo 1S 3,7 V DC, charge 0,3 A Un émetteur pour avions compatible DSM2/DSMX est nécessaire pour compléter votre Night Vapor. Préparation au premier vol Veuillez noter que cette check-list n’est pas destinée à remplacer le contenu de ce manuel. Bien qu’elle puisse être utilisée comme guide de démarrage rapide, nous recommandons instamment de lire l’ensemble... -
Seite 49: Charge De La Batterie
A noter: La batterie LiPo fournie avec votre Night Vapor est livrée partiellement chargée. La charge initiale ne prend donc que de 15 à 20 minutes. A noter: Vous pourrez charger la batterie de vol LiPo de 10 à... -
Seite 50: Installation De La Batterie De Vol Dans L'avion
Affectation (binding) de l’émetteur au récepteur Lorsque vous le recevez, votre Night Vapor RTF est, déjà affecté à l’émetteur DSM2/DSMX inclus. Si vous deviez avoir à réaffecter votre avion, faites-le en suivant les instructions ci-après. -
Seite 51: Instructions Spécifiques D'affectation Pour Les Émetteurs
Instructions spécifiques d’affectation pour les émetteurs Emetteur MLP4DSM 1. Lorsque vous constatez le clignotement rapide de la DEL sur le récepteur, appuyez sur la manette gauche de l’émetteur en poussant vers l’intérieur du coffret (NE PAS enfoncer la manette des gaz) jusqu’à... -
Seite 52: Contrôle De L'appairage De L'émetteur
Contrôle de l’appairage de l’émetteur A noter: Avant chaque vol, allumez TOUJOURS l'émetteur en premier avant de connecter la batterie au récepteur. Après chaque vol, déconnectez toujours en premier la batterie de vol du module de réception avant d’éteindre l'émetteur. Mode 2 Fonctions Fonction gaz... -
Seite 53: Identification Des Del
Identification des DEL Le Night Vapor est doté de six points lumineux à DEL. Vous en trouverez ci-dessous une description. • 3 feux à DEL sont intégrés au bord d'attaque de l’aile. Ces points lumineux de couleur blanche restent allumés en permanence. -
Seite 54: Inversion Des Commandes De Vol
Inversion des commandes de vol L’émetteur inclus dans le Night Vapor est le même émetteur que celui inclus dans les versions PKZ Ember 2, Vapor, et Ultra Micro RTF. Il a également un fonctionnement identique à celui de l'émetteur inclus avec les E-flite mCX et mSR (MLP4DSM). -
Seite 55: Centrage Des Commandes
Centre de gravité Pour les premiers vols, le support avant de l’aile du Night Vapor devrait être disposé entre 28 et 30 mm en recul par rapport à l’avant du fuselage, l’avant du réceptacle batterie devant se trouver entre 10 et 12 mm approximativement du support d’aile avant. -
Seite 56: Description De L'unité De Réception, Initialisation Et Contrôle De La Commande Moteur
Description de l’unité de réception, initialisation et contrôle de la commande moteur Le récepteur, très léger, installé dans votre Night Vapor est une combinaison de contrôleur électronique de vitesse (CEV) du moteur principal, de servos et d’un récepteur Spektrum compatible DSM2/DSMX. L’unité de réception est également équipée d’une DEL d’indication d’état. -
Seite 57: Check-List De Vol
Check-list de vol ‰ Allumez toujours l’émetteur en premier. ‰ Branchez la batterie de vol sur le récepteur. ‰ Laissez le récepteur s’initialiser et s’armer correctement. ‰ Faites voler le modèle. ‰ Faites-le atterrir. ‰ Débranchez la batterie de vol du récepteur. ‰... -
Seite 58: Remplacement De La Dérive Verticale
Remplacement de la dérive verticale Pour remplacer la dérive verticale de votre Night Vapor, procédez aux étapes suivantes: 1. Enlevez avec précaution le tube de fixation (par pression) transparent se trouvant en dessous de l’aéronef. 2. Déconnectez avec précaution la tige du bras de commande. -
Seite 59: Remplacement De L'aile
Remplacement de l’aile Toutes les DEL que comporte l’aile y sont fixées une fois pour toutes. La nouvelle aile comportera un nouvel ensemble de DEL. Pour remplacer l’aile, procédez aux étapes suivantes: 1. Débranchez le câble principal des DEL de la platine du récepteur. 2. -
Seite 60: Remplacement De L'hélice
Remplacement de l’hélice L’hélice est vissée sur l’arbre du réducteur. 1. Pour enlever l’hélice, utilisez une pince à bec fin ou hémostatique pour maintenir l’arbre d’hélice. 2. Faites tourner l’hélice dans le sens antihoraire pour l’enlever. 3. Vissez la nouvelle hélice 140 mm x 45 mm et son cône dans le sens horaire sur l’arbre du réducteur. Remplacement de l’arbre d’hélice Vous serez peut-être amené... - Seite 61 2. Tout en maintenant l’écrou en nylon, faites tourner la couronne dans le sens horaire. L’arbre d’hélice s’extraira de l’écrou. 3. Tirer doucement sur la couronne et l’arbre d’hélice sortira du réducteur. 4. Vissez l’hélice 140 mm x 45 mm et son cône sur le nouvel arbre d’hélice en maintenant la couronne et en tournant l’hélice dans le sens horaire.
-
Seite 62: Pièces De Rechange
PKZ3327....Réducteur sans moteur: Vapor/Night Vapor PKZ3328....Arbre d’hélice avec réducteur (2): Vapor/Night Vapor PKZ3341. -
Seite 63: Guide De Dépannage
Guide de dépannage Si vous avez un problème quelconque avec le réglage ou la programmation qui ne puisse être résolu avec le guide de dépannage, reportez-vous à la page 72 et appelez le bureau d’assistance produit Horizon approprié. Problème Solutions possibles L’avion ne «... -
Seite 64: Garantie Et Réparations
Garantie et réparations Durée de la garantie – Garantie exclusive - Horizon valeur unitaire du produit. Horizon n’exerce aucune influence Hobby, LLC (Horizon) garantit que le Produit acheté (le « sur le montage, l’utilisation ou la maintenance du produit Produit ») sera exempt de défauts matériels et de fabrica- ou sur d’éventuelles combinaisons de produits choisies par tion à... -
Seite 65: Informations De Contact
complète, d’un numéro de téléphone (pour demander des utes de travail en atelier ainsi que les frais de réexpédition. renseignements) et d’une adresse de courriel. En l’absence d’un accord pour la réparation dans un délai de 90 jours, nous nous réservons la possibilité de détruire le Garantie et réparations –... -
Seite 66: Precauzioni Per La Sicurezza E Avvertenze
AVVISO Istruzioni, garanzie e tutti gli altri documenti accessori sono soggetti a modifiche a totale discrezione di Horizon Hobby, LLC. Per avere una documentazione aggiornata sul prodotto, visitare il sito Web www.horizonhobby.com e fare clic sulla scheda di supporto per questo prodotto. Significato di termini specialistici I seguenti termini vengono utilizzati in tutta la documentazione relativa al prodotto per indicare il livello di eventuali danni collegati all’utilizzo di questo prodotto:... -
Seite 67: Avvertenze Per La Carica
Precauzioni per la Sicurezza e Avvertenze, Continua • Rimuovere sempre le batterie prima dello smontaggio. • Tenere sempre libere le parti mobili. • Tenere sempre i componenti asciutti. • Lasciar sempre raffreddare i componenti dopo l’uso prima di toccarli. • Rimuovere sempre le batterie dopo l’uso. • Accertarsi sempre che il failsafe sia impostato correttamente prima del volo. -
Seite 68: Specifiche
Contenuti di Night Vapor BNF ........ -
Seite 69: Contenuti Di Night Vapor Rtf
Contenuti di Night Vapor RTF • Modello Night Vapor • 8 batterie AA • batteria 70mAh 3.7V 14C LiPo • Trasmittente DSM2/DSMX 2.4GHz • Caricabatteria 1S 3.7V DC LiPo, 0.3A CC Contenuti di Night Vapor BNF • Modello Night Vapor • 4 batterie AA... -
Seite 70: Carica Della Batteria
20 secondi o si spegne. carica situato sul fondo dell’alloggiamento del Nota: La batteria LiPo inclusa nella confezione caricabatteria. del Night Vapor è già parzialmente carica, di conseguenza la prima carica potrebbe richiedere solo 15-20 minuti. Nota: Sarà possibile effettuare 10-15 cicli di ricarica prima di dover sostituire le pile AA nel caricabatteria. -
Seite 71: Istallazione Della Batteria Di Volo
Nota: Anche se il trasmettitore inclusi nel Night Vapor è a 4 canali, l’aereo è a 3 canali interamente proporzionale che utilizza i controlli di acceleratore, timone ed elevatore. Per questo motivo, il... -
Seite 72: Istruzioni Specifiche Per Il Collegamento Del Trasmettitore
Istruzioni specifiche per il collegamento del trasmettitore Trasmettitore MLP4DSM 1. Quando si vede il LED della ricevente che inizia a lampeggiare, spingete lo stick di sinistra della trasmittente verso l’interno della trasmittente (NON abbassando lo stick dell’acceleratore) fino a sentire il click. -
Seite 73: Identificazione Di Controllo Del Trasmettitore
Identificazione di controllo del trasmettitore Nota: Prima di ogni volo accendere SEMPRE la trasmittente prima di collegare la batteria di volo alla ricevente. Al termine di ogni volo, scollegare sempre la batteria di volo dalla ricevente prima di spegnere la trasmittente. Modalità... -
Seite 74: Identificazione Led
Identificazione LED Night Vapor è dotato di 6 luci a LED. Qui in basso è presente una descrizione delle singole luci. • Ci sono 3 LED sul bordo dell’ala. Le luci sono di color bianco e rimangono fisse. • Ci sono 2 LED sul bordo dell’ala. La luce nella parte destra dell’ala (guardando dalla zona frontale) lampeggerà... -
Seite 75: Trim Digitali
Trim digitali La trasmittente ParkZone 2.4GHz DSM2/DSMX è dotata di pulsanti per il trim digitale su tutti i controlli per consentire una migliore regolazione. Centrare le superfici di controllo usando i trim. Se il trim elettronico non fosse sufficiente, regolate meccanicamente i collegamenti di controllo per centrare le superfici. -
Seite 76: Test Di Controllo
10–12mm dietro il supporto di montaggio frontale dell’ala. Night Vapor volerà con una vasta gamma di posizioni del CG consentendovi di modificare le caratteristiche di volo dell’aereo. Si può anche sperimentare ed aggiungere un po’... -
Seite 77: Lista Di Controllo Per Il Volo
Nota: L’unica circostanza in cui si deve collegare prima la batteria di volo alla ricevente prima di accendere la trasmittente. è quando si deve effettuare il binding tra ricevente e trasmittente. Si prega di fare riferimento alla sezione del collegamento fra il trasmettitore e il ricevitore di questo manuale, per ottenere ulteriori informazioni. -
Seite 78: Istallazione/Smontaggio Del Carrello Di Atterraggio
Istallazione/smontaggio del carrello di atterraggio Per smontare il carrello di atterraggio seguire queste fasi: 1. Avvicinate delicatamente il carrello ed estrarlo dal suo supporto. Nota: La prima volta può essere difficile smontare il carrello di atterraggio. 2. Spingere il nuovo carrello nelle due colonne di montaggio finchè non si inserisce con un click. Nota: Per dei voli brevi è... -
Seite 79: Sostituire La Pinna Verticale
Sostituire la pinna verticale Per sostituire la penna verticale sul Night Vapor bisogna seguire le fasi elencate qui sotto. 1. Rimuovere delicatamente il tubo di pressione ubicato in basso sull'aereo. 2. Disconnettere delicatamente l’asta di spinta dall’antenna di controllo. 3. Far scorrere la pinna verticale fuori dalla colonna di montaggio. -
Seite 80: Sostituire L'ala
Sostituire l’ala Tutti i LED sull’ala sono collegati in maniera permanente. La nuova ala includerà un nuovo set di LED. Per sostituire l’ala bisogna seguire queste fasi: 1. Disconnettere il cavo del LED principale dalla scheda del ricevitore. 2. Rimuovere il LED vicino alla coda dell’aereo. Nota: Il LED è... -
Seite 81: Sostituire L'elica
Sostituire l’elica L’elica è avvitata sull’albero della scatola del riduttore di giri. 1. Per rimuovere l’elica, usate un paio di pinze con becchi ad ago o pinze emostatiche per stringere l'albero dell’elica. 2. Fate ruotare l’elica in senso antiorario per rimuoverla. 3. - Seite 82 2. Mantenete fermo il dado e ruotate in senso orario l’ingranaggio cilindrico a denti dritti. Mantenete fermo il dado e ruotate in senso orario l’ingranaggio cilindrico a denti dritti 3. Tirate delicatamente l’ingranaggio e l’albero dell’elica scivolerà fuori. 4. Avvitate l’elica e lo spinner nuovi da 140mm x 45mm tenendo fermo l’ingranaggio e ruotano l’elica in senso orario.
-
Seite 83: Pezzi Di Ricambio
PKZU1161 ... . Fusoliera con Elettronica: Night Vapor PKZU1170 ... . Cellula di ricambio (niente elettronica o motore): Night Vapor PKZU1167 . -
Seite 84: Guida Alla Risoluzione Dei Problemi
Guida alla risoluzione dei problemi Se incontrate dei problemi con il montaggio o con la programmazione che non riuscite a risolvere attraverso la Guida alla risoluzione dei problemi, consultate pagina 96 e contattate il servizio di assistenza Horizon di competenza. Problema Soluzioni possibili Nell’aereo non funziona il “throttle... -
Seite 85: Garanzia E Policy Per Le Riparazioni
Garanzia e policy per le riparazioni Periodo di garanzia – Garanzia esclusiva - Horizon taggio del prodotto l’utente acconsente a tutte le condizioni, Hobby, LLC, (Horizon) garantisce che i prodotti acquistati (il limitazioni e riserve di garanzia citate in questa sede. “Prodotto”) sono privi di difetti relativi ai materiali e di even- Qualora l’utente non fosse pronto ad assumersi tale tuali errori di montaggio. -
Seite 86: Informazioni Per I Contatti
ATTENZIONE: Le riparazioni a pagamento sono rivenditore. Le riparazioni a pagamento avranno un costo disponibili solo sull’elettronica e sui motori. Le minimo di 30 minuti di lavoro e in fattura includeranno le riparazioni a livello meccanico, soprattutto per spese di restituzione. Qualsiasi riparazione non pagata e non gli elicotteri e le vetture RC sono molto costose richiesta entro 90 giorni verrà... - Seite 88 © 2018 Horizon Hobby, LLC. ParkZone products are distributed exclusively by Horizon Hobby, LLC. ® US 7,898,130. US D578,146. PRC ZL 200720069025.2. Other patents pending. The Spektrum trademark is used with permission of Bachmann Industries, Inc. DSMX is a trademark of Horizon Hobby, LLC., registered in the US. All other marks are trademarks or registered trademarks of Horizon Hobby, LLC.