Herunterladen Inhalt Inhalt Diese Seite drucken
Inhaltsverzeichnis

Werbung

Verfügbare Sprachen

Verfügbare Sprachen

 Elektro-Flugmodell „Wild Hawk" RtF
 Electric Flight Model „Wild Hawk" RtF
Best.-Nr. / Item No. / N° de commande / Bestelnr. 1380197
 Bedienungsanleitung
 Operating Instructions
Seite 2 - 36
Page 37 - 71
Version 11/15
7

Werbung

Kapitel

Inhaltsverzeichnis
loading

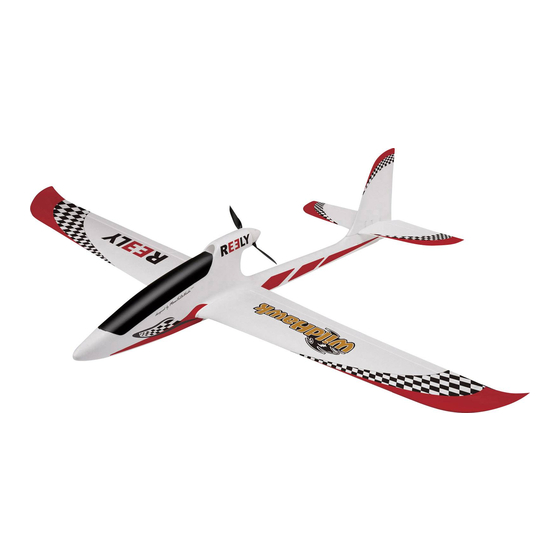
Inhaltszusammenfassung für Reely Wild Hawk 1380197

  • Seite 1  Elektro-Flugmodell „Wild Hawk“ RtF  Electric Flight Model „Wild Hawk“ RtF Best.-Nr. / Item No. / N° de commande / Bestelnr. 1380197  Bedienungsanleitung Seite 2 - 36  Operating Instructions Page 37 - 71 Version 11/15...
  • Seite 2: Inhaltsverzeichnis

    Inhaltsverzeichnis Seite Einführung ................................4 Symbol-Erklärungen ............................4 Bestimmungsgemäße Verwendung ........................5 Produktbeschreibung ............................5 Lieferumfang ................................6 Sicherheitshinweise .............................7 a) Allgemein ...............................7 b) Ladegerät mit Steckernetzteil ........................8 c) Vor der Inbetriebnahme ..........................9 d) Während des Betriebs ..........................10 Batterie- und Akkuhinweise ..........................11 Flugakku laden ..............................13 Aufbau des Modells ............................15 a) Montage von Höhen- und Seitenruder ......................15 b) Montage der Anlenkgestänge an Höhen- und Seitenruder .................17...
  • Seite 3 Seite 12. Propellerwechsel ...............................29 13. Programmierung des Flugreglers ........................30 a) Motor aus (1) ...............................30 b) Motorbremse (2) ............................31 c) Akkutyp (3 + 4) ............................31 d) Unterspannungserkennung (5 + 6 + 7) ......................31 e) Werkseinstellung (8) ............................32 f) Motor-Timming (9 + 10 + 11) ........................32 g) Startcharakteristik (12 + 13 + 14) ........................32 h) Helikopter (15 + 16 + 17) ..........................33 i) Motordrehrichtung (18) ..........................33...
  • Seite 4: Einführung

    Einführung Sehr geehrte Kundin, sehr geehrter Kunde, wir bedanken uns für den Kauf dieses Produkts. Dieses Produkt erfüllt die gesetzlichen, nationalen und europäischen Anforderungen. Um diesen Zustand zu erhalten und einen gefahrlosen Betrieb sicherzustellen, müssen Sie als Anwender diese Bedienungsanleitung beachten! Diese Bedienungsanleitung gehört zu diesem Produkt.
  • Seite 5: Bestimmungsgemäße Verwendung

    Bestimmungsgemäße Verwendung Bei diesem Produkt handelt es sich um ein Flugmodell, das mit Hilfe einer Fernsteueranlage drahtlos per Funk ge- steuert wird. Das Modell ist für den Einsatz im Freien ausgelegt und für den Anfänger des Flugmodellsports konzipiert. Ein passender 3zelliger LiPo-Flugakku und ein Balancer-Ladegerät mit Steckernetzteil befindet sich im Lieferumfang. Das gesamte Produkt darf nicht feucht oder nass werden. Das Produkt ist nicht für Kinder unter 14 Jahren geeignet.
  • Seite 6: Lieferumfang

    Lieferumfang Bevor Sie mit dem Bau beginnen, sollten Sie anhand der Stückliste den Lieferumfang Ihres Modells kontrollieren. • Rumpf mit Kabinenhaube • Tragfläche links und rechts • Höhenleitwerk • Seitenleitwerk • Flächenstab • Flugakku • Balancer-Ladegerät mit Steckernetzteil • Sender • Bedienungsanleitung für Flugmodell • Bedienungsanleitung für Fernsteueranlage Aktuelle Bedienungsanleitungen: 1. Öffnen Sie die Internetseite www.produktinfo.conrad.com in einem Browser oder scannen Sie den rechts abgebildeten QR-Code.
  • Seite 7: Sicherheitshinweise

    Sicherheitshinweise Bei Schäden, die durch Nichtbeachtung dieser Bedienungsanleitung verursacht werden, erlischt die Gewährleistung/Garantie. Für Folgeschäden übernehmen wir keine Haftung! Bei Sach- oder Personenschäden, die durch unsachgemäße Handhabung oder Nichtbeachten der Sicherheitshinweise verursacht werden, übernehmen wir keine Haftung! In solchen Fällen erlischt die Gewährleistung/Garantie.
  • Seite 8: Ladegerät Mit Steckernetzteil

    b) Ladegerät mit Steckernetzteil • Betreiben Sie das mitgelieferte Ladegerät nur über das zugehörige Steckernetzteil. • Der Aufbau des Steckernetzteils entspricht der Schutzklasse II. • Verwenden Sie zur Spannungs-/Stromversorgung des Steckernetzteils nur eine ordnungsgemäße Netzsteckdose des öffentlichen Versorgungsnetzes. • Die Netzsteckdose, in die das Steckernetzteil eingesteckt wird, muss leicht zugänglich sein. • Ziehen Sie das Steckernetzteil niemals am Kabel aus der Netzsteckdose. Fassen Sie es seitlich am Gehäuse an und ziehen Sie es dann aus der Netzsteckdose heraus. • Das Steckernetzteil und das Ladegerät dürfen nicht feucht oder nass werden. Stellen Sie auch keine mit Flüssigkeit gefüllten Gefäße, Vasen oder Pflanzen auf oder neben das Ladegerät bzw. das Steckernetzteil. Wenn diese Flüssigkeiten ins Ladegerät gelangen, wird das Ladegerät zerstört, außerdem besteht höchste Gefahr eines Brandes.
  • Seite 9: C) Vor Der Inbetriebnahme

    • Wenn Sie mit dem Ladegerät/Steckernetzteil oder Akkus arbeiten, tragen Sie keine metallischen oder leitfähigen Materialien, wie z.B. Schmuck (Ketten, Armbänder, Ringe o.ä). Durch einen Kurzschluss besteht Brand- und Explo- sionsgefahr. • Verwenden Sie das Ladegerät/Steckernetzteil niemals gleich dann, wenn es von einem kalten Raum in einen war- men Raum gebracht wurde. Das dabei entstehende Kondenswasser kann unter Umständen zu Funktionsstörungen oder Beschädigungen führen! Lassen Sie das Ladegerät/Steckernetzteil zuerst auf Zimmertemperatur kommen, bevor Sie es anschließen und in Betrieb nehmen.
  • Seite 10: Während Des Betriebs

    d) Während des Betriebs • Gehen Sie bei Betrieb des Produkts kein Risiko ein! Ihre eigene Sicherheit und die Ihres Umfeldes hängen alleine von Ihrem verantwortungsbewussten Umgang mit dem Modell ab. • Der unsachgemäße Betrieb kann schwerwiegende Personen- und Sachschäden verursachen! Achten Sie deshalb beim Flugbetrieb auf einen ausreichenden Sicherheitsabstand zu Personen, Tieren und Gegenständen. • Wählen Sie ein geeignetes Gelände zum Betrieb Ihres Modellflugzeugs aus. • Fliegen Sie mit Ihrem Modell nur dann, wenn Ihre Reaktionsfähigkeit uneingeschränkt gegeben ist. Müdigkeit, Alkohol- oder Medikamenten-Einfluss können zu Fehlreaktionen führen.
  • Seite 11: Batterie- Und Akkuhinweise

    Batterie- und Akkuhinweise Obwohl der Umgang mit Batterien und Akkus im täglichen Leben heute eine Selbstverständlichkeit ist, bestehen zahlreiche Gefahren und Probleme. Speziell bei LiPo-/LiIon-Akkus mit ihrem hohen Energieinhalt (im Vergleich zu herkömmlichen NiMH-Akkus) sind diverse Vorschriften unbedingt einzuhalten, da andern- falls Explosions- und Brandgefahr besteht.
  • Seite 12 • Achten Sie beim Einlegen von Batterien/Akkus in den Sender bzw. beim Anschluss eines Flugakkus an den Flug- regler auf die richtige Polung (Plus/+ und Minus/- beachten). Bei Falschpolung werden nicht nur der Sender, das Flugmodell und der Akku beschädigt. Es besteht zudem Brand- und Explosionsgefahr. • Bei längerem Nichtgebrauch (z.B. bei Lagerung) entnehmen Sie die in der Fernsteuerung eingelegten Batterien (bzw. Akkus), um Schäden durch auslaufende Batterien/Akkus zu vermeiden. Trennen Sie außerdem den Flugakku vom Flugregler.
  • Seite 13: Flugakku Laden

    Flugakku laden Bild 1 Bevor Sie mit der Fertigstellung des Modells beginnen, ist es sinnvoll, den Flugakku (1) aufzuladen. Dafür befindet sich ein geeignetes Steckernetzteil (2) und ein passendes Balancer-Ladegerät (3) mit im Lieferumfang des Modells. Das 2adrige Anschlusskabel am Akku (4) dient zur Stromversorgung des Antriebsmotors. Dieses Kabel wird später im Modell am Flugregler angeschlossen (siehe auch Bild 8). Während dem Ladevorgang darf dieses Kabel nicht mit dem Flugregler verbunden sein.
  • Seite 14 Beachten Sie: Der Ladevorgang startet nur dann, wenn die Akkuspannung einer Zelle zwischen 0,7 V und 4,18 V liegt. Aus fototechnischen Gründen ist in Bild 1 das Ladekabel des Steckerladegeräts im aufgewickelten Zustand zu sehen. Vor dem ersten Einsatz sollte jedoch der Kabelbinder geöffnet und das Kabel abgewickelt werden. Wichtig! Lassen Sie Balancer-Ladegerät und Akku beim Laden niemals unbeaufsichtigt.
  • Seite 15: Aufbau Des Modells

    Aufbau des Modells Bevor Sie mit dem Aufbau beginnen, lesen Sie bitte zuerst jeden einzelnen Abschnitt in Ruhe durch. Zum besseren Verständnis ist immer ein Bild beigefügt, das den beschriebenen Bauabschnitt darstellt. Für das Design und die Farbgebung des Modells als auch der Fernsteuerung orientieren Sie sich z.B. nach der Abbildung auf der Verpackung.
  • Seite 16 Beachten Sie, dass das am Seitenruder (4) eingesetzte Scharnier (5) hierbei in einen vorgefertigten Schlitz einge- passt werden muss. Dabei darf sich das Seitenruder nicht verkanten, sondern es muss parallel zur Seitenruderflosse verlaufen. Prüfen Sie, ob eine Montage gemäß Bild 2 problemlos möglich ist. Idealerweise sollte hierzu die Tragfläche montiert und die Leitwerkseinheit gemäß Bild 3 ausgerichtet werden. Bild 3...
  • Seite 17: Montage Der Anlenkgestänge An Höhen- Und Seitenruder

    b) Montage der Anlenkgestänge an Höhen- und Seitenruder Stellen Sie die Ruderhörner der Servos für Höhen- und Seitenruder exakt im 90°-Winkel zum Servogehäuse ein (siehe auch Bild 8, Pos. 4 + 5). Längen Sie die Gestänge für Höhen- und Seitenruder an den Dämpfungsflächen durch Ein- oder Ausdrehen der Gabelköpfe in der Art ab, dass die Dämpfungsflächen in der Neutrallage sind.
  • Seite 18: Kontrolle Der Anlenkgestänge An Den Querrudern

    c) Kontrolle der Anlenkgestänge an den Querrudern Die Anlenkungen der Querruder sind bereits ab Werk montiert (1). Kontrollieren Sie, ob sich die Ruderhörner der Anlenkgestänge in der vorletzten, äußeren Position der Ruderhörner (2) befinden. Bei neutraler Position von Trimmung und Steuerknüppel vom Querruder müssen sich die Querruder ebenfalls in neutraler Position befinden und mit der Tragflächenhinterkante abschließen (3). Ist dies nicht der Fall, müssen die Querruder durch Ein- bzw.
  • Seite 19: Montage Der Tragfläche

    d) Montage der Tragfläche Die Tragflächen werden links und rechts in die Aussparungen an den Rumpf montiert. Schieben Sie hierzu in die Tragfläche (1) den mitgelieferten Flächenstab (2) hinein. Der Flächenstab wird später bei aufgesteckten Tragflächen durch je eine Schraube gesichert. Zur Montage des Flächenstabs müssen diese Schrauben bei der Erstmontage eventuell etwas heraus gedreht werden (siehe Bild 7). Schieben Sie die Flächenstab (2) in das Loch des Rumpfmittelteils. Führen Sie den Stecker des Querruderservos in den Rumpf ein und stecken ihn in das Y-Kabel am Empfänger (3).
  • Seite 20: Sicherung Der Tragfläche Für Den Flugbetrieb

    e) Sicherung der Tragfläche für den Flugbetrieb Die Passformen von Tragfläche und Tragflächenaufnahme am Rumpf (1) gewährleisten für den Flugbetrieb keine ausreichende Fixierung. Deshalb werden die Tragflächen durch je eine Schraube gesichert, die den vorderen Flächenstab festklemmen (2). Drehen Sie hierzu die Schrauben vorsichtig im Uhrzeigersinn, bis eine sichere Klemmung gewährleistet ist, jedoch der Flächenstab nicht durch zu starkes Festziehen beschädigt wird. Bild 7...
  • Seite 21: Inbetriebnahme Des Modells

    Inbetriebnahme des Modells a) Inbetriebnahme der Fernsteuerung In dieser Bedienungsanleitung zum Flugmodell werden in den Bildern zur Fernsteuerung nur die Steuerelemente dar- gestellt und dienen somit nur der Illustration. Die genaue Funktion der Fernsteuerung wird in der separat beigelegten Bedienungsanleitung erklärt. b) Einlegen und Anschließen des Flugakkus In Bild 8 sehen Sie die Position des Flugakkus (1), das Steckersystem (2), den Magneten für die Kabinenhalterung (3), das Höhenruderservo (4), das Seitenruderservo (5), den Flugregler (6) und den Empfänger (7).
  • Seite 22: Einstellen Des Schwerpunkts

    c) Einstellen des Schwerpunkts Das Flugmodell muss durch geschickte Anordnung des Flugakkus (und wenn nötig durch Zugabe von Trimmblei) so eingestellt werden, dass sich der Schwerpunkt ca. 85 mm hinter der Nasenleiste der Tragfläche befindet. Markieren Sie hierzu an den Unterseiten der Tragfläche mit einem Stift die entsprechenden Positionen des Schwer- punktes. Stützen Sie das zusammengebaute, flugfertige Modell von unten an den Messpunkten mit den Zeigefingern der linken und rechten Hand (oder einer entsprechenden Vorrichtung) ab. Bei korrektem Schwerpunkt sollte das Flugmodell eine leicht nach vorne geneigte Lage einnehmen. Wichtig! Messen Sie den Schwerpunkt immer flugfertig mit aufgesetzter Kabinenhaube aus.
  • Seite 23: Überprüfen Der Steuerfunktionen

    d) Überprüfen der Steuerfunktionen Bevor Sie mit Ihrem Modell zum ersten Mal starten, ist es erforderlich, sich mit der Fernsteuerung als auch den Steu- erfunktionen vertraut zu machen sowie die Modellfunktionen zu testen. Die Funktionen und die Inbetriebnahme der Fernsteueranlage sind in der separat beigelegten Bedienungsanleitung zur Fernsteuerung ersichtlich. Schalten Sie zunächst den Sender ein und stellen den Steuerknüppel für die Drehzahl auf die Stellung „Motor aus“...
  • Seite 24 Wird der Steuerknüppel für die Höhenruderfunktion nach oben bewegt, muss das Höhenruder nach unten ausschla- gen. Die hintere Kante des Ruders muss dabei ca. 12 mm nach unten ausgelenkt werden. Im Flug wird dadurch das Leitwerk nach oben gedrückt und das Modell taucht nach unten weg. Diese Steuerfunktion wird benötigt, um das Modell in eine normale Fluglage zu bringen, falls es durch einen Steuerfehler oder eine Windböe zu sehr nach oben steigen will.
  • Seite 25 Seitenruderfunktion Wird der Steuerknüppel für die Seitenruderfunktion nach links bewegt, muss das Seitenruder nach links ausschlagen. Die hintere Kante des Ruders muss dabei ca. 25 mm nach links ausgelenkt werden. Im Flug wird dadurch das Leit- werk nach rechts gedrückt und das Modell fliegt eine Linkskurve. Bild 14 Wird der Steuerknüppel für die Seitenruderfunktion nach rechts bewegt, muss das Seitenruder nach rechts ausschla- gen.
  • Seite 26: Einstellen Der Ruderausschläge

    • Schieben Sie den Steuerknüppel für die Motorfunktion langsam von der untersten in die oberste Stellung. Der Propeller wird anlaufen und die Drehzahl wird sich in Abhängigkeit von der Stellung des Steuerknüppels erhöhen. • Wenn sich der Steuerknüppel am oberen Anschlag befindet, ist die maximale Propellerdrehzahl erreicht. Bewegen Sie danach den Steuerknüppel wieder zurück in die unterste Stellung. • Führen Sie einen kurzen Motortest durch und überprüfen dabei den Rundlauf des Propellers.
  • Seite 27: Einfliegen Des Modells

    Einfliegen des Modells Nachdem Sie den Schwerpunkt, die Funktion des Motors sowie die Richtung der Ruderausschläge überprüft haben, ist Ihr Modell zum Erstflug bereit. Wir empfehlen Ihnen, in jedem Fall einen erfahrenen Modellflug-Piloten zu kontaktie- ren oder einen Modellbau-Verein in Ihrer Nähe aufzusuchen, falls Sie mit dem korrekten Einfliegen eines Flugmodells nicht vertraut sind. a) Reichweitentest Vor dem ersten Start sind alle Akkus (z.B. im Sender und der Flugakku) entsprechend den Herstellerangaben zu laden.
  • Seite 28: Eintrimmen Des Modells

    Wichtig! Die Wirksamkeit der Ruder ist neben dem Ausschlagweg am Sender auch von der Motorleistung bzw. der Fluggeschwindigkeit abhängig. Je höher die Motordrehzahl bzw. Fluggeschwindigkeit, desto agiler reagiert das Modell. Achtung! Achten Sie beim Fliegen immer auf eine ausreichende Mindest-Fluggeschwindigkeit. Bei reduzierter Motor- leistung führt zu starkes Ziehen am Höhenruder-Steuerknüppel dazu, dass das Modell zu langsam wird und nach vorne über die Rumpfspitze oder seitlich über eine Tragfläche abkippt.
  • Seite 29: Propellerwechsel

    Propellerwechsel Muss der Propeller einmal wegen einer Beschädigung gewechselt werden, so entfernen Sie die Spinnerkappe durch Herausdrehen der Befestigungsschrauben des Spinners (1). Jedes Propellerblatt ist an der Propellernabe mit einer Schraube und einer Stoppmutter (2) verankert. Durch Entfer- nen der Schraube kann das beschädigte Propellerblatt gewechselt werden. Die Schraube muss nach dem Wechsel wieder mit der Stoppmutter in der Art gesichert werden, dass sich das Propellerblatt mit möglichst wenig Spiel leicht- gängig bewegen lässt.
  • Seite 30: Programmierung Des Flugreglers

    Programmierung des Flugreglers Der im Modell eingebaute Flugregler ist programmierbar und bereits ab Werk für das Modell „Wild Hawk“ korrekt voreingestellt. Abweichend zu der Voreinstellung sind folgende Funktionen programmierbar: Stellung „Motor aus“, Motorbremse, Ak- kutyp, Unterspannungserkennung in drei Stufen, Werkseinstellung herstellen, Motortiming, Startverhalten, Helikopter- Modus, Motordrehrichtung, Taktfrequenz und das Abschaltverhalten bei Unterspannung.
  • Seite 31: B) Motorbremse (2)

    b) Motorbremse (2) In dem Flugregler ist eine Motorbremse integriert. Diese sogenannte „EMK-Bremse“ hat den Sinn, dass der Motor nach dem Steuersignal „Motor aus“ sofort stehen bleibt (also gebremst wird). Durch diesen Umstand läuft der Motor im Flug durch die durchströmende Luft am Propeller nicht mehr mit und der Klapp-Propeller kann sich anlegen. Somit wird der Luftwiderstand im reinen Segelflug reduziert.
  • Seite 32: Werkseinstellung

    e) Werkseinstellung (8) Mit dem Programmpunkt „Werkseinstellung“ können Sie den Flugregler in die Grundeinstellungen zurücksetzen. Die- se Grundeinstellung entspricht bis auf die noch zu programmierende Motorbremse den Werkseinstellungen zum Mo- dell „Wild Hawk“. Sollten Sie im Betrieb des Modells bzw. des Flugreglers irgendwelche unerwünschten Reaktionen feststellen, so empfehlen wir Ihnen, die Werkseinstellung herzustellen.
  • Seite 33: H) Helikopter (15 + 16 + 17)

    h) Helikopter (15 + 16 + 17) Hier stellen Sie die Startcharakteristik für einen Helikopter ein, dessen Motor über einen Ein-/Ausschalter und/oder über den Steuerhebel der Motorsteuerung erfolgt. In der Hauptsache ist diese Funktion zur Schonung von Getriebe- antrieben der Helikopter gedacht. Folgende Einstellmöglichkeiten haben Sie: „aus“, „kurz“...
  • Seite 34: Optionale Kamera

    Optionale Kamera Auf Grund der gutmütigen Flugeigenschaften und dem Umstand, dass der Antriebsmotor hinter der Tragfläche auf einem Pylon montiert ist, eignet sich das Flugmodell „Wild Hawk“ auch hervorragend als Kameraträger. Notwendiges Zubehör und eine Kamera gehören nicht zum Lieferumfang und müssen gesondert erstanden werden. Orientieren Sie sich hierzu auch bei dem zum Modell angebotenen Zubehör. Als Montageort wird der hintere Bereich der Kabinenhaube empfohlen.
  • Seite 35: Entsorgung

    Entsorgung a) Allgemein Das Produkt gehört nicht in den Hausmüll! Entsorgen Sie das Produkt am Ende seiner Lebensdauer gemäß den geltenden gesetzlichen Vorschriften. Entnehmen Sie die eingelegten Batterien/Akkus und entsorgen Sie diese getrennt vom Produkt. b) Batterien und Akkus Sie als Endverbraucher sind gesetzlich (Batterieverordnung) zur Rückgabe aller gebrauchten Batterien und Akkus verpflichtet; eine Entsorgung über den Hausmüll ist untersagt! Schadstoffhaltige Batterien/Akkus sind mit nebenstehendem Symbol gekennzeichnet, das auf das Verbot der Entsorgung über den Hausmüll hinweist.
  • Seite 36: Technische Daten

    Technische Daten Modell: Spannweite ............1650 mm Länge..............1159 mm Gewicht ............... Flugfertig ab ca. 1050 g Steuerung ............4 Kanäle (Querruder, Seitenruder, Höhenruder, Motor) Propeller .............. 20,3 x 15,2 cm (8“ x 6“) Elektromotor: Leistungsaufnahme ..........max. ca. 200 W Betriebsspannung ..........
  • Seite 37 Table of Contents Page Introduction ................................39 Explanation of Symbols .............................39 Intended Use ..............................40 Product Description ............................40 Scope of Delivery ...............................41 Safety Notes ..............................42 a) General ................................42 b) Charger with mains adapter ........................43 c) Before Commissioning ..........................44 d) During Operation ............................45 Battery and Rechargeable Battery Notes ......................46 8. Charge flight battery ............................48 Setup of the Model .............................50...
  • Seite 38 Page 12. Propeller Change ...............................64 13. Programming the Flight Controller ........................65 a) Motor off (1) ..............................65 b) Motor Brake (2) ............................66 c) Rechargeable Battery Type (3 + 4)......................66 d) Undervoltage Recognition (5 + 6 + 7) ......................66 e) Factory Settings (8) .............................67 f) Motor Timing (9 + 10 + 11) ..........................67 g) Start Characteristics (12 + 13 + 14) ......................67 h) Helicopter (15 + 16 + 17) ..........................68...
  • Seite 39: Introduction

    Introduction Dear Customer, Thank you for purchasing this product. This product complies with the statutory national and European requirements. To maintain this status and to ensure safe operation, you as the user must observe these operating instructions! These operating instructions are part of this product. They contain important notes on commissioning and handling.
  • Seite 40: Intended Use

    Intended Use This product is an model airplane with wireless radio control through a remote control system. The model is intended for outdoor use and designed for flight model sports beginners. A matching 3-cell LiPo flight battery and a balancer charger with plug-in mains unit are enclosed. The entire product must not become damp or wet. The product is not suitable for children under 14 years of age. Observe all safety information in these operating instructions.
  • Seite 41: Scope Of Delivery

    Scope of Delivery Before you start assembly, check the parts in the scope of delivery of your model. • Fuselage with canopy • Left and right wings • Tail unit • Fin • Wing rod • Flight battery • Balancer charger with mains adapter • Transmitter • Operating instructions for flight model • Operating instructions for remote control system Up-to-date Operating Instructions: 1.
  • Seite 42: Safety Information

    Safety Information In case of damage caused by non-compliance with these operating instructions, the warranty/guar- antee will expire. We do not assume any liability for consequential damage! We do not assume any liability for property damage or personal injury caused by improper use or non-compliance with the safety instructions! In such cases the warranty/guarantee is voided.
  • Seite 43: B) Charger With Mains Adapter

    b) Charger with mains adapter • Operate the enclosed charger only via the associated plug-in mains unit. • The mains unit is constructed pursuant to protection category II. • Use only a proper mains socket of the public supply mains for voltage/current supply of the plug-in mains unit. • The mains socket to which the mains adapter is connected must be easily accessible. • Do not pull the plug-in mains unit from the mains socket by pulling the cable. Take it at the side of the housing and pull it from the socket then. • The mains adapter and the charger must not become damp or wet. Also do not place any containers filled with liquid, vases or plants, on or next to the charger or the mains adapter. If these liquids get into the charger, the charger will be destroyed and there is a considerable fire hazard. The mains adapter also poses danger of a potentially fatal electrical shock. If the plug-in mains unit has become moist or wet or damaged, do not touch it.
  • Seite 44: Before Commissioning

    • If you have reason to assume that safe operation is no longer possible, disconnect the charger/mains adapter im- mediately and secure it against inadvertent operation. It can be assumed that operation without danger is no longer possible if the charger/mains adapter has any visible damage, the charger/mains adapter no longer works, after extended storage under unsuitable conditions or after difficult transport conditions.
  • Seite 45: During Operation

    d) During Operation • Do not take any risks when operating the product! Your own safety and that of your environment depends completely on your responsible use of the model. • Improper operation may cause serious injury and property damage! Therefore make sure to keep a sufficiently safe distance from persons, animals or objects during operation. • Select a suitable area to operate your model plane. • Fly your model only if your ability to respond is unrestricted. The influence of tiredness, alcohol or medication can cause incorrect responses. • Do not direct your model towards spectators or towards yourself. • Never point the aerial of the transmitter directly at the model. This has a considerable negative effect on signal transmission to the model and thus range. • Never switch off the remote control (transmitter) while the model is in use. After landing, always disconnect the flight battery first. Only then must be remote control be switched off.
  • Seite 46: Information On Batteries And Rechargeable Batteries

    Information on Batteries and Rechargeable Batteries Although use of batteries and rechargeable batteries in everyday life is a matter of course today, there are many dangers and problems. In particular in LiPo/LiIon batteries with high energy content (as compared to conventional NiMH batteries), various provisions must be complied with to avoid danger of explosion and fire.
  • Seite 47 • If the device is not used for an extended period of time (e.g. storage), remove the inserted batteries (or rechargeable batteries) from the remote control to avoid damage from leaking batteries/rechargeable batteries. Also disconnect the flight battery from the flight controller. Attention! Do not leave the rechargeable flight battery connected to the plane model if the latter is not used (e.g. during transport or storage). Otherwise, the flight battery may be fully discharged and is thus destroyed/unusable! • Recharge the rechargeable batteries about every 3 months. Otherwise, deep discharge may result, rendering the rechargeable batteries useless. • Always replace the entire set of batteries or rechargeable batteries in the transmitter. Never mix fully charged bat- teries/rechargeable batteries with partially discharged ones. Always use batteries or rechargeable batteries of the same type and manufacturer.
  • Seite 48: Charge Flight Battery

    8. Charge flight battery Figure 1 Before the final assembly of the model, you should charge the flight battery (1). A suitable mains adapter (2) and a suitable balancer charger (3) are included in model's scope of delivery. The 2-wire connection cable at the rechargeable battery (4) supplies the drive motor with power. This cable is later connected to the flight controller in the model (also see figure 8). This cable must not be connected to the flight controller while charging.
  • Seite 49 Observe: Charging will only commence when the rechargeable battery voltage of one cell is between 0.7 V and 4.18 V. For photo-technical reasons, figure 1 shows the charging cable of the plug-in mains adapter in the wound-up state. Before first use, the cable retainer should be opened and the cable unwound. Important! Never leave the balancer charger and rechargeable battery unattended when charging. Observe the charg- ing time and check for excessive heating of the balancer charger and the rechargeable battery in between. If the red and green LEDs at the balancer charger flash, there is a fault. In this case, disconnect the re- chargeable battery from the balancer charger at once.
  • Seite 50: Setup Of The Model

    Model Setup Before assembling the model, please read each individual section carefully. The construction stages are illustrated for better understanding. For design and colour of your model and the remote control, use the illustration, e.g. on the packaging for reference. Design and colour deviations in these operating instructions are possible. The figures in these operating instructions only serve illustration.
  • Seite 51 Observe that the hinge (5) moulded onto the rudder (4) must be adjusted to a pre-made slot. The rudder must not catch but must run in parallel with the rudder fin. Check if installation according to figure 2 is possible without problems. Ideally, the wing should be installed for this and the tail unit aligned according to figure 3. Figure 3...
  • Seite 52: B) Mounting The Elevator And Rudder Linkage Rods

    b) Mounting the Elevator and Rudder Linkage Rods Put the rudder horns of the servos for elevator and rudder at precisely 90° to the servo casing (also see figure 8, item 4 + 5). Shorten the rods for elevator and rudder at the dampening areas by twisting the clevises in or out so that the dampen- ing surfaces are in neutral position. Screw the clevises at the rudder horns on with a suitable tool so that the clevises move freely with a little play (1 and 2).
  • Seite 53: C) Checking The Linkage Rods At The Ailerons

    c) Checking the Linkage Rods at the Ailerons The linkages of the ailerons are pre-installed ex works (1). Also check if the rudder horns of the linkage rods are in the second-to-last, outer position of the rudder horns (2). In the neutral position of aileron trimming and control lever, the ailerons need to be in the neutral position as well and end flush (3) with the rear wing edge. If this is not the case, the ailerons must be adjusted by twisting the clevises in or out.
  • Seite 54: Mounting The Wing

    d) Mounting the Wing The wings are installed in the fuselage slots on the left and right. For this, push the enclosed wing rod (2) into the wing (1). The wing rod is later secured with one screw each with the wing pushed on. To install the wing rod, these screws may need to be turned out a little at initial assembly (see figure 7).
  • Seite 55: E) Securing The Wings For Flight Operation

    e) Securing the Wings for Flight Operation The fits of the wing and wing holder at the fuselage (1) do not ensure sufficient fastening for flight operation. Therefore, the wings are additionally secured with one screw each that clamps the front wing rod (2). For this, carefully turn the screws clockwise until secure clamping is ensured, but the wing rod is not damaged by too-strong tightening. Figure 7...
  • Seite 56: Motor Commissioning

    Motor Commissioning a) Commissioning the Remote Control In the operating instructions for the flight model, only the control elements are illustrated in the figures of the remote control. They therefore serve illustration purposes only. The precise function of the remote control is explained in the separately enclosed operating instructions. b) Inserting and Connecting the Flight Battery Figure 8 shows the position of the flight battery (1), the plug system (2), the magnets for the cabin holder (3), the elevator servo (4), the rudder servo (5), the flight controller (6) and the receiver (7). After removing the canopy, the flight battery is pushed into the fuselage from the front and secured with the enclosed hook-and-loop tape in the front area of the fuselage tip. The flight battery must not move in flight.
  • Seite 57: C) Setting Of The Centre Of Gravity

    c) Setting of the Centre of Gravity The model airplane must be set by proper placement of the flight battery (and, if required, by addition of trimming lead) so that the centre of gravity is approx. 85 mm behind the nose strip of the wing. To do so, mark the corresponding centre of gravity position at the bottom of the wing with a pen. Use your index fingers (or a device intended for this) to hold the assembled and ready-to-fly model from below at the measured positions. If the centre of gravity is set correctly, the model airplane should be leaning slightly forward. Important! Always measure the centre of gravity ready-to-fly with the cabin hood in place.
  • Seite 58: D) Verification Of The Control Functions

    d) Verification of the Control Functions Before starting your model for the first time, you need to familiarise yourself with the remote control, the control func- tions and test the model functions. The functions and commissioning of the remote control system can be taken in the operating instructions separately enclosed with the remote control. Always turn on the transmitter first and put the speed control lever to "Motor off" (see figure 16). Connect the flight battery to the flight controller (see figure 8, item 2). The flight controller now checks the "Motor off" control signal of the transmitter. Depending on how the flight controller is programmed, the flight controller's readiness for operation is signalled by different signal sounds. The signal sounds are generated by a short start-up of the motor by the flight controller.
  • Seite 59: Aileron Function

    If the control stick for the elevator function is moved up, the elevator must deflect downwards. The rear rudder edge must be deflected downwards by approx. 12 mm. In flight, the landing gear is pressed upwards and the model dives. This control function is required to put the model into a normal light position if it wants to ascend too much due to a control error or a gust of wind. Figure 11 Aileron function If the control lever for the aileron function is moved to the left, the left wing's aileron must break out to the top and the aileron of the right wing to the bottom. The rear rudder edge must be deflected or downwards or upwards by approx. 12 mm. In flight, this presses the wing to the lower left and the model flies to the left with a little elevator support. Figure 12 If the control lever for the aileron function is moved to the right, the left wing's aileron must break out to the bottom and the aileron of the right wing to the top. The rear rudder edge must be deflected or downwards or upwards by approx.
  • Seite 60: Rudder Function

    Rudder function If the control stick for the rudder function is moved to the left, the rudder must deflect to the left. The rear rudder edge must be deflected to the left by approx. 25 mm. In flight, the landing gear is pressed to the right and the model flies to the left. Figure 14 If the control stick for the rudder function is moved to the right, the rudder must deflect to the right. The rear rudder edge must be deflected to the right by approx. 25 mm. In flight, the landing gear is pressed to the left and the model flies to the right. Figure 15 If the rudder does not deflect as described above, the "Servo-Reverse" function at the transmitter must be used to change the running direction of the servos. Further information on this can be found in the operating instructions for the remote control. Motor Function Attention! Ensure that no loose parts, such as paper, film or other objects can be sucked into the rotor during this motor test.
  • Seite 61: E) Setting The Rudder Deflections

    • Push the control lever for the motor function slowly from the bottom to the top position. The rotor will start up and increase speed depending on control lever position. • When the control lever is at the top stop, the maximum rotor speed is reached. Then move the control lever back to the bottom-most position. • Perform a brief engine test and check the run of the propeller and the propeller catch. • Disconnect the flight battery from the model and switch off the transmitter. Figure 17 e) Setting the Rudder Deflections If the construction is performed and the transmitter set correctly, the rudders should have the following rudder deflec- tion values: Aileron 12 mm upwards 12 mm downwards Elevator 12 mm upwards 12 mm downwards Rudder 25 mm to the left 25 mm to the right Attention! The indicated values show the rudder deflections to be selected for the first flights.
  • Seite 62: Flying In The Model

    Flying the Model in After checking the centre of gravity, the motor functions and the rudder surface travel directions, your model is ready for its first flight. However, we recommend you contact an experienced model airplane pilot or a model construction club in your area if you are not sure as how to fly in an airplane model properly. a) Range Test Before the first take-off, all rechargeable batteries (e.g. in the transmitter and flight battery) must be charged accord- ing to manufacturer information. First perform a range test for the remote control system in the flight area. Switch on the remote control and then the receiver. Now check the range according to the notes in the operating instructions of your remote control.
  • Seite 63: Trimming In The Model

    Important! The rudder efficiency depends on the deflection path at the transmitter, as well as the motor performance or flight speed. The higher the motor or flight speed, the more agilely will the model react. Attention! When flying, always observe sufficient minimum flight speed. With reduced motor output, pulling on the elevator control lever too much will cause the model to slow down and top forwards over the fuselage top or to the side over a wing. Therefore, fly at a sufficient safety height in the beginning in order to allow yourself to get used to the steer- ing attitude of the model. Do not fly too far in order to be able to clearly evaluate flight attitude at all times. d) Trimming in the Model If your model tends to drift to one direction in straight flight, correct the neutral position of the corresponding rudder by trimming in flight. Always find the reason for which trimming was required after touch-down, and correct it (e.g. centre of gravity, etc.).
  • Seite 64: Propeller Change

    Propeller change If the propeller must be replaced due to damage, remove the spinner cap by turning out the attachment screws of the spinner (1). Every propeller blade is anchored to the propeller hub with a screw and a stop nut (2). Removing the screw permits replacement of the damaged propeller blade.
  • Seite 65: Programming The Flight Controller

    Programming the Flight Controller The flight controller installed in the model is programmable and correctly pre-set ex works for the "Wild Hawk" model. Deviating from the pre-settings, the following functions can be programmed: Position "Motor off", motor brake, re- chargeable battery type, undervoltage recognition in three steps, restore factory settings, motor timing, start-up be- haviour, helicopter mode, motor rotating direction, cycle frequency and deactivation behaviour at undervoltage. To get to the programming mode, switch on the transmitter, push the control lever for the motor control all the way to the front and connect the rechargeable battery to the flight controller. After a few seconds, the motor will emit different signal sounds, melodies or a combination of them to indicate a specific function and are repeated four times.
  • Seite 66: B) Motor Brake (2)

    b) Motor Brake (2) The flight controller has an integrated motor brake. This "EMK brake" stops (brakes) the motor immediately after the control signal "Motor off". The motor will then no longer run on due to the air flowing through the propeller in flight, and the folding propeller may fold in. This reduces air resistance in pure gliding. The motor brake can be switched on and off as follows: • Switch on the transmitter on and then put the throttle lever for motor control to the full throttle position. • Then connect the flight battery to the flight controller again. • The flight controller switches to programming mode and will start the first programme item (neutral position = short sound). • After this programme item, the programme item "Motor brake" will follow. This is signalled by the sound sequence "DiDiDi" repeated four times (2). Now pull the control lever of the transmitter to the rear position (motor off) while this sound sequence is played.
  • Seite 67: Factory Settings

    e) Factory Settings (8) Use the programme item "Factory Settings" to reset the flight controller to its basic settings. These basic settings cor- respond to the factory settings for the "Wild Hawk" model, except for the motor brake that is still to be programmed. If you find any undesired reactions in operation of the model or flight controller, we recommend resetting to the factory settings. You can recognise the programme item "Factory settings" by a double reducing melody followed by a high sound (8). Remember that you have to switch on the motor brake again after restoring the factory settings! f) Motor Timing (9 + 10 + 11) This setting influences motor running characteristics (similar to early ignition of a combustion engine). You have the...
  • Seite 68: H) Helicopter (15 + 16 + 17)

    h) Helicopter (15 + 16 + 17) Here, you can set the start characteristics for a helicopter the motor of which is controlled by an on/off switch and/ or via the control lever of the motor control. This function is mostly intended to protect gear drives of the helicopter. You have the following setting options: "off", "short"...
  • Seite 69: Optional Camera

    Optional camera Due to the good flight properties and the circumstance that the drive motor is installed on a pylon behind the wing, the flight model "Wild Hawk" is also outstandingly suitable as a camera carrier. Necessary accessories and a camera are not part of the delivery and must be purchased separately. For this, also use the accessories offered for the model for orientation. The rear area of the canopy is recommended as the mounting site.
  • Seite 70: Disposal

    Disposal a) General Information The product does not belong in the household waste! At the end of its service life, dispose of the product according to the relevant statutory regulations. Remove any inserted batteries/rechargeable batteries and dispose of them separately from the product. b) Batteries and Rechargeable Batteries You as the end user are required by law (Battery Ordinance) to return all used batteries/rechargeable batteries.
  • Seite 71: Technical Data

    Technical Data Model: Wing span ............1650 mm Length..............1159 mm Weight ..............Ready to fly from approx. 1050 g upwards Control ..............4 channels (aileron, elevator, rudder, motor) Propeller .............. 20.3 x 15.2 cm (8“ x 6“) Electric Engine: Power intake ............Max. approx. 200 W Supply voltage .............
  • Seite 72: Legal Notice

    Impressum Dies ist eine Publikation der Conrad Electronic SE, Klaus-Conrad-Str. 1, D-92240 Hirschau (www.conrad.com). Alle Rechte einschließlich Übersetzung vorbehalten. Reproduktionen jeder Art, z. B. Fotokopie, Mikroverfilmung, oder die Er- fassung in elektronischen Datenverarbeitungsanlagen, bedürfen der schriftlichen Genehmigung des Herausgebers. Nachdruck, auch auszugsweise, verboten. Die Publikation entspricht dem technischen Stand bei Drucklegung. © Copyright 2015 by Conrad Electronic SE. Legal Notice This is a publication by Conrad Electronic SE, Klaus-Conrad-Str.

Inhaltsverzeichnis