
Verwandte Anleitungen für HP LaserJet M5035x MFP


Inhaltszusammenfassung für HP LaserJet M5035x MFP
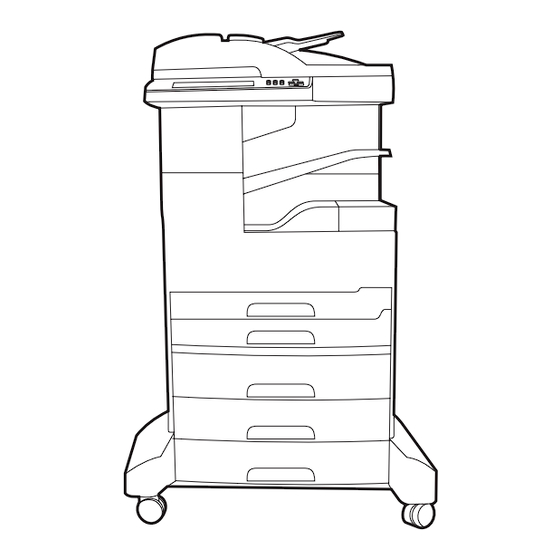
- Seite 1 HP LaserJet M5035x/M5035xs MFP Getting Started Guide Guide de mise en route Leitfaden zur Inbetriebnahme Guida introduttiva Guía de instalación inicial Beknopte handleiding Primers passos Guia de Primeiros Passos Lea esto primero...
- Seite 2 Les informations contenues dans le présent document sont susceptibles d’être modifiées sans préavis. The only warranties for HP products and services are set forth in the express warranty statements accompanying such products and services. Les seules garanties pour les produits et services HP sont exposées dans la Nothing herein should be construed as constituting an additional warranty.
- Seite 3 • Prepare the site • Préparation du site • Vorbereiten des Standorts • Preparazione della superficie • Prepare el lugar donde va a colocar el dispositivo • De locatie voorbereiden Make sure there is enough space to position the device. To position the device, select a sturdy, well-ventilated, dust-free area that is out of direct sunlight to position the device.
- Seite 4 • Unpack the device • Déballage du périphérique • Auspacken des Gerätes • Disimballaggio della periferica • Desembale el dispositivo • Het apparaat uitpakken 1) Open the box and remove it. Set the duplexer box aside. 2) Remove the packaging, plastic cover, and locate the ramps (callout 1). 1) Ouvrez le carton et retirez-le.
- Seite 5 3) Install the ramps. 4) Make sure that the wheel locks are in the unlocked 5) Remove all of the orange tape and cardboard packaging. position, and then roll the device onto the ramps and off of the pallet. WARNING: Make sure that two people roll the device off of the pallet. 3) Installation des rampes.
- Seite 6 M5035 MFPx M5035 MFPxs 6) Remove the orange tray locks from tray 2 (callout 1) and tray 3 7) Remove the cardboard in tray 4, tray 5, and tray 6 (XS model only). (callout 2). 6) Retirez les verrous oranges du bac 2 (schéma 1) et du bac 3 7) Retirez le carton du bac 4, 5 et 6 (Modèle XS uniquement).
- Seite 7 8) Open the upper-right door and remove the orange print-cartridge locks. 9) Remove the print cartridge from its packaging, remove the strip (callout 1) and orange tape, insert the print cartridge (callout 2) into the device, and then close the upper-right door (callout 3). 8) Ouvrez le panneau avant droit et retirez les verrous oranges de la 9) Sortez la cartouche d’impression de son emballage, retirez la pellicule cartouche d’impression.
- Seite 8 M5035 MFPx M5035 MFPxs 10) Open each tray to load the media. 11) Adjust the tray guides to match the media size, and then load the media. 10) Ouvrez chaque bac pour charger les supports. 11) Ajustez les guides des bacs selon le format du support utilisé, puis chargez le support.
- Seite 9 M5035 MFPx M5035 MFPxs M5035 MFPx M5035 MFPxs 12) Close all of the trays. 13) Move the scanner carriage shipping lock toward the back of the device so it unlocks. 12) Fermez tous les bacs. 13) Déverrouillez le verrou de transport du chariot du scanner en le déplaçant vers l’arrière du périphérique.
- Seite 10 M5035 MFPx M5035 MFPxs 14) Remove the duplexer from the box (callout 1), remove the duplexer 15) If necessary, remove the control-panel overlays and install new cover if necessary (callout 2), and then install the duplexer (callout 3). overlays. 14) Retirez l’unité recto-verso du carton (schéma 1), retirez le couvercle 15) Si nécessaire, retirez les caches du panneau de commande et de l’unité...
- Seite 11 16) If you are connecting using a USB cable, wait until you are prompted 17) Connect the network cable and the telephone cord (for fax). at the computer in step 26 on page 17. 16) Si vous utilisez une connexion via un câble USB, attendez le message 17) Connectez le câble réseau et le cordon téléphonique (pour le fax).
- Seite 12 M5035 MFPx M5035 MFPxs 18) Connect the power cable. 18) Branchez le câble d’alimentation. 18) Schließen Sie das Netzkabel an. 18) Collegare il cavo di alimentazione. 18) Conecte el cable de alimentación. 18) Sluit het netsnoer aan.
- Seite 13 • Set up the control panel • Configuration du panneau de commande • Einrichten des Bedienfelds • Configurazione del pannello di controllo • Configure el panel de control • Het bedieningspaneel instellen M5035 MFPx M5035 MFPxs 19) Turn on the device. 20) Wait for the device to initialize (this might take a few minutes).
- Seite 14 21) If you are connected to a network, print a test page from the control Note: Many networks provide IP addresses automatically. If the IP panel and check for a valid IP Address. On the control panel, touch the address shows a series of zeros, make sure that you are connected to the Network Address button, and then touch Print.
- Seite 15 22) Configure the IP address (if necessary). On the control panel, scroll to and touch Administration. Scroll to and touch Initial Setup, and then Networking and I/O. Touch Embedded Jetdirect, TCP/IP, and IPV4 Settings. Touch Manual Settings, and then enter the IP Address, Subnet Mask, and Default Gateway.
- Seite 16 28 de la página 18. impresión.. Voordat u de software gaat installeren. 23) HP raadt u aan alle Ga voor instructies voor software-installatie voor de Macintosh naar niet-noodzakelijke toepassingen af te sluiten voordat u de software voor stap 28 op pagina 18.
- Seite 17 To install a USB connection, go to step 24. Windows with a direct connection (USB). 24) Install the software from the CD before connecting the cable to the device. Note: If the New Hardware Found message appears, insert the CD. Follow the onscreen instructions, accept the default selections, and then go to step 35 on page 21.
- Seite 18 26) Attenersi alle istruzioni visualizzate sullo schermo. Quando richiesto, visualizzata l’installazione guidata. Nota: se la schermata di benvenuto collegare un cavo USB tra la periferica e il computer. Nota: HP sconsiglia non viene visualizzata, fare clic su Start, quindi su Esegui. Digitare l’uso di hub USB.
- Seite 19 Macintosh 27) Click Finish. If prompted, restart the computer. Go to step 35 on Connect to a Macintosh computer. 28) Place the CD in the CD-ROM page 21. drive and run the installer. Complete an easy install. Note: Install the software before connecting the USB cable.
- Seite 20 35 a pagina 21. AppleTalk. 29) Conecte un cable USB entre el dispositivo y el equipo. Nota: HP no 30) En Preferencias del sistema de Apple (disponible en el menú recomienda el uso de concentradores USB. Utilice un cable USB que no desplegable de Apple), haga clic en Imprimir y enviar por fax y, a mida más de 2 metros (6,5 pies).
- Seite 21 32) Dans la fenêtre du lecteur d’imprimantes, sélectionnez le 33) Cliquez sur Ajouter pour créer une file d’impression puis suivez les périphérique HP. Remarque : Si le logiciel HP est installé, il doit être instructions pour configurer manuellement les options disponibles du automatiquement configuré...
- Seite 22 Nota: se la pagina non viene stampata, reinstallare il software. Se la pagina non viene stampata anche dopo aver reinstallato il software, accedere al sito www.hp.com/support/M5035mfp. Pruebe la instalación del software. 35) Imprima una página desde cualquier programa para asegurarse de que el software se instaló...
- Seite 23 • Set up digital send • Configuration de l’envoi numérique • Einrichten von Digital Sending • Configurazione dell’invio digitale • Configure el envío digital • Digitaal verzenden instellen 36) Open a web browser. 37) Type the device IP address (found on the 40) Select E-mail Settings from the left navigation menu.
- Seite 24 42) Select The E-mail Address Book from the left navigation area to 43) To scan a document to your computer or shared network folder, use enter frequently-used e-mail addresses and e-mail distribution lists. the Send To Folder feature (on the left navigation bar) to set up one or Note: The Fax Address Book and Fax Speed Dials are located in the more folder destinations.
- Seite 25 44) If your device has faxing capabilities and you did not install the send fax driver in step 25, insert the CD to install the driver. Select Custom, Send Fax driver, and follow the instructions. Note: See the HP LaserJet Analog Fax Accessory 300 User Guide on the installation CD for more information.
- Seite 26 Note: Save the boxes and the packing materials in case you need to and ways to use your new HP device, and news about emerging transport the device. technologies. Félicitations ! Le périphérique est prêt à l’emploi. Le guide de l’utilisateur Enregistrement de votre périphérique.
-
Seite 27: Troubleshooting
Troubleshooting Area Symptom Cause/Remedy Control-pan Blank 1) Make sure that the power cable is connected to a working power outlet. el display 2) Make sure that the device is turned on. See page 12 for more information. 3) If the status lights on the left side of the control panel are functioning, adjust the contrast by using the dial in the upper left of the control panel. - Seite 28 2) Print a configuration page and check the modem status on the fax accessory page. If "Operational/Enabled" is not listed, it might be disabled or there might be a problem with the fax hardware. See the HP LaserJet Fax Accessory 300 User Guide for more information.
- Seite 29 Troubleshooting Area Symptom Cause/Remedy Staple A job is not stapled. 1) Remove the staple cassette and check if it is jammed or empty. 2) For copy jobs, select the Staple/Collate option at the control panel. For print jobs, make sure the stapler/stacker is configured in the printer driver. 3) Use only Letter or A4-size paper for staple jobs.
-
Seite 30: Dépannage
Dépannage Zone Symptôme Cause/Solution Ecran du Vide 1) Assurez-vous que le câble d’alimentation est connecté à une prise murale qui panneau de fonctionne. commande 2) Assurez-vous que le périphérique est sous tension. Reportez-vous à la page 12 pour de plus amples informations. 3) Si les voyants d’état à... - Seite 31 Reportez-vous au guide de l’utilisateur Accessoire télécopieur analogique 300 du périphérique HP LaserJet pour obtenir de plus amples informations. Le télécopieur est 1) Veillez à utiliser le cordon téléphonique livré avec l’appareil.
- Seite 32 Dépannage Zone Symptôme Cause/Solution Vous souhaitez modifier le Dans la fonction de courriers électronique du panneau de commande, type de fichiers ou les sélectionnez Options supplémentaires pour modifier le format de fichier image paramètres de couleur avant d’envoyer le courrier électronique. des pièces jointes aux courriers électroniques Un message «...
-
Seite 33: Fehlerbehebung
Fehlerbehebung Bereich Problem Ursache/Maßnahme Bedienfeldanzeige Leer 1) Vergewissern Sie sich, dass das Netzkabel mit einer funktionstüchtigen Steckdose verbunden ist. 2) Vergewissern Sie sich, dass das Gerät eingeschaltet ist. Weitere Informationen finden Sie auf Seite 12. 3) Wenn die Status-LEDs auf der linken Seite des Bedienfelds funktionieren, passen Sie über das Rädchen in der oberen linken Ecke des Bedienfelds den Kontrast an. - Seite 34 Modem evtl. deaktiviert, oder es liegt ein Problem mit der Fax-Hardware vor. Weitere Informationen finden Sie im Benutzerhandbuch für HP LaserJet Fax Accessory 300. Fax konfiguriert, aber Fax 1) Vergewissern Sie sich, dass Sie das mit dem Gerät gelieferte wird nicht gesendet (keine Telefonkabel verwenden.
- Seite 35 Fehlerbehebung Bereich Problem Ursache/Maßnahme Sie möchten zum Verwenden Sie den integrierten Webserver, um das standardmäßige Scannen und „Senden an Bilddateiformat zu ändern. Wählen Sie dazu Digital Sending, An E-Mail E-Mail“ das Schwarzweiß- senden und Erweitert aus. TIFF-Format verwenden Sie möchten den Dateityp Wählen Sie auf dem Bedienfeld unter der E-Mail-Funktion die Option oder die Farbeinstellung Weitere Optionen aus, um das Bilddateiformat vor dem Senden der E-Mail...
-
Seite 36: Risoluzione Dei Problemi
Risoluzione dei problemi Area Sintomo Causa/Rimedio Display Vuoto 1) Assicurarsi che il cavo di alimentazione sia collegato a una presa di pannello di corrente funzionante. controllo 2) Assicurarsi che la periferica sia accesa. Vedere pagina 12 per ulteriori informazioni. 3) Se le spie di stato a sinistra del pannello di controllo funzionano, regolare il contrasto utilizzando il selettore in alto a sinistra sul pannello di controllo. - Seite 37 Per ulteriori informazioni, consultare la guida dell’accessorio fax HP LaserJet 300. Il fax è configurato, ma non 1) Assicurarsi di utilizzare il cavo telefonico fornito con la periferica.
- Seite 38 Risoluzione dei problemi Area Sintomo Causa/Rimedio Si desidera modificare il tipo Dalla funzione e-mail del pannello di controllo, selezionare Altre opzioni per di file o l’impostazione del modificare il formato del file immagine prima di inviare un’e-mail. colore per gli allegati di posta elettronica Viene visualizzato un 1) Inviare un’e-mail contenente solo testo per assicurarsi che l’indirizzo e-mail...
-
Seite 39: Solución De Problemas
Solución de problemas Área Síntoma Causa/solución Pantalla En blanco 1) Compruebe que el cable de alimentación está conectado a una fuente del panel de alimentación. de control 2) Compruebe que el dispositivo está encendido. Consulte la página 12 para obtener más información. 3) Si los indicadores de estado de la parte izquierda del panel de control se iluminan, ajuste el contraste con el selector de la parte superior izquierda del panel de control. - Seite 40 Si no aparece la opción “Operativo/Activado”, es posible que se haya desactivado o haya ocurrido un problema con el hardware del fax. Consulte la guía del usuario del accesorio de fax analógico HP 300 para obtener más información.
- Seite 41 Solución de problemas Área Síntoma Causa/solución Correo La ficha de envío digital del Es posible que se haya configurado una contraseña de administración. electrónico servidor Web incorporado Seleccione la opción de Inicio de sesión de la esquina superior derecha del (EWS) no aparece EWS.
-
Seite 42: Problemen Oplossen
Problemen oplossen Functie Probleem Oorzaak/oplossing Display op het Leeg 1) Controleer of het netsnoer is aangesloten op een functionerende bedieningspaneel wandcontactdoos. 2) Controleer of het apparaat is ingeschakeld. Zie pagina 12 voor meer informatie. 3) Als de statuslampjes aan de linkerzijde van het bedieningspaneel functioneren, past u het contrast aan met de keuzeknop in de linkerbovenhoek van het bedieningspaneel. - Seite 43 Faxaccessoire. Als "In werking/ingeschakeld" niet wordt weergegeven is de fax mogelijk uitgeschakeld of is er een probleem met de faxhardware. Zie de gebruikershandleiding van de HP LaserJet Fax Accessory 300 voor meer informatie. De fax is geconfigureerd...
- Seite 44 Problemen oplossen Functie Probleem Oorzaak/oplossing U wilt scannen en naar Gebruik de EWS om de standaardindeling voor afbeeldingen te wijzigen door e-mail verzenden in achtereenvolgens Digitaal verzenden, Verzenden naar e-mail en zwart-witte TIFF-indeling Geavanceerd te selecteren. U wilt het bestandstype of Selecteer Meer opties in de e-mailfunctie op het bedieningspaneel om de de kleurinstelling van indeling van het afbeeldingsbestand te wijzigen voordat u de e-mail verzendt.
- Seite 46 • Prepare o local • Prepareu el lloc Verifique se há espaço suficiente para posicionar o dispositivo. Para posicioná-lo, selecione um local firme, bem ventilado, sem poeira e sem exposição direta à luz solar. Assegureu-vos que hi ha prou espai per col·locar-hi el dispositiu. Per col·locar-hi el dispositiu trieu un lloc estable, ben ventilat i sense pols, protegit de la llum directa del sol.
- Seite 47 3) Instale as rampas. 4) Verifique se as travas das rodas estão 5) Retire toda a fita laranja e a embalagem de papelão. destravadas e, em seguida, retire o dispositivo do palete, deslizando-o pelas rampas. AVISO: É recomendável pedir ajuda a mais uma pessoa para retirar o dispositivo do palete.
- Seite 48 8) Abra a porta superior direita e remova as travas laranjas dos cartuchos 9) Retire o cartucho de impressão da embalagem, remova a fita longa de impressão. (ilustração 1) e a fita laranja, insira o cartucho de impressão (ilustração 2) no dispositivo e, em seguida, feche a porta superior direita (ilustração 3).
- Seite 49 M5035 MFPx M5035 MFPxs M5035 MFPx M5035 MFPxs 12) Feche todas as bandejas. 13) Mova a trava de transporte do scanner em direção à parte traseira do dispositivo para destravá-lo. 12) Tanqueu totes les safates. 13) Moveu el bloqueig de transport del carro de l’escàner fins a la part del darrere del dispositiu per desbloquejar-lo.
- Seite 50 16) Se você estiver usando um cabo USB para conexão, aguarde a 17) Conecte o cabo de rede e o cabo telefônico (para fax). solicitação do computador na etapa 26 na página 17. 16) Si us connecteu amb un cable USB, espereu fins que us indiquin a 17) Connecteu el cable de xarxa i el cable telefònic (per fax).
- Seite 51 • Configure o painel de controle • Configureu el tauler de control M5035 MFPx M5035 MFPxs 19) Ligue o dispositivo. 20) Aguarde a inicialização do dispositivo (isso pode levar alguns minutos). Se solicitado no painel de controle, digite o idioma, a data, a hora, o local, o nome da empresa e o número de telefone (fax).
- Seite 52 • Instale o software • Instal·leu el programari Macintosh Prepare-se para a instalação do software. 23) A HP recomenda que Para obter instruções de instalação do software no Macintosh, vá para a todos os aplicativos que não estejam em uso sejam encerrados antes de etapa 28 na página 18.
- Seite 53 26) Siga as instruções exibidas na tela. Quando solicitado, conecte um de configuração é exibido. Observação: Se a tela de boas-vindas não cabo USB entre o dispositivo e o computador. Observação: A HP não aparecer, clique em Iniciar e, em seguida, em Executar. Digite X:SETUP recomenda o uso de hubs USB.
- Seite 54 29) Conecte um cabo USB entre o dispositivo e o computador. 30) Em Apple System Preferences (Preferências do sistema Apple) Observação: A HP não recomenda o uso de hubs USB. Utilize um cabo (disponível no menu suspenso da Apple), clique em Print & Fax (Impressão USB de no máximo 2 metros (6,5 pés) de comprimento.
- Seite 55 34) Em Model Name (Nome do modelo), selecione o dispositivo, clique em Add (Adicionar) e vá para a etapa 35. 32) A la finestra del navegador d’impressores, trieu el dispositiu d’HP. 33) Feu clic a Add (Afegeix) per crear una cua d’impressió i, a continuació, Nota: Si el programari d’HP està...
- Seite 56 • Configure o envio digital • Configureu l’enviament digital 36) Abra um navegador da Web. 37) Digite o endereço IP do dispositivo 40) Selecione Configurações de e-mail no menu de navegação (localizado na página de configuração da Jetdirect). 38) Selecione a guia esquerdo.
- Seite 57 Personalizar, Driver de envio de fax e siga as instruções. Observação: Consulte o HP LaserJet Analog Fax Accessory 300 User Guide (Guia do Usuário do Acessório de Fax Analógico HP LaserJet 300) no CD de instalação para obter mais informações.
-
Seite 58: Solução De Problemas
Solução de problemas Área Sintoma Causa/Solução Visor do painel Em branco 1) Verifique se o cabo de alimentação está conectado a uma tomada que de controle esteja funcionando. 2) Verifique se o dispositivo está ligado. Consulte a página 50 para obter mais informações. - Seite 59 Consulte o HP LaserJet Fax Accessory 300 User Guide (Guia do Usuário do Acessório de Fax Analógico HP LaserJet 300) para obter mais informações.
- Seite 60 Solução de problemas Área Sintoma Causa/Solução E-mail A guia de envio digital no Uma senha administrativa pode estar configurada. Selecione Efetuar logon EWS (embedded Web no canto superior direito do servidor da Web incorporado. server, servidor da Web incorporado) não é exibida Ao tentar enviar um e-mail, 1) O endereço de gateway SMTP pode estar incorreto.
- Seite 61 Resolució de problemes Àrea Símptoma Causa/solució Pantalla del En blanc 1) Assegureu-vos que el cable elèctric està connectat a un endoll que funciona. tauler de 2) Assegureu-vos que el dispositiu està encès. Per obtenir més informació, control vegeu la pàgina 50. 3) Si els llums d’estat del costat esquerre del tauler de control funcionen, ajusteu el contrast mitjançant el dial de la part esquerra superior del tauler de control.
- Seite 62 Si no hi apareix “Operational/Enabled” (Operatiu/habilitat), potser està inhabilitat o hi ha problemes amb el maquinari del fax. Vegeu la guia de l’usuari de l’accessori de fax 300 de l’HP LaserJet per obtenir informació. Fax configurat però no 1) Assegureu-vos que utilitzeu el cable telefònic que s’inclou amb el dispositiu.
- Seite 63 Resolució de problemes Àrea Símptoma Causa/solució Correu No apareix la pestanya Potser hi ha configurada una contrasenya administrativa. Seleccioneu Log On electrònic d’enviament digital al (Connecta) a la cantonada dreta superior de l’EWS. servidor web incrustat (EWS) A la pantalla del tauler de 1) Potser l’adreça de la passarel·la SMTP és incorrecta.
- Seite 64 © 2006 Hewlett-Packard Development Company, L.P. www.hp.com *Q7830-90901* *Q7830-90901* Q7830-90901...