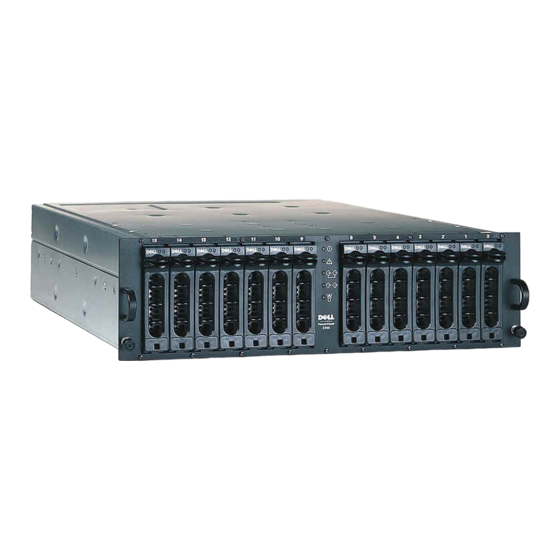
Dell PowerVault 220S Installationsanleitung
Rack
Vorschau ausblenden
Andere Handbücher für PowerVault 220S:
- Handbuch (72 Seiten) ,
- Benutzerhandbuch (21 Seiten) ,
- Handbuch (60 Seiten)
Inhaltsverzeichnis
Verfügbare Sprachen
Verfügbare Sprachen
Quicklinks
Kapitel
Inhaltsverzeichnis

Verwandte Anleitungen für Dell PowerVault 220S


Inhaltszusammenfassung für Dell PowerVault 220S
- Seite 22 In d e x...
- Seite 23 Systèmes Dell™ Guide d'installation du rack w w w . d e l l . c o m | s u p p o r t . d e l l . c o m...
- Seite 44 In d e x...
-
Seite 46: Anmerkungen, Hinweise, Vorsichtshinweise Und Warnungen
Eine Reproduktion dieses Dokuments in jeglicher Form ist nur mit vorheriger schriftlicher Genehmigung der Dell Computer Corporation erlaubt. Die in diesem Text verwendeten Warenzeichen: Dell , das DELL -Logo, PowerEdge , RapidRails und VersaRails sind Warenzeichen der Dell Computer Corporation. - Seite 47 Inhalt des RapidRails-Rack-Kits ......3-3 Dell-Rack-Anforderungen ......3-3 Inhalt des VersaRails-Rack-Kits .
- Seite 48 Abbildungen Abbildung 3-1. Inhalt des RapidRails-Rack-Kits ... . . 3-3 Abbildung 3-2. Inhalt des VersaRails-Rack-Kits ... . . 3-4 Abbildung 3-3. Eine Rack-Einheit .
-
Seite 49: Sicherheitshinweise
Gleitschienen aus dem Rack. Durch das Gewicht von mehr als einer Komponente kann das Rack umkippen und Verletzungen hervorrufen. HINWEIS: Ihr Dell-System ist als frei stehende Einheit und für die Verwendung als Komponente in Dell-Gestellschränken sicherheitszertifiziert, wobei das Dell Customer Rack-Kit eingesetzt werden muss. -
Seite 50: Installationsanleitung
Diese Installationsanleitung enthält Anweisungen zur Installation eines oder mehrerer Systeme in einem Gestellschrank durch geschulte Servicetechniker. Das RapidRails™ Rack- Kit kann in allen Dell™-Gestellschränken installiert werden und das VersaRails™ Rack-Kit in den meisten Standardgestellschränken. Die Installation der beiden Rack-Kits erfolgt in ähnlicher Weise. -
Seite 51: Inhalt Des Rapidrails-Rack-Kits
I n h a l t d e s R a p i d R a i l s - R a c k - K i t s RapidRails-Montageschienen Dell-Rack-Anforderungen BITTE BEACHTEN: Dieses Rack-Kit muss von geschulten Servicetechnikern in einem Dell- Rack installiert werden. Wenn Sie das Kit in einem anderen Rack installieren, vergewissern Sie sich, dass das Rack die Spezifikationen des American National Standards Institute... -
Seite 52: Rack-Anforderungen Anderer Anbieter
A b b i l d u n g 3 - 2 . I n h a l t d e s V e r s a R a i l s - R a c k - K i t s 10-32 x 0,5-Zoll Flachkopf- VersaRails-Montageschienen... -
Seite 53: Rack-Stabilisatoren
Installieren des Tower-nach-Rack-Konvertier-Kits (falls erforderlich) Installieren des Systems im Rack Einsetzen der Rack-Türen HINWEIS: Die im Folgenden beschriebenen Verfahren gelten für Dell-Gestellschränke und für Gestellschränke anderer Anbieter gleichermaßen, sofern nicht anders angegeben. Ra c k-I ns ta llati on sanle itung... -
Seite 54: Abnehmen Der Rack-Türen
Abnehmen der Rack-Türen Weitere Informationen zum Abnehmen der Türen finden Sie der den Dell 24-U- und 42-U- Gestellschränken beiliegenden Dokumentation. Wenn Sie einen Gestellschrank des Typs Dell PowerEdge™ 4210 haben, lesen Sie die Prozeduren in Installationshinweise für das PowerEdge 4210 Rack. Wenn Ihr Gestellschrank kein Dell-Produkt ist, lesen Sie die Anleitungen des Herstellers zum Abnehmen der Türen. - Seite 55 12,7 mm (0,5 Zoll) Weitere Informationen über die Anforderungen zur Installation von Komponenten in einem Dell-Rack finden Sie in der Software Dell Rack Advisor auf der Dell-Website unter http://support.dell.com. VORSICHT: Wenn Sie mehr als ein System installieren, installieren Sie die Montageschienen so, dass das erste System möglichst weit unten im Rack...
- Seite 56 Um das Rack markieren, gehen Sie wie folgt vor: Bringen Sie auf den vorderen vertikalen Schienen des Racks eine Markierung an der Stelle an, an der sich die Unterseite des Systems befinden soll, das Sie in den Gestellschrank einbauen. Die Unterkante jeder 1-U-Einheit befindet sich in der Mitte des schmalsten Metallzwischenraums zwischen den Löchern (auf einigen Gestellschränken mit einer horizontalen Linie gekennzeichnet –...
-
Seite 57: Installieren Der Rapidrails-Montageschienen
Installieren der RapidRails-Montageschienen HINWEIS: Wenn Sie VersaRails-Schienen installieren, lesen Sie „Installieren der VersaRails- Montageschienen“. Positionieren Sie an der Vorderseite des Gestellschrankes eine der Montageschienen so, dass der zugehörige Montagehalterungsflansch zwischen die Markierungen oder das Kreppband an dem Rack passt (siehe Abbildung 3-5). Richten Sie den Montagehalterungsflansch der Schienen (auf der Vorderseite der Schiene) mit den rechteckigen Löchern in den vorderen vertikalen Schienen aus (siehe Abbildung 3-5). -
Seite 58: Installieren Der Versarails-Montageschienen
Ziehen Sie an der Rückseite des Gestellschrankes den Flansch der Montagehalterung nach hinten, bis die Montagehaken in ihren rechteckigen Löchern auf der vertikalen Schiene positioniert sind. Drücken Sie dann den Montagehalterungsflansch nach unten, bis die Montagehaken in die rechteckigen Löcher eingerastet sind, der blaue Druckknopf herausspringt und ein Klicken zu hören ist. -
Seite 59: Installieren Des Tower-Nach-Rack-Konvertier-Kits
Drücken Sie die Montageschiene nach vorn, bis die Montagelöcher mit den Löchern auf der vorderen vertikalen Schiene ausgerichtet sind. Befestigen Sie den vorderen Montagehalterungsflansch mit zwei 10-32 x 0,5-Zoll- Kreuzschlitzschrauben an der vorderen vertikalen Schiene. Ziehen Sie auf der Rückseite des Gestellschrankes den hinteren Montagehalterungs- flansch nach hinten, bis er mit den rechteckigen Löchern auf der hinteren vertikalen Schiene ausgerichtet ist. - Seite 60 A b b i l d u n g 3 - 7 . E n t f e r n e n d e r F r o n t b l e n d e Riegel Flügelschraube Blende Beschriften Sie alle Festplatten und nehmen Sie sie aus dem System heraus. HINWEIS: Obwohl es für die Konvertierung nicht zwingend notwendig ist, sollten Sie die beiden Netzteil- und Kühlmodule an der Rückseite des System-Chassis entfernen, und das Gewicht des Chassis während der Durchführung dieses Verfahrens möglichst gering zu...
- Seite 61 Um den Sockel des Tower-Systems zu entfernen, führen Sie die folgenden Schritte aus: Legen Sie das System auf die rechte Seite. Entfernen Sie die beiden Sechskantschrauben und flachen Unterlegscheiben auf der Unterseite des Tower-Systems mithilfe eines 3/16-Zoll-Inbusschlüssels. Entfernen Sie den Sockel und legen Sie ihn beiseite (siehe Abbildung 3-8). A b b i l d u n g 3 - 8 .
-
Seite 62: Installieren Der Frontplatte Des Racks
Um die Frontplatte des Tower-Systems zu entfernen, führen Sie die folgenden Schritte aus (siehe Abbildung 3-9): Positionieren Sie das System so, dass die Frontplatte ca. 2,5 cm (1 Zoll) über die Tischkante oder Arbeitsfläche hinausragt. Entfernen Sie die 14 schwarzen 4-40 x 0,25-Zoll T-10 Torx-Flachkopf-Schrauben, mit denen die Frontplatte des Towers an dem Chassis befestigt ist. -
Seite 63: Installieren Des Systems Im Rack
A b b i l d u n g 3 - 9 . I n s t a l l i e r e n d e r R a c k - F r o n t p l a t t e Schrauben (14) Lichtröhren (5) Frontplatte... -
Seite 64: Einsetzen Der Rack-Türen
Flügelschraube (2) Einsetzen der Rack-Türen Weitere Informationen über das Einsetzen der Türen finden Sie in der den Dell 24-U- und 42-U-Gestellschränken beiliegenden Dokumentation. Wenn Sie ein Rack des Typs Dell PowerEdge 4210 haben, lesen Sie die Prozeduren in Installationshinweise für das PowerEdge 4210 Rack. - Seite 65 I n d e x Anforderungen Kit-Inhalt Sicherheitsinformationen, 3-4 Dell-Rack, 3-3 abgebildet, 3-3, 3-4 System Racks anderer Anbieter, 3-4 Liste, 3-3 Installation im Rack, 3-15, RapidRails-Kit, 3-3 3-16 VersaRails-Kit, 3-3 Dell-Rack-Anforderungen, Tower-nach-Rack Markieren des Racks, 3-6 Dell-Website, 3-7 Einbau, 3-11 Türen...
- Seite 66 In d e x...
- Seite 67 Sistemas Dell™ Guía de montaje del rack w w w . d e l l . c o m | s u p p o r t . d e l l . c o m...
- Seite 88 Ín d i ce...
- Seite 89 システム Dell ™ ラック取り付けガイド w w w . d e l l . c o m | s u p p o r t . d e l l . c o m...
- Seite 110 ら ラック , 5-5 印を付ける , 5-6 ラックキットの内容 , 5-3 図 , 5-3, 5-4 リスト , 5-3 取り付け , 5-5 ラックに印を付ける , 5-6 ラックユニット , 5-7 索引...