La Marzocco linea mini Handbuch
Vorschau ausblenden
Andere Handbücher für linea mini:
- Bedienungsanleitung (140 Seiten) ,
- Bedienungsanleitung (106 Seiten) ,
- Bedienungsanleitung (26 Seiten)
Werbung
Quicklinks
manual
linea mini
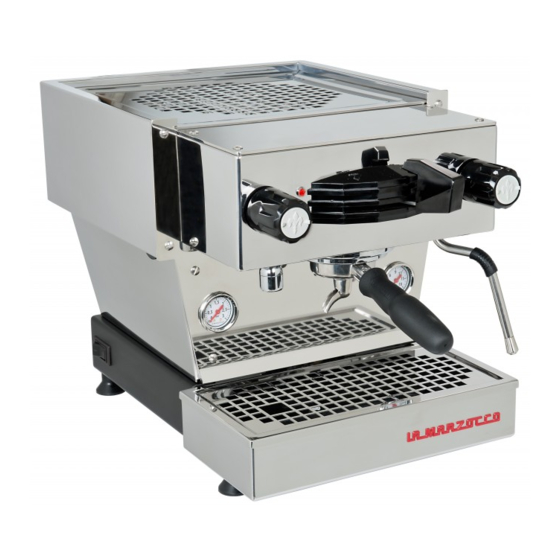
La Marzocco's linea mini is a handmade, professional-grade
espresso machine for the home, reflecting the classic, iconic design
in a miniature version. The linea mini, with its stainless steel group
for coffee, and a boiler for steam and hot water, is prepared to brew
quality shots with freshly ground coffee, coffee capsules or pods as
well as tea or other hot beverages.
Werbung

Verwandte Anleitungen für La Marzocco linea mini


Inhaltszusammenfassung für La Marzocco linea mini
- Seite 1 La Marzocco’s linea mini is a handmade, professional-grade espresso machine for the home, reflecting the classic, iconic design in a miniature version. The linea mini, with its stainless steel group for coffee, and a boiler for steam and hot water, is prepared to brew quality shots with freshly ground coffee, coffee capsules or pods as well as tea or other hot beverages.
- Seite 2 Operating Manual V1.1 - 04/2015 Chapters La Marzocco S.r.l. Via La Torre 14/H page 3 1. Important Safeguards Località La Torre 50038 Scarperia e San Piero page 5 2. General Information (Florence) - ITALY page 8 3. Machine Description www.lamarzocco.com...
- Seite 3 1. Important Safeguards WARNING SAVE THESE INSTRUCTIONS IMPORTANT SAFEGUARDS When using electrical appliance is used by 7. The use of accessory appliances, basic safety or near children. attachments not precautions should always recommended by the 5. Unplug from outlet when be followed, including the appliance manufacturer not in use and before...
- Seite 4 WARNING SAVE THESE INSTRUCTIONS IMPORTANT SAFEGUARDS to “off,” then remove experience and knowledge, 15. The service area is plug from wall outlet. as long as they have been restricted to persons given supervision by a having knowledge and 12. Do not use appliance for person responsible for practical experience of the other than intended use.
- Seite 5 2. General Information Espresso coffee machine essentially made WARNING WARNING up of a brewing group of hot water for This appliance is not intended The manufacturer declines espresso coffee and a steam boiler that for use by persons (including any responsibility for any is able to supply steam and hot water for infusions.
- Seite 6 signs of damage which might have affected 4) Safe electrical operation of this device responsible for any damages caused by the enclosed machine. will be achieved only when the connection improper and/or irrational use. to the power outlet has been completed 2) Check the machine’s integrity after correctly and in observance of all local, 8) Using any electrical device requires that...
- Seite 7 10) If the machine is operating in a faulty 12) Do not obstruct air intake and exhaust 14) These instructions are also available in manner or stops working, disconnect it grilles and, in particular, do not cover the an alternative format on a website. from the electrical network (as described cup warmer tray with cloths or other items.
- Seite 8 3. Machine Description Cup tray Group activation Paddle Group head Hot water dispensing spout Power indicator light (red) Pressure gauge Pressure gauge Main power switch (steam boiler) (integrated brew group) Hot water activation knob Group cover Water tank indicator light (blue) Steam activation knob Steam wand...
- Seite 9 • The weighted sound pressure when the water pump is activated. When are not present, a specific filtration device the linea mini is turned on the electronics level of the machine is should be installed, while always adhering will activate the water pump to fill both to the local national standards in place lower than 70dBA.
- Seite 10 4) Verify filling of boilers. expansion valve in such a manner that the 6) Machine plate: pressure never exceeds 12 bar. The installation is now complete and the Machine CE plate normal operating conditions, espresso machine should be heating to the Integrated brew group pressure gauge operating temperatures.
- Seite 11 7) Adjusting the expansion valve. The expansion valve is a component that limits the maximum pressure in the Integrated brew group. Heating the integrated brew group causes the water within to expand. Since the integrated brew group is completely saturated, the expanding water causes an increase in pressure within the boiler.
- Seite 12 8) Adjusting water pump pressure. 3. Adjust the water pump pressure to the NOTE: The water pump pressure should be desired measurement. The water pump is factory set at 9 bar adjusted when the machine is operating 4. Rotate clockwise to increase pressure pressure.
- Seite 13 Press down on the ground coffee with the supplied tamper and install WARNING Spring the portafilter on the linea mini. Move the The machine must not be dipped paddle handle from right to left to begin in, nor splashed with, water in brewing (see Fig.1 page 8).
- Seite 14 even monitored by professional baristas NOTE: 4. Dispensing hot water. It is important to have a sufficient around the world. volume of liquid in the steaming pitcher. You may dispense hot water by using the Therefore if you intend to steam small hot water nozzle.
- Seite 15 6. Key Features coffee, along with the type of coffee blend N.B. WARNING used. The ideal grind can be determined by If the machine has not been used for more If the above-mentioned making various coffees using the amount than 8 hours or, in any case, after long instructions are not adhered to of ground coffee that you would normally periods of being idle, in order to use the...
- Seite 16 7. Preventative Maintenance and Cleaning 2. Cleaning the brewing system. WARNING WARNING Insert the blind filter into to the portafilter The expansion valve can Jets of water should not be used and put the correct amount of espresso to clean the machine, nor should discharge water as hot as 200°F cleaning product (following the product’s instructions) into the filter, engage the...
- Seite 17 3. Cleaning the body. Cleaning (Periodic) 2. Clean the water reservoir: The water Wipe the stainless steel surfaces with a 1. Draining boilers: reservoir needs to be cleaned periodically Both the Integrated soft, non abrasive cloth in the direction of to ensure that no algae forms on the inside brew group and the steam boiler may be the glazing marks, if any.
- Seite 18 8. Installation Guide 1. Unpack linea mini Espresso Machine page 19 page 23 7. Adjust the expansion valve 2. Fill with water (initial fill) page 19 page 24 8. Monitor steam boiler pressure 3. Drain box alignment page 20 page 25 9 .
- Seite 19 Drain box box. Make sure the drain box is inserted fully. The water reservoir must make contact with the level indicators on the rear side. NOTE: The linea mini is configured to work with the water reservoir. Water reservoir Fill cover...
- Seite 20 The drain box must be installed correctly for the machine to function properly. The drain box has two magnets that mate with two alignment grooves on the base of the linea mini. When installing the drain box, ensure that the alignment magnets are inserted into the alignment grooves.
- Seite 21 WARNING The manufacturer declines any responsibility for any Turn on power by pressing the main power switch. The main event leading to liability suits power switch may be found on the left rear of the machine. whenever grounding has not been completed according to current local, national, and international regulations and electrical codes,...
- Seite 22 Steam boiler Integrated brew group pressure gauge pressure gauge Next it will be necessary to check the expansion valve. As the integrated brew group heats to operating temperature the pressure in the integrated brew group will rise. There is an expansion valve behind the drain tray that allows some water to escape during this process to limit the maximum pressure in the integrated brew group to 12 bar.
- Seite 23 Increase pressure Decrease pressure Please follow this procedure if it is necessary to adjust the expansion valve. First WARNING remove the drain box to access the expansion valve. The expansion valve protrudes The expansion valve can through the sheet metal, has the shape of a hexagon, is brass in color and 18 discharge water as hot as 200°F mm (tool).
- Seite 24 You may also monitor the steam boiler heating progress by watching the steam boiler pressure gauge. The steam boiler is set at approximately 2.0 Bar of pressure at the factory. Once the pressure gage reaches this point the heating will stop. Steam boiler Integrated brew group pressure gauge...
- Seite 25 When the espresso machine is ready, (red indicator light ON) place ground coffee into the portafilter and activate the brewing process. Integrated brew Steam boiler group pressure gauge pressure gauge When brewing, the integrated brew group pressure should be between 8-10 bar. The steam boiler pressure should be set at 2 bar but can operate at any setting between 1.3 bar and 2 bar.
- Seite 34 4. Installation Installation der Espressomaschine linea mini nationalen Standards zum Trinkwasser eine ACHTUNG spezielle Filtervorrichtung installiert werden. Die Kaffeemaschine Waagrecht 1) Füllen des Wassertanks mit Wasser. Sobald das Gerät ausgepackt, auf einem auf einer Theke aufstellen, die 2) Verbinden der Espressomaschine mit dem...
- Seite 35 Aufheizen wird automatisch gefüllt, sobald der Luft, aus dem Kessel zu entweichen und Espressomaschine bis zur Betriebstemperatur. Pumpe aktiviert wird. Wenn die linea mini durch Wasserdampf ersetzt zu werden. Während dieser Wartezeit sollte eingeschaltet wird, aktiviert die Elektronik Druckmesser für das Brühgruppensystem die Pumpe, um beide Kessel zu füllen.
- Seite 36 7) Einstellen des Expansionsventils. Das Expansionsventil ist ein Bauteil, maximalen Druck Brühgruppensystem regelt. Durch Aufheizen des Brühgruppensystems kommt es zu einer Ausdehnung des Wassers. Da das Brühgruppensystem vollständig gefüllt ist, sorgt das sich ausdehnende Wasser für einen Druckanstieg Druck Kessel. Ohne eine Sicherheitsvorrichtung erhöhen könnte Druckanstieg...
- Seite 37 8) Einstellen des Wasserpumpendrucks. 2. Suchen Sie die Einstellschraube HINWEIS: Der Druck der Wasserpumpe der Wasserpumpe und lösen Sie die Die Wasserpumpe ist werksseitig auf einen sollte eingestellt werden, wenn das Gerät Kontermutter. Druck von 9 bar eingestellt. Falls es nötig in Betrieb ist und sich gemahlener Kaffee 3.
- Seite 38 ACHTUNG Federring Stopfer und setzen Sie den Siebträger in Die Maschine zur Reinigung die linea mini ein. Um den Brühvorgang zu nicht in Wasser tauchen bzw. starten, bewegen Sie den Griff von rechts Siebträger nach links (siehe Abb.1 Seite 8).
- Seite 39 vieler Techniken auf Webseiten, in Blogs HINWEIS: 4. Ausgabe von heißem Wasser. Es ist wichtig, eine ausreichende sowie Foren finden. Einige werden auch Menge an Flüssigkeit im Milchkännchen Sie können heißes Wasser über den von professionellen Betreiber von Kaffee- Heißwasserauslass beziehen. Um heißes zu haben.
- Seite 40 6. Hauptfunktionen Zubereitung eines guten Espresso äußerst N.B. ACHTUNG wichtig. Der ideale Mahlgrad kann Zubereitung Wurde das Gerät über mehr als 8 Stunden Wenn die oben genannten mehrerer Kaffees mit der üblicherweise nicht benutzt, bzw. in jedem Falle nach einem Anweisungen nicht befolgt verwendeten Menge an gemahlenem Kaffee langen Leerlauf, ist es notwendig, damit das...
- Seite 41 7. Wartung und Reinigung 2. Reinigung des Brühsystems. ACHTUNG ACHTUNG Setzen Sie das Blindsieb in einen der Aus dem Expansionsventil kann Es dürfen keine Wasserstrahlen zur mitgelieferten Siebträger ein. Geben Sie Reinigung der Maschine verwendet heißes Wasser mit bis zu 93°C richtige Menge Kaffeefettlöser...
- Seite 42 3. Reinigung des Gehäuses. Vorgang, bis keine Rückstände mehr Ablassen des Brühgruppensystems: Schalten vorhanden sind. Wischen Sie alle Edelstahl-Oberflächen Sie das Gerät aus. Lösen Sie unter Einsatz mit einem weichen, nicht scheuernden HINWEIS: einer angemessenen Schutzvorrichtung Dieser Reinigungsplan bezieht Tuch Richtung eventuell sich auf moderaten bis durchschnittlichen...
- Seite 43 8. Installationsanleitung 1. Auspacken der S. 19 S. 23 7. Einstellen des Expansionsventils Espressomaschine linea mini S. 24 8. Überwachen des Drucks im Dampfkessel S. 19 2. Füllen mit Wasser (Erstbefüllung) S. 25 9. Brühen eines Espresso S. 20 3. Montage der Abtropfschale S.
- Seite 44 Position und montieren Sie die Abtropfschale. Stellen Sie sicher, dass die Abtropfschale korrekt montiert ist. Der Wasserbehälter muss mit den Messfühlern auf der Rückseite des Gerätes Kontakt haben. HINWEIS: Das Gerät linea mini ist auf einen Betrieb mit Wasserbehälter ausgelegt. Wasserbehälter Tankdeckel...
- Seite 45 Gerät funktioniert. Die Abtropfschale hat zwei Magneten, die in die Magnetaufnahmen am Rahmen der linea mini greifen. Bei der Montage der Abtropfschale ist darauf zu achten, dass diese Magneten richtig in den Magnetaufnahmen sitzen. Dazu kann es nötig sein, die Abtropfschale mit sanftem Druck in ihre richtige Position zu bringen.
- Seite 46 ACHTUNG Der Hersteller lehnt jede Verantwortung ab, wenn Schalten Sie die Stromversorgung durch Drücken des die Erdung nicht nach den Hauptschalters ein. Der Hauptschalter befindet sich links auf geltenden lokalen, nationalen der Rückseite des Gerätes. und internationalen Richtlinien erfolgte und die elektrischen Kabel oder andere elektrische Teile nicht korrekt angeschlossen wurden.
- Seite 47 Druckmesser des Druckmesser des Dampfkessels Brühgruppensys- tems Als nächstes muss das Expansionsventil kontrolliert werden. Wenn das Brühgruppensystem auf Betriebstemperatur gebracht wird, steigt der Druck im Brühgruppensystem. Hinter der Abtropfschale befindet sich ein Expansionsventil, das während dieses Vorgangs eine geringe Menge Wasser aus dem Kessel entweichen lässt, um den maximalen Brühgruppensystemsdruck auf 12 bar zu begrenzen.
- Seite 48 Druck erhöhen Druck verringern Bitte folgen Sie diesen Anweisungen, um das Expansionsventil einzustellen. ACHTUNG Entfernen Sie zuerst die Abtropfschale, um an das Expansionsventil zu gelangen. Das Aus dem Expansionsventil kann Expansionsventil ragt aus dem Metallgehäuse heraus, ist sechseckig, messingfarben heißes Wasser mit bis zu 93°C und CH18 (Werkzeug).
- Seite 49 Überwachen Sie auch den Heizvorgang des Dampfkessels auf dessen Druckmesser. Der Dampfkesseldruck wird werksseitig auf etwa 2 bar eingestellt. Sobald der Druckmesser 2 bar erreicht, endet der Heizvorgang. Druckmesser des Druckmesser des Dampfkessels Brühgruppensys- tems...
- Seite 50 Füllen Sie, sobald die Espressomaschine betriebsbereit ist, (rote LED eingeschaltet) den Siebträger mit gemahlenem Kaffee und starten Sie den Brühvorgang. Weitergehende Informationen zum Betrieb dieser Espressomaschine finden Sie im Handbuch des Eigentümers. Druckmesser Druckmesser des Brühgrup- pensystems Dampfkessels Während des Brühvorgangs sollte der Druck im Brühgruppensystem zwischen 8 und 10 bar betragen.
- Seite 51 Dieser Parameter wird werkseitig auf eine Nenntemperatur voreingestellt. Die Kesseltemperatur wird am kritischsten Punkt gemessen, wo die Temperaturschwankungen am größten sind. Die Temperatur des aus dem Brühgruppenkopf ausströmenden Wassers wird durch die Masse des Gehäuses konstant gehalten. Auch wenn die Wassertemperatur geringfügig schwankt, ist dadurch die Temperatur des an der Brühgruppe ausströmenden Wassers konstant.
- Seite 54 La linea mini de Marzocco es una máquina espresso de calidad profesional para el hogar hecha a mano, que refleja el diseño clásico e icónico en una versión en miniatura. La linea mini, con su grupo de acero inoxidable para café y una caldera de vapor y agua caliente, está...
- Seite 55 Manual de Operaciones V1.1 - 04/2015 Capítulos La Marzocco S.r.l. Via La Torre 14/H pág. 3 1. Precauciones Importantes Localidad La Torre 50038 Scarperia e San Piero pág. 5 2. Información General (Florence) - ITALY pág. 8 3. Descripción de la Máquina www.lamarzocco.com...
- Seite 56 1. Precauciones Importantes ADVERTENCIA CONSERVAR ESTAS INSTRUCCIONES PRECAUCIONES IMPORTANTES Cuando se usan aparatos niños o cerca de ellos. 7. El uso de accesorios no eléctricos, deben seguirse unas recomendados por el 5. Desconectar de la toma de medidas de seguridad básicas, fabricante del aparato corriente cuando no esté...
- Seite 57 ADVERTENCIA CONSERVAR ESTAS INSTRUCCIONES PRECAUCIONES IMPORTANTES al aparato en primer llevarlos a cabo personas cable fuera del alcance lugar y, luego, conectar el (incluidos niños de más de los niños menores enchufe a la toma de la de 8 años de edad) con de 8 años de edad.
- Seite 58 2. Información General La máquina espresso está compuesta esencialmente por un grupo de preparación Esta máquina no debe ser El fabricante declina toda de agua caliente para café espresso y una responsabilidad en caso de usada por personas (incluidos caldera de vapor que suministra vapor y producirse un evento que agua caliente para infusiones.
- Seite 59 Retirar la máquina del embalaje 3) Una instalación incorrecta puede causar locales, nacionales e internacionales, lesiones/daños a personas animales u teniendo cuidado de no superar los límites Asegúrese integridad objetos, de los cuales el fabricante no será de resistencia y potencia que aparecen en producto inspeccionando el embalaje y responsable.
- Seite 60 9) Antes de llevar a cabo cualquier tarea el fabricante o un centro autorizado 13) El cable de alimentación de la máquina de mantenimiento y/o limpieza (que no que utilice exclusivamente piezas de no debe ser sustituido por el usuario. Si el sea la auto limpieza del grupo), ponga repuesto originales reparará...
- Seite 61 3. Descripción de la Máquina Bandeja para tazas Activación de la manija y del grupo Cabeza del grupo Pico de erogación de agua caliente Led indicador de Manómetro Manómetro Interruptor encendido (rojo) (caldera vapor) (grupo del café) principal Manija de activación del agua caliente Cubierta del grupo Led del tanque de agua (azul)
- Seite 62 4. Instalación Instalación de la máquina espresso, linea no están presentes, se deberá instalar un dispositivo específico de filtrado, siempre mini La máquina de café se debe de conformidad con las normas nacionales y colocar en posición horizontal locales vigentes respecto del agua potable. 1) Llene recipiente para el agua con agua sobre una barra que esté...
- Seite 63 Cuando se enciende la vacío se cierra y el vapor ya no puede salir. 5) Esperar que la máquina espresso Llegue a linea mini, el sistema electrónico activa la Este proceso permite la entrada de aire la temperatura operativa.
- Seite 64 7) Ajuste de la válvula de expansión. La válvula de expansión es un componente que limita la presión máxima en el grupo del café. Al calentar el grupo del café, el agua que contiene se expande. Debido a que el grupo del café está completamente saturado, agua...
- Seite 65 8) Ajuste de la presión de la bomba de agua. bomba de agua y afloje la contratuerca. NOTA: La presión de la bomba de agua 3. Ajuste la presión de la bomba de agua La bomba de agua está configurada en debe ajustarse cuando la máquina está...
- Seite 66 única o la doble. Presione sobre el café No sumergir la máquina en agua molido con el pisón provisto y enganche y evitar salpicaduras de agua el porta-filtro en la linea mini. Mueva Portafiltro durante la limpieza. Para las la manija de derecha a izquierda para comenzar la preparación (ver Fig.1 página...
- Seite 67 mejor procedimiento para usted. Existen habilidad. Experimente con las diversas 4. Erogación de agua caliente. muchas técnicas para preparar café técnicas para encontrar el mejor método Usted puede erogar agua caliente espresso. Puede encontrar instrucciones para su caso. Puede encontrar muchos utilizando la boquilla pertinente.
- Seite 68 6. Características Principales café, además del tipo de mezcla de café NOTA usada. El molido ideal se puede determinar Para usar la máquina en todo su potencial Si no se cumplen las instrucciones haciendo varios cafés utilizando la cantidad cuando no ha sido utilizada durante más mencionadas anteriormente, el de café...
- Seite 69 7. Mantenimiento Preventivo y Limpieza coloque la cantidad correcta de producto de limpieza de máquinas de café espresso No usar chorros de agua para La válvula de expansión puede (siguiendo las instrucciones del producto) limpiar la máquina ni colocarla descargar agua caliente con una en el filtro y enganche el porta-filtro en el grupo que desea limpiar.
- Seite 70 3. Limpieza del cuerpo de la máquina. Limpieza (periódica) 2. Limpieza del recipiente para el agua. Repase las superficies de acero inoxidable con 1. Drenaje de las Calderas. recipiente para el agua debe limpiarse Tanto el grupo un paño suave, no abrasivo, en la dirección periódicamente para asegurar que no se del café...
- Seite 71 8. Guía de Instalación 1. Desembalaje de la Máquina pág. 19 pág. 23 7. Ajuste de la válvula de expansión Espresso linea mini pág. 24 8. Control de la presión de la caldera de vapor pág. 19 2. Llenado con agua (llenado inicial) pág.
- Seite 72 El recipiente para el agua debe hacer contacto con los indicadores de nivel ubicados en el lado posterior. NOTA: la linea mini está configurada para funcionar con el recipiente para el agua. Recipiente de agua Tapa para...
- Seite 73 La caja de drenaje tiene dos imanes que se acoplan con dos ranuras de alineación en la base de la linea mini Al instalar la caja de drenaje, asegúrese de que los imanes de alineación se inserten en las ranuras de alineación.
- Seite 74 El fabricante declina toda responsabilidad en caso de producirse un evento que resulte en acciones Encienda la máquina pulsando el interruptor principal. El interruptor principal está ubicado en la parte trasera legales por responsabilidad cuando izquierda de la máquina. no se haya completado la conexión a tierra según las reglamentaciones locales, nacionales e internacionales, y los códigos de electricidad vigentes,...
- Seite 75 Manómetro de la Manómetro del caldera de vapor grupo del café Luego será necesario verificar la válvula de expansión. A medida que el grupo del café se calienta a la temperatura operativa, la presión del grupo aumenta. Hay una válvula de expansión detrás de la bandeja de drenaje que permite que salga un poco de agua durante este proceso para limitar la presión máxima del grupo del café...
- Seite 76 Aumentar la presión Disminuir la presión Siga este procedimiento si es necesario ajustar la válvula de expansión. Primero extraiga la caja de drenaje para acceder a la válvula de expansión. La válvula de La válvula de expansión puede expansión sobresale a través de la lámina de metal, tiene forma de hexágono, es descargar agua caliente con una de color bronce y CH18 (herramienta).
- Seite 77 También puede controlar el progreso de calentamiento de la caldera de vapor observando el manómetro de dicha caldera. La caldera de vapor se configura en fábrica a aproximadamente 2,0 bar de presión. Una vez que el manómetro llegue a este punto, el calentamiento se detendrá. Manómetro de la Manómetro del caldera de vapor...
- Seite 78 Cuando la máquina espresso esté lista (led rojo ON), coloque el café en el portafiltro y active el proceso de preparación. Para obtener más información sobre el uso de esta máquina espresso, consulte el Manual del Propietario. Manómetro del Manómetro de grupo del café...
- Seite 79 Este parámetro se define en fábrica con una temperatura nominal prefijada. La temperatura de preparación del agua se mide en el punto más crítico del grupo de café donde la fluctuación de la temperatura es mayor. La temperatura del agua que sale de la cabeza del grupo se mantiene constante por medio de la masa de la fundición del grupo.