Herunterladen Diese Seite drucken
Progress PBN13002X Benutzerinformation
Vorschau ausblenden Andere Handbücher für PBN13002X:

Werbung

Verfügbare Sprachen

Verfügbare Sprachen

Oven
EN
Four
FR
Backofen
DE
User Manual
Notice d'utilisation
Benutzerinformation
3
17
33
PBN13002X

Werbung

loading

Inhaltszusammenfassung für Progress PBN13002X

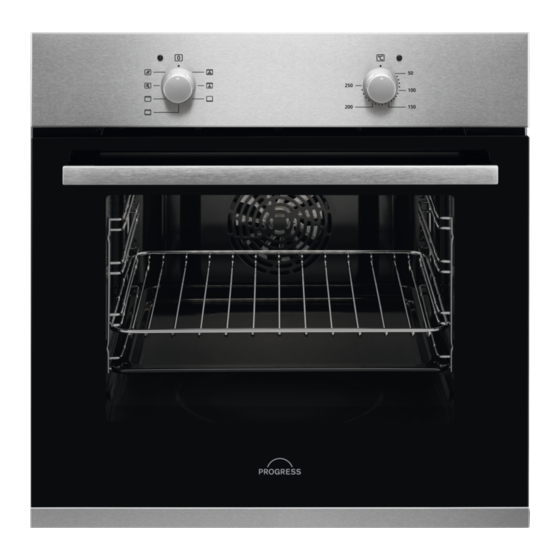
  • Seite 1 User Manual Oven Notice d'utilisation Four Benutzerinformation Backofen PBN13002X...
  • Seite 2 INSTALLATION / INSTALLATION / MONTAGE min. 550 min. 560 min. 550 min. 560...
  • Seite 3 VISIT OUR WEBSITE TO: Get usage advice, brochures, trouble shooter, service and repair information: www.progress-hausgeraete.de/support CONTENTS 1. SAFETY INFORMATION...................3 2. SAFETY INSTRUCTIONS.................5 3. PRODUCT DESCRIPTION................8 4. BEFORE FIRST USE..................8 5. DAILY USE......................9 6. ADDITIONAL FUNCTIONS................9 7. USING THE ACCESSORIES................10 8.
  • Seite 4 Children should be supervised to ensure that they do not • play with the appliance. Keep all packaging away from children and dispose of it • appropriately. WARNING: The appliance and its accessible parts become • hot during use. Keep children and pets away from the appliance when in use and when cooling down.
  • Seite 5 To remove the shelf supports first pull the front of the shelf • support and then the rear end away from the side walls. Install the shelf supports in the opposite sequence. Do not use a steam cleaner to clean the appliance. •...
  • Seite 6 2.3 Use • Do not use multi-plug adapters and extension cables. • Make sure not to cause damage to the WARNING! mains plug and to the mains cable. Should Risk of injury, burns and electric shock or the mains cable need to be replaced, this explosion.
  • Seite 7 • If the appliance is installed behind a • Concerning the lamp(s) inside this product furniture panel (e.g. a door) make sure the and spare part lamps sold separately: door is never closed when the appliance These lamps are intended to withstand operates.
  • Seite 8 3. PRODUCT DESCRIPTION 3.1 General overview Control panel Power lamp / symbol Knob for the heating functions Control knob (for the temperature) Temperature indicator / symbol Air vents for the cooling fan Heating element Lamp Cavity embossment - Aqua cleaning container Shelf support, removable Shelf positions...
  • Seite 9 5. DAILY USE WARNING! Turbo Grilling Refer to Safety chapters. To roast large meat joints or poultry with bones on one shelf position. To 5.1 Heating functions bake gratins and to brown. Defrost Fan Cooking To defrost food (vegetables and fruit). To roast or roast and bake food with the The defrosting time depends on the same cooking temperature on more...
  • Seite 10 7. USING THE ACCESSORIES Insert the shelf between the guide bars of the WARNING! shelf support and make sure that the feet point down. Make sure that the shelf touches Refer to Safety chapters. the back of the oven interior. Baking tray 7.1 Inserting accessories A small indentation at the top increases...
  • Seite 11 8.3 Moist Baking • Ramekins - ceramic, diameter 8cm, height 5 cm For the best results follow suggestions listed • Flan base tin - dark, non-reflective, in the table below. diameter 28cm Sweet rolls, 12 baking tray or dripping pan 35 - 40 pieces Rolls, 9 pieces...
  • Seite 12 Mediterranean veg‐ baking tray or dripping pan 35 - 40 etables, 0.7 kg 8.4 Information for test institutes Tests according to IEC 60350-1. Small cakes, 16 Conventional Baking tray 20 - 35 per tray Cooking Small cakes, 16 Fan Cooking Baking tray 20 - 35 per tray...
  • Seite 13 9.4 Removing and installing door • Moisture can condense in the appliance or on the door glass panels. To decrease the The oven door has two glass panels. You can condensation, let the appliance work for remove the oven door and the internal glass 10 minutes before cooking.
  • Seite 14 8. After cleaning, install the glass panel and the oven door. If the door is installed correctly, you will hear a click when closing the latches. When installed correctly, the door trim clicks. Make sure that you install the internal glass panel in the seats correctly.
  • Seite 15 11. ENERGY EFFICIENCY 11.1 Product Information Sheet and Product Information according to EU Energy Labelling and Ecodesign Regulations Supplier's name Progress Model identification PBN13002X 944068069 Energy Efficiency Index 95.1 Energy efficiency class Energy consumption with a standard load, conventional mode 0.89 kWh/cycle Energy consumption with a standard load, fan-forced mode 0.78 kWh/cycle...
  • Seite 16 11.2 Product Information for power consumption and maximum time to reach applicable low power mode Power consumption in off mode 0.3 W Maximum time needed for the equipment to automatically reach the applicable low power mode 20 min 11.3 Energy saving tips Residual heat When the cooking duration is longer than 30 Following tips below will help you save...
  • Seite 17 VISITEZ NOTRE SITE WEB POUR : Obtenir des conseils d’utilisation, des brochures, un dépanneur, des informations sur le service et les réparations : www.progress-hausgeraete.de/support TABLE DES MATIÈRES 1. INFORMATION SUR LA SÉCURITÉ.............. 17 2. CONSIGNES DE SÉCURITÉ................19 3. DESCRIPTION DE L'APPAREIL..............22 4.
  • Seite 18 de 8 ans et les personnes ayant un handicap très important et complexe doivent être tenus à l'écart de l’appareil, à moins d'être surveillés en permanence. Veillez à ce que les enfants n’utilisent pas . • Ne laissez pas les emballages à la portée des enfants et •...
  • Seite 19 AVERTISSEMENT : L'appareil et ses parties accessibles • deviennent chauds pendant l'utilisation. Des précautions doivent être prises pour éviter de toucher les éléments chauffants ou la surface de la cavité de l'appareil. Utilisez toujours des gants de cuisine pour retirer ou insérer •...
  • Seite 20 • Ne tirez pas sur le câble secteur pour débrancher l'appareil. Tirez toujours sur la Dimensions minimales 560x20 mm fiche de la prise secteur. de l’ouverture de ventila‐ • N'utilisez que des systèmes d'isolation tion. Ouverture placée appropriés : des coupe-circuits, des sur la partie inférieure de fusibles (les fusibles à...
  • Seite 21 • Soyez prudent lors de l'ouverture de la du meuble tant que l’appareil n’a pas porte de l'appareil lorsque celui-ci refroidi complètement. fonctionne. De l'air chaud peut se 2.4 Entretien et nettoyage dégager. • N'utilisez pas l'appareil avec des mains AVERTISSEMENT! mouillées ou en contact avec de l'eau.
  • Seite 22 2.6 Service • Contactez votre service municipal pour obtenir des informations sur la marche à • Pour réparer l'appareil, contactez le suivre pour mettre l’appareil au rebut. service après-vente agréé. • Débranchez l’appareil. • Utilisez uniquement des pièces de • Coupez le câble d'alimentation au ras de rechange d'origine.
  • Seite 23 aliments. L'appareil est susceptible de 4. Éteignez l'appareil et attendez qu'il dégager des odeurs désagréables et de la refroidisse. fumée. Ventilez la pièce pendant le 5. Nettoyez l’appareil et les accessoires préchauffage. uniquement avec un chiffon en microfibre, de l’eau chaude et un détergent doux. 1.
  • Seite 24 recommandations générales sur l'économie 2. Tournez la manette pour sélectionner la d'énergie, reportez-vous au chapitre température. « Efficacité énergétique », Conseils 3. Une fois la cuisson terminée, tournez les d’économie d'énergie. manettes sur la position Arrêt pour mettre à l’arrêt l’appareil. 5.3 Réglage d’un mode de cuisson 1.
  • Seite 25 Plateau de cuisson Poussez la plaque entre les rails du support de grille. Placez la plaque de cuisson avec la pente vers l’arrière de l’intérieur du four. 8. CONSEILS 8.1 Recommandations de cuisson Température Les températures et temps de cuisson se trouvant dans les tableaux ne sont indiqués Accessoire qu'à...
  • Seite 26 Petits pains, 9 mor‐ Plateau de cuisson ou plat 35 - 40 ceaux à rôtir Pizza, surgelée, grille métallique 35 - 40 0,35 kg Gâteau Roulé Plateau de cuisson ou plat 30 - 40 à rôtir Brownie Plateau de cuisson ou plat 30 - 40 à...
  • Seite 27 Légumes, pochés, Plateau de cuisson ou plat 35 - 40 0,4 kg à rôtir Omelette végéta‐ plaque à pizza sur la grille 30 - 45 rienne métallique Légumes méditer‐ Plateau de cuisson ou plat 35 - 40 ranéens, 0,7 kg à...
  • Seite 28 9. ENTRETIEN ET NETTOYAGE 2. Écartez l'avant du support de grille de la AVERTISSEMENT! paroi latérale. 3. Écartez l'arrière du support de grille de la Reportez-vous aux chapitres concernant paroi latérale et retirez-le. la sécurité. 9.1 Remarques concernant le nettoyage Agent nettoyant •...
  • Seite 29 90° 2. Soulevez et tirez les loquets jusqu’à ce 6. Soulevez d’abord avec précaution, puis qu'ils produisent un clic. retirez le panneau de verre. 3. Fermez la porte du four à mi-chemin de la 7. Nettoyez les vitres à l'eau savonneuse. première position d’ouverture.
  • Seite 30 », Rempla‐ cement de la lampe. 11. RENDEMENT ÉNERGÉTIQUE 11.1 Fiche d'informations sur le produit et informations sur le produit conformément aux réglementations européennes sur l'étiquetage énergétique et l'écoconception Nom du fournisseur Progress Identification du modèle PBN13002X 944068069 FRANÇAIS...
  • Seite 31 Indice d’efficacité énergétique 95.1 Classe d’efficacité énergétique Consommation d’énergie avec charge standard, en mode con‐ 0.89 kWh/cycle ventionnel Consommation d’énergie avec charge standard, en mode cha‐ 0.78 kWh/cycle leur tournante Nombre de cavités Source de chaleur Électricité Volume 65 l Type de four Four encastrable Masse...
  • Seite 32 12. EN MATIÈRE DE PROTECTION DE L'ENVIRONNEMENT Recyclez les matériaux portant le symbole portant le symbole avec les ordures ménagères. Emmenez un tel produit dans . Déposez les emballages dans les votre centre local de recyclage ou contactez conteneurs prévus à cet effet. Contribuez à la vos services municipaux.
  • Seite 33 BESUCHEN SIE UNSERE WEBSITE, UM: Anwendungshinweise, Prospekte, Informationen zu Fehlerbehebung, Service und Reparatur zu erhalten: www.progress-hausgeraete.de/support INHALTSVERZEICHNIS 1. SICHERHEITSHINWEISE................33 2. SICHERHEITSANWEISUNGEN..............35 3. GERÄTEBESCHREIBUNG................38 4. VOR DER ERSTEN INBETRIEBNAHME............39 5. TÄGLICHER GEBRAUCH................39 6. ZUSATZFUNKTIONEN................... 40 7. VERWENDUNG DES ZUBEHÖRS..............40 8.
  • Seite 34 ordnungsgemäßer Bedienung bestehen. Kinder unter 8 Jahren und Personen mit schweren Behinderungen oder Mehrfachbehinderung sollten vom Gerät ferngehalten werden, wenn sie nicht ständig beaufsichtigt werden. Kinder sollten beaufsichtigt werden, um sicherzustellen, • dass sie nicht mit dem Gerät spielen. Halten Sie sämtliches Verpackungsmaterial von Kindern •...
  • Seite 35 WARNUNG: Vergewissern Sie sich, dass das Gerät • ausgeschaltet ist, bevor Sie die Lampe austauschen, um einen Stromschlag zu vermeiden. WARNUNG: Das Gerät und die zugänglichen Geräteteile • werden während des Betriebs heiß. Es ist darauf zu achten, die Heizelemente oder die Oberfläche des Garraums nicht zu berühren.
  • Seite 36 nicht ohne Werkzeug entfernt werden können. Breite der Geräterück‐ 558 mm • Stecken Sie den Netzstecker erst nach seite Abschluss der Montage in die Steckdose. Stellen Sie sicher, dass der Netzstecker Gerätetiefe 561 mm nach der Montage noch zugänglich ist. Geräteeinbautiefe 540 mm •...
  • Seite 37 2.3 Gebrauch – Gehen Sie beim Herausnehmen oder Einsetzen des Zubehörs sorgfältig vor. • Verfärbungen der Emaille- oder WARNUNG! Edelstahlbeschichtung haben keine Verletzungs-, Verbrennungs-, Auswirkung auf die Leistung des Geräts. Stromschlag- oder Explosionsgefahr. • Kochen Sie immer bei geschlossener Gerätetür. •...
  • Seite 38 Diese Lampen müssen extremen • Dabei dürfen ausschließlich physikalischen Bedingungen in Originalersatzteile verwendet werden. Haushaltsgeräten standhalten, wie z.B. 2.7 Entsorgung Temperatur, Vibration, Feuchtigkeit, oder sollen Informationen über den WARNUNG! Betriebszustand des Gerätes anzeigen. Sie sind nicht für den Einsatz in anderen Verletzungs- und Erstickungsgefahr.
  • Seite 39 4. VOR DER ERSTEN INBETRIEBNAHME 2. Einstellen der Funktion . Einstellen der WARNUNG! Höchsttemperatur. Lassen Sie das Gerät für 1 Std laufen. Siehe Kapitel Sicherheitshinweise. 3. Einstellen der Funktion . Einstellen der 4.1 Erstvorheizen und Reinigung Höchsttemperatur. Lassen Sie das Gerät für 15 Min laufen.
  • Seite 40 5.2 Hinweise zu: Feuchte Heißluft Allgemeine Empfehlungen zum Energiesparen finden Sie im Kapitel Diese Funktion wurde zur Einhaltung der „Energieeffizienz“, Energiesparen. Energieeffizienzklasse und der Ökodesign- Anforderungen (gemäß EU 65/2014 und EU 5.3 Einstellen einer Ofenfunktion 66/2014) verwendet. Tests gemäß: IEC/EN 1.
  • Seite 41 Backblech Schieben Sie das Backblech zwischen die Führungsstäbe der Einhängegitter. Platzieren Sie das Backblech mit Gefälle zur Rückseite des Backofeninnenraums. 8. TIPPS UND HINWEISE 8.1 Garempfehlungen Zubehör Die Temperaturen und Garzeiten in den Tabellen dienen nur als Richtwerte. Sie Einschubebene hängen von den Rezepten sowie der Qualität und Menge der verwendeten Zutaten ab.
  • Seite 42 Biskuitrolle Backblech oder tiefes Blech 30 - 40 Brownie Backblech oder tiefes Blech 30 - 40 Soufflé, 6 Stück Keramikförmchen auf Kom‐ 30 - 40 birost Biskuitboden Biskuitform auf Kombirost 20 - 30 Englischer Sand‐ Backform auf Kombirost 35 - 45 wichkuchen à...
  • Seite 43 Törtchen, 16 Ober- / Unterhitze Backblech 20 - 35 pro Blech Törtchen, 16 Umluft Backblech 20 - 35 pro Blech Törtchen, 16 Umluft Backblech 1 und 3 20 - 35 pro Blech Apfelkuchen, 2 Ober- / Unterhitze Kombirost 70 - 90 Backformen à...
  • Seite 44 9.4 Aus- und Einbauen der Tür Sie Speisen nicht länger als 20 Minuten im Gerät stehen. Trocknen Sie das Innere Die Backofentür hat zwei Glasscheiben. Sie des Geräts nach jedem Gebrauch nur mit können die Backofentür und die innere einem Mikrofasertuch. Glasscheibe entfernen, um sie zu reinigen.
  • Seite 45 Bei korrektem Einbau macht die Türabdeckung ein Klickgeräusch. Stellen Sie sicher, dass Sie die innere Glasplatte korrekt in der Aufnahme installieren. 5. Drehen Sie die Befestigungen um 90° und nehmen Sie sie aus der Halterung. 9.5 Austauschen der Lampe 90° WARNUNG! Stromschlaggefahr.
  • Seite 46 „Austauschen der Lampe“. 11. ENERGIEEFFIZIENZ 11.1 Produktinformationen und Produktinformationsblatt gemäß den EU- Verordnungen zu Umweltdesign und Energiekennzeichnung Name des Lieferanten Progress Modellbezeichnung PBN13002X 944068069 Energieeffizienzindex 95.1 Energieeffizienzklasse Energieverbrauch mit einer Standardbeladung, konventioneller 0.89 kWh/Programm Modus Energieverbrauch mit einer Standardbeladung, Umluft-Modus 0.78 kWh/Programm...
  • Seite 47 IEC/EN 60350-1 – Elektrische Kochgeräte für den Hausgebrauch – Teil 1: Herde, Backöfen, Dampfbacköfen und Grills – Methoden zur Leistungsmessung. 11.2 Produktinformationen für Stromverbrauch und maximale Zeit bis zum Erreichen des entsprechenden Energiesparmodus Energieverbrauch im Aus-Zustand 0.3 W Maximale Zeit, die das Gerät benötigt, um automatisch den entsprechenden Energiesparmodus 20 Min zu erreichen 11.3 Energiespartipps...
  • Seite 48 Bevor das Altgerät entsorgt werden darf, Elektronikgerätes geknüpft, kann aber auf müssen alle Altbatterien und drei Altgeräte pro Geräteart beschränkt Altakkumulatoren vom Altgerät getrennt werden. werden, die nicht vom Altgerät umschlossen Ort der Abgabe ist auch der private Haushalt, sind. Das gleiche gilt für Lampen, die wenn das neue Elektro- oder Elektronikgerät zerstörungsfrei aus dem Altgerät entnommen dorthin geliefert wird;...
  • Seite 49 Elektro- oder Elektronikgerätes abhängig Containerplätzen oder zugelassenen gemacht werden. Recyclinghöfen erfolgen. Für weitere Informationen wenden Sie sich bitte an Ihre Die Rücknahme von Elektro- und Gemeindeverwaltung. Elektronikgeräten kann auch auf DEUTSCH...
  • Seite 52 867386745-A-232024...