BESUCHEN SIE UNSERE WEBSITE, UM: Anwendungshinweise, Prospekte, Informationen zu Fehlerbehebung, Service und Reparatur zu erhalten: www.progress-hausgeraete.de/support INHALTSVERZEICHNIS 1. SICHERHEITSHINWEISE.................2 2. SICHERHEITSANWEISUNGEN............... 4 3. MONTAGE......................7 4. GERÄTEBESCHREIBUNG................8 5. VOR DER ERSTEN VERWENDUNG............... 9 6. TÄGLICHER GEBRAUCH.................9 7. VERWENDUNG DES ZUBEHÖRS..............10 8.
ordnungsgemäßer Bedienung bestehen. Kinder unter 8 Jahren und Personen mit schweren Behinderungen oder Mehrfachbehinderung sollten vom Gerät ferngehalten werden, wenn sie nicht ständig beaufsichtigt werden. Kinder sollten beaufsichtigt werden, um sicherzustellen, • dass sie nicht mit dem Gerät. Halten Sie sämtliches Verpackungsmaterial von Kindern •...
WARNUNG: Vergewissern Sie sich, dass das Gerät • ausgeschaltet ist, bevor Sie die Lampe austauschen, um einen Stromschlag zu vermeiden. ACHTUNG: Das Gerät und die zugänglichen Geräteteile • werden während des Betriebs heiß. Es ist darauf zu achten, die Heizelemente oder die Oberfläche des Garraums nicht zu berühren.
nicht ohne Werkzeug entfernt werden können. Breite der Geräterück‐ 558 mm • Stecken Sie den Netzstecker erst nach seite Abschluss der Montage in die Steckdose. Stellen Sie sicher, dass der Netzstecker Gerätetiefe 561 mm nach der Montage noch zugänglich ist. Geräteeinbautiefe 540 mm •...
2.3 Gebrauch • Verfärbungen der Emaille- oder Edelstahlbeschichtung haben keine Auswirkung auf die Leistung des Geräts. WARNUNG! • Verwenden Sie eine tiefe Pfanne für Verletzungs-, Verbrennungs-, feuchte Kuchen. Fruchtsäfte verursachen Stromschlag- oder Explosionsgefahr. Flecken, die dauerhaft sein können. • Kochen Sie immer bei geschlossener •...
• Bezüglich der Lampe(n) in diesem Gerät • Dabei dürfen ausschließlich und separat verkaufter Ersatzlampen: Originalersatzteile verwendet werden. Diese Lampen müssen extremen 2.7 Entsorgung physikalischen Bedingungen in Haushaltsgeräten standhalten, wie z.B. WARNUNG! Temperatur, Vibration, Feuchtigkeit, oder sollen Informationen über den Verletzungs- und Erstickungsgefahr.
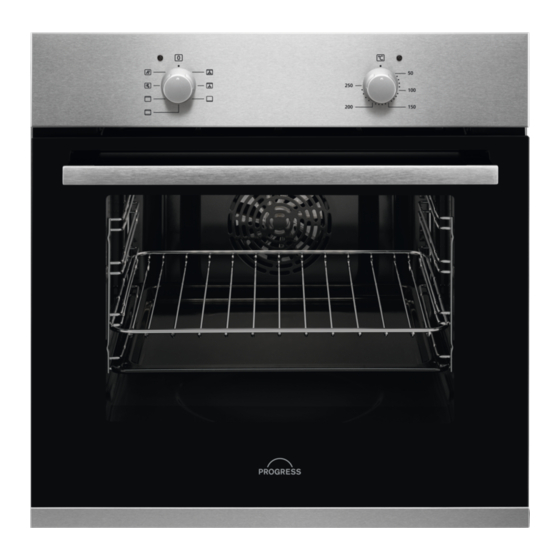
min. 550 min. 560 3.2 Befestigung des Ofens am Möbel 4. GERÄTEBESCHREIBUNG 4.1 Gesamtansicht Bedienfeld Betriebskontrolllampe/-symbol Einstellknopf für die Ofenfunktionen Einstellknopf (für die Temperatur) Temperaturanzeige / -symbol Lüftungsöffnungen für den Kühlventilator Heizelement Lampe Ventilator Garraumvertiefung - Behälter für Aqua- Reinigungsfunktion Einschubschienen, herausnehmbar Einschubebenen 4.2 Zubehör...
Für Kuchen und Plätzchen. 5. VOR DER ERSTEN VERWENDUNG WARNUNG! Siehe Kapitel Sicherheitshinweise. 5.1 Vor der ersten Inbetriebnahme Der Backofen kann während des Aufheizens Geruch und Rauch verströmen. Stellen Sie sicher, dass der Raum belüftet ist. Schritt 1 Schritt 2 Reinigen Sie den Backofen.
Ofenfunk‐ Anwendung Ofenfunk‐ Anwendung tion tion Zum Braten großer Fleischstücke Diese Funktion ist darauf ausge‐ oder von Geflügel mit Knochen legt, beim Kochen Energie zu auf einer Ebene. Gratinieren und sparen. Wenn du diese Funktion Heißluftgril‐ Feuchte Überbacken. verwendest, kann die Temperatur Heißluft im Gerät von der eingestellten Temperatur abweichen.
Kombirost Schieben Sie den Rost zwischen die Führungs‐ schienen der Einhängegitter mit den Füßen nach unten zeigend. Backblech: Schieben Sie das Backblech zwischen die Füh‐ rungsstäbe der Einhängegitter. 8. ZUSATZFUNKTIONEN 8.1 Kühlgebläse gefährlichen Überhitzung führen. Um dies zu verhindern, ist der Backofen mit einem Wenn das Gerät in Betrieb ist, schaltet sich Sicherheitsthermostat ausgestattet, der die das Kühlgebläse automatisch ein, um die...
Garen von Fleisch und Fisch Garzeitdauer Lassen Sie das Fleisch vor dem Tranchieren Die Kochzeiten hängen von der ca. 15 Minuten ruhen, damit der Bratensaft Lebensmittelart, ihrer Konsistenz und ihrem nicht austritt. Volumen ab. Um während des Bratens zu viel Rauch im Überwachen Sie zunächst die Leistung, wenn Backofen zu vermeiden, geben Sie etwas Sie kochen.
10. REINIGUNG UND PFLEGE WARNUNG! Siehe Kapitel Sicherheitshinweise. 10.1 Hinweise zur Reinigung Reinigen Sie die Vorderseite des Geräts nur mit einem Mikrofasertuch mit warmem Was‐ ser und einem milden Reinigungsmittel. Reinigen und überprüfen Sie die Türdichtung um den Garraumrahmen. Reinigen Sie die Metalloberflächen mit einer geeigneten Reinigungslösung. Reinigungs‐...
Schritt Ziehen Sie das Einhängegitter hin‐ ten von der Seitenwand weg und nehmen Sie es heraus. Schritt Setzen Sie die Einhängegitter in umgekehrter Reihenfolge ein. 10.3 Benutzung: Aqua Reinigung Schritt Lassen Sie den Backofen 30 Min. Bei dieser Reinigungsfunktion werden mithilfe lang eingeschaltet.
Seite 17
Schritt Heben und ziehen Sie die Verriegelungen an, bis sie einrasten. Schritt Schließen Sie die Backofentür halb bis zur ersten Öffnungsstellung. Anschlie‐ ßend heben und ziehen Sie die Tür aus der Aufnahme heraus. Schritt Legen Sie die Backofentür auf eine stabile Fläche und lösen Sie das Verriegelungs‐...
Schritt Setzen Sie nach der Reinigung die Glasscheibe und die Backofentür ein Wenn die Tür korrekt installiert ist, hören Sie beim Schließen der Verriegelungen ein Klicken. Bei korrektem Einbau macht die Türabdeckung ein Klickgeräusch. Stellen Sie sicher, dass Sie die interne Glasplatte korrekt in der Aufnahme installieren.
Kundendienst. 12. ENERGIEEFFIZIENZ 12.1 Produktinformation und Produktinformationsblatt gemäß den EU- Verordnungen zu Umweltdesign und Energiekennzeichnung Name des Lieferanten Progress Modellbezeichnung PBN13002X 944068069 Energieeffizienzindex 95.1 Energieeffizienzklasse Energieverbrauch mit einer Standardbeladung, konventioneller 0.89 kWh/Programm Modus Energieverbrauch mit einer Standardbeladung, Umluft-Modus 0.78 kWh/Programm...
12.2 Energiesparen Restwärme Beträgt die Garzeit mehr als 30 Minuten, reduzieren Sie die Gerätetemperatur Das Gerät verfügt über Funktionen, mindestens 3 - 10 Min. vor Ablauf des mit deren Hilfe Sie beim täglichen Garvorgangs. Durch die Restwärme im Gerät Kochen Energie sparen können. wird der Garvorgang fortgesetzt.
VISIT OUR WEBSITE TO: Get usage advice, brochures, trouble shooter, service and repair information: www.progress-hausgeraete.de/support CONTENTS 1. SAFETY INFORMATION.................21 2. SAFETY INSTRUCTIONS................23 3. INSTALLATION....................26 4. PRODUCT DESCRIPTION................27 5. BEFORE FIRST USE..................27 6. DAILY USE...................... 28 7. USING THE ACCESSORIES................29 8.
Children should be supervised to ensure that they do not • play with the appliance. Keep all packaging away from children and dispose of it • appropriately. WARNING: The appliance and its accessible parts become • hot during use. Keep children and pets away from the appliance when in use and when cooling down.
To remove the shelf supports first pull the front of the shelf • support and then the rear end away from the side walls. Install the shelf supports in the opposite sequence. Do not use a steam cleaner to clean the appliance. •...
Seite 24
2.3 Use • Do not use multi-plug adapters and extension cables. • Make sure not to cause damage to the WARNING! mains plug and to the mains cable. Should Risk of injury, burns and electric shock or the mains cable need to be replaced, this explosion.
• Always cook with the appliance door • Concerning the lamp(s) inside this product closed. and spare part lamps sold separately: • If the appliance is installed behind a These lamps are intended to withstand furniture panel (e.g. a door) make sure the extreme physical conditions in household door is never closed when the appliance appliances, such as temperature,...
4. PRODUCT DESCRIPTION 4.1 General overview Control panel Power lamp / symbol Knob for the heating functions Control knob (for the temperature) Temperature indicator / symbol Air vents for the cooling fan Heating element Lamp Cavity embossment - Aqua cleaning container Shelf support, removable Shelf positions...
Remove all accessories and removable shelf Set the maximum temperature for the function: supports from the oven. Clean the oven and the accessories only with a Time: 1 h. microfibre cloth, warm water and a mild deter‐ Set the maximum temperature for the function: gent.
EU 66/2014). Tests according to: IEC/EN For the cooking instructions refer to "Hints 60350-1. and tips" chapter, Moist Baking. For general energy saving recommendations refer to The oven door should be closed during "Energy Efficiency" chapter, Energy Saving. cooking so that the function is not interrupted and the oven operates with the highest energy efficiency possible.
supply. The oven turns on again automatically when the temperature drops. 9. HINTS AND TIPS To prevent too much smoke in the oven during roasting, add some water into the Refer to Safety chapters. deep pan. To prevent the smoke condensation, add water each time after it 9.1 Cooking recommendations dries up.
Seite 31
Sweet rolls, 12 baking tray or dripping pan 35 - 40 pieces Rolls, 9 pieces baking tray or dripping pan 35 - 40 Pizza, frozen, 0.35 wire shelf 35 - 40 Swiss roll baking tray or dripping pan 30 - 40 Brownie baking tray or dripping pan 30 - 40...
Seite 32
( °C) (min) Small Convention‐ Baking 20 - 35 cakes, 16 al Cooking tray per tray Small Fan Cooking Baking 20 - 35 cakes, 16 tray per tray Small Fan Cooking Baking 1 and 20 - 35 cakes, 16 tray per tray Apple pie, Convention‐...
( °C) (min) Beef bur‐ Grill Wire max. 20 - 30 Put the wire shelf ger, 6 shelf and on the third level pieces, dripping and the dripping 0.6 kg pan on the second level of the oven. Turn the food half‐ way through the cooking time.
Seite 34
Step 1 Turn off the oven and wait until it is cold. Step 2 Pull the front of the shelf support away from the side wall. Step 3 Pull the rear end of the shelf sup‐ port away from the side wall and remove it.
Seite 35
Step 2 Lift and pull the latches until they click. Step 3 Close the oven door halfway to the first opening position. Then lift and pull to re‐ move the door from its seat. Step 4 Put the door on a soft cloth on a stable surface and release the locking system to remove the internal glass panel.
Step 8 After cleaning, install the glass panel and the oven door. If the door is installed correctly, you will hear a click when closing the latches. When installed correctly the door trim clicks. Make sure that you install the internal glass panel in the seats correctly.
12. ENERGY EFFICIENCY 12.1 Product Information and Product Information Sheet according to EU Ecodesign and Energy Labelling Regulations Supplier's name Progress Model identification PBN13002X 944068069 Energy Efficiency Index 95.1 Energy efficiency class Energy consumption with a standard load, conventional mode 0.89 kWh/cycle Energy consumption with a standard load, fan-forced mode 0.78 kWh/cycle...
Keep breaks between baking as short as Use the residual heat to warm up other possible when you prepare a few dishes at dishes. one time. Keep food warm Cooking with fan Choose the lowest possible temperature When possible, use the cooking functions setting to use residual heat and keep a meal with fan to save energy.
VISITEZ NOTRE SITE WEB POUR : Obtenir des conseils d’utilisation, des brochures, un dépanneur, des informations sur le service et les réparations : www.progress-hausgeraete.de/support TABLE DES MATIÈRES 1. INFORMATION SUR LA SÉCURITÉ.............. 39 2. CONSIGNES DE SÉCURITÉ................41 3. INSTALLATION....................44 4.
de 8 ans et les personnes ayant un handicap très important et complexe doivent être tenus à l'écart de l’appareil, à moins d'être surveillés en permanence. Veillez à ce que les enfants ne jouent pas avec l’appareil. • Ne laissez pas les emballages à la portée des enfants et •...
AVERTISSEMENT : Assurez-vous que l'appareil est éteint • avant de remplacer l'ampoule pour éviter tout risque d'électrocution. AVERTISSEMENT : L'appareil et ses parties accessibles • deviennent chauds pendant l'utilisation. Des précautions doivent être prises pour éviter de toucher les éléments chauffants ou la surface de la cavité...
• Ne branchez la fiche secteur dans la prise secteur qu'à la fin de l'installation. Profondeur de l'appareil 561 mm Assurez-vous que la prise secteur est accessible après l'installation. Profondeur d’encastre‐ 540 mm • Si la prise secteur est détachée, ne ment de l’appareil branchez pas la fiche secteur.
• Assurez-vous que les orifices d'aération • Si l’appareil est installé derrière la paroi ne sont pas obstrués. d’un meuble (par ex. une porte), veuillez à • Ne laissez pas l'appareil sans surveillance ce que la porte ne soit jamais fermée durant son fonctionnement.
• Ce produit contient une source lumineuse • Contactez votre service municipal pour de classe d’efficacité énergétique G. obtenir des informations sur la marche à • Utilisez uniquement des ampoules ayant suivre pour mettre l’appareil au rebut. les mêmes spécifications. •...
min. 550 min. 560 3.2 Fixation du four au meuble 4. DESCRIPTION DE L'APPAREIL 4.1 Vue d’ensemble Bandeau de commande Voyant / symbole de mise sous tension Manette de sélection des modes de cuisson Manette de commande (de la température) Indicateur / symbole de température Fentes d’aération du ventilateur de refroidissement...
4.2 Accessoires • Plateau de cuisson Pour les gâteaux et biscuits. • Grille métallique Pour les plats de cuisson, les moules à gâteaux, les rôtis. 5. AVANT LA PREMIÈRE UTILISATION AVERTISSEMENT! Reportez-vous aux chapitres concernant la sécurité. 5.1 Avant la première utilisation Une odeur et de la fumée peuvent s'échapper du four durant le préchauffage.
Mode de Application Mode de Application cuisson cuisson Le four est à l’arrêt. Cette fonction est conçue pour économiser de l'énergie pendant la cuisson. Lorsque vous utilisez Position Ar‐ Chaleur cette fonction, la température à rêt tournante l'intérieur de l'appareil peut diffé‐ humide rer de la température réglée.
Grille métallique Poussez la grille entre les barres de guidage des supports de grille et assurez-vous que les pieds sont orientés vers le bas. Plateau de cuisson: Poussez la plaque entre les rails du support de grille. 8. FONCTIONS SUPPLÉMENTAIRES 8.1 Ventilateur de refroidissement surchauffe dangereuse.
Seite 49
Si vous utilisez deux plateaux de cuisson en Heures de cuisson même temps, gardez un niveau vide entre Les durées de cuisson dépendent du type, de eux. la consistance et du volume des aliments. Cuisson de la viande et du poisson Au départ, surveillez les performances Laissez la viande pendant environ 15 minutes lorsque vous cuisinez.
Seite 50
Brownie Plateau de cuisson ou plat 30 - 40 à rôtir Soufflé, 6 mor‐ ramequins en céramique 30 - 40 ceaux sur une grille métallique Fond de tarte en moule à tarte sur une grille 20 - 30 génoise métallique Gâteau à...
Seite 51
9.4 Informations pour les organismes de contrôle Tests conformément à la norme IEC 60350-1. ( °C) (min) Petits gâ‐ Chauffage Plateau 20 - 35 teaux, 16 Haut/Bas de cuis‐ par pla‐ Petits gâ‐ Chaleur Plateau 20 - 35 teaux, 16 tournante de cuis‐...
( °C) (min) Steak ha‐ Gril Grille mé‐ max. 20 - 30 Placez la grille mé‐ ché de tallique et tallique sur le troi‐ bœuf, lèchefrite sième niveau et la 6 pièces, lèchefrite sur le 0,6 kg deuxième niveau du four.
Seite 53
10.2 Comment retirer : Supports de grille Retirez les supports de grille pour nettoyer le four. Éta‐ Éteignez le four et attendez qu’il soit froid. pe 1 Éta‐ Écartez l'avant du support de grille de la paroi latérale. pe 2 Éta‐...
Seite 54
Éta‐ Ouvrez complètement la porte et saisis‐ sez les 2 charnières de porte. pe 1 Étape Soulevez et tirez les loquets jusqu’à ce qu'ils produisent un clic. Éta‐ Fermez la porte du four à mi-chemin de la première position d’ouverture. Puis, soule‐ pe 3 vez et tirez pour retirer la porte de son emplacement.
Seite 55
Étape Soulevez d’abord avec précaution, puis retirez le panneau de verre. Éta‐ Nettoyez les vitres à l'eau savonneuse. Essuyez soigneusement les panneaux de verre. Ne pas‐ sez pas les panneaux en verre au lave-vaisselle. pe 7 Éta‐ Après le nettoyage, installez le panneau de verre et la porte du four. pe 8 Si la porte est installée correctement, vous entendrez un clic lors de la fermeture des loquets.
12. RENDEMENT ÉNERGÉTIQUE 12.1 Informations sur le produit et fiche d'information sur le produit conformément aux réglementations européennes sur l'écoconception et l'étiquetage énergétique Nom du fournisseur Progress Identification du modèle PBN13002X 944068069 Indice d’efficacité énergétique 95.1 Classe d’efficacité énergétique FRANÇAIS...
Consommation d’énergie avec charge standard, en mode con‐ 0.89 kWh/cycle ventionnel Consommation d’énergie avec charge standard, en mode cha‐ 0.78 kWh/cycle leur tournante Nombre de cavités Source de chaleur Électricité Volume 65 l Type de four Four encastrable Masse 27.5 kg IEC/EN 60350-1 - Appareils de cuisson domestiques électriques - Partie 1 : Cuisinières, fours, fours à...
Seite 58
votre centre local de recyclage ou contactez vos services municipaux. FRANÇAIS...