Seite 1
All manuals and user guides at all-guides.com Gebruiksaanwijzing User Manual Notice d'utilisation Benutzerinformation Oven Oven Four Backofen PBN1220X...
All manuals and user guides at all-guides.com 2 Progress INHOUDSOPGAVE Veiligheidsinformatie Aanwijzingen en tips Veiligheidsvoorschriften Onderhoud en reiniging Beschrijving van het product Probleemoplossing Voordat u het apparaat voor de eerste keer Montage gebruikt Technische informatie Dagelijks gebruik Energiezuinigheid Extra functies Wijzigingen voorbehouden.
All manuals and user guides at all-guides.com Progress 3 Algemene veiligheid Alleen een erkende installatietechnicus mag het apparaat • installeren en de kabel vervangen. Van binnen wordt het apparaat heet als het in werking is. • Raak de verwarmingselementen in het apparaat niet aan.
Seite 4
All manuals and user guides at all-guides.com 4 Progress • Controleer of de elektrische informatie • De specificatie van het apparaat mag op het typeplaatje overeenkomt met de niet worden veranderd. stroomvoorziening. Zo niet, neem dan • Zorg ervoor dat de ventilatieopeningen contact op met een elektromonteur.
Seite 5
All manuals and user guides at all-guides.com Progress 5 • Gebruik een diepe braadpan voor geen schuurmiddelen, schuursponsjes, vochtige taarten. Fruitsappen kunnen oplosmiddelen of metalen voorwerpen. permanente vlekken maken. • Raadpleeg als u een ovenspray gebruikt • Dit apparaat is uitsluitend bestemd om eerst de aanwijzingen op de verpakking.
All manuals and user guides at all-guides.com 6 Progress BESCHRIJVING VAN HET PRODUCT Algemeen overzicht Bedieningspaneel Temperatuurlampje/symbool/ indicatielampje Temperatuurregelknop Knop voor ovenfuncties Stroomlampje/symbool/indicatielampje Luchtopeningen voor koelventilator Verwarmingselement Lampje Rekframe, verwijderbaar Rekstanden Accessoires • Grill-/braadpan Voor braden en roosteren of als schaal •...
All manuals and user guides at all-guides.com Progress 7 DAGELIJKS GEBRUIK knop voor de temperatuur in de uit- WAARSCHUWING! Raadpleeg stand. de hoofdstukken Veiligheid. Verzonken knoppen Om het apparaat te bedienen, moet u op de bedieningsknop drukken. De bedieningsknop komt naar voren.
All manuals and user guides at all-guides.com 8 Progress EXTRA FUNCTIES Koelventilator oververhitting veroorzaken. Om dit te voorkomen is de oven voorzien van een Als het apparaat in werking is, wordt de veiligheidsthermostaat die de koelventilator automatisch ingeschakeld om stroomtoevoer onderbreekt. Zodra de...
Seite 9
All manuals and user guides at all-guides.com Progress 9 Bak- en braadtabel Taart Gerecht Boven + onderwarmte Tijd (min) Opmerkingen Temperatuur Rooster- (°C) hoogte Schuimtaart 45 - 60 In een cake- vorm Zandtaartdeeg 24 - 34 In een cake- vorm...
Seite 10
All manuals and user guides at all-guides.com 10 Progress Gerecht Boven + onderwarmte Tijd (min) Opmerkingen Temperatuur Rooster- (°C) hoogte 25 - 35 Op een bak- Soesjes plaat Taartjes 45 - 70 In een cake- vorm van 20 Victoria-taart 1 of 2...
Seite 11
All manuals and user guides at all-guides.com Progress 11 Gerecht Boven + onderwarmte Tijd (min) Opmerkingen Temperatuur Rooster- (°C) hoogte Lasagne 25 - 40 In een vorm Cannelloni 25 - 40 In een vorm Yorkshire pud- 20 - 30 6 puddingvor- ding 1) Verwarm de oven 10 minuten voor.
Seite 12
All manuals and user guides at all-guides.com 12 Progress Gerecht Boven + onderwarmte Tijd (min) Opmerkingen Temperatuur Rooster- (°C) hoogte Kalkoen 210 - 240 Heel in een braadpan Eend 120 - 150 Heel in een braadpan Gans 150 - 200...
All manuals and user guides at all-guides.com Progress 13 Gerecht Aantal Temper- Tijd (min) Rooster- atuur hoogte Stuks 1e kant 2e kant (°C) Kip (in 2 1000 30 - 35 25 - 30 helften) Vleesspie- 10 - 15 10 - 12...
All manuals and user guides at all-guides.com 14 Progress deur bevindt zich rondom het frame aan U kunt het verwarmingselement verwijderen de binnenkant van de oven. Gebruik het om het plafond van de oven gemakkelijker apparaat niet als de afdichting van de te reinigen.
Seite 15
All manuals and user guides at all-guides.com Progress 15 2. Til de hendels op de twee scharnieren 4. Leg de deur op een zachte doek op een omhoog en draai ze. stabiele ondergrond. 5. Maak het vergrendelingssysteem open om het glazen binnenruitje te verwijderen.
All manuals and user guides at all-guides.com 16 Progress 90° 7. De glasplaat voorzichtig optillen en verwijderen. Het lampje vervangen Leg een doek op de bodem van de binnenkant van het apparaat. Dit voorkomt schade aan het afdekglas en de ovenruimte.
All manuals and user guides at all-guides.com Progress 17 Probleem Mogelijke oorzaak Oplossing De oven wordt niet warm. De zekering is doorgebrand. Controleer of de zekering de oorzaak van de storing is. Als de zekeringen keer op keer doorslaan, neemt u contact op met een erkende installa- teur.
All manuals and user guides at all-guides.com 18 Progress Dit apparaat wordt geleverd met stekker en netsnoer. Kabel Kabeltypes die van toepassing zijn op de min. 550 installatie of vervanging: H07 RN-F, H05 RN-F, H05 RRF, H05 VV-F, H05 V2V2-F min.
All manuals and user guides at all-guides.com Progress 19 Energie-efficiëntie Index 103.0 Energie-efficiëntieklasse Energieverbruik bij een standaardbelasting, stand boven 0.83 kWh/cyclus + onderwarmte Aantal ruimten Warmtebron Electriciteit Volume 61 l Soort oven Inbouwoven Massa 27.0 kg EN 60350-1 - Elektrische huishoudelijke –...
All manuals and user guides at all-guides.com 20 Progress CONTENTS Safety information Hints and tips Safety instructions Care and cleaning Product description Troubleshooting Before first use Installation Daily use Technical information Additional functions Energy efficiency Subject to change without notice.
All manuals and user guides at all-guides.com Progress 21 Internally the appliance becomes hot when in operation. Do • not touch the heating elements that are in the appliance. Always use oven gloves to remove or put in accessories or ovenware.
Seite 22
All manuals and user guides at all-guides.com 22 Progress • The shock protection of live and • Do not let sparks or open flames to insulated parts must be fastened in such come in contact with the appliance a way that it cannot be removed without when you open the door.
All manuals and user guides at all-guides.com Progress 23 • Remaining fat or food in the appliance • Before replacing the lamp, disconnect can cause fire. the appliance from the power supply. • Clean the appliance with a moist soft •...
All manuals and user guides at all-guides.com 24 Progress BEFORE FIRST USE Accessories can become hotter than usual. WARNING! Refer to Safety The appliance can emit an odour and chapters. smoke. This is normal. Make sure that the airflow in the room is sufficient.
All manuals and user guides at all-guides.com Progress 25 Oven functions Oven function Application Off position The appliance is off. Conventional To bake and roast food on 1 shelf position. Cooking Bottom Heat To bake cakes with crispy bottom and to preserve food.
All manuals and user guides at all-guides.com 26 Progress Baking cakes • To prevent too much smoke in the oven during roasting, add some water into the • Do not open the oven door before 3/4 of deep pan. To prevent the smoke the set cooking time is up.
Seite 27
All manuals and user guides at all-guides.com Progress 27 Food Conventional Cooking Time (min) Comments Temperature Shelf position (°C) Small cakes 20 - 30 In a baking tray 20 - 30 In a baking tray Biscuits Meringues 90 - 120...
Seite 28
All manuals and user guides at all-guides.com 28 Progress Food Conventional Cooking Time (min) Comments Temperature Shelf position (°C) Lasagne 25 - 40 In a mould Cannelloni 25 - 40 In a mould Yorkshire pud- 20 - 30 6 pudding...
Seite 29
All manuals and user guides at all-guides.com Progress 29 Food Conventional Cooking Time (min) Comments Temperature Shelf position (°C) Rabbit 60 - 80 Cut in pieces Hare 150 - 200 Cut in pieces Pheasant 90 - 120 Whole on a...
All manuals and user guides at all-guides.com 30 Progress Food Quantity Temper- Time (min) Shelf po- ature sition Pieces 1st side 2nd side (°C) Fish fillet 12 - 14 10 - 12 Toasted 4 - 6 5 - 7 sand-...
All manuals and user guides at all-guides.com Progress 31 Cleaning the oven door The oven door has two glass panels. You can remove the oven door and the internal glass panel to clean it. The oven door can close if you...
Seite 32
All manuals and user guides at all-guides.com 32 Progress 90° 7. First lift carefully and then remove the glass panel. 4. Put the door on a soft cloth on a stable surface. 8. Clean the glass panel with water and soap.
All manuals and user guides at all-guides.com Progress 33 Replacing the lamp The back lamp Put a cloth on the bottom of the interior of 1. Turn the lamp glass cover the appliance. It prevents damage to the counterclockwise to remove it.
All manuals and user guides at all-guides.com 34 Progress We recommend that you write the data here: Product number (PNC) ......... Serial number (S.N.) ......... INSTALLATION Securing the appliance to the WARNING! Refer to Safety cabinet chapters. Building In min. 550 Electrical installation min.
All manuals and user guides at all-guides.com Progress 35 TECHNICAL INFORMATION Technical data Voltage 230 V Frequency 50 Hz ENERGY EFFICIENCY Product Fiche and information according to EU 65-66/2014 Supplier's name Progress Model identification PBN1220X Energy Efficiency Index 103.0 Energy efficiency class Energy consumption with a standard load, conventional 0.83 kWh/cycle...
Seite 36
All manuals and user guides at all-guides.com 36 Progress dispose appliances marked with the symbol product to your local recycling facility or contact your municipal office. with the household waste. Return the...
All manuals and user guides at all-guides.com Progress 37 TABLE DES MATIÈRES Consignes de sécurité Conseils Instructions de sécurité Entretien et nettoyage Description de l'appareil En cas d'anomalie de fonctionnement Avant la première utilisation Installation Utilisation quotidienne Caractéristiques techniques Fonctions supplémentaires Rendement énergétique...
All manuals and user guides at all-guides.com 38 Progress Consignes générales de sécurité L'appareil doit être installé et le câble remplacé uniquement • par un professionnel qualifié. L'intérieur de l'appareil devient chaud lorsqu'il est en • fonctionnement. Ne touchez pas les éléments chauffants se trouvant dans l'appareil.
Seite 39
All manuals and user guides at all-guides.com Progress 39 Utilisation • L'ensemble des branchements électriques doit être effectué par un AVERTISSEMENT! Risque de technicien qualifié. blessures, de brûlures, • L'appareil doit être relié à la terre. d'électrocution ou d'explosion. • Vérifiez que les données électriques figurant sur la plaque signalétique...
All manuals and user guides at all-guides.com 40 Progress – ne versez jamais d'eau directement • Nettoyez l'appareil avec un chiffon doux dans l'appareil lorsqu'il est chaud. humide. Utilisez uniquement des – une fois la cuisson terminée, ne produits de nettoyage neutres. N'utilisez laissez jamais d'aliments ou de plats pas de produits abrasifs, de tampons à...
All manuals and user guides at all-guides.com Progress 41 DESCRIPTION DE L'APPAREIL Vue d'ensemble Panneau de commande Voyant/symbole/indicateur de température Manette du thermostat Manette de sélection des fonctions du four Voyant/symbole/indicateur de puissance Orifices d'aération du ventilateur de refroidissement Résistance Éclairage...
All manuals and user guides at all-guides.com 42 Progress Laissez le four refroidir. Nettoyez la cavité d'une solution d'eau tiède et de détergent du four à l'aide d'un chiffon doux imbibé liquide non agressif. UTILISATION QUOTIDIENNE Activation et désactivation de...
All manuals and user guides at all-guides.com Progress 43 FONCTIONS SUPPLÉMENTAIRES Ventilateur de refroidissement causer une surchauffe dangereuse. Pour éviter cela, le four dispose d'un thermostat Lorsque le four fonctionne, le ventilateur de de sécurité interrompant l'alimentation refroidissement se met automatiquement électrique.
Seite 44
All manuals and user guides at all-guides.com 44 Progress Tableau de rôtissage et de cuisson des gâteaux Gâteaux Mets Cuisson traditionnelle Durée (min) Commen- taires Température Niveau (°C) Pâtes à gâteaux 45 - 60 Dans un moule à gâteau Pâte sablée...
Seite 45
All manuals and user guides at all-guides.com Progress 45 Mets Cuisson traditionnelle Durée (min) Commen- taires Température Niveau (°C) 15 - 20 Sur un plateau Petits pains de cuisson 25 - 35 Sur un plateau Choux de cuisson Tourtes 45 - 70 Dans un moule à...
Seite 46
All manuals and user guides at all-guides.com 46 Progress Mets Cuisson traditionnelle Durée (min) Commen- taires Température Niveau (°C) Gratin aux lé- 45 - 60 Dans un moule gumes Quiches 40 - 50 Dans un moule Lasagnes 25 - 40...
Seite 47
All manuals and user guides at all-guides.com Progress 47 Mets Cuisson traditionnelle Durée (min) Commen- taires Température Niveau (°C) Épaule de porc 120 - 150 Dans un plat à rôtir Jarret de porc 100 - 120 2 pièces dans un plat à rôtir...
All manuals and user guides at all-guides.com 48 Progress Mets Quantité Tempér- Durée (min) Niveau ature Mor- 1er côté 2ème (°C) ceaux face Filet de 12 - 15 12 - 14 bœuf Steaks de 10 - 12 6 - 8 bœuf...
Seite 49
All manuals and user guides at all-guides.com Progress 49 Appareils en acier inoxydable ou en aluminium Nettoyez la porte uniquement avec une éponge humidifiée. Séchez-la avec un chiffon doux. N'utilisez jamais de produits abrasifs ou acides ni d'éponges métalliques car ils peuvent endommager la surface du four.
All manuals and user guides at all-guides.com 50 Progress AVERTISSEMENT! Assurez- vous que l'élément chauffant est correctement installé et qu'il ne tombe pas. Nettoyage de la porte du four La porte du four est dotée de deux panneaux de verre. Vous pouvez retirer la porte du four et le panneau de verre intérieur pour le nettoyer.
All manuals and user guides at all-guides.com Progress 51 la surface du panneau en verre où se trouve la zone imprimée est lisse au toucher (le relief doit être de l'autre côté). Veillez à installer correctement le panneau de verre intérieur dans son logement.
All manuals and user guides at all-guides.com 52 Progress En cas d'anomalie de fonctionnement... Problème Cause probable Solution Le four ne chauffe pas. Le four est éteint. Mettez le four en marche. Le four ne chauffe pas. Le fusible a disjoncté.
All manuals and user guides at all-guides.com Progress 53 Encastrement Installation électrique Le fabricant ne pourra être tenu pour responsable si vous ne respectez pas les précautions de sécurité du chapitre « Consignes de sécurité ». min. 550 Cet appareil est fourni avec une fiche d'alimentation et un câble d'alimentation.
All manuals and user guides at all-guides.com 54 Progress RENDEMENT ÉNERGÉTIQUE Fiche produit et informations selon la norme UE 65-66/2014 Nom du fournisseur Progress Identification du modèle PBN1220X Index d'efficacité énergétique 103.0 Classe d'efficacité énergétique Consommation d'énergie avec charge standard, mode 0.83 kWh/cycle...
All manuals and user guides at all-guides.com Progress 55 INHALTSVERZEICHNIS Sicherheitsinformationen Tipps und Hinweise Sicherheitsanweisungen Reinigung und Pflege Gerätebeschreibung Fehlersuche Vor der ersten Inbetriebnahme Montage Täglicher Gebrauch Technische Daten Zusatzfunktionen Energieeffizienz Änderungen vorbehalten. SICHERHEITSINFORMATIONEN Lesen Sie vor der Montage und dem Gebrauch des Geräts zuerst die Gebrauchsanleitung.
All manuals and user guides at all-guides.com 56 Progress Allgemeine Sicherheit Nur eine qualifizierte Fachkraft darf den Elektroanschluss des • Geräts vornehmen und das Kabel austauschen. Der Geräteinnenraum wird während des Betriebs heiß. • Berühren Sie nicht die Heizelemente im Geräteinnern.
All manuals and user guides at all-guides.com Progress 57 • Die Seiten des Geräts dürfen nur an müssen aus dem Halter entfernt werden Geräte oder Einheiten in gleicher Höhe können), Fehlerstromschutzschalter und angrenzen. Schütze. • Die elektrische Installation muss eine...
All manuals and user guides at all-guides.com 58 Progress • Gehen Sie beim Aushängen der Tür WARNUNG! Das Gerät könnte vorsichtig vor. Die Tür ist schwer! beschädigt werden. • Reinigen Sie das Gerät regelmäßig, um eine Abnutzung des • Um Beschädigungen und Verfärbungen Oberflächenmaterials zu verhindern.
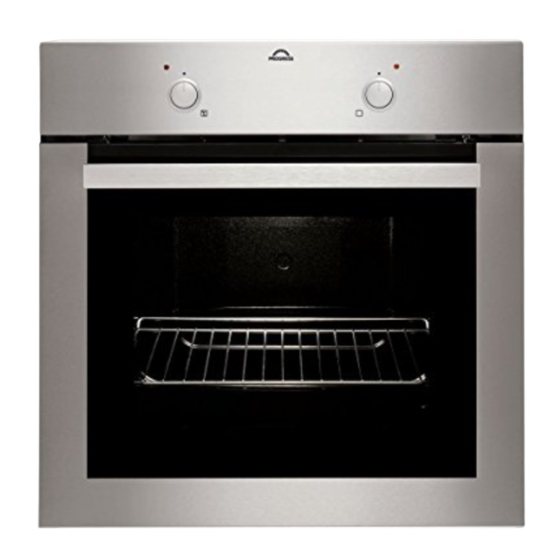
All manuals and user guides at all-guides.com Progress 59 GERÄTEBESCHREIBUNG Allgemeine Übersicht Bedienblende Temperaturkontrolllampe/-symbol/- anzeige Temperatur-Einstellknopf Backofen-Einstellknopf Betriebskontrolllampe/-symbol/-anzeige Lüftungsöffnungen für das Kühlgebläse Heizelement Licht Einschubschienen, herausnehmbar Einschubebenen Zubehör Für Kuchen und Plätzchen. • Brat- und Fettpfanne • Kombirost Zum Backen und Braten oder zum Für Kochgeschirr, Kuchenformen,...
All manuals and user guides at all-guides.com 60 Progress Spülmittel an und reinigen Sie damit den Garraum. TÄGLICHER GEBRAUCH Ein- und Ausschalten des WARNUNG! Siehe Kapitel Geräts Sicherheitshinweise. Je nach Modell besitzt Ihr Versenkbare Knöpfe Gerät Knopfsymbole, Kontrolllampen oder Drücken Sie zum Benutzen des Geräts auf Anzeigen: den versenkbaren Knopf.
All manuals and user guides at all-guides.com Progress 61 ZUSATZFUNKTIONEN Kühlgebläse gefährlichen Überhitzung führen. Um dies zu verhindern, ist der Backofen mit einem Wenn das Gerät in Betrieb ist, wird Sicherheitsthermostat ausgestattet, der die automatisch das Kühlgebläse eingeschaltet, Stromzufuhr unterbrechen kann. Die um die Geräteflächen zu kühlen.
All manuals and user guides at all-guides.com 62 Progress Ihnen zubereiteten Garmengen am besten geeignet sind. Back- und Brattabelle Kuchen Speise Ober-/Unterhitze Dauer (Min.) Bemerkungen Temperatur Ebene (°C) Rührteig 45 - 60 In einer Ku- chenform Mürbeteig 24 - 34...
Seite 63
All manuals and user guides at all-guides.com Progress 63 Speise Ober-/Unterhitze Dauer (Min.) Bemerkungen Temperatur Ebene (°C) Rosinenbrötch- 15 - 20 Auf dem Back- blech 25 - 35 Auf dem Back- Brandteig blech Törtchen 45 - 70 In einer Ku-...
Seite 64
All manuals and user guides at all-guides.com 64 Progress Speise Ober-/Unterhitze Dauer (Min.) Bemerkungen Temperatur Ebene (°C) Gemüseauflauf 45 - 60 In einer Auflauf- form Quiche 40 - 50 In einer Auflauf- form Lasagne 25 - 40 In einer Auflauf-...
Seite 65
All manuals and user guides at all-guides.com Progress 65 Speise Ober-/Unterhitze Dauer (Min.) Bemerkungen Temperatur Ebene (°C) Hähnchen 70 - 85 Ganz auf einem tiefen Blech Truthahn 210 - 240 Ganz auf einem tiefen Blech Ente 120 - 150 Ganz auf einem...
All manuals and user guides at all-guides.com Progress 67 Reinigen der Türdichtung Backofendecke • Die Türdichtung muss regelmäßig WARNUNG! Schalten Sie das überprüft werden. Die Türdichtung ist im Gerät aus, bevor Sie das Rahmen des Garraums angebracht. Heizelement entfernen. Nehmen Sie das Gerät nicht in Betrieb, Vergewissern Sie sich, dass das wenn die Türdichtung beschädigt ist.
Seite 68
All manuals and user guides at all-guides.com 68 Progress Die Backofentür kann sich schließen, wenn Sie versuchen, die innere Glasscheibe zu entfernen, bevor Sie die Backofentür abnehmen. ACHTUNG! Verwenden Sie das Gerät nicht ohne die innere Glasscheibe. 1. Klappen Sie die Backofentür ganz auf, und greifen Sie an die beiden Türscharniere.
All manuals and user guides at all-guides.com Progress 69 90° 7. Heben Sie die Glasscheibe vorsichtig an und entfernen Sie sie. Austauschen der Lampe Legen Sie ein Tuch unten in den Garraum des Geräts. Auf diese Weise schützen Sie die Glasabdeckung der Backofenlampe und den Innenraum des Backofens.
All manuals and user guides at all-guides.com 70 Progress Was tun, wenn ... Problem Mögliche Ursache Abhilfe Der Backofen heizt nicht. Der Backofen ist ausgeschal- Schalten Sie den Backofen tet. ein. Der Backofen heizt nicht. Die Sicherung hat ausgelöst. Vergewissern Sie sich, dass die Sicherung der Grund für...
All manuals and user guides at all-guides.com Progress 71 Montage Elektrischer Anschluss Der Hersteller haftet nicht für Schäden, die aufgrund der Nichtbeachtung der in den Sicherheitshinweisen beschriebenen Sicherheitsvorkehrungen min. 550 entstehen. min. 560 Das Gerät wird mit einem Netzstecker und Netzkabel geliefert.