Herunterladen Inhalt Inhalt Diese Seite drucken
Eurosystems RTT3 Bedienungsanleitung
Vorschau ausblenden Andere Handbücher für RTT3:

Werbung

Verfügbare Sprachen
  • DE

Verfügbare Sprachen

  • DEUTSCH, seite 18
Bedienungsanleitung
für RTT3 Fräse
Stand 01.06.2018
eurosystems Deutschland
Motorgeräte Handelsgesellschaft mbH
Im Fuchshau 14
D-73635 Rudersberg
Tel: +49 7183 / 30 590-0
Fax: +49 7183 / 30 590-20
info@eurosystems.info
www.eurosystems.info

Werbung

Inhaltsverzeichnis
loading

Inhaltszusammenfassung für Eurosystems RTT3

  • Seite 1 Bedienungsanleitung für RTT3 Fräse Stand 01.06.2018 eurosystems Deutschland Motorgeräte Handelsgesellschaft mbH Im Fuchshau 14 D-73635 Rudersberg Tel: +49 7183 / 30 590-0 Fax: +49 7183 / 30 590-20 info@eurosystems.info www.eurosystems.info...
  • Seite 5 Leggere il manuale prima di usare la macchina - Attenzione: rotazione fresa. Read the instructions manual before operating on the machine - Danger tiller rotation. Lesen Sie die Gebrauchsanweisung vor der Inbetriebnahme - Achtung: drehende Etichetta innesto Retromarcia. Hackwerkzeuge. Reverse drive. Lire le mode d’emploi avant l’usage - Attention: danger rotation fraise.
  • Seite 6 Costruttore Anno di costruzione Massa Manufacturer Year of construction Mass Hersteller Baujahr Gewicht Constructeur Année de construction Masse Fabricante Año de fabricación Masa ΚΑΤΑΣΚΕΥΑΣΤΗΣ ΕΤΟΣ ΚΑΤΑΣΚΕΥΗΣ ΒΑΡΟΣ Producent Rok produkcji Masa Fabricante Ano de produção Massa Výrobce Rok výroby Hmotnost Producent Konstruktionsår Vægt...
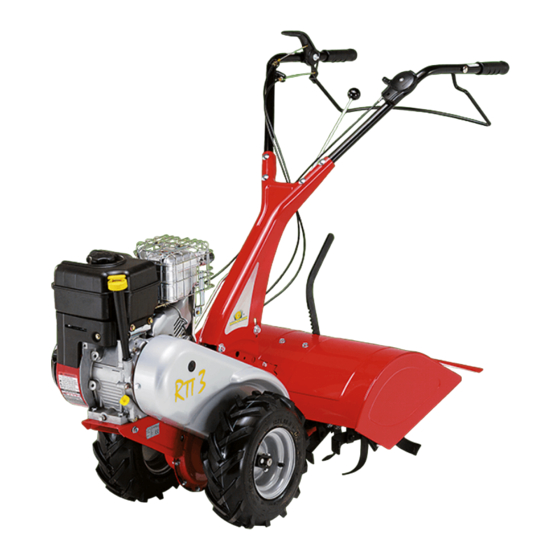
  • Seite 7 Modello 2+2 velocità, fresa 60 cm. - Model 2+2 speed, cultivating width 60 cm. - Mod. 2vg+2rg, Hacksatz cm. 60 - Modèle 2+2 vitesse, fraise 60 cm. - Mo- delo 2+2 Velocidad, fresa 60 cm. - Μοντέλο 2+2 ταχύτητες, φρέζα 60 εκατ - Model prędkość 2+2, nóż60 cm. - Modelo 2+2 velocidades, fresa 60 cm - Model 2+2 převodové...
  • Seite 8: Norme Di Sicurezza

    Istruzioni originali INTRODUZIONE Indice Gentile Cliente, la ringraziamo per la fiducia accordata al nostro prodotto, le auguriamo un piacevole e sicuro utilizzo di questa macchina. Questo libretto contiene tutte le informazioni per un uso corretto e senza problemi, perciò si consiglia di leggere Introduzione attentamente le NORME DI SICUREZZA e le ISTRUZIONI D’USO qui di seguito riportate, per avere un funzionamento senza inconvenienti e una durata sicura, della macchina, nel tempo.
  • Seite 9: Dispositivo Di Sicurezza

    5 Durante il lavoro, per maggiore protezione, vanno indossate calzature robuste e pantaloni lunghi. Fare attenzione, perché il pericolo di ferirsi le dita o i piedi con la macchina in funzione è molto elevato. 6 Durante il trasporto della macchina e tutte le operazioni di manutenzione, pulitura, cambio degli attrezzi, il motore deve essere spento. 7 Allontanarsi dalla macchina non prima di aver spento il motore.
  • Seite 10: Descrizione Dei Comandi

    Montaggio bandella cofano fresa (Fig.4) Infilare i ganci della bandella (part.1), tenendo questa ruotata verso l’alto, nelle relative asole ricavate sul cofano fresa, abbassare la bandella e avvitare le piastrine (2) con le relative viti (3). ATTENZIONE! La bandella deve essere posizionata con i ganci rivolti come nell'ingrandimento in figura, ossia i ganci devono entrare dall'alto nella feritoia "B"...
  • Seite 11 Posizionare la forcella (Fig.2) nella posizione 1 (libero) la ruota gira libera sull’albero così da permettere gli spostamenti. Portarsi ai bordi del terreno da fresare. Posizionare la forcella (Fig.2) nella posizione 2 (bloccata) posizione di lavoro. - Assicurarsi che la leva del cambio(Fig.8 part.4 solo versione 2+2 velocità) sia in posizione di folle.
  • Seite 12: Rumore Aereo E Vibrazioni

    RUMORE AEREO E VIBRAZIONI Valore di pressione acustica al posto di lavoro secondo EN 709 Leq = 80 dB (A), con coefficiente di incertezza K = ± 1,1 dB (A). Valore rilevato di potenza acustica LWA = 89,1 dB (A), con coefficiente di incertezza K = ± 1,2 dB (A). Vibrazione alle stegole secondo EN 709 e ISO 5349.
  • Seite 13 Translation of original user instructions INTRODUCTION Index Dear Customer, thank you for the confidence in purchasing our product .We hope you will spend many enjoyable hours using it. Introduction The present instructions are issued to ensure a right and correct use of the product : for this reason we beg you to carefully follow such working and safety instructions so that the machine could operate with complete Conditions of use satisfaction and have a long service life.
  • Seite 14: Safety Device

    6 During the machine transport and all the maintenance, cleaning, equipment change operations, the engine must be switched off. 7 Before leaving the machine, please switch the engine off. 8 Do not switch the machine on in closed rooms/areas where you can have carbon monoxide exhalations. 9 WARNING !! The petrol/gasoline is highly inflammable.
  • Seite 15: Controls Description

    taking care the holes to line up with the screws seatings and screw the 6 pcs. screws again (5). Then carefully screw the support (7) screws (6) as well. Assembly of the hinge engine hood rotary cutter (Fig.4) put the hinge hooks (part. 1) keeping it turning to the top side into the slots on the engine hood milling, lower the hinge and screw down the plates (2) with the relevant screws (3).
  • Seite 16 Engine instructions: Carefully read the istructions booklet anclosed to the relevant engine. Check if the air filter is clean. Fill the tank in as per the fuel described in the engine specifications and using a filter filling funnel. Do not change the calibration of the speeds control rotation device of the engine in order not to over-speed it. Put the fork (Fig.2) into position 1 (free) so that the wheel could freely turn on the shaft to allow the movements.
  • Seite 17 rubber cap (1). KEEP ATTENTION! once such operation has finished you must close the hole again with the rubber cap (1) because inside the casing there are some gears/parts on motion. NOISE LEVEL AND VIBRATION LEVEL Measured sound power level LWA = 89,1 dB (A), with a uncertainty value K = ±1,2 dB (A). Measured sound pressure level with En709, Leq = 80 dB (A), with a uncertainty value K = ±1,1 dB (A).
  • Seite 18: Einleitung

    Übersetzung der originalen Betriebsanleitung EINLEITUNG Inhaltsverzeichnis Sehr geehrter Kunde, wir danken Ihnen für das Vertrauen, das Sie unserem Produkt geschenkt haben. Wir wünschen Ihnen eine angenehme und sichere Benutzung dieser Maschine. Dieses Handbuch enthält alle Informationen für einen korrekten und problemlosen Gebrauch. Daher empfehlen wir Ihnen, die auf den folgenden Einleitung Seiten stehenden SICHERHEITSBESTIMMUNGEN und GEBRAUCHSANLEITUNGEN aufmerksam zu lesen, damit Sie die Maschine auf lange Zeit störungsfrei und sicher benutzen können.
  • Seite 19: Sicherheitsvorrichtungen

    Vorsichtig vorgehen, weil eine große Gefahr besteht, sich bei laufender Maschine die Finger oder die Füße zu verletzen. 6 Während des Transports der Maschine und aller Wartungsarbeiten, dem Reinigen und dem Wechsel der Geräte muss der Motor immer abgeschaltet sein. 7 Entfernen Sie sich erst dann von der Maschine, wenn man den Motor abgeschaltet hat.
  • Seite 20: Montage Des Prallblechs Der Fräsenhaube

    die Schrauben (6), die Halter (7) befestigen, locker lassen, damit eine leichtere Montage zu bekommen. Daher die Haube (8) positionieren,damit die Ösen mit den Schraubensitzen genau übereinstimmen, dann die Nr.6 Schrauben (5) wieder einschrauben. Endlich auch die Schrauben (6) der Halter (7) sorgfältig befestigen.
  • Seite 21: Lagerhaltung Und Laufende Wartung

    Kapitel FAHRGETRIEBE. ACHTUNG Vor dem Starten des Motors immer sicherstellen, dass der Einachsschlepper einen einwandfreien Betriebszustand aufweist. - Anweisungen für den Motor: Lesen Sie aufmerksam die Betriebsanleitung durch, die den Motor beiliegt. - Sicherstellen, dass der Luftfilter sauber ist. - Den Kraftstofftank mit dem Treibstoff füllen, der in den Angaben der Betriebsanleitung des Motors steht. Zum Einfüllen einen Trichter mit Filter benutzen. - Die Einstellung des Drehzahlreglers des Motors nicht ändern.
  • Seite 22: Lärmpegel Und Vibrationen

    Fräsen auf der Welle fest angezogen sind (Teil 3 und 9). Welle Rückwärtsfahren (Abb. 11) Alle 50 Betriebsstunden die Welle für Rückwärtsfahren mit dem Schmiernippel (Teil 1) schmieren, nach der Demontage des Gummistöpsels (1). ACHTUNG: nachdem dieser Vorgang beendet ist, muss man das Loch durch Stöpsel wiederschliessen, da es bewegliche Teile auf der Innenseite des Gehäuses gibt.
  • Seite 23 Traduction du mode d’emploi original INTRODUCTION Table des matières Cher client, nous vous remercions de la confiance que vous avez bien voulu accorder à notre produit et vous en souhaitons une agréable utilisation. Cette notice contient toutes les informations pour vous permettre d’utiliser Introduction correctement et facilement votre machine;...
  • Seite 24: Dispositif De Sécurité

    4 Ne pas mettre en marche la machine lorsqu’on se trouve devant la fraise et ne pas s’y approcher lorsqu’elle est en marche. Lorsqu’on tire sur la corde du lanceur, les fraises et la machine ne doivent pas se mettre en marche. 5 Pour bénéficier d’une meilleure protection durant le travail, il est nécessaire de porter des chaussures robustes et un pantalon long.
  • Seite 25 Montage du capot fraise (seulement pour le model avec fraise 60 cm.) (Fig. 10) Inserér les élargissements (part. 1) au bout des fraises (2) et fixer les avec les vis (3) et l’ècrou. Dèvisser les 6 vis (5) du siége du cadre: faites attention que les vis (6) fixant les supports soient partiellement desserer au but de permettre un montage plus facile.
  • Seite 26 ATTENTION. Avant de mettre le moteur en marche, toujours contrôler que le motoculteur se trouve en parfaites conditions d’utilisation. Instructions Moteur : Lisez attentivement le manuel d’instructions en annexe au moteur correspondant. Vérifiez si le filtre à air est propre.Remplissez le réservoir avec un carburant étant du type indiqué par les spécifications rapportées dans le livret du moteur, en utilisant un entonnoir à...
  • Seite 27 Fraise (Fig. 10) Chaque utilisation du motoculteur, il est nécessaire que l’opérateur vérifie si les vis et les écrous de fixation des fraises sur l’arbre sont serrées à fond (détail 3 et 9). Arbre marche arrière (Fig. 11) Toutes les 50 heures de travail, graissez à l’aide du graisseur spécifique (détail 2) l’arbre de la marche arrière, après avoir au préalable démonté...
  • Seite 28: Normas De Seguridad

    Traducción del manual de instrucciones original INTRODUCCIÓN ĺndice Estimado cliente, le agradecemos por la confianza acordada a nuestro producto y le deseamos un agradable y seguro uso de la máquina. Este manual contiene todas las informaciones por un funcionamiento correcto, sin inconvenientes y duradero.
  • Seite 29: Dispositivo De Seguridad

    6 Durante el transporte de la máquina y en todas las operaciones de mantenimiento, limpieza y cambio de los equipos y herramientas, el motor debe estar apagado. 7 Antes de alejarse de la máquina cerciorarse que el motor esté apagado. 8 No arrancar la máquina en lugares cerrados donde se podrían acumular exhalaciones de carbono.
  • Seite 30 tornillos y volver a enroscar los tornillos (5). Por último, fijar bien los tornillos (6) de los soportes (7). Montaje banda cárter fresa (Fig.4) Introducir los ganchos de la banda (pieza 1) (manteniendo la banda girada hacia arriba) en los relativos ojales presentes en el cárter fresa, bajar la banda y enroscar las plaquetas (2) con los relativos tornillos (3).
  • Seite 31 - Controlar que el filtro de aire esté perfectamente limpio. - Llenar el depósito con carburante del tipo indicado en las especificaciones del manual del motor, por un embudo con filtro. - No modificar la calibración del regulador de velocidad de rotación del motor y no llevarlo a velocidad demasiado elevada. - Posicionar la horquilla (Fig.2) en la posición 1 (libre) la rueda gira libre en el ejel para permitir los desplazamientos.
  • Seite 32 hay componentes en movimiento. NIVEL DE RUIDO AÉREO Y VIBRACIONES Valor de presión acústica en el lugar de trabajo según EN 709 Leq = 80 dB (A). Coeficiente de incertidumbre K = ±1,1 dB (A). Valor de potência acústica LWA = 89,1 dB (A). Coeficiente de incertidumbre K = ± 1,2 dB (A). Vibraciones en las manceras segùn EN 709 y ISO 5349.
  • Seite 33 ΕΙΣΑΓΩΓΗ Περιεχόμενα Αγαπητέ πελάτη, σας ευχαριστούμε για την εμπιστοσύνη που δείξατε στο προϊόν μας. Ελπίζουμε ότι θα μείνετε ευχαριστημένος από το μηχάνημά μας. Οι παρούσες οδηγίες έχουν γραφτεί για να εξασφαλίσουν μία αξιόπιστη λειτουργία του μηχανήματος: γι’ αυτόν το λόγο σας παρακαλούμε να ακολουθήσετε προσεκτικά αυτές τις οδηγίες εργασίας ΕΙΣΑΓΩΓΗ...
  • Seite 34 4. Να μη θέσετε σε λειτουργία το μηχάνημα εάν στέκεστε μπροστά από τη φρέζα, ούτε να είστε κοντά στο μηχάνημα όταν αυτό είναι σε λειτουργία. Τραβώντας το σχοινάκι εκκίνησης του κινητήρα, η φρέζα και το μηχάνημα πρέπει να είναι σε ακινησία. 5.
  • Seite 35: Οδηγιεσ Χρησησ

    ΣΥΝΑΡΜΟΛΟΓΗΣΗ ΚΑΠΑΚΙΟΥ ΦΡΕΖΑΣ: (μόνο για τα μοντέλα RTT3 – Εικ. 10) Τοποθετήστε τις προεκτάσεις της φρέζας (1) στη φρέζα (2) και βιδώστε με τις βίδες (3) και τα παξιμάδια (4). Ξεβιδώστε τις 6 βίδες (5) των εδρών του πλαισίου φρέζας για να είναι λασκαρισμένες οι 6 βίδες που κρατούν το...
  • Seite 36 Ελέγξτε εάν το φίλτρο αέρα είναι καθαρό. Γεμίστε το ρεζερβουάρ με το καύσιμο που αναφέρεται στις προδιαγραφές του κινητήρα χρησιμοποιώντας μια χοάνη με φίλτρο. Μην μετατρέπετε τις στροφές του κινητήρα. Βάλτε τη φουρκέτα (εικ. 2) στη θέση 1 (ελεύθερο) έτσι ώστε ο τροχός να μπορεί ελεύθερα να κινηθεί στον άξονα για να επιτρέπονται οι μετακινήσεις.
  • Seite 37 Φρέζα (εικ. 10) κάθε φορά που χρησιμοποιείται το μονοαξονικό, πρέπει ο χειριστής να ελέγχει εάν οι βίδες και τα παξιμάδια είναι καλά σφιγμένα (μέρος 3 και 9). Άξονας όπισθεν ταχύτητας (εικ. 11) Κάθε 50 ώρες εργασίας, να γρασάρετε από τον γρασαδόρο τον άξονα της όπισθεν ταχύτητας αφαιρώντας το...
  • Seite 38: Przepisy Bezpieczeństwa

    Tłumaczenie oryginalnej instrukcji obsług WPROWADZENIE Spis treści Drogi odbiorco, dziękujemy za okazane zaufanie i zakup naszego wyrobu. Życzymy zadowolenia z użytkowania naszych maszyn. Niniejsza instrukcja obsługi zawiera wszystkie niezbędne informacje dla poprawnej i bezproblemowej obsługi, Wprowadzenie dlatego też zaleca się uważnie przeczytać poniższe PRZEPISY BEZPIECZEŃSTWA i INSTRUKCJE OBSŁUGI, w celu zapewnienia niezawodnej pracy i długiego działania maszyny.
  • Seite 39: Urządzenia Zabezpieczające

    5. Dla większego zabezpieczenia w czasie pracy, należy nosić obuwie ochronne i długie spodnie. Zachować szczególną ostrożność - nóż jest potencjalnym zagrożeniem dla rąk i stóp. 6. Podczas przemieszczania maszyny oraz wszelkiej obsługi konserwacyjnej, czyszczenia, wymiany wyposażenia, silnik powinien być wyłączony.
  • Seite 40: Instrukcja Obsługi

    Montaż pokrywy noży (tylko dla wersji z nożem 60 cm) (Rys. 10) Wstawić poszerzacze (szczegół 1) na końcach noży (2) i dokręcić je wkrętami (3) i nakrętką (4). Odkręcić 6 wkrętów (5) znajdujących się na ramie, przy jednoczesnym zachowaniu lekko poluzowanych wkrętów (6), które mocują wsporniki (7), w celu ułatwienia składania.
  • Seite 41 - Instrukcje silnika: Uważnie przeczytać instrukcje dołączoną do danego silnika. - Sprawdzić czy filtr powietrza jest czysty. - Przy pomocy lejka filtrującego napełnić zbiornik paliwem zalecanym w instrukcji obsługi silnika. - Nie zmieniać kalibracji regulatora prędkości obrotowej silnika i nie dopuścić do przekroczenia dozwolonej prędkości. - Umieścić...
  • Seite 42: Wyposażenie Dodatkowe

    Wał biegu wstecznego (Rys.11) Co 50 godzin pracy wyciągnąć gumowy korek (1) i nasmarować wał biegu wstecznego specjalną smarownicą (szczegół 2). UWAGA! Po zakończeniu czynności należy zatkać otwór korkiem (1), gdyż wewnątrz obudowy znajdują się elementy w ruchu. HAŁAS I DRGANIA Wartość...
  • Seite 43: Normas De Segurança

    Tradução do manual original INTRODUÇÃO Índice Excelentíssimo cliente, você adquiriu um novo equipamento agrícola. Agradecemos a confiança que demonstrou nos nossos produtos e fazemos votos para que a utilização da sua máquina seja sempre agradável. Redigimos estas instruções de uso com a finalidade de garantir um funcionamento da máquina sem problemas Introdução desde o começo.
  • Seite 44: Dispositivo De Segurança

    6. Desligue o motor para transportar, limpar o fazer qualquer manutenção na máquina. 7. Não abandone a máquina com o motor a funcionar. 8. Não pôr o motor a travalhar em espaços tapados onde acumulam-se exalações de carbono 9. Atenção: a gasolina è muito inflamável. Evite encher o depósito quando o motor estiver quente. Encha o depósito em espaços arejados. Não fume e fique longe das chamas.
  • Seite 45 Montagem da dobradiça do cofre fresa (fig. 4) Introduzir os ganchos da dobradiça (part. 1) nas aberturas do cofre, inclinar a dobradiça e parafusar as chapas (2) por os relativos parafusos (3). ATENÇÃO: a dobradiça tem que ser pregada com os ganchos tal como indicado na ampliação da figura 4; ou seja os ganchos têm que entrar do alto na abertura B e sair da abertura A.
  • Seite 46 - Não modificar a afinação do regulador de velocidade de rotação do motor e não levar-o à uma velocidade de mais elevada. - Pôr a forquilla (fig. 2) na posição 1 (livre): a roda gira livre sobre o eixo - è possível deslocar a máquina com o motor apagado. - Dirigir-se às beiras do terreno por fresar - Pôr a forquilla (fig.2) na posição 2 (bloqueio): o motocultivador está...
  • Seite 47: Ruído Aéreo E Vibrações

    RUÍDO AÉREO E VIBRAÇÕES Valor de pressão acústica no posto de trabalho de acordo com EN 709 Leq = 80 dB (A) , coeficiente de incerteza K = ± 1,1 dB(A). Valor medido de potência sonora LWA = 89,1 dB (A), com um coeficiente de incerteza K = ± 1,2 dB (A). Vibrações nas rabiças de acordo com EN 709 e ISO 5349.
  • Seite 48: Bezpečnostní Předpisy

    Překlad originálního návodu ÚVOD Obsah Vážený zákazníku, děkujeme Vám za důvěru a zájem o náš výrobek a přejeme Vám příjemné a bezpečné použití tohoto zařízení. Tento návod obsahuje veškeré informace nezbytné pro správné a bezproblémové použití, proto doporučujeme Úvod pozorně si přečíst dále uvedené BEZPEČNOSTNÍ PŘEDPISY a NÁVOD K POUŽITÍ, pro zaručení bezpečného použití...
  • Seite 49 7 Neopouštějte zařízení před vypnutím motoru. 8 Nespouštějte zařízení v uzavřených prostorech, kde se mohou hromadit zplodiny obsahující oxid uhličitý. 9 UPOZORNĚNÍ Benzín je vysoce hořlavý: Neplňte benzínem v uzavřených prostorech ani s nastartovaným motorem, nekuřte a dávejte pozor na unikání paliva z nádrže. V případě úniku se nepokoušejte nastartovat motor, ale oddalte zařízení ze zašpiněného prostoru a vyhněte se zápalným zdrojům, dokud se benzínové...
  • Seite 50 SEŘÍZENÍ Seřízení napínáku řemenu řazení převodových stupňů vpřed a vzad (Obr.5) Pozor, kola se musí začít otáčet pouze v okamžiku, kdy se ovládací páka dostala do druhé poloviny své dráhy. Po celkovém zatažení páky (pracovní poloha) se vyrovnávací pružina napínáku řemenu (detail 1 jízda vpřed) a (detail 2 jízda vzad) musí...
  • Seite 51: Hlučnost A Vibrace

    (detail 1). Pokud je motor studený, spusťte startovací zařízení na karburátoru, uchopte startovací rukojeť a silně s ní otočte. Po spuštění motoru, po prvních zážezích uveďte startér do klidové polohy. - Uchopte rukojeť, zařaďte rychlost (pouze pro verzi 2+2 převodové stupně) pol. A pomalý chod, pol. B rychlý chod. Na začátku doporučujeme pracovat v poloze 1, pomalý...
  • Seite 52 PORUCHY Před jakýmkoliv úkonem vždy odpojte koncovku svíčky ! Porucha Řešení Motor nelze nastartovat Chybí palivo, doplňte jej. Zkontrolujte, zda je plyn nastaven do polohy START. Zkontrolujte, zda je koncovka svíčky dobře nasazena. Zkontrolujte stav svíčky a případně ji vyměňte. Zkontrolujte, zda je kohout paliva otevřený...
  • Seite 53: Beskrivelse Af Kommandoer

    Original brugsanvisning INTRODUKTION Kære kunde, Vi takker for den tillid, som du har vist vores produkt. Vi håber, du vil få stor glæde af maskinen Indhold og den sikre brug. Denne brugsanvisning indeholder alle oplysninger, som er nødvendige for en sikker og problemfri brug af fræseren.
  • Seite 54 6 Når maskinen transporteres, og under al vedligeholdelse, rengøring og udskiftning af komponenter, skal motoren være slukket. 7 Forlad aldrig maskinen uden først at have slukket motoren. 8 Start aldrig maskinen i lukkede omgivelser, hvor udstødningsgas kan ophobe sig. 9 ADVARSEL Benzin er særdeles brandfarligt! Brug særligt beregnede beholdere til opbevaringen. Fyld aldrig benzin på maskinen i lukkede omgivelser eller med tændt motor.
  • Seite 55 JUSTERINGER Regulering af remspænding for forlæns og baglæns kørsel (Fig. 5) Forsigtig! Hjulene må første begynde at dreje, når håndgrebet er trukket mere end halvvejs i bund. Når håndgrebet er trukket helt i bund (arbejdsposition), skal spændefjederen på remspændingen (del 1: forlæns kørsel) og (del 2: baglæns kørsel) strækkes ca.
  • Seite 56: Ekstraudstyr

    - Regulér styrets højde til den, som passer bedst til arbejdet, som skal udføres. - Start af motoren (Fig. 8) Luk benzinhanen op (på motorer, som er udstyret med benzinhane), speederhåndtaget på styret til midterposition (del 1); hvis motoren er kold bruges startanordningen på karburatoren: Grib fat i starthåndtaget og træk i snoren med en hurtig og 'beslutsom' bevægelse. Når motoren er startet bringes starteren tilbage i positionen efter de første motorlyde fra tændt motor.
  • Seite 57 DEFEKTER Inden du udfører noget som helst indgreb skal tændrørshætten fjernes Fejl Afhjælpning Motoren starter ikke Maskinen er løbet tør for benzin, fyld op. Kontrollér, at speederen er placeret i positionen START. Kontrollér, at tændrørshætten sidder korrekt. Kontrollér tændrørets tilstand, og udskift eventuelt. Kontrollér, at benzinhanen er åben (kun for motormodeller med benzinhane).

Inhaltsverzeichnis