Medela Harmony Gebrauchsanweisung
Vorschau ausblenden
Andere Handbücher für Harmony:
- Gebrauchsanweisung (40 Seiten) ,
- Gebrauchsanweisung (72 Seiten)
Kapitel
Inhaltsverzeichnis
Fehlerbehebung

Verwandte Anleitungen für Medela Harmony


Inhaltszusammenfassung für Medela Harmony
- Seite 1 Harmony ™ Harmony Pump & Feed Set ™ EN Instructions for use | DE Gebrauchsanweisung FR Mode d’emploi | IT Istruzioni per l’uso NL Gebruiksaanwijzing | ID Petunjuk penggunaan...
- Seite 2 » Grazie per aver scelto il tiralatte Harmony. Il latte materno è la scelta naturale per il tuo bambino, ma in alcuni casi non è possibile allattare al seno. Da oltre 50 anni Medela è impegnata ad aiutare madri e bambini che si trovano in questa situazione.
- Seite 3 4–31 32–59 60–87 88–115 116–143 144–170...
-
Seite 4: Inhaltsverzeichnis
1. Intended Use / Population – Contraindication 2. Meaning of symbols 3. Important safety information 4. Product description 4.1 Harmony - light, convenient, clever 4.2 Product parts 5. Cleaning 5.1 Before using for the first time and after every use 5.2 Before using for the first time and once a day... -
Seite 5: Intended Use / Population - Contraindication
Women are often delighted to learn that a breastpump can be used as a supplement to breastfeeding and that some pumps are designed to mimic the sucking of a nursing baby. Contraindications There are no known contraindications for the Harmony breastpump. -
Seite 6: Meaning Of Symbols
2. Meaning of symbols The warning symbol identifies all instructions that are important for safety. Failure to follow these instructions can lead to injury or damage to the Harmony breastpump! There are several warning symbols. Each symbol is used together with a specific word. -
Seite 7: Symbols On The Device
This symbol indicates to follow the instructions for use. This symbol indicates the manufacturer. This CE symbol indicates the compliance of the Harmony breastpump with the essential requirements of the Council Directive 93/42/EEC of 14 June 1993 concerning medical devices. -
Seite 8: Important Safety Information
Failure to follow the safety information on these pages can lead to danger. Device The Harmony breastpump is not heat-resistant: keep away from radiators and open flames. Do not expose the Harmony breastpump to direct sunlight. Check the breastpump’s components for wear or damage. - Seite 9 Use the Harmony breastpump only for its intended use as described in this manual. Supervision is necessary when you use the Harmony breastpump in the vicinity of children. Keep all parts that are not in use out of children’s reach.
-
Seite 10: Product Description
Or if you want to involve your partner in breastfeeding. You can also use Harmony in addition to a rental pump. Harmony can also help to overcome health problems, such as sore, flat or inverted nipples. -
Seite 11: Product Parts
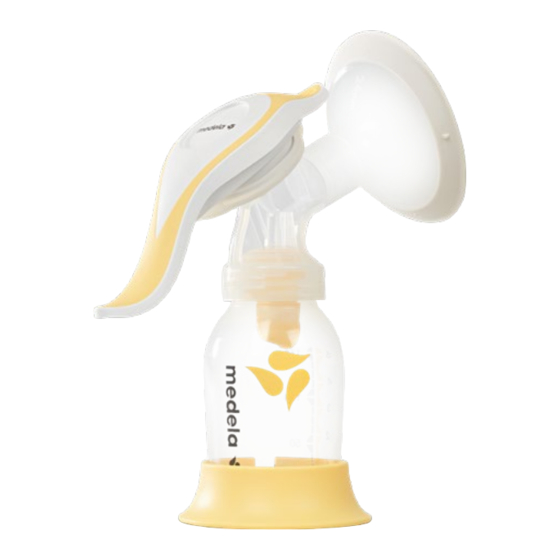
2 x valve 1 x valve head membrane 1 x multi-lid 1 x Calma Solitaire 1 x bottle Included in the Harmony Pump & Feed Set, but not in Harmony 1 x bottle stand * for other breastshield sizes, see chapter 12... -
Seite 12: Cleaning
Take care not to damage parts its individual parts. of the pump set during cleaning. I Some parts of the Harmony pump set are very small (e.g. the O-ring or the valve membrane). Check that no parts are missing when you reassemble the pump set after cleaning. - Seite 13 Rinse all parts with cold, clear Clean all parts with plenty water (approx. 20 ° C). of warm soapy water (approx. Check the parts for damage 30 ° C). and throw away at first signs of damage or weakness. Dry with a clean cloth or If you clean the individual parts leave to dry on a clean cloth.
-
Seite 14: Before Using For The First Time And Once A Day
5. Cleaning 5.2 Before using for the Caution first time and once a day I Do not drop the parts of the pump set into boiling water. I To avoid contamination, do not touch the inside of the parts after sterilisation. - Seite 15 Cover all parts with water Use a Quick Clean Microwave and boil for five minutes. Bag* in accordance with the instructions. * More information at www.medela.com...
-
Seite 16: Cleaning - Summary
5. Cleaning 5.3 Cleaning – summary Before using for the first time and after every use Rinse with cold, clear water ( approx. 20 ° C ), then clean with plenty of warm soapy water ( approx. 30 ° C ) and √... -
Seite 18: Preparing For Pumping
Note l Only use Medela original accessories. I Check that the (white) O-ring is Insert the stem (with the still placed around the stem: O-ring) into the hole on the upper side of the diaphragm. - Seite 19 √ Make sure the oval shaped Place the diagraphm into the base of the stem has the pump handle. Press down right position in the dia phragm. firmly around the entire edge to ensure a proper seal. Place the valve membrane in a Push the valve head onto the horizontal position on the valve inner ring of the connector.
-
Seite 20: Placing The Breastshield
6. Preparing for pumping 6.2 continued Screw the bottle onto the Insert the stem of the handle connector. assembly into the opening on top of the connector. Push until the stem locks into place. 6.3 Placing the breastshield Wipe your breast with a warm Hold the breastshield onto cloth (do not use alcohol). - Seite 21 If the answer to any of these questions is “No”, or if you experience problems or pain during expression, your breastshield may not be the right size. Medela offers five different sizes of the PersonalFit™ breastshield. Consult your breastfeeding and...
-
Seite 22: Expression
7. Expression Caution l Wash your hands thoroughly (for approx. one minute) with soap and water before you touch your breast and the pump parts. l Contact your midwife or breast- feeding and lactation consultant if you can express only minimal or no milk or if expression is painful. - Seite 23 Once your milk starts to flow, switch Stop pumping when you feel that to expression: press down the lower, the milk does not flow anymore or longer part of the handle. when the bottle is full. Use the By doing so, you build up a vacuum stand to prevent the bottle from that facilitates the milk flow.
-
Seite 24: Storing And Thawing Breastmilk
Alternatively, you can hold the bottle or “Pump & Save” bag under warm water (max. 37 ° C). l Gently swirl the bottle or “Pump & Save” bag to mix any fat that has separated. Avoid shaking or stirring the milk. * More information at www.medela.com... -
Seite 25: Feeding Breastmilk
More milk in breast. Deve lo ped for a great breast- less time feeding experience. * Calma is included in the Harmony Pump & Feed Set only. It is also available separately; please refer to chapter 12. -
Seite 26: Troubleshooting
10. Troubleshooting Problem Solution I Make sure the yellow valve head and the white membrane are clean and not damaged. I Make sure the membrane lies flat on the valve head. If there is low I Make sure the valve head is positioned sideways on the connector. or no suction I Make sure the components of the handle are assembled correctly. -
Seite 27: Disposal
11. Disposal The Harmony breastpump is made of plastics. You must dispose of it in accordance with local regulations. -
Seite 28: Complete Care During Breastfeeding Time
12. Complete care during breastfeeding time The following product variants, spare parts, consumables and accessories for the Harmony breastpump are available from Medela distribution partners. You can order a product by specifying the product name or the corresponding product (article) number. -
Seite 29: Accessories
PersonalFit Breastshield XXL ( 36 mm ) ™ 800.0796 Breastmilk Bottles 150 ml – 3 pcs. 200.1659 Breastmilk Bottles 250 ml – 2 pcs. 008.0315 Pump & Save™ Breastmilk Bags 008.0139 Calma Solitaire Other Medela products are available at www.medela.com... - Seite 32 Inhaltsverzeichnis 1. Verwendungszweck/Zielgruppe - Kontraindikationen 2. Bedeutung der Symbole 3. Wichtige Sicherheitshinweise 4. Produktbeschreibung 4.1 Harmony – leicht, praktisch, clever 4.2 Bestandteile 5. Reinigung 5.1 Vor Erstgebrauch und nach jedem Gebrauch 5.2 Vor Erstgebrauch und einmal täglich 5.3 Reinigung – Zusammenfassung 6.
-
Seite 33: Verwendungszweck/Zielgruppe - Kontraindikationen
Gründen von ihrem Baby getrennt sind. Sie sind häufig erfreut, wenn sie erfahren, dass Milchpumpen als Ergänzung zum Stillen an der Brust eingesetzt werden können und dass die Funktionsweise gewisser Pumpen das natürliche Saugen des Babys imitiert. Kontraindikationen Für die Milchpumpe Harmony gibt es keine bekannten Kontraindikationen. -
Seite 34: Bedeutung Der Symbole
2. Bedeutung der Symbole Das Warnsymbol kennzeichnet alle für die Sicherheit wichtigen Anweisungen. Missachtung kann zu Verletzungen oder Schäden an der Milchpumpe Harmony führen! Es gibt verschiedene Warnsymbole, wobei jedes Symbol zusammen mit einem spezifischen Wort verwendet wird. Die Kombinationen aus Symbol und Wort bedeuten: Vorsicht Missachtung von Anweisungen dieser Art kann zu (geringfügigen) -
Seite 35: Symbole Auf Dem Gerät
Identifikationsnummer, an. Dieses Symbol zeigt an, dass die Gebrauchsanweisung zu befolgen ist. Dieses Symbol weist auf den Hersteller hin. Dieses CE-Symbol zeigt an, dass die Milchpumpe Harmony der Richtlinie 93/42/EWG des Rates vom 14. Juni 1993 über Medizinprodukte entspricht. -
Seite 36: Wichtige Sicherheitshinweise
Bei Missachtung der Sicherheitshinweise können Gefährdungen durch das Gerät entstehen. Gerät Die Milchpumpe Harmony ist nicht hitzebeständig: Halten Sie das Gerät von Heizkörpern und offenem Feuer fern. Die Milchpumpe Harmony nicht direktem Sonnenlicht aussetzen. Die Teile der Milchpumpe auf Abnutzung oder Beschädigung überprüfen. -
Seite 37: Verwendung
Die Milchpumpe Harmony ausschließlich für den in dieser Gebrauchsanweisung beschriebenen Verwendungszweck benutzen. Bei Verwendung der Milchpumpe Harmony in der Nähe von Kindern ist eine entsprechende Beaufsichtigung notwendig. Einzelteile, die nicht unmittelbar verwendet werden, dürfen nicht in die Hände von Kindern gelangen. -
Seite 38: Produktbeschreibung
4. Produktbeschreibung 4.1 Harmony – leicht, praktisch, clever Mit dem Kauf der Milchpumpe Harmony haben Sie eine gute Wahl getroffen: Harmony ist die erste Hand-Milchpumpe mit der 2-Phase Expression Technologie, die den natürlichen Saugrhythmus des Babys nachahmt. Der ergonomische Griff der Pumpe ermöglicht Ihnen, zwischen kurzen Bewegungen zur Stimulation und längeren zum Abpumpen zu wechseln. -
Seite 39: Bestandteile
1 x Membrane/Stiel mit O-Ring 2 x Ventil- 1 x Ventilkopf membrane 1 x Multi-Deckel 1 x Flasche 1 x Calma Solitaire eingeschlossen im Harmony Pump & Feed Set, nicht aber in Harmony 1 x Standfuß * Weitere Brusthaubengrößen siehe Kapitel 12... -
Seite 40: Reinigung
Einzelteile zerlegen. (wie Zahnstochern). I Teile des Pumpsets bei Reinigung nicht beschädigen. I Einige Teile des Harmony Pump- sets sind sehr klein (z. B. der O-Ring oder die Ventilmembrane). Überprüfen Sie, dass kein Teil fehlt, wenn Sie das Pumpset nach der Reinigung wieder zusammensetzen. - Seite 41 Alle Teile mit kaltem, sauberem Alle Teile mit viel warmem Wasser (circa 20 °C) abspülen. Seifenwasser (circa 30 °C) Die Teile auf Schäden prüfen reinigen. und bei ersten Anzeichen von Schäden oder Schwachstellen umgehend entsorgen. oder Mit einem sauberen Tuch abtrocknen Einzelteile im oberen Gitter oder auf einem sauberen Tuch oder im Besteckfach des...
-
Seite 42: Vor Erstgebrauch Und Einmal Täglich
5. Reinigung 5.2 Vor Erstgebrauch und Vorsicht einmal täglich I Lassen Sie die Teile des Pumpsets nicht in kochendes Wasser fallen, Spritzgefahr! I Berühren Sie die Innenseite der Teile nach dem Sterilisieren nicht, um Verunreinigung zu vermeiden. l Alle Teile, die mit Brust und Milch in Berührung kommen, sofort nach Gebrauch auseinanderneh- men und waschen, um Eintrock-... - Seite 43 Alle Teile mit Wasser bedeckt Verwenden Sie den Quick fünf Minuten lang auskochen. Clean-Mikrowellenbeutel* gemäß Gebrauchsanweisung. * Weitere Informationen finden Sie unter www.medela.de...
-
Seite 44: Reinigung - Zusammenfassung
5. Reinigung 5.3 Reinigung – Zusammenfassung Vor Erstgebrauch und nach jedem Gebrauch Mit kaltem, sauberem Wasser (circa 20 °C) abspülen, dann mit viel warmem Seifenwasser (circa 30 °C) reinigen √ √ √ √ √ √ √ √ und mit kaltem, sauberem Wasser 10 –15 Sekunden nachspülen. -
Seite 46: Vorbereitung Des Abpumpens
(ca. eine Minute) mit Seife und Wasser, bevor Sie Ihre Brust und die Pumpenteile berühren. Hinweis I Nur Originalzubehör von Medela verwenden. I Überprüfen Sie, dass sich der Stecken Sie den Stiel (mit dem (weiße) O-Ring noch auf dem Stiel... - Seite 47 √ Stellen Sie sicher, dass die Setzen Sie die Membrane in ovale Basis des Stiels richtig in den Pumpengriff ein. Drücken die Membrane eingesetzt ist. Sie den Rand rundum fest nach unten, um ein vollständiges Abdichten zu gewährleisten. Legen Sie die Ventilmembrane horizontal Drücken Sie den Ventilkopf auf den auf den Ventilkopf.
-
Seite 48: Die Brusthaube Anlegen
6. Vorbereitung des Abpumpens 6.2 Fortsetzung Flasche auf das Führen Sie den Stiel des Handgriffs Verbindungsstück in die Öffnung auf der Oberseite des schrauben. Verbindungsstücks ein. Drücken Sie, bis der Stiel einrastet. 6.3 Die Brusthaube anlegen Wischen Sie Ihre Brust mit einem Brusthaube mit Daumen und warmen Tuch ab (verwenden Sie kei- Zeigefinger an Brust halten. - Seite 49 Größe. Wenn Sie eine dieser Fragen mit „Nein“ beantworten mussten oder wenn das Abpumpen Probleme oder Schmerzen bereitet, hat Ihre Brusthaube möglicherweise nicht die richtige Größe. Medela bietet fünf unterschiedliche PersonalFit™-Brusthaubengrößen an. Erkundigen Sie sich bei Ihrer Still- und Laktationsberaterin oder Hebamme.
-
Seite 50: Abpumpen
7. Abpumpen Vorsicht I Waschen Sie die Hände gründlich (ca. eine Minute) mit Seife und Wasser, bevor Sie Ihre Brust und die Pumpenteile berühren. I Kontaktieren Sie Ihre Still- und Laktationsberaterin oder Hebam- me, wenn Sie keine oder nur we- nig Milch abpumpen können oder das Abpumpen schmerzhaft ist. - Seite 51 Sobald die Milch zu fließen beginnt, Beenden Sie das Abpumpen, wenn wechseln Sie zum Abpumpen: Drücken Sie Sie spüren, dass keine Milch mehr fließt, nun den unteren, längeren Teil des Griffs. oder wenn die Flasche voll ist. Dadurch bauen Sie ein Vakuum auf, das Verwenden Sie den Standfuß, um ein den Milchfluss fördert.
-
Seite 52: Aufbewahren Und Auftauen Der Muttermilch
Kühlschrank stellen oder unter warmes Wasser halten (max. 37 ° C). I Schwenken Sie die Milchflasche oder den „Pump & Save“ Beutel sanft, um abgesetztes Fett mit der Milch zu vermischen. Schütteln oder rühren Sie die Milch nicht. * Weitere Informationen finden Sie unter www.medela.de... -
Seite 53: Füttern Von Muttermilch
Brust Mehr Milch in kürzerer Zeit erlernte Saugverhalten beibehalten. Speziell entwickelt für eine glückliche Stillzeit. * Calma ist nur im Harmony Pump & Feed Set eingeschlossen. Der Sauger ist auch einzeln erhältlich; mehr Informationen dazu finden Sie in Kapitel 12. -
Seite 54: Fehlerbehebung
10. Fehlerbehebung Problem Lösung I Stellen Sie sicher, dass der gelbe Ventilkopf und die weiße Membrane sauber und unbeschädigt sind. I Stellen Sie sicher, dass die Membrane flach auf dem Ventilkopf liegt. Die Pumpe saugt I Stellen Sie sicher, dass der Ventilkopf seitwärts auf dem zu schwach oder Verbindungsstück positioniert ist. -
Seite 55: Entsorgung
11. Entsorgung Die Milchpumpe Harmony besteht aus Kunststoff. Entsorgen Sie sie gemäß den örtlichen Vorschriften. -
Seite 56: Rundum Versorgt In Der Stillzeit
12. Rundum versorgt in der Stillzeit Die folgenden Produktvarianten, Ersatzteile, Verbrauchsartikel und Zubehörteile können über Medela Verkaufsstellen bezogen werden. Bei der Bestellung eines Produkts geben Sie bitte den Namen oder die Artikelnummer des Produkts an. Produktvarianten Artikelnummer Produkt 005.2052 Harmony™ DE/FR/IT 005.2062... - Seite 57 PersonalFit™ Brusthaube XL ( 30 mm ) SHIELD SIZES 008.0331 PersonalFit™ Brusthaube XXL ( 36 mm ) 800.0796 Muttermilchflaschen 150 ml – 3 Stk. 200.1659 Muttermilchflaschen 250 ml – 2 Stk. 008.0315 Pump & Save™ Muttermilchbeutel 008.0138 Calma Solitaire Weitere Medela Produkte finden Sie unter www.medela.de.
- Seite 58 Pflege & Schutz Abpumpen der Brust Evidenzbasierte Forschung Fortbildung Erfahrung Service Innovation Fachpersonal Füttern Auffangen & Aufbewahren Transportieren & Reinigen...
- Seite 60 1. Utilisation/Public cible – Contre-indications 2. Signification des symboles 3. Informations de sécurité importantes 4. Description du produit 4.1 Harmony – Léger, pratique, astucieux. 4.2 Pièces du produit 5. Nettoyage 5.1 Avant la première utilisation et après chaque utilisation 5.2 Avant la première utilisation et une fois par jour 5.3 Nettoyage –...
-
Seite 61: Utilisation/Public Cible - Contre-Indications
Elles sont souvent ravies d’apprendre qu’un tire-lait peut être utilisé en tant que complément à l’allaitement maternel et que certains sont même conçus pour imiter la succion d’un bébé au sein. Contre-indications Il n’y a aucune contre-indication connue au tire-lait Harmony. -
Seite 62: Signification Des Symboles
2. Signification des symboles Les symboles d’avertissement réfèrent aux instructions importantes pour la sécurité. Le non-respect de ces instructions peut provoquer des blessures ou endommager le tire-lait ! Il existe plusieurs symboles d’avertissement. Chacun d’entre-eux est associé à un terme spécifique. Voici l’explication des symboles : Avertissement Le non-respect des instructions de cette catégorie peut entraîner des blessures (mineures) ou une contamination/prolifération bactérienne. -
Seite 63: Symboles Présents Sur L'appareil
Ce symbole indique qu’il est impératif de respecter les instructions d’utilisation. Ce symbole fait référence au fabricant. Ce symbole CE indique la conformité du tire-lait Harmony aux exigences essentielles de la directive du Conseil 93/42/CEE du 14 juin 1993 relative aux dispositifs médicaux. -
Seite 64: Informations De Sécurité Importantes
Le tire-lait Harmony n’est pas thermorésistant : le tenir éloigné des radiateurs et des flammes. Ne pas exposer le tire-lait Harmony à la lumière directe du soleil. Contrôler les différentes parties du tire-lait et vérifier qu’il ne présente pas de signes d’usure ou de dommages. Ne jamais utiliser un produit défectueux. - Seite 65 Utilisation N’utilisez le tire-lait Harmony que pour l’usage auquel il est destiné, tel que décrit dans ce manuel. Une surveillance est nécessaire lorsque vous utilisez le tire-lait Harmony à proximité d’enfants. Conservez toutes les pièces inutilisées hors de portée des enfants.
-
Seite 66: Description Du Produit
Vous pouvez ainsi exprimer davantage de lait en moins de temps. Le tire-lait Harmony est idéal pour une utilisation occasionnelle. Par exemple, si vous devez vous séparer de votre bébé pendant de courtes périodes (pratique d’un sport, sortie, etc.). -
Seite 67: Pièces Du Produit
2x membranes 1x valve 1x couvercle multifonction 1 x Calma seule 1x biberon Compris dans le set Harmony Pump & Feed Set, mais pas dans Harmony 1x support de biberon * pour d’autres tailles de téterelle, reportez-vous au chapitre 12... -
Seite 68: Nettoyage
Veillez à ne pas endommager les pièce du tire-lait. pièces du tire-lait lors du nettoyage. I Certaines pièces du tire-lait Harmony sont très petites (par ex. la membrane ou le joint torique). Vérifiez qu’aucune pièce ne manque lorsque vous assemblez le tire-lait après nettoyage. - Seite 69 Rincez toutes les pièces à l’eau claire Nettoyez toutes les pièces et froide (plus ou moins 20 °C). à l’eau savonneuse et Vérifiez que les pièces ne présentent chaude (environ 30 °C). pas de dégradation ou de dysfonctionnement, remplacez-les aux premiers signes. Essuyez les pièces avec un Si vous nettoyez les différentes chiffon propre ou laissez-les...
-
Seite 70: Avant La Première Utilisation Et Une Fois Par Jour
5. Nettoyage 5.2 Avant la première utilisa- Avertissement tion et une fois par jour I Ne plongez pas les pièces du tire-lait dans l’eau bouillante. I Pour éviter toute contamination, ne touchez pas l’intérieur des pièces après stérilisation. l Démontez et nettoyez toutes les pièces entrant en contact avec la poitrine et le lait maternel immé- diatement après utilisation afin... - Seite 71 Recouvrez toutes les pièces Utilisez un sachet pour d’eau et portez à ébullition micro-ondes Quick pendant 5 minutes. Clean* conformément aux instructions. * Pour plus d’informations, consultez le site www.medela.com...
-
Seite 72: Nettoyage - Résumé
5. Nettoyage 5.3 Nettoyage – résumé Avant la première utilisation et après chaque utilisation Rincer à l’eau claire et froide (environ 20 °C), puis nettoyer abondamment à l’eau chaude et savonneuse (environ √ √ √ √ √ √ √ √ 30 °C). Enfin, rincer à l’eau claire et froide pendant 10 à... -
Seite 74: Préparation Pour La Séance D'expression
Remarque l N’utilisez que des accessoires Medela d’origine. I Vérifiez que le joint torique (blanc) Insérez la tige (avec le joint est toujours placé autour de la tige : torique) dans l’orifice situé sur la face supérieure du diaphragme. - Seite 75 √ Assurez-vous que la base ovale de Positionner le diaphragme sur la la tige est correctement positionnée poignée du tire-lait. Appuyez dans le diaphragme. fermement sur les bords pour assurer une bonne étanchéité. Placez la membrane à l’horizontal sur la valve. Insérer la valve munie de la membrane Appuyez fermement sur la partie saillante de sur la partie inférieure du connecteur.
-
Seite 76: Positionnement De La Téterelle
6. Préparation pour la séance d’expression 6.2 suite Vissez le biberon sur Une fois la poignée assem- le connecteur. blée, insérez la tige de celle-ci dans l’orifice situé au dessus du connecteur. Poussez jusqu’à ce que la tige soit bien enclenchée. 6.3 Positionnement de la téterelle Pour un bonne étanchéité... - Seite 77 Si la réponse à l’une de ces questions est « Non », si vous rencontrez des problèmes ou ressentez une douleur pendant l’expression, votre téterelle n’est peut-être pas à la bonne taille. Medela propose des téterelles PersonalFit™ en 5 tailles différentes. Contactez votre professionnel de l’allaitement (consultant(e) en lactation, sage-femme)
-
Seite 78: Expression
7. Expression Avertissement l Lavez-vous soigneusement les mains (pendant environ une minute) avec de l’eau et du savon avant de toucher votre sein et les pièces du tire-lait. l Contactez un professionnel des l’allaitement, par exemple une sage-femme ou un(e) consultant(e) en lactation, si vous n’exprimez Démarrez l’expression par la phase de que très peu de lait ou pas du... - Seite 79 Lorsque le lait commence à s’écouler, Arrêtez l’expression lorsque vous passez en phase d’expression : sentez que le lait ne s’écoule plus appuyez sur la partie inférieure et ou lorsque le biberon est plein. longue de la poignée. Utilisez le support de biberon pour Vous créez ainsi un vide facilitant l’écou- éviter que celui-ci ne se renverse.
-
Seite 80: Conservation Et Décongélation Du Lait Maternel
Vous pouvez également tenir le biberon ou le sachet « Pump & Save » sous l’eau chaude (max. 37 °C). l Secouez délicatement le biberon ou le sachet « Pump & Save » afin d’homogénéiser les corps gras. Évitez de d’agiter brutalement le lait. * Pour plus d’informations, consultez le site www.medela.com... -
Seite 81: Alimentation Au Lait Maternel
Conçue pour une belle expérience d’allaitement. * Calma est comprise uniquement dans Harmony Pump & Feed Set. L‘article est également disponible séparé- ment. Cf. chapitre 12. -
Seite 82: Résolution Des Problèmes
10. Résolution des problèmes Problème Solution I Assurez-vous que la valve jaune et la membrane blanche soient propres et ne soient pas endommagées. I Vérifiez que la membrane soit positionnée à plat sur la valve. S’il n’y a pas ou I Assurez-vous que la valve soit positionnée latéralement sur le connecteur. -
Seite 83: Mise Au Rebut
11. Mise au rebut Le tire-lait Harmony est composé de matériaux plastiques. Vous devez le jeter conformément aux réglementations locales. -
Seite 84: Une Gamme Complète Pour L'allaitement Maternel
12. Une gamme complète pour l’allaitement maternel Les variantes de produit, les pièces de rechange, les consommables et les accessoires indiqués ci-dessous et destinés au tire-lait Harmony sont disponibles chez les distributeurs Medela. Vous pouvez commander un produit en précisant son nom ou le numéro de produit (d’article) correspondant. - Seite 85 Biberon pour lait maternel 150 ml (3 pc). 200.1659 Biberon pour lait maternel 250 ml (2 pc). 008.0315 Sachets pour lait maternel Pump & Save™ 008.0138 Calma Seule DE/FR 008.0139 Calma Seule EN/FR 008.0140 Calma Seule NL/FR Les autres produits Medela sont disponibles sur www.medela.com.
- Seite 86 Soigner les mamelons Exprimer le lait Recherche factuelle Formation Expertise Service Innovation Professionnels Reccueillir Nourrir bébé le lait Transporter et nettoyer...
- Seite 88 1. Uso previsto/Popolazione - Controindicazioni 2. Significato dei simboli 3. Importanti informazioni di sicurezza 4. Descrizione del prodotto 4.1 Harmony: leggero, pratico, intelligente 4.2 Componenti del prodotto 5. Pulizia 5.1 Prima del primo impiego e dopo ciascun utilizzo 5.2 Prima del primo impiego e una volta al giorno 5.3 Pulizia - riepilogo...
-
Seite 89: Uso Previsto/Popolazione - Controindicazioni
Le madri sono spesso liete di sapere che il tiralatte può essere usato come integrazione all’allattamento al seno e che alcuni modelli sono studiati per imitare la suzione del bambino. Controindicazioni Non ci sono controindicazioni note per il tiralatte Harmony. -
Seite 90: Significato Dei Simboli
Il simbolo di avvertenza identifica tutte le istruzioni importanti per la sicurezza. La mancata osservanza di tali istruzioni può comportare lesioni alle persone o danni al tiralatte Harmony! Sono presenti diversi simboli di avvertenza. Ogni simbolo viene utilizzato insieme a uno specifico termine. - Seite 91 Questo simbolo indica il codice univoco GSI Global Trade Item Number (GTIN). Questo simbolo indica di seguire le istruzioni per l’uso. Questo simbolo indica il produttore. Questo simbolo CE indica la conformità del tiralatte Harmony ai requisiti fondamentali della Direttiva del Consiglio 93/42/CEE del 14 giugno 1993 relativa ai dispositivi medici.
-
Seite 92: Importanti Informazioni Di Sicurezza
La mancata osservanza delle informazioni di sicurezza presenti in queste pagine può comportare situazioni di pericolo. Dispositivo Il tiralatte Harmony non è resistente al calore: tenere lontano da radiatori e fiamme libere. Non esporre il tiralatte Harmony alla luce diretta del sole. - Seite 93 Usare il tiralatte Harmony solo per l’uso previsto, come descritto nel presente manuale. Prestare particolare attenzione quando si utilizza il tiralatte Harmony in prossimità di bambini. Mantenere tutti i componenti non utilizzati fuori dalla portata dei bambini. In caso di problemi o se si avverte dolore, consultare il proprio consulente per l’allattamento o il medico.
-
Seite 94: Descrizione Del Prodotto
O se si desidera coinvolgere il partner nell’allattamento. Harmony è utilizzabile anche in aggiunta a un tiralatte a noleggio. L’utilizzo di Harmony è indicato in caso di problemi di salute, come capezzoli screpolati, appiattiti o rientrati. -
Seite 95: Componenti Del Prodotto
1 testa della della valvola valvola 1 coperchio multifunzione 1 bottiglia 1 Calma Solitaire Incluso in Harmony Pump & Feed Set, ma non in Harmony 1 supporto per bottiglia * per altre taglie di coppe per il seno consultare il capitolo 12... -
Seite 96: Pulizia
I Alcuni componenti del set di pompaggio Harmony sono di dimensioni molto piccole (ad esempio la guarnizione O-ring o la mem- brana della valvola). Verificare che non manchi alcun componente durante il montaggio del set di pompaggio dopo la pulizia. - Seite 97 Risciacquare tutti i componenti con Pulire tutti i componenti con acqua pulita e fredda (20 °C circa). abbondante acqua saponata Verificare la presenza di eventuali tiepida (30 °C circa). danni ai singoli componenti e gettare ai primi segni di danneggiamento o di usura. oppure Asciugare con un panno pulito Se i singoli componenti del set di...
-
Seite 98: Prima Del Primo Impiego E Una Volta Al Giorno
5. Pulizia 5.2 Prima del primo impiego Attenzione e una volta al giorno I Non immergere in acqua bollente i componenti del set di pompaggio. I Per evitare contaminazioni, non toccare la parte interna dei com- ponenti dopo la sterilizzazione. l Separare e lavare tutti i com- ponenti che entrano in contatto con il seno o con il latte materno... - Seite 99 Coprire tutti i componenti con Utilizzare una sacca per acqua e lasciare bollire per microonde Quick Clean* cinque minuti. secondo le istruzioni. * Per ulteriori informazioni visitare il sito www.medela.com...
-
Seite 100: Pulizia - Riepilogo
5. Pulizia 5.3 Pulizia - riepilogo Prima del primo impiego e dopo ciascun utilizzo Risciacquare con acqua pulita e fredda (20 °C circa), poi pulire con abbondante acqua saponata tiepida (30 °C circa) √ √ √ √ √ √ √ √... -
Seite 102: Preparazione All'estrazione
Nota l Utilizzare esclusivamente accessori originali Medela. Inserire il supporto (con la guarnizione I Verificare che la guarnizione O-ring) nel foro sul lato superiore O-ring (bianca) si trovi posizionata del diaframma. - Seite 103 √ Assicurarsi che la base a Posizionare il diaframma forma ovale del supporto sia nell’impugnatura del tiralatte. correttamente posizionata nel Esercitare una ferma pressione diaframma. lungo tutto il bordo per garan- tire una tenuta adeguata. Posizionare la membrana della valvola in Spingere la testa della valvola posizione orizzontale sulla testa della valvola.
-
Seite 104: Posizionamento Della Coppa Per Il Seno
6. Preparazione all’estrazione 6.2 continua Avvitare la bottiglia Inserire il supporto del gruppo al connettore. dell’impugnatura nell’apertura superiore del connettore. Spingere finché il supporto scatta in posizione. 6.3 Posizionamento della coppa per il seno Pulire il seno con un panno Trattenere la coppa sul caldo (non usare alcool). - Seite 105 Se la risposta a una qualunque di tali domande è „No“ o in caso di problemi o di sensazioni di dolore durante l’estrazione, la misura della coppa per il seno potrebbe non essere quella corretta. Medela offre coppe per il seno PersonalFit™ di cinque taglie diverse. Chiedere consiglio al consulente per l’allattamento o a un’ostetrica di fiducia.
-
Seite 106: Estrazione
7. Estrazione Attenzione l Lavarsi accuratamente le mani (per circa un minuto) con acqua e sapone prima di toccare il seno e i componenti del tiralatte. l Consultare il proprio consulente per l’allattamento o l’ostetrica se la quantità di latte estratta è minima o nulla oppure se l’estrazione risulta dolorosa. - Seite 107 Una volta che il latte inizia a fluire, Arrestare l’estrazione quando non passare su estrazione: premere verso esce più latte o al riempimento della il basso la parte più bassa e lunga bottiglia. Usare il supporto della dell’impugnatura. bottiglia per evitare ribaltamenti. Per effetto di tale pressione si crea un vuoto che facilita il flusso del latte.
-
Seite 108: Conservazione E Scongelamento Del Latte Materno
In alternativa, è possibile tenere la bottiglia o la sacca „Pump & Save“ sotto l’acqua calda (max. 37 °C). l Far roteare delicatamente la bottiglia o la sacca „Pump & Save“ per miscelare il grasso eventualmente separato. Evitare di scuotere o mescolare il latte. * Per ulteriori informazioni visitare il sito www.medela.com... -
Seite 109: Alimentazione Con Latte Materno
Più latte in minor tempo seno. Sviluppato per favorire un’ottimale esperienza di allattamento al seno. * Calma è incluso solo in Harmony Pump & Feed Set. È anche disponibile separatamente; si prega di consultare il capitolo 12. -
Seite 110: Risoluzione Dei Problemi
10. Risoluzione dei problemi Problema Soluzione I Assicurarsi che la testa gialla della valvola e la membrana bianca siano pulite e non danneggiate. I Assicurarsi che la membrana aderisca alla testa della valvola. Se la suzione I Assicurarsi che la testa della valvola sia posizionata lateralmente sul è... -
Seite 111: Smaltimento
11. Smaltimento Il tiralatte Harmony è realizzato in plastica. Smaltire secondo le normative locali. -
Seite 112: Cura Completa Durante L'allattamento Al Seno
12. Cura completa durante l’allattamento al seno Sono disponibili presso i distributori Medela le seguenti varianti del prodotto, parti di ricambio, materiali di consumo e accessori del tiralatte Harmony. Per ordinare un prodotto specificare il nome del prodotto o il numero di prodotto (articolo) corrispondente. - Seite 113 Coppa per il seno PersonalFit™ taglia XXL ( 36 mm ) 800.0796 Bottiglie per latte materno 150 ml – 3 unità 200.1659 Bottiglie per latte materno 250 ml - 2 unità 008.0315 Sacche per latte materno Pump & Save™ 008.0142 Calma Solitaire Altri prodotti Medela sono disponibili su www.medela.com.
- Seite 114 Cura del seno Estrazione del latte materno Ricerca basata sull’evidenza Competenza Educazione Assistenza Innovazione Mondo professionale Somministrazione Raccolta e conservazione del latte materno Gestione del latte materno...
- Seite 116 1. Beoogd gebruik/populatie – contra-indicatie 2. Betekenis van de symbolen 3. Belangrijke veiligheidsinformatie 4. Productomschrijving 4.1 Harmony – licht, handig, slim 4.2 Productonderdelen 5. Reiniging 5.1 Voorafgaand aan het eerste gebruik en na elk gebruik 5.2 Voorafgaand aan het eerste gebruik en daarna eenmaal per dag 5.3 Reiniging –...
-
Seite 117: Beoogd Gebruik/Populatie - Contra-Indicatie
Vrouwen zijn vaak blij te horen dat een borstkolf gebruikt kan worden als ondersteuning bij het geven van borstvoeding en dat sommige kolven zo zijn ontworpen dat ze het zuigen van een baby imiteren. Contra-indicaties Er zijn geen contra-indicaties bekend voor de Harmony borstkolf. -
Seite 118: Betekenis Van De Symbolen
2. Betekenis van de symbolen Het waarschuwingssymbool geeft belangrijke veiligheidsinstructies aan. Als deze instructies niet worden gevolgd, kan dit letsel of schade aan de Harmony borstkolf veroorzaken! Er zijn verschillende waarschuwingssymbolen. Elk symbool wordt in combinatie met een specifiek woord gebruikt. De symbool-woordcombinaties staan voor:... -
Seite 119: Symbolen Op Het Apparaat
Dit symbool wil zeggen dat de gebruiksaanwijzing gevolgd moet worden. Dit symbool duidt de fabrikant aan. Dit CE-symbool geeft aan dat de Harmony borstkolf voldoet aan de essentiële eisen van de Richtlijn 93/42/EEC van de Raad van 14 juni 1993 betreffende medische hulpmiddelen. -
Seite 120: Belangrijke Veiligheidsinformatie
Als de op deze pagina’s vermelde veiligheidsinformatie niet wordt opgevolgd, kan dit gevaar opleveren. Apparaat De Harmony borstkolf is niet hittebestendig: weghouden van radiatoren en open vuur. Plaats de Harmony borstkolf niet in direct zonlicht. Controleer de componenten van de borstkolf op slijtage en beschadiging. - Seite 121 Gebruik de Harmony borstkolf alleen voor het doel waarvoor deze bestemd is, zoals beschreven in deze gebruiksaanwijzing. Er is toezicht vereist als u de Harmony borstkolf in de buurt van kinderen gebruikt. Houd alle delen die niet worden gebruikt buiten het bereik van kinderen.
-
Seite 122: Productomschrijving
De Harmony borstkolf is ideaal voor incidenteel gebruik. Bijvoorbeeld als u korte tijd niet bij uw baby kunt zijn, bv. om te gaan sporten of bij een avondje uit. Of als u uw partner bij de borstvoeding wilt betrekken. -
Seite 123: Productonderdelen
1 x vacuümklep 1 x multideksel 1 x fles 1 x Calma Solitaire Meegeleverd met de Harmony Pump & Feed Set, maar niet met de Harmony. 1 x standaard * voor borstschilden in andere maten, zie hoofdstuk 12... -
Seite 124: Reiniging
Pas op dat u tijdens het reinigen geen onderdelen van de afkolfset beschadigt. I Sommige delen van de Harmony afkolfset zijn erg klein (bv. de O-ring of het membraan van de vacuümklep). Controleer dat er geen onderdelen ont- breken als u de afkolfset na het reinigen in elkaar zet. - Seite 125 Spoel alle onderdelen in koud, Maak alle delen schoon in ruim schoon water van circa 20 °C warm zeepwater (circa 30 °C). Controleer de onderdelen en gooi ze weg bij de eerste tekenen van beschadiging of verzwakking. Droog ze af met een schone Als u de afzonderlijke onderdelen doek of leg ze op een schone van de afkolfset in de vaatwasser...
-
Seite 126: Voorafgaand Aan Het Eerste Gebruik En Daarna Eenmaal Per Dag
5. Reiniging 5.2 Voorafgaand aan het Waarschuwing eerste gebruik en daarna eenmaal per dag l De delen van de afkolfset mogen niet in kokend water worden gehouden of gelegd. l Om verontreiniging te voorkomen, na sterilisatie niet de binnenkant van de onderdelen aanraken. l Haal de borstkolf uit elkaar en maak alle onderdelen die in aanraking komen met de borst... - Seite 127 Zorg dat alle delen onder Gebruik een Quick Clean water staan en laat vijf Magnetronzak* volgens minuten koken. de aanwijzingen. * Meer informatie vindt u op www.medela.nl of www.medela.be...
-
Seite 128: Reiniging - Samenvatting
5. Reiniging 5.3 Reiniging – samenvatting Voorafgaand aan het eerste gebruik en na elk gebruik Spoel in koud, schoon water (ongeveer 20 °C), reinig daarna in ruim warm zeepwater (ongeveer 30 °C) en spoel √ √ √ √ √ √ √... -
Seite 130: Voorbereidingen Voor Het Afkolven
Opmerking l Gebruik alleen originele accessoi- res van Medela. I Controleer of de (witte) O-ring zich Breng de steel (met de O-ring) in nog om de steel bevindt: de opening aan de bovenkant van het diafragma. - Seite 131 √ Zorg ervoor dat de ovaalvormige Plaats het diafragma in de hand- basis van de steel zich in de juiste greep van de kolf Druk rondom positie in het diafragma bevindt. de rand stevig aan om een juiste afsluiting te bewerkstelligen. Plaats het membraan van de vacuümklep Druk de vacuümklep op de horizontaal op de vacuümklep.
-
Seite 132: Het Borstschild Plaatsen
6. Voorbereidingen voor het afkolven 6.2 vervolg Schroef de fles op Plaats de steel van de hand- de connector. greepset in de opening aan de bovenkant van de connector. Druk aan tot de steel vastklikt. 6.3 Het borstschild plaatsen Veeg uw borst af met een Houd het borstschild met warme doek (gebruik geen uw duim en wijsvinger op de... - Seite 133 Als uw antwoord op een van deze vragen „Nee“ is, of als u tijdens het afkolven proble- men of pijn ondervindt, heeft het borstschild mogelijk niet de juiste maat. Medela biedt PersonalFit™-borstschilden aan in vijf verschillende maten. Vraag uw borstvoedings-...
-
Seite 134: Afkolven
7. Afkolven Waarschuwing l Was uw handen grondig (gedurende ca. een minuut) met zeep en water, voordat u uw borst en delen van de afkolfset aanraakt. l Raadpleeg uw verloskundige of borstvoedingsdeskundige/lactatie- kundige als u slechts een minimale hoeveelheid of geen melk kunt af- kolven of als het afkolven pijnlijk is. - Seite 135 Als de melk gaat stromen, schakel dan Stop het afkolven als u merkt dat de over op afkolven: druk het onderste, melk niet meer stroomt of als de fles lange deel van de handgreep omlaag. vol is. Gebruik de flesstandaard om Hierdoor wordt een vacuüm gecreëerd te voorkomen dat de fles omvalt.
-
Seite 136: Moedermelk Bewaren En Ontdooien
„Pump & Save“-zak in warm water (max. 37 °C) te plaatsen. l Het flesje of de „Pump & Save“-zak behoedzaam schudden om eventueel gescheiden vet door de melk te mengen. Vermijd hard schudden en roeren van de melk. * Meer informatie vindt u op www.medela.nl of www.medela.be... -
Seite 137: Moedermelk Voeden
Ontwikkeld voor een fijne voedingservaring voor moeder en baby. * Calma wordt alleen meegeleverd met de Harmony Pump & Feed Set. Deze is ook apart verkrijgbaar: zie hoofdstuk 12. -
Seite 138: Problemen Oplossen
I Raadpleeg uw borstvoedingsdeskundige/lactatiekundige of verloskun- op gang dige als de melkstroom ook dan niet op gang komt. Functioneert het product niet naar behoren, neem dan contact op met de dichtstbijzijnde Medela-vestiging. U vindt de adressen aan de achterkant van deze handleiding. -
Seite 139: Afvalverwijdering
11. Afvalverwijdering De Harmony is vervaardigd van kunststof. Afvalverwijdering moet plaatsvinden in overeenstemming met de plaatselijke voorschriften. -
Seite 140: Volledige Verzorging Tijdens De Borstvoedingsperiode
12. Volledige verzorging tijdens de borstvoedingsperiode De volgende productvarianten, vervangingsonderdelen, verbruiksartikelen en accessoires voor de Harmony borstkolf zijn verkrijgbaar via de distributiepartners van Medela. U kunt een product bestellen door de productnaam of het desbetreffende product-/artikelnummer op te geven. Productvarianten... - Seite 141 SHIELD SIZES 008.0341 PersonalFit™ borstschild XXL ( 36 mm ) 800.0796 Moedermelkflesjes 150 ml – 3 stuks 200.1659 Moedermelkflesjes 250 ml – 2 stuks 008.0315 Pump & Save™ moedermelkbewaarzakjes 008.0140 Calma Solitaire Andere producten van Medela vindt u op www.medela.com.
- Seite 142 Kolven Borstverzorging Research Based onderzoek Voorlichting Expertise Service Innovatie Deskundigen Opvangen Voeden Omgaan met moedermelk...
- Seite 144 1. Peruntukan/Populasi - Kontraindikasi 2. Arti simbol 3. Petunjuk keselamatan penting 4. Uraian produk 4.1 Harmony - ringan, nyaman, pintar 4.2 Bagian produk 5. Membersihkan 5.1 Sebelum menggunakannya untuk kali pertama dan selanjutnya 5.2 Sebelum menggunakannya untuk kali pertama dan sekali setiap hari 5.3 Pembersihan - ringkasan...
-
Seite 145: Peruntukan/Populasi - Kontraindikasi
ASI saat kembali bekerja, atau selama melakukan perjalanan atau saat sedang jauh dari bayi mereka. Wanita senang mengetahui bahwa pompa ASI dapat digunakan untuk menyempurnakan pemberian ASI dan bahwa beberapa jenis pompa dirancang meniru isapan bayi yang sedang menyusu. Kontraindikasi Tidak ada kontraindikasi untuk pompa ASI Harmony. -
Seite 146: Arti Simbol
2. Arti simbol Simbol peringatan berisi semua petunjuk penting bagi keselamatan. Patuhi petunjuk- petunjuk tersebut untuk menghindari cedera atau kerusakan pada pompa ASI Harmony! Terdapat beberapa simbol peringatan. Setiap simbol digunakan secara bersamaan dengan kata yang spesifik. Kombinasi simbol / kata peringatan merupakan:... -
Seite 147: Simbol Pada Perangkat
Simbol ini menunjukkan Nomor Item Perdagangan Global GSI (GTIN) unik. Simbol ini artinya patuhi petunjuk penggunaan. Simbol ini menunjukkan produsen alat. Simbol CE ini menunjukkan kepatuhan Pompa ASI Harmony dengan persyaratan penting dari Council Directive 93/42/EEC 14 Juni 1993 tentang peralatan medis. -
Seite 148: Petunjuk Keselamatan Penting
Kegagalan untuk mengikuti informasi keselamatan pada halaman ini dapat menyebabkan bahaya. Produk Pompa ASI Harmony tidak tahan panas: jauhkan dari radiator dan api terbuka. Hindarkan pompa ASI Harmony dari sinar matahari langsung. Periksa komponen ASI untuk pemakaian atau kerusakan. Jangan menggunakan produk rusak. - Seite 149 Penggunaan Gunakan pompa ASI Harmony sesuai peruntukannya seperti diuraikan di dalam buku petunjuk ini. Hati-hati saat menggunakan pompa ASI Harmony ini di sekitar anak-anak. Jauhkan semua bagian yang tidak sedang digunakan dari jangkauan anak-anak. Jika muncul gangguan atau rasa sakit, hubungi konsultan laktasi atau dokter Anda.
-
Seite 150: Uraian Produk
Anda. Sebagai hasilnya, Anda dapat mengekspresikan lebih banyak ASI dalam waktu yang lebih sedikit. Pompa ASI Harmony sangat ideal untuk penggunaan sesekali. Misalnya, apabila Anda per- lu untuk meninggalkan bayi Anda untuk jangka pendek, misalnya melakukan olahraga atau keluar malam. -
Seite 151: Bagian Produk
1 x diafragma/ tangkai dengan O-ring 2x membran 1x ujung katup katup 1x multi-lid 1 x Calma 1x botol Solitaire Termasuk Harmony Pump & Feed Set, tetapi tidak untuk Harmony 1x kaki botol * untuk ukuran corong lain, baca chapter 12... -
Seite 152: Membersihkan
Hati-hati jangan sampai merusak set Melepas set memompa menjadi memompa saat dibersihkan. bagian-bagian tersendiri. I Beberapa bagian dari set memompa Harmony sangat kecil (misalnya O-ring atau katup membran). Periksa apakah ada bagian yang hilang ketika Anda memasang set memompa setelah dibersihkan. - Seite 153 Bilas semua bagian dengan air bersih Bersihkan semua bagian dingin (suhu kira-kira 20 °C). Periksa dengan air sabun hangat yang bagian-bagian dari kerusakan dan banyak (suhu kira-kira 30 °C). buang pada saat ditemukan tanda-tandar kerusakan atau kecacatan. atau Keringkan dengan kain bersih Taruh set memompa di rak atas atau atau biarkan mengering di rak pisau jika Anda membersihkannya...
-
Seite 154: Sebelum Menggunakannya Untuk Kali Pertama Dan Sekali Setiap Hari
5. Membersihkan 5.2 Sebelum menggunakannya Awas untuk kali pertama dan sekali setiap hari I Jangan menjatuhkan bagian dari set memompa ke dalam air mendidih. I Untuk menghindari kontaminasi, tidak menyentuh bagian dalam dari komponen-komponen setelah sterilisasi. l Lepas dan cuci semua bagian yang berkontak dengan payudara dan ASI segera setelah digunakan untuk menghindari sisa ASI yang... - Seite 155 Rendam semua bagian Gunakan Kantung Microwave dalam air dan rebus Quick Clean* sesuai petunjuk. selama lima menit. * Informasi lebih lanjut ada di www.medela.com...
-
Seite 156: Pembersihan - Ringkasan
5. Membersihkan 5.3 Pembersihan - ringkasan Sebelum menggunakannya untuk kali pertama dan selanjutnya Bilas dengan air dingin, jernih (sekitar 20 ° C), kemudian bersihkan dengan air sabun hangat (sekitar 30 ° C) dan √ √ √ √ √ √ √ √... -
Seite 158: Persiapan Memompa
(untuk kira-kira satu menit) dengan sabun dan air sebelum menyentuh payudara Anda dan bagian-bagian pompa. Catatan l Gunakan aksesori asli Medela saja. Masukkan tangkai (dengan O-ring) I Periksa apakah O-ring (putih) ke dalam lubang di bagian atas masih berada di sekitar tangkai: diafragma. - Seite 159 √ Pastikan alas tangkai berbentuk Tempatkan diafragma ke pegangan oval memiliki posisi yang tepat pompa. Tekan dengan kuat di sekitar dalam diafragma. seluruh tepi untuk memastikan segel yang tepat. Tempatkan katup membran dalam posisi Dorong kepala katup ke cincin bagian horisontal pada kepala katup.
-
Seite 160: Menempatkan Breastshield
6. Persiapan memompa 6.2 bersambung Pasang botol ke konektor. Masukkan tangkai yang telah dirakit di pegangan ke dalam lubang di atas konektor. Dorong hingga tangkai terkunci ke tempatnya. 6.3 Menempatkan breastshield Bersihkan payudara dengan Tahan corong ke payudara kain hangat (jangan gunakan dengan ibu jari dan telunjuk alkohol). - Seite 161 Jika jawaban untuk semua pertanyaan ini adalah „Tidak“, atau jika Anda mengalami masalah atau sakit saat ekspresi, corong Anda mungkin bukan ukuran yang tepat. Medela menawarkan lima ukuran yang berbeda dari corong PersonalFit™. Konsultasikan ke konsultan laktasi dan menyusui atau bidan untuk...
-
Seite 162: Ekspresi
7. Ekspresi Awas l Cuci tangan Anda secara menyeluruh (untuk kira-kira satu menit) dengan sabun dan air sebelum menyentuh payudara Anda dan bagian-bagian pompa. l Hubungi bidan atau konsultan laktasi dan menyusui apabila ASI yang dihasilkan terlalu sedikit atau tidak keluar sama sekali Mulai memompa dengan stimulasi: atau Anda merasa nyeri selama tekan bagian kecil dari pegangan. - Seite 163 Setelah susu mulai mengalir, beralih Berhenti memompa pada saat ke ekspresi: tekan ke bawah bagian Anda merasa bahwa susu tidak pegangan yang lebih panjang, lebih mengalir lagi atau ketika botol rendah. Dengan demikian, Anda penuh. Gunakan kaki botol untuk membangun vakum yang memfasilitasi mencegahnya terbalik.
-
Seite 164: Menyimpan Dan Mencairkan Asi
Cara lain, Anda dapat memegang botol atau kantung „Pump & Save“ di bawah air hangat (maks. 37 °C). l Secara lembut putar botol atau kantung „Pump & Save“ untuk mencampur lemak yang terpisah. Hindari mengocok atau mengaduk susu. * Informasi lebih lanjut ada di www.medela.com... -
Seite 165: Memberikan Asi
Lebih banyak ASI lebih mereka pelajari secara alami. Dikembangkan sedikit waktu untuk pengalaman menyusui yang baik. * Calma hanya termasuk di Harmony Pump & Feed Set. Tersedia pula secara terpisah. Silakan merujuk ke chapter 12. -
Seite 166: Jika Ada Masalah
10. Jika ada masalah Gangguan Tindakan I Pastikan kepala katup kuning dan membran putih, bersih dan tidak rusak. I Pastikan membran terletak datar di kepala katup. Isapan lemah I Pastikan kepala katup diposisikan menyamping pada konektor. atau tidak ada I Pastikan komponen pegangan dirakit dengan benar. sama sekali I Periksa semua sambungan. -
Seite 167: Pembuangan
11. Pembuangan Pompa ASI Harmony terbuat dari plastik. Anda harus membuangnya sesuai dengan peraturan lokal. -
Seite 168: Perawatan Lengkap Selama Periode Menyusui
12. Perawatan lengkap selama periode menyusui Varian produk, suku cadang, dan aksesoris untuk Pompa ASI Harmony berikut tersedia dari mitra distributor Medela. Anda dapat memesan produk dengan menyebutkan nama produk atau nomor (artikel) produk yang sesuai. Varian produk Nomor artikel Produk 005.2055... - Seite 169 PersonalFit™ Breastshield XXL ( 36 mm ) 800.0796 Botol ASI 150 ml - 3 pcs. 200.1659 Botol ASI 250 ml - 2 pcs. 008.0315 Kantung ASI Pump & Save™ 008.0139 Calma Solitaire Produk lain dari Medela dapat dilihat di situs web www.medela.com.
- Seite 170 Perawatan Memompa Riset Berbasis Bukti Pendidikan Kepakaran Layanan Inovasi Profesional Menyusui Mengumpulkan Mengelola susu ibu...
-
Seite 171: Technical Specifications
13. Technical specifications Vacuum (shield size M) Vakuum (Brusthaubengröße M) Vide (Téterelle taille M) Vuoto (taglia della coppa M) Vacuüm (borstschild maat M) Vakum (ukuran tangkup dada M) Stimulation phase Expression phase Stimulationsphase Abpumpphase Phase de stimulation Phase d‘expression Fase di stimolazione Fase di estrazione Stimulatiefase Afkolffase... - Seite 172 Italy Medela AG Australia Lättichstrasse 4b Medela Italia Srl Medela Australia Pty Ltd, 6341 Baar, Switzerland Via Turrini, 13–15 – Loc. Bargellino Medical Technology www.medela.com 40012 Calderara di Reno (BO) 3 Arco Lane, Heatherton, Vic 3202 Italy Australia International Sales...