Herunterladen Inhalt Inhalt Diese Seite drucken
Medela Symphony Gebrauchsanweisung

Medela Symphony Gebrauchsanweisung

Mit personalfit plus brusthaube, für den heimgebrauch
Inhaltsverzeichnis

Werbung

Verfügbare Sprachen
  • DE

Verfügbare Sprachen

Symphony
with PersonalFit PLUS breast shield
EN Instructions for use – home use | DE Gebrauchsanweisung – für den Heimgebrauch
FR Mode d'emploi – Usage à domicile | IT Istruzioni per l'uso - Uso domestico
NL Gebruiksaanwijzing – voor thuisgebruik
INITIATION
TECHNOLOGY
®
EFFICIENCY

Werbung

Inhaltsverzeichnis
loading

Inhaltszusammenfassung für Medela Symphony

  • Seite 1 Symphony ® with PersonalFit PLUS breast shield EN Instructions for use – home use | DE Gebrauchsanweisung – für den Heimgebrauch FR Mode d’emploi – Usage à domicile | IT Istruzioni per l’uso - Uso domestico NL Gebruiksaanwijzing – voor thuisgebruik...
  • Seite 2 Baby wollen. „Because you care.” Nous vous remercions d’avoir choisi le tire-lait Symphony. Le lait maternel est ce qu’il y a de plus naturel pour votre enfant, mais dans certaines situations, l’allaitement au sein n’est pas possible.
  • Seite 3 04 – 41 42 – 79 80 – 117 118 – 155 156 – 193...
  • Seite 4: Inhaltsverzeichnis

    7. Expression 7.1 Selecting the right program 7.2 Symphony Standard card: Operation 7.3 Set comfort vacuum 7.4 Symphony PLUS card: Operation INITIATE program 7.5 Symphony PLUS card: Operation MAINTAIN program 7.6 Expression by single pumping 7.7 Expression by double pumping 8.
  • Seite 5: Intended Use / Population / Contraindication

    1. Intended use / population / contraindication Intended use The Symphony breast pump is intended to be used by lactating women in the hospital or home environment for expressing breast milk. Indications for use The Symphony breast pump is indicated to initiate, build and maintain a lactating woman’s milk supply.
  • Seite 6: Meaning Of Symbols

    2. Meaning of symbols The warning symbol identifies all instructions that are important for safety. Failure to observe these instructions can lead to injury to the user or damage to the breast pump. There are several warning symbols/word combinations. These have the following meanings: Warning Note...
  • Seite 7 Vacuum level indicator, stimulation phase – Standard program card and Symphony PLUS program card (MAINTAIN program). Vacuum level indicator, expression phase – Standard program card and Symphony PLUS program card (MAINTAIN program). Vacuum level indicator – Symphony PLUS program card (INITIATE program).
  • Seite 8: Important Safety Information

    Microwaving can also change the composition of breast milk. I Use only the power cord that comes with the Symphony breast pump. Make sure that its rated voltage is compatible with the power source.
  • Seite 9 Virus (HIV): Pumping breast milk will not reduce or remove the risk of transmitting the virus to the baby through breast milk. I Inspect all components of the Symphony breast pump as well as all parts of the pump set(s) before each use.
  • Seite 10: Caution

    Never drop or insert any object into any opening or tubing. l Do not use the pump outdoors. l Supervision is necessary when the Symphony breast pump is used in the vicinity of children. l Never leave packaging and components unattended. Keep them out of reach of children.
  • Seite 11 I Never put the breast pump unit in water, as this can cause permanent damage to the breast pump. I Do not use Medela Symphony pump sets with a non-compatible breast pump. I Do not use the Medela Symphony breast pump with non-compatible pump sets.
  • Seite 12: Product Description

    4. Product description Symphony single or double pump set (applied parts)* The Symphony single or double pump set is an accessory for the Symphony breast pump. The pump set must be used by only one mother; use by more than one mother could pose a health risk.
  • Seite 13 Symphony Standard Symphony PLUS program card program card * Accessories available for order can be found in chapter 11. Articles may not be available in all countries. For further information about Medela products, visit www.medela.com and look for location finders.
  • Seite 14: Cleaning

    The membrane prevents milk from flowing into the tubing, however inspect the tubing and the Symphony cap after each pumping session for visible residues. If there are visible residues, follow the instructions in chapter 5.1.
  • Seite 15: Before First Use / After Each Use

    5.2 Before first use / after each use Disassemble the pump set into its l Rinse all parts with cold, clear individual parts: drinking-quality water (approx. 20 °C). – bottle l Clean these parts with plenty of warm, – multi lid soapy water (approx.
  • Seite 16: Before First Use / Once A Day

    5. Cleaning 5.3 Before first use / once a day Caution l Do not spray or pour liquid directly onto the pump. l Only use drinking-quality water for cleaning. l Take apart and wash all parts that come in contact with the breast and breast milk immediately after use to avoid drying up of milk residues and prevent growth of bacteria.
  • Seite 17: Breast Pump - Cleaning And Disinfection

    Drying / storage Dry with a clean cloth or leave to dry on a clean cloth. Put the clean parts in a clean storage bag or a clean environment. Do not store parts in an airtight container/bag. It is important that all residual moisture dries.
  • Seite 18: Preparing For Pumping

    Info l Use the pump only with the appropriate To remove, unscrew the card program card (Symphony Standard or and cord protector and slide it Symphony PLUS). out of the guide rail. Optional for pump with battery: l The built-in battery must be charged for 12 hours on receipt of the device.
  • Seite 19: Changing The Program Card

    Push the card and cord protector Insert the cord into the card and over the guide rail on the back until cord protector in a loop around it stops. Tighten the screw. the pin.  Make sure there is enough play to plug the cord in.
  • Seite 20: Assembling The Pump Set

    Note Carefully place the membrane into l Use Medela original accessories only. the connector with the flap into l Check pump set parts for wear or the opening of the connector.
  • Seite 21 Carefully push the breast shield audibly clicks. onto the connector. Choose a breast shield size that suits your needs. Insert the tubing adapter into Insert the tubing adapter into the the corresponding opening in opening in the Symphony cap. the connector lid.
  • Seite 22 6. Preparing for pumping Info l Always close the lid when pumping. The lid keeps the Symphony cap pushed down to prevent a loss of vacuum that could occur if the Symphony cap came off. Open the lid of the breast pump:...
  • Seite 23 Position the Symphony cap firmly on Centre the tubing connector in the the breast pump membrane to form recess in the pump housing. a seal.  Make sure that the Symphony cap engages and lies flush to the surface.
  • Seite 24: Expression

    7. Expression 7.1 Selecting the right program The Symphony breast pump is installed with either the Symphony PLUS program card or Symphony Standard program card which generate the pump suction patterns. The Symphony PLUS program card contains two pump programs. The aim of the INITIATE program is to initiate milk production with Medela’s initiation...
  • Seite 25 When the Symphony Standard card is installed: You will not need to select a pumping program. The card contains the 2-Phase Expression technology and will start with the stimulation phase. See chapter 7.2 for further information. When the Symphony PLUS card is installed:...
  • Seite 26: Symphony Standard Card: Operation

    7. Expression 7.2 Symphony Standard card: Note Operation l Always disconnect the Symphony from the power source after expression. Info l The program stores the last vacuum setting in the stimulation phase. l For the Standard program: Press the “Let-down” button...
  • Seite 27: Set Comfort Vacuum

    7.3 Set comfort vacuum Continue pumping until the breast feels Set the comfort vacuum by rotating the well drained and soft all over (Medela vacuum adjustment knob. First rotate to recommends a pumping time of at least the right to increase the vacuum until you 15 minutes).
  • Seite 28: Symphony Plus Card: Operation Initiate Program

    – Throughout the first five days. If milk production has not started after five days, change to the MAINTAIN pro- gram (see chapter 7.5). l Always disconnect the Symphony from the power source after expression. Press the On/off button to switch on the breast pump.
  • Seite 29 INITIATE press Set the comfort vacuum (see chapter Press the “Let-down” button within 7.3). The bullets on the display show 10 seconds. The display text will change the vacuum level. The more bullets, to “INITIATE running”. the stronger the vacuum.
  • Seite 30: Symphony Plus Card: Operation Maintain Program

    OR – Beginning on day six, whichever of the two options comes first. l Always disconnect the Symphony from the power source after expression. Press the On/off button switch on the breast pump.
  • Seite 31 The more drops, the stronger the the expression phase. vacuum. Continue pumping until the breast feels well drained and soft all over (Medela recommends a pumping time of at least 15 minutes). Switch off the pump by pressing the...
  • Seite 32: Expression By Single Pumping

    Prepare one bottle and pump engorgement. set for expression. Mount only l Contact the midwife or breastfeeding one Symphony cap on the breast and lactation consultant if only minimal pump (see chapter 6.4). or no milk can be expressed or if expression is painful.
  • Seite 33 The PersonalFit PLUS breast Place the breast shield on the breast shield is oval and can be ro- so that the nipple is properly centred tated (360°) and placed in the in the tunnel. Hold the breast shield desired position which is most onto the breast with the thumb and comfortable for you.
  • Seite 34: Expression By Double Pumping

    Prepare two bottles and pump engorgement. sets for expression. l Contact the midwife or breastfeeding Mount the Symphony caps on the and lactation consultant if only minimal breast pump (see chapter 6.4). or no milk can be expressed or if expression is painful.
  • Seite 35 Press power Place the breast shield of one bottle on Switch on the breast pump with the first breast so that the nipple is prop- Proceed with the program selection erly centred in the tunnel. The PersonalFit (see chapter 7.2). PLUS breast shield is oval and can be rotated (360°) and placed in the desired position which is most comfortable for...
  • Seite 36: Storing And Thawing Breast Milk

    Alternatively, you can hold the bottle or “Pump & Save” bag under warm water (max. 37 °C / 98.6 °F). I Gently swirl the bottle or “Pump & Save” bag to mix any fat that has separated. Avoid shaking or stirring the milk. * More information at www.medela.com...
  • Seite 37: Troubleshooting

    The ends of the tubing must be firmly connected to the connector or no suction lid and the opening in the Symphony cap. l The Symphony cap must be firmly fitted to the breast pump membrane to form a seal. l The membrane must be intact.
  • Seite 38: Error Codes

    The following describes error codes that may be displayed indicating a problem with the unit, potential causes, and steps to correct the problem. Potential problems Actions Program card is not a Symphony – Check if the correct program card card is being used Program card is incorrectly inserted –...
  • Seite 39: Warranty And Maintenance / Disposal

    Medela deems that the final production testing replaces on-site testing of the device before putting into service. The operating life of the Symphony breast pump is 3000 hours. The service life is 7 years if used normally, including the life of the internal batteries. The service life...
  • Seite 40 10. Warranty and maintenance / disposal Disposal The Symphony breast pump is made of metals and plastics and should be disposed of in accordance with European directives 2011/65/EU and 2012/19/EU. Additional local guidelines must also be observed. For the AC/DC versions, the electronic com- ponents and the rechargeable battery must be disposed of separately, in accord- ance with the local regulations.
  • Seite 41: Complete Care During Breastfeeding Time

    008.0040 Quick Clean bag Articles may not be available in all countries. For more information about all Medela products, contact your local dealer or see www.medela.com. * If the result of expression is unsatisfactory or expression is painful, contact your lactation consultant or health care practitioner.
  • Seite 42 7. Abpumpen 7.1 Auswahl des richtigen Programms 7.2 Symphony Standard-Programmkarte: Betrieb 7.3 Einstellen des Komfort-Vakuums 7.4 Symphony PLUS Programmkarte: Betrieb des INITIAL-Programms 7.5 Symphony PLUS Programmkarte: Betrieb des ERHALT-Programms 7.6 Einseitiges Abpumpen 7.7 Beidseitiges Abpumpen 8. Aufbewahren und Auftauen von Muttermilch 8.1 Aufbewahrung...
  • Seite 43: Verwendungszweck/Zielgruppe/Kontraindikationen

    Säuglinge mit Muttermilch zu versorgen, die nicht direkt gestillt werden können (z. B. Anlegeprobleme, Gaumenspalte oder Frühgeborene). Kontraindikationen Für die Milchpumpe und Pumpsets Symphony gibt es keine bekannten Kontraindikationen. Produktbeschreibung Die Milchpumpe Symphony für mehrere Benutzerinnen verfügt über die Symphony PLUS Programmkarte, mit der verschiedene Pumpprogramme abgerufen werden können.
  • Seite 44: Bedeutung Der Symbole

    2. Bedeutung der Symbole Das Warnsymbol kennzeichnet alle für die Sicherheit wichtigen Anweisungen. Nichtbeachtung kann zu Verletzungen der Benutzerin oder Schäden an der Milchpumpe führen. Es gibt eine Reihe von Kombinationen aus Warnsymbolen und Worten. Diese haben folgende Bedeutungen: Achtung Hinweis Kann zu schweren Verletzungen Kann zu Sachschäden führen.
  • Seite 45 Dieses Symbol gibt an, dass die Abdeckung der Netzbuchse zu öffnen ist. Ein-/Aus-Taste „Let-down“-Taste Vakuumeinstellknopf Symbole auf dem Display Vakuumlevelanzeige, Stimulationsphase – Standard-Programmkarte und Symphony PLUS Programmkarte (ERHALT-Programm). Vakuumlevelanzeige, Abpumpphase – Standard-Programmkarte und Symphony PLUS Programmkarte (ERHALT-Programm). Vakuumlevelanzeige – Symphony PLUS Programmkarte (INITIAL-Programm).
  • Seite 46: Wichtige Sicherheitshinweise

    Greifen Sie niemals nach einem ins Wasser gefallenen elektrischen Gerät. Ziehen Sie sofort den Netzstecker aus der Steckdose. l Trennen Sie die Milchpumpe Symphony nach der Verwendung immer sofort von der Stromversorgung. WARNUNG: Zur Vermeidung von Feuer, Stromschlägen oder schweren Verbrennungen: l Die Milchpumpe Symphony ist nicht hitzebeständig: Von Heizkörpern und offener...
  • Seite 47 Das Abpumpen der Muttermilch reduziert oder vermeidet nicht das Risiko einer Übertragung des Virus an das Baby über die Muttermilch. I Überprüfen Sie vor jedem Gebrauch alle Teile der Milchpumpe Symphony sowie alle Teile des/der Pumpsets. l Verwenden Sie niemals Geräte, Komponenten oder Teile, die beschädigt sind.
  • Seite 48: Vorsicht

    Stecken Sie keine Objekte in eine Öffnung der Pumpe oder in den Schlauch oder lassen Sie nichts hineinfallen. l Verwenden Sie die Pumpe nicht im Freien. l Bei Verwendung der Milchpumpe Symphony in der Nähe von Kindern ist eine entsprechende Beaufsichtigung notwendig. l Lassen Sie Verpackungen und deren Inhalt nie unbeaufsichtigt. Außer Reichweite von Kindern aufbewahren.
  • Seite 49 I Legen Sie die Milchpumpe nie in Wasser, da dies dauerhafte Schäden an der Milchpumpe verursachen kann. I Verwenden Sie die Medela Symphony Pumpsets nicht mit einer nicht kompatiblen Milchpumpe. I Verwenden Sie die Medela Milchpumpe Symphony nicht mit nicht kompatiblen Pumpsets.
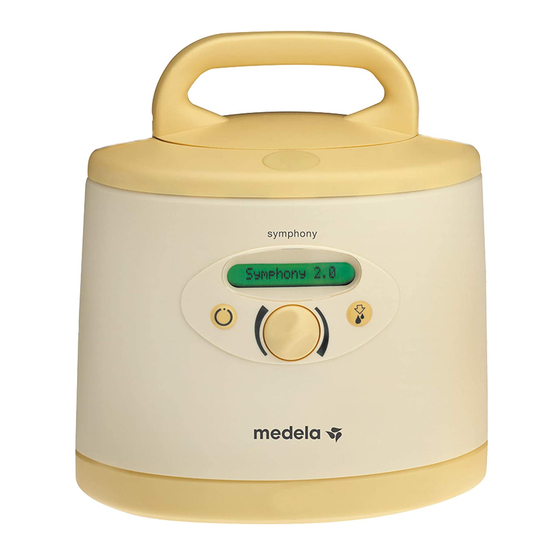
  • Seite 50: Produktbeschreibung

    4. Produktbeschreibung Symphony Einzel- oder Doppelpumpset (angewandte Teile)* Das Symphony Einzel- oder Doppelpumpset ist Zubehör zur Milchpumpe Symphony. Das Pumpset darf nur von einer Mutter verwendet werden; die Benutzung durch mehrere Mütter kann ein Gesundheitsrisiko darstellen. Das Einzelpumpset enthält jedes Teil einmal, während das Doppelpumpset alle Teile doppelt beinhaltet.
  • Seite 51 Anschluss für Autokabelanschluss Netzkabel oder Symphony Standard- Symphony PLUS Programmkarte Programmkarte * Bestellbares Zubehör finden Sie in Kapitel 11. Manche Artikel sind möglicherweise nicht in allen Ländern verfügbar. Weitere Informationen über Produkte von Medela finden Sie unter www.medela.com über die Händlersuche.
  • Seite 52: Reinigen

    Dies hat jedoch keinen Einfluss auf deren Funktion. l Die Membran verhindert, dass die Milch in den Schlauch fließt; kontrollieren Sie den Schlauch und die Symphony Kappe dennoch nach jedem Abpumpen auf sichtbare Rückstände. Bei sichtbaren Rückständen folgen Sie den Anweisungen in Kapitel 5.1.
  • Seite 53: Vor Dem Ersten Gebrauch/Nach Jedem Gebrauch

    5.2 Vor dem ersten Gebrauch/nach jedem Gebrauch Zerlegen Sie das Pumpset in seine l Spülen Sie alle Teile mit kaltem, Einzelteile: klarem Wasser in Trinkwasserqualität – Flasche (ca. 20 °C) ab. – Multi-Deckel l Reinigen Sie diese Teile mit viel warmem –...
  • Seite 54: Vor Dem Ersten Gebrauch/ Einmal Täglich

    5. Reinigen 5.3 Vor dem ersten Gebrauch/ Vorsicht einmal täglich l Sprühen oder schütten Sie keine Flüssigkeiten direkt auf die Pumpe. l Verwenden Sie für die Reinigung nur Wasser in Trinkwasserqualität. l Alle Teile, die mit Brust und Muttermilch in Berührung kommen, sofort nach Gebrauch auseinandernehmen und reinigen, um ein Eintrocknen von Milch und Bakterienwachstum zu verhindern.
  • Seite 55: Milchpumpe - Reinigung Und Desinfektion

    Trocknen/Aufbewahren Mit einem sauberen Tuch abtrocknen oder auf einem sauberen Tuch trocknen lassen. Legen Sie die sauberen Teile in einen sauberen Aufbewahrungsbeutel oder an einen sauberen Ort. Bewahren Sie die Teile nicht in einem luftdichten Alle Teile mit Wasser bedecken und mindes- Behälter/Beutel auf.
  • Seite 56: Vorbereitung Des Abpumpens

    6. Vorbereitung des Abpumpens 6.1 Karten- und Kabelschutz Achtung Zu Kapitel 6.2 Netzbetrieb: l Bitte verwenden Sie ausschließlich das mit der Milchpumpe Symphony gelieferte Netzkabel. l Stellen Sie sicher, dass die Spannung des Netzkabels mit der Stromquelle kompatibel ist. Info Zum Entfernen lösen Sie...
  • Seite 57: Wechseln Der Programmkarte

    Karten- und Kabelschutz Kabel in einer Schlaufe um den über Führungsschiene bis zum Stift im Karten- und Kabelschutz Anschlag in Rückseite schieben. einlegen. Die Schraube festziehen.  Stellen Sie sicher, dass genug Spielraum zum Einstecken des Kabels vorhanden ist. 6.3 Wechseln der Programmkarte Stecken Sie das Netzkabel Sobald das Kartenfach offengelegt in eine Netzsteckdose ein.
  • Seite 58: Zusammensetzen Des Pumpsets

    Pumpenteile und das saubere Pumpset anfassen. Trocknen Sie Ihre Hände mit einem frischen Handtuch oder einem Einweg-Papierhandtuch. Hinweis l Nur Originalzubehör von Medela Stecken Sie die Membran verwenden. vorsichtig mit der Lasche in die l Überprüfen Sie die Teile des Pumpsets Öffnung des Verbindungsstückes.
  • Seite 59 Schließen Sie den Deckel des Brusthaube sorgfältig Verbindungsstücks, bis er auf Verbindungsstück hörbar einrastet. stecken. Wählen Sie eine Brusthaubengröße, die Ihren Bedürfnissen entspricht. Stecken Sie den Schlauchadapter Stecken Sie den Schlauchadapter in in entsprechende Anschlussöffnung die Öffnung der Symphony Kappe. im Verbindungsstück.
  • Seite 60 6. Vorbereitung des Abpumpens Info l Schließen Sie beim Abpumpen immer den Deckel. Der Deckel hält die Symphony Kappe unten, um einen Vakuumverlust durch Abspringen der Symphony Kappe zu verhindern. Öffnen Sie den Deckel der Milchpumpe: Drücken Sie den ovalen Knopf auf der Oberseite der Milchpumpe Symphony und heben Sie den Griff an.
  • Seite 61 Setzen Sie die Symphony Zentrieren Sie den Kappe fest und dicht auf die Schlauchanschluss in der Milchpumpenmembran. Aussparung im Pumpengehäuse.  Stellen Sie sicher, dass die Symphony Kappe einrastet und bündig zur Oberfläche aufliegt.
  • Seite 62: Abpumpen

    7. Abpumpen 7.1 Auswahl des richtigen Programms Die Milchpumpe Symphony wird entweder mit der Symphony PLUS Programmkarte oder der Symphony Standard-Programmkarte ausgestattet, mit denen verschiedene Abpumpmuster abgerufen werden können. Die Symphony PLUS Programmkarte enthält zwei Pumpprogramme. Das Ziel des INITIAL-Programms ist die Anregung der Milchproduktion mit der Initiierungs- technologie von Medela.
  • Seite 63 Sie brauchen kein Pumpprogramm auszuwählen. Die Karte enthält die 2-Phase Expression Technologie und beginnt mit der Stimulationsphase. Siehe Kapitel 7.2 für weitere Informationen. Wenn die Symphony PLUS Karte installiert ist: Verwenden Sie das INITIAL-Programm gleich nach der Geburt: l Bis Sie in drei aufeinanderfolgenden Pumpsitzungen jeweils mindestens 20 ml Muttermilch abgepumpt haben ODER l Während der ersten fünf Tage nach der Geburt.
  • Seite 64: Symphony Standard-Programmkarte: Betrieb

    7. Abpumpen 7.2 Symphony Standard- Hinweis Karte: Betrieb l Trennen Sie die Milchpumpe Symphony nach dem Abpumpen immer von der Stromquelle. Info l Das Programm speichert die letzte Vakuum-Einstellung in der Stimulationsphase. l Für das Standard-Programm: Drücken Sie die Ein-/Aus-Taste Drücken Sie die „Let-down“-Taste...
  • Seite 65: Einstellen Des Komfort-Vakuums

    Stellen Sie das Komfort-Vakuum durch gut geleert hat und ganz weich anfühlt Drehen des Vakuumeinstellknopfes ein. (Medela empfiehlt eine Pumpzeit von Drehen Sie den Knopf zuerst nach rechts, mindestens 15 Minuten). Schalten Sie um das Vakuum zu erhöhen, bis es leicht die Milchpumpe durch Drücken der...
  • Seite 66: Symphony Plus Programmkarte: Betrieb Des Initial-Programms

    – Während der ersten fünf Tage. Falls die Milchbildung nach fünf Tagen noch nicht eingesetzt hat, wechseln Sie zum ERHALT-Programm (siehe Kapitel 7.5). l Trennen Sie die Milchpumpe Symphony nach dem Abpumpen immer von der Drücken Sie die Ein-/Aus-Taste, Stromquelle.
  • Seite 67 INITIATE press Stellen Sie das Komfort-Vakuum ein Drücken Sie die „Let-down“-Taste (siehe Kapitel 7.3). Die Punkte auf innerhalb von 10 Sekunden. Das Display dem Display zeigen die Vakuumstufe zeigt nun „Start INITIAL“ an. an. Je mehr Punkte, desto höher das Vakuum.
  • Seite 68: Symphony Plus Programmkarte: Betrieb Des Erhalt-Programms

    – Sobald Sie in drei aufeinanderfolgenden Pumpsitzungen jeweils mindestens 20 ml Muttermilch abgepumpt haben ODER – Ab dem sechsten Tag, je nachdem, was zuerst eintritt. l Trennen Sie die Milchpumpe Symphony nach dem Abpumpen immer von der Stromquelle. Drücken Sie die Ein-/Aus- Info Taste , um die Milchpumpe einzuschalten.
  • Seite 69 , um in die Abpumpphase Tropfen, desto höher das Vakuum. zu wechseln. Pumpen Sie weiter, bis sich die Brust gut geleert hat und ganz weich anfühlt (Medela empfiehlt eine Pumpzeit von mindestens 15 Minuten). Schalten Sie die Milchpumpe durch Drücken der Ein-/Aus-Taste aus.
  • Seite 70: Einseitiges Abpumpen

    Laktationsberaterin oder Hebamme, wenn nur wenig oder keine Milch abgepumpt werden kann oder das Abpumpen schmerzhaft ist. Hinweis Press power l Trennen Sie die Milchpumpe Symphony nach dem Abpumpen immer von der Stromquelle. Info Milchpumpe mit einschalten. l Bitte knicken Sie den Schlauch Weiter mit der Programmauswahl während des Abpumpens nicht.
  • Seite 71 Die PersonalFit PLUS Setzen Sie die Brusthaube auf die Brusthaube ist oval und kann Brust auf, so dass die Brustwarze gedreht (360°) und in der gut zentriert im Tunnel liegt. Halten gewünschten Position, die Sie die Brusthaube mit Daumen und für Sie am angenehmsten ist, Zeigefinger an die Brust.
  • Seite 72: Beidseitiges Abpumpen

    (siehe Kapitel 6.4). nur wenig oder keine Milch abgepumpt werden kann oder das Abpumpen schmerzhaft ist. Hinweis l Trennen Sie die Milchpumpe Symphony nach dem Abpumpen immer von der Stromquelle. Info l Beidseitiges Abpumpen verringert den Zeitaufwand und erhöht den Energiegehalt der Milch.
  • Seite 73 Press power Setzen Sie die Brusthaube auf die erste Brust Milchpumpe mit einschalten. Weiter mit auf, so dass die Brustwarze gut zentriert der Programmauswahl (siehe Kapitel 7.2). im Tunnel liegt. Die PersonalFit PLUS Brusthaube ist oval und kann gedreht (360°) und in der gewünschten Position, die für Sie am angenehmsten ist, angebracht werden.
  • Seite 74: Aufbewahren Und Auftauen Von Muttermilch

    Beutel auch unter warmes Wasser (max. 37 °C) halten. l Schwenken Sie die Milchflasche oder den „Pump & Save“-Beutel sanft, um abgesetztes Fett mit der Milch zu vermischen. Schütteln oder rühren Sie die Milch nicht. * Weitere Informationen finden Sie unter www.medela.de...
  • Seite 75: Problembehebung

    Die Pumpe saugt Verbindungsstücks und der Öffnung der Symphony Kappe zu schwach oder verbunden sein. l Die Symphony Kappe muss fest und dicht auf der gar nicht Milchpumpenmembran sitzen. l Die Membran muss intakt sein. l Die Membran muss richtig auf dem Verbindungsstück sitzen und der Deckel des Verbindungsstücks muss fest geschlossen sein.
  • Seite 76: Fehlercodes

    Netzkabel auf der Rückseite akustisches Signal (ab dem Hinweis der Pumpe eingesteckt ist. verbleiben 15 Minuten Pumpzeit) – Wenden Sie sich an Ihre Medela Motorüberlastung Motor zieht zu viel Strom Mietstation, wenn das öfter vorkommt. – Wenden Sie sich an Ihre Medela Möglicher Fehler bei der Elektronik...
  • Seite 77: Garantie Und Wartung/Entsorgung

    Schäden an der Pumpe oder dem Netzkabel, heruntergefallene oder ins Wasser gefallene Pumpe, sind keine weiteren Überprüfungen nötig. Wie bereits in Kapitel 3 erwähnt, darf die Wartung und Reparatur nur von einer autorisierten Servicestelle gemäß der Symphony Gebrauchsanleitung unter Verwendung von hier genannten Original-Ersatzteilen von Medela erfolgen.
  • Seite 78 DC-Versionen müssen die elektrischen Bestandteile und der wiederaufladbare Akku gemäß den lokalen Vorschriften separat entsorgt werden. Bitte stellen Sie sicher, dass Sie die Milchpumpe Symphony und die Zubehörteile gemäß Ihren lokalen Richtlinien entsorgen. Das Zubehör (Pumpset / Flaschen) ist aus Kunststoff hergestellt und darf nur gemäß...
  • Seite 79: Rundum Versorgt In Der Stillzeit

    Quick Clean Beutel Manche Artikel sind möglicherweise nicht in allen Ländern verfügbar. Wenden Sie sich für weitere Informationen zu allen Produkten von Medela an Ihren Händler vor Ort oder besuchen Sie www.medela.com. * Sollte das Pumpergebnis unbefriedigend oder das Abpumpen schmerzhaft sein, wenden Sie sich bitte an Ihre Laktationsberaterin oder Ihren behandelnden Arzt.
  • Seite 80 7.1 Sélection du programme adéquat 7.2 Carte de programmation Symphony Standard : Utilisation 7.3 Réglage du niveau de vide confortable 7.4 Carte Symphony PLUS : Utilisation du programme INITIATE 7.5 Carte Symphony PLUS : Utilisation du programme MAINTAIN 7.6 Expression simple 7.7 Expression double 8.
  • Seite 81: Utilisation Prévue/Public Concerné/Contre-Indications

    1. Utilisation prévue/Public concerné/Contre-indications Utilisation prévue Le tire-lait Symphony est prévu pour être utilisé par des femmes allaitantes, à l’hôpital ou à la maison, pour exprimer leur lait. Indications d’utilisation Le tire-lait Symphony aide les mères à initier, amplifier et maintenir leur production de lait.
  • Seite 82: Signification Des Symboles

    2. Signification des symboles Les symboles d’avertissement renvoient à des instructions importantes en matière de sécurité. Le non-respect de ces instructions peut provoquer des blessures aux utilisatrices ou endommager le tire-lait. Il existe plusieurs symboles/expressions d’avertissement. Ceux-ci ont les significations suivantes : Avertissement Remarque Peut provoquer des blessures graves...
  • Seite 83 Standard et carte de programmation Symphony PLUS (programme MAINTAIN). Indicateur du niveau de vide, phase d’expression - Carte de programmation Standard et carte de programmation Symphony PLUS (programme MAINTAIN). Indicateur du niveau de vide - Carte de programmation Symphony PLUS (programme INITIATE).
  • Seite 84: Recommandations Importantes En Matière De Sécurité

    Ne placez pas et ne stockez pas cet appareil à un endroit d’où il risque de chuter ou d’être tiré dans une baignoire ou un lavabo. l N’utilisez pas le tire-lait Symphony en prenant un bain ou une douche. l Ne saisissez jamais un appareil électrique qui est tombé dans l’eau. Débranchez-le immédiatement.
  • Seite 85 (VIH) : exprimer le lait maternel ne réduit pas et n’élimine pas le risque de transmission du virus au bébé par le lait maternel. I Examinez tous les composants du tire-lait Symphony et toutes les pièces du ou des set(s) pour tire-lait avant chaque utilisation.
  • Seite 86: Mise En Garde

    Ne modifiez pas les pièces du tire-lait ou du set pour tire-lait. l N’utilisez pas le tire-lait Symphony pendant votre sommeil ou en cas de forte somnolence. l N’utilisez pas le tire-lait Symphony en conduisant un véhicule à moteur.
  • Seite 87 I Ne placez jamais le tire-lait dans l’eau, car cela l’endommagerait définitivement. I N’utilisez pas les sets pour le tire-lait Symphony de Medela avec un tire-lait incompatible. I N’utilisez pas le tire-lait Symphony de Medela avec des sets pour tire-lait incompatibles.
  • Seite 88: Description Du Produit

    Set simple ou double pour tire-lait Symphony (pièces associées)* Le set simple ou double pour tire-lait Symphony est un accessoire qui complète le tire-lait Symphony. Il ne doit être utilisé que par une seule mère ; en effet, son utilisation par plusieurs mamans pourrait entraîner un risque de contamination.
  • Seite 89 * Les accessoires disponibles à la vente sont indiqués au chapitre 11. Certains articles peuvent ne pas être disponibles dans certains pays. Pour plus de détails concernant les produits Medela, consultez le site www.medela.com et recherchez un magasin à proximité.
  • Seite 90: Nettoyage

    Assurez-vous toutefois qu’aucun résidu visible n’est présent au niveau du tuyau et du couvercle Symphony après chaque séance d’expression de lait. En cas de présence de résidus visibles, suivez les instructions du chapitre 5.1.
  • Seite 91: Avant La Première Utilisation/Après Chaque Utilisation

    5.2 Avant la première utilisation/après chaque utilisation Démontez chaque pièce du set pour l Rincez toutes les pièces à l’eau claire, tire-lait : potable et froide (env. 20 °C). – biberon, l Nettoyez abondamment toutes les – couvercle multifonction, pièces à l’eau savonneuse et chaude –...
  • Seite 92: Avant La Première Utilisation/Une Fois Par Jour

    5. Nettoyage 5.3 Avant la première Mise en garde utilisation/une fois par jour l Ne vaporisez pas et ne versez pas de liquide directement sur le tire-lait. l Utilisez uniquement de l’eau potable pour le nettoyage. l Démontez et nettoyez toutes les pièces qui sont entrées en contact avec le sein et le lait maternel immédiatement après utilisation afin d’éviter l’assèchement...
  • Seite 93: Tire-Lait - Nettoyage Et Désinfection

    Séchage/Stockage Séchez à l’aide d’un chiffon propre ou laisser sécher sur un chiffon propre. Placez les pièces propres dans un sac de rangement propre ou dans un endroit propre. Ne stockez pas de pièces dans un conteneur ou un sac hermétique. Il est important que Recouvrez toutes les pièces d’eau et portez toute l’humidité...
  • Seite 94: Préparation À La Séance D'expression

    Pour retirer la protection l Utilisez exclusivement le tire-lait avec la carte de programmation adaptée du cordon et de la carte, (Symphony Standard ou Symphony PLUS). dévissez-la et désengagez-la de la glissière. Pour le modèle de tire-lait avec batterie : l Lorsque l’appareil vous est livré, chargez 6.2 Fonctionnement...
  • Seite 95: Remplacement De La Carte De Programmation

    Insérez la protection de la carte Introduisez le cordon dans la protection et du cordon dans la glissière de la carte et du cordon en formant une située à l’arrière jusqu’à ce boucle autour de la vis. qu’elle se bloque. Serrez la vis. ...
  • Seite 96: Assemblage Du Set Pour Tire-Lait

    Insérez délicatement la membrane dans le connecteur en plaçant le l Utilisez exclusivement des accessoires rabat dans l’ouverture du connecteur. Medela originaux. Assurez-vous que la membrane est l Avant utilisation, vérifiez que les positionnée de façon hermétique pièces du set pour tire-lait ne autour du bord du connecteur.
  • Seite 97 Choisissez la produise un déclic. taille de téterelle qui correspond le mieux à vos besoins. Introduisez l’adaptateur du Insérez l’adaptateur du tuyau dans l’orifice prévu tuyau dans l’orifice situé sur  à cet effet sur le couvercle la capsule Symphony. du connecteur.
  • Seite 98 6. Préparation à la séance d’expression Info l Fermez toujours le couvercle lorsque vous exprimez votre lait. Il maintient la capsule Symphony enfoncée de manière à empêcher le niveau de vide de faiblir si la capsule se détachait. Ouvrez le couvercle du tire-lait : Appuyez sur le bouton ovale situé...
  • Seite 99 Fixez solidement la capsule Symphony Centrez le connecteur du tuyau sur la membrane du tire-lait afin dans la rainure placée sur le d’assurer l’étanchéité. dessus du tire-lait.  Vérifiez que la capsule Symphony est bien emboîtée et affleure à la surface.
  • Seite 100: Expression

    7.1 Sélection du programme adéquat Le tire-lait Symphony contient soit la carte de programmation Symphony PLUS soit la carte Symphony Standard qui génère les schémas de succion du tire-lait. La carte de programmation Symphony PLUS contient deux programmes d’expression. L’objectif du programme INITIATE est d’initier la production de lait grâce à...
  • Seite 101 Lorsque la carte Symphony Standard est installée : Vous n’aurez pas à sélectionner un programme d’expression. La carte contient la technologie 2-Phase Expression et démarrera la phase de stimulation. Voir le chapitre 7.2. pour plus d’informations. Lorsque la carte Symphony PLUS est installée : Utilisez le programme INITIATE dès la naissance :...
  • Seite 102: Carte De Programmation Symphony Standard : Utilisation

    Il vous est également possible de vous masser les seins et de reprendre  la séance en phase d’expression. l Si le tire-lait Symphony reste en fonctionnement pendant 30 minutes sans qu’aucune manipulation ne soit effectuée (par exemple, le réglage du vide), il s’éteint automatiquement.
  • Seite 103: Réglage Du Niveau De Vide Confortable

    Réglez le niveau de vide qui vous convient vous sentiez que votre sein est bien drainé en tournant le bouton de réglage du niveau et souple (Medela recommande une de vide. Dans un premier temps, tournez le expression d’au moins 15 minutes). Éteignez...
  • Seite 104: Carte Symphony Plus : Utilisation Du Programme Initiate

    – Tout au long des cinq premiers jours. Si la production de lait n’a pas commencé après cinq jours, passez au programme MAINTAIN (voir chapitre 7.5.) l Déconnectez toujours le tire-lait Symphony de la source d’alimentation après l’expression. Appuyez sur le bouton on/off pour mettre en marche le tire-lait.
  • Seite 105 INITIATE press Réglage du niveau de vide de confort A ppuyez sur le bouton d’« écoulement » (voir le chapitre 7.3). Les points sur dans les 10 secondes. L’écran affichera alors l’écran montrent le niveau de vide. « Départ INITIATE ». Plus il y a de points, plus le niveau de vide est important.
  • Seite 106: Carte Symphony Plus : Utilisation Du Programme Maintain

    30 minutes avant de réessayer. Il vous est également possible de vous masser les seins et de reprendre la séance  en phase d’expression. l Si le tire-lait Symphony reste en Réglez le niveau de vide qui vous fonctionnement pendant 30 minutes convient pour la phase d’expression sans qu’aucune manipulation ne soit...
  • Seite 107 élevé. Continuez l’expression jusqu’à ce que vous sentiez que votre sein est bien drainé et souple (Medela recommande une expression d’au moins 15 minutes). Éteignez le tire-lait en appuyant sur le bouton on/off...
  • Seite 108: Expression Simple

    Ne tenez pas le set pour tire-lait par tire-lait pour l’expression. Placez le biberon pendant l’expression. Vous une seule capsule Symphony sur risquez d’appuyer trop fortement sur le le tire-lait (voir le chapitre 6.4). sein et pourriez provoquer un blocage des canaux galactophores et un engorgement.
  • Seite 109 La téterelle PersonalFit PLUS Placez la téterelle sur le sein de sorte est ovale. Vous pouvez la que le mamelon soit correctement faire pivoter (360°) afin de la centré dans l’embout. Maintenez la placer dans la position la plus téterelle sur le sein à l’aide du pouce confortable pour vous.
  • Seite 110: Expression Double

    énergétique du lait. Elle peut augmenter la production de Placez la téterelle du deuxième biberon lait et la maintenir sur le long terme. Medela sur l’autre sein de sorte que le mamelon recommande la double expression.
  • Seite 111 Press power Faites démarrer le tire-lait en appuyant sur Placez la téterelle d’un biberon sur un sein de le bouton . Sélectionnez le programme sorte que le mamelon soit correctement centré (voir le chapitre 7.2). dans l’embout. La téterelle PersonalFit PLUS est ovale.
  • Seite 112: Conserver Et Décongeler Le Lait Maternel

    (37 °C max.). I Secouez délicatement le biberon ou le sachet « Pump & Save » afin d’homogénéiser les corps gras. Évitez de secouer vigoureusement le lait ou de le mélanger à la cuillère. * Pour plus d’informations, consultez le site www.medela.com...
  • Seite 113: Résolution Des Problèmes

    Les extrémités du tuyau doivent être solidement raccordées au couvercle du connecteur et à l’ouverture de la capsule Symphony. inexistante l Fixez solidement la capsule Symphony sur la membrane du tire-lait afin d’assurer l’étanchéité. l La membrane doit être intacte.
  • Seite 114: Codes D'erreur

    étapes à suivre pour corriger le problème. Problèmes possibles Actions La carte de programmation – Vérifiez que vous utilisez la carte n’est pas une carte Symphony de programmation adéquate La carte de programmation – Vérifiez que la carte est correctement Carte invalide est mal insérée...
  • Seite 115: Garantie Et Entretien/Mise Au Rebut

    Medela considère que les essais de production finaux remplacent les essais sur site de l’appareil avant sa mise en service. La durée de vie en fonctionnement du tire-lait Symphony est de 3 000 heures. La durée de vie de l’appareil est de 7 ans s’il est utilisé normalement, durée des batteries internes comprises.
  • Seite 116 10. Garantie et entretien/mise au rebut Mise au rebut Le tire-lait Symphony est constitué de métal et de plastique et doit être mis au rebut conformément aux directives européennes 2011/65/UE et 2012/19/UE. Respectez également les instructions complémentaires locales. Sur les modèles CA /CC, les composants électroniques et la batterie rechargeable doivent être mis au rebut...
  • Seite 117: Une Gamme Complète Pour L'allaitement Maternel

    11. Une gamme complète pour l’allaitement maternel Pour obtenir les accessoires suivants du tire-lait Symphony auprès des distributeurs Medela, il vous suffit de préciser le nom ou la référence du produit. Réf. article Produit 008.0437* Téterelles PersonalFit PLUS S (21 mm) : EN/DE/FR/IT/NL 008.0442*...
  • Seite 118 7. Estrazione 7.1 Selezione del programma corretto 7.2 Scheda Symphony Standard: Funzionamento 7.3 Impostazione del “vuoto confortevole” 7.4 Scheda Symphony PLUS: Funzionamento del programma INITIATE 7.5 Scheda Symphony PLUS: Funzionamento del programma MAINTAIN 7.6 Estrazione singola 7.7 Estrazione doppia 8. Conservazione e scongelamento di latte materno 8.1 Conservazione...
  • Seite 119: Uso Previsto/Destinatari/Controindicazioni

    (ad es. a causa di problemi di attaccamento, palatoschisi o perché prematuri). Controindicazioni Non esistono controindicazioni note per il tiralatte Symphony e per i set per tiralatte. Descrizione del prodotto Il tiralatte multi-utente Symphony è dotato della scheda di programma Symphony PLUS, che genera schemi di suzione per l’estrazione.
  • Seite 120: Significato Dei Simboli

    2. Significato dei simboli Il simbolo di avvertenza identifica tutte le istruzioni importanti per la sicurezza. La mancata osservanza di tali istruzioni può comportare lesioni alle persone o danni al tiralatte. Vi sono diverse combinazioni di simboli/termini di avvertenza. Di seguito ne riportiamo il significato: Avvertenza Nota Può...
  • Seite 121 Standard e scheda di programma Symphony PLUS (programma MAINTAIN). Indicatore livello di vuoto, fase di estrazione – Scheda di programma Standard e scheda di programma Symphony PLUS (programma MAINTAIN). Indicatore livello di vuoto – Scheda di programma Symphony PLUS (programma INITIATE).
  • Seite 122: Importanti Informazioni Di Sicurezza

    Scollegare sempre il tiralatte Symphony subito dopo l’uso. AVVERTENZA: per evitare incendi, folgorazioni o ustioni gravi: l Il tiralatte Symphony non è resistente al calore: tenere lontano da radiatori e fiamme libere. l Non esporre l’unità motore alla luce diretta del sole.
  • Seite 123 I Controllare tutti i componenti del tiralatte Symphony e del/i set per tiralatte prima di ogni utilizzo. l Non utilizzare mai dispositivi, parti o componenti danneggiati.
  • Seite 124: Attenzione

    Non modificare nessun componente del tiralatte o del set per tiralatte. l Non utilizzare il tiralatte Symphony quando si dorme o si è troppo assonnati. l Non utilizzare il tiralatte Symphony durante la guida di un autoveicolo.
  • Seite 125 I Non mettere mai il tiralatte in acqua poiché il dispositivo subirebbe un danno permanente. I Non utilizzare i set per tiralatte Symphony Medela con un tiralatte non compatibile. I Non utilizzare il tiralatte Symphony Medela con set per tiralatte non compatibili.
  • Seite 126: Descrizione Del Prodotto

    4. Descrizione del prodotto Set per tiralatte Symphony singolo o doppio (parti applicate)* Il set per tiralatte Symphony singolo o doppio è un accessorio del tiralatte Symphony. Il set per tiralatte deve essere utilizzato da un’unica madre; l’uso da parte di più madri può...
  • Seite 127 * Gli accessori disponibili su ordinazione sono reperibili nel capitolo 11. Gli articoli possono non essere disponibili in tutti i Paesi. Per ulteriori informazioni sui prodotti Medela e per trovare i rivenditori più vicini, visitare il sito Web all’indirizzo www.medela.it.
  • Seite 128: Pulizia

    La membrana impedisce al latte di fluire nel tubicino, tuttavia raccomandiamo di ispezionare il tubicino e il coperchio del set Symphony dopo ogni sessione di estrazione per individuare residui visibili. Se sono presenti residui visibili, seguire le istruzioni nel capitolo 5.1.
  • Seite 129: Prima Del Primo Impiego/Dopo Ciascun Utilizzo

    5.2 Prima del primo impiego/dopo ciascun utilizzo Smontare il set per tiralatte nei l Risciacquare tutti i componenti singoli componenti: con acqua potabile pulita fredda – bottiglia (20 °C circa). – tappo multifunzione l Pulire questi componenti con – coppa per il seno abbondante acqua saponata tiepida –...
  • Seite 130: Prima Del Primo Uso/Una Volta Al Giorno

    5. Pulizia 5.3 Prima del primo uso/ Attenzione una volta al giorno l Non spruzzare o versare liquidi direttamente sul tiralatte. l Per la pulizia, usare esclusivamente acqua potabile. l Per evitare l’essiccazione dei residui di latte e prevenire la formazione di batteri, separare e lavare subito dopo l’uso tutti i componenti che entrano a contatto con il seno o con il...
  • Seite 131: Tiralatte - Pulizia E Disinfezione

    Asciugatura/conservazione Asciugare con un panno pulito o lasciare asciugare su un panno pulito. Riporre i componenti detersi in una borsa di conservazione o in un ambiente puliti. Non conservare i componenti in contenitori/borse a chiusura ermetica. È importante Coprire tutti i componenti con acqua e far asciugare tutta l’umidità...
  • Seite 132: Preparazione All'estrazione Del Latte

    Informazioni l Usare il tiralatte soltanto con la scheda Per rimuovere la scheda, di programma appropriata (Symphony svitare la protezione della Standard o Symphony PLUS). scheda e del cavo e farla scorrere fuori dalla guida.
  • Seite 133: Sostituzione Della Scheda Di Programma

    Spingere la protezione della scheda Inserire il cavo nella protezione e del cavo sulla guida posta sul retro della scheda e del cavo facendolo fino al fermo. Quindi, stringere la vite. ruotare intorno al perno.  Accertarsi che ci sia gioco a sufficienza per collegare il cavo.
  • Seite 134: Montaggio Del Set Per Tiralatte

    Nota l Utilizzare esclusivamente accessori Inserire con cautela la membrana originali Medela. nel connettore con l’aletta l Controllare l’eventuale usura o il nell’apertura del connettore. danneggiamento dei componenti Assicurarsi che la membrana del set per tiralatte prima dell’uso.
  • Seite 135 Scegliere una misura di coppa per il seno che si adatti alle esigenze individuali. Inserire l’adattatore del Inserire l’adattatore del tubicino tubicino nell’apposita nell’apertura del coperchio del apertura nel tappo del set Symphony. connettore.
  • Seite 136 6. Preparazione all’estrazione del latte Informazioni l Chiudere sempre il coperchio durante l’estrazione. Il coperchio del tiralatte tiene il coperchio del set Symphony spinto verso il basso per evitare perdite di vuoto che potrebbero verificarsi in caso il coperchio del set Symphony si distacchi.
  • Seite 137 Posizionare il connettore del del set Symphony sulla membrana tubicino al centro nell’incavo del tiralatte fino a ottenere una perfetta dell’apparecchio. tenuta.  Accertarsi che il coperchio del set Symphony sia saldo in sede e sia a livello della superficie circostante.
  • Seite 138: Estrazione

    7. Estrazione 7.1 Selezione del programma corretto Il tiralatte Symphony è dotato sia della scheda di programma Symphony Plus che della scheda di programma Symphony Standard che generano schemi di suzione per l’estrazione. La scheda di programma Symphony PLUS contiene due programmi di estrazione.
  • Seite 139 Quando è installata la scheda Symphony Standard: Non è necessario selezionare un programma di estrazione. La scheda, che contiene la tecnologia 2-Phase Expression, inizierà con la fase di stimolazione. Per maggiori informazioni, consultare il capitolo 7.2. Quando è installata la scheda Symphony PLUS: Utilizzare il programma INITIATE subito dopo il parto: l fino a quando la madre non avrà...
  • Seite 140: Scheda Symphony Standard: Funzionamento

    7. Estrazione 7.2 Scheda Symphony Nota Standard: Funzionamento l Scollegare sempre Symphony dall’alimentazione di rete al termine dell’estrazione. Informazioni l Il programma memorizza l’ultima impostazione di vuoto nella fase di stimolazione. l Per il programma Standard: Premere il tasto ON/OFF Premere il tasto di “erogazione”...
  • Seite 141: Impostazione Del "Vuoto Confortevole

    Impostare il proprio “vuoto confortevole” quando il seno non sarà ben drenato e ruotando la manopola di regolazione morbido (Medela suggerisce un tempo del vuoto. Ruotare prima verso destra, di estrazione di almeno 15 minuti). per aumentare il vuoto fino ad avvertire Spegnere il tiralatte premendo il tasto un leggero fastidio.
  • Seite 142: Scheda Symphony Plus: Funzionamento Del Programma Initiate

    7. Estrazione 7.4 Scheda Symphony PLUS: Nota Funzionamento del l Utilizzare il programma INITIATE programma INITIATE subito dopo il parto: – fino a quando la madre non avrà estratto un totale di almeno 20 ml durante ognuna delle ultime tre sessioni di estrazione OPPURE –...
  • Seite 143 INITIATE press Impostare il proprio “vuoto Premere il tasto di “erogazione” confortevole” (vedere capitolo 7.3). entro 10 secondi. Sul display appare I puntini mostrati sul display indicano la scritta “INITIATE attivo”. il livello di vuoto. Una maggiore quantità di puntini equivale a un vuoto maggiore.
  • Seite 144: Scheda Symphony Plus: Funzionamento Del Programma Maintain

    7. Estrazione 7.5 Scheda Symphony PLUS: Nota Funzionamento del l Utilizzare il programma MAINTAIN programma MAINTAIN in seguito alla montata lattea: – dopo che la madre avrà estratto un totale di almeno 20 ml durante ognuna delle ultime tre sessioni di estrazione OPPURE –...
  • Seite 145 Continuare con l’estrazione fino a quando il seno non sarà ben drenato e morbido (Medela suggerisce un tempo di estrazione di almeno 15 minuti). Spegnere il tiralatte premendo il tasto ON/OFF...
  • Seite 146: Estrazione Singola

    Montare soltanto un coperchio l Consultare il proprio consulente per del set Symphony sul tiralatte l’allattamento o l’ostetrica se la quantità (vedere capitolo 6.4). di latte estratta è minima o nulla oppure se l’estrazione risulta dolorosa.
  • Seite 147 La coppa per il seno Posizionare la coppa sul seno in PersonalFit PLUS è ovale modo tale che il capezzolo si trovi e può essere ruotata di 360° correttamente al centro del condotto. e indossata nella posizione Trattenere la coppa sul seno con che risulta più...
  • Seite 148: Estrazione Doppia

    Questo potrebbe comportare il blocco Montare i coperchi dei set dei dotti lattiferi e l’ingorgo. Symphony sul tiralatte (vedere l Consultare il proprio consulente per capitolo 6.4). l’allattamento o l’ostetrica se la quantità di latte estratta è minima o nulla oppure se l’estrazione risulta dolorosa.
  • Seite 149 Press power Posizionare la coppa di una bottiglia su un Accendere il tiralatte con seno in modo tale che il capezzolo si trovi Procedere con la selezione del correttamente al centro del condotto. La programma (vedere capitolo 7.2). coppa per il seno PersonalFit PLUS è ovale e può...
  • Seite 150: Conservazione E Scongelamento Di Latte Materno

    “Pump & Save” sotto acqua calda (max. 37 °C / 98,6 °F). I Far roteare delicatamente la bottiglia o la sacca “Pump & Save” per miscelare il grasso eventualmente separato. Evita di scuotere o mescolare il latte. * Per ulteriori informazioni visitare il sito www.medela.com...
  • Seite 151: Risoluzione Dei Problemi

    Se la suzione l Le estremità del tubicino devono essere collegate saldamente al è scarsa o tappo del connettore e all’apertura nel coperchio del set Symphony. inesistente l Il coperchio del set Symphony deve aderire saldamente alla membrana del tiralatte fino a ottenere una perfetta tenuta.
  • Seite 152: Codici Di Errore

    Potenziali problemi Azioni La scheda di programma non – Controllare che si stia utilizzando è una scheda Symphony la scheda di programma corretta La scheda di programma non – Controllare che la scheda sia posizionata Scheda è...
  • Seite 153: Garanzia E Manutenzione / Smaltimento

    Medela ritiene che i test di produzione finali sostituiscano i test sul dispositivo in loco prima della messa in servizio. La durata di funzionamento del tiralatte Symphony è di 3.000 ore. La vita utile del dispositivo e delle batterie interne è di 7 anni utilizzati in condizioni normali. La vita utile...
  • Seite 154 10. Garanzia e manutenzione / smaltimento Smaltimento Il tiralatte Symphony è composto di materie plastiche e metalli e, pertanto, deve essere smaltito conformemente alle direttive europee 2011/65/EU e 2012/19/EU. È inoltre necessario rispettare anche eventuali ulteriori linee guida locali. Nelle versioni CA /CC i componenti elettronici e la batteria ricaricabile devono essere smaltiti separatamente, in conformità...
  • Seite 155: Cura Completa Durante L'allattamento Al Seno

    11. Cura completa durante l’allattamento al seno I seguenti accessori per Symphony sono disponibili presso i distributori Medela, specificando il nome o il codice del prodotto. Codice articolo Prodotto 008.0437* Coppa per il seno PersonalFit PLUS S (21 mm): EN/DE/FR/IT/NL 008.0442*...
  • Seite 156 7. Afkolven 7.1 Het juiste programma kiezen 7.2 Symphony Standard kaart: Bediening 7.3 Maximaal comfortabel vacuüm instellen 7.4 Symphony PLUS kaart: Bediening INITIATE-programma: 7.5 Symphony PLUS kaart: Bediening MAINTAIN-programma: 7.6 Enkel afkolven 7.7 Dubbel afkolven 8. Moedermelk bewaren en ontdooien 8.1 Bewaren...
  • Seite 157: Beoogd Gebruik / Populatie / Contra-Indicatie

    MAINTAIN-programma is bedoeld om de melkproductie te stimuleren en op gang te houden met de 2-Phase Expression technologie. Het kan zijn dat de Symphony borstkolf is voorzien van de Standard programmakaart om de zuigpatronen te genereren. Dit programma is bedoeld om de melkproductie te stimuleren en op gang te houden met de 2-Phase Expression technologie.
  • Seite 158: Betekenis Van De Symbolen

    2. Betekenis van de symbolen Het waarschuwingssymbool geeft belangrijke veiligheidsinstructies aan. Als die instructies niet in acht worden genomen, kan dat letsel bij de gebruiker of schade aan de borstkolf veroorzaken. Er zijn verschillende combinaties van symbolen/meldingen. Die hebben de volgende betekenis: Waarschuwing Opmerking Kan leiden tot ernstig letsel...
  • Seite 159 Dit symbool geeft aan dat de klep van het stroompunt geopend dient te worden. Aan/uit-knop Druppeltoets Vacuüm-instelknop Symbolen op de display Vacuümniveau-indicator, stimulatiefase – Standard programmakaart en Symphony PLUS programmakaart (MAINTAIN-programma). Vacuümniveau-indicator, afkolffase – Standard programmakaart en Symphony PLUS programmakaart (MAINTAIN-programma). Vacuümniveau-indicator – Symphony PLUS programmakaart (INITIATE-programma).
  • Seite 160: Belangrijke Veiligheidsinformatie

    Pak een elektrisch apparaat dat in het water is gevallen niet vast. Trek onmiddellijk de stekker uit het stopcontact. l Trek onmiddellijk na gebruik van de Symphony borstkolf de stekker uit het stopcontact. WAARSCHUWING: Om vuur, elektrocutie of ernstige brandwonden...
  • Seite 161 In geval van beschadiging mag het netsnoer niet meer gebruikt worden. Neem contact op met je plaatselijke Medela vertegenwoordiger. l Laat de Symphony borstkolf niet onbeheerd achter met de stekker in het stopcontact. l Scheiding van het net is alleen gewaarborgd als het netsnoer uit het stopcontact getrokken is.
  • Seite 162: Waarschuwing

    Pas geen onderdelen van de borstkolf of afkolfset aan. l Gebruik de Symphony borstkolf niet tijdens het slapen of als je zeer slaperig bent. l Gebruik de Symphony borstkolf niet tijdens het besturen van een motorvoertuig.
  • Seite 163 I Dompel de borstkolf nooit onder in water omdat dit permanente schade aan de borstkolf kan veroorzaken. I Gebruik de Medela Symphony afkolfsets niet met een niet-compatibele borstkolf. I Gebruik de Medela Symphony borstkolf niet met niet-compatibele afkolfsets. I Gebruik de afkolfsets niet voor andere doeleinden dan het afkolven van moedermelk.
  • Seite 164: Productomschrijving

    4. Productomschrijving Enkele en dubbele Symphony afkolfset (toegepaste onderdelen)* De enkele en dubbele Symphony afkolfset is een accessoire voor de Symphony borstkolf. De afkolfset mag maar door één moeder worden gebruikt; gebruik van het apparaat door meer dan één moeder kan een gezondheidsrisico met zich meebrengen.
  • Seite 165 Programmakaart Programmakaart Symphony Standard Symphony PLUS * Leverbare accessoires vind je in hoofdstuk 11. Mogelijk zijn de artikelen niet in alle landen verkrijgbaar. Meer informatie over producten van Medela en verkooppunten in jouw land vind je op www.medela.nl of www.medela.be.
  • Seite 166: Reiniging

    Het membraan voorkomt dat melk in de slang stroomt, maar inspecteer de slang en Symphony kap na elke kolfsessie op zichtbare resten. Als er zichtbare resten zijn, volg dan de instructies in hoofdstuk 5.1.
  • Seite 167: Vóór Het Eerste Gebruik/Na Elk Gebruik

    5.2 Vóór het eerste gebruik/na elk gebruik Haal de afkolfset tot losse onderdelen l Spoel alle onderdelen met koud, uit elkaar: schoon water van drinkkwaliteit – fles (circa 20 °C). – multideksel l Maak deze onderdelen schoon in – borstschild ruim warm zeepwater (circa 30 °C).
  • Seite 168: Vóór Het Eerste Gebruik/Eenmaal Per Dag

    5. Reiniging 5.3 Vóór het eerste gebruik/ Waarschuwing eenmaal per dag l Spuit of giet geen vloeistof direct op de borstkolf. l Gebruik voor het reinigen alleen water van drinkkwaliteit. l Haal de borstkolf uit elkaar en maak alle onderdelen die in aanraking komen met de borst en moedermelk onmiddellijk na het gebruik schoon, om te voorkomen dat melkresten...
  • Seite 169: Borstkolf - Reiniging En Desinfectie

    Drogen/bewaren Afdrogen met een schone doek of op een schone doek leggen om te drogen. Bewaar de schone onderdelen in een schone bewaarzak of in een schone omgeving. Bewaar de onderdelen niet in een luchtdichte verpakking/zak. Het is belangrijk Zorg ervoor dat alle onderdelen onder water dat al het achtergebleven staan en laat minstens 5 minuten koken.
  • Seite 170: Voorbereidingen Voor Het Afkolven

    Waarschuwing snoerbescherming Voor hoofdstuk 6.2 Werking op netstroomadapter: l Gebruik uitsluitend het netsnoer dat bij de Symphony is geleverd. l Vergewis je ervan dat het voltage van het netsnoer overeenkomt met het voltage ter plaatse. Info l Gebruik de borstkolf alleen met de...
  • Seite 171: De Programmakaart Veranderen

    Druk de kaart- en snoerbescher- Steek het netsnoer in de kaart- ming zo ver mogelijk over de en snoerbescherming in een lus geleiderail op de achterkant. rond de pin. Draai de schroef vast.  Zorg ervoor dat er genoeg speling is om het snoer in te steken.
  • Seite 172: De Afkolfset In Elkaar Zetten

    Opmerking l Gebruik alleen originele accessoires Plaats het membraan voorzichtig van Medela. in de connector met de flap in de l Controleer voor gebruik de onderdelen opening van de connector. Zorg van de afkolfset op slijtage en ervoor dat het membraan een beschadiging.
  • Seite 173 Kies een borstschild in een maat die bij je behoeften past. Steek de adapter van Steek de adapter van de de slang in de correspon- slang in de opening van derende opening van het de Symphony kap. connectordeksel.
  • Seite 174 6. Voorbereidingen voor het afkolven Info l Sluit tijdens het afkolven altijd het deksel. Het deksel duwt de Symphony kap omlaag om te voorkomen dat verlies van vacuüm optreedt ingeval de Symphony kap zou losraken. Open het deksel van de borstkolf:...
  • Seite 175 Plaats de Symphony kap stevig op het Plaats de connector van membraan van de borstkolf zodat er de slang in de uitsparing een luchtdichte afsluiting ontstaat. in de borstkolfbehuizing.  Controleer of de Symphony kap vastgeklikt is en vlak op het...
  • Seite 176: Afkolven

    7. Afkolven 7.1 Het juiste programma kiezen De Symphony borstkolf is voorzien van de Symphony PLUS programmakaart of Symphony Standard programmakaart om de zuigpatronen te genereren. De Symphony PLUS programmakaart bevat twee kolfprogramma’s. Het INITIATE- programma is bedoeld om de melkproductie te initiëren met de initiatietechnologie van Medela.
  • Seite 177 Als de Symphony Standard kaart is geplaatst: Je moet geen kolfprogramma selecteren. De kaart bevat de 2-Phase Expression technologie en start met de stimulatiefase. Zie hoofdstuk 7.2 voor meer informatie. Als de Symphony PLUS kaart is geplaatst: Gebruik het INITIATE-programma direct na de geboorte:...
  • Seite 178: Symphony Standard Kaart: Bediening

    7. Afkolven 7.2 Symphony Standard Opmerking kaart: Bediening l Haal na het afkolven altijd direct de stekker van de Symphony uit het stopcontact. Info l Het programma slaat de laatste vacuüm- instelling in de stimulatiefase op. l Voor het Standard-programma:...
  • Seite 179: Maximaal Comfortabel Vacuüm Instellen

    7.3 Maximaal comfortabel vacuüm instellen Ga door met afkolven totdat de borst Stel het maximaal comfortabel vacuüm leeg en zacht aanvoelt (Medela in door de vacuüm-instelknop te draaien. adviseert een afkolftijd van minstens Verhoog eerst het vacuüm door de knop 15 minuten).
  • Seite 180: Symphony Plus Kaart: Bediening Initiate-Programma

    MAINTAIN-programma (zie hoofdstuk 7.5). l Haal na het afkolven altijd direct de stekker van de Symphony uit het Druk de aan/uit-knop in stopcontact. de borstkolf in te schakelen. Op de display verschijnt de tekst “INITIATE...
  • Seite 181 INITIATE press Stel het maximaal comfortabel Druk binnen 10 seconden op de vacuüm in (zie hoofdstuk 7.3). De druppeltoets . De tekst op de stippen op de display geven het display verandert in ‘INITIATE loopt’. vacuümniveau aan. Hoe meer stippen, hoe sterker het vacuüm.
  • Seite 182: Symphony Plus Kaart: Bediening Maintain-Programma

    – Vanaf dag zes, afhankelijk van welke van de twee opties het eerst aan de orde is. l Haal na het afkolven altijd direct de stekker van de Symphony uit het stopcontact. Druk de aan/uit-knop in de borstkolf in te schakelen.
  • Seite 183 Hoe meer druppels, over te schakelen naar de afkolffase. hoe sterker het vacuüm. Ga door met afkolven totdat de borst leeg en zacht aanvoelt (Medela adviseert een afkolftijd van minstens 15 minuten). Schakel de borstkolf uit door op de aan/uit-knop te drukken...
  • Seite 184: Enkel Afkolven

    Opmerking Press power l Haal na het afkolven altijd direct de stekker van de Symphony uit het stopcontact. Info Schakel de borstkolf in via l Zorg ervoor dat de slang tijdens Ga verder met de programmakeuze het afkolven niet knikt.
  • Seite 185 Het PersonalFit PLUS borstschild Plaats het borstschild op de borst is ovaal en kan worden gedraaid met de tepel in het midden van de (360°) in elke gewenste positie schacht. Houd het borstschild met welke het meest comfortabel de duim en wijsvinger op de borst. is voor jou.
  • Seite 186: Dubbel Afkolven

    Opmerking l Haal na het afkolven altijd direct de stekker van de Symphony uit het stopcontact. Info l Dubbel afkolven bespaart tijd en Plaats het borstschild van de tweede...
  • Seite 187 Press power Plaats het borstschild van de eerste fles op Schakel de borstkolf in via de eerste borst met de tepel in het midden Ga verder met de programmakeuze van de schacht. Het PersonalFit PLUS (zie hoofdstuk 7.2). borstschild is ovaal en kan worden gedraaid (360°) in elke gewenste positie welke het meest comfortabel is voor jou.
  • Seite 188: Moedermelk Bewaren En Ontdooien

    (max. 37 °C/98,6 °F) te plaatsen. l Draai het flesje of “Pump & Save” zakje voorzichtig rond om eventueel gescheiden vet te mengen. Vermijd schudden en roeren van de melk. * Meer informatie vindt u op www.medela.nl of op www.medela.be...
  • Seite 189: Problemen Oplossen

    Er is weinig of het connectordeksel en de opening in de Symphony kap. geen zuigkracht l De Symphony kap moet stevig op het membraan van de borstkolf worden aangebracht om een luchtdichte afsluiting te krijgen. l Het membraan moet intact zijn.
  • Seite 190: Foutcodes

    Hieronder vind je een beschrijving van de mogelijke foutcodes die een probleem met het apparaat aanduiden, samen met de mogelijke oorzaken en mogelijke oplossingen. Mogelijke problemen Acties Programmakaart is geen Symphony – Controleer of de juiste programmakaart kaart wordt gebruikt Programmakaart is niet correct Ongeldige –...
  • Seite 191: Garantie En Onderhoud / Afvalverwijdering

    Medela. Onafhankelijke testinstituten hebben vastgesteld dat de constructie van de Medela Symphony borstkolf in overeenstemming is met de norm EN/IEC 60601-1. Een kopie van de desbetreffende certificaten wordt op verzoek uitgereikt. Vanwege de toegepaste constructie, verwacht Medela niet dat de elektrische veiligheid op enig moment tijdens de levenscyclus...
  • Seite 192 10. Garantie en onderhoud / afvalverwijdering Afvalverwijdering De Symphony borstkolf is gemaakt van metalen en kunststoffen en moet worden afgevoerd in overeenstemming met de Europese richtlijnen 2011/65/EU en 2012/19/EU. Bovendien moeten de lokale voorschriften in acht worden genomen. Bij de AC/DC-versies moeten de elektronische componenten en de oplaadbare batterij apart worden afgevoerd, conform de lokale regelgeving.
  • Seite 193: Volledige Verzorging Tijdens De Borstvoedingsperiode

    Quick Clean zak Mogelijk zijn de artikelen niet in alle landen verkrijgbaar. Neem voor meer informatie over alle producten van Medela contact op met je plaatselijke leverancier of kijk op www.medela.nl of www.medela.be. * Als het resultaat van het afkolven onbevredigend is of als het afkolven pijnlijk is, raadpleeg dan je lactatiekundige of medisch ondersteuner.
  • Seite 195: Technical Specifications

    12. Technical specifications Operation Vacuum (approx.) Betrieb Vakuum (ungefährer Wert) Utilisation Force d’aspiration (env.) Vuoto (circa) Funzionamento Vacuüm (ca.) Bediening –50 ... –250 mmHg –7 ... –33 kPa Transport / Storage 45 ... 120 cpm Transport/Lagerung Transport/stockage 100 – 240 V ~ Trasporto/conservazione 50 / 60 Hz Transport/opslag...
  • Seite 196 85378 Eching www.medela.fr Germany Phone +49 89 31 97 59-0 Italy +49 89 31 97 59 99 Medela Italia Srl a socio unico info@medela.de Via Turrini, 13-15 - Loc. Bargellino www.medela.de 40012 Calderara di Reno (BO) Italy Austria Phone + 39 051 72 76 88 Medela Österreich GmbH...

Inhaltsverzeichnis