Herunterladen Diese Seite drucken
Vorschau ausblenden Andere Handbücher für HandyStep S:

Werbung

Verfügbare Sprachen

Verfügbare Sprachen

Liquid Handling · Easy Handling!
HandyStep
3
Gebrauchsanleitung
21
Operating Manual
39
Mode d'emploi
57
Instrucciones de manejo
F I R S T
®
C L A S S · B R A N D

Werbung

loading

Inhaltszusammenfassung für BRAND HandyStep S

  • Seite 1 Liquid Handling · Easy Handling! HandyStep ® F I R S T C L A S S · B R A N D Gebrauchsanleitung Operating Manual Mode d'emploi Instrucciones de manejo...
  • Seite 3 Inhaltsverzeichnis Seite Sicherheitsbestimmungen Funktion und Einsatzgrenzen Funktions- und Bedienelemente PD-Tip einsetzen Volumen einstellen PD-Tip füllen Repetitives Dosieren PD-Tip abwerfen Volumen kontrollieren Genauigkeitstabelle Wartung · Reinigung · UV-Entkeimung Bestelldaten · Zubehör Störung – was tun? Reparatur Mängelhaftung Entsorgung...
  • Seite 5 Sicherheitsbestimmungen Bitte unbedingt sorgfältig durchlesen! Dieses Gerät kann in Kombination mit gefährlichen Materialien, Arbeits- vorgängen und Apparaturen verwendet werden. Die Gebrauchsanleitung kann jedoch nicht alle Sicherheitsprobleme aufzeigen, die hierbei eventuell auftreten. Es liegt in der Verantwortung des Anwenders, die Einhaltung der Sicherheits- und Gesundheitsvorschriften sicherzustellen und die entspre- chenden Einschränkungen vor Gebrauch festzulegen.
  • Seite 6 Funktion und Einsatzgrenzen S handelt es sich um einen Mehrfachdispenser zum Beim HandyStep ® schnellen und einfachen repetitiven Dosieren von Flüssigkeiten. Durch die Kombination der verwendeten PD-Tip-Größe und der am Hubeinstell- rad eingestellten Hubeinstellung können Volumina zwischen 2 µl und 5 ml mit höchster Präzision und Richtigkeit dosiert werden.
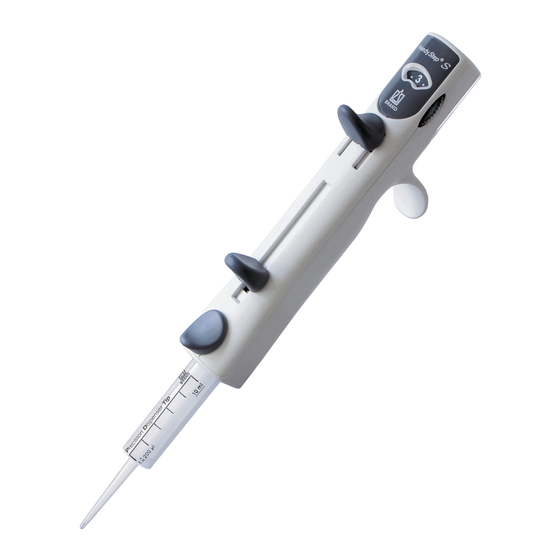
  • Seite 7 Funktions- und Bedienelemente Volumentabelle Geräterückseite, Hubanzeige unter Klarsichtclip (Zahl = mm pro Hub) Hubeinstellrad Dosierhebel (Startposition) Fingerbügel Griffteil Arretier-/Füllhebel • Kolben arretieren/ entkoppeln • Aufsaugen Die Tabelle auf der • Restentleerung Geräterückseite ist doppelseitig bedruckt. Abwurftaste Zum Wechseln, Clip einfach hochschieben, Zylinder freigeben Tabelle umdrehen und (PD-Tip abwerfen)
  • Seite 8 PD-Tip einsetzen • Zum Einsatz der 25 ml und 50 ml PD-Tips wird der zu den Spitzen mitgelieferte wiederverwendbare Adapter benötigt. Dieser wird über einen Bajonettverschluss an die PD-Tips gekoppelt und kann nach der Verwendung wieder gelöst werden. • PD-Tips sind Einmalartikel! Arretier-/ Arretier-/ Füllhebel bis...
  • Seite 9 Volumen einstellen S sind in Tabellen aufge- Die möglichen Dosiervolumina des HandyStep ® führt. Diese befinden sich unter dem Klarsichtclip auf der Geräterückseite. Die Hubeinstellung hat 9 halbzahlige Positionen von 1 bis 5. Das gewünschte Dosiervolumen (Volume) in der Tabelle suchen. Zum verwendeten PD-Tip (Tip size) die zum Volumen gehörige Hub- zahl (Setting) mit dem Hubeinstellrad einstellen.
  • Seite 10 PD-Tip füllen Flüssigkeit aufsaugen Arretier-/Füllhebel bis zum unteren Anschlag schieben. PD-Tip Spitze 3 - 10 mm tief senk- recht in die Flüssigkeit eintauchen. Arretier-/Füllhebel bis zum oberen Anschlag langsam hochziehen, um das Entstehen von Luftblasen zu vermeiden. Hinweis: Kleine Luftblasen im Bereich des Kolbens können vernachlässigt werden, da die Resthubsperre verhindert, dass das nach dem letzten kompletten Dosierschritt...
  • Seite 11 Repetitives Dosieren Dosiervorgang Volumeneinstellung nochmals überprüfen. (Einstellungen mit der Volumentabelle vergleichen!) Außen anhaftende Flüssigkeit an der PD-Tip Spitze mit faserfreiem Zellstoff abwischen. Spitze des PD-Tip an die Gefäßwand anlegen. Flüssigkeit jeweils durch vollständiges Herunterdrücken des Dosierhebels abgeben und diesen ganz nach oben zurückgleiten lassen.
  • Seite 12 PD-Tip abwerfen Handhabung S über ein Gefäß halten. HandyStep ® PD-Tip durch Schieben des Arretier-/ Füllhebels bis zum unteren Anschlag entleeren. Arretier-/Füllhebel nach vorne herausschwenken (der Kolben wird dadurch entkoppelt). HandyStep S über Abfallbehälter ® halten. Abwurftaste nach unten drücken (hiermit wird der Zylinder freigegeben).
  • Seite 13 Volumen kontrollieren Wir empfehlen, je nach Einsatz, alle 3-12 Monate eine gravimetrische Volumenprüfung des Gerätes durchzuführen. Dieser Zyklus sollte den individuellen Anforderungen angepasst werden. Die gravimetrische Volu- menprüfung nach DIN EN ISO 8655-5 erfolgt in folgenden Schritten: Gerät vorbereiten Spitze aufstecken. Diese Prüfung kann mit jeder PD-Tip-Größe durchgeführt werden.
  • Seite 14 – 1 *) = Berechnung von Richtigkeit (R%) und Variationskoeffizient (VK%): R% und VK% werden nach den Formeln der statistischen Qualitäts- kontrolle berechnet. Hinweis: Prüfanweisungen (SOPs) und eine Demoversion der Kalibriersoftware EASYCAL ™ 4.0 stehen unter www.brand.de zum Download bereit.
  • Seite 15 Genauigkeitstabelle Technische Daten HandyStep S mit PD-Tips von BRAND, 20 °C 'Ex', ® Nennvolumen Volumen- ± % < < – – PD-Tip bereich Hubeinstellung % vom Hubeinstellung % vom (µl) Nennvolumen Nennvolumen 0,1 ml 0,5 ml 10 - 1,33 0,73...
  • Seite 16 Wartung · Reinigung · UV-Entkeimung S ist werkseitig kalibriert und wartungsfrei. HandyStep ® Das Gerät darf nicht zerlegt werden! Bei äußerer Verschmutzung empfehlen wir, das Gerät mit einem Tuch und Wasser oder Isopropanol zu reinigen. Wichtig! Vermeiden Sie, dass Flüssigkeit ins Geräteinnere gelangt! Sollte dennoch Flüssigkeit eintreten, lassen Sie das Gerät durch eine autorisierte Servicestelle öffnen und reinigen oder senden Sie das Gerät zu BrandTech.
  • Seite 17 Bestelldaten · Zubehör HandyStep ® Verp.-Einh. 1 Stück, 1 Regalhalter, Regalhalter 3 PD-Tips (0,1 ml, 1 ml, 10 ml) Verp.-Einh. 1 Stück Best.-Nr. 27051 10 Best.-Nr. 7051 30 PD-Tips (Präzisions-Dispenser-Tips) Größe Verp.- unsteril steril** BIO-CERT ® Einheit Best.-Nr. Best.-Nr. Best.-Nr. 0,1 ml 7024 02 7024 04...
  • Seite 18 Störung – was tun? Störung Mögliche Ursache Was tun? PD-Tip-Kolben lässt Arretier-/Füllhebel Erst Abwurftaste sich nicht arretieren ist nicht ganz nach betätigen und PD-Tip nachdem PD-Tip unten geschoben entfernen, dann Arre- eingesetzt wurde. und nicht nach vorne tier-/Füllhebel ganz nach geschwenkt.
  • Seite 19 Reparatur Sollte eine evtl. Funktionsstörung im eigenen Labor durch einfachen Austausch von Ersatzteilen nicht zu beheben sein, muss das Gerät zur Reparatur eingesandt werden. Dabei ist zu beachten, dass aus Sicherheitsgründen nur saubere und dekontaminierte Geräte geprüft und repariert werden können! Zur Reparatur einsenden Achtung! Der Transport von gefährlichem Material ohne...
  • Seite 20 Mängelhaftung Wir haften nicht für Folgen unsachgemäßer Behandlung, Verwendung, Wartung, Bedienung oder nicht autorisierter Reparatur des Gerätes oder für Folgen normaler Abnutzung, insbesondere von Verschleißteilen wie z.B. Kolben, Dichtungen, Ventilen sowie bei Glasbruch. Gleiches gilt für die Nichtbeachtung der Gebrauchsanleitung. Insbesondere übernehmen wir keine Haftung für entstandene Schäden, wenn das Gerät weiter zer- legt wurde als in der Gebrauchsanleitung beschrieben oder wenn fremde Zubehör- bzw.
  • Seite 21 Table of Contents Page Safety Instructions Function and Limitations of Use Operating and Control Elements Inserting the PD-Tip Setting the Volume Filling the PD-Tip Repetitive Dispensing Ejecting the PD-Tip Checking the Volume Accuracy Table Servicing · Cleaning · UV sterilization Ordering Information ·...
  • Seite 23 Safety Instructions Please read the following carefully! This instrument may sometimes be used with hazardous materials, opera- tions, and equipment. It is beyond the scope of this manual to address all of the potential safety risks associated with its use in such applications. It is the responsibility of the user of this pipette to consult and establish appropriate safety and health practices and determine the applicability of regulatory limitations prior to use.
  • Seite 24 Function and Limitations of Use S is a repetitive pipette for quick and simple repetitive The HandyStep ® dispensing of liquids. Volumes from 2 µl to 5 ml can be dispensed with the highest precision and accuracy through combinations of the PD-Tip size used and adjustment of the stroke setting on the stroke-setting wheel.
  • Seite 25 Operating and Control Elements Volume table Instrument backside, Stroke indicator under transparent clip (Number = mm per stroke) Stroke setting wheel Dispensing lever (Start position) Finger rest Hand grip Locking/filling lever • Lock/decouple piston • Aspirate • Empty completely The volume table on the instrument back- side is printed on both Ejection key...
  • Seite 26 Inserting the PD-Tip • Use of the 25 ml and 50 ml PD-Tips requires the reusable adapter supplied with the PD-Tips. This is coupled to the PD-Tips with a bayonet lock, and can be detached after use. • PD-Tips are disposables. Push the Swing out the locking/...
  • Seite 27 Setting the Volume S are listed in tables. The possible dispensing volumes of the HandyStep ® These are found beneath the transparent clip on the backside of the instrument. There are 9 half-integral stroke setting positions, from 1 to 5. Look for the desired dispensing volume (Volume) in the table.
  • Seite 28 Filling the PD-Tip Aspirating Liquid Push the locking/filling lever to the lower stop. Immerse the orifice of the PD-Tip vertically into the liquid to a depth of 3 - 10 mm. Raise the locking/filling lever slowly to the upper stop to avoid the forma- tion of air bubbles.
  • Seite 29 Repetitive Dispensing Dispensing Operation Check the volume setting once again. (Compare with the settings in the volume table.) Wipe off any liquid adhering to the outside of the PD-Tip orifice with a lint-free tissue. Place the orifice of the PD-Tip against the wall of the vessel.
  • Seite 30 Ejecting the PD-Tip Operation S over a vessel. Hold the HandyStep ® Empty the PD-Tip by pushing the locking/filling lever to its lower stop. Swing out the locking/filling lever (the piston will then be decoupled). Hold the HandyStep S over the ®...
  • Seite 31 Checking the Volume Depending on use, we recommend that gravimetric testing of the instru- ment be carried out every 3-12 months. This time frame should be adjusted to individual requirements. Gravimetric volume testing according to DIN EN ISO 8655-5 is performed as follows: Preparation of the instrument Fitting tip.
  • Seite 32 *) = Calculation of accuracy (A%) and variation coefficient (CV%): A% and CV% are calculated according to the formulas for statistical control. Note: Testing instructions (SOPs) and a demo version of the EASYCAL calibration software are available for download at www.brand.de.
  • Seite 33 Accuracy Table Technical Data HandyStep S with PD-Tips from BRAND, 20 °C 'Ex', ® Nominal Volume ± % < < – – volume range (µl) Stroke setting Stroke setting PD-Tip of nominal volume of nominal volume 0.1 ml 0.5 ml 10 - 1.33...
  • Seite 34 Servicing · Cleaning · UV sterilization S is factory calibrated and maintenance-free. HandyStep ® The instrument must not be dismantled! In cases of external contamination, we recommend cleaning the instrument using a wipe with water or isopropanol. Important! Avoid liquid getting inside the instrument. In case this happens, let the instrument be opened and cleaned by an authorized service center, or send it back to BrandTech.
  • Seite 35 Ordering Information · Accessories HandyStep ® pack of 1, 1 shelf/rack mount, Shelf/rack mount 3 PD-Tips (0.1 ml, 1 ml, 10 ml). pack of 1. Cat. No. 27051 10 Cat. No. 7051 30 PD-Tips (Positive Displacement Tips) Capacity Pack of non sterile sterile** BIO-CERT...
  • Seite 36 Troubleshooting Problem Possible cause Corrective action PD-Tip piston Locking/filling lever First press the ejection cannot be locked is not pushed down key and remove the after the PD-Tip completely and is not PD-Tip, then push the has been inserted. swung out. locking/filling lever all the way down and swing it out completely.
  • Seite 37 Repairs If a problem cannot be fixed by following the troubleshooting guide, or by replacing spare parts, then the instrument must be sent in for repair. Please note: for the safety of courriers and our employees, and to avoid violation of federal and local laws, only clean instruments free of any chemical, biological or radioactive hazards can be inspected and repaired! Return for Repair...
  • Seite 38 Warranty We shall not be liable for the consequences of improper handling, use, servicing, operation or unauthorized repairs of the instrument or the con- sequences of normal wear and tear especially of wearing parts such as pistons, seals, valves and the breakage of glass as well as the failure to follow the instructions of the operating manual.
  • Seite 39 Table des matières Page Règles de sécurité Fonction et limites d'emploi Eléments de fonction et de commande Emboîter la pointe DD tip Réglage du volume Remplissage de la pointe DD tip Distribution répétitive Ejection de la pointe DD tip Contrôle du volume Table de précision Entretien ·...
  • Seite 41 Règles de sécurité A lire attentivement! Cet appareil peut être utilisé avec des matériaux dangereux ou en relation avec des appareillages ou procédés dangereux. Le livret mode d'emploi n'a pas pour but d‘exposer tous les problèmes de sécurité pouvant en résulter.
  • Seite 42 Fonction et limites d'emploi S est un distributeur à répétition pour une distribution Le HandyStep ® répétitive facile de milieux de façon rapide et simple. Grâce à la combi- naison de la taille de pointe DD tip utilisée et du réglage sur la roue de réglage de la course, des volumes de 2 µl à...
  • Seite 43 Eléments de fonction et de commande Tableau des volumes Au dos sous Indication de la course clip transparent (Nombre = mm par course) Roue de réglage de la course Levier de distribution (Position de démarrage) Anse de maintien Poignée Levier de blocage/ remplissage •...
  • Seite 44 Emboîter la pointe DD tip • Pour l'utilisation des pointes DD tip 25 ml et 50 ml, il faut l'adaptateur réutilisable fourni avec les pointes. Ce dernier est rattaché aux pointes DD tip au moyen d'une fermeture à baïonnette et peut être desserré après l'utilisation.
  • Seite 45 Réglage du volume S sont indiqués dans Les volumes de distribution possibles du HandyStep ® des tableaux. Ils se trouvent sous le clip transparent sur le dos de l'appareil. Le réglage de la course compte 9 positions en demi-nombres de 1 à 5. Rechercher le volume de distribution souhaité...
  • Seite 46 Remplissage de la pointe DD tip Aspiration de milieu Pousser le levier de blocage/remplis- sage jusqu'à la butée inférieure. Plonger l’orifice de la pointe DD tip verticalement 3 - 10 mm dans le liquide. Tirer lentement le levier de blocage/ remplissage vers la butée supérieure afin d'éviter la formation de bulles d'air.
  • Seite 47 Distribution répétitif Opération de distribution Vérifier encore une fois le réglage du volume. (Comparer les réglages avec le tableau de volumes!) Essuyer le liquide attaché à l'extérieur de la pointe DD tip avec de la cellu- lose sans fibres. Appuyer l’orifice de la pointe DD tip contre la paroi intérieure du récipient.
  • Seite 48 Ejection de la pointe DD tip Manipulation S au-dessus d’un Tenir le HandyStep ® récipient. Vider la pointe DD tip en poussant le levier de blocage/remplissage jusqu’à la butée inférieure. Tourner le levier de blocage/remplis- sage vers l'avant (le piston est alors découplé).
  • Seite 49 Contrôle du volume Selon l'utilisation, nous recommandons l'exécution d'un contrôle gravi- métrique du volume de l'appareil tous les 3-12 mois. Ce cycle doit être adapté en fonction des exigences individuelles. Le contrôle gravimé- trique du volume selon DIN EN ISO 8655-5 se déroule selon les étapes suivantes: Préparation de l'appareil Pose de la pointe.
  • Seite 50 E% et CV% seront calculés selon les formules utilisés pour le contrôle statistique de qualité. Remarque: Des instructions de contrôle (SOPs) et une version de démonstration du logiciel de calibrage EASYCAL ™ 4.0 peuvent être téléchargées sur le site www.brand.de.
  • Seite 51 Table de précision Données techniques HandyStep S avec pointes DD tips de BRAND, 20 °C 'Ex', ® Volume Gamme ± % < < – – nominal de volume Course ajustée Course ajustée pointe DD tip (µl) de volume nominal de volume nominal...
  • Seite 52 Entretien · Nettoyage · Désinfection aux rayons UV S a été calibré en usine et ne nécessite aucun entretien. HandyStep ® Ne jamais essayer de démonter l'appareil! En cas de salissures extérieures nous recommandons de nettoyer l'appareil avec un chiffon et de l'eau ou de l'isopropanol. Important! Veiller à...
  • Seite 53 Données de commande · Accessoires HandyStep ® emballage standard 1 unité, 1 support pour étagère, 3 pointes Support pour étagère DD tips (0,1 ml, 1 ml, 10 ml). emballage standard 1 unité. Réf. Réf. 27051 10 7051 30 Pointes DD tips (pointes de précision pour distribution) Capacité...
  • Seite 54 Dérangement – que faire? Dérangement Cause possible Que faire? Après la mise en Le levier de blocage/ En premier actionner place de la pointe DD remplissage n'est pas la touche d'éjection et tip, le piston de la complètement en bas enlever la pointe DD tip, pointe DD tip ne peut et n'est pas tourné...
  • Seite 55 Réparation L'appareil doit être envoyé en réparation dans la mesure ou il n'est pas possible de remédier à une panne dans le laboratoire en remplaçant simplement les pièces. Veuillez observer que, pour des raisons de sécurité, seuls les appareils propres et décontaminés seront contrôlés et réparés! Envoyer en réparation Attention: Transporter des matériaux dangereux sans autorisation...
  • Seite 56 Garantie Nous déclinons toute responsabilité en cas de conséquences d'un trai- tement, d'une utilisation, d'un entretien et d'une manipulation incorrecte ou d'une réparation non-autorisée de l'appareil ou d'une usure normale, notamment des pièces d'usure, telles que les pistons, les joints d'étan- chéité, les soupapes et de rupture de pièces en verre.
  • Seite 57 Contenido Página Normas de seguridad Función y limitaciones de empleo Elementos funcionales y operativos Colocación de la punta PD Ajuste de volumen Llenado de la punta PD Dosificación repetitiva Expulsar la punta PD Controlar el volumen Tabla de precisión Mantenimiento · Limpieza · Esterilización con UV 70 Referencias · Accesorios ¿Qué hacer en caso de avería? Reparación Garantía Eliminación...
  • Seite 59 Normas de seguridad ¡Rogamos lea este documento cuidadosamente! Este aparato puede entrar en contacto con instalaciones, aplicaciones o materiales peligrosos. Estas instrucciones de manejo no tienen por objeto enumerar todas las limitaciones de seguridad que pueden presentarse durante el uso. El usuario del aparato tiene responsabilidad de tomar las medidas suficientes para su seguridad y su salud, así...
  • Seite 60 Función y limitaciones de empleo S es un dispensador manual para fácil dosificación repe- El HandyStep ® titiva de muestras de manera rápida y sencilla. Mediante la combinación del tamaño de la punta PD utilizada y el ajuste de la carrera en la rueda de ajuste, es posible dosificar volúmenes entre 2 µl y 5 ml con máxima precisión y exactitud.
  • Seite 61 Elementos funcionales y operativos Tabla de volúmenes Parte posterior debajo del clip transparente Indicación de la carrera (Cifra = mm por carrera) Rueda de ajuste de carrera Palanca de dosificación (Posición inicial) Estribo para dedo Empuñadura Palanca de bloqueo/ llenado • Bloquear/desacoplar émbolo •...
  • Seite 62 Colocación de la punta PD • Para utilizar las puntas PD de 25 y 50 ml se requiere el adaptador reutilizable suministrado junto con las puntas. Este se acopla a las puntas PD mediante un cierre bayoneta y después del uso puede retirar nuevamente. •...
  • Seite 63 Ajuste de volumen S están indi- Los volúmenes de dosificación posibles con el HandyStep ® cados en la tabla. Estos se encuentran debajo del clip transparente en la parte posterior del aparato. El ajuste de la carrera tiene 9 posiciones de números fraccionados, de 1 a 5. Buscar en la tabla el volumen a dosificar deseado (Volume).
  • Seite 64 Llenado de la punta PD Aspiración de muestra Desplazar la palanca de bloqueo/ llenado hasta el tope inferior. Introducir el orificio de la punta PD 3 a 10 mm verticalmente dentro del líquido. Para evitar la formación de burbujas de aire, levantar la palanca de blo- queo/llenado lentamente hasta el tope superior.
  • Seite 65 Dosificación repetitiva Proceso de dosificación Verificar nuevamente el ajuste de volumen. (Comparar los ajustes con la tabla de volúmenes.) Limpiar el líquido adherido exterior- mente al orificio de la punta PD con un paño suave exento de pelusas. Colocar el orificio de la punta PD tocando la pared interior del reci- piente.
  • Seite 66 Expulsar de la punta PD Manejo S sobre un Mantener el HandyStep ® recipiente. Vaciar la punta PD desplazando la palanca de bloqueo/llenado hasta el tope inferior. Girar la palanca de bloqueo/llenado hacia adelante (esto producirá el desacople del émbolo). S por Mantener el HandyStep ®...
  • Seite 67 Controlar el volumen Dependiendo de la aplicación, recomendamos realizar un control gravi- métrico de volumen del aparato cada 3 a 12 meses. La periodicidad debe adaptarse a los requisitos individuales. El control gravimétrico de volumen según DIN EN ISO 8655-5 se realiza en tres pasos: Preparación del aparato Este control se puede realizar con una punta PD de cualquier capaci- dad, habitualmente se utiliza la punta PD de 5 ml.
  • Seite 68 *) = Cálculo de la exactitud (E%) y el coeficiente de variación (CV%): E% y CV% se calculan según las fórmulas de control estadístico de calidad. Nota: Bajo www.brand.de se encuentran instrucciones de ensayo disponibles, como así también una versión del programa de calibración ™ EASYCAL...
  • Seite 69 Tabla de precisión Datos técnicos HandyStep S con puntas PD de BRAND, 20 °C 'Ex', ® Volumen Gama de ± % CV* < < – – nominal ajuste (µl) Carrera ajustada Carrera ajustada punta PD de volumen nominal de volumen nominal 10% 10% 0,1 ml 0,5 ml...
  • Seite 70 Mantenimiento · Limpieza · Esterilización con UV S ha sido calibrado en fábrica y no requiere El HandyStep ® mantenimiento. No intentar nunca desmontar el aparato! Para la suciedad exterior, recomendamos limpiar el aparato con un paño y agua o isopropanol. Importante: Evitar el ingreso de líquido en el interior del aparato. No obstante, si ingresara líquido, hacer abrir y limpiar el aparato por un centro de servicio autorizado, o enviarlo a BrandTech.
  • Seite 71 Referencias · Accesorios HandyStep ® 1 unidad por embalaje, 1 soporte de estante, 3 puntas PD (0,1 ml, Soporte de estante 1 ml, 10 ml). 1 unidad por embalaje. Ref. 27051 10 Ref. 7051 30 Puntas PD (puntas de desplazamente directo) Capacidad unidades sin esterilizar esterilizadas** BIO-CERT ® por emb. Ref. Ref.
  • Seite 72 ¿Qué hacer en caso de avería? Avería Causa probable ¿Qué hacer? No se puede La palanca de bloqueo/ En primer lugar accionar la bloquear el émbolo llenado no está total- tecla de expulsión y retirar la de la punta PD mente deslizada hacia punta PD, después empujar después de haber abajo ni tampoco girada la palanca de bloqueo/lle-...
  • Seite 73 Reparación En caso de que no sea posible solucionar una avería en el laboratorio mediante la sustitución de piezas de repuesto, deberá enviarse el aparato a reparación. Rogamos tenga en cuenta que, por motivos de seguridad, sólo podrán comprobarse y repararse los aparatos limpios y desconta- minados. Envíos para reparación Atención: Transportar materiales peligrosos sin autorización está prohibido por la leí. BrandTech Scientific, Inc.
  • Seite 74 Garantía No seremos responsables de las consecuencias derivadas del trato, ma- nejo, mantenimiento, uso incorrecto o reparación no autorizada del apa- rato, ni de las consecuencias derivadas del desgaste normal, en especial de partes susceptibles de abrasión, tales como émbolos, juntas hermeti- cas, valvulas, ni de la rotura de partes de vidrio o del incumplimiento de las instrucciones de manejo.
  • Seite 75 BrandTech Scientific, Inc. · 11 Bokum Road · Essex, CT 06426-1506 · USA Phone: (860) 767-2562 · Fax: (860) 767-2563 · Internet: www.brandtech.com 9974 21 · Printed in Germany · 5/0811/2...