Herunterladen Inhalt Inhalt Diese Seite drucken
BRAND Transferpette electronic Gebrauchsanleitung
Vorschau ausblenden Andere Handbücher für Transferpette electronic:
Inhaltsverzeichnis

Werbung

Verfügbare Sprachen
  • DE

Verfügbare Sprachen

  • DEUTSCH, seite 1
Transferpette
electronic
Gebrauchsanleitung
·
Operating Manual
37
·
Mode d'emploi
71
·
®
3
Instrucciones de manejo
Istruzioni per l'uso
您可在www.brand.de/cn/manuals
105
·
下载本产品的中文操作手册。
139
·

Werbung

Inhaltsverzeichnis
loading

Inhaltszusammenfassung für BRAND Transferpette electronic

  • Seite 1 Transferpette ® electronic 您可在www.brand.de/cn/manuals Gebrauchsanleitung Instrucciones de manejo · · 下载本产品的中文操作手册。 Operating Manual Istruzioni per l'uso · · Mode d'emploi ·...
  • Seite 3: Inhaltsverzeichnis

    Inhaltsverzeichnis Seite Sicherheitsbestimmungen Funktion und Einsatzgrenzen Einsatzausschlüsse Die Bedienelemente Die ersten Schritte Volumen einstellen Aufsaug- und Abgabegeschwindigkeit einstellen Richtig pipettieren Die Pipettierprogramme PIP-Modus PIPmix-Modus revPIP-Modus Elektrophorese (GEL)-Modus DISP-Modus Volumen kontrollieren Genauigkeitstabelle Easy Calibration (Justieren) Autoklavieren Referenzfahrt (rEF) Wartung und Reinigung Akku laden und wechseln Akku-Regenerationsfunktion Störung –...
  • Seite 4: Sicherheitsbestimmungen

    Sicherheitsbestimmungen Dieses Gerät kann in Kombination mit gefährlichen Materialien, Arbeitsvorgängen und Apparaturen ver- wendet werden. Die Gebrauchsanleitung kann jedoch nicht alle Sicherheitsprobleme aufzeigen, die hierbei eventuell auftreten. Es liegt in der Verantwortung des Anwenders, die Einhaltung der Sicherheits- und Ge- sundheitsvorschriften sicherzustellen und die entsprechenden Einschränkungen vor Gebrauch festzulegen.
  • Seite 5: Funktion Und Einsatzgrenzen

    Funktion und Einsatzgrenzen Bei der Transferpette electronic handelt es sich Bei richtiger Handhabung des Gerätes kommt die ® um eine mikroprozessorgesteuerte, akkubetrie- zu dosierende Probe nur mit der Spitze und nicht bene Kolbenhubpipette nach dem Luftpolster- mit der Transferpette electronic in Berührung. ®...
  • Seite 6: Die Bedienelemente

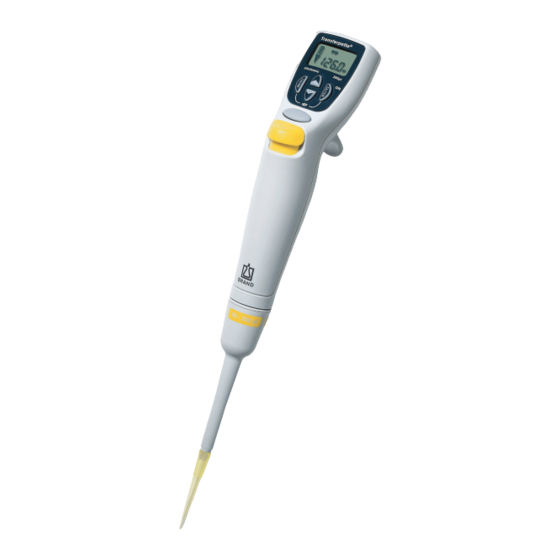
    Die Bedienelemente Die Transferpette electronic ist eine auf Bedienungs- ® ergonomie und Arbeitserleichterung optimierte mikro- prozessorgesteuerte, akkubetriebene Kolbenhubpipette. Ladesteckerbuchse Display Programmtasten Akkufach Pipettiertaste Spitzen-Abwurftaste Fingerbügel Die Transferpette ® electronic liegt er- gonomisch angenehm in der Hand. Zum ab- solut mühelosen Bedie- Griffteil nen der Funktionstasten lässt sich die Handposition...
  • Seite 7: Die Ersten Schritte

    Die ersten Schritte Ist alles in der Verpackung? In der Verpackung befindet sich Ihre Transferpette electronic, ein Akku, ® das Netzteil mit Akku-Ladekabel, Silikonöl, diese Gebrauchsanleitung sowie 1 Musterbeutel Pipettenspitzen. Inbetriebnahme der Transferpette electronic ® Akku einsetzen a) Deckel des Akku-Fachs öffnen. b) Akku einlegen.
  • Seite 8: Volumen Einstellen

    Volumen einstellen Das Volumen ist werkseitig auf das jeweilige Nennvolumen der Transferpette electronic ® eingestellt und kann einfach und schnell individuell verändert werden. Was muss ich tun? Wie geht das? Welche Taste? Was zeigt das Display? Volumenauswahl Durch Drücken einer der aktivieren Pfeiltasten erfolgt die direkte Auswahl eines Volumens.
  • Seite 9: Aufsaug- Und Abgabegeschwindigkeit Einstellen

    Aufsaug- und Abgabegeschwindigkeit einstellen Aufsaug- und Abgabegeschwindigkeit sind separat einstellbar. Beim Menü-Aufruf wird die jeweils zuletzt eingestellte Geschwindigkeit angezeigt. 5 Geschwindigkeitsstufen stehen jeweils zur Verfügung. Was muss ich tun? Wie geht das? Welche Taste? Was zeigt das Display? Aufsauggeschwindigkeit einstellen Menü...
  • Seite 10: Richtig Pipettieren

    Richtig pipettieren mit der Transferpette electronic ® Das Volumen ist werkseitig auf das jeweilige Nennvolumen der Transferpette electronic ® eingestellt und kann einfach und schnell individuell verändert werden (s. Seite 8). Quick Start im Standard-Pipettiermodus Spitze aufstecken Richtige Spitze entsprechend dem Volumenbereich bzw. Color-Code ver- wenden! Auf dichten und festen Sitz der Spitze achten.
  • Seite 11: Die Pipettierprogramme

    Die Pipettierprogramme Seite Normales Pipettieren -Modus Standard-Programm. Ein zuvor eingegebenes Volumen wird aufgenommen und wieder abgegeben Mischen von Proben PIPmix -Modus Programm zum Durchmischen von Flüssig- keiten. Probe wird ständig wiederholt aufge- saugt und abgegeben. Reverses Pipettieren revPIP -Modus Programm besonders zum Pipettieren von Flüssigkeiten mit hoher Viskosität, hohem Dampfdruck oder schäumenden Medien.
  • Seite 12: Pip-Modus

    PIP-Modus Die Programme · Einstellung und Handhabung Das Standard-Programm – ein zuvor eingegebenes Volumen wird aufgenommen und wieder abgegeben. Volumen- und Geschwindigkeitseinstellung wie auf Seite 8/9 beschrieben. Was muss ich tun? Wie geht das? Welche Taste? Was zeigt das Display? Menü-Selektion Durch dreimaliges Drücken aufrufen...
  • Seite 13: Blow-Out Direkt Auslösen

    PIP-Modus Was muss ich tun? Wie geht das? Welche Taste? Was zeigt das Display? Flüssigkeit Durch einmaliges Drücken abgeben der Pipettiertaste erfolgt die Abgabe der Flüssigkeit. Der Pfeil im Display zeigt nach unten (Abgabe). Überhub Sie müssen nichts tun! auslösen? Beim Pipettieren im PIP-Modus erfolgt der Überhub (blow-out)
  • Seite 14: Pipmix-Modus

    PIPmix-Modus Die Programme · Einstellung und Handhabung Programm zum Durchmischen von Flüssigkeiten. Probe wird ständig wiederholt aufgesaugt und abgegeben. Volumen- und Geschwindigkeitseinstellung wie auf Seite 8/9 beschrieben. Was muss ich tun? Wie geht das? Welche Taste? Was zeigt das Display? Menü-Selektion Durch dreimaliges Drücken aufrufen...
  • Seite 15 PIPmix-Modus Was muss ich tun? Wie geht das? Welche Taste? Was zeigt das Display? Flüssigkeit im Durch anhaltendes Drücken PIPmix-Modus der Pipettiertaste erfolgt die abgeben wechselnde Abgabe und Aufnahme der Flüssigkeit. Im Display werden abwech- selnd das Pfeilsymbol für Aufnahme bzw. Abgabe, gedrückt halten sowie die Anzahl der Zyklen angezeigt.
  • Seite 16: Revpip-Modus

    revPIP-Modus Die Programme · Einstellung und Handhabung Programm besonders zum Pipettieren von Flüssigkeiten mit hoher Viskosität, Dampfdruck oder schäumenden Medien. Volumen- und Geschwindigkeitseinstellung wie auf Seite 8/9 beschrieben. Was muss ich tun? Wie geht das? Welche Taste? Was zeigt das Display? Menü-Selektion Durch dreimaliges Drücken der Menü-Taste gelangt man...
  • Seite 17 revPIP-Modus Was muss ich tun? Wie geht das? Welche Taste? Was zeigt das Display? Flüssigkeit im Durch erneutes Drücken der revPIP-Modus Pipettiertaste wird jetzt das erneut auf- eingestellte Volumen wieder nehmen aufgenommen. (Nochmaliges Drücken der Pipettiertaste gibt das Volumen wieder ab, usw.) Nach der letzten Pipettie- Überhub auslösen rung Enter-Taste drücken.
  • Seite 18: Elektrophorese (Gel)-Modus

    Elektrophorese (GEL)-Modus Einstellung und Handhabung Programm zum Beladen von Elektrophorese-Gelen. Ein vorher definiertes Probenvolumen wird bei hoher, veränderbarer Geschwindigkeit aufgesaugt und langsam wieder abgegeben. Volumen- und Geschwindigkeitseinstellung wie auf Seite 8/9 beschrieben. Was muss ich tun? Wie geht das? Welche Taste? Was zeigt das Display? Menü-Selektion Durch dreimaliges Drücken...
  • Seite 19 Elektrophorese (GEL)-Modus Was muss ich tun? Wie geht das? Welche Taste? Was zeigt das Display? Flüssigkeit im Zur Abgabe einmal Pipet- GEL-Modus tiertaste kurz drücken. Im abgeben Display wird eine Raute angezeigt. Das aufgenom- mene Volumen wird langsam wieder abgegeben. Abgabe unterbrechen Die Abgabe der Probe kann durch nochmaliges Drücken...
  • Seite 20: Disp-Modus

    DISP-Modus Die Programme · Einstellung und Handhabung Programm zur Abgabe einer aufgenommenen Flüssigkeit in Teilschritten. Es wird etwas mehr Flüssigkeit aufgenommen als rechnerisch nötig. Geschwindigkeitseinstellung wie auf Seite 9 beschrieben. Was muss ich tun? Wie geht das? Welche Taste? Was zeigt das Display? Menü-Selektion Durch dreimaliges Drücken aufrufen...
  • Seite 21 DISP-Modus Was muss ich tun? Wie geht das? Welche Taste? Was zeigt das Display? Anzahl Steps Durch Drücken der Pfeiltas- einstellen te (+/-) wird die Anzahl der Steps eingestellt. 'steps' blinkt weiterhin. – Anzahl Steps Enter-Taste drücken. bestätigen Das Display zeigt die einge- stellte Anzahl der Steps an.
  • Seite 22: Volumen Kontrollieren

    Volumen kontrollieren Wir empfehlen, je nach Einsatz, alle 3-12 Monate eine Prüfung des Gerätes. Der Zyklus kann aber den individuellen Anforderungen angepasst werden. Die gravimetrische Volumenprüfung der Pipette erfolgt durch nachfolgende Schritte und entspricht der DIN EN ISO 8655, Teil 6. Nennvolumen einstellen Maximales angegebenes Gerätevolumen einstellen.
  • Seite 23: Genauigkeitstabelle

    2 - 200 50 - 1000 1000 50 - 1000 250 - 5000 5000 500 - 5000 2500 * R = Richtigkeit, VK = Variationskoeffizient Hinweis: Prüfanweisungen (SOPs) und eine Demoversion der Kalibriersoftware EASYCAL ™ stehen unter www.brand.de zum Download bereit.
  • Seite 24: Easy Calibration (Justieren)

    Easy Calibration Justieren der Transferpette electronic ® Der Justier-Modus 'CAL' Justieren Das Nennvolumen bzw. zu prüfendes Volumen ist eingestellt, Standard-Modus Pipettieren (PIP), z. B. 200,0 µl (Vorgehensweise siehe Seite 8, 12). Bsp.: Volumen entsprechend Volumenprüfung 201,3 µl. Was muss ich tun? Wie geht das? Welche Taste? Was zeigt das Display?
  • Seite 25 Easy Calibration Werkszustand wieder herstellen Das ständig angezeigte CAL-Symbol im Display weist auf eine vorgenommene Justierung hin. Was muss ich tun? Wie geht das? Welche Taste? Was zeigt das Display? Durch anhaltendes Drücken CAL-Modus (> 3 Sek.) der Menü-Taste aufrufen >3s wird der CAL-Modus auf- gerufen.
  • Seite 26: Autoklavieren

    Autoklavieren Der hervorgehoben abgebildete Pipettenschaft der Transferpette ® electronic ist autoklavierbar bei 121 °C (250 °F), 2 bar und einer Haltezeit von mindestens 15 Minuten nach DIN EN 285. Achtung: Das Griffteil ist nicht autoklavierbar! Pipettenspitze abwerfen. Pipettenschaft vom Griffteil abschrauben. Ohne weitere Demontage kompletten Pipettenschaft autoklavieren.
  • Seite 27: Wartung Und Reinigung

    Wartung Pipettenaufnahmekonus auf Beschädigung prüfen. Kolben und Dichtung auf Verschmutzung untersuchen. Dichtheit des Geräts prüfen. Wir empfehlen das BRAND Dichtheitsprüfgerät BRAND PLT unit zu verwenden. Alternativ dazu Probe aufsaugen, Gerät ca. 10 s senk- recht halten. Falls sich an der Pipettenspitze ein Tropfen bildet: Störung –...
  • Seite 28 Wartung Pipettenaufnahmekonus auf Beschädigung prüfen. Kolben und Dichtung auf Verschmutzung untersuchen. Dichtheit des Geräts prüfen. Wir empfehlen das BRAND Dichtheitsprüfgerät BRAND PLT unit zu verwenden. Alternativ dazu Probe aufsaugen, Gerät ca. 10 s senk- recht halten. Falls sich an der Pipettenspitze ein Tropfen bildet: Störung –...
  • Seite 29: Akku Laden Und Wechseln

    Akku laden und wechseln Ein vollständig geladener Akku erlaubt ca. 8 h Dauerpipettieren (über 4000 Pipettierzyklen) von Proben wasserähnlicher Viskosität und Dichte. Achtung! Vor dem Laden ist sicherzustellen, dass das Netzteil für die im Labor vorhandene Spannung geeignet ist. Das Gerät darf nicht in explosionsgefährdeter Umgebung geladen werden. Der Akku kann ausschließlich in der Transferpette electronic geladen werden! ®...
  • Seite 30: Akku-Regenerationsfunktion

    Akku laden und wechseln Batterieanzeige nach a) Nach dem Einsetzen eines Akkus erscheint erneutem Einsetzen im Display die volle Kapazitätsanzeige eines Akkus mit blinkendem Rahmen (das Gerät erkennt den Ladezustand zunächst noch nicht). Nach 3,5 h Ladezeit – sicheres vollständiges Laden des Akkus –...
  • Seite 31: Störung - Was Tun

    Störung – was tun? Beim Auftreten eines Fehlers zeigt das Gerät im Display 'Err' und die Fehlernummer an. Das Gerät reagiert dann nur noch auf die Enter-Taste. Durch Betätigen der Enter-Taste wird versucht, das Gerät neu zu starten. Es wird daher automatisch eine Referenzfahrt (rEF) angefordert. Störung Error-Anzeige im Display Mögliche Ursache...
  • Seite 32: Bestelldaten · Zubehör · Ersatzteile

    7053 51 für UK/Irland 7053 91 für USA/Japan 7053 52 für USA/Japan 7053 92 für Australien 7053 53 für Australien 7053 93 Qualitäts-Pipettenspitzen von BRAND, Ersatz-Akku unsteril, PP für Transferpette electronic ® Best.-Nr. 7055 00 Volumen Verp.-Einh. Best.-Nr. lose verpackt 0,1 - 20 µl...
  • Seite 33 Bestelldaten · Zubehör · Ersatzteile Ersatzteile für Transferpette electronic bis 1000 µl ® Design und Abmessungen der Ersatzteile entsprechen dem jeweiligen Nennvolumen. (Abb. Ersatzteile Trans- ferpette electronic 10-200 µl.) ® Feder mit Schaft mit Schaft Abwerferoberteil Kolbeneinheit Abwerferunterteil Dichtung Abwerferfeder komplett Volumen 0,5 -...
  • Seite 34: Reparatur · Kontaktadressen

    – Senden Sie ausschließlich gereinigte und dekontaminierte Geräte an die Adresse, die Sie zusammen mit der Rücksendenummer erhalten haben. Die Rücksendenummer außen am Paket gut sichtbar anbringen. Kontaktadressen BRAND GMBH + CO KG Indien: Otto-Schott-Straße 25 BRAND Scientific Equipment Pvt. Ltd.
  • Seite 35: Kalibrierservice

    Gerät. Bei hoher Gebrauchshäufigkeit oder aggressiven Medien sollte häufiger geprüft werden. Die ausführliche Prüfanweisung steht unter www.brand.de bzw. www.brandtech.com zum Download bereit. BRAND bietet Ihnen darüber hinaus die Möglichkeit, Ihre Geräte durch un- seren Werks-Kalibrierservice oder durch das BRAND-DAkkS-Labor kalibrie- ren zu lassen.
  • Seite 36: Mängelhaftung · Entsorgung

    Entsorgung Das nebenstehende Symbol bedeutet, dass Batterien/Akkus und elek- tronische Geräte am Ende ihrer Lebensdauer vom Hausmüll (unsortierter Siedlungsabfall) getrennt entsorgt werden müssen. - Elektronische Geräte müssen gemäß der Richtlinie 2002/96/EG des europäischen Parlaments und des Rates vom 27. Januar 2003 über Elektro- und Elektronik-Altge- räte fachgerecht entsprechend den nationalen Entsorgungs- vorschriften entsorgt werden.
  • Seite 37 Table of Contents Page Safety Instructions Functions and Limitations of Use Operating Exclusions Operating Elements The First Steps Setting the Volume Setting the Aspiration and Discharging Speed Correct Pipetting The Pipetting Programs PIP mode PIPmix mode revPIP mode Electrophoresis (GEL) mode DISP mode Checking the Volume Accuracy Table...
  • Seite 38: Safety Instructions

    Safety Instructions This instrument may sometimes be used with hazardous materials, operations, and equipment. It is be- yond the scope of this manual to address all of the potential safety problems associated with its use in such applications. It is the responsibility of the user of this pipette to consult and establish appropriate safety and health practices and determine the applicability of regulatory limitations prior to use.
  • Seite 39: Functions And Limitations Of Use

    Functions and Limitations of Use The Transferpette electronic is a microprocessor- When the instrument is used properly, the sample ® controlled, battery-operated piston-stroke pipette only comes into contact with the tip and not with which uses the air-displacement principle for the the Transferpette electronic.
  • Seite 40: Operating Elements

    Operating Elements The Transferpette electronic is a microprocessor-con- ® trolled, battery-operated, piston-stroke pipette, which has been optimized for ergonomic operation and ease of use. Charging jack Display Program keys Battery compartment Pipetting key Tip ejection key Finger rest The Transferpette ®...
  • Seite 41: The First Steps

    The First Steps Is everything in the package? Confirm that your package includes: Transferpette electronic pipette, battery, ® AC adapter with battery charging cable, silicone oil, operating manual and one bag with sample pipette tips. Initializing the Transferpette electronic ® Insert the a) Open the cover of the battery compartment.
  • Seite 42: Setting The Volume

    Setting the Volume The volume for the Transferpette electronic is set at the factory to the nominal volume of ® the instrument and can be changed quickly and easily. What to do How to do it Keys to press Display readout Activate volume Press one of the arrow keys setting...
  • Seite 43: Setting The Aspiration And Discharging Speed

    Setting the Aspiration and Discharging Speed The aspiration and discharging speeds can be individually adjusted. When the menu is called up, the last speed setting is shown. Five speed levels are available. What to do How to do it Keys to press Display readout Setting the aspiration speed Bring up the menu...
  • Seite 44: Correct Pipetting

    Correct Pipetting with the Transferpette electronic ® The volume is set at the factory to the nominal volume for the Transferpette electronic and ® can be changed quickly and easily. See page 42. Quick start in the standard pipetting mode Attach the tip Use the correct tip according to the volume range or the color code.
  • Seite 45: The Pipetting Programs

    The Pipetting Programs Page Normal Pipetting Mode Standard program. A previously set volume is aspirated into the pipette tip and then discharged. Mixing of Samples PIPmix Mode Program for mixing liquids. The sample is repeatedly aspirated and discharged. Reverse Pipetting revPIP Mode Program especially for pipetting liquids with a...
  • Seite 46: Pip Mode

    PIP Mode The Programs · Settings and Use The standard program – a previously set volume is aspirated and then discharged. Volume and speed adjustments are described on pages 42 and 43. What to do How to do it Keys to press Display readout Bring up the menu Press the MENU key three...
  • Seite 47 PIP Mode What to do How to do it Keys to press Display readout Discharge liquid Press the pipetting key once to discharge the liquid. The arrow in the display points downwards (discharge). Start blow-out? No action required! When pipetting in the PIP mode the blow-out function is performed automati- cally.
  • Seite 48: Pipmix Mode

    PIPmix Mode The Programs · Settings and Use Program for mixing of liquids. The sample is repeatedly aspirated and discharged. Volume and speed adjustments are described on pages 42 and 43. What to do How to do it Keys to press Display readout Bring up the menu Press the MENU key three...
  • Seite 49 PIPmix Mode What to do How to do it Keys to press Display readout Discharge liquid Press and hold the pipet- in the PIPmix ting key and the liquid is mode alternately aspirated and dis- charged. The display shows the up arrow for aspiration and the down arrow for discharging and the number press and hold...
  • Seite 50: Revpip Mode

    revPIP Mode The Programs · Settings and Use Program for pipetting of liquids with high viscosity, vapor pressure or that tend to foam. Volume and speed adjustments are described on pages 42 and 43. What to do How to do it Keys to press Display readout Bring up the menu...
  • Seite 51 revPIP Mode What to do How to do it Keys to press Display readout Repeat aspiration Press the pipetting key of liquid in revPIP again and the set volume is mode aspirated into the tip. Press the pipetting key again and the volume is discharged again, and so on...
  • Seite 52: Electrophoresis (Gel) Mode

    Electrophoresis (GEL) Mode The Programs · Settings and Use Program for loading electrophoresis gels. A predefined sample volume is aspirated into the pipette tip with high adjustable speed and then slowly discharged. Volume and speed adjustment is described on pages 42 and 43. What to do How to do it Keys to press...
  • Seite 53 Electrophoresis (GEL) Mode What to do How to do it Keys to press Display readout Discharge liquid Press the pipetting key once in the GEL mode to discharge the liquid. The rhombus is shown in the dis- play. The liquid is discharged very slowly.
  • Seite 54: Disp Mode

    DISP Mode The Programs · Settings and Use Program for discharging an aspirated liquid in pre-defined steps. The volume aspirated will be a little bit more than actually needed. Speed adjustment is described on page 43. What to do How to do it Keys to press Display readout Bring up the menu...
  • Seite 55 DISP Mode What to do How to do it Keys to press Display readout Set the number Press the arrow keys (+/-) of steps to set the number of steps. ‚Steps‘ continues to blink. – Confirm the Press the ENTER key. number of steps The display now shows the number of steps that has...
  • Seite 56: Checking The Volume

    Checking the Volume Depending on use, we recommend inspection of the instrument every 3 to 12 months. The cycle can, however, be adjusted to individual requirements. The gravimetric testing of the pipette volume is performed according to the following steps and is in accordance with DIN EN ISO 8655, Part 6.
  • Seite 57: Accuracy Table

    50 - 1000 250 - 5000 5000 500 - 5000 2500 * A = Accuracy, CV = Coefficient of Variation Note: ™ Testing instructions (SOPs) and a demo version of the EASYCAL 4.0 calibration software are available for download at www.brand.de.
  • Seite 58: Easy Calibration (Adjustment)

    Easy Calibration Adjustment of the Transferpette electronic ® The calibration mode ‚CAL‘ Adjustment The instrument should be set to either the nominal volume (for example 200 µl for a 200 µl pipette) or a specific test volume, in the standard pipetting mode (PIP).
  • Seite 59 Easy Calibration Revert to factory default settings The continually displayed CAL symbol refers to a previously made adjustment. What to do How to do it Keys to press Display readout Bring up the CAL Press and hold the MENU mode key (>...
  • Seite 60: Autoclaving

    Autoclaving The pipette shaft of the Transferpette electronic (highlighted in ® picture) can be autoclaved at 121 °C (250 °F) at a pressure of 2 bar (30 psi) with a holding time of at least 15 minutes according to DIN EN 285. Attention: The handgrip can not be autoclaved! Eject the pipette tip.
  • Seite 61: Servicing And Cleaning

    Inspect the piston and seal for contamination and damage. Test the sealing of the instrument. We recommend using the BRAND leak testing instrument PLT unit. Alternatively: to do this aspirate a sample, and then hold the instrument in a vertical position for about 10 sec. If a drop forms at the tip orifice, see the troubleshooting guide on page 65.
  • Seite 62 Inspect the piston and seal for contamination and damage. Test the sealing of the instrument. We recommend using the BRAND leak testing instrument PLT unit. Alterna- tively: to do this aspirate a sample, and then hold the instrument in a vertical position for about 10 sec. If a drop forms at the tip orifice, see the troubleshooting guide on page 65.
  • Seite 63: Charging And Replacing The Battery

    Charging and Replacing the Battery A fully charged battery allows approx. eight hours (equals more than 4000 pipetting cycles) of continuous pipetting of liquids with a viscosity and density similar to water. Important! Before charging the battery ensure that the AC adapter is compatible with the line voltage in the labora- tory.
  • Seite 64: Battery Regeneration Function

    Charging and Replacing the Battery Battery display after a) After the battery is inserted, the display inserting a battery shows the full capacity indicator with a blinking frame, the instrument does not recognize the charging status right now. After 3.5 hours of charging time – safe full charging of the battery –...
  • Seite 65: Troubleshooting

    Troubleshooting If an error occurs, the instrument display shows "Err" and the error number is also shown. The instrument will now only react to the ENTER key. Pressing the ENTER key will attempt to restart the instrument. Therefore, a reference run is automatically requested. Problem Error message Possible cause...
  • Seite 66: Ordering Information · Accessories · Spare Parts

    UK/Ireland 7053 91 for USA/Japan 7053 52 for USA/Japan 7053 92 for Australia 7053 53 for Australia 7053 93 Quality pipette tips from BRAND, Replacement battery non-sterile, PP for Transferpette electronic ® Volume Pack of Cat. No. Cat. No.
  • Seite 67 Ordering Information · Accessories · Spare Parts Spare parts for Transferpette electronic up to 1000 µl ® Parts will differ slightly depending on nominal volume of instrument. (Fig. shows spare parts for Transferpette ® electronic 10 - 200 µl). Upper part Spring Shaft with Lower part...
  • Seite 68: Repairs · Contact Addresses

    – Complete the “Declaration on Absence of Health Hazards” and send the instru- ment to the manufacturer or supplier. Ask your supplier or manufacturer for the form. The form can also be downloaded from www.brand.de. In the U.S. and Canada: –...
  • Seite 69: Calibration Service

    Just send in the instruments to be calibrated, accompanied by an indication of which kind of calibration you wish. Your instruments will be returned within a few days together with a test report (BRAND Calibration Service) or with a DAkkS Calibration Certificate. For further information, please contact your dealer or BRAND.
  • Seite 70: Warranty Information · Disposal

    Disposal The adjoining symbol means that storage batteries and electronic devices must be disposed of separately from household trash (mixed municipal waste) at the end of their service life. - According to the Directive 2002/96/EC of the European Parliament and of the Council on Waste Electrical and Electronic Equipment (WEEE) of 27 January 2003, elec- tronic equipment requires disposal according to the relevant national disposal regulations.
  • Seite 71 Table des matières Page Règles de sécurité Fonction et limites d'emploi Interdictions d'emploi Les éléments de commande Premiers pas Réglage du volume Réglage de la vitesse d'aspiration et d'éjection Le pipetage correct Les programmes de pipetage Mode PIP Mode PIPmix Mode revPIP Mode électrophorèse (GEL) Mode DISP...
  • Seite 72: Règles De Sécurité

    Règles de sécurité Cet appareil peut être utilisé avec des matériaux dangereux ou en relation avec des appareillages ou pro- cédés dangereux. Le livret de mode d'emploi cependant n'a pas pour but d'exposer tous les problèmes de sécurité pouvant en résulter. Ce sera donc de la responsabilité de l'utilisateur d'être sûr que les consignes de sécurité...
  • Seite 73: Fonction Et Limites D'emploi

    Fonction et limites d'emploi La Transferpette electronic est une pipette à Dans la mesure où l’appareil est manipulé correc- ® piston conformément au principe du coussin d’air tement, l’échantillon à doser entrera uniquement commandée par microprocesseur élle fonctionne à en contact avec la pointe et non pas avec la l’aide de piles permettant de pipeter les solutions Transferpette electronic.
  • Seite 74: Les Éléments De Commande

    Les eléments de commande La Transferpette electronic est une pipette à piston ® commandée par microprocesseur et fonctionnant sur pile, optimisée pour l’ergonomie de manipulation et la simplification du travail. Prise de recharge Ecran d'affichage Touches de programmation Logement de la pile Touche pipetage Touche d'éjection des pointes...
  • Seite 75: Premiers Pas

    Premiers pas Contenu de la livraison L’emballage contient une Transferpette electronic, une pile, le bloc d’ali- ® mentation avec câble de recharge de la pile, de l’huile de silicone, le présent mode d’emploi ainsi qu’un sachet d’échantillons de pointes de pipettes. Mise en service de la Transferpette electronic ®...
  • Seite 76: Réglage Du Volume

    Réglage du volume Le volume nominal correspondant de la Transferpette electronic a été ajusté en usine ® et se laisse facilement et rapidement modifier de manière individuelle. Que dois-je faire? Comment procéder? Quelle touche? Qu'affiche l'écran? Activation de la Il suffit d’appuyer sur l’une sélection du des touches flèches afin de pouvoir directement sélec-...
  • Seite 77: Réglage De La Vitesse D'aspiration Et D'éjection

    Réglage de la vitesse d'aspiration et d'éjection La vitesse d’aspiration et la vitesse d’éjection peuvent être réglées séparément. Lors de l’appel du menu, la dernière vitesse programmée s’affiche. 5 vitesses sont disponibles. Que dois-je faire? Comment procéder? Quelle touche? Qu'affiche l'écran? Réglage de la vitesse d’aspiration Appel du menu Pour accéder au menu...
  • Seite 78: Le Pipetage Correct

    Le pipetage correct à l'aide de la Transferpette electronic ® Le volume nominal correspondant de la Transferpette electronic a été ajusté en usine et se ® laisse facilement et rapidement modifier de manière individuelle (voir page 76). Démarrage rapide avec le mode de pipetage par défaut Insertion N'utiliser que de pointe appropriée correspondant au volume ou au code d'une pointe...
  • Seite 79: Les Programmes De Pipetage

    Les programmes de pipetage Page Pipetage normal Mode Programme par défaut. Un volume programmé préalablement est aspiré puis éjecté. Dispersion de l'echantillon PIPmix Mode Programme permettant de mélanger les liquides. L’échantillon est aspiré puis éjecté à plusieurs reprises. Pipetage inverse revPIP Mode Programme conçu pour le pipetage de liquides...
  • Seite 80: Mode Pip

    Mode PIP Les programmes · Réglage et manipulation Le programme par défaut, un volume programmé auparavant est aspiré puis éjecté. Le réglage du volume et de la vitesse sont décrits en pages 76 et 77. Que dois-je faire? Comment procéder? Quelle touche? Qu'affiche l'écran? Appel de la...
  • Seite 81 Mode PIP Que dois-je faire? Comment procéder? Quelle touche? Qu'affiche l'écran? Ejection du liquide Pour éjecter le liquide, il suffit d’appuyer une fois sur la touche pipetage. La flèche sur l’écran pointe vers le bas (éjection). Déclenchement du Vous ne devez abso- dépassement de lument rien faire! Le course?
  • Seite 82: Mode Pipmix

    Mode PIPmix Les programmes · Réglage et manipulation Le programme par défaut, un volume programmé auparavant est aspiré puis éjecté. Le réglage du volume et de la vitesse sont décrits en pages 76 et 77. Que dois-je faire? Comment procéder? Quelle touche? Qu'affiche l'écran? Appel de la...
  • Seite 83 Mode PIPmix Que dois-je faire? Comment procéder? Quelle touche? Qu'affiche l'écran? Ejection du liquide En maintenant la touche en mode PIPmix pipetage enfoncée, le liquide est aspiré puis éjecté en permanence. Sur l’écran, les flèches d’aspiration et d’éjection s’affichent en alternance avec le nombre maintenir enfoncée de cycles.
  • Seite 84: Mode Revpip

    Mode revPIP Les programmes · Réglage et manipulation Programme spécial pour le pipetage liquides à viscosité élevée, à tension de pression élevée ou à fluides effervescents. Le réglage du volume et de la vitesse sont décrits en pages 76 et 77. Que dois-je faire? Comment procéder? Quelle touche?
  • Seite 85 Mode revPIP Que dois-je faire? Comment procéder? Quelle touche? Qu'affiche l'écran? Réaspiration du En appuyant à nouveau liquide en mode sur la touche pipetage, le revPIP volume programmé est à nouveau aspiré (une nou- velle pression sur la touche pipetage et le liquide est éjecté, etc.).
  • Seite 86: Mode Électrophorèse (Gel)

    Mode électrophorèse (GEL) Les programmes · Réglage et manipulation Programme permettant de charger les gels électrophorèse. Un volume programmé au préalable est aspiré à grande vitesse puis éjecté lentement. Le réglage du volume et de la vitesse sont décrits en pages 76 et 77. Que dois-je faire? Comment procéder? Quelle touche?
  • Seite 87 Mode électrophorèse (GEL) Que dois-je faire? Comment procéder? Quelle touche? Qu'affiche l'écran? Ejection du liquide Afin d’éjecter le liquide, en mode GEL appuyer un court instant sur la touche pipetage, un dièse s’affiche sur l’écran. Le volume programmé est lentement éjecté. Interrompre l’éjection L’éjection de l’échantillon peut être interrompue en...
  • Seite 88: Mode Disp

    Mode DISP Les programmes · Réglage et manipulation Programme permettant la distribution d'un volume de liquide en plusieurs fractions. Il y a plus de liquide aspiré que nécessaire selon le calcul. Le réglage de la vitesse est décrit en page 77. Que dois-je faire? Comment procéder? Quelle touche?
  • Seite 89 Mode DISP Que dois-je faire? Comment procéder? Quelle touche? Qu'affiche l'écran? Réglage du nom- En appuyant sur la touche bre de fractions (+/-) on peut régler le nom- bre de fractions. «steps» clignote toujours. – Confirmation du Appuyer sur la touche nombre de frac- ENTER.
  • Seite 90: Contrôle Du Volume

    Contrôle du volume En fonction de l’usage, nous recommandons de faire contrôler l’appareil tous les 3 à 12 mois. Mais le cycle peut être adapté aux exigences individuelles. L’essai volumétrique gravimétrique des pipettes s’effectue de la manière suivante et satisfait aux exigences de la 6 ème partie de la norme DIN EN ISO 8655.
  • Seite 91: Table De Précision

    250 - 5000 5000 500 - 5000 2500 * E = exactitude, CV = coefficient de variation Remarque: Des instructions de contrôle (SOPs) et une version de démonstration du logiciel de calibrage EASYCAL ™ 4.0 peuvent être téléchargées sur le site www.brand.de.
  • Seite 92: Easy Calibration (Ajustage)

    Easy Calibration Ajustage de la Transferpette electronic ® Le mode d'ajustage «CAL» Ajustage Le volume nominal, resp. le volume à contrôler, est programmé. Pipetage en mode par défaut (PIP), 200,0 µl, par ex. (procédure, voir pages 76, 80). Par. ex.: volume en relation avec l'essai volumétrique 201,3 µl. Que dois-je faire? Comment procéder? Quelle touche?
  • Seite 93 Easy Calibration Restauration de l'état à la livraison Le symbole CAL affiché en permanence sur l’écran signale la présence d’un ajustage. Que dois-je faire? Comment procéder? Quelle touche? Qu'affiche l'écran? Appel du mode Pour appeler le mode CAL, il suffit de maintenir la touche >3s MENU enfoncée (>...
  • Seite 94: Autoclavage

    Autoclavage La tige de pipette mise en relief de la Transferpette electronic ® est autoclavable à 121 °C (250 °F), 2 bar avec un durée de manintien d'au moins 15 minutes selon DIN EN 285. Attention: La poignée n’est pas autoclavable! Jeter la pointe de la pipette.
  • Seite 95: Entretien Et Nettoyage

    Contrôler la propreté du piston et du joint d’étanchéité. Contrôlez l’étanchéité de l’appareil. Nous conseillons em- ployer l'appareil de côntrole d'étanchéité BRAND PLT unit. pour ce faire, aspirer l’échantillon puis tenir l’ap- Alternatif: pareil à la verticale pendant env. 10 s. Lorsqu’une goutte se forme à...
  • Seite 96 Contrôler l’absence de détérioration au niveau du cône pour le logement de la pointe. Contrôler la propreté du piston et du joint d’étanchéité. Contrôlez l’étanchéité de l’appareil. Nous conseillons employer l'appareil de côntrole d'étanchéité BRAND PLT unit. pour ce faire, aspirer l’échantillon puis tenir Alternatif: l’appareil à...
  • Seite 97: Recharge Et Remplacement De La Pile

    Recharge et remplacement de la pile Une pile complètement chargée permet de pipeter en permanence des échantillons à viscosité et densité proches de l’eau durant env. 8 heures (plus de 4000 cycles de pipetage). Attention: Avant de recharger la pile, il est impératif de s’assurer que le bloc d’alimentation convient pour la tension disponible dans le laboratoire.
  • Seite 98: Fonction De Régénération De La Pile

    Recharge et remplacement de la pile Affichage de la pile a) Après insertion de la pile, la capacité maxi- après remplacement male s’affiche dans un cadre clignotant (l’appareil ne reconnaît pas immédiatement l’état de charge). Après 3,5 h de charge – charge maximale sûre de la pile –...
  • Seite 99: Dérangement - Que Faire

    Dérangement – que faire? En cas de panne, l’appareil affiche «Err» et le numéro d’erreur sur l’écran. L’appareil ne réagit plus qu’à la touche ENTER. Après avoir actionné la touche ENTER, l’appareil tente de redémarrer. Il demande donc automatiquement une course d’essai (rEF). Dérangement Message d'erreur Cause possible...
  • Seite 100: Données De Commande · Accessoires · Pièces De Rechange

    7053 91 pour USA/Japon 7053 52 pour USA/Japon 7053 92 pour Australie 7053 53 pour Australie 7053 93 Pointes de pipette de qualité de BRAND, Pile de rechange non stérilisées, PP pour Transferpette electronic ® Volume Unité d'emb. Réf. Réf.
  • Seite 101 Données de commande · Accessoires · Pièces de rechange Pièces de rechange pour la Transferpette electronic jusqu'à 1000 µl ® Design et dimensions des pièces de rechange conformément au volume nominal correspondant (illustration pièces de rechange de la Transferpette electronic 10-200 µl) ®...
  • Seite 102: Réparation · Adresses De Contact

    – Remplir l’»Attestation de Décontamination» et la retourner avec l’appareil au fabricant ou au fournisseur. Demander le formulaire au fournisseur ou au fabricant ou bien en téléchargement gratuit sous www.brand.de. Aux États-Unis et au Canada: – Veuillez contacter BrandTech Scientific, Inc. pour demander les conditions de retour de l’appareil avant de le renvoyer au service après-vente.
  • Seite 103: Service De Calibration

    être fréquents. Les instructions de contrôle détaillés sont disponibles en téléchargement gratuit sur www.brand.de ou www.brandtech.com. BRAND vous offre également la possibilité de faire calibrer vos instruments par notre service de calibration ou par le laboratoire de calibration DAkkS de BRAND.
  • Seite 104: Garantie · Elimination

    Elimination Le symbole ci-contre signifie qu’à la fin de leur durée de vie, les piles/accus et appareils électroniques ne doivent pas être éliminés avec les ordures ménagères (déchets municipaux non triés). - Le traitement special des déchets des appareils électro- niques doit être effectué...
  • Seite 105 Contenido Página Normas de seguridad Función y limitaciones de empleo Excepciones de uso Elementos de manejo Los primeros pasos Ajuste de volumen Ajuste de la velocidad de aspiración y salida Pipetear correctamente Programas de pipeteado Modo PIP Modo PIPmix Modo revPIP Modo de electroforesis (GEL) Modo DISP Controlar el volumen...
  • Seite 106: Normas De Seguridad

    Normas de seguridad Este aparato puede entrar en contacto con instalaciones, aplicaciones o materiales peligrosos. Estas instrucciones de manejo no tienen por objeto enumerar todas las limitaciones de seguridad que pueden presentarse durante el uso. El usuario del aparato tiene responsabilidad de tomar las medidas suficientes para su seguridad y su salud, así...
  • Seite 107: Función Y Limitaciones De Empleo

    Función y limitaciones de empleo Transferpette electronic es una pipeta de embolo Si el aparato se maneja correctamente, la muestra ® controlada por microprocesador y que funciona que se desea dosificar sólo tendrá contacto con la con batería siguiendo el principio de cojín de aire punta, y no con Transferpette electronic.
  • Seite 108: Elementos De Manejo

    Elementos de manejo Transferpette electronic es una pipeta de embolo aspi- ® rante controlada por microprocesador y que funciona con batería que ha sido optimizada en cuanto a su ergonomía y facilitación de manejo. Hembrilla para carga Pantalla Teclas de programación Compartimento para batería Tecla de pipetación...
  • Seite 109: Los Primeros Pasos

    Los primeros pasos ¿La caja viene completa? En la caja, deberá encontrar su Transferpette electronic, una batería, el ® equipo de red con cable de carga de batería, aceite de silicona, las presen- tes instrucciones de manejo, así como 1 paquete de muestra con puntas de pipetas.
  • Seite 110: Ajuste De Volumen

    Ajuste de volumen El volumen viene ajustado de fabrica al volumen nominal de Transferpette electronic ® y puede modificarse individualmente de forma rápida y sencilla. ¿Qué tengo que hacer? ¿Cómo se hace? ¿Qué tecla? ¿Qué indica la pantalla? Activar la selec- Pulsando una de las flechas, ción de volumen podrá...
  • Seite 111: Ajuste De La Velocidad De Aspiración Y Salida

    Ajuste de la velocidad de aspiración y salida Las velocidades de aspiración y salida pueden ajustarse de forma individual. Al llamar el menú, se mostra- rá la última velocidad ajustada correspondientemente. Existen 5 niveles de velocidad ajustables corres- pondientemente. ¿Qué tengo que hacer? ¿Cómo se hace? ¿Qué...
  • Seite 112: Pipetear Correctamente

    Pipetear correctamente con la Transferpette electronic ® El volumen viene ajustado de fábrica al volumen nominal de Transferpette electronic y puede ® modificarse individualmente de forma rápida y sencilla (véase la página 110). Inicio rápido (Quick Start) en el modo de pipeteado estándar Utilizar la punta apropiada, de acuerdo con el rango de volumen y el código Acoplar la punta de color.
  • Seite 113: Programas De Pipeteado

    Programas de pipeteado Pagina Pipeteado normal Modo Programa estándar. Se aspira un volumen ajustado previamente y se vuelve a soltar. Mezclar muestras PIPmix Modo Programa para mezclar líquidos. La muestra se aspira y suelta repetidamente en todo momento. Pipeteado inverso revPIP Modo Programa especial para pipetear líquidos...
  • Seite 114: Modo Pip

    Modo PIP Los programas · Ajuste y manejo El programa estándar: se aspira un volumen ajustado previamente y se vuelve a soltar. El ajuste de volumen y velocidad como se ha descrito en la página 110/111. ¿Qué tengo que hacer? ¿Cómo se hace? ¿Qué...
  • Seite 115 Modo PIP ¿Qué tengo que hacer? ¿Cómo se hace? ¿Qué tecla? ¿Qué indica la pantalla? Soltar líquido Pulsando una vez la tecla de pipeteado, se provocará la expulsión del líquido. La flecha de la pantalla indicará hacia abajo (salida). ¿Activar la carrera ¡Usted no tiene que hacer excesiva? nada! Al pipetear en el...
  • Seite 116: Modo Pipmix

    Modo PIPmix Los programas · Ajuste y manejo Programa para mezclar líquidos. La muestra se aspira y suelta repetidamente en todo momento. El ajuste de volumen y velocidad como se ha descrito en la página 110/111. ¿Qué tengo que hacer? ¿Cómo se hace? ¿Qué...
  • Seite 117 Modo PIPmix ¿Qué tengo que hacer? ¿Cómo se hace? ¿Qué tecla? ¿Qué indica la pantalla? Soltar líquido en Manteniendo pulsada la tecla el modo PIPmix de pipeteado, se provocará la salida y aspiración alterna del líquido. En la pantalla aparecerán alternados los iconos de las flechas de absorción o mantener pulsada...
  • Seite 118: Modo Revpip

    Modo revPIP Los programas · Ajuste y manejo Programa especial para pipetear líquidos de alta viscosidad, presión de vapor o medios espumosos. El ajuste de volumen y velocidad, véase la descripción de la página 110/111. ¿Qué tengo que hacer? ¿Cómo se hace? ¿Qué...
  • Seite 119 Modo revPIP ¿Qué tengo que hacer? ¿Cómo se hace? ¿Qué tecla? ¿Qué indica la pantalla? Volver a aspirar Pulsando nuevamente la te- líquido en el cla de pipeteado, se volverá modo revPIP a aspirar el volumen ajusta- do. (Pulsando nuevamente la tecla de pipeteado, se vuelve a soltar el volumen, etc.) Tras el último pipeteado,...
  • Seite 120: Modo De Electroforesis (Gel)

    Modo de electroforesis (GEL) Ajuste y manejo Programa para cargar geles en electroforesis. Un volumen de muestra previamente definido se absorbe a gran velocidad modificable y se vuelve a soltar lentamente. El ajuste de volumen y velocidad como se ha descrito en la página 110/111. ¿Qué...
  • Seite 121 Modo de electroforesis (GEL) ¿Qué tengo que hacer? ¿Cómo se hace? ¿Qué tecla? ¿Qué indica la pantalla? Soltar líquido en Para soltar líquido, pulse el modo GEL brevemente la tecla de pipeteado una vez. En la pantalla, aparecerá un rom- bo.
  • Seite 122: Modo Disp

    Modo DISP Los programas · Ajuste y manejo Programa para la dosificación de líquidos. Un volumen aspirado es dosificado en pasos parciales. Se aspira un poco más volumen que calculadamente necessario. El ajuste de la velocidad como se ha descrito en la página 111. ¿Qué...
  • Seite 123 DISP-Modus ¿Qué tengo que hacer? ¿Cómo se hace? ¿Qué tecla? ¿Qué indica la pantalla? Ajustar el número Pulsando la flecha (+/-) de pasos se ajusta el número de pasos. 'steps' continuará encendiéndose intermiten- – temente. Confirmar el Pulsar la tecla Enter. número de pasos Entonces, la pantalla mos- trará...
  • Seite 124: Controlar El Volumen

    Controlar el volumen Recomendamos, dependiendo del uso, que el aparato pase por un control cada 3-12 meses. No obstante, el ciclo puede adaptarse a sus necesidades individuales. La comprobación de volumen gravimétrica de la pipeta se realiza en pasos subsiguientes y cumple con la norma DIN EN ISO 8655, parte 6.
  • Seite 125: Tabla De Precisión

    50 - 1000 250 - 5000 5000 500 - 5000 2500 * E = Exactitud, CV = Coeficiente de variación Nota: Bajo www.brand.de se encuentran instrucciones de ensayo disponibles, como así ™ también una versión del programa de calibración EASYCAL 4.0.
  • Seite 126: Easy Calibration (Ajustar)

    Easy Calibration Ajustar con Transferpette electronic ® El modo de ajuste 'CAL' Ajustar El volumen nominal o el volumen que debe comprobarse está ajustado, modo estándar de pipetear (PIP), por ejemplo 200,0 µl (Modo de proceder, véase la página 110, 114). P.e.: volumen correspondiente de la comproba- ción de volumen 201,3 µl.
  • Seite 127 Easy Calibration Volver a obtener el estado original de fábrica El símbolo CAL que aparece constantemente en la pantalla es muestra de que se ha realizado un ajuste. ¿Qué tengo que hacer? ¿Cómo se hace? ¿Qué tecla? ¿Qué indica la pantalla? Llamar el modo Manteniendo pulsada (>3 seg.) la tecla de menú, se...
  • Seite 128: Autoclavage

    Autoclavage El vástago de pipeta ilustrado de Transferpette electronic es ® autoclavable a 121 °C (250 °F), 2 bares y con un tiempo de exposición de como mínimo 15 minutos según DIN EN 285. Atención: ¡La empuñadura no es autoclavizable! Eyectar la punta de la pipeta.
  • Seite 129: Mantenimiento Y Limpieza

    Compruebe también si los émbolos y la obturación están limpios. Compruebe la hermeticidad del aparato. Recomendamos usar el aparato verificador de estanqueidad de BRAND PLT unit. Alternativo: para ello, absorba una muestra y mantenga el aparato en posición vertical durante unos 10 segundos.
  • Seite 130 Compruebe también si los émbolos y la obturación están limpios. Compruebe la hermeticidad del aparato. Recomendamos usar el aparato verificador de estanqueidad de BRAND PLT unit. Alternativo: para ello, absorba una muestra y manten- ga el aparato en posición vertical durante unos 10 segun- dos.
  • Seite 131: Cargar Y Cambiar La Batería

    Cargar y cambiar la batería Una batería cargada completamente permite pipetear muestras de viscosidad y densidad similar al agua de forma continua durante unas 8 horas (corresponde a más de 4000 ciclos de pipeteado). Atención: Antes de cargar la batería, deberá asegurarse de que el equipo de red es adecuado para el voltaje existente en el laboratorio.
  • Seite 132: Función De Regeneración De Batería

    Cargar y cambiar la batería Indicación del nivel a) Tras haber insertado una batería, en la pan- de batería tras haber talla aparecerá la indicación de capacidad completa con un marco parpadeante (el insertado una nueva batería aparato no reconocerá el estado de carga de la batería en un primer momento).
  • Seite 133: Qué Hacer En Caso De Avería

    ¿Qué hacer en caso de avería? Al producirse una avería, en la pantalla podrá leer el aviso 'Err' y el número de error. Entonces, el apa- rato sólo reaccionará si pulsa la tecla Enter. Pulsando la tecla Enter se intenta iniciar de nuevo el aparato. Por tanto, automáticamente será...
  • Seite 134: Referencias · Accesorios · Recambios

    EE.UU./Japón 7053 52 para EE.UU./Japón 7053 92 para Australia 7053 53 para Australia 7053 93 Batería de repuesto Puntas de pipeta de BRAND, para Transferpette electronic ® sin esterilizar, PP Ref. 7055 00 Volumen Unidad por emb. Ref. Empaquetadas sueltas 0,1 - 20 µl...
  • Seite 135 Referencias · Accesorios · Recambios Recambios para Transferpette electronic hasta 1000 µl ® El diseño y las dimensiones de las piezas de repuesto según el volumen nominal correspondiente. (Ilustr. piezas de recambio Transferpette electronic 10-200 µl). ® Pieza superior Unidad Muelle Vástago con muelle Pieza inferior...
  • Seite 136: Reparación · Direcciones De Contacto

    – Rellenar la “Declaración sobre la ausencia de riesgos para la salud” y enviarla con el aparato al fabricante o al distribuidor. Pedir el formulario al proveedor o al fabricante, o se encuentran bajo www.brand.de para un download. En los EE.UU. y Canadá: –...
  • Seite 137: Servicio De Calibración

    (véase 'Documentos técnicos'). Además, BRAND le ofrece la posibilidad de calibrar sus instrumentos por medio del servicio de calibrado de BRAND o por el laboratorio de calibrado DAkkS. Mándenos sencillamente los instrumentos a calibrar con la información qué...
  • Seite 138: Garantía · Eliminación

    Eliminación El siguiente símbolo significa que al final de su vida útil, las pilas / acumu- ladores y aparatos electrónicos deben descartarse separadamente de los residuos domésticos (residuos municipales mezclados). - Según la directiva UE 2002/96/CE del Consejo y Par- lamento Europeo sobre residuos de aparatos eléctricos y electrónicos del 27 enero 2003 es necessario eliminar los aparatos eléctricos conforme a las normas correspondien-...
  • Seite 139 Indice dei contenuti Pagina Norme di sicurezza Funzioni e limiti all'uso Usi non previsti Elementi funzionali I primi passi Regolazione del volume Regolazione della velocità di aspirazione e di erogazione Pipettaggio corretto Programmi di pipettaggio Modalità PIP Modalità PIPmix Modalità revPIP Modalità...
  • Seite 140: Norme Di Sicurezza

    Norme di sicurezza Questo strumento può essere utilizzato con materiali, procedure e apparecchiature pericolosi. Le istruzioni per l'uso non possono però coprire tutte le eventuali problematiche di sicurezza che possono presentar- si. È responsabilità dell'utilizzatore osservare adeguate prescrizioni per la sicurezza e la salute e definire prima dell'uso le opportune limitazioni.
  • Seite 141: Funzioni E Limiti All'uso

    Funzioni e limiti all'uso La Transferpette electronic è una pipetta a pistone Nell'uso corretto dello strumento soltanto il puntale ® a cuscinetto d'aria, controllata da un microproces- viene a contatto con il campione da dosare, mai la sore e alimentata a batteria, per il pipettaggio di Transferpette electronic.
  • Seite 142: Elementi Funzionali

    Elementi funzionali La Transferpette electronic è una pipetta a pistone, otti- ® mizzata dal punto di vista ergonomico e della facilità d'uso, controllata da un microprocessore e alimentata a batteria. Presa per lo spinotto di ricarica Display Pulsante di programmazione Vano accumulatore Tasto di pipettaggio Pulsante di espulsione...
  • Seite 143: I Primi Passi

    I primi passi C'è tutto nella confezione? Nella confezione sono contenuti: la vostra Transferpette electronic, ® un accumulatore, l'alimentatore con il relativo cavo, olio al silicone, queste istruzioni per l'uso e 1 busta di campioni di puntali. Messa in funzione della Transferpette electronic ®...
  • Seite 144: Regolazione Del Volume

    Regolazione del volume Il volume viene impostato in fabbrica al volume nominale della Transferpette electronic ® e può essere modificato autonomamente in modo facile e veloce. Cosa devo fare? Come fare? Quale tasto? Cosa mostra il display? Attivare la scelta Premendo una delle frecce del volume si sceglie direttamente un...
  • Seite 145: Regolazione Della Velocità Di Aspirazione E Di Erogazione

    Regolazione velocità di aspirazione/erogazione Le velocità di aspirazione e di erogazione possono essere impostate in modo indipendente. Richiamando il menù viene mostrata la velocità impostata per ultima. Sono disponibili 5 livelli di velocità. Cosa devo fare? Come fare? Quale tasto? Cosa mostra il display? Impostare la velocità...
  • Seite 146: Pipettaggio Corretto

    Pipettaggio corretto con la Transferpette electronic ® Il volume viene impostato in fabbrica al volume nominale della Transferpette electronic e ® può essere modificato autonomamente in modo facile e veloce (vedere pagina 144). Quick Start nella modalità di pipettaggio standard Inserire il puntale Scegliere il puntale adatto in base al range di volume prescelto e al color- code! Assicurarsi che il puntale sia inserito ermeticamente e saldamente...
  • Seite 147: Programmi Di Pipettaggio

    Programmi di pipettaggio Pagina Pipettaggio normale Modalità Programma standard. Un volume prestabilito viene prima aspirato e poi erogato. Mescolamento dei campioni PIPmix Modalità Programma per la risospensione di liquidi. Il campione viene aspirato e scaricato ripetu- tamente. Pipettaggio inverso revPIP Modalità...
  • Seite 148: Modalità Pip

    Modalità PIP I programmi · Regolazione e utilizzo È il programma standard - un volume prestabilito viene prima aspirato e poi scaricato. La regolazione del volume e della velocità è descritta alle pagine 144 e 145. Cosa devo fare? Come fare? Quale tasto? Cosa mostra il display? Richiamare...
  • Seite 149 Modalità PIP Cosa devo fare? Come fare? Quale tasto? Cosa mostra il display? Erogare Premere una volta il tasto il liquido di pipettaggio per erogare il liquido. La freccia del display è rivolta verso il basso (ero- gazione). Attivare Non dovete fare niente! lo scarico? Nel pipettaggio in modalità...
  • Seite 150: Modalità Pipmix

    Modalità PIPmix I programmi · Regolazione e utilizzo Programma per la risospensione di liquidi. Il campione viene aspirato ed erogato ripetutamente. La regolazione del volume e della velocità è descritta alle pagine 144 e 145. Cosa devo fare? Come fare? Quale tasto? Cosa mostra il display? Richiamare il...
  • Seite 151 Modalità PIPmix Cosa devo fare? Come fare? Quale tasto? Cosa mostra il display? Erogare il liquido Premere il tasto di pipettag- in modalità gio per attivare una sequenza PIPmix di erogazioni e aspirazioni del liquido. Sul display si alter- nano le frecce di indicazione dell'aspirazione e dell'ero- gazione e viene indicato il tenere premuto...
  • Seite 152: Modalità Revpip

    Modalità revPIP I programmi · Regolazione e utilizzo Programma particolarmente adatto per il pipettaggio di liquidi molto viscosi, ad alta tensione di vapore o schiumosi. La regolazione del volume e della velocità è descritta alle pagine 144 e 145. Cosa devo fare? Come fare? Quale tasto? Cosa mostra il display?
  • Seite 153 Modalità revPIP Cosa devo fare? Come fare? Quale tasto? Cosa mostra il display? Aspirare di nuovo Premendo ancora una volta il il liquido in modali- tasto di pipettaggio viene ora tà revPIP aspirato di nuovo il volume impostato. (La successi- va pressione del tasto di pipettaggio eroga di nuovo il volume, e così...
  • Seite 154: Modalità Elettroforesi (Gel)

    Modalità Elettroforesi (GEL) Regolazione e utilizzo Programma per aspirare i gel per elettroforesi. Un volume variabile di campione viene aspirato con velocità alta e regolabile, poi viene erogato lentamente. La regolazione del volume e della velocità è descritta alle pagine 144 e 145. Cosa devo fare? Come fare? Quale tasto?
  • Seite 155 Modalità Elettroforesi (GEL) Cosa devo fare? Come fare? Quale tasto? Cosa mostra il display? Erogare il liquido Premere una volta breve- in modalità GEL mente il tasto di pipettaggio. Il display mostra un rombo. Il volume aspirato viene erogato lentamente. Interrompere l'erogazione L'erogazione del campio- ne può...
  • Seite 156: Modalità Disp

    Modalità DISP I programmi · Regolazione e utilizzo Programma per l'erogazione dose per dose del liquido aspirato. Viene aspirato un po' più di liquido di quanto richiesto in base al calcolo. La regolazione della velocità è descritta a pagina 145. Cosa devo fare? Come fare? Quale tasto?
  • Seite 157 Modalità DISP Cosa devo fare? Come fare? Quale tasto? Cosa mostra il display? Impostare il Premendo le frecce (+/-) si numero di step regola il numero di step. 'steps' lampeggia ancora. – Confermare Premere il tasto Enter. il numero di step Il display mostra il numero di step impostati.
  • Seite 158: Verifica Del Volume

    Verifica del volume Si consiglia, in base all’impiego, una verifica dello strumento ogni 3-12 mesi. L'intervallo dipende comunque dalle prestazioni richieste allo strumento. La verifica gravimetrica del volume va eseguita secondo la seguente procedura, secondo le norme DIN EN ISO 8655, parte 6. Impostare il volume nominale Impostare il volume massimo indicato sullo strumento.
  • Seite 159: Tabella Della Precisione

    50 - 1000 250 - 5000 5000 500 - 5000 2500 * A = Accuratezza, CV = Coefficiente di variazione Nota: Le Procedure operative standard (SOP) e una versione demo del software di calibrazione EASYCAL ™ 4.0 possono essere scaricate da www.brand.de.
  • Seite 160: Easy Calibration (Calibrazione)

    Easy Calibration Calibrazione della Transferpette electronic ® La modalità "CAL" Calibrazione È impostato il volume nominale o uno specifico volume, ad esempio 200,0 µl, con modalità di pipettaggio standard (PIP) (vedere pagine 144, 148 per la pro- cedura). Ad esempio: volume corrispondente a la verifica del volumen 201,3 µl. Cosa devo fare? Come fare? Quale tasto?
  • Seite 161 Easy Calibration Ripristino delle impostazioni di fabbrica Il simbolo CAL fisso sul display indica che è stata eseguita una calibrazione. Cosa devo fare? Come fare? Quale tasto? Cosa mostra il display? Richiamare la Tenendo premuto (più di modalità CAL 3 sec.) il tasto Menù si >3s richiama la modalità...
  • Seite 162: Sterilizzazione In Autoclave

    Sterilizzazione in autoclave E possibile sterilizzare in autoclave il gambo della Transferpette ® electronic a 121 °C (250 °F), 2 bar assoluti e tempo di perma- nenza di almeno 15 min per DIN EN 285. Attenzione: L'impugnatura non può essere sterilizzata in autoclave! Espellere il puntale della pipetta.
  • Seite 163: Manutenzione E Pulizia

    Controllare la tenuta dello strumento: Raccomandiamo utilizzare lo strumento per prove di tenuta PLT unit di BRAND. Alternativo: aspirare del campione e tenere lo strumento verticale per circa 10 secondi. Se si forma una goccia sul puntale: "Individuazione e soluzione dei problemi", pagina 167.
  • Seite 164 Controllare la tenuta dello strumento: Raccomandiamo utilizzare lo strumento per prove di tenuta PLT unit di BRAND. Alternativo: aspirare del campione e tenere lo strumento verticale per circa 10 secondi. Se si forma una goccia sul puntale: "Individuazione e soluzione dei problemi", pagina 167.
  • Seite 165: Ricarica E Sostituzione Dell'accumulatore

    Ricarica e sostituzione dell'accumulatore Un accumulatore completamente carico consente un pipettaggio continuativo (più di 4000 cicli) per circa 8 ore con campioni con viscosità e densità analoga all'acqua. Attenzione! Prima di eseguire la ricarica, controllare che l'alimentatore sia compatibile con la tensione disponibile in laboratorio.
  • Seite 166: Funzione Di Rigenera Dell'accumulatore

    Ricarica e sostituzione dell'accumulatore Visualizzazione a) Dopo la sostituzione dell'accumulatore appare della carica dopo sul display l'indicazione della carica com- pleta con contorno lampeggiante (lo strumen- la sostituzione dell'accumulatore to non ha ancora rilevato il livello di carica). Dopo un tempo di ricarica di 3,5 ore – sicura- mente sufficiente alla ricarica completa –...
  • Seite 167: Individuazione E Soluzione Dei Problemi

    Individuazione e soluzione dei problemi In caso di errore, sul display viene visualizzato "Err" e il relativo codice dell'errore. A questo punto lo strumento risponde solo al tasto Enter. Quando viene premuto Enter lo strumento cerca di riavviarsi. Viene anche eseguito automaticamente un ciclo di riferimento. Problema Codice errore Possibile causa...
  • Seite 168: Dati Per L'ordinazione · Accessori · Parti Di Ricambio

    7053 91 per USA/Giappone 7053 52 per USA/Giappone 7053 92 per Australia 7053 53 per Australia 7053 93 Puntali di qualità per pipette di BRAND, Accumulatore di ricambio non sterili, PP per Transferpette electronic ® Volume Confezione da Codice Codice...
  • Seite 169 Dati per l'ordinazione · Accessori · Parti di ricambio Parti di ricambio per Transferpette electronic fino a 1000 µl ® Forma e dimensioni delle parti di ricambio dipendono dal rispettivo volume nominale. (fig. Parti di ricambio per Transferpette electronic 10-200 µl.) ®...
  • Seite 170: Riparazione · Indirizzi Di Contatto

    – Inviare solo strumenti puliti e decontaminati all'indirizzo ricevuto insieme al numero di reso. Applicare il numero di reso bene in vista sull'esterno del pacco. Indirizzi di contatto BRAND GMBH + CO KG India: Otto-Schott-Straße 25 BRAND Scientific Equipment Pvt. Ltd.
  • Seite 171: Servicio Calibrazione

    Inoltre, BRAND vi offre la possibilità di far tarare i vostri strumenti dal nostro Servizio calibrazione o dal Laboratorio DAkkS BRAND. Inviateci semplicemente i vostri strumenti con le indicazione del tipo di tara- tura richiesta.
  • Seite 172: Garanzia · Smaltimento

    Smaltimento Il simbolo accanto segnala che alla fine della loro vita utile le batterie/accu- mulatori e le apparecchiature elettroniche devono essere smaltite separata- mente dai rifiuti domestici (rifiuti urbani misti). - Gli strumenti elettronici devono essere smaltiti secondo quanto prescritto dalla direttiva del parlamento europeo 2002/96/CE e del consiglio del 27 gennaio 2003 e dalla normativa nazionale vigente in materia di smaltimento di rifiuti di apparecchiature elettriche ed elettroniche.
  • Seite 173 Notizen / Notes / Notas / Appunti:...
  • Seite 175 Transferpette electronic is made in Germany. BRAND U.S. - and international patents pending. Licensed under Rainin U.S. - and international patents. ®...
  • Seite 176 9974 74 · Printed in Germany · 21/0917/6...

Inhaltsverzeichnis