Herunterladen Inhalt Inhalt Diese Seite drucken
Inhaltsverzeichnis

Werbung

Verfügbare Sprachen
  • DE

Verfügbare Sprachen

  • DEUTSCH, seite 27
USER´S MANUAL
BEDIENUNGSANLEITUNG
MANUEL D`UTILISATION
MANUAL DE USUARIO
INSTRUKCJA OBSŁUGI
MANUALE D' USO
OPUS SP5 PLUS
PROFILE MOVING HEAD
CLOSP5PLUS

Werbung

Inhaltsverzeichnis
loading

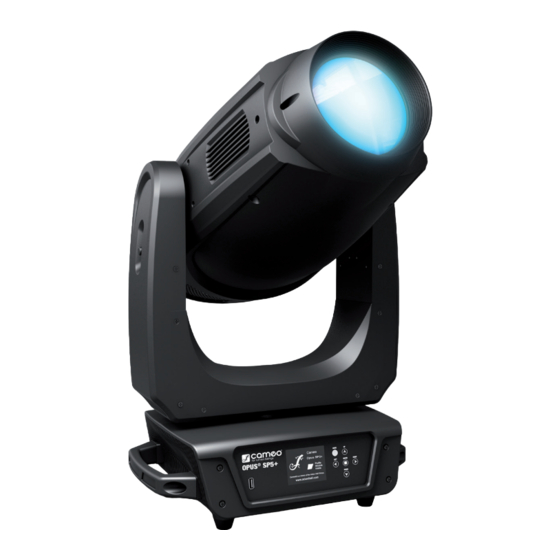
Inhaltszusammenfassung für Cameo OPUS SP5 PLUS

  • Seite 1 USER´S MANUAL BEDIENUNGSANLEITUNG MANUEL D`UTILISATION MANUAL DE USUARIO INSTRUKCJA OBSŁUGI MANUALE D‘ USO OPUS SP5 PLUS PROFILE MOVING HEAD CLOSP5PLUS...
  • Seite 2: Inhaltsverzeichnis

    CONTENTS / INHALTSVERZEICHNIS / CONTENU / CONTENIDO / TREŚĆ / CONTENUTO ENGLISH INFORMATION ON THIS USER MANUAL INTENDED USE DEFINITIONS AND SYMBOL EXPLANATIONS SAFETY INSTRUCTIONS NOTES FOR MOBILE INDOOR DEVICES INCLUDED INTRODUCTION CONNECTIONS, OPERATING AND DISPLAY ELEMENTS OPERATION SETUP AND INSTALLATION CARE, MAINTENANCE AND REPAIR TECHNICAL DATA MINIMUM DISTANCE TO ILLUMINATED SURFACE...
  • Seite 3 FRANÇAIS INFORMATIONS SUR CE MANUEL D'UTILISATION UTILISATION PRÉVUE DÉFINITIONS ET EXPLICATION DES PICTOGRAMMES CONSIGNES DE SÉCURITÉ NOTES POUR LES APPAREILS MOBILES D'INTÉRIEUR LIVRAISON INCLUSE INTRODUCTION CONNECTEURS, UTILISATION ET INDICATEURS FONCTIONNEMENT MONTAGE ET INSTALLATION ENTRETIEN, MAINTENANCE ET RÉPARATIONS CARACTÉRISTIQUES TECHNIQUES DISTANCE MINIMALE PAR RAPPORT À LA SURFACE ÉCLAIRÉE DISTANCE MINIMALE PAR RAPPORT AUX MATÉRIAUX NORMALEMENT INFLAMMABLES MISE AU REBUT DÉCLARATIONS DU FABRICANT...
  • Seite 4 POLSKI INFORMACJE NA TEMAT NINIEJSZEJ INSTRUKCJI OBSŁUGI ZAMIERZONE ZASTOSOWANIE DEFINICJE I OBJAŚNIENIA SYMBOLI INSTRUKCJE BEZPIECZEŃSTWA UWAGI DOTYCZĄCE MOBILNYCH URZĄDZEŃ WEWNĘTRZNYCH DOSTAWA WLICZONA W CENĘ WPROWADZENIE PRZYŁĄCZA, ELEMENTY OBSŁUGI I WSKAŹNIKI OBSŁUGA KONFIGURACJA I INSTALACJA PIELĘGNACJA, KONSERWACJA I NAPRAWA DANE TECHNICZNE MINIMALNA ODLEGŁOŚĆ...
  • Seite 5 DMX CONTROL / DMX STEUERUNG / PILOTAGE DMX / CONTROL DMX / STEROWANIE DMX / CONTROLLO DMX...
  • Seite 6: Information On This User Manual

    This device has been developed and manufactured to the highest quality standards to ensure many years of problem-free operation. Please read this user manual carefully to be able to use your new Cameo product quickly and optimally. Further information about Cameo Light is availab- le on our website CAMEOLIGHT.COM.
  • Seite 7: Safety Instructions

    This symbol identifies hazards that can cause electric shock. This symbol identifies hazardous areas or hazardous situations. This symbol indicates hazards caused by hot surfaces. This symbol indicates hazards caused by intense light sources. This symbol indicates a device in which there are no user-replaceable parts. This symbol indicates additional information on the operation of the product.
  • Seite 8 3. To disconnect the unit from the mains at all poles, it is not sufficient to press the on/off switch on the unit. 4. Make sure that the fuse used corresponds to the type printed on the unit. 5. Make sure that appropriate measures have been taken against overvoltage (e.g. lightning strike).
  • Seite 9 ATTENTION: 1. Do not install or use the device in the vicinity of radiators, accumulators, stoves, or other heat sources. Ensure that the device is always installed in such a way that it is sufficiently cooled and cannot overheat. 2. Do not place any ignition sources, such as burning candles, near the device. 3.
  • Seite 10 WARNING: Devices with wireless signal transmission are not suitable for use in sen- sitive areas in which radio operation can lead to potential detrimental effects. These include: • Hospitals, health centres or other healthcare facilities that provide patient treatment with skilled personnel and equipment. •...
  • Seite 11: Notes For Mobile Indoor Devices

    Please contact your sales partner immediately after the purchase if the delivery is not complete or is damaged. The packaging includes: X 1 x OPUS SP5 PLUS LED Moving Head X 2 x Omega mounting bracket X 1x Power cord...
  • Seite 12: Connections, Operating And Display Elements

    TRUE1 plug is included. POWER OUT Neutrik powerCON TRUE1 mains output socket. Facilitates power supply to other CAMEO spot- lights. Ensure that the total power consumption of all devices connected to the device does not exceed the given ampere (A) value.
  • Seite 13 NET IN RJ45 network connector for connecting to an Art-Net or sACN network. Use CAT 5e or better cables to set up the network. NET OUT RJ45 network connector for connecting additional Art-Net or sACN-capable devices to the net- work. Use CAT 5e or better cables to set up the network. ANTENNA FOR W-DMX ™...
  • Seite 14: Usb Interface

    USB INTERFACE USB interface for updating the device firmware. In the Service menu, set the status for USB update to ON. When available, download the latest firmware from the product page at www. cameolight.com, unzip it and copy the files to a folder without special characters on a USB stick. Disconnect the Moving Head from the mains and all input connections (DMX / Ethernet), connect the USB stick to the USB interface and reconnect the Moving Head to the mains.
  • Seite 15: Operation

    NOTES As soon as the fixture is correctly connected to the mains, "Software Update Please Wait..." and the Cameo logo with information on the fixture model are shown in the display one after the other during the start-up process and the motor reset. After this process, the spotlight is ready for operation and the previously selected mode will be activa- ted.
  • Seite 16 CONTROL MENU (Control) SETTING DMX START ADDRESS (DMX Address) Starting from the main display, press ENTER to enter the main menu. Use the and controls to select the control menu Control and press ENTER. Use UP and DOWN to select the menu item "DMX Address"...
  • Seite 17 Network Network input deactivated Network Activate / deactivate Input network input Network input activated ArtNET ArtNet Protocol Protocol Network protocol sACN sACN protocol 000 to 255. Change value with Universe LEFT and RIGHT, confirm with 000 - 255 ENTER. Select block with LEFT and RIGHT, Universe 1 - 256, Address IP Address...
  • Seite 18 STAND ALONE MODES (Stand Alone) Starting from the main display, press ENTER to enter the main menu. Use the and controls to select the control menu Control and press ENTER. Using and , now select the menu item “Stand Alone” and confirm by pressing ENTER. Now select one of the three stand-alone modes using the and controls and confirm with ENTER.
  • Seite 19 SLAVE MODE (Slave) The slave operating mode is selected as previously described under item "STAND ALONE OPERA- TING MODES". Connect the slave unit and the master unit (same model, same software version) using a DMX cable (master DMX OUT - slave DMX IN) and activate one of the standalone modes Auto or Static in the master unit.
  • Seite 20: Dimmer Curves

    Light intensity can be finely adjusted Exponential at lower DMX values and broadly adjusted at higher DMX values Light intensity can be broadly adjusted Dimmer Selecting the Logarithmic at lower DMX values and finely adjus- Curve Dimmer curve ted at higher DMX values Light intensity can be finely adjusted at Dimmer curve lower and higher DMX values and bro-...
  • Seite 21: Service Menu

    SERVICEMENU Starting from the main display, press ENTER to enter the main menu. Use the UP and DOWN control fields to select the Service menu and press ENTER. This takes you to the submenu for editing the submenu items (select with UP and DOWN, confirm with ENTER, change value with LEFT and RIGHT, confirm with ENTER).
  • Seite 22: Setup And Installation

    Total Time Displays total operating time in hours Current Time Displays the current operating time Displays Runtime Enter the password for resetting the current operating time Time PW operating time (Time PW = 050) Clean Current Resets the current operating time Display of the firm- Firmware ware of the compo-...
  • Seite 23: Care, Maintenance And Repair

    CARE, MAINTENANCE AND REPAIR In order to ensure the long-term, proper functioning of the device, it must be regularly cleaned and, if necessary, maintained. The maintenance requirement depends on the intensity of use and the environment in which it is used. We generally recommend a visual inspection before each operation.
  • Seite 24: Technical Data

    TECHNICAL DATA Product number: CLOSP5PLUS Product type: LED moving light Type: Moving Head Number of lamps: Type of lamp: 500W High Efficiency LED Colour Cold white 6600K temperature lamp: CRI: >70 LED PWM frequency: 650Hz, 1530Hz, 3600Hz, 12kHz, 25kHz (adjustable) Colour blend function: CMY + CTO Number of colours:...
  • Seite 25: Minimum Distance To Illuminated Surface

    Operating voltage: 100–240 V AC / 50–60 Hz Power consumption: 800 W Luminous flux: 22000 lm Power supply Neutrik TRUE1 input and output (output max. 4A) connection: Fuse: T8AL / 250V (5 x 20mm) Ambient operating tem- -15°C to 40°C perature: Relative air humidity: <...
  • Seite 26: Disposal

    DISPOSAL PACKAGING: 1. Packaging can be fed into the reusable material cycle using the usual disposal methods. 2. Please separate the packaging in accordance with the disposal laws and recycling regulations in your country. DEVICE: 1. This appliance is subject to the European Directive on Waste Electrical and Electronic Equipment as amended.
  • Seite 27: Deutsch

    Dieses Gerät wurde unter hohen Qualitätsanforderungen entwickelt und gefertigt, um viele Jahre einen reibungslosen Betrieb zu gewährleisten. Bitte lesen Sie diese Bedienungsanleitung sorgfäl- tig, damit Sie Ihr neues Produkt von Cameo Light schnell und optimal einsetzen können. Weitere Informationen über Cameo Light erhalten Sie auf unserer Website CAMEOLIGHT.COM.
  • Seite 28: Sicherheitshinweise

    Dieses Symbol kennzeichnet Gefahren, die einen elektrischen Schlag verursachen können. Dieses Symbol kennzeichnet Gefahrenstellen oder gefährliche Situationen. Dieses Symbol kennzeichnet Gefahren durch heiße Oberflächen. Dieses Symbol kennzeichnet Gefahren durch intensive Lichtquellen. Dieses Symbol kennzeichnet ein Gerät, in dem sich keine vom Benutzer austauschba- ren Teile befinden.
  • Seite 29 ACHTUNG: 1. Nehmen Sie das Gerät nicht in Betrieb, wenn es starken Temperaturschwankungen ausgesetzt war (beispielsweise nach dem Transport). Feuchtigkeit und Kondensat könnten das Gerät beschädigen. Schalten Sie das Gerät erst ein, wenn es Umge- bungstemperatur erreicht hat. 2. Stellen Sie sicher, dass die Spannung und die Frequenz des Stromnetzes mit den auf dem Gerät angegebenen Werten übereinstimmen.
  • Seite 30: Signalübertragung Per Funk (Z.b. W-Dmx Oder Audio-Funksysteme)

    VORSICHT: 1. Bei beweglichen Bauteilen wie Montagebügeln, oder sonstigen beweglichen Bau- teilen besteht die Möglichkeit sich zu klemmen. 2. Bei Geräten mit motorisch angetriebenen Bauteilen besteht Verletzungsgefahr durch die Bewegung des Gerätes. Plötzliche Gerätebewegungen können zu Schreckreaktionen führen. 3. Die Gehäuseoberfläche des Geräts kann sich im regulären Betrieb stark erwärmen. Stellen Sie sicher, dass ein versehentliches Berühren des Gehäuses ausgeschlos- sen ist.
  • Seite 31: Signalübertragung Per W-Dmx

    Alle Reichweitenangaben beziehen sich auf Freifeldanwendung mit Sichtkontakt ohne Störeinflüsse! Der Betrieb von Sendeanlagen unterliegt behördlichen Bestimmungen. Diese können regional unterschiedlich ausfallen und müssen vor Inbetriebnahme vom Betreiber überprüft werden (z.B. Funkfrequenz und Sendeleistung). WARNUNG: Geräte mit kabelloser Signalübertragung sind nicht für den Betrieb in sensiblen Bereichen, in denen Funkbetrieb zu möglichen Wechselwirkungen führen kann, geeignet.
  • Seite 32: Hinweise Für Ortsveränderliche Indoor-Geräte

    Bitte überprüfen Sie die Vollständigkeit und Unversehrtheit der Lieferung und benachrichtigen Sie Ihren Vertriebspartner bitte unverzüglich nach dem Kauf, falls die Lieferung nicht komplett oder beschädigt ist. Im Lieferumfang des Produkts sind enthalten: X 1 x OPUS SP5 PLUS LED Moving Head X 2 x Omega-Montagebügel X 1 x Netzkabel X Bedienungsanleitung EINFÜHRUNG...
  • Seite 33: Zusätzliche Eigenschaften

    Netzkabel mit powerCON TRUE1 Gerätestecker befindet sich im Lieferumfang. POWER OUT Neutrik powerCON TRUE1 Netzausgangsbuchse. Dient der Netzversorgung weiterer CAMEO Scheinwerfer. Achten Sie darauf, dass die gesamte Stromaufnahme aller angeschlossenen Geräte den auf dem Gerät in Ampere (A) angegebenen Wert nicht überschreitet.
  • Seite 34: Antenne Für W-Dmx

    FUSE Sicherungshalter für 5 x 20mm Feinsicherungen. WICHTIGER HINWEIS: Ersetzen Sie die Sicherung ausschließlich durch eine Sicherung des gleichen Typs und mit gleichen Werten. Sollte die Siche- rung wiederholt auslösen, wenden Sie sich bitte an ein autorisiertes Servicezentrum. DMX IN Männliche 3- und 5-Pol XLR-Buchsen zum Anschließen eines DMX-Kontrollgeräts (z.B.
  • Seite 35: Berührungsempfindliche Bedienfelder

    BERÜHRUNGSEMPFINDLICHE BEDIENFELDER MODE - Durch (wiederholtes) Drücken auf MODE gelangen Sie in der Menüstruktur eine Ebene höher, bis zur Hauptanzeige. UP  und DOWN  - Auswählen der einzelnen Menüpunkte im Hauptmenü (DMX-Adresse, Betriebsart usw.) und in den Untermenüs. ENTER - Ausgehend von der Hauptanzeige gelangen Sie durch Drücken auf ENTER in das Haupt- menü.
  • Seite 36: Bedienung

    Sobald der Scheinwerfer korrekt am Stromnetz angeschlossen ist, wer- den während des Startvorgangs und des Motoren-Resets nacheinander „Software Update Please Wait...“ und das Cameo Logo mit Informatio- nen zum Gerätemodell im Display angezeigt. Nach diesem Vorgang ist der Scheinwerfer betriebsbereit und die Betriebsart, die zuvor ange- wählt war, wird aktiviert.
  • Seite 37 im Display zu blinken und hinter „Signal“ in der oberen Zeile wird „None“ angezeigt (kein Signal), liegt das Steuer-Signal wieder an, wechselt das Display wieder zur Hauptanzeige. Die Display-An- zeige kann um 180° gedreht werden, indem Sie auf das berührungsempfindliche Bedienfeld DOWN tippen, ist die Display-Anzeige bereits um 180°...
  • Seite 38 bestätigen durch Drücken auf ENTER. Den gewünschten DMX-Modus wählen Sie wiederum mit UP und DOWN und bestätigen die Auswahl mit ENTER. Drücken Sie 2x auf MODE, um zurück zur Hauptanzeige zu gelangen, der ausgewählte DMX-Modus ist nun aktiviert. Tabellen mit der Kanal- belegung der verschiedenen DMX-Modi finden Sie in dieser Anleitung unter DMX STEUERUNG.
  • Seite 39 W-DMX EINSTELLUNGEN (Wireless) Ausgehend von der Hauptanzeige gelangen Sie durch Drücken auf ENTER in das Hauptmenü. Wählen Sie mit Hilfe der Bedienfelder UP und DOWN das Kontrollmenü Control aus und drücken auf ENTER. Mit Hilfe von UP und DOWN wählen Sie nun den Menüpunkt „Wireless“ aus und bestätigen durch Drücken auf ENTER.
  • Seite 40 STAND-ALONE-BETRIEBSART STATISCHER MODUS (Static) Der Statische Modus ermöglicht es, ähnlich wie mit einem DMX-Steuergerät, PAN, TILT, Dimmer, Stroboskop, Farbrad und Goborad usw. direkt am Gerät mit Werten von 000 bis 255 einzustellen. Somit kann eine individuelle Szene erstellt werden, ohne einen zusätzlichen DMX-Controller zu benötigen.
  • Seite 41: Settings (Fettdruck = Werkseinstellung)

    SYSTEMEINSTELLUNGEN (Settings) Ausgehend von der Hauptanzeige gelangen Sie durch Drücken auf ENTER in das Hauptmenü. Wählen Sie mit Hilfe der Bedienfelder UP und DOWN das Menü für die Systemeinstellungen Set- tings aus und drücken auf ENTER. Daraufhin gelangen Sie in das Untermenü zum Einstellen der Untermenüpunkte, siehe Tabelle (Auswahl mit UP und DOWN, bestätigen mit ENTER, Status ändern mit UP und DOWN, bestätigen mit ENTER): Settings (Fettdruck = Werkseinstellung)
  • Seite 42: Dimmerkurven

    650Hz, 1530Hz, Einstellen der LED 3600Hz, 12KHz, Frequency PWM Frequenz 25KHz Keine Umkehrung der Pan Bewe- gungsrichtung Pan Reverse Umkehrung der Pan Bewe- gungsrichtung Keine Umkehrung der Tilt Bewe- gungsrichtung Tilt Reverse Einstellungen des Umkehrung der Tilt Bewegungs- Pan / Tilt Gerätekopfs richtung 630 Pan Winkel 630°...
  • Seite 43: Servicemenü

    SERVICEMENÜ Ausgehend von der Hauptanzeige gelangen Sie durch Drücken auf ENTER in das Hauptmenü. Wählen Sie mit Hilfe der Bedienfelder UP und DOWN das Service-Menü Service aus und drücken auf ENTER. Daraufhin gelangen Sie in das Untermenü zum Bearbeiten der Untermenüpunkte (Auswahl mit UP und DOWN, bestätigen mit ENTER, Wert ändern mit LEFT und RIGHT, bestätigen mit ENTER).
  • Seite 44: Aufstellung Und Montage

    System Info Funktionsfehleranzeige Error Info Falls sich ein Funktionsfehler durch einen Reset oder Neustart nicht beheben lässt, muss die defekte Einheit von einem autorisierten Servicezentrum repariert werden. Head xx°C/F° Tempera- Base xx°C/F° Temperaturanzeige ture Anzeige der Temperatur in Celsius oder Unit Fahrenheit Total Time...
  • Seite 45: Pflege, Wartung Und Reparatur

    PFLEGE, WARTUNG UND REPARATUR Um die einwandfreie Funktion des Geräts auf Dauer zu gewährleisten, muss es regelmäßig ge- pflegt und bei Bedarf gewartet werden. Der Pflege- bzw. Wartungsbedarf steht in Abhängigkeit der Nutzungsintensität und -umgebung. Wir empfehlen generell eine Sichtprüfung vor jeder Inbetrieb- nahme.
  • Seite 46: Technische Daten

    WARTUNG UND REPARATUR (nur durch Fachpersonal) GEFAHR! Im Gerät befinden sich Spannungsführende Bauteile. Auch nach Trennung der Netzverbindung kann noch Restspannung im Gerät vorhanden sein, z.B. durch geladene Kondensatoren. HINWEIS! Im Gerät befinden sich keine für den Anwender zu wartenden Baugruppen. HINWEIS! Wartungs- und Reparaturmaßnahmen dürfen nur vom Hersteller autori- siertem Fachpersonal durchgeführt werden.
  • Seite 47 Fokus fein, Iris, Prisma, Prisma Rotation, Frost, Blade 1 - 4, Blade 1 - DMX Funktionen: 4 fein, Shape Rotation, Shape Rotation fein, Pan/Tilt Makros, Pan/Tilt Speed, Dimmerkurve, Systemeinstellungen Standalone Funktionen: Auto Programm 1 - 4, Statischer Modus, Master/Slave-Betrieb Wireless Setting, Display Reverse, Display Beleuchtung On/Off, DMX Fail, Dimmer Curve, Pan Reverse, Tilt Reverse, Pan Winkel, Feedback, Systemeinstellungen: Fan Setting, Movement Blackout, Test, Motor Reset, Factory Reset,...
  • Seite 48: Mindestabstand Zur Beleuchteten Fläche

    MINDESTABSTAND ZUR BELEUCHTETEN FLÄCHE Dieses Symbol mit Entfernungsangabe in Metern (m) gibt den Mindestabstand des Leuchtkörpers zur beleuchteten Fläche an. In diesem Beispiel beträgt der Abstand 0.5 m 0,5m. Den für dieses Gerät gültigen Wert entnehmen Sie bitte den technischen Daten in dieser Anleitung und dem Aufdruck auf dem Gerätegehäuse! MINDESTABSTAND ZU NORMAL ENTFLAMMBAREN MATERIALIEN Dieses Symbol mit Entfernungsangabe in Metern (m) gibt den Mindestabstand...
  • Seite 49: Herstellererklärungen

    HERSTELLERERKLÄRUNGEN Herstellergarantie & Haftungsbeschränkung Adam Hall GmbH, Adam-Hall-Str. 1, D-61267 Neu Anspach / E-Mail Info@adamhall.com / +49 (0)6081 / 9419-0 Unsere aktuellen Garantiebedingungen und Haftungsbeschränkung finden Sie unter: https://cdn-shop.adamhall.com/media/pdf/Manufacturers-Declarations-CAMEO_DE_EN_ES_FR.pdf Im Servicefall wenden Sie sich an Ihren Vertriebspartner. CE-Konformität Hiermit erklärt die Adam Hall GmbH, dass dieses Produkt folgender Richtlinie entspricht (soweit zutreffend): Niederspannungsrichtlinie (2014/35/EU) EMV-Richtlinie (2014/30/EU)
  • Seite 50: Français

    Veuillez lire attentivement ce manuel d'utilisa- tion afin de pouvoir utiliser votre nouveau produit Cameo rapidement et de manière et optimale. De plus amples informations sur Cameo Light sont disponibles sur notre site web CAMEOLIGHT.COM.
  • Seite 51: Consignes De Sécurité

    Ce pictogramme identifie les dangers qui peuvent causer un choc électrique. Ce pictogramme identifie les zones ou les situations dangereuses. Ce pictogramme indique les dangers causés par les surfaces portées à haute tempé- rature. Ce symbole indique les dangers causés par des sources lumineuses intenses. Ce symbole indique que l'appareil ne contient aucune pièce remplaçable par l'utilisateur.
  • Seite 52 AVIS : 1. Ne faites pas fonctionner l'appareil s'il a été exposé à de fortes variations de tem- pérature (par exemple, après le transport). L'humidité et la condensation internes peuvent endommager l'appareil. N'allumez l'appareil qu'une fois qu'il a atteint la température ambiante. 2.
  • Seite 53 ATTENTION : 1. Dans le cas de composants mobiles tels que des supports de montage ou d'autres pièces similaires, il existe un risque de blocage. 2. Dans le cas des appareils dotés de composants motorisés, il existe un risque de blessure dû au mouvement de l'appareil. Un mouvement brusque de l'appareil peut provoquer des réactions de choc.
  • Seite 54 TRANSMISSION DE SIGNAUX PAR RADIO (PAR EXEMPLE, W-DMX OU SYSTÈMES DE RADIO AUDIO) : La qualité et les performances des transmissions de signaux sans fil dépendent généralement des conditions environnantes. Les facteurs suivants peuvent avoir un impact sur la portée et la stabilité du signal : Absoprtion (par exemple, maçonnerie, structures métalliques, eau) Utilisation intensive du spectre HF (par exemple, réseaux locaux sans fil de grande puissance)
  • Seite 55: Notes Pour Les Appareils Mobiles D'intérieur

    été effectuée dans les délais impartis est endommagé. Le carton contient : X 1 x lyre asservie à LED à couteaux OPUS SP5 PLUS X 2 x supports de montage Omega X 1 x cordon secteur...
  • Seite 56: Introduction

    INTRODUCTION LYRE ASSERVIE SÉRIE OPUS CLOSP5PLUS FONCTIONS DE CONTRÔLE DISPONIBLES Contrôle DMX 34 canaux et 50 canaux (CLOSP5PLUS) Contrôle DMX 27 canaux et 33 canaux (CLOSP5PLUS avec module de roue d'animation CLOS- P5AM en option) Art-Net sACN PARAMÈTRES Activé par RDM Fonctionnement maître/esclave Modes autonomes POINTS FORTS :...
  • Seite 57: Connecteurs, Utilisation Et Indicateurs

    TRUE1, est livré. POWER OUT Embase de renvoi secteur Neutrik powerCON TRUE1. Facilite l'alimentation d'autres projecteurs CAMEO. Assurez-vous que la consommation totale de tous les projecteurs connectés ne dépasse pas la valeur indiquée, en ampères (A). FUSIBLE Porte-fusible pour micro-fusibles de 5 x 20 mm.
  • Seite 58: Interface Usb

    NET OUT Connecteur réseau RJ45 pour connecter au réseau d'autres appareils Art-Net ou sACN. Utilisez des câbles CAT 5e ou supérieur pour configurer le réseau. ANTENNE W-DMX ™ L'antenne pour pilotage par W-DMX est placée dans le support (= position d'utilisation). ™...
  • Seite 59 USB et reconnectez la tête mobile au secteur. La clé USB est automatiquement reconnue et affi- chée à l'écran. Naviguez maintenant vers le dossier correspondant sur la clé USB et confirmez en cliquant sur ON. La procédure de mise à jour commence. Ne retirez pas la clé USB et ne débran- chez pas la tête mobile du secteur pendant la procédure de mise à...
  • Seite 60: Fonctionnement

    REMARQUES : Dès que le projecteur est correctement connecté au réseau, le mes- sage "Software Update Please Wait..." et le logo Cameo avec des informations sur le modèle du projecteur s'affichent successivement sur l'écran pendant le processus de démarrage et la réinitialisation du moteur.
  • Seite 61 MENU CONTROL (Control) RÉGLAGE DE L'ADRESSE DE DÉPART DMX (DMX Address) À partir de l'écran principal, appuyez sur ENTER pour accéder au menu principal. Utilisez les commandes et pour sélectionner le menu Control, puis appuyez sur ENTER. Utilisez les touches HAUT et BAS pour sélectionner l'élément de menu "DMX Address", puis confirmez en appuyant sur la touche ENTER.
  • Seite 62 Network Network Activer / désactiver l'entrée Entrée réseau désactivée Input réseau Entrée réseau activée ArtNET Protocole ArtNet Protocol Network protocol sACN protocole sACN 000 à 255. Modifiez la valeur avec Univers GAUCHE et DROITE, confirmez 000 - 255 avec ENTER. Sélectionnez le bloc avec GAUCHE Univers 1 - 256, IP Address...
  • Seite 63 Wireless Désactiver W-DMX W-DMX W-DMX activé Operating Receiver Module W-DMX configuré comme récepteur (actuellement en version Transmitter Module W-DMX configuré comme émetteur bêta) Transmitting Receiver Norme d'émission G3 (actuellement en version Norme d'émission G4s bêta) Appairer des appareils W-DMX. W-DMX doit être activé...
  • Seite 64 MODE DE FONCTIONNEMENT AUTONOME PROGRAMMES AUTO (Auto Prog) Les 4 programmes automatiques différents (Programme 1 - 4) consistent chacun en des mou- vements de tête, des changements de gobos et de couleurs, etc. programmés et fixes, la vitesse de défilement pouvant être réglée séparément. Comme décrit précédemment sous "MODES DE FONCTIONNEMENT AUTOMATIQUES", sélectionnez le mode de fonctionnement Auto, confirmez avec ENTER, sélectionnez le programme Auto désiré...
  • Seite 65 Vous accédez ainsi au sous-menu permettant de régler les éléments du sous-menu (voir tableau, sélectionnez avec HAUT et BAS, confirmez avec ENTRÉE, modifiez la valeur ou l'état avec HAUT et BAS, confirmez avec ENTRÉE). Settings (en gras = réglage d'usine) OFF Pas de rotation de l'affichage L'écran peut être tourné...
  • Seite 66 Configuration de la 650Hz, 1530Hz, fréquence PWM de 3600Hz, 12KHz, Frequency la LED 25KHz N'inverse pas le sens du pano- ramique Pan reverse Inverse la direction du panora- mique N'inverse pas le sens de l'incli- Tilt Reverse naison Paramètres de la tête Pan / Tilt Inverse le sens de l'inclinaison de l'appareil...
  • Seite 67: Service Menu

    SERVICEMENU À partir de l'écran principal, appuyez sur ENTER pour accéder au menu principal. Utilisez les champs de contrôle UP et DOWN pour sélectionner le menu Service et appuyez sur ENTER. Vous accédez ainsi au sous-menu permettant de modifier les éléments du sous-menu (sélec- tionner avec HAUT et BAS, confirmer avec ENTRÉE, modifier la valeur avec GAUCHE et DROITE, confirmer avec ENTRÉE).
  • Seite 68: Montage Et Installation

    Tempera- Affichage de la Affichage de la température en degrés Celsius Unute ture température ou Fahrenheit Affiche la durée totale de fonctionnement en Total Time heures Current Time Affiche le temps de fonctionnement actuel Affiche la durée de Runtime Saisissez le mot de passe pour réinitialiser le fonctionnement Temps PW temps de fonctionnement actuel...
  • Seite 69: Entretien, Maintenance Et Réparations

    ENTRETIEN, MAINTENANCE ET RÉPARATIONS Afin de garantir le bon fonctionnement à long terme de l'appareil, celui-ci doit être régulièrement nettoyé et, si nécessaire, passer en maintenance. Le besoin de maintenance dépend de l'intensité de l'utilisation et de l'environnement dans lequel il est utilisé. Nous recommandons généralement une inspection visuelle avant chaque utilisation.
  • Seite 70: Caractéristiques Techniques

    5. Les appareils doivent généralement être stockés au sec et protégés de la poussière et de la saleté. MAINTENANCE ET RÉPARATION (uniquement par du personnel qualifié) DANGER ! L'appareil contient des composants sous tension. Même après avoir débranché la fiche de la prise secteur, il peut subsister une tension résiduelle dans l'appareil, par exemple en raison de condensateurs chargés.
  • Seite 71 Pan/Tilt, Pan/Tilt fin, Dimmer, Dimmer fin, Stroboscope multifonction- nel, Cyan, Cyan fin, Magenta, Magenta fin, Jaune, Jaune fin, CTO, CTO fin, Roue des couleurs, Rotation de la roue des couleurs, Roue des gobos 1, Rotation des gobos 1, Rotation des gobos 1 fin, Rotation de la roue des gobos 1, Secousses des gobos 1, Roue des gobos Fonctions DMX : 2, Rotation de la roue des gobos 2, Secousses des gobos 2, Zoom,...
  • Seite 72: Distance Minimale Par Rapport À La Surface Éclairée

    Couleur du boîtier : Noir Refroidissement Système de refroidissement par caloducs et ventilateurs à du boîtier : température contrôlée Dimensions (L x H x P, 397 x 741,5 x 285mm sans support) : Poids : 27,8kg Caractéristiques Câble d'alimentation de 1m avec fiche TRUE1 et supplémentaires : 2 supports de montage Omega inclus DISTANCE MINIMALE PAR RAPPORT À...
  • Seite 73: Déclarations Du Fabricant

    DÉCLARATIONS DU FABRICANT GARANTIE DU FABRICANT ET LIMITATION DE RESPONSABILITÉ Adam Hall GmbH, Adam-Hall-Str. 1, D-61267 Neu Anspach / Courriel : Info@adamhall.com / +49 (0)6081 9419-0 Nos conditions de garantie et notre limitation de responsabilité actuelles peuvent être consultées en ligne à l'adresse suivante : https://cdn-shop.adamhall.com/media/pdf/Manufacturers-Declarations-CAMEO_DE_EN_ES_FR.pdf En cas de recours au service après-vente, veuillez contacter votre interlocuteur commercial.
  • Seite 74: Español

    Este aparato ha sido desarrollado y fabricado siguiendo las normas de calidad más exigentes para garantizarle muchos años de funcionamiento sin problemas. Lea atentamente este manual de usuario para poder utilizar su nuevo producto Cameo de forma rápida y óptima. Encontrará más información sobre Cameo Light en nuestra página web CAMEOLIGHT.COM.
  • Seite 75: Instrucciones De Seguridad

    Este símbolo indica peligro de descarga eléctrica. Este símbolo identifica las zonas o situaciones peligrosas. Este símbolo indica peligro por superficie a alta temperatura. Este símbolo indica peligro causado por fuentes de luz intensas. Este símbolo indica que el equipo no contiene piezas que el usuario pueda sustituir. Este símbolo indica información adicional sobre el funcionamiento del equipo.
  • Seite 76 2. Asegúrese de que la tensión y la frecuencia de la red eléctrica coinciden con los valores indicados en el equipo. Si el equipo dispone de un selector de tensión, antes de enchufarlo a la red eléctrica, asegúrese de que el valor seleccionado es correcto.
  • Seite 77 3. La superficie de la carcasa del equipo puede calentarse mucho durante el fun- cionamiento regular. Asegúrese de que no sea posible tocar accidentalmente la carcasa. Deje siempre que la lámpara se enfríe lo suficiente antes de desmontarla, realizar trabajos de mantenimiento, recarga, etc. ATENCIÓN: 1.
  • Seite 78 Todas las especificaciones sobre el alcance se refieren a la operación en campo libre con línea directa visual y sin interferencias. El funcionamiento de los transmisores está sujeto a la normativa oficial. Esta puede variar de una región a otra y el operador debe verificarla antes del uso (como la frecuencia de radio y la potencia de transmisión).
  • Seite 79: Notas Para Los Equipos Portátiles Que Se Instalan En Interiores

    Póngase en contacto con su socio de ventas inmediatamente después de la compra si la entrega no está completa o está dañado. En el embalaje se incluyen los siguientes componentes: X 1 x Cabeza móvil OPUS SP5 PLUS LED X 2 x Soporte de montaje Omega X 1 cable eléctrico...
  • Seite 80: Características

    CARACTERÍSTICAS: lED de alta eficiencia de 500 W. Módulo de persiana enmarcable. - Mezcla de colores CMY + CTO Rueda de colores con 7 colores brillantes + colores abiertos y divididos. Rueda de gobos 1 con 8 gobos fijos + abierta. Rueda de gobos 2 con 7 gobos giratorios + abiertos (gobos intercam- biables).
  • Seite 81 FUSIBLE Portafusibles para microfusibles de 5 x 20 mm. NOTA IMPORTANTE: Sustituya el fusible solo por uno del mismo tipo y características. Si el fusible se fundiera varias veces, póngase en contacto con un servicio técnico autorizado. DMX IN Tomas XLR macho de 3 y 5 patillas para la conexión de un dispositivo de control DMX (por ejemp- lo, una consola DMX).
  • Seite 82: Interfaz Usb

    CONTROLES MODO - Pulsando MODE (repetidamente) se sube un nivel en la estructura de menús, hasta la pantalla principal. ARRIBA  y ABAJO  - Seleccionan los distintos elementos del menú principal (dirección DMX, modo de funcionamiento, etc.) y de los submenús. ENTER - Partiendo de la pantalla principal, pulse ENTER para entrar en el menú...
  • Seite 83: Funcionamiento

    En cuanto la luminaria esté correctamente conectada a la red eléctrica, aparecerán en la pantalla, uno tras otro, el mensaje "Software Update Please Wait..." y el logotipo de Cameo con información sobre el modelo de la luminaria durante el proceso de puesta en marcha y el reinicio del motor.
  • Seite 84 En cuanto se interrumpe la señal de control, los caracteres de la pantalla empiezan a parpadear y aparece "Ninguno" (sin señal) detrás de "Señal" en la línea superior. La pantalla puede girarse 180° tocando el panel de control táctil hacia ABAJO; si la pantalla ya está girada 180°, toque el panel de control hacia ARRIBA para volver a la imagen estándar.
  • Seite 85 CONFIGURACIÓN DE LA RED (Network) Partiendo de la pantalla principal, pulse ENTER para acceder al menú principal. Utilice los mandos y para seleccionar el menú Control y pulse ENTER. Utilice ARRIBA y ABAJO para seleccionar la opción de menú "Red" y confirme pulsando ENTER. Para obtener información sobre la configura- ción de la red, consulte la tabla siguiente.
  • Seite 86 CONFIGURACIÓN W-DMX (Wireless) Partiendo de la pantalla principal, pulse ENTER para acceder al menú principal. Utilice los mandos y para seleccionar el menú Control y pulse ENTER. Utilice ARRIBA y ABAJO para seleccionar la opción de menú "Inalámbrico" y confirme pulsando ENTER. Para obtener información sobre los ajustes de la W-DMX, consulte la tabla siguiente.
  • Seite 87 MODO ESTÁTICO STANDALONE (Static) El modo estático permite ajustar PAN, Inclinación, Atenuador, Estroboscopio, Rueda de color y Rueda de gobos, etc. directamente en el aparato con valores entre 000 y 255, de forma similar a una unidad de control DMX. De este modo, se puede crear una escena individual sin necesidad de un controlador DMX adicional.
  • Seite 88 SYSTEM SETTINGS (Settings) Partiendo de la pantalla principal, pulse ENTER para acceder al menú principal. Seleccione el menú Configuración para los ajustes del sistema utilizando los paneles de control ARRIBA y ABAJO y pulse ENTER. Se abrirá el submenú para ajustar los elementos del submenú (véase la tabla, seleccione con UP y DOWN, confirme con ENTER, cambie el valor o el estado con UP y DOWN, y confirme con ENTER).
  • Seite 89 Ajustar la intensidad luminosa de forma más brusca en los valores DMX Logarithmic bajos y con precisión en los valores DMX altos Dimmer Selección del Curve Curva de atenuación Ajustar la intensidad luminosa con precisión en los valores DMX altos y Dimmerkurve bajos, y de forma más amplia en los valores DMX intermedios...
  • Seite 90: Curvas De Atenuación

    CURVAS DE ATENUACIÓN: Linear Exponential Logarithmic S-curve Valor DMX Valor DMX Valor DMX Valor DMX SERVICEMENU Partiendo de la pantalla principal, pulse ENTER para acceder al menú principal. Utilice los campos de control ARRIBA y ABAJO para seleccionar el menú Servicio y pulse ENTER. Esto le lleva al submenú...
  • Seite 91: System Info

    System Info Indicación de error de funcionamiento Error Info Si una avería no se corrige con un reinicio o reinicio, la unidad defectuosa debe ser reparada por un centro de servicio autorizado. Head xx°C/F° Tempera- Indicación de la Base xx°C/F° ture temperatura Indicación de la temperatura en grados Cel-...
  • Seite 92: Cuidado, Mantenimiento Y Reparación

    CUIDADO, MANTENIMIENTO Y REPARACIÓN Para garantizar el buen funcionamiento del equipo a largo plazo, hay que limpiarlo con regu- laridad y, si es necesario, hacerle las revisiones necesarias. Los requisitos de mantenimiento dependen de la intensidad de uso y del entorno en el que se utilice. Por lo general, recomenda- mos una inspección visual antes de cada puesta en marcha.
  • Seite 93: Datos Técnicos

    5. Por lo general, los equipos deben guardarse en un lugar seco y protegido del polvo y la suciedad. MANTENIMIENTO Y REPARACIÓN (solo por personal cualificado) ¡PELIGRO! Dentro del equipo hay componentes con tensión. Incluso después de des- enchufar el equipo del suministro eléctrico, puede haber tensiones residuales dentro del equipo, por ejemplo, en los condensadores.
  • Seite 94 Pan/Tilt, Pan/Tilt fino, Atenuador, Atenuador fino, Estroboscopio mul- tifunción, Cian, Cian fino, Magenta, Magenta fino, Amarillo, Amarillo fino, CTO, CTO fino, Rueda de color, Rotación de la rueda de color, Rueda de gobo 1, Rotación del gobo 1, Rotación del gobo 1 fino, Rotación de la rueda de gobo 1, Agitación del gobo 1, Rueda de gobo Funciones DMX: 2, Rotación de la rueda de gobo 2, Agitación del gobo 2, Zoom, Zoom...
  • Seite 95: Distancia Mínima A La Superficie Iluminada

    Dimensiones (An. × Al. × 397 x 741,5 x 285 mm F., sin soporte): Peso: 27,8kg Cable de red de 1 m con enchufe TRUE1 y Otras características: 2 soportes de montaje Omega incluidos DISTANCIA MÍNIMA A LA SUPERFICIE ILUMINADA Este símbolo con información de distancia en metros (m) indica la distancia mínima de la luminaria a la superficie iluminada.
  • Seite 96: Declaración Del Fabricante

    DECLARACIÓN DEL FABRICANTE Garantía del fabricante y limitación de responsabilidad Adam Hall GmbH, Adam-Hall-Str. 1, D-61267 Neu Anspach / Correo electrónico: info@adamhall.com / +49 (0)6081 9419 0 Puede consultar nuestras condiciones de garantía y la limitación de responsabilidad vigentes en: https://cdn-shop.adamhall.com/media/pdf/Manufacturers-Declarations-CAMEO_DE_EN_ES_FR.pdf Para cualquier tarea de mantenimiento o reparación, póngase en contacto con su distribuidor.
  • Seite 97: Informacje Na Temat Niniejszej Instrukcji Obsługi

    Urządzenie to zostało opracowane i wyprodukowane zgodnie z najwyższymi standardami jakości, aby zapewnić wiele lat bezproblemowej pracy. Proszę uważnie przeczytać niniejszą instrukcję obsługi, aby móc szybko i optymalnie korzystać z nowego produktu Cameo. Więcej informacji na temat Cameo Light znajdą Państwo na naszej stronie internetowej CAMEOLIGHT.COM.
  • Seite 98: Instrukcje Bezpieczeństwa

    Ten symbol wskazuje na zagrożenia, które mogą spowodować porażenie prądem. Ten symbol oznacza niebezpieczne obszary lub niebezpieczne sytuacje. Ten symbol oznacza zagrożenia spowodowane gorącymi powierzchniami. Ten symbol oznacza zagrożenia powodowane przez intensywne źródła światła. Ten symbol oznacza urządzenie, w którym nie ma części wymienianych przez użyt- kownika.
  • Seite 99 UWAGA: 1. Nie używać urządzenia, jeżeli było narażone na duże wahania temperatury (np. po transporcie). Wilgoć i kondensacja mogą uszkodzić urządzenie. Urządzenie należy włączać dopiero wtedy, gdy osiągnie temperaturę pokojową. 2. Upewnić się, że napięcie i częstotliwość sieci zasilającej odpowiadają wartościom podanym na urządzeniu.
  • Seite 100 PRZESTROGA! 1. W przypadku ruchomych elementów, takich jak wsporniki montażowe lub inne ruchome elementy, istnieje możliwość zakleszczenia. 2. W przypadku urządzeń z elementami napędzanymi silnikiem istnieje ryzyko obra- żeń spowodowanych ruchem urządzenia. Nagły ruch urządzenia może wywołać reakcje szokowe. 3. Powierzchnia obudowy urządzenia może się bardzo nagrzewać podczas regularnej pracy.
  • Seite 101 TRANSMISJA SYGNAŁU DROGĄ RADIOWĄ (NP. W-DMX LUB SYSTEMY RADIOWE AUDIO): Jakość i wydajność transmisji sygnału bezprzewodowego zasadniczo zależy od warunków otoczenia. Następujące czynniki mogą wpływać na zasięg i stabilność sygnału: Ekranowanie (np. mur, konstrukcje metalowe, woda) Duże natężenie ruchu radiowego (np. silne bezprzewodowe sieci LAN) Zakłócenia Promieniowanie elektromagnetyczne (np.
  • Seite 102: Uwagi Dotyczące Mobilnych Urządzeń Wewnętrznych

    Proszę skontaktować się z partnerem handlowym natychmiast po zakupie, jeśli dostawa nie jest kompletna lub jest uszkodzony. Opakowanie zawiera: X 1 x ruchoma głowica LED OPUS SP5 PLUS X 2 x wspornik montażowy Omega X 1x Przewód zasilający X Instrukcja Uzytkowania...
  • Seite 103: Wprowadzenie

    WPROWADZENIE SERIA OPUS Z RUCHOMĄ GŁOWICĄ CLOSP5PLUS FUNKCJE KONTROLNE: 34-kanałowe i 50-kanałowe sterowanie DMX (CLOSP5PLUS) 27-kanałowe i 33-kanałowe sterowanie DMX (CLOSP5PLUS z opcjonalnym modułem koła anima- cji CLOSP5AM) Art-Net sACN W-DMX ™ Obsługa RDM Praca w trybie Master/Slave Funkcje w trybie Standalone CECHY: Wysokowydajna dioda LED o mocy 500 W.
  • Seite 104: Przyłącza, Elementy Obsługi I Wskaźniki

    Hz. W zestawie znajduje się odpowiedni kabel sieciowy z wtyczką powerCON TRUE1. WYJŚCIE ZASILANIA Gniazdo wyjścia sieciowego Neutrik powerCON TRUE1. Umożliwia zasilanie innych reflektorów CAMEO. Należy upewnić się, że całkowity pobór mocy wszystkich urządzeń podłączonych do urządzenia nie przekracza podanej wartości w amperach (A). BEZPIECZNIK Uchwyt bezpiecznika dla mikro bezpieczników 5 x 20 mm.
  • Seite 105 NET OUT Złącze sieciowe RJ45 do podłączania dodatkowych urządzeń Art-Net lub sACN do sieci. Do konfi- guracji sieci proszę używać kabli CAT 5e lub lepszych. ANTENA DLA W-DMX Antena do sterowania na W-DMX jest mocowana w czasie zakładania w położeniu środkowym ™...
  • Seite 106 do interfejsu USB i ponownie podłączyć Moving Head do zasilania. Pamięć USB zostanie automa- tycznie rozpoznana i pokazana na wyświetlaczu. Teraz proszę przejść do odpowiedniego folderu w pamięci USB i potwierdzić przyciskiem ON. Rozpoczyna się procedura aktualizacji. Proszę nie wyj- mować...
  • Seite 107: Obsługa

    Gdy tylko urządzenie zostanie prawidłowo podłączone do sieci, podczas procesu uruchamiania i resetowania silnika na wyświetlaczu pojawi się komunikat "Software Update Please Wait..." oraz logo Cameo z infor- macją o modelu urządzenia. Po zakończeniu tego procesu reflektor jest gotowy do pracy, a wybrany wcześniej tryb zostanie aktywowany. Z jed- nej strony, reflektor jest obsługiwany za pomocą...
  • Seite 108 CONTROL MENU (Control) USTAWIANIE ADRESU STARTOWEGO DMX (DMX Address) Zaczynając od ekranu głównego, proszę nacisnąć ENTER, aby wejść do menu głównego. Za pomocą przycisków i proszę wybrać menu Sterowanie i nacisnąć ENTER. Proszę zastosować UP i DOWN, aby wybrać pozycję menu "DMX Address" i potwierdzić wciskając ENTER. Teraz proszę ustawić...
  • Seite 109 Network Wejście sieciowe wyłączone Network Aktywacja/dezaktywacja Input wejścia sieciowego Aktywowane wejście sieciowe ArtNET Protokół ArtNet Protocol Protokół sieciowy sACN protokół sACN 000 do 255. Zmienić wartość za Universe pomocą przycisków W LEWO i W 000 - 255 PRAWO, potwierdzić przyciskiem ENTER.
  • Seite 110 Wireless Dezaktywacja W-DMX W-DMX Aktywować W-DMX Receiver Moduł W-DMX skonfigurowany jako odbiornik Operating (obecnie w wersji beta) Transmitter Moduł W-DMX skonfigurowany jako nadajnik Standard przekładni G3 Transmitting (obecnie w wersji beta) Standard transmisji G4S Parowanie z urządzeniami W-DMX. W-DMX musi być Link włączony na wszystkich urządzeniach, a parowanie Link...
  • Seite 111 TRYB PRACY SAMODZIELNEJ PROGRAMY AUTO (Auto Prog) Każdy z 4 różnych programów automatycznych (Program 1 - 4) składa się ze stałych zaprogra- mowanych ruchów głowicy, zmian gobo i kolorów itp. prędkość pracy można ustawić osobno. Jak opisano wcześniej w sekcji "TRYBY PRACY SAMODZIELNEJ", proszę wybrać tryb pracy Auto, potwierdzić...
  • Seite 112 Settings (pogrubione = ustawienie fabryczne) Brak rotacji wyświetlacza Wyświetlacz jest obracany o Reverse 180° (np. w przypadku montażu nad głową) Display Display Dezaktywacja podświetlenia wy- Settings świetlacza po ok. 30 sekundach Backlight bezczynności Stale włączone podświetlenie wyświetlacza Black Aktywuje zaciemnienie Stan pracy, gdy DMX Fail sygnał...
  • Seite 113: Krzywe Ściemniania

    Brak zaciemnienia podczas ruchu Automatyczne głowy B.O. Moving zaciemnienie dla Utrata przytomności podczas ruchu ruch głowy głowy Profile Module Fixture Type Typ urządzenia: Spot Module Automatyczne sterowanie wen- Auto tylatorem Dezaktywowany wentylator o Fan Off znacznie zmniejszonej jasności Stała niska prędkość wentyla- Sterowanie Constant Low tora ze zmniejszoną...
  • Seite 114 Reset Moror - resetowanie silników. All = Wszystkie silniki, Pan&Tilt = Silniki Pan i Tilt, Head Only = Silniki w głowicy urządzenia. USB Update - aktualizacja oprogramowania sprzętowego przez interfejs USB. OFF = zablokowa- nie aktualizacji oprogramowania sprzętowego przez interfejs USB. ON = Zezwól na aktualizację oprogramowania sprzętowego przez interfejs USB.
  • Seite 115: Konfiguracja I Instalacja

    KONFIGURACJA I INSTALACJA Dzięki zintegrowanym gumowym nóżkom reflektor można umieścić w odpowiednim miejscu na twardej i równej powierzchni. Montaż na kratownicy można wykonać za pomocą dwóch wspor- ników Omega, które są przymocowane do podstawy urządzenia (A). w zestawie znajdują się 2 x wsporniki Omega.
  • Seite 116: Dane Techniczne

    UWAGA: Niewłaściwe obchodzenie się z urządzeniem może doprowadzić do jego uszkodzenia, a nawet zniszczenia. 1. Powierzchnie obudowy należy czyścić czystą, wilgotną szmatką. Proszę upewnić się, że do urządzenia nie przedostanie się wilgoć. 2. Wloty i wyloty powietrza muszą być regularnie czyszczone z kurzu i brudu. Jeśli używane jest sprężone powietrze, należy upewnić...
  • Seite 117 Liczba kolorów: 7 + kolory otwarte i dzielone Koło kolorów: Liczba gobosów: 15 + otwarte (8 stałych + 7 obrotowych) Ø zewnętrzna 22,9 mm (-0,2 / +0,1 mm), Ø motywu 19 mm, grubość Rozmiar gobo: materiału 1,1 mm (szkło) Kąt wiązki 6°...
  • Seite 118: Minimalna Odległość Od Oświetlanej Powierzchni

    Względna wilgotność < 85%, bez kondensacji powietrza: Minimalna odległość od oświetlanej powierzchni: Minimalna odległość od normalnie łatwopalnych 0,5 m materiałów: Materiał obudowy: Metal, ABS Kolor obudowy: Czarny Chłodzenie obudowy: System chłodzenia Heatpipe oraz wentylatory z regulacją temperatury Wymiary (szer. x wys. x 397 x 741,5 x 285 mm gł., bez wspornika): Masa:...
  • Seite 119: Deklaracje Producenta

    URZĄDZENIE: 1. Niniejsze urządzenie podlega Dyrektywie Europejskiej w sprawie zużytego sprzętu elektrycznego i elektronicznego z późniejszymi zmianami. Dyrektywa WEEE Zużyty sprzęt elektryczny i elektroniczny. Stare urządzenia nie należą do odpadów domowych. Stare urządzenie należy zutylizować za pośrednictwem zatwierd- zonej firmy utylizacyjnej lub komunalnego zakładu utylizacji. Należy przestrzegać odpowiednich przepisów obowiązujących w danym kraju! 2.
  • Seite 120: Italiano

    Questo dispositivo è stato sviluppato e prodotto secondo i più alti standard di qualità, per garantire molti anni di funzionamento senza problemi. Leggere attentamente questo Manuale di istruzioni per iniziare rapidamente a utilizzare al meglio il prodotto Cameo. Ulteriori informazioni su Ca- meo Light sono disponibili sul nostro sito web CAMEOLIGHT.COM.
  • Seite 121: Istruzioni Di Sicurezza

    Questo simbolo identifica pericoli che possono causare scosse elettriche. Questo simbolo identifica aree o situazioni pericolose. Questo simbolo indica i pericoli causati da superfici calde. Questo simbolo indica i pericoli causati da fonti luminose intense. Questo simbolo indica un dispositivo che non contieneparti sostituibili dall’utente. Questo simbolo indica informazioni aggiuntive sul funzionamento del prodotto.
  • Seite 122 2. Verificare che la tensione e la frequenza dell’alimentazione di rete corrispondano ai valori indicati sul dispositivo. Se il dispositivo è dotato di un selettore di tensione, non collegare il dispositivo finché non è impostato correttamente. Usare solo cavi di alimentazione adatti. 3.
  • Seite 123 ATTENZIONE 1. Non installare o utilizzare l’apparecchio vicino a radiatori, accumulatori, stufe o altre fonti di calore. Assicurarsi sempre che il dispositivo sia installato in modo che possa raffreddarsi a sufficienza e non si surriscaldi. 2. Non metta fonti di accensione, come candele accese, vicino al dispositivo. 3.
  • Seite 124 AVVERTENZA: Devices with wireless signal transmission are not suitable for use in sensitive areas in which radio operation can lead to potential detrimental effects. Queste zone includono: • Ospedali, centri sanitari o altre strutture sanitarie che forniscono trattamenti ai pazienti con personale e attrezzature qualificate. •...
  • Seite 125: Note Per I Dispositivi Mobili Per Interni

    La preghiamo di contattare il suo partner commerciale subito dopo l'acquisto, se la consegna non è completa o se non è stata effettuata è danneggiato. La confezione comprende: X 1 x Testa mobile OPUS SP5 PLUS LED X 2 x staffa di montaggio Omega X 1 cavo di alimentazione...
  • Seite 126: Caratteristiche

    È incluso un cavo di rete adatto con spina powerCON TRUE1. POWER OUT Presa di uscita di rete Neutrik powerCON TRUE1. Facilita l’alimentazione di altri faretti CAMEO. As- sicurarsi che il consumo totale di energia di tutti i dispositivi collegati all’apparecchio non superi il...
  • Seite 127 FUSIBILE Portafusibili per microfusibili da 5 x 20 mm. NOTA IMPORTANTE: sostituire il fusibile solo con un fusibile dello stesso tipo e caratteristiche. In caso di guasti ripetuti ai fusibili, rivolgersi a un centro di assistenza autorizzato. DMX IN Prese XLR maschio a 3 e 5 pin per il collegamento di un dispositivo di controllo DMX (ad esempio, console DMX).
  • Seite 128: Interfaccia Usb

    COMANDI A SFIORAMENTO MODE - Premendo MODE (ripetutamente) sale di un livello nella struttura dei menu, fino alla visualizzazione principale. SU  e GIÙ  - Seleziona le singole voci del menu principale (indirizzo DMX, modalità operativa, ecc.) e dei sottomenu. ENTER - Partendo dalla visualizzazione principale, prema ENTER per accedere al menu principale.
  • Seite 129: Funzionamento

    Non appena l'apparecchio è collegato correttamente alla rete elettri- ca, sul display vengono visualizzati uno dopo l'altro "Aggiornamento software attendere..." e il logo Cameo con le informazioni sul modello dell'apparecchio, durante il processo di avvio e il reset del motore. Dopo questo processo, il faretto è...
  • Seite 130 viene interrotto, i caratteri sul display iniziano a lampeggiare e viene visualizzato "Nessuno" (nessun segnale) dietro a "Segnale" nella riga superiore. Il display può essere ruotato di 180° toccando il pannello di controllo sensibile al tatto GIÙ; se il display è già ruotato di 180°, tocchi il pannello di controllo SU per riportare il display all'immagine standard.
  • Seite 131 IMPOSTAZIONI DI RETE (Network) Partendo dal display principale, prema ENTER per accedere al menu principale. Utilizzi i controlli e per selezionare il menu Controllo e prema INVIO. Utilizzi i tasti SU e GIÙ per selezionare la voce di menu "Rete" e confermi premendo INVIO. Per informazioni sulle impostazioni di rete, faccia riferimento alla tabella seguente.
  • Seite 132 Wireless Disattivare W-DMX W-DMX Attivare il W-DMX Operating Receiver Modulo W-DMX configurato come ricevitore (attualmente in stato di Transmitter Modulo W-DMX configurato come trasmettitore beta) Trasmissione G3 standard Transmitting (attualmente in stato beta) Standard di trasmissione G4S Si accoppi con i dispositivi W-DMX. W-DMX deve essere abilitato su tutti i dispositivi e l'accoppiamen- Link to con un trasmettitore deve essere resettato (Reset...
  • Seite 133 desiderato. Le voci del sottomenu corrispondono ai canali da 1 a 50 nella modalità DMX estesa a 50 canali (vedere CONTROLLO DMX, selezionare la voce del sottomenu con SU e GIÙ, modificare il valore con SINISTRA e DESTRA, confermare con ENTER). Prema ripetutamente MODE per tornare al display principale.
  • Seite 134 La scena viene attivata quando si conferma e si possono effettuare le impostazioni desiderate (vedere tabella, selezionare con UP e DOWN, confermare con ENTER, modificare il valore o lo stato con UP e DOWN, confermare con ENTER). Settings (grassetto = impostazione di fabbrica) OFF Nessuna rotazione del display Il display viene ruotato di 180°...
  • Seite 135: Curve Dimmer

    Configurazione della 650Hz, 1530Hz, frequenza PWM del 3600Hz, 12KHz, Frequency 25KHz OFF Non inverte la direzione pan Pan Reverse Inverte la direzione pan OFF Non inverte la direzione tilt Tilt Reverse Inverte la direzione tilt Impostazioni della 630 Angolo di panoramica 630° Pan/Tilt Pan Angle testa del dispositivo...
  • Seite 136 SERVICEMENU Partendo dal display principale, prema ENTER per accedere al menu principale. Utilizzi i campi di controllo SU e GIÙ per selezionare il menu Assistenza e prema INVIO. Questo la porta al sottomenu per modificare le voci del sottomenu (selezionare con SU e GIÙ, confermare con INVIO, modificare il valore con SINISTRA e DESTRA, confermare con INVIO).
  • Seite 137: Installazione E Montaggio

    Total Time Visualizza il tempo di funzionamento totale in ore Current Time Visualizza il tempo di funzionamento attuale Visualizza il tempo Runtime Inserisca la password per reimpostare l'ora di di funzionamento Time PW funzionamento attuale (Time PW = 050) Clean Current Azzera il tempo di funzionamento attuale Visualizzazione del Firmware firmware dei compo-...
  • Seite 138: Cura, Manutenzione E Riparazione

    CURA, MANUTENZIONE E RIPARAZIONE Per garantire il funzionamento corretto nel lungo termine del dispositivo, è necessario effettuarne la pulizia e, se necessario, la manutenzione regolarmente. I requisiti di manutenzione dipendono dall’intensità e dall’ambiente di utilizzo. In generale, raccomandiamo un’ispezione visiva prima di ogni utilizzo.
  • Seite 139: Dati Tecnici

    DATI TECNICI Codice prodotto: CLOSP5PLUS Tipo di prodotto: Luce mobile a LED Tipo: Testa mobile Numero di lampade: Tipo di lampada: 500W LED ad alta efficienza Temperatura del Bianco freddo 6600K colore lamp: CRI: > 70 Frequenza PWM LED: 650Hz, 1530Hz, 3600Hz, 12kHz, 25kHz (regolabile) Funzione CMY + CTO miscelazione colori:...
  • Seite 140: Distanza Minima Dalla Superficie Illuminata

    Comandi sensibili al tatto BACK, ENTER, UP, DOWN, LEFT, RIGHT, Controlli operativi: display LCD grafico a colori sensibile alla pressione (compatibile con i guanti) Display LCD grafico a colori illuminato, alimentato a batteria per le Indicatori: impostazioni del sistema indipendenti dalla rete Tensione operativa: 100–240 V CA / 50–60 Hz Consumo:...
  • Seite 141: Smaltimento

    SMALTIMENTO IMBALLAGGIO 1. Gli imballaggi possono essere immessi nel ciclo dei materiali riutilizzabili attra- verso i consueti metodi di smaltimento. 2. Separare l’imballaggio in conformità alle norme sullo smaltimento e alle dispo- sizioni sul riciclaggio vigenti nel proprio Paese. DISPOSITIVO 1.
  • Seite 142 DMX CONTROL / DMX STEUERUNG / PILOTAGE DMX / CONTROL DMX / STEROWANIE DMX / CONTROLLO DMX 50CH Mode Extended Function Values Sub-Group 255 0% to 100% Pan fine 255 0% to 100% Tilt 255 0% to 100% Tilt Tilt fine 255 0% to 100% Dimmer 255 0% to 100%...
  • Seite 143 161 CTO / Congo Blue 173 Congo Blue 185 Congo Blue / Open Colour Wheel 192 Colour off (open) Colour Wheel 223 Colour Wheel rot. Slow -> Fast, CW 224 Colour Wheel rot. Stop 255 Colour Wheel rot. Fast -> Slow, CCW 005 Open 018 Gobo 1 031 Gobo 2...
  • Seite 144 113 Gobo 1 shake (slow-fast) 125 Gobo 2 shake (slow-fast) 137 Gobo 3 shake (slow-fast) 149 Gobo 4 shake (slow-fast) 161 Gobo 5 shake (slow-fast) 173 Gobo 6 shake (slow-fast) Gobo Wheel 2 Gobo 185 Gobo 7 shake (slow-fast) 191 Gobo 8 shake (slow-fast) 192 Open 223 Gobo Wheel rot.
  • Seite 145 Blade 2B fine 255 0% - 100% Blade 3A 255 0% - 100% Blade 3A fine 255 0% - 100% Blade 3B 255 0% - 100% Blade 3B fine 255 0% - 100% Blade 4A 255 0% - 100% Framing Blades Blade 4A fine 255 0% - 100%...
  • Seite 146 155 LED PWM Freq. 1530 Hz (hold 3s) 170 LED PWM Freq. 3.600 Hz (hold 3s) 185 LED PWM Freq. 12.000 Hz (hold 3s) Device Settings Device (please read 200 LED PWM Freq. 25.000 Hz (hold 3s) Settings remark 1*) 215 Reset Pan/Tilt (Hold 3s) 230 Reset only Head (Hold 3s) 255 Reset All Functions (Hold 3s)
  • Seite 147 149 CTO 161 CTO / Congo Blue 173 Congo Blue 185 Congo Blue / Open Colour Wheel Colour Wheel 192 Colour off (open) 223 Colour Wheel rot. Slow -> Fast, CW 224 Colour Wheel rot. Stop 255 Colour Wheel rot. Fast -> Slow, CCW 005 Open 018 Gobo 1 031 Gobo 2...
  • Seite 148 101 Gobo 8 113 Gobo 1 shake (slow-fast) 125 Gobo 2 shake (slow-fast) 137 Gobo 3 shake (slow-fast) 149 Gobo 4 shake (slow-fast) 161 Gobo 5 shake (slow-fast) Gobo Wheel 2 173 Gobo 6 shake (slow-fast) Gobo 185 Gobo 7 shake (slow-fast) 191 Gobo 8 shake (slow-fast) 192 Open 223 Gobo Wheel rot.
  • Seite 149 Framing Shape Rotation 255 0% - 100% Blades Pan/Tilt Pan/Tilt Speed 255 Pan/Tilt Fast -> Slow speed 005 No function 063 Linear Dimmer Curve Set Dimmer Set Dimmer 127 Exponential Dimmer Curve Curve Curve 191 Logarithmic Dimmer Curve 255 S-Curve Dimmer Curve 005 No function 020 Blackout while Moving on (Hold 3s) 035 Blackout while Moving off (Hold 5s)
  • Seite 150 EN: (1*) After the adjustments have been made, set the value to 000 to avoid disturbance by endless function call. DE: (1*) Nachdem die Einstellungen vorgenommen wurden, stellen Sie den Wert auf 000 ein, um Störungen durch endlosen Funktionsaufruf zu vermeiden. FR: (1*) Une fois les ajustements effectués, réglez la valeur sur 000 pour éviter les perturbations par appel de fonction sans fin.
  • Seite 154 CAMEOLIGHT.COM Adam Hall GmbH Adam-Hall-Str. 1 | 61267 Neu-Anspach | Germany Phone: +49 6081 9419-0 | adamhall.com Adam Hall Ltd. | The Seedbed Business Centre | SS3 9QY Essex | United Kingdom REV: 01...

Diese Anleitung auch für:

Closp5plus

Inhaltsverzeichnis