Baumer Hubner Berlin HMG 10 Profibus DP Montage- Und Betriebsanleitung
Absoluter drehgeber mit magnetischer abtastung
Vorschau ausblenden
Andere Handbücher für Hubner Berlin HMG 10 Profibus DP:
- Montage- und betriebsanleitung (72 Seiten) ,
- Betriebsanleitung (52 Seiten) ,
- Handbuch (51 Seiten)

Verwandte Anleitungen für Baumer Hubner Berlin HMG 10 Profibus DP


Inhaltszusammenfassung für Baumer Hubner Berlin HMG 10 Profibus DP
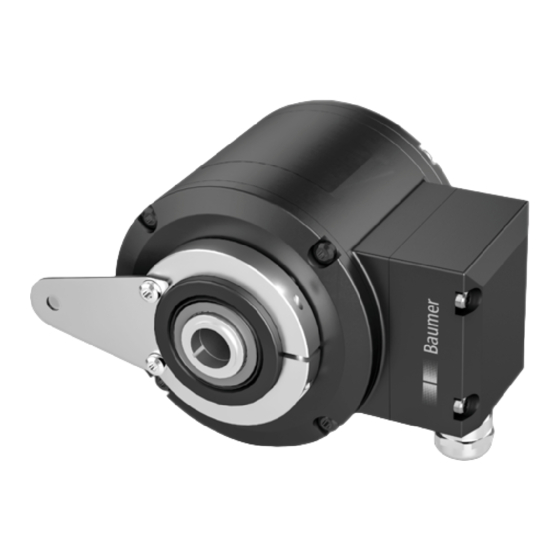
- Seite 1 Montage- und Betriebsanleitung HMG 10 - Profibus DP Absoluter Drehgeber mit magnetischer Abtastung...
-
Seite 2: Inhaltsverzeichnis
INHALTSVERZEICHNIS INHALTSVERZEICHNIS 1. WICHTIGE HINWEISE �����������������������������������������������������������������������������������������������������������1 1.1 Symbolerklärung �������������������������������������������������������������������������������������������������������������1 1.2 Bestimmungsgemäße Verwendung ��������������������������������������������������������������������������������1 1.3 Haftungsausschluss �������������������������������������������������������������������������������������������������������1 1.4 Wartung und Lebensdauer ���������������������������������������������������������������������������������������������2 1.5 Zulassungen und Gewährleistung ����������������������������������������������������������������������������������2 1.6 Lagertemperatur und Entsorgung �����������������������������������������������������������������������������������2 2. SICHERHEITS- UND ACHTUNGSHINWEISE ����������������������������������������������������������������������3 2.1 Sicherheitshinweise ��������������������������������������������������������������������������������������������������������3 2.2 Achtungshinweise zu Montage und Betrieb �������������������������������������������������������������������4 3. - Seite 3 INHALTSVERZEICHNIS 5.1.4 Ansicht in Busanschlusskasten Profibus DP [A]�������������������������������������������������16 5.1.5 Einstellung der Abschlusswiderstände ���������������������������������������������������������������16 5.1.6 Einstellung der Teilnehmeradresse ��������������������������������������������������������������������16 5.2 Drehzahlschalter und Zusatzausgang inkremental ������������������������������������������������������17 5.2.1 Beschreibung der Anschlüsse ����������������������������������������������������������������������������17 5.2.2 Ausgangssignale inkremental (Zusatzausgang) ������������������������������������������������17 5.2.3 LED-Funktionsanzeigen �������������������������������������������������������������������������������������18 5.2.4 Drehzahlschalter - Ausgangsschaltverhalten �����������������������������������������������������18 5.2.5 Kabelanschluss ��������������������������������������������������������������������������������������������������19 5.2.6 Belegung Anschlussklemmen ����������������������������������������������������������������������������20 5.2.6.1 Anschlussklemmen Klemmenkasten [B]...
-
Seite 4: Wichtige Hinweise
WICHTIGE HInWEISE WICHTIGE HINWEISE Symbolerklärung Warnung Schwere Verletzungen bis hin zum Tod sowie Sachschäden sind die Folge bei Missachtung Achtung Missachtung kann Sachschäden und Zerstörung/Fehlfunktion des Drehgebers verursachen Information Zusatzinformationen und Empfehlungen Bestimmungsgemäße Verwendung Der Drehgeber ist ein Präzisionsmessgerät. Er dient der Drehzahl- /Positionserfassung zur Steuerung von Antrieben und Bereitstellung von Messwerten als elektrische Ausgangssig- nale für das Folgegerät. -
Seite 5: Wartung Und Lebensdauer
WICHTIGE HInWEISE Wartung und Lebensdauer Der Drehgeber darf für Montage- und Wartungsarbeiten nur wie in dieser Anleitung be- schrieben geöffnet werden. Reparaturen oder Wartungsarbeiten, die ein vollständiges Öff- nen des Drehgebers erfordern, sind ausschließlich vom Hersteller durchzuführen. Am Drehgeber dürfen keine Veränderungen vorgenommen werden. Die zu erwartende Lebensdauer des Drehgebers hängt von den Kugellagern ab, die mit einer Dauerschmierung ausgestattet sind. -
Seite 6: Sicherheits- Und Achtungshinweise
SICHERHEITS- UnD ACHTUnGSHInWEISE SICHERHEITS- UND ACHTUNGSHINWEISE Sicherheitshinweise Explosionsgefahr Durch Funkenbildung kann ein Brand und eine Explosion ausgelöst werden. » Den Drehgeber nicht in Bereichen mit explosionsgefährdeten bzw. leicht entzündli- chen Materialien verwenden. Durch eventuelle Funkenbildung können diese leicht Feuer fangen und/oder explodieren. Verletzungsgefahr durch rotierende Wellen Haare und Kleidungsstücke können von rotierenden Wellen erfasst werden. -
Seite 7: Achtungshinweise Zu Montage Und Betrieb
SICHERHEITS- UnD ACHTUnGSHInWEISE Achtungshinweise zu Montage und Betrieb Zerstörungsgefahr durch elektrostatische Aufladung Die elektronischen Bauteile im Drehgeber sind empfindlich gegen hohe Spannun- gen. » Steckkontakte und elektronische Komponenten nicht berühren. » Ausgangsklemmen vor Fremdspannungen schützen. » Maximale Betriebsspannung nicht überschreiten. Zerstörungsgefahr durch mechanische Überlastung Eine starre Befestigung kann zu Überlastung durch Zwangskräfte führen. -
Seite 8: Vorbereitung
VoRBEREITUnG VORBEREITUNG Lieferumfang 6d 6e 6f 7a 6a 6b [ B ] [ A ] [ A ] Gehäuse Einseitig offene Hohlwelle* oder Konuswelle*: Abdeckung Einseitig offene Hohlwelle oder Konus- welle mit Schlüsselfläche SW 17 mm Kombi-Torx-Schraube - DIn 7964, M4x10 mm 7b Spannelement, nicht bei Konuswelle LED-Funktionsanzeigen... -
Seite 9: Zur Montage/Demontage Erforderliches Zubehör (Nicht Im Lieferumfang Enthalten)
VoRBEREITUnG Zur Montage/Demontage erforderliches Zubehör (nicht im Lieferumfang enthalten) Für den elektrischen Anschluss sind noch Anschlusskabel und ggf. Stecker erforder- lich. Details siehe Abschnitt 5, Seite 13� Drehmomentstütze, Länge L / Bestellnummer Standardversion: 67-70 mm / 11043628 125 (±5) mm, kürzbar auf ≥71 mm / 11004078 440 (+20/-15) mm, kürzbar auf ≥131 mm / 11002915 Isolierte Version: 67-70 mm / 11054917... -
Seite 10: Montage
MonTAGE / PoSITIonSEInSTELLUnG DES DREHMoMEnTBLECHES MONTAGE Positionseinstellung des Drehmomentbleches TX 20 Schraube lösen 360° Schraube festziehen Mt = 2-3 Nm Montage der Drehmomentstütze am Drehgeber » Anbauhinweise zur Drehmomentstütze in Abschnitt 4.4, Seite 11 beachten. 10 mm 10 mm 7/29 MB246DE - 11171694, 17A1, Baumer_HMG10-ProfibusDP_II_DE... -
Seite 11: Montage An Antriebswelle
MonTAGE / MonTAGE An AnTRIEBSWELLE Montage an Antriebswelle 4.3.1 Version mit einseitig offener Hohlwelle Lebensdauereinschränkung und Winkelfehler durch Rundlauffehler Hohe Rundlauffehler der Antriebswelle verursachen Winkelfehler des Drehge- bers, siehe Abschnitt 4.5, Seite 12� Hohe Rundlauffehler der Antriebswelle verursachen Vibrationen, die die Lebens- dauer des Drehgebers verkürzen können. -
Seite 12: Version Mit Konuswelle
MonTAGE / MonTAGE An AnTRIEBSWELLE 4.3.2 Version mit Konuswelle Lebensdauereinschränkung und Winkelfehler durch Rundlauffehler Hohe Rundlauffehler der Antriebswelle verursachen Winkelfehler des Drehge- bers, siehe Abschnitt 4.5, Seite 12� Hohe Rundlauffehler der Antriebswelle verursachen Vibrationen, die die Lebens- dauer des Drehgebers verkürzen können. »... -
Seite 13: Version Mit Durchgehender Hohlwelle
MonTAGE / MonTAGE An AnTRIEBSWELLE 4.3.3 Version mit durchgehender Hohlwelle Lebensdauereinschränkung und Winkelfehler des Drehgebers Hohe Rundlauffehler der Antriebswelle verursachen Winkelfehler des Drehge- bers, siehe Abschnitt 4.5, Seite 12� Hohe Rundlauffehler der Antriebswelle verursachen Vibrationen, die die Lebens- dauer des Drehgebers verkürzen können. »... -
Seite 14: Antriebsseitige Montage Der Drehmomentstütze
MonTAGE / AnTRIEBSSEITIGE MonTAGE DER DREHMoMEnTSTÜTZE Antriebsseitige Montage der Drehmomentstütze Lebensdauereinschränkung und Winkelfehler des Drehgebers Ein Spiel der Drehmomentstütze von beispielsweise ±0,03 mm entspricht einem Rundlauffehler des Drehgebers von 0,06 mm, was zu einem großen Winkelfehler führen kann, siehe Abschnitt 4.5, Seite 12�... -
Seite 15: Hinweis Zur Vermeidung Von Winkelfehlern
MonTAGE / HInWEIS ZUR VERMEIDUnG Von WInKELFEHLERn Hinweis zur Vermeidung von Winkelfehlern Für einen einwandfreien Betrieb des Drehgebers ist ein korrekter Anbau, insbesondere der Drehmomentstütze, notwendig, wie in Abschnitt 4.1 bis 4.4 beschrieben. Die Rundlaufabweichung der Motorwelle sollte nicht mehr als 0,2 mm (0,03 mm empfoh- len) betragen, da hierdurch Winkelfehler verursacht werden. -
Seite 16: Elektrischer Anschluss
ELEKTRISCHER AnSCHLUSS / PRoFIBUS DP ELEKTRISCHER ANSCHLUSS Profibus DP Eine ausführliche Anleitung für die Profibus DP Schnittstelle und die GSD-Datei finden Sie im Handbuch auf der mit dem Gerät mitgelieferten CD. 5.1.1 Merkmale Bus-Protokoll Profibus DP V0* oder Profibus DP V2* Profibus-Features Profibus DP V0 = Device Class 1 und 2 Profibus DP V2 = Device Class 3 und 4... -
Seite 17: Kabelanschluss Bei Version Mit Kabelverschraubungen
ELEKTRISCHER AnSCHLUSS / PRoFIBUS DP 5.1.2 Kabelanschluss bei Version mit Kabelverschraubungen Zur Gewährleistung der angegebenen Schutzart sind nur geeignete Kabeldurch- messer zu verwenden. Anschlusskabel sind nicht im Lieferumfang enthalten. TX 20 14 12 Busanschlusskasten Profibus DP Kombi-Torx-Schraube, M4x32 mm Scheibe A4, DIn 137 Stecker D-SUB Kabelverschraubung M16x1,5 mm... -
Seite 18: Busanschlusskasten Profibus Dp [ A ] - Version Mit Stecker
ELEKTRISCHER AnSCHLUSS / PRoFIBUS DP Busanschlusskasten Profibus DP [ A ] - Version mit Stecker 5.1.3 Busanschlusskasten Profibus DP [ A ] [ D ] [ E ] [ C ] 5.1.3.1 Stecker M12 [C] „Betriebsspannung“ (Stift, 4-polig, A-codiert) STIFT AnSCHLUSS BESCHREIBUnG Betriebsspannung 10...30 VDC nicht benutzen... -
Seite 19: Ansicht In Busanschlusskasten Profibus Dp [A]
ELEKTRISCHER AnSCHLUSS / PRoFIBUS DP 5.1.4 Ansicht in Busanschlusskasten Profibus DP [A] Einstellung der Abschlusswiderstände Einstellung der Teilnehmeradresse Klemmenbelegung negative serielle Datenleitung, Paar 1 und Paar 2 Positive serielle Datenleitung, Paar 1 und Paar 2 Betriebsspannung 10...30 VDC Masseanschluss für UB Anschlüsse mit gleicher Bezeichnung sind intern verbunden und funktionsiden- tisch. -
Seite 20: Drehzahlschalter Und Zusatzausgang Inkremental
ELEKTRISCHER AnSCHLUSS / DREHZAHLSCHALTER UnD ZUSATZAUSGAnG InKREMEnTAL Drehzahlschalter und Zusatzausgang inkremental 5.2.1 Beschreibung der Anschlüsse Betriebsspannung Masseanschluss Kanal A+ Kanal A _ (Kanal A+ invertiert) Kanal B+ Kanal B _ (Kanal B+ invertiert) nullimpuls (Referenzsignal) nullimpuls invertiert System oK+ / Fehlerausgang nE _ System oK _ / Fehlerausgang invertiert SP+*... -
Seite 21: Led-Funktionsanzeigen
ELEKTRISCHER AnSCHLUSS / DREHZAHLSCHALTER UnD ZUSATZAUSGAnG InKREMEnTAL 5.2.3 LED-Funktionsanzeigen grün InC1 ohne Funktion ohne Funktion InC2 Unterspannung (Zusatzausgang Überlast inkremental) Übertemperatur Status Interner Fehler Speed Drehzahl über Schaltdrehzahl Drehzahl unter Schaltdrehzahl (Überdrehzahl) 5.2.4 Drehzahlschalter - Ausgangsschaltverhalten Ereignis Zustand des Drehzahlschalterausgangs Während der Initialisierung Hochohmig (Überdrehzahl) nach der Initialisierung und... -
Seite 22: Kabelanschluss
ELEKTRISCHER AnSCHLUSS / DREHZAHLSCHALTER UnD ZUSATZAUSGAnG InKREMEnTAL 5.2.5 Kabelanschluss Zur Gewährleistung der angegebenen Schutzart sind nur geeignete Kabeldurch- messer zu verwenden. Anschlusskabel sind nicht im Lieferumfang enthalten. Mt = 2-3 Nm TX 20 Klemmenkastendeckel Kombi-Torx-Schraube, M4x32 mm Kabelverschraubung Kabelschirm M20x1,5 mm für Kabel ø5-13 mm Anschlussklemmen Aderquerschnitt ≤1,5 mm... -
Seite 23: Belegung Anschlussklemmen
ELEKTRISCHER AnSCHLUSS / DREHZAHLSCHALTER UnD ZUSATZAUSGAnG InKREMEnTAL 5.2.6 Belegung Anschlussklemmen Betriebsspannung nicht auf die Ausgänge legen! Zerstörungsgefahr! Spannungsabfälle in langen Leitungen berücksichtigen (Ein- und Ausgänge)! 5.2.6.1 Anschlussklemmen Klemmenkasten [B] Drehzahlschalter/Zusatzausgang SP+* SP-* nE _ * nur bei Version mit Drehzahlschalter 20/29 MB246DE - 11171694, 17A1, Baumer_HMG10-ProfibusDP_II_DE... -
Seite 24: Abmessungen
ABMESSUnGEn / EInSEITIG oFFEnE HoHLWELLE ABMESSUNGEN Einseitig offene Hohlwelle Drehzahlschalter Profibus DP [ A ] Zusatzausgang ød 53 65�5 [ B ] Positive Zubehör Drehrichtung [ C ] [ D ] [ E ] Alle Maßangaben in Millimeter, wenn nicht anders angegeben. 21/29 MB246DE - 11171694, 17A1, Baumer_HMG10-ProfibusDP_II_DE... -
Seite 25: Durchgehende Hohlwelle
ABMESSUnGEn / DURCHGEHEnDE HoHLWELLE Durchgehende Hohlwelle Drehzahlschalter Profibus DP [ A ] Zusatzausgang ød = 16 , 20 [ B ] Positive Zubehör Drehrichtung [ C ] [ D ] [ E ] Alle Maßangaben in Millimeter, wenn nicht anders angegeben. 22/29 MB246DE - 11171694, 17A1, Baumer_HMG10-ProfibusDP_II_DE... -
Seite 26: Konuswelle
ABMESSUnGEn / KonUSWELLE Konuswelle Drehzahlschalter Profibus DP [ A ] Zusatzausgang [ B ] Positive Zubehör Drehrichtung [ C ] [ D ] [ E ] Alle Maßangaben in Millimeter, wenn nicht anders angegeben. 23/29 MB246DE - 11171694, 17A1, Baumer_HMG10-ProfibusDP_II_DE... -
Seite 27: Demontage
DEMonTAGE / VERSIon MIT EInSEITIG oFFEnER HoHLWELLE oDER KonUSWELLE DEMONTAGE Version mit einseitig offener Hohlwelle oder Konuswelle Die Beispielbilder zeigen die Version mit einseitig offener Hohlwelle. Die Demontageschrit- te bei der Version mit Konuswelle sind identisch. 7.1.1 Schritt 1 17 mm 5 mm TX 20 10b 10c... - Seite 28 DEMonTAGE / VERSIon MIT EInSEITIG oFFEnER HoHLWELLE oDER KonUSWELLE 7.1.3 Schritt 3 17 mm 6 mm 7.1.4 Schritt 4 25/29 MB246DE - 11171694, 17A1, Baumer_HMG10-ProfibusDP_II_DE...
-
Seite 29: Version Mit Durchgehender Hohlwelle
DEMonTAGE / VERSIon MIT DURCHGEHEnDER HoHLWELLE Version mit durchgehender Hohlwelle TX 10 Schraube lösen 1,6x8 mm 10 mm 26/29 MB246DE - 11171694, 17A1, Baumer_HMG10-ProfibusDP_II_DE... -
Seite 30: Technische Daten
TECHnISCHE DATEn TECHNISCHE DATEN Technische Daten - elektrisch Betriebsspannung 10...30 VDC Kurzschlussfest Betriebsstrom ohne Last ≤200 mA Initialisierungszeit ≤500 ms nach Einschalten Schnittstelle Profibus DPV0/V2 Funktion Multiturn Übertragungsrate 9,6...12000 kBaud Teilnehmeradresse Drehschalter in Busanschlusskasten (typenbezogen) Schrittzahl je Umdrehung 8192 / 13 Bit Anzahl der Umdrehungen 65536 / 16 Bit Zusatzausgänge... -
Seite 31: Technische Daten - Mechanisch
TECHnISCHE DATEn Technische Daten - mechanisch Baugrösse (Flansch) ø105 mm Flansch Drehmomentblech, 360° frei positionierbar Schutzart DIn En 60529 IP 66/IP 67 Betriebsdrehzahl ≤6000 U/min Schaltdrehzahlbereich ±2...6000 U/min, Werkseinstellung 6000 U/min Betriebsdrehmoment typ. 10 ncm Trägheitsmoment Rotor 950 gcm Zulässige Wellenbelastung ≤450 n axial ≤650 n radial Werkstoffe... - Seite 32 Baumer Hübner GmbH P.O. Box 12 69 43 · 10609 Berlin, Germany Phone: +49 (0)30/69003-0 · Fax: +49 (0)30/69003-104 info@baumerhuebner.com · www.baumer.com/motion MB246DE - 11171694, 17A1 (15.03.2017), Baumer_HMG10-ProfibusDP_II_DE...
- Seite 33 Installation and operating instructions HMG 10 - Profibus DP Absolute Encoder with magnetic sensing...
- Seite 34 TABLE OF CONTENTS TABLE OF CONTENTS 1. IMPORTANT NOTES �������������������������������������������������������������������������������������������������������������1 1.1 Symbol guide ������������������������������������������������������������������������������������������������������������������1 1.2 Intended use �������������������������������������������������������������������������������������������������������������������1 1.3 Exclusion from liability ����������������������������������������������������������������������������������������������������1 1.4 Maintenance and lifetime ������������������������������������������������������������������������������������������������2 1.5 Approvals and warranty ��������������������������������������������������������������������������������������������������2 1.6 Storage temperature and disposal ���������������������������������������������������������������������������������2 2. SAFETY AND ATTENTION INSTRUCTIONS ������������������������������������������������������������������������3 2.1 Safety instructions ����������������������������������������������������������������������������������������������������������3 2.2 Attention instructions for mounting and operation ����������������������������������������������������������4 3.
- Seite 35 TABLE OF CONTENTS 5.1.4 View in bus connecting box Profibus DP [A] ������������������������������������������������������16 5.1.5 Setting for the terminating resistors ��������������������������������������������������������������������16 5.1.6 Setting for the user address �������������������������������������������������������������������������������16 5.2 Speed switch and additional output incremental ����������������������������������������������������������17 5.2.1 Terminal significance ������������������������������������������������������������������������������������������17 5.2.2 Output signals incremental (additional output) ���������������������������������������������������17 5.2.3 LED function displays �����������������������������������������������������������������������������������������18 5.2.4 Speed switch - Switching characteristics �����������������������������������������������������������18 5.2.5 Cable connection ������������������������������������������������������������������������������������������������19...
-
Seite 36: Important Notes
IMPORTANT NOTES IMPORTANT NOTES Symbol guide Warning Disregarding could result in serious injury, death or damage to property Attention Disregarding could result in damage to property or damage/malfunction of the en- coder Information Additional information and recommendations Intended use The encoder is a precision measurement device for the acquisition of speed/position in- formation for the control of drive units and the provision of electronic output signals for downstream devices. -
Seite 37: Maintenance And Lifetime
IMPORTANT NOTES Maintenance and lifetime The encoder may be only opened as described in this instruction. Repair or maintenance work that requires opening the encoder completely must be carried out by the manufactu- rer� Alterations of the device are not permitted. The expected operating life of the device depends on the ball bearings, which are equipped with a permanent lubrication. -
Seite 38: Safety And Attention Instructions
SAFETy AND ATTENTION INSTRUCTIONS SAFETY AND ATTENTION INSTRUCTIONS Safety instructions Explosion risk Spark formation can cause a fire or an explosion. » Do not use the encoder in areas with explosive and/or highly infl ammable materi- als. They may explode and/or catch fire by possible spark formation. Risk of serious injuries due to rotating shafts Hair and clothes may become tangled in rotating shafts. -
Seite 39: Attention Instructions For Mounting And Operation
SAFETy AND ATTENTION INSTRUCTIONS Attention instructions for mounting and operation Risk of destruction due to electrostatic charge Electronic parts contained in the encoder are sensitive to high voltages. » Do not touch plug contacts or electronic components. » Protect output terminals against external voltages. »... -
Seite 40: Preparation
PREPARATION PREPARATION Scope of delivery 6d 6e 6f 7a 6a 6b [ B ] [ A ] [ A ] Housing Blind hollow shaft* or cone shaft*: Cover Blind hollow shaft or cone shaft with spanner flat 17 a/f Torx and slotted screw - DIN 7964, M4x10 mm 7b Clamping element, not for cone shaft LED function indicators... -
Seite 41: Required Accessory For Mounting/Dismounting (Not Included In Scope Of Delivery)
PREPARATION Required accessory for mounting/dismounting (not included in scope of delivery) Connecting cables and respective connectors are required for the electrical connec- tion. Details see section 5, page 13� Torque arm, length L / order number Standard version: 67-70 mm / 11043628 125 (±5) mm, can be shortened to ≥71 mm / 11004078 440 (+20/-15) mm, can be shortened to ≥131 mm / 11002915 Insulated version:... -
Seite 42: Mounting
MOUNTING / POSITIONING THE TORqUE PLATE MOUNTING Positioning the torque plate TX 20 Loosen the screw 360° Tighten the screw Mt = 2-3 Nm Mounting the torque arm at the encoder Note the mounting instructions for the torque arm in section 4.4, page 11�... -
Seite 43: Mounting To Drive Shaft
MOUNTING / MOUNTING TO DRIVE SHAFT Mounting to drive shaft 4.3.1 Version with blind hollow shaft Lifetime restrictions and angle error by radial deviations High runout of the drive shaft can cause encoder angle error, see section 4.5, page 12� High runout of the drive shaft can cause vibrations, which can shorten the lifeti- me of the encoder. -
Seite 44: Version With Cone Shaft
MOUNTING / MOUNTING TO DRIVE SHAFT 4.3.2 Version with cone shaft Lifetime restrictions and angle error by radial deviations High runout of the drive shaft can cause encoder angle error, see section 4.5, page 12� High runout of the drive shaft can cause vibrations, which can shorten the lifeti- me of the encoder. -
Seite 45: Version With Through Hollow Shaft
MOUNTING / MOUNTING TO DRIVE SHAFT 4.3.3 Version with through hollow shaft Lifetime restrictions and angle error by radial deviations High runout of the drive shaft can cause encoder angle error, see section 4.5, page 12� High runout of the drive shaft can cause vibrations, which can shorten the lifeti- me of the encoder. -
Seite 46: Drive Side Mounting Of The Torque Arm
MOUNTING / DRIVE SIDE MOUNTING OF THE TORqUE ARM Drive side mounting of the torque arm Lifetime restrictions and angle error of the encoder A play of just ±0.03 mm, results in concentricity error of the encoder of 0.06 mm. That may lead to a large angle error, see section 4.5, page 12�... -
Seite 47: How To Prevent Measurement Errors
MOUNTING / HOW TO PREVENT MEASUREMENT ERRORS How to prevent measurement errors To ensure that the encoder operates correctly, it is necessary to mount it accurately as described in section 4.1 to 4.4, which includes correct mounting of the torque arm. The radial runout of the drive shaft should not exceed 0.2 mm (0.03 mm recommended), to prevent an angle error. -
Seite 48: Electrical Connection
ELECTRICAL CONNECTION / PROFIBUS DP ELECTRICAL CONNECTION Profibus DP Please find a detailed instruction for the Profibus DP interface and the device de- scription file in the manual on the CD provided with the device. 5.1.1 Features Bus protocol Profibus DP V0* or Profibus DP V2* Profibus-Features Profibus DP V0 = Device Class 1 and 2 Profibus DP V2 = Device Class 3 and 4... -
Seite 49: Cable Connection For Version With Cable Glands
ELECTRICAL CONNECTION / PROFIBUS DP 5.1.2 Cable connection for version with cable glands To ensure the specified protection of the device the correct cable diameter must be used. Connecting cables are not in scope of delivery. TX 20 Bus connecting box 14 12 Profibus DP Torx and slotted screw,... -
Seite 50: Bus Connecting Box Profibus Dp [ A ] - Version With Connectors
ELECTRICAL CONNECTION / PROFIBUS DP Bus connecting box Profibus DP [ A ] - Version with connectors 5.1.3 Bus connecting box Profibus DP [ A ] [ D ] [ E ] [ C ] 5.1.3.1 Connector M12 [C] „Voltage supply“ (male, 4-pin, A-coded) MALE CONNECTION DESCRIPTION Voltage supply 10...30 VDC... -
Seite 51: View In Bus Connecting Box Profibus Dp [A]
ELECTRICAL CONNECTION / PROFIBUS DP 5.1.4 View in bus connecting box Profibus DP [A] Setting for the terminating resistors Setting for the user address Terminal assignment Negative serial data transmission, pair 1 and pair 2 Positive serial data transmission, pair 1 and pair 2 Voltage supply 10...30 VDC Ground for UB Terminals of the same significance are internally connected and identical in their... -
Seite 52: Speed Switch And Additional Output Incremental
ELECTRICAL CONNECTION / SPEED SWITCH AND ADDITIONAL OUTPUT INCREMENTAL Speed switch and additional output incremental 5.2.1 Terminal significance Voltage supply Ground Channel A+ Channel A _ (Channel A+ inverted) Channel B+ Channel B _ (Channel B+ inverted) Zero pulse (reference signal) Zero pulse inverted System OK+ / error output nE _... -
Seite 53: Led Function Displays
ELECTRICAL CONNECTION / SPEED SWITCH AND ADDITIONAL OUTPUT INCREMENTAL 5.2.3 LED function displays green INC1 Without function Without function INC2 Undervoltage (additional output Overload incremental) Over-temperature Status Internal error Speed Speed higher switching speed Speed lower switching speed (overspeed) 5.2.4 Speed switch - Switching characteristics Event State of the speed switch output... -
Seite 54: Cable Connection
ELECTRICAL CONNECTION / SPEED SWITCH AND ADDITIONAL OUTPUT INCREMENTAL 5.2.5 Cable connection To ensure the specified protection of the device the correct cable diameter must be used. Connecting cables are not in scope of delivery. Mt = 2-3 Nm TX 20 Terminal box cover Torx and slotted screw, M4x32 mm... -
Seite 55: Assignment Connecting Terminal
ELECTRICAL CONNECTION / SPEED SWITCH AND ADDITIONAL OUTPUT INCREMENTAL 5.2.6 Assignment connecting terminal Do not connect voltage supply to outputs! Danger of damage! Please, beware of possible voltage drop in long cable leads (inputs and out- puts)! 5.2.6.1 Connecting terminal terminal box [B] Speed switch/additonal output SP+* SP-*... -
Seite 56: Dimensions
DIMENSIONS / BLIND HOLLOW SHAFT DIMENSIONS Blind hollow shaft Speed switch Profibus DP [ A ] Additional output ød 53 65�5 [ B ] Positive Accessory rotating direction [ C ] [ D ] [ E ] All dimensions in millimeters, unless otherwise stated. 21/29 MB246EN - 11171695, 17A1, Baumer_HMG10-ProfibusDP_II_EN... -
Seite 57: Through Hollow Shaft
DIMENSIONS / THROUGH HOLLOW SHAFT Through hollow shaft Speed switch Profibus DP [ A ] Additional output ød = 16 , 20 [ B ] Positive Accessory rotating direction [ C ] [ D ] [ E ] All dimensions in millimeters, unless otherwise stated. 22/29 MB246EN - 11171695, 17A1, Baumer_HMG10-ProfibusDP_II_EN... -
Seite 58: Cone Shaft
DIMENSIONS / CONE SHAFT Cone shaft Speed switch Profibus DP [ A ] Additional output [ B ] Positive Accessory rotating direction [ C ] [ D ] [ E ] All dimensions in millimeters, unless otherwise stated. 23/29 MB246EN - 11171695, 17A1, Baumer_HMG10-ProfibusDP_II_EN... -
Seite 59: Dismounting
DISMOUNTING / VERSION WITH BLIND HOLLOW SHAFT OR CONE SHAFT DISMOUNTING Version with blind hollow shaft or cone shaft Pictures showing the version with blind hollow shaft. The dismounting steps be identical at the version with cone shaft. 7.1.1 Step 1 17 mm 5 mm TX 20... - Seite 60 DISMOUNTING / VERSION WITH BLIND HOLLOW SHAFT OR CONE SHAFT 7.1.3 Step 3 17 mm 6 mm 7.1.4 Step 4 25/29 MB246EN - 11171695, 17A1, Baumer_HMG10-ProfibusDP_II_EN...
-
Seite 61: Version With Through Hollow Shaft
DISMOUNTING / VERSION WITH THROUGH HOLLOW SHAFT Version with through hollow shaft TX 10 Loosen the screw 1�6x8 mm 10 mm 26/29 MB246EN - 11171695, 17A1, Baumer_HMG10-ProfibusDP_II_EN... -
Seite 62: Technical Data
TECHNICAL DATA TECHNICAL DATA Technical data - electrical ratings Voltage supply 10...30 VDC Short-circuit proof Consumption w/o load ≤200 mA Initializing time ≤500 ms after power on Interface Profibus DP Function Multiturn Transmission rate 9.6...12000 kBaud Device adress Rotary switches in bus connecting box (type-specific) Steps per turn 8192 / 13 bit... -
Seite 63: Technical Data - Mechanical Design
TECHNICAL DATA Technical data - mechanical design Size (flange) ø105 mm Flange Support plate, 360° freely positionable Protection DIN EN 60529 IP 66/IP 67 Operating speed ≤6000 rpm Range of switching speed ±2...6000 rpm, default 6000 rpm Operating torque typ. 10 Ncm Rotor moment of inertia 950 gcm... - Seite 64 Baumer Hübner GmbH P.O. Box 12 69 43 · 10609 Berlin, Germany Phone: +49 (0)30/69003-0 · Fax: +49 (0)30/69003-104 info@baumerhuebner.com · www.baumer.com/motion MB246EN - 11171695, 17A1 (15.03.2017), Baumer_HMG10-ProfibusDP_II_EN...