Federal Communications Commission Statement NOTE: This equipment has been tested and found to comply with the limits for a Class A digital device, pursuant to part 15 of the FCC Rules. These limits are designed to provide reasonable protection against harmful interference when the equipment is operated in a commercial environment.
Seite 4
WARNING To reduce the risk of fire or electric shock, do not expose this appliance to rain or moisture. Warranty will be void if any unauthorized modifications are done to the product. Do not drop the unit or subject it to physical shock. ...
Package Contents Power Adapter & USB 2.0 Type-C to Camera Unit Power Cord* Remote Control Type-A Cable (12V, 2A) (1.8M) QR Code Card Warranty Card** * The power cord will vary depending on the standard power outlet of the country where it is sold. ** Only for Japan.
Product Introduction Overview Function Buttons Auto Focus PRESS & HOLD Zoom In SECONDS Zoom Out MORE INFO ROTATE LED Lamp Volume Up AUTO ROTATE Volume Down 1. Microphones 7. USB Type-A Port (Note 1) 2. LED Indicator 8. USB Type-C Port - Solid red: power on 9.
Function Buttons You can use the Function Buttons to perform the functions described below. You can also refer to the sticker on the Foldable Arm for advanced function info. Function Control Buttons Descriptions Short press to auto focus. Long press for 3 seconds to bring-up the OSD menu. To exit the OSD menu, long press the button again.
OSD Menu Operation You can also use the Function Buttons to operate the OSD menu. For more details about the OSD Menu, please refer to the <OSD> Menu chapter. Buttons Descriptions Long press for 3 seconds to bring-up the OSD menu. To exit the OSD menu, long press the button again.
Connections Desktop or Laptop 1. For HDMI cable connection: - Connect the unit to a TV/Monitor to display camera streams or configure camera OSD settings using the supplied Remote Control or the Function Buttons on the unit. 2. For power connection: - Use the supplied Power Adapter &...
Remote Control The remote control requires two “AAA” batteries. Make sure batteries are installed properly before use. You can access all the features of the unit with the remote control. Name Function Power Turn on/off the unit. (12) Camera Enter the Camera mode (live view). (13) (14) Start/stop audio/video recording.
Seite 13
Name Function the video. Press again to pause (12) playback. (13) - Press the Freeze/Stop button to stop playing (14) back. (15) (16) In PIP mode, press this button to switch the (13) PC 1/2 (17) video source displayed on the Main View. (18) (19) - In Live mode, freeze live images.
Auto Rotate You can enable the Auto Rotate function for the unit to automatically flip 0/180° of the live images when turning the Camera Head upward or downward. For the Auto Rotate function to work, enable the Auto Rotate function in advance. Please refer to Auto Rotate in the <Image>...
Camera Setup OSD Menu You can configure all camera settings via the OSD menu. To access the OSD menu, connect the unit to a monitor or TV using the HDMI cable, and then you can use the supplied Remote Control or the Function Buttons on the unit to operate the OSD Menu.
Picture In Picture The Picture In Picture (PIP) function allows you to display two camera streams, one from the A30 and the other from an USB camera, on a screen. It’s useful for a presenter to display the content of the materials and the presenter/audience simultaneously.
Presentation Spotlight: Enable or disable the function. Spotlight will focus on the central area of the camera view and cover all of the rest areas. To enable Spotlight: 1. Go to OSD menu > Presentation > Spotlight and select On, the central area of the camera view will be displayed.
Audio Noise Reduction: Enable or disable the Noise Reduction function. Echo Cancellation: Enable or disable the Echo Cancellation function. Microphone Volume: Adjust the microphone volume (0-32). Speaker Volume: Adjust the speaker volume (0-15). Audio Input Source: Select an audio input source. Options include MIC In and LINE In.
Setting Capture Resolution: Select a resolution for the captured images. 13M: Apply the 4208x3120 resolution to the captured images. Normal: The resolution of the captured images will be based on the selected resolution in the Output Display (System > Output Display). ...
System Language: Select a language. Output Display: Select a resolution for the output display. The unit will automatically detect the output device resolution and configure to the highest resolution. Backup: Select a storage to backup the images from the internal Embedded storage to the selected storage.
OSD Menu Tree -Layer -Layer -Layer Brightness 0~255 Contrast 0~255 Saturation 0~255 Preview Mode Normal/Motion/High Quality Effect Color/B/W/Negative Mirror On/Off Auto Rotate On/Off Exposure Setup Auto/Manual Manual Exposure Image * This function only appears when “Manual” is 0~99 selected in Exposure Setup. White Balance Setup Auto/Manual Manual W.B Blue...
Seite 23
1st-Layer 2nd-Layer 3rd-Layer Noise Reduction On/Off Echo Cancellation On/Off Audio Microphone Volume 0~32 Speaker Volume 0~15 Audio Input Source Mic In/Line In Capture Resolution 13M/Normal Capture Quality Finest/High/Normal Capture Type Single/Continuous Capture Interval * This function only appears when “Continuous” 1~600 sec.
Specification Camera Sensor 1/3.06” CMOS Pixel Count 13 Megapixels 3840x2160 (4K): Up to 30fps Frame Rate 1080p or lower: Up to 60fps White Balance Auto / Manual Exposure Auto / Manual Preview Mode Normal / Motion / High Quality Effect Color / B/W / Negative MJPEG: 3840x2160, 1920x1080, 1280x720, 640x360, 2560x1920, Output Resolutions...
Seite 25
Functions Supported FW Update FW update can be done using AVerTouch software LED Lamp Yes, embedded LED lamp 0.5W Internal Storage Image capture up to 200 frames (XGA: 1024x768) External Storage Support FAT32, 32GB USB storage Auto Rotation AEC, background noise suppression technology. Audio Function AI noise reduction.
Troubleshooting This section provides many useful tips on how to solve common problems while using the unit. There is no picture on the presentation screen. 1. Check all the connectors again as shown in this manual. 2. Verify the setting of the display output device. 3.
Seite 75
自動回転 対応 AEC, 環境音ノイズ低減、 音声処理 AI ノイズ減少 一般 電源 100-240VAC, 50~60Hz; 12VDC, 2A ランプ点灯時: 12VDC、1.25A、最大 15W, 電源入力 ランプ消灯時: 12VDC、1.21A、最大 14.5W アーム展開中: 96.9 x 239.04 x 348.4 mm 本体寸法 (横 x 縦 x 高さ) アーム収納時: 96.9 x 98.1 x 184.5 mm 本体重量...
Warenzeichen dienen lediglich der Information und sind Eigentum der entsprechenden Unternehmen. All rights of this object belong to AVer Information Inc. Reproduced or transmitted in any form or by any means without the prior written permission of AVer Information Inc. is prohibited. All information or specifications are subject to change without prior notice.
Seite 79
DAS SYMBOL MIT DER DURCHGESTRICHENEN ABFALLTONNE BEDEUTET, DASS DIESES PRODUKT NICHT MIT DEM HAUSMÜLL ENTSORGT WERDEN DARF. STATTDESSEN MÜSSEN ALTGERÄTE ZUM RECYCLING VON ELEKTRISCHEN UND ELEKTRONISCHEN ALTGERÄTEN ZU SPEZIELLEN SAMMELSTELLEN GEBRACHT WERDEN.WEITERE INFORMATIONEN ÜBER ANNAHMESTELLEN ZUR ENTSORGUNG VON ALTGERÄTEN ZU RECYCLINGZWECKEN ERHALTEN SIE VON IHREM ENTSORGUNGSDIENSTLEISTER ODER IN DEM GESCHÄFT, IN DEM SIE DAS GERÄT ERWORBEN HABEN.
WARNING Zur Vermeidung der Brandgefahr bzw. von Elektroschocks setzen Sie das Gerät weder Regen noch Feuchtigkeit aus. Die Gewährleistung verfällt, wenn am Produkt unautorisierte Änderungen vorgenommen werden Die Kamera keinen Schlägen oder starker Vibration aussetzen Die richtige Stromspannung wählen, um Schäden an der Kamera zu vermeiden. ...
Für FAQs, technische Unterstützung, Software und für den Download der Bedienungsanleitung besuchen Sie bitte: Download Center: https://www.avereurope.com/download-center Technischer Support: https://www.avereurope.com/technical-support Kontaktinformationen AVer Information Europe B.V. https://www.avereurope.com Westblaak 134, 3012KM, Rotterdam, The Netherlands Tel: +31 (0) 10 7600 550 Technischer support: eu.rma@aver.com...
Lieferumfang Netzteil & USB 2.0 Typ-C auf Kamera Netzkabel Fernbedienung Typ-A-Kabel (12V, 2A) (1.8M) QR-Code-Karte Garantiekarte * Das Netzkabel variiert abhängig von den im Verkaufsland üblichen Steckdosen. ** Nur für Japan.
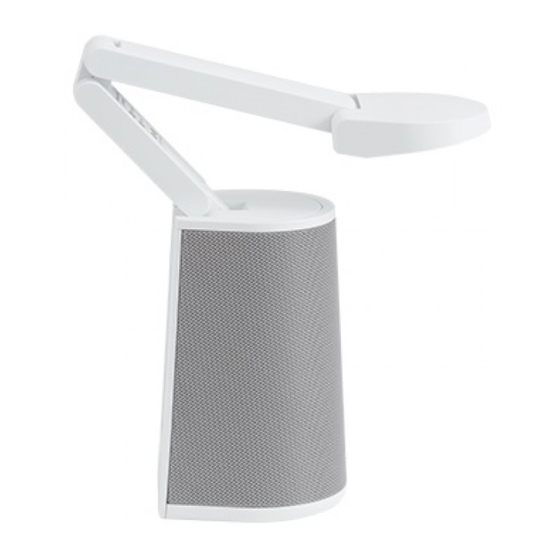
Funktionstasten Mit den Funktionstasten können Sie die folgenden Funktionen ausführen: Hinweise auf die erweiterten Funktionen finden Sie auf dem Aufkleber auf faltbaren Arm. Funktionstast Funktionssteuerung Tasten Beschreibungen Für Autofokus kurz antippen. 3 Sekunden antippen, um das OSD-Menü einzublenden. Durch erneutes langes Antippen verlassen Sie das OSD-Menü.
OSD-Menü Das OSD-Menü kann auch über die Funktionstasten betätigt werden. Weitere Informationen zum OSD-Menü finden Sie im Kapitel <OSD>-Menü. Tasten Beschreibungen 3 Sekunden antippen, um das OSD-Menü einzublenden. Durch erneutes langes Antippen verlassen Sie das OSD-Menü. Zurück zur vorherigen Seite im Menü. Nach oben Die Tasten Nach Oben, Nach Unten, Rechts, Links können folgendermaßen verwendet werden:...
Verbindung Desktop oder Laptop 1. HDMI-Kabelverbindung: - Verbinden Sie das Gerät mit einem Fernsehgerät/Monitor, um Kamerastreams anzuzeigen bzw. für die Konfiguration der OSD-Einstellungen der Kamera mithilfe der beiliegenden Fernbedienung oder den Funktionstasten am Gerät. 2. Stromanschluss: - Zum Einschalten des Gerätes verbinden Sie den beiliegenden Netzadapter und das Netzkabel mit einer Steckdose.
Fernbedienung Die Fernbedienung benötigt zwei Batterien der Größe „AAA“. Vergewissern Sie sich vor der Verwendung, dass die Batterien richtig eingesetzt sind. Sie können mit der Fernbedienung auf alle Funktionen des Gerätes zugreifen. Name Funktion (1) Stromversorgung Ein- und Ausschalten des Geräts. (12) (2) Kamera Zugriff auf den Kameramodus (Liveansicht).
Seite 89
Name Funktion (11) Zoom 1x Zoom-Level auf 100 % zurücksetzen. (12) Wiedergabe erfasster Bilder/Videos vom (13) (14) USB-Flash-Laufwerk. (15) - Mit ▲,▼,◄ und ► wählen Sie ein Bild (16) (17) oder ein Video aus. (18) (19) (12) Wiedergabe - Drücken Sie für die Bildanzeige oder die Videowiedergabe.
Seite 90
Name Funktion umzuschalten. (12) Drücken Sie die Timer-Taste, um auf die (13) Präsentation-Timer-Einrichtungsseite im (14) (15) OSD-Menü zuzugreifen. Auswahl für (16) (18) Timer Start/Pausieren/Stoppen des (17) (18) Timer-Countdowns. (19) Auswahl des Timer-Intervalls für die Festlegung der Timer-Dauer. (20) - Auswahl bestätigen. (10) (21) - Zugriff auf das Untermenü...
Autom. drehen Sie können die Funktion Autom. drehen für das automatische Drehen um 0/180° aktivieren. Für die Funktion Autom. drehen muss Autom. drehen vorab aktiviert werden. Weiterführende Informationen zu Autom. drehen finden Sie im Kapitel <Bild>. Wenn der Winkel des Kamerakopfs 30° unterschreitet, werden Livebilder um 0° gedreht. ...
Kameraeinrichtung OSD-Menü Alle Kameraeinstellungen können über das OSD-Menü konfiguriert werden. Für den Zugriff auf das OSD-Menü verbinden Sie das Gerät mit dem HDMI-Kabel mit einem Monitor oder Fernsehgerät. Dann können Sie mit der beiliegenden Fernbedienung oder den Funktionstasten Einstellungen im OSD-Menü...
Manual W.B Red: Diese Funktion wird nur angezeigt, wenn Manual in White Balance Setup ausgewählt ist. Passen Sie den Wert an (0-255). Focus: Anpassung des Fokuswertes (0-1023). Bild-In-Bild (Picture In Picture) Die Funktion Picture In Picture (PIP) erlaubt Ihnen die Anzeige von zwei Kamerastreams auf dem Bildschirm: einer von der A30, der andere von einer USB-Kamera.
manuell anpassen. Mit den Tasten ▲, ▼, , an der Fernbedienung wählen Sie eine Position aus. Size: Auswahl einer Größe für die Unteransicht. Die Optionen sind Large und Small. Start PIP Automatically: Aktivieren Sie diese Funktion, wenn die A30 automatisch den PIP-Modus anzeigen soll, wenn eine Kamera mit der A30 verbunden ist.
Nach der Auswahl einer Teilen-Option wählen Sie ein erfasstes Bild oder Video mit ▲,▼,◄ und ► an der Fernbedienung aus. Drücken Sie für die Bildanzeige oder die Videowiedergabe. Timer: Wählen Sie für den Timer-Countdown Start, Pause oder Stop. Sie können auch das Timer Interval festlegen.
Einstellungen (Setting) Capture Resolution: Auswahl der Auflösung für die erfassten Bilder. 13M: Auf die erfassten Bilder wird die Auflösung 4208x3210 angewendet. Normal: Die Auflösung der erfassten Bilder basiert auf der gewählten Auflösung in Output Display (System > Output Display). ...
USB Streaming Resolution: Für die Aktivierung dieser Funktion müssen Sie zuerst das USB-Kabel vom Gerät abziehen. Wählen Sie eine Streaming-Auflösung. Die Optionen sind Max to 4K und Max to 1080P. Flicker: Wählen Sie 50Hz oder 60Hz. Einige Anzeigegeräte können höhere Aktualisierungsraten verarbeiten.
OSD Menüstruktur Ebene Ebene Ebene Brightness 0~255 Contrast 0~255 Saturation 0~255 Preview Mode Normal/Motion/High Quality Effect Color/B/W/Negative Mirror On/Off Auto Rotate On/Off Exposure Setup Auto/Manual Manual Exposure Image * This function only appears when “Manual” is 0~99 selected in Exposure Setup. White Balance Setup Auto/Manual Manual W.B Blue...
Seite 100
Ebene Ebene Ebene Noise Reduction On/Off Echo Cancellation On/Off Audio Microphone Volume 0~32 Speaker Volume 0~15 Audio Input Source Mic In/Line In Capture Resolution 13M/Normal Capture Quality Finest/High/Normal Capture Type Single/Continuous Capture Interval * This function only appears when “Continuous” 1~600 sec.
Fehlerbehebung In diesem Abschnitt finden Sie eine Menge nützlicher Tipps zum Beheben von Problemen die bei der Nutzung des Gerätes gelegentlich auftreten können. Kein Bild am Präsentationsbildschirm. 1. Prüfen Sie die Anschlüsse gemäß den Angaben in diesem Handbuch. 2. Prüfen Sie die Einstellung des Display-Ausgabegeräts. 3.
Seite 104
AVerVision A30 Caméra universelle Mode d'emploi...
Seite 105
Cámara universal AVerVision A30 Manual del usuario...
AVer Information Inc. AVer Information Inc. se reserva el derecho a modificar sus productos, incluso sus especificaciones, y cualquier otra información aquí expuesta sin previo aviso.
Seite 107
EL SÍMBOLO DE LA PAPELERA CON RUEDAS TACHADA INDICA QUE NO DEBE MEZCLAR ESTE PRODUCTO CON EL RESTO DE LA BASURA DOMÉSTICA PARA DESHACERSE DE ÉL. EN SU LUGAR, ES NECESARIO DESHACERSE DEL EQUIPO DEPOSITÁNDOLO EN UN PUNTO LIMPIO DESIGNADO DE RECICLAJE DE EQUIPOS ELÉCTRICOS Y ELECTRÓNICOS.
Seite 108
ADVERTENCIA Para reducir el riesgo de incendio o descarga eléctrica, no exponga el dispositivo a la lluvia o la humedad. En caso de realizarse modificaciones no autorizadas en el producto, se invalidará la garantía. No deje caer la cámara ni la someta a golpes. ...
Para preguntas frecuentes, soporte técnico y descargas de software y manuales de instrucciones, visite: Centro de descargas: https://www.avereurope.com/download-center Soporte técnico: https://www.avereurope.com/technical-support Información de contacto AVer Information Europe B.V. https://www.avereurope.com Westblaak 134, 3012KM, Rotterdam, The Netherlands Tel: +31 (0) 10 7600 550 Soporte técnico: eu.rma@aver.com...
Seite 110
Índice Contenidos del paquete ....................1 Introducción del producto ....................2 Vista general ........................2 Botones de función ......................3 Ángulos de funcionamiento .................... 4 Conexión ........................5 Mando a distancia ......................6 Giro automático ......................9 Configuración de la cámara .................... 10 Menú...
Contenidos del paquete Adaptador de Cable USB 2.0 tipo C corriente y cable de Unidad de Cámara Mando a distancia a tipo A alimentación* (1.8M) (12V, 2A) Tarjeta de código Tarjeta de garantía ** * El cable de alimentación variará según la toma de corriente estándar del país de vent. ** Solo para Japón.
Introducción del producto Vista general Botones de función Enfoque automático PRESS & HOLD Acercar SECONDS Alejar MORE INFO ROTATE Luz LED Subir volumen AUTO ROTATE Bajar volumen 1. Micrófon 7. Puerto USB Tipo-A (Nota 1) 2. Indicador LED 8. Puerto USB Tipo-C - Rojo fijo: encendido 9.
3. Para encender la unidad, pulse el botón de encendido/apagado; el indicador LED parpadeará en rojo durante el proceso de encendido y luego cambiará a azul fijo. Botones de función Puede utilizar los botones de función para realizar las funciones que se describen a continuación. También puede consultar la pegatina del brazo plegable para conocer las funciones avanzadas .
Pulse simultáneamente los dos botones para activar o desactivar la función de giro automático. La función de giro automático garantiza que las imágenes en vivo se muestren con la orientación correcta, lo que hará que las imágenes se volteen automáticamente cuando estén al revés. Consulte el capítulo <Giro automático>...
Conexión Ordernador de sobremesa o portátil 1. Para la conexión del cable HDMI: - Conecte la unidad a un televisor/monitor para visualizar las secuencias de la cámara o configurar los ajustes OSD de la cámara mediante el mando a distancia suministrado o los botones de función de la unidad.
Mando a distancia El mando a distancia requiere de dos pilas “AAA”. Asegúrese de que las pilas estén instaladas correctamente antes de su uso. Puede acceder a todas las funciones de la unidad con el mando a distancia. Nombre Función Power Encender/Apagar la unidad.
Seite 117
Nombre Función (11) Zoom 1x Restablezca el nivel de zoom a 100%. (12) Reproduzca las imágenes/vídeos capturados (13) (14) desde la unidad flash USB. (15) - Utilice ▲,▼,◄ y ► para seleccionar una (16) (17) imagen o un vídeo. (18) (12) Playback (19) - Pulse...
Seite 118
Nombre Función para iniciar/pausar/detener la cuenta atrás. (12) Seleccione el intervalo de temporizador para (13) establecer la duración del temporizador. (14) (15) - Confirme una selección. (16) - Acceda al submenú del menú OSD. (17) (19) - Reproduzca/Pause un vídeo. (18) (19) - Vea las imágenes capturadas.
Giro automático Puede activar la función de giro automático para que la unidad voltee automáticamente 0/180° las imágenes en vivo al girar el cabezal de la cámara hacia arriba o hacia abajo. Para utilizar la función de giro automático, primero debe activarla. Consulte la sección Giro automático en el capítulo <Imagen>...
Configuración de la cámara Menú OSD Puede configurar todos los ajustes de la cámara a través del menú OSD. Para acceder al menú OSD, conecte la unidad a un monitor o televisor mediante el cable HDMI. A continuación, podrá utilizar el mando a distancia incluido o los botones de función de la unidad para utilizar el menú...
Imagen (Image) Brightness: ajuste el nivel de brillo (0-255). Contrast: ajuste el nivel de contraste (0-255). Saturation: ajuste el nivel de saturación (0-255). Preview Mode: seleccione un modo. Normal: ajuste el gradiente de la imagen. ...
Manual W.B Red: esta función solo se muestra si se ha seleccionado Manual en White Balance Setup. Ajuste el valor (0-255). Focus: ajuste el valor del enfoque (0-1023). Imagen En Imagen (Picture In Picture) La función Picture In Picture (PIP) permite mostrar en una pantalla dos transmisiones de la cámara, una de la unidad A30 y otra de una cámara USB.
Start PIP Automatically: active esta función si quiere que la unidad A30 muestre automáticamente el modo PIP cuando se conecte una cámara USB al dispositivo A30. Para poder utilizar esta función: 1. Vaya a menú OSD > Picture In Picture > PIP Mode y seleccione On. 2.
Para pausar o detener la opción Timer, pulse el botón Timer del mando a distancia y seleccione Pause o Stop en el menú OSD. Timer Interval: establezca un intervalo para la opción Timer. Audio (Audio) Noise Reduction: active o desactive la función Noise Reduction. ...
Ajuste (Setting) Capture Resolution: seleccione una resolución para las imágenes capturadas. 13M: aplique una resolución de 4208x3120 a las imágenes capturadas. Normal: La resolución de las imágenes capturadas se basará en la resolución seleccionada en Output Display (System > Output Display). ...
USB Streaming Resolution: para poder utilizar esta función, primero desconecte el cable USB de la unidad. Seleccione la resolución de la transmisión. Opciones disponibles: Max to 4K y Max to 1080P. Flicker: seleccione 50Hz o 60Hz. Algunos dispositivos de visualización no admiten frecuencias de actualización elevadas.
Árbol del menú OSD Nivel 1 Nivel 2 Nivel 3 Brightness 0~255 Contrast 0~255 Saturation 0~255 Preview Mode Normal/Motion/High Quality Effect Color/B/W/Negative Mirror On/Off Auto Rotate On/Off Exposure Setup Auto/Manual Manual Exposure Image * This function only appears when “Manual” is 0~99 selected in Exposure Setup.
Seite 128
1st-Layer 2nd-Layer 3rd-Layer Noise Reduction On/Off Echo Cancellation On/Off Audio Microphone Volume 0~32 Speaker Volume 0~15 Audio Input Source Mic In/Line In Capture Resolution 13M/Normal Capture Quality Finest/High/Normal Capture Type Single/Continuous Capture Interval * This function only appears when “Continuous” 1~600 sec.
Especificaciones Cámara Sensor 1/3.06” CMOS Número de píxeles 13 Megapixels 3840x2160 (4K): hasta 30 fps Velocidad de fotogramas 1080p o inferior: hasta 60 fps Balance de blancos Auto / Manual Exposición Auto / Manual Modo de vista previa Normal / Motion / High Quality Efecto Color / B/W / Negative MJPEG: 3840x2160, 1920x1080, 1280x720, 640x360, 2560x1920,...
Seite 130
Funciones Compatible Actualización de firmware Actualizaciones de firmware disponibles utilizando el software Luz LED Sí, luz LED integrada de 0,5 W Almacenamiento interno Captura de imágenes de hasta 200 fotogramas (XGA: 1024x768) Almacenamiento externo Compatible con almacenamiento USB (FAT32) de 32 GB Giro automático Sí...
Troubleshooting Esta sección proporciona muchos consejos útiles sobre cómo resolver problemas habituales al utilizar la unidad. No se muestra ninguna imagen en la pantalla de presentación. 1. Vuelva a comprobar todos los conectores de acuerdo con las instrucciones de este manual. 2.
Les informations contenues dans ces documents sont passibles de modifications sans avis préalable. En aucun cas AVer ne sera tenu responsable de dommages directs, indirects, accessoires ou immatériels découlant de l'utilisation ou de l'impossibilité d'utiliser ce produit ou cette documentation, même s'il a été...
Seite 133
AVERTISSEMENT Pour réduire les risques d'incendie ou de décharges électriques, n'exposez pas cet appareil à la pluie ni à l'humidité. Toute modification non autorisée du produit annulera la garantie. Ne laissez pas tomber l'appareil ni ne lui faites subir de heurts. ...
Pour la FAQ, l'assistance technique et le téléchargement du logiciel et du mode d'emploi, rendez-vous sur le site : Centre de téléchargement: https://www.avereurope.com/download-center Assistance Technique: https://www.avereurope.com/technical-support Coordonnées de contact AVer Information Europe B.V. https://www.avereurope.com Westblaak 134, 3012KM, Rotterdam, The Netherlands Tel: +31 (0) 10 7600 550 Assistance technique: eu.rma@aver.com...
Seite 135
Table des matières Contenu de l’emballage..................... 1 Présentation du Produit ....................2 Vue d’ensemble......................2 Boutons de fonctions ...................... 3 Angles d'utilisation......................4 Connexion ........................5 Télécommande ......................6 Pivotement automatique ....................9 Configuration de la caméra ..................... 10 Menu sur écran (OSD) ....................10 Image (Image) ......................11 Incrustation (Picture In Picture) ................
Contenu de l’emballage Adaptateur secteur & Câble USB 2.0 de Cordon Module caméra Télécommande type C à type A d’alimentation* (1,8 m) (12V, 2A) Carte de code QR Carte de garantie** * La prise d'alimentation diffère en fonction de la prise de courant standard du pays d'achat. ** Uniquement pour le Japon.
Présentation du Produit Vue d’ensemble Boutons de fonctions cautomatique PRESS & HOLD Zoom avant SECONDS Zoom arrière MORE INFO ROTATE Lampe LED Volume + AUTO ROTATE Volume – 1. Micros 7. Port USB de type-A (remarque 1) 2. Voyant DEL 8.
Boutons de fonctions Les boutons de fonctions commandent les fonctions décrites ci-après. Voyez aussi l'autocollant apposé sur le bras pliant concernant les fonctions avancées. Boutons de fonctions Commandes des fonctions Boutons Descriptions Appuyer brièvement pour faire une mise au point automatique. ...
Utilisation du menu sur écran (OSD) Le menu OSD peut être utilisé aussi à l'aide des boutons de fonctions. Pour plus de détails, consultez la section <Menu OSD>. Boutons Descriptions Maintenir appuyé pendant 3 secondes pour appeler le menu sur écran (OSD). Réappuyer pendant 3 secondes pour le quitter.
Connexion Ordinateur de bureau ou 1. Pour brancher le câble HDMI: - Connectez l'appareil à un poste TV ou à un moniteur pour afficher les images caméra ou pour paramétrer l'OSD de la caméra à l'aide de la télécommande fournie ou des boutons de fonctions de l'appareil.
Télécommande La télécommande fonctionne avec deux piles de catégorie « AAA ». Assurez-vous que les piles sont correctement installées avant toute utilisation. Toutes les fonctions de l'appareil sont accessibles depuis la télécommande. Fonction Allumage/extinction de l'appareil. (12) Caméra Entrez au mode Caméra (vue en direct). (13) (14) Démarrage/arrêt de l'enregistrement audio et...
Seite 142
Fonction (11) Zoom x1 Remettre le niveau de zoom à 100 %. (12) Lire les photos et vidéos capturées depuis la (13) (14) clé USB. (15) - Sélection d'une photo ou d'une vidéo à l'aide (16) (17) des commandes▲, ▼, ◄ et ►. (18) (12) Lecture (19)
Seite 143
Fonction définir la durée de la minuterie. (12) (13) - Confirmez une sélection. (14) - Entrez au sous-menu du menu OSD. (15) (19) - Lecture/Pause de la lecture vidéo. (16) - Affichez les images capturées. (17) (18) (19) Allumage/extinction de la lampe LED. (20) Lampe (21) Luminosité...
Pivotement automatique La fonction Pivotement automatiquepeut être activée pour retourner automatiquement de 0 à 180° l'image en direct selon que la caméra est utilisée en position normale ou tête en bas. Pour que le Pivotement automatique fonctionne, il faut l'activer à l'avance. Pour de plus amples détails, consultez le paragraphe Pivotement automatique de la section «...
Configuration de la caméra Menu sur écran (OSD) Tous les paramètres de la caméra peuvent être définis depuis le menu OSD. Pour accéder au menu OSD, connectez l'appareil à un moniteur ou à un poste TV à l'aide du câble HDMI. Vous pourrez alors utiliser le menu OSD depuis la télécommande fournie ou avec les boutons de fonctions de l'appareil.
Image (Image) Brightness: réglez le niveau de luminosité (de 0 à 255). Contrast: réglez le niveau de contraste (de 0 à 255). Saturation: réglez le niveau de saturation (de 0 à 255). Preview Mode: sélectionnez un mode. ...
Manual W.B Blue: cette fonction ne s'affiche que si vous avez sélectionné Manual sous White Balance Setup. réglez la valeur (de 0 à 255). Manual W.B Red: Cette fonction ne s'affiche que si vous avez sélectionné Manual sous White Balance Setup.
Start PIP Automatically: activez cette fonction si vous souhaitez que l'A30 passe automatiquement en mode PIP dès qu'une caméra USB y est connectée. Pour activer cette fonction: 1. Allez au menu OSD > Picture In Picture > PIP Mode et sélectionnez On. 2.
Timer ou la mettre en pause, appuyez sur le bouton Timer de la télécommande et sélectionnez Pause ou Stop dans le menu OSD. Timer Interval: Configurez un intervalle pour Timer (voir ci-dessus). Son (Audio) Noise Reduction: activez ou désactivez la fonction Noise Reduction. ...
Parametres (Setting) Capture Resolution: sélectionnez une résolution pour les images capturées. 13M: appliquer la résolution 4208x3120 aux images capturées. Normal: la résolution des images capturées sera basée sur celle sélectionnée dans Output Display (System > Output Display). ...
USB Streaming Resolution: pour configurer cette fonction, retirez d'abord le câble USB de l'appareil. Sélectionnez une résolution pour le streaming. Les options sont Max to 4K ou Max to 1080P. Flicker: Sélectionnez 50 Hz ou 60 Hz. Certains afficheurs ne prennent pas en charge des fréquences de rafraîchissement élevées.
Arbre du menu OSD couche couche couche Brightness 0~255 Contrast 0~255 Saturation 0~255 Preview Mode Normal/Motion/High Quality Effect Color/B/W/Negative Mirror On/Off Auto Rotate On/Off Exposure Setup Auto/Manual Manual Exposure Image * This function only appears when “Manual” is 0~99 selected in Exposure Setup. White Balance Setup Auto/Manual Manual W.B Blue...
Seite 153
1st-Layer 2nd-Layer 3rd-Layer Noise Reduction On/Off Echo Cancellation On/Off Audio Microphone Volume 0~32 Speaker Volume 0~15 Audio Input Source Mic In/Line In Capture Resolution 13M/Normal Capture Quality Finest/High/Normal Capture Type Single/Continuous Capture Interval * This function only appears when “Continuous” 1~600 sec.
Spécifications Caméra Capteur 1/3.06” CMOS Nombre de pixels 13 Megapixels 3840x2160 (4K) : jusqu'à 30 i/s Cadence 1080p ou inférieure : jusqu'à 60 i/s Balance des blancs Automatique / Manuelle Exposition Automatique / Manuelle Mode de prévisualisation Normal / Motion / High Quality Effet Color / B/W / Negative MJPEG: 3840x2160, 1920x1080, 1280x720, 640x360, 2560x1920,...
Seite 155
Fonctions Prise en charge Mise à jour du La mise à jour du microprogramme peut s'effectuer à l'aide du logiciel Lampe LED Oui, lampe LED intégrée de 0,5 W Stockage interne Capture de jusqu'à 200 images (XGA: 1024x768) Stockage externe Prend en charge des supports de stockage USB FAT32, 32 Go Pivotement automatique AEC, technologie de suppression du bruit de fond.
Guide de dépannage Cette section contient de nombreux conseils utiles pour résoudre des problèmes souvent rencontrés lors de l'utilisation de l'appareil. Pas d'image sur l'écran de présentation. 1. Revérifier tous les connecteurs comme indiqué dans ce manuel. 2. Vérifier le paramétrage de l'afficheur de sortie. 3.
Seite 157
AVerVision A30 Telecamera Universale Manuale dell’utente...
Seite 159
AVVERTENZA Per ridurre il rischio di incendio o di scosse elettriche, non esporre questo dispositivo alla pioggia o all’umidità. La garanzia decade qualora vengano apportate modifiche non autorizzate al prodotto. Non lasciar cadere la telecamera e non sottoporla a urti fisici. ...
Per Domande tecniche, assistenza tecnica, download di software e manuale di istruzioni, invitiamo a visitare: Centro download: https://www.avereurope.com/download-center Assistenza tecnica: https://www.avereurope.com/technical-support Informazioni di contatto AVer Information Europe B.V. https://www.avereurope.com Westblaak 134, 3012KM, Rotterdam, The Netherlands Tel: +31 (0) 10 7600 550 Assistenza tecnica: eu.rma@aver.com...
Seite 161
Contenuti Contenuto della confezione ....................1 Informazioni sul prodotto ....................2 Panoramica ........................2 Pulsanti funzione ......................3 Angoli di funzionamento ....................4 Collegamento ......................... 5 Telecomando ........................6 Rotazione automatica..................... 9 Impostazione della telecamera ..................10 Menu OSD ........................10 Image (Image) ......................11 Picture In Picture (Picture In Picture) ..............
Contenuto della confezione Adattatore di Cavo USB 2.0 da alimentazione Unità telecamera Telecomando Tipo C a Tipo A cavo di alimentazione * (1.8M) (12V, 2A) Carta con codice Garanzia** * Il cavo di alimentazione varia a seconda della presa di corrente standard del paese in cui viene venduto il prodotto.
Informazioni sul prodotto Panoramica Pulsanti funzione Messa a fuoco automatica PRESS & HOLD Ingrandimento SECONDS Rimpicciolimento MORE INFO ROTATE Lampada LED Volume Su AUTO ROTATE Volume Giù 1. Microfono 7. Porta USB di tipo A (Nota 1) 2. Indicatore LED 8.
Pulsanti funzione Sarà possibile utilizzare i pulsanti di funzione per eseguire le funzioni descritte di seguito. Si può anche fare riferimento all'adesivo sul braccio pieghevole per le funzioni avanzate . Pulsanti funzione Controllo delle funzioni Buttons Descrizioni Breve pressione per la messa a fuoco automatica. ...
Funzionamento del menu OSD Per usare il menu OSD è anche possibile usare i pulsanti di funzione. Per maggiori dettagli sul menu OSD, invitiamo a consultare il capitolo del menu <OSD>. Buttons Descrizioni Premere a lungo per 3 secondi per aprire il menu OSD. Per uscire dal menu OSD, premere di nuovo a lungo il pulsante.
Collegamento Fisso o portatile 1. Per il collegamento con il cavo HDMI: - Collegare l'unità a una TV/Monitor per visualizzare i flussi della telecamera o configurare le impostazioni OSD della telecamera servendosi del telecomando fornito in dotazione o i pulsanti funzione sull'unità.
Telecomando Per il telecomando sono necessarie due batterie “AAA”. Assicurarsi che le batterie siano inserite correttamente prima dell’uso. Sarà possibile accedere a tutte le funzioni dell’unità usando il telecomando. Nome Funzione Alimentazione Accendere/spegnere l’unità. (12) Entrare nella modalità telecamera (vista dal (13) Telecamera (14)
Seite 168
USB. Le opzioni di divisione includono Sinistra, (16) Split Screen Destra, Alto e Basso. Dopo aver selezionato un'opzione di divisione, usare ▲,▼,◄, & ► per selezionare un'immagine o un video da acquisire. Premere per visualizzare l'immagine o riprodurre il video.
Seite 169
Nome Funzione Premere per passare tra le modalità Normale, (17) Modalità (12) Alta qualità e Movimento. (13) Premere il pulsante Timer per entrare nella (14) (15) pagina di impostazione del Timer di (16) presentazione nel menu OSD. Selezionare per (17) (18) (18) Timer avviare/mettere in pausa/fermare il conto alla...
Rotazione automatica Sarà possibile abilitare la funzione di Rotazione automatica per l'unità per capovolgere automaticamente 0/180° delle immagini dal vivo quando si gira la testa della telecamera verso l'alto o verso il basso. Per fare in modo che la funzione di Rotazione automatica funzioni correttamente, abilitare in anticipo la funzione di Rotazione automatica .
Impostazione della telecamera Menu OSD È possibile configurare tutte le impostazioni della telecamera tramite il menu OSD. Per accedere al menu OSD, collegare l'unità a un monitor o a un televisore utilizzando il cavo HDMI, quindi sarà possibile utilizzare il telecomando in dotazione o i pulsanti funzione sull'unità per azionare il menu OSD.
Image (Image) Brightness: Regolare il livello di luminosità (0-255). Contrast: Regolare il livello di contrasto (0-255). Saturation: Regolare il livello di saturazione (0-255). Preview Mode: Selezionare una modalità. Normal: Regolare il gradiente dell’immagine. Motion: Elevata velocità di aggiornamento su immagini in movimento. ...
Manual W.B Red: Questa funzione viene visualizzata solo quando l’opzione Manual è impostata alla voce White Balance Setup. Regolare il valore (0-255). Focus: Regolare il valore di messa a fuoco (0-1023). Picture In Picture (Picture In Picture) La funzione Picture In Picture (PIP) consente di visualizzare due flussi di telecamera, uno dall'A30 e l'altro da una telecamera USB, su uno schermo.
USB. Le opzioni di divisione comprendono Left, Right, Top e Bottom. Dopo aver selezionato un'opzione di divisione, usare i pulsanti ▲,▼,◄ e ► del telecomando per selezionare un'immagine o un video da acquisire. Premere per visualizzare l'immagine o riprodurre il video.
interrompere il Timer, premere il pulsante Timer sul telecomando e selezionare Pause oppure Stop sul menu OSD. Timer Interval: Impostare un intervallo per il Timer sopra. Audio (Audio) Noise Reduction: Attivare o disattivare la funzione Noise Reduction. Echo Cancellation: Abilita o disabilita la funzione Echo Cancellation. ...
Setting (Setting) Capture Resolution: Selezionare una risoluzione per le immagini acquisite. 13M: Applicare la risoluzione 4208x3120 alle immagini acquisite. Normal: La risoluzione delle immagini acquisite sarà basata sulla risoluzione selezionata nel menu Output Display (System > Output Display). ...
Save Setting: Salva le impostazioni correnti, come luminosità, modalità di anteprima, contrasto e così via, come profilo. Sarà possibile configurare fino a 3 profili. Per fare questo, dopo aver configurato tutte le impostazioni, selezionate un profilo e poi premete il pulsante telecomando per salvare le impostazioni come profilo.
Struttura del Menu OSD 1° livello 2° livello 3° livello Brightness 0~255 Contrast 0~255 Saturation 0~255 Preview Mode Normal/Motion/High Quality Effect Color/B/W/Negative Mirror On/Off Auto Rotate On/Off Exposure Setup Auto/Manual Manual Exposure Image * This function only appears when “Manual” is 0~99 selected in Exposure Setup.
Seite 179
1st-Layer 2nd-Layer 3rd-Layer Noise Reduction On/Off Echo Cancellation On/Off Audio Microphone Volume 0~32 Speaker Volume 0~15 Audio Input Source Mic In/Line In Capture Resolution 13M/Normal Capture Quality Finest/High/Normal Capture Type Single/Continuous Capture Interval * This function only appears when “Continuous” 1~600 sec.
Specifiche Telecamera Sensore 1/3.06” CMOS Conteggio pixel 13 Megapixels 3840x2160 (4K): Fino a 30fps Frame Rate 1080p o inferiore: Fino a 60fps Bilanciamento dei bianchi Auto / Manuale Esposizione Auto / Manuale Modalità anteprima Normal / Motion / High Quality Effetto Color / B/W / Negative MJPEG: 3840x2160, 1920x1080, 1280x720, 640x360, 2560x1920,...
Seite 181
Funzioni Supportata Aggiornamento firmware L'aggiornamento FW può essere fatto usando il software AVerTouch Lampada LED Sì, lampada LED integrata da 0.5W Archiviazione interna Acquisizione di immagini fino a 200 fotogrammi (XGA: 1024x768) Dispositivo di stoccaggio Supporto FAT32, 32GB di memoria USB Rotazione automatica Sì...
Guida alla risoluzione dei problemi Questa sezione fornisce diversi consigli utili su come risolvere problemi comuni durante l'uso dell'unità. Non c'è alcuna immagine sullo schermo di presentazione. 1. Controllare di nuovo tutti i connettori come indicato in questo manuale. 2. Verificare l'impostazione del dispositivo di uscita del display. 3.