Herunterladen Inhalt Inhalt Diese Seite drucken
BRAND Transferpette-8 Gebrauchsanleitung
Vorschau ausblenden Andere Handbücher für Transferpette-8:
Inhaltsverzeichnis

Werbung

Verfügbare Sprachen
  • DE

Verfügbare Sprachen

  • DEUTSCH, seite 1
Gebrauchsanleitung | Operating manual | Mode
d'emploi | Instrucciones de manejo | Istruzione | 操作
手册
Transferpette® -8/-12
electronic
Mikroliterpipetten | Micropipettes

Werbung

Inhaltsverzeichnis
loading

Inhaltszusammenfassung für BRAND Transferpette-8

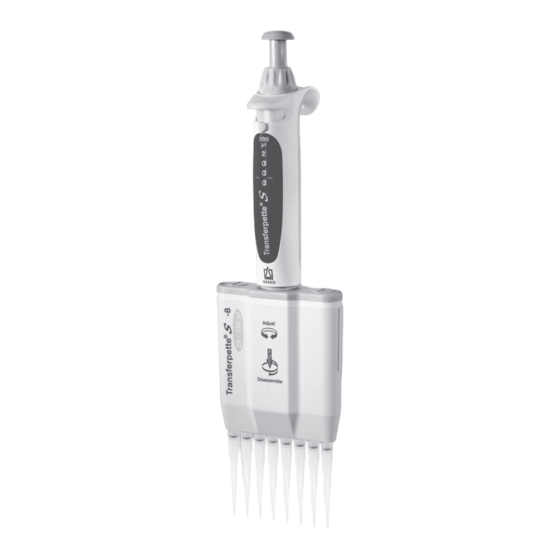
  • Seite 1 Gebrauchsanleitung | Operating manual | Mode d'emploi | Instrucciones de manejo | Istruzione | 操作 手册 Transferpette® -8/-12 electronic Mikroliterpipetten | Micropipettes...
  • Seite 2 Impressum BRAND GMBH + CO KG Otto-Schott-Str. 25 97877 Wertheim (Germany) T +49 9342 808 0 F +49 9342 808 98000 info@brand.de www.brand.de Languages Gebrauchsanleitung............2 Operating manual ............48 Mode d'emploi ..............89 Instrucciones de manejo ..........132 Istruzione............... 174 操作手册...
  • Seite 5 Declaration of conformity – China RoHS 2 BRAND GMBH + CO KG has made reasonable efforts to ensure that hazardous materials and substances may not be used in BRAND products. In order to determine the concentration of hazardous substances in all homogeneous materials of the subassemblies, a “Product Conformity Assessment”...
  • Seite 6 (PBB), and polybrominated diphenyl ethers (PBDE). Products manufactured by BRAND may enter into further devices or can be used together with other appli- ances. With these third party products and appliances in particular, please note the EFUP labeled on these products.
  • Seite 7 Inhaltsverzeichnis 1 Einleitung ........... 8 10.4 Akku laden und auswechseln ... 38 Lieferumfang ........10.5 Akku-Regenerationsfunktion.... 39 Gebrauchsbestimmung ....11 Störung – Was tun? .......40 2 Sicherheitsbestimmungen ....9 12 Kennzeichnung auf dem Produkt ...41 Allgemeine Sicherheitsbestimmun- gen ............ 13 Bestellinformationen ......42 Verwendungszweck ......
  • Seite 8: Einleitung

    1 Einleitung 1.1 Lieferumfang Transferpette® -8/-12 electronic, ein Akku-Pack, 1 Reagenzreservoir, Fett, Gebrauchsanleitung. Nennvolumen Lieferumfang bis 300 µl Steckernetzteil mit Akku-Ladekabel, 1 Geräteständer, 1 Satz O-Ringe aus FKM/ Silikon 1250 µl Universalnetzteil mit Akku-Ladekabel, 1 Regalhalter, 1 Satz O-Ringe aus Silikon 1.2 Gebrauchsbestimmung •...
  • Seite 9: Allgemeine Sicherheitsbestimmungen

    2 Sicherheitsbestimmungen 2 Sicherheitsbestimmungen 2.1 Allgemeine Sicherheitsbestimmungen Bitte unbedingt sorgfältig durchlesen! Das Laborgerät Transferpette® -8/-12 electronic kann in Kombination mit gefährlichen Materialien, Ar- beitsvorgängen und Apparaturen verwendet werden. Die Gebrauchsanleitung kann jedoch nicht alle Sicherheitsprobleme aufzeigen, die hierbei eventuell auftreten. Es liegt in der Verantwortung des An- wenders, die Einhaltung der Sicherheits- und Gesundheitsvorschriften sicherzustellen und die ent- sprechenden Einschränkungen vor Gebrauch festzulegen.
  • Seite 10: Verwendungszweck

    2 Sicherheitsbestimmungen 2.2 Verwendungszweck Bei der Transferpette® -8/-12 electronic handelt es sich um eine mikroprozessorgesteuerte, akkube- triebene Kolbenhubpipette nach dem Luftpolsterprinzip zum Pipettieren von wässrigen Lösungen mittlerer Dichte und Viskosität. Bei richtiger Handhabung des Gerätes kommt die zu dosierende Probe nur mit der Spitze und nicht mit der Transferpette®...
  • Seite 11: Funktions- Und Bedienelemente

    3 Funktions- und Bedienelemente 3 Funktions- und Bedienelemente Ladesteckerbuchse Akkufach Menu-Auswahl-Taste Pfeiltaste (+) Enter-Taste: Pfeiltaste (-) Eingabe-bestätigung/Power 'On' *) Fingerbügel Spitzenaufnahmekonus Pipettiereinheit Griffteil Spitzenabwurftaste Pipettiertaste Display *) Das Gerät wird durch Betätigung der Enter-Taste eingeschaltet! Durch anschließendes Drücken der Pipettiertaste ist das Gerät pipettierbereit. Transferpette®...
  • Seite 12: Erste Schritte

    4 Inbetriebnahme Die Transferpette® -8/-12 electronic schaltet sich 10 min nach der letzten Bedienung selbsttätig aus (Auto-Power-Off). Die Transferpette® -8/-12 electronic liegt ergonomisch angenehm in der Hand. Zum absolut mühelo- sen Bedienen der Funktionstasten lässt sich die Handposition durch den über eine Schraube höhen- verstellbaren Fingerbügel noch weiter optimieren.
  • Seite 13: Volumen Einstellen

    4 Inbetriebnahme Das Display zeigt den werkseitig eingestellten Standard-Pi- Akku-Kapazitäts Pipettieren -anzeige pettiermodus (PIP) und das jeweilige Nennvolumen. Aufsaug- und Abgabegeschwindigkeit sind werkseitig maxi- mal eingestellt. Die einfache Volumen- und Geschwindigkeitseinstellung ist auf den nachfolgenden Seiten beschrieben. Pfeilsymbol Volumenanzeige 'Aufsaugen' 4.2 Volumen einstellen Das Volumen ist werkseitig auf das jeweilige Nennvolumen der Transferpette®...
  • Seite 14: Aufsaug- Und Abgabegeschwindigkeit Einstellen

    4 Inbetriebnahme 4.3 Aufsaug- und Abgabegeschwindigkeit einstellen Aufsaug- und Abgabegeschwindigkeit sind separat einstellbar. Beim Menüaufruf wird die jeweils zu- letzt eingestellte Geschwindigkeit angezeigt. 5 Geschwindigkeitsstufen stehen jeweils zur Verfügung. Aufsauggeschwindigkeit einstellen Durch einmaliges, kurzes Drücken der Menü-Taste ge- langt man in das Menü Aufsauggeschwindigkeit. ð...
  • Seite 15: Pipettieren

    HINWEIS > Einwandfreie Analysenergebnisse sind nur mit Qualitätsspitzen zu erreichen. Wir empfehlen das Spitzen-System von BRAND. > Werden andere Pipettenspitzen verwendet, überprüfen Sie, ob diese Spitzen auf das Laborgerät Transferpette® -8/-12 electronic passen und für den gewünschten Einsatzzweck die erforderliche Qualität besitzen.
  • Seite 16: Blow-Out Direkt Auslösen

    4 Inbetriebnahme Flüssigkeit abgeben: Nach Abschluss der Flüssigkeits- aufnahme zeigt der Pfeil im Display nach unten (Abga- be). Pipettenspitze an Gefäßwand anlegen. Pipette im Winkel von 30-45° halten. Durch erneute Betätigung der Pipettiertaste wird die Flüssigkeit vollständig mit auto- matischem Überhub abgegeben. Pipettenspitze dabei an der Gefäßwand abstreifen.
  • Seite 17 5 Pipettierprogramme 5 Pipettierprogramme Tätigkeit Bezeichnung Info Normales Pipet- PIP-Modus, siehe PIP-Mo- Standard-Programm. tieren dus, S. 17 Ein zuvor eingegebenes Volumen wird aufgenommen und wieder abgegeben Pipettieren bei GEL-Modus, siehe Elektro- Programm zum Beladen von Elektrophorese-Gelen. Ein Elektrophorese phorese(GEL)-Mo- vorher definiertes Probenvolumen wird bei hoher, ver- dus, S. 22 änderbarer Geschwindigkeit aufgesaugt und langsam wieder abgegeben.
  • Seite 18 5 Pipettierprogramme PIP-Modus einstellen: Mit einer der Pfeiltasten die Modi durchscrollen bis 'PIP' erscheint. ð 'Mode' blinkt weiterhin. PIP-Modus bestätigen: Enter-Taste drücken. ð Das Display zeigt jetzt 'blo' für blow-out (Überhub). Vorbereiten zum Pipettieren: Durch einmaliges Drücken der Pipettiertaste wird der Kolben in seine Startposition gefahren.
  • Seite 19: Pipmix-Modus

    5 Pipettierprogramme 5.2 PIPmix-Modus Programm zum Durchmischen von Flüssigkeiten. Probe wird ständig wiederholt aufgesaugt und abge- geben. Volumen- und Geschwindigkeitseinstellung, siehe Volumen einstellen, S. 13 und Aufsaug- und Abga- begeschwindigkeit einstellen, S. 14. Menü-Selektion aufrufen: Durch dreimaliges Drücken der Menü-Taste gelangt man in die Programm-Selekti- ð...
  • Seite 20: Revpip-Modus

    5 Pipettierprogramme Flüssigkeit im PIPmix-Modus abgeben: Durch anhalten- des Drücken der Pipettiertaste erfolgt die wechselnde Abgabe und Aufnahme der Flüssigkeit. Im Display wer- den abwechselnd das Pfeilsymbol für Aufnahme bzw. Gedrückt halten Abgabe, sowie die Anzahl der Zyklen angezeigt. Pipettieren beenden: Durch einmaliges Drücken der Pi- pettiertaste wird die Flüssigkeit abgegeben und der Überhub (blow-out) ausgelöst.
  • Seite 21 5 Pipettierprogramme Vorbereiten zum Pipettieren: Durch einmaliges Drücken der Pipettiertaste wird der Kolben in seine Startposition gefahren. ð Der Pfeil im Display zeigt nach oben (Aufnahme). Flüssigkeit aufsaugen: Zum Aufsaugen der Flüssigkeit Pipettiertaste einmal drücken. HINWEIS Beim Aufsaugen der Flüssigkeit wird etwas mehr Volumen aufgenommen als eingestellt! Flüssigkeit im revPIP-Modus abgeben: Zur Abgabe ein- mal Pipettiertaste drücken.
  • Seite 22: Elektrophorese(Gel)-Modus

    5 Pipettierprogramme 5.4 Elektrophorese(GEL)-Modus Programm zum Beladen von Elektrophorese-Gelen. Ein vorher definiertes Probenvolumen wird bei hoher, veränderbarer Geschwindigkeit aufgesaugt und langsam wieder abgegeben. Volumen- und Geschwindigkeitseinstellung, siehe Volumen einstellen, S. 13 und Aufsaug- und Abga- begeschwindigkeit einstellen, S. 14. Menü-Selektion aufrufen: Durch dreimaliges Drücken der Menü-Taste gelangt man in die Programm-Selekti- ð...
  • Seite 23 5 Pipettierprogramme Um mehr Flüssigkeit aufzusaugen als eingestellt (bis max. 110% des Nennvolumens), Pipettiertaste während des Aufsaugvorgangs so lange gedrückt halten, bis ge- Gedrückt wünschtes Volumen aufgesaugt wurde. halten ð Im Display wird eine Raute angezeigt. Flüssigkeit im GEL-Modus abgeben: Zur Abgabe einmal Pipettiertaste kurz drücken.
  • Seite 24 5 Pipettierprogramme Menü-Selektion aufrufen: Durch dreimaliges Drücken der Menü-Taste gelangt man in die Programm-Selekti- ð 'Mode' blinkt. DISP-Modus einstellen: Mit einer der Pfeiltasten die Mo- di durchscrollen bis 'DISP' erscheint. ð 'Mode' blinkt weiterhin. DISP-Modus bestätigen: Enter-Taste drücken. ð Das Display zeigt jetzt 'blo' für blow-out (Überhub). Vorbereiten zum Pipettieren: Durch einmaliges Drucken der Pipettiertaste wird der Kolben in seine Startposition gefahren.
  • Seite 25 5 Pipettierprogramme Anzahl Steps einstellen: Durch Drücken der Pfeiltaste (+/-) wird die Anzahl der Steps eingestellt. ð 'steps' blinkt weiterhin. Anzahl Steps bestätigen: Enter-Taste drücken. ð Das Display zeigt die eingestellte Anzahl der Steps an. Flüssigkeit aufsaugen: Zum Aufsaugen der Flüssigkeit Pipettiertaste einmal drücken.
  • Seite 26: Volumen Kontrollieren

    6 Volumen kontrollieren 6 Volumen kontrollieren Wir empfehlen, je nach Einsatz, alle 3-12 Monate eine Prüfung des Gerätes. Der Zyklus kann aber den individuellen Anforderungen angepasst werden. Die gravimetrische Volumenprüfung der Pipette er- folgt durch nachfolgende Schritte und entspricht der DIN EN ISO 8655, Teil 6. 1.
  • Seite 27 7 Genauigkeitstabelle *) = Berechnung von Richtigkeit (R%) und Variationskoeffizient (VK%): R% und VK% werden nach den Formeln der statistischen Qualitätskontrolle berechnet. HINWEIS Prüfanweisungen (SOPs) stehen unter www.brand.de als Download zur Verfügung. 7 Genauigkeitstabelle Volumen- Teil- R* ≤ ± % VK* ≤...
  • Seite 28: Justieren

    8 Justieren – Easy Calibration 8 Justieren – Easy Calibration 8.1 Justieren Das Nennvolumen bzw. zu prüfendes Volumen ist eingestellt, Standard-Modus Pipettieren (PIP), z. B. 200,0 µl (Vorgehens- weise siehe PIP-Modus, S. 17). Bsp.: Volumen entsprechend Volumenprüfung 201,3 µl. CAL-Modus aufrufen: Durch anhaltendes Drücken (> 3 Sek.) der Menü-Taste wird der CAL-Modus aufgerufen.
  • Seite 29: Werkseinstellung Wiederherstellen

    8 Justieren – Easy Calibration 8.2 Werkseinstellung wiederherstellen Das ständig angezeigte CAL-Symbol im Display weist auf eine vorgenommene Justierung hin. CAL-Modus aufrufen: Durch anhaltendes Drücken (> 3 s.) der Menü-Taste wird der CAL-Modus aufgerufen. ð Die Anzeige zeigt 'on'. ð 'CAL' blinkt.
  • Seite 30: Referenzfahrt (Ref)

    9 Desinfektion/Autoklavieren 9 Desinfektion/Autoklavieren 9.1 UV-Entkeimung Das Gerät ist gegen die übliche Belastung einer UV-Entkeimungslampe beständig. Infolge der UV-Ein- wirkung ist eine Farbänderung möglich. 9.2 Autoklavieren Der hervorgehoben abgebildete Teil der Transferpette® -8/-12 electronic ist autoklavierbar bei 121 °C (250 °F), 2 bar und einer Haltezeit von mindestens 15 Minuten nach DIN EN 285.
  • Seite 31: Wartung

    Was ist zu prüfen? Pipettenschäfte, Kolben und Dichtungen auf Beschädigung und Verschmutzung prüfen. Dichtheit des Geräts prüfen. Wir empfehlen das BRAND Dichtheitsprüfgerat BRAND PLT unit zu verwenden. Alternativ dazu Probe aufsaugen, Gerat ca. 10 s senkrecht halten. Falls sich an den Pipettenspitzen Tropfen bilden, siehe Störung –...
  • Seite 32: Demontage Transferpette -8 / -12 Electronic Bis 300 Μl

    10 Wartung 10.2 Demontage Transferpette -8 / -12 electronic bis 300 µl Zur Wartung, Reinigung oder zum Teileaustausch lassen sich die drei Hauptkomponenten der Pipet- tiereinheit leicht trennen und zerlegen. Die Vorgehensweise ist auf den folgenden Seiten anschaulich erklärt. Der Wechsel der O-Ringe an den Einzelschäften wird detailliert in der dem Ersatzteil beiliegenden An- leitung beschrieben.
  • Seite 33: Kolben Zur Reinigung Oder Zum Austausch Entfernen

    10 Wartung Dichtung montieren: Bei Bedarf Kolben mit dem mitge- lieferten Silikonfett leicht nachfetten. Dichtung mit der flachen Seite nach oben auf den Kolben schieben. Ge- reinigten oder neuen Schaft mit dem Montageschlüssel festschrauben. Pipettiereinheit zusammenbauen: Pipettiereinheit wie- der zusammenbauen und am Griffteil montieren. Gerät auf Dichtheit, Gängigkeit und Genauigkeit prüfen.
  • Seite 34: Demontage Transferpette -8 / -12 Electronic 1250 Μl

    10 Wartung Kolben entfernen: Montageschlüssel auf Kolbenmutter stecken und Kolbenmutter abschrauben. Kolbenmutter entfernen und Kolben herausziehen. Kolben montieren: Gereinigten oder neuen Kolben ein- setzen. Kolbenmutter mit Montageschlüssel wieder festschrauben. Kolben- und Schafteinheit zusammenbauen: Schäfte um eine halbe Umdrehung lockern. Anschließend die Schafteinheit auf die Kolbeneinheit aufstecken und be- festigen.
  • Seite 35: Hauptkomponenten Der Pipettiereinheit

    10 Wartung Hauptkomponenten der Pipettiereinheit Vollständiges Kolben-Schaft-System mit zentraler Führungsachse (Z), verbunden mit der Pipettierge- hauseabdeckung [II] (hier Kanalkennzeichnung ablesbar). Kolben-Schaft-Einheiten eingesetzt im Rahmen [I] der Pipettiereinheit. Die Einheiten bestehen aus dem Kolben (mit Dichtung) (B') und dem Schaft (mit O-Ring) (B''), die zur Reinigung, zum Fetten sowie zum Austausch demontiert werden können.
  • Seite 36: Entfernen Von Schäften Und Kolben Zur Reinigung Oder Zum Austausch

    10 Wartung Entfernen von Schäften und Kolben zur Reinigung oder zum Austausch Pipettiereinheit abschrauben: Pipettiereinheit vom Griffteil trennen. Pipettiergehäuse abziehen: Schiebeverschlüsse der Pi- pettiergehäuseabdeckung seitlich bis zum Anschlag herausziehen und Pipettiergehäuse abnehmen. Kolben in untere Position bringen: Den Stempel nach unten schieben, bis sich die Kolben in der untersten Po- sition befinden.
  • Seite 37 10 Wartung Kolben mit Dichtung aus dem Schaft herausziehen. Pinsel in beigefügtes Kolbenfett eintauchen und gut an der Gefäßwand abstreifen. Pinsel gegen Dichtung hal- ten und Kolben mit Dichtung 1-2 Umdrehungen drehen. Kolben mit Dichtung wieder in den Schaft einstecken. HINWEIS Kolbenfett nur sehr dünn mit dem Pinsel auf die Dichtung auftragen.
  • Seite 38: Akku Laden Und Auswechseln

    10 Wartung 10.4 Akku laden und auswechseln Ein vollständig geladener Akku erlaubt ca. 8 h Dauerpipettieren (über 4000 Pipettierzyklen) von Pro- ben wasserähnlicher Viskosität und Dichte. HINWEIS > Vor dem Laden ist sicherzustellen, dass das Netzteil für die im Labor vorhandene Spannung geeig- net ist.
  • Seite 39: Batterieanzeige Nach Erneutem Einsetzen Eines Akkus

    10 Wartung Batterieanzeige nach erneutem Einsetzen eines Akkus Nach dem Einsetzen eines Akkus erscheint im Display die vol- le Kapazitätsanzeige mit blinkendem Rahmen (das Gerät er- kennt den Ladezustand zunächst noch nicht). Nach 3,5 h La- dezeit – sicheres vollständiges Laden des Akkus – hört der Rahmen auf zu blinken.
  • Seite 40: Störung - Was Tun

    11 Störung – Was tun? 11 Störung – Was tun? Störung Anzeige im Dis- Ursache Was tun? play Gerät reagiert nicht ERR 1 Akku leer oder defekt Akku mind. 5 min ohne Betätigung laden, dann nur mit Ladekabel wei- ter-arbeiten bis Akku nachgeladen ist, ggf.
  • Seite 41: Kennzeichnung Auf Dem Produkt

    Eichverordnung gekennzeichnet. Zeichenfolge DE-M (DE für Deutschland), eingerahmt durch ein Rechteck, sowie die beiden letzten Ziffern des Jahres, in dem die Kennzeichnung an- gebracht wurde. www.brand.de/ip Patentinformationen XXZXXXXX Seriennummer Beachten Sie die gegebenen Hinweise am Gerät, den Zubehörteilen und in der Gebrauchsanleitung.
  • Seite 42 13 Bestellinformationen 13 Bestellinformationen 13.1 Bestelldaten ® Transferpette -8 electronic bis 300 µl, inkl. Netzteil (100-240 V/50-60 Hz) Volumen 0,5-10 µl 1-20 µl 5-100 µl 10-200 µl 15-300 µl Best.-Nr. Best.-Nr. Best.-Nr. Best.-Nr. Best.-Nr. für Europa 705399 705400 705403 705404 705406 für UK/Irland 705409 705410 705413...
  • Seite 43: Ersatzteile

    13 Bestellinformationen 13.2 Ersatzteile 13.2.1 Transferpette® electronic bis 300 µl Design und Abmessungen der Ersatzteile entsprechend dem jeweiligen Nennvolumen (Abb. Ersatztei- le Transferpette® -8/-12 electronic 5-100 µl). A Kolben B Schaft C O-Ring D Dichtung Volumen 0,5-10 µl 705659 705677 703380 703340 1-20 µl...
  • Seite 44: Weiteres Zubehör

    13 Bestellinformationen 13.3 Weiteres Zubehör Bezeichnung Best.-Nr. Regalhalter 705383 Wandhalter 705382 Einzelständer 705384 NiMH Akku-Pack für Transferpette® -8/-12 electronic 705500 Silikonfett für Transferpette® -8/-12 electronic bis 300 µl 703677 Fluorstatikfett 703678 Kolbenfett für Transferpette® -8/-12 electronic 1250 µl 703675 PLT unit 703970 Gebrauchsanleitung Transferpette®...
  • Seite 45: Zur Reparatur Einsenden

    "Erklärung zur gesundheitlichen Unbedenklichkeit" ausfüllen und gemeinsam mit dem Gerät an Her- steller oder Händler senden. Vordrucke können beim Händler oder Hersteller angefordert werden, bzw. stehen unter www.brand.de zum Download bereit. Innerhalb der USA und Kanada Bitte klären Sie mit BrandTech Scientific, Inc. die Voraussetzungen für die Rücksendung bevor Sie das Gerät zum Service einschicken.
  • Seite 46: Mängelhaftung

    BRAND bietet Ihnen darüber hinaus die Möglichkeit, Ihre Geräte durch unseren Werks-Kalibrierservice oder durch das BRAND-DAkkS-Labor kalibrieren zu lassen. Schicken Sie uns einfach die zu kalibrieren- den Geräte mit der Angabe, welche Art der Kalibrierung Sie wünschen. Sie erhalten die Geräte nach wenigen Tagen zusammen mit einem Prüfbericht (Werkskalibrierung) bzw.
  • Seite 47: Entsorgung

    17 Entsorgung 17 Entsorgung Das nebenstehende Symbol bedeutet, dass Batterien/Akkus und elektronische Geräte am Ende ihrer Lebensdauer vom Hausmüll (unsortierter Siedlungsabfall) getrennt entsorgt werden müssen. Elektronische Geräte müssen gemäß der Richtlinie 2012/19/EU des europäischen Parlaments und des Rates vom 04. Juli 2012 über Elektro- und Elektronik-Altgeräte fachgerecht entsprechend den natio- nalen Entsorgungsvorschriften entsorgt werden.
  • Seite 48 Table of contents 1 Introduction........49 10.4 Charge and replace rechargeable battery..........79 Scope of delivery......49 10.5 Rechargeable battery regeneration Terms of use ........49 function..........80 2 Safety regulations ....... 50 11 Troubleshooting ........81 General safety regulations....50 Intended use........
  • Seite 49: Scope Of Delivery

    1 Introduction 1.1 Scope of delivery Transferpette® -8/-12 electronic, one battery pack, one reagent reservoirs, grease, operating manual. Nominal volume Scope of delivery Up to 300 µl Plug-in power supply unit with battery charging cable, 1 instrument stand, 1 set of O-rings made of FKM/silicone 1250 µl Universal power adapter with battery charging cable, 1 shelf mount, 1 set of O-...
  • Seite 50: General Safety Regulations

    2 Safety regulations 2 Safety regulations 2.1 General safety regulations Please read carefully! The instrument Transferpette® -8/-12 electronic can be used in combination with hazardous materi- als, work processes and equipment. However, the operating manual cannot cover all of the safety is- sues that may occur in doing so.
  • Seite 51: Limitations Of Use

    2 Safety regulations 2.3 Limitations of use This instrument is intended for pipetting samples, within the following limitations: • Operating temperature of instrument and reagent should be between +15 °C and +40 °C (59 °F to 104 °F) (other temperatures upon request) •...
  • Seite 52 3 Functional and operational components 3 Functional and operational components Charging socket Battery compartment Menu selection key Arrow key (+) ‘Enter’ key Arrow key (−) Input confirmation/Power ‘On’*) Finger rest Tip cone Pipetting unit Handle Tip ejection key Pipetting key Display *) The instrument is switched on by pressing the ‘Enter’...
  • Seite 53: First Steps

    4 Commissioning The Transferpette® -8/-12 electronic switches itself off automatically 10 minutes after the last opera- tion (auto power off). The Transferpette® -8/-12 electronic fits ergonomically in your hand. For absolutely effortless opera- tion of the function keys, the hand position can be further optimized by means of the finger grip, which is height-adjustable via a screw.
  • Seite 54: Set Volume

    4 Commissioning The display shows the factory-set default pipetting mode Rechargeable battery Pipetting capacity indicator (PIP) and the respective nominal volume. The aspiration and dispensing speed are set to maximum at the factory. The simple volume and speed setting is described on the fol- lowing pages.
  • Seite 55 4 Commissioning NOTICE By pressing the menu key, any setting procedure can be canceled. The display then jumps to the next setting option or back to the initial display. 4.3 Set the aspiration and dispensing speed Aspiration and dispensing speed are separately adjustable. When the menu is called up, the last speed set in each case is displayed.
  • Seite 56 NOTICE > Perfect analysis results can only be achieved by using quality tips. We recommend the tip system from BRAND. > If other pipette tips are used, check whether these tips fit the Transferpette® -8/-12 electronic labo- ratory instrument and have the required quality for the desired application.
  • Seite 57 4 Commissioning Dispense liquid: When the liquid aspiration is finished, the arrow in the display points downwards (dispensing). Place the pipette tip against the vessel wall. Hold the pipette at an angle of 30–45°. By pressing the pipetting key again, the liquid is dispensed completely with auto- matic blow-out While doing this, wipe the pipette tip against the vessel wall.
  • Seite 58: Pip Mode

    5 Pipetting programs 5 Pipetting programs Activity Designation Info Normal pipet- PIPmode, see PIP Standard program. ting mode, p. 58 A previously entered volume is aspirated and dispensed again Pipetting for GELmode, see Elec- Program for loading electrophoresis gels. A previously electrophoresis trophoresis (GEL) defined sample volume is aspirated at a high, variable mode, p. 62...
  • Seite 59: Pipmix Mode

    5 Pipetting programs Confirm PIP mode: Press ‘Enter’ key. ð The display now shows ‘blo’ for blow-out. Preparing for pipetting: Press the pipetting key once to move the piston to its start position. ð The arrow in the display points upwards (aspiration). Aspirate liquid: Press the pipetting key once to aspirate the liquid.
  • Seite 60 5 Pipetting programs Call up menu selection: Pressing the menu key three times takes you to the program selection. ð ‘Mode’ flashes. Set PIPmix mode: Use one of the arrow keys to scroll through the modes until ‘PIPmix’ appears. ð ‘Mode’...
  • Seite 61: Revpip Mode

    5 Pipetting programs End pipetting: Pressing the pipetting key once dis- penses the liquid and triggers the blow-out. After dis- pensing the residual liquid (blow-out), the display jumps back to the set mode (start position). NOTICE The display shows a maximum of 19 cycles. 5.3 revPIP mode Program especially for pipetting liquids with high viscosity, high vapor pressure, or foaming media.
  • Seite 62: Electrophoresis (Gel) Mode

    5 Pipetting programs Aspirate liquid: Press the pipetting key once to aspirate the liquid. NOTICE When aspirating the liquid, slightly more volume is aspirated than set. Dispense liquid in revPIP mode: Press the pipetting key once to dispense. On the display, the arrow points down (dispensing).
  • Seite 63 5 Pipetting programs Call up menu selection: Pressing the menu key three times takes you to the program selection. ð ‘Mode’ flashes. Set GEL mode: Use one of the arrow keys to scroll through the modes until ‘GEL’ appears. ð ‘Mode’...
  • Seite 64: Disp Mode

    5 Pipetting programs Dispense liquid in GEL mode: To dispense, briefly press the pipetting key once. A rhombus appears in the dis- play. The aspirated volume is slowly released again. The dispensing of the sample can be interrupted by pressing the pipetting key again. ð...
  • Seite 65 5 Pipetting programs Set DISP mode: Use one of the arrow keys to scroll through the modes until ‘DISP’ appears. ð ‘Mode’ continues to flash. Confirm DISP mode: Press ‘Enter’ key. ð The display now shows ‘blo’ for blow-out. Preparing for pipetting: Press the pipetting key once to move the piston to its start position.
  • Seite 66 5 Pipetting programs Confirm number of steps: Press ‘Enter’ key. ð The display shows the set number of steps. Aspirate liquid: Press the pipetting key once to aspirate the liquid. Dispense liquid: Each time the pipetting key is pressed, a dispensing step is performed. The arrow in the display points downwards (dispensing).
  • Seite 67: Checking The Volume

    6 Checking the volume 6 Checking the volume We recommend testing the device every 3 to 12 months, depending on the level of use. However, the testing cycle can be adapted to meet individual requirements. Gravimetric volume testing of the pipette is carried out according to the following steps and complies with DIN EN ISO 8655, Part 6.
  • Seite 68: Accuracy Table

    7 Accuracy table *) = Calculation for accuracy (A%) coefficient of variation (CV%): A% and CV% are calculated using the formulas of statistical quality control. NOTICE Test instructions (SOPs) are available for download at www.brand.de . 7 Accuracy table Volume Partial A* ≤...
  • Seite 69: Adjustment

    8 Adjustment – Easy Calibration 8 Adjustment – Easy Calibration 8.1 Adjustment The nominal volume or volume to be tested is set, standard mode Pipetting (PIP), e.g. 200.0 µl (for procedure, see PIP mode, p. 58). Ex: Volume according to volume test 201.3 µl. Bring up CAL mode: Press and hold the MENU key (>...
  • Seite 70: Restore Factory Setting

    8 Adjustment – Easy Calibration 8.2 Restore factory setting The CAL symbol permanently shown in the display indicates that an adjustment has been made. Enter CAL mode: Pressing and holding (> 3 s) the menu key invokes the CAL mode. ð...
  • Seite 71: Reference Run (Ref)

    9 Disinfection/autoclaving 9 Disinfection/autoclaving 9.1 UV sterilization The device is resistant to normal exposure to a UV disinfection lamp. The effects of the UV exposure may cause some color change. 9.2 Autoclaving The highlighted part of Transferpette® -8/-12 electronic can be autoclaved at 121°C (250 °F), 2 bar, and with a holding time of at least 15 minutes according to DIN EN 285.
  • Seite 72 Check the pipette shafts, pistons, and seals for damage and contamination. Check the device for leaks. We recommend using the BRAND leak detector, the BRAND PLT unit. As an alternative to this, aspirate a sample and hold the instrument vertically for approx. 10 s. If drops form at the pipette tips, see Troubleshooting, p. 81.
  • Seite 73: Cleaning Instructions

    10 Maintenance 10.2 Disassembly of Transferpette -8 / -12 electronic up to 300 µl The three main components of the pipetting unit can be easily separated and disassembled for main- tenance, cleaning or replacing parts. The procedure is explained in detail on the following pages. Changing the O-rings on the individual shafts is described in detail in the instructions included with the replacement part.
  • Seite 74 10 Maintenance Mount the seal: If required, re-grease the piston with the silicone grease supplied. Slide the seal onto the piston with the flat side upwards. Tighten the cleaned or new shaft using the installation tool. Assemble pipetting unit: Reassemble the pipetting unit and mount it on the handle.
  • Seite 75 10 Maintenance Remove piston: Place the installation tool onto the pis- ton nut and unscrew it. Remove piston nut, and pull out piston. Mount piston: Insert cleaned or new piston. Tighten the piston nut again using the installation tool. Assemble the piston and shaft unit: Loosen the shafts by half a turn.
  • Seite 76 10 Maintenance Main components of the pipetting unit Complete piston shaft system with central guide axis (Z) connected to the pipetting housing cover [II] (channel identification can be read here). Piston–shaft units inserted in the frame [I] of the pipetting unit. The units consist of the piston (with seal) (B′) and the stem (with O-ring) (B″), which can be disassembled for cleaning, lubrication, and re- placement.
  • Seite 77 10 Maintenance Removing shafts and pistons for cleaning or replacement Unscrew pipetting unit: Separate the pipetting unit from the handle. Remove the pipetting housing: Pull the sliding catches of the pipetting housing cover out to the side as far as they will go and remove the pipetting housing.
  • Seite 78 10 Maintenance Pull the piston with the seal out of the shaft. Dip the brush into the piston grease supplied and wipe it well against the vessel wall. Hold brush against seal, and turn piston with seal 1–2 turns. Insert the piston with seal back into the shaft.
  • Seite 79 10 Maintenance 10.4 Charge and replace rechargeable battery A fully charged rechargeable battery allows approx. 8 h of continuous pipetting (over 4000 pipetting cycles) of samples of water-like viscosity and density. NOTICE > Before charging, ensure that the power adapter is suitable for the voltage present in the labora- tory.
  • Seite 80 10 Maintenance Replace the cover of the battery compartment and close it. Remove the rechargeable battery from the instrument during longer breaks in operation. Battery indicator after reinserting a battery pack After inserting a rechargeable battery, the full capacity indi- cator appears in the display with a flashing frame (the instru- ment does not yet recognize the charge status at first).
  • Seite 81 11 Troubleshooting 11 Troubleshooting Fault Display Cause Corrective action Instrument does not ERR 1 Rechargeable battery Charge the battery for at least 5 respond empty or defective min without actuation. Then con- tinue working with the charging ca- ble only until the battery is recharged.
  • Seite 82: Product Markings

    Calibration Act as well as the Measurement and Calibration Regula- tion. Character sequence DE-M (DE for Germany), framed by a rectangle, as well as the two last digits of the year the marking was affixed. www.brand.de/ip Patent information XXZXXXXX Serial number Follow the instructions listed on the instrument, the accessory parts and in the operating manual.
  • Seite 83: Order Information

    13 Order Information 13 Order Information 13.1 Ordering Information ® Transferpette -8 electronic up to 300 µl, including power adapter (100– 240 V/50–60 Hz) Volume 0.5–10 µl 1–20 µl 5–100 µl 10–200 µl 15–300 µl Order no. Order no. Order no. Order no.
  • Seite 84 13 Order Information 13.2 Spares 13.2.1 Transferpette® electronic to 300 µl The spare parts correspond to the respective nominal volume. (Fig. Spare parts of Transferpette® -8/-12 electronic 5–100 µl). A Piston B Shaft C O-ring D Seal Volume 0.5–10 µl 705659 705677 703380...
  • Seite 85: Additional Accessories

    13 Order Information 13.3 Additional accessories Designation Order no. Shelf mount 705383 Wall mount 705382 Single stand 705384 NiMH battery pack for Transferpette® -8/-12 electronic 705500 Silicone grease for Transferpette® -8/-12 electronic up to 300 µl 703677 Fluorine static grease 703678 Piston grease for Transferpette®...
  • Seite 86: Contact Addresses

    Number. Place the Return Authorization number so that it is clearly visible on the outside of the package. Contact addresses Germany: USA and Canada: ® BRAND GMBH + CO KG BrandTech Scientific, Inc. Otto-Schott-Str. 25 11 Bokum Road 97877 Wertheim (Germany)
  • Seite 87: Calibration Service

    The detailed testing instructions are available for download on www.brand.de or www.brandtech.com. BRAND also offers the possibility to have your devices calibrated by our factory calibration service or by the BRAND DAkkS laboratory. Simply send us the device to be calibrated, accompanied by details about which type of calibration you would like.
  • Seite 88 16 Warranty 16 Warranty We shall not be liable for the consequences of improper handling, use, servicing, operating or unau- thorized repairs of the device or for the consequences of normal wear and tear, especially of wearing parts such as pistons, seals, valves and the breakage of glass. The same applies for failure to follow the instructions of the operating manual.
  • Seite 89 Sommaire 1 Introduction........90 10.3 Démontage de Transferpette -8 / -12 electronic 1250 µl ......1 18 Étendue de la livraison ....90 10.4 Charger et remplacer l'accu....1 22 Conditions d'utilisation ....90 10.5 Fonction de régénération de l'accu.. 1 23 2 Règles de sécurité........
  • Seite 90: Étendue De La Livraison

    1 Introduction 1.1 Étendue de la livraison Transferpette® -8/-12 electronic, un pack d'accus, 1 réservoir à réactif, de la graisse, un mode d'em- ploi. Volume nominal Contenu de la livraison jusqu’à 300 µl Bloc d'alimentation avec câble de chargement de l'accu, 1 support d'appareil, 1 jeu de joints toriques en FKM/silicone 1250 µl Bloc d'alimentation universel avec câble de chargement de l'accu, 1 support...
  • Seite 91: Règles De Sécurité Générales

    2 Règles de sécurité 2 Règles de sécurité 2.1 Règles de sécurité générales À lire attentivement ! L’appareil de laboratoire Transferpette® -8/-12 electronic peut être utilisé avec des matériaux, des procédés et des appareillages dangereux. Le mode d'emploi n'a pas pour but d'exposer tous les pro- blèmes de sécurité...
  • Seite 92: Limites D'utilisation

    2 Règles de sécurité 2.2 Utilisation Le Transferpette® -8/-12 electronic est une pipette à piston commandée par microprocesseur et fonc- tionnant sur accu, selon le principe du coussin d'air, pour le pipetage de solutions aqueuses de densi- té et de viscosité moyennes. Lorsque l'appareil est correctement utilisé, le liquide à doser entre uni- quement en contact avec la pointe mais pas avec le Transferpette®...
  • Seite 93 3 Éléments fonctionnels et de commande 3 Éléments fonctionnels et de commande Prise de charge Compartiment à accus Bouton de sélection du menu Touche fléchée (+) Touche Enter : Touche fléchée (-) Confirmation de saisie / alimentation « On » *) Anse de maintien Cône de logement de la pointe Unité...
  • Seite 94 3 Éléments fonctionnels et de commande Le Transferpette® -8/-12 electronic s'éteint automatiquement 10 min après la dernière utilisation (Au- to-Power-Off). Le Transferpette® -8/-12 electronic offre une prise en main ergonomique et agréable. Pour une utilisa- tion absolument sans effort des touches de fonction, la position de la main peut être encore optimisée grâce à...
  • Seite 95: Mise En Service

    4 Mise en service 4 Mise en service 4.1 Premiers pas 1. Accu défectueux Ouvrir le couvercle du compartiment de l'accu. Insérer l’accu. Veiller à ce que la fiche de l'accu soit bien enfoncée dans la prise de l'appareil. Remettre le couvercle du compartiment de l'accu et le fermer.
  • Seite 96: Régler Le Volume

    4 Mise en service 4.2 Régler le volume Le volume est réglé en usine sur le volume nominal respectif de Transferpette® -8/-12 electronic et peut être modifié individuellement de manière simple et rapide. En appuyant sur l'une des touches fléchées, on sélec- tionne directement un volume.
  • Seite 97 4 Mise en service Régler la vitesse d'aspiration En appuyant une fois brièvement sur la touche Menu, on accède au menu Vitesse d'aspiration. ð « Speed » clignote. En actionnant les touches fléchées (+/-), on sélectionne le niveau de vitesse (par exemple niveau 5). ð...
  • Seite 98 AVIS > Des résultats d'analyse exacts ne peuvent être obtenus qu'avec des pointes de qualité. Nous conseillons le système de pointes de BRAND. > Si d'autres pointes de pipettes sont utilisées, vérifiez que ces pointes s'adaptent à l'appareil de la- boratoire Transferpette®...
  • Seite 99 4 Mise en service Dosage de liquide : Une fois l'aspiration de liquide ter- minée, la flèche de l'écran pointe vers le bas (distribu- tion). Appliquer la pointe de la pipette sur la paroi du ré- cipient. Tenir la pipette en angle de 30-45°. En appuyant à...
  • Seite 100: Mode Pip

    5 Programmes de pipetage 5 Programmes de pipetage Activité Désignation Info Pipetage normal Mode PIP, voir Mode Programme standard. PIP, p. 100 Un volume défini auparavant est aspiré puis à nouveau distribué Pipetage pour Mode GEL, voir Mode Programme de chargement des gels d'électrophorèse. l'électrophorèse électrophorèse Un volume d'échantillon défini au préalable est aspiré...
  • Seite 101: Mode Pipmix

    5 Programmes de pipetage Confirmer le mode PIP : Appuyer sur la touche Enter. ð L'écran affiche maintenant « blo » pour blow-out (sur- course). Préparation au pipetage : En appuyant une fois sur le bouton de pipetage, le piston se déplace vers sa posi- tion de départ.
  • Seite 102 5 Programmes de pipetage Appeler la sélection de menu : En appuyant trois fois sur la touche Menu, on accède à la sélection des pro- grammes. ð « Mode » clignote. Régler le mode PIPmix : Utiliser une des touches flé- chées pour faire défiler les modes jusqu'à ce que « PIP- mix »...
  • Seite 103: Mode Revpip

    5 Programmes de pipetage Arrêter le pipetage : En appuyant une fois sur le bouton de pipetage, le liquide est distribué et la surcourse (blow-out) est déclenchée. Après la distribution du li- quide résiduel (surcourse), l'écran revient au mode ré- glé...
  • Seite 104: Mode Électrophorèse (Gel)

    5 Programmes de pipetage Aspirer le liquide : Pour aspirer le liquide, appuyer une fois sur le bouton de pipetage. AVIS Lors de l'aspiration du liquide, le volume absorbé est légère- ment supérieur au volume réglé ! Distribuer le liquide en mode revPIP: Pour la distribu- tion, appuyer une fois sur la touche de pipetage.
  • Seite 105 5 Programmes de pipetage Appeler la sélection de menu : En appuyant trois fois sur la touche Menu, on accède à la sélection des pro- grammes. ð « Mode » clignote. Régler le mode GEL : Utiliser une des touches fléchées pour faire défiler les modes jusqu'à ce que 'GEL' appa- raisse.
  • Seite 106: Mode Disp

    5 Programmes de pipetage Distribuer le liquide en mode GEL : Pour la distribution, appuyer une fois brièvement sur la touche de pipetage. Un losange s'affiche à l'écran. Le volume absorbé est lentement restitué. La distribution de l'échantillon peut être interrompue en appuyant à...
  • Seite 107 5 Programmes de pipetage Régler le mode DISP : Utiliser une des touches fléchées pour faire défiler les modes jusqu'à ce que « DISP » ap- paraisse. ð « Mode » continue de clignoter. Confirmer le mode DISP : Appuyer sur la touche Enter. ð...
  • Seite 108 5 Programmes de pipetage Confirmer le nombre d'étapes : Appuyer sur la touche Enter. ð L'écran affiche le nombre d’étapes défini. Aspirer le liquide : Pour aspirer le liquide, appuyer une fois sur le bouton de pipetage. Dosage de liquide : Chaque fois que la touche de pipe- tage est actionnée, une étape de distribution est effec- tuée.
  • Seite 109: Contrôle Du Volume

    6 Contrôle du volume 6 Contrôle du volume Nous conseillons de contrôler l’appareil tous les 3 à 12 mois selon l’utilisation. Le cycle peut cepen- dant être adapté aux exigences individuelles. L'essai volumétrique gravimétrique des pipettes s’effec- tue de la manière suivante et satisfait aux exigences de la norme DIN EN ISO 8655, partie 6. 1.
  • Seite 110 *) = Calcul de l’exactitude (R %) et du coefficient de variation (CV %) : E % et CV % seront calculés selon les formules utilisées pour le contrôle statistique de la qualité. AVIS Des instructions de contrôle (SOP) son disponibles sous www.brand.de pour leur téléchargement. Mode d'emploi Transferpette® -8/-12 electronic 997200...
  • Seite 111 7 Tableau des précisions 7 Tableau des précisions Plage de Volume R* ≤ ± % CV* ≤ % Type de pointes recommandé volume de la frac- inter- [μl] tion mé- [µl] [μl] diaires [μl] 0,5 - 10 0,01 0,5 - 20   5   1 1 - 20...
  • Seite 112 8 Ajustage – Easy Calibration 8 Ajustage – Easy Calibration 8.1 Ajustage Le volume nominal ou le volume à contrôler est réglé, mode standard Pipetage (PIP), par exemple 200,0 µl (pour la procé- dure, voir Mode PIP, p. 100). Ex. : Volume correspondant au test de volume 201,3 µl.
  • Seite 113: Rétablir Les Paramètres D'usine

    8 Ajustage – Easy Calibration 8.2 Rétablir les paramètres d'usine Le symbole CAL affiché en continu à l’écran indique un ajus- tage réalisé. Appel du mode CAL : En appuyant de manière prolon- gée (> 3 s.) sur la touche Menu, on accède au mode CAL. ð...
  • Seite 114 9 Désinfection / autoclavage 9 Désinfection / autoclavage 9.1 Désinfection aux UV L'appareil résiste à la sollicitation habituelle que représente une lampe de désinfection aux UV. Un changement de couleur est possible en raison de l'effet produit par les UV. 9.2 Autoclavage La partie du nom de Transferpette®...
  • Seite 115 Contrôler l’étanchéité de l’appareil. Nous conseillons d’utiliser le contrôleur d’étanchéité pour pipettes PLT de BRAND. En alternative à cela, aspirer l’échantillon, tenir l’appareil à la verticale pendant env. 10 s. Si une goutte se forme aux pointes des pipettes, voir Dérangement - Que faire ?, p. 124.
  • Seite 116 10 Entretien 10.2 Démontage Transferpette -8 / -12 electronic jusqu'à 300 µl Pour l’entretien, le nettoyage ou pour le remplacement de composants, les trois composants princi- paux de l’unité de pipetage se laissent facilement séparer et désassembler. La méthode est décrite de manière détaillée sur les pages suivantes.
  • Seite 117 10 Entretien Monter le joint : En cas de besoin regraisser légèrement le piston avec la graisse au silicone fournie. Pousser le joint d’étanchéité avec le côté plat vers le haut sur le piston. Visser fermement la tige nettoyée ou la tige neuve avec la clé...
  • Seite 118 10 Entretien Retirer le piston : Placer la clé de montage sur l’écrou du piston et dévisser l’écrou du piston. Retirer l’écrou du piston et dégager le piston. Démonter le piston : Utiliser le piston nettoyé ou le pis- ton neuf. Revisser à fond l’écrou du piston avec la clé de montage.
  • Seite 119 10 Entretien Principaux composants de l’unité de pipetage Système piston-tige complet avec axe de guidage central (Z), relié au couvercle du boîtier de pipe- tage [II] (on peut lire ici l'identification du canal). Unités piston-tige utilisées dans le cadre [I] de l'unité de pipetage. Les unités se composent du piston (avec joint) (B') et de la tige (avec joint torique) (B''), qui peuvent être démontés pour le nettoyage, le graissage ainsi que le remplacement.
  • Seite 120 10 Entretien Enlèvement des tiges et des pistons pour le nettoyage ou pour le remplacement Dévisser l’unité de pipetage : Séparer l’unité de pipe- tage de la poignée. Enlever le boîtier de pipetage : Tirer les fermetures cou- lissantes du couvercle du boîtier de pipetage latérale- ment jusqu'à...
  • Seite 121 10 Entretien Retirer le piston avec le joint de la tige. Tremper le pinceau dans la graisse pour piston jointe et bien le frotter contre la paroi du récipient. Tenir le pin- ceau contre le joint et tourner le piston avec le joint de 1 à...
  • Seite 122 10 Entretien 10.4 Charger et remplacer l'accu Une accu entièrement chargée permet environ 8 heures de pipetage continu (plus de 4000 cycles de pipetage) d'échantillons de viscosité et de densité similaires à l'eau. AVIS > Avant de charger, il faut s'assurer que l'adaptateur AC est adapté à la tension disponible dans le la- boratoire.
  • Seite 123 10 Entretien Remettre le capuchon du compartiment de l'accu et le fermer. En cas de pauses prolongées, retirer l'accu de l'appareil. Indicateur de batterie après avoir réinséré une accu Après l'insertion d'une accu, l'affichage de la pleine capacité apparaît à l'écran avec un cadre clignotant (l'appareil ne re- connaît pas encore l'état de charge dans un premier temps).
  • Seite 124: Dérangement - Que Faire

    11 Dérangement - Que faire ? 11 Dérangement - Que faire ? Dysfonctionnement Affichage sur Cause Que faire ? l'écran L'appareil ne réagit pas ERR 1 Accu vide ou défec- Charger l'accu pendant au moins 5 tueuse min sans l'actionner, puis conti- nuer à travailler uniquement avec le câble de chargement jusqu'à...
  • Seite 125 Mention DE-M (DE pour Allemagne), encadrée par un rectangle, ainsi que les deux derniers chiffres de l’année au cours de laquelle le marquage a été apposé. www.brand.de/ip Informations relatives aux brevets XXZXXXXX Numéro de série Veuillez tenir compte des indications se trouvant sur l'appareil, les acces- soires et dans le mode d'emploi.
  • Seite 126: Informations Pour La Commande

    13 Informations pour la commande 13 Informations pour la commande 13.1 Données pour la commande ® Transferpette -8 electronic jusqu'à 300 µl, adaptateur AC inclus (100-240 V/50-60 Hz) Volume 0,5-10 µl 1-20 µl 5-100 µl 10-200 µl 15-300 µl Réf. de Réf.
  • Seite 127: Pièces Détachées

    13 Informations pour la commande 13.2 Pièces détachées 13.2.1 Transferpette® electronic jusqu’à 300 μl L’aspect et les dimensions des pièces détachées correspondent au volume nominal respectif (ill. pièces détachées Transferpette® -8/-12 electronic 5-100 µl). A Piston B Tige C Joint torique D Joint d’étanchéité...
  • Seite 128: Autres Accessoires

    13 Informations pour la commande Volume 50-1250 µl 705665 705619 13.3 Autres accessoires Désignation Réf. de com- mande Support pour étagère 705383 Support mural 705382 Supports individuels 705384 Paquet d'accus NiMH pour Transferpette® -8/-12 electronic 705500 Graisse de silicone pour Transferpette® -8/-12 electronic jusqu’à 300 µl 703677 Graisse Fluorstatic 703678...
  • Seite 129: Retour Pour Réparation

    Le numéro de retour doit être apposé à l’extérieur du colis de façon bien visible. Adresses de contact Allemagne : États-Unis et Canada : ® BRAND GMBH + CO KG BrandTech Scientific, Inc. Otto-Schott-Straße 25 11 Bokum Road 97877 Wertheim (Germany)
  • Seite 130: Service De Calibrage

    Les instructions de contrôle détaillées peuvent être téléchargées sur www.brand.de ou www.brand- tech.com. BRAND vous offre également la possibilité de faire calibrer vos instruments par notre service de cali- bration ou par le laboratoire de calibration BRAND-DAkkS. Envoyez-nous simplement les appareils à...
  • Seite 131 16 Responsabilité pour défauts 16 Responsabilité pour défauts Nous déclinons toute responsabilité en cas de conséquences d'un traitement, d'une utilisation, d'un entretien et d'une manipulation incorrects, d'une réparation non autorisée de l'appareil ou d'une usure normale, notamment des pièces d'usure, telles que les pistons, les joints d'étanchéité, les sou- papes, et de rupture de pièces en verre.
  • Seite 132 Índice 1 Introducción ........133 10.2 Desmontaje Transferpette -8 / -12 electronic hasta 300 µl ...... 1 58 Contenido de la entrega ....133 10.3 Desmontaje Transferpette -8 / -12 Información general sobre las ins- electronic 1250 µl ......1 60 trucciones de uso ......133 10.4 Cargar y cambiar batería....
  • Seite 133: Contenido De La Entrega

    1 Introducción 1.1 Contenido de la entrega Transferpette® -8/-12 electronic, un paquete de baterías, 1 depósito para reactivo, grasa, instruccio- nes de uso. Volumen nominal Contenido de la entrega Hasta 300 µl Adaptador de red con cable de carga para batería, 1 soporte de dispositivos, 1 juego de juntas tóricas de FKM / silicona 1250 µl Fuente de alimentación universal con cable de carga para batería, 1 estante, 1...
  • Seite 134: Disposiciones Generales De Seguridad

    2 Disposiciones de seguridad 2 Disposiciones de seguridad 2.1 Disposiciones generales de seguridad ¡Leer todo el manual con atención por favor! El equipo de laboratorio Transferpette® -8/-12 electronic puede utilizarse en combinación con mate- riales, procesos de trabajo y aparatos riesgosos. No obstante, el manual de instrucciones no puede hacer referencia a todas las cuestiones que, eventualmente, podrían afectar la seguridad.
  • Seite 135: Limitaciones De Empleo

    2 Disposiciones de seguridad 2.2 Aplicación El producto Transferpette® -8/-12 electronic es una pipeta de émbolo controlada por microprocesa- dor que funciona a batería, basada en el principio de desplazamiento del aire, para pipetear solucio- nes acuosas de densidad y viscosidad media. Al manipular el equipo de manera correcta, la muestra dosificada entra en contacto solo con la punta y no con la Transferpette®...
  • Seite 136: Elementos De Mando Y Funcionamiento

    3 Elementos de mando y funcionamiento 3 Elementos de mando y funcionamiento Conector de carga Compartimiento de la batería Tecla de selección del menú Tecla de flecha (+) Tecla Enter: Tecla de flecha (-) Confirmación de entrada / Power «On»*) Estribo para el dedo Cono de acoplamiento de puntas Unidad de pipeteado...
  • Seite 137 3 Elementos de mando y funcionamiento La Transferpette® -8/-12 electronic se apaga automáticamente 10 minutos después de su último uso (Auto-Power-Off). La Transferpette® -8/-12 electronic tiene un agarre ergonómico y cómodo para las manos. Para facili- tar el manejo aún más, puede optimizar la posición manual mediante el estribo para el dedo, cuya al- tura puede ajustarse con un tornillo.
  • Seite 138: Puesta En Marcha

    4 Puesta en marcha 4 Puesta en marcha 4.1 Primeros pasos 1. Colocar la batería Abra la tapa del compartimiento de la batería. Inserte la batería. Asegúrese de que el conector de la batería esté firmemente insertado en la toma del equi- Vuelva a colocar la tapa del compartimiento de la bate- ría y ciérrela.
  • Seite 139: Ajustar El Volumen

    4 Puesta en marcha 4.2 Ajustar el volumen El volumen viene configurado de fábrica según el volumen nominal de la Transferpette® -8/-12 elec- tronic y se puede modificar individualmente de forma sencilla y rápida. Presione una de las flechas para seleccionar el volu- men.
  • Seite 140 4 Puesta en marcha Configurar velocidad de absorción Al presionar la tecla de menú una vez, accederá al menú de velocidad de absorción. ð «Speed» parpadea. Podrá elegir el nivel de velocidad (p. ej.: nivel 5) presio- nando las flechas (+/-). ð...
  • Seite 141 AVISO > Utilice solo puntas de calidad para obtener buenos resultados. Le recomendamos el sistema de puntas de BRAND. > Si utiliza otras puntas para pipetas, verifique si esas puntas se ajusten al equipo Transferpette® -8/-12 electronic y si poseen la calidad necesaria para alcanzar el propósito deseado.
  • Seite 142 4 Puesta en marcha Dosificar líquido: Una vez aspirado el líquido, la flecha en la pantalla apunta hacia abajo (dosificación). Apoye la punta para pipetas en la pared del recipiente. Man- tenga la pipeta en un ángulo entre 30° y 45°. Para dosifi- car el líquido por completo con una sobrecarrera auto- mática, presione la tecla de pipeteo nuevamente.
  • Seite 143 5 Programas de pipeteo 5 Programas de pipeteo Tarea Denominación Información Pipeteo normal Modo PIP, véase Modo Programa estándar. PIP, p. 143 El volumen previamente indicado se aspira o se dosifica Pipeteo por Modo GEL, véase Electro- Programa para cargar geles de electroforesis. Un volu- electroforesis foresis Modo (GEL), p. 147 men de muestra predefinido se aspira a una gran veloci-...
  • Seite 144: Modo Pipmix

    5 Programas de pipeteo Confirmar modo PIP: Presione la tecla Enter. ð Ahora la pantalla muestra «blo» para blow-out (sobre- carrera). Prepararse para pipetear: Al presionar la tecla de pipe- teo una vez, el émbolo se mueve a su posición inicial. ð...
  • Seite 145 5 Programas de pipeteo Acceder a la selección del menú: Para acceder al pro- grama de selección, presione la tecla de menú tres ve- ces. ð «Mode» parpadea. Configurar modo PIPmix: Desplácese con las flechas hasta que aparezca el modo «PIPmix» . ð...
  • Seite 146: Modo Revpip

    5 Programas de pipeteo Terminar pipeteo: Para dosificar el líquido y activar la sobrecarrera (blow-out), presione la tecla de pipeteo una vez. Una vez dosificado el líquido residual (sobreca- rrera), la pantalla volverá al modo configurado (posi- ción de inicio). AVISO La pantalla muestra un máximo de 19 ciclos.
  • Seite 147 5 Programas de pipeteo Absorber líquido: Para absorber el líquido, presione la tecla de pipeteo una vez. AVISO ¡Al absorber el líquido se aspirará un poco más del volumen configurado! Dosificar líquido en el modo revPIP: Para dosificar, pre- sione la tecla de pipeteo una vez. En la pantalla la flecha apunta hacia abajo (dosificar).
  • Seite 148 5 Programas de pipeteo Acceder a la selección del menú: Para acceder al pro- grama de selección, presione la tecla de menú tres ve- ces. ð «Mode» parpadea. Configurar modo GEL: Desplácese con las flechas hasta que aparezca el modo «GEL». ð...
  • Seite 149 5 Programas de pipeteo Dosificar líquido en el modo GEL: Para dosificar, presio- ne brevemente la tecla de pipeteo una vez. La pantalla muestra un rombo. El volumen aspirado se vuelve a do- sificar lentamente. Puede interrumpir la dosificación de la muestra presio- nando la tecla de pipeteo una vez más.
  • Seite 150 5 Programas de pipeteo Configurar modo DISP: Desplácese con las flechas hasta que aparezca el modo «DISP». ð «Mode» sigue parpadeando. Confirmar modo DISP: Presione la tecla Enter. ð Ahora la pantalla muestra «blo» para blow-out (sobre- carrera). Prepararse para pipetear: Al presionar la tecla de pipe- teo una vez, el émbolo se mueve a su posición inicial.
  • Seite 151 5 Programas de pipeteo Confirmar número de steps: Presione la tecla Enter. ð La pantalla muestra el número configurado de steps. Absorber líquido: Para absorber el líquido, presione la tecla de pipeteo una vez. Dosificar líquido: Cada vez que presione la tecla de pi- peteo, se lleva a cabo un paso de dosificación.
  • Seite 152: Controlar El Volumen

    6 Controlar el volumen 6 Controlar el volumen En función del uso, recomendamos comprobar el equipo cada 3-12 meses. El ciclo puede adaptarse a los requisitos individuales. El control de volumen gravimétrico de la pipeta se realiza con los pasos si- guientes y satisface la norma DIN EN ISO 8655, parte 6.
  • Seite 153: Tabla De Precisión

    *) = cálculo de la exactitud (R%) y el coeficiente de variación (VK%): E % y CV % se calculan según las fórmulas del control estadístico de calidad. AVISO Las instrucciones de inspección (SOP) pueden descargarse en www.brand.de. 7 Tabla de precisión Rango de Volumen E* ≤...
  • Seite 154 8 Ajuste – Easy Calibration 8 Ajuste – Easy Calibration 8.1 Ajuste El volumen nominal o de consigna está configurado, modo estándar para pipetear (PIP), p. ej. 200,0 µl (consulte cómo proceder en Modo PIP, p. 143). P. ej.: volumen según control de volumen 201,3 µl.
  • Seite 155 8 Ajuste – Easy Calibration 8.2 Restablecer configuración de fábrica El símbolo CAL que aparece constantemente en la pantalla indica que se ha realizado un ajuste. Acceder al modo CAL: Para acceder al modo CAL man- tenga presionada (> 3 s.) la tecla de menú. ð...
  • Seite 156 9 Desinfección / autoclave 9 Desinfección / autoclave 9.1 Esterilización UV El equipo es resistente al efecto habitual de una lámpara UV germicida. Debido a la influencia de la ra- diación UV, pueden tener lugar cambios de color. 9.2 Autoclave La parte destacada de la Transferpette®...
  • Seite 157 Vástagos de la pipeta, émbolos y juntas en busca de daños y suciedad. Compruebe la estanqueidad del equipo. Le recomendamos utilizar el comprobador de estan- queidad BRAND PLT unit de BRAND. De forma alternativa, aspire la muestra y mantenga el equipo unos 10 segundos en posición vertical.
  • Seite 158 10 Mantenimiento 10.2 Desmontaje Transferpette -8 / -12 electronic hasta 300 µl Los tres componentes principales de la unidad de pipeteado se desmontan con facilidad para el man- tenimiento, la limpieza o la sustitución de piezas. En las páginas siguientes se explica cómo proceder. La sustitución de las juntas tóricas en cada uno de los vástagos se describe de forma detallada en las instrucciones adjuntas a las piezas de repuesto.
  • Seite 159 10 Mantenimiento Montar la junta: En caso necesario, engrase ligeramente los émbolos con la grasa siliconada suministrada. Colo- que la junta con el lado plano hacia arriba sobre el ém- bolo. Atornille el vástago limpio o nuevo con la llave de montaje.
  • Seite 160 10 Mantenimiento Retirar el émbolo: Inserte la llave de montaje en la tuer- ca del émbolo y desenrósquela. Retire la tuerca del ém- bolo y saque el émbolo. Montar el émbolo: Coloque el émbolo limpio o nuevo. Vuelva a apretar la tuerca del émbolo con la llave de montaje.
  • Seite 161 10 Mantenimiento Componentes principales de la unidad de pipeteado Sistema de émbolo y vástago completo con eje central de guía (Z), conectado con la cubierta de la carcasa de pipeteado [II] (aquí se puede leer la identificación del canal). Unidades de émbolo y vástago utilizadas en el marco [I] de la unidad de pipeteado. Las unidades es- tán compuestas por el émbolo (con junta) (B') y el vástago (con junta tórica) (B''), que se pueden des- montar para limpiarlos, engrasarlos y cambiarlos.
  • Seite 162 10 Mantenimiento Retirar los vástagos y émbolos para su limpieza o sustitución Desatornillar la unidad de pipeteado: Separe la unidad de pipeteado del mango. Retirar la carcasa de pipeteado: Extraiga los cierres des- lizantes de la cubierta de la carcasa de pipeteado hacia el costado hasta que hagan tope y retire la carcasa de pipeteado.
  • Seite 163 10 Mantenimiento Retire el émbolo con la junta del vástago. Sumerja el pincel en la grasa para émbolo suministrada y límpielo bien en la pared del recipiente. Sostenga el pincel sobre la junta y gire el émbolo con la junta 1-2 vueltas.
  • Seite 164: Recargar La Batería

    10 Mantenimiento 10.4 Cargar y cambiar batería La batería cargada por completo permite aprox. 8 h de pipeteo continuo (más de 4000 ciclos de pipe- teo) de muestras con viscosidad y densidad acuosas. AVISO > Antes de realizar la carga, asegúrese de contar con una la fuente de alimentación adecuada para la tensión del laboratorio.
  • Seite 165 10 Mantenimiento Indicador de batería luego de volver a colocar la batería Al colocar la batería, la pantalla le mostrará el indicador de batería lleno con marco parpadeante (el equipo aún no reco- noce el estado de carga). Luego de 3,5 h de carga (carga com- pleta y segura de la batería), el marco dejará...
  • Seite 166 11 Avería - ¿Qué hacer en caso de errores? 11 Avería - ¿Qué hacer en caso de errores? Error Indicador en la Causa ¿Qué hacer? pantalla El equipo no reacciona ERR 1 Batería vacía o defec- Cargue la batería al menos 5 minu- tuosa tos sin realizar ninguna acción, lue- go continúe trabajando solo con el...
  • Seite 167 Cuenta con la secuencia de caracteres DE-M («DE» en referencia a Alema- nia) enmarcada en un rectángulo, así como las últimas dos cifras del año en el que se realizó la identificación. www.brand.de/ip Información sobre patentes XXZXXXXX Número de serie Respete las indicaciones contenidas en el equipo, los accesorios y el ma- nual de instrucciones.
  • Seite 168: Información Para Pedidos

    13 Información para pedidos 13 Información para pedidos 13.1 Información para pedidos ® Transferpette -8 electronic hasta 300 µl, incl. fuente de alimentación (100-240 V/50-60 Hz) Volumen 0,5-10 µl 1-20 µl 5-100 µl 10-200 µl 15-300 µl N.º de pedi- N.º de pedi- N.º de pedi- N.º de pedi- N.º...
  • Seite 169: Piezas De Repuesto

    13 Información para pedidos 13.2 Piezas de repuesto 13.2.1 Transferpette® electronic hasta 300 µl Diseño y dimensiones de las piezas de repuesto según el volumen nominal correspondiente (Fig. pie- zas de repuesto Transferpette® -8/-12 electronic 5-100 µl). A Émbolo B Vástago C Junta tórica D Junta Volumen...
  • Seite 170: Otros Accesorios

    13 Información para pedidos 13.2.2 Transferpette® electronic 1250 µl E Unidad de émbolo y vástago F Junta tórica Volumen 50-1250 µl 705665 705619 13.3 Otros accesorios Denominación N.º de pedido Estante 705383 Soporte de pared 705382 Soportes individuales 705384 Paquete de baterías NiMH para Transferpette® -8/-12 electronic 705500 Grasa siliconada para Transferpette®...
  • Seite 171: Envíos Para Reparación

    Completar la «Declaración sobre la ausencia de riesgos para la salud» y enviarla junto con el equipo al fabricante o al distribuidor. El formulario se puede pedir al proveedor o al fabricante, o bien, se puede descargar en el sitio web www.brand.de/es. Dentro de EE. UU. y Canadá...
  • Seite 172: Servicio De Calibración

    Asimismo, BRAND ofrece la posibilidad de solicitar el calibrado de los equipos al servicio técnico de calibrado en fábrica o al laboratorio de BRAND acreditado por el organismo DAkkS de Alemania. A tal fin, alcanza tan solo con enviar los equipos que se desea calibrar con la indicación de qué tipo de cali- brado se desea realizar.
  • Seite 173 17 Eliminación 17 Eliminación El símbolo que puede verse al costado significa que las pilas/ baterías y los equipos electrónicos deben desecharse por se- parado de los residuos domésticos (residuos municipales sin separar) al finalizar su vida útil. De acuerdo con la directiva 2012/19/UE del Parlamento Europeo y del Consejo de 04 de julio de 2012 sobre residuos de aparatos eléctricos y electrónicos (RAEE), los equipos electrónicos deben desechar- se de forma apropiada en función de las normas nacionales de eliminación de residuos.
  • Seite 174 Indice 1 Introduzione ........175 10.1 Separare l’unità di pipettaggio dall’impugnatura....... 1 99 Contenuto della fornitura....175 10.2 Smontaggio Transferpette -8 / -12 Destinazione d'uso......175 electronic fino a 300 µl ...... 2 00 2 Disposizioni di sicurezza.......176 10.3 Smontaggio Transferpette -8 / -12 electronic 1250 µl ......
  • Seite 175: Contenuto Della Fornitura

    1 Introduzione 1.1 Contenuto della fornitura Transferpette® -8/-12 electronic, un gruppo accumulatori, 1 serbatoio per reagenti, grasso, istruzioni per l'uso. Volume nominale Contenuto della fornitura fino a 300 µl Alimentatore a spina con cavo di carica dell'accumulatore, 1 porta-strumento, 1 set di O-ring in FKM (elastomeri fluorurati)/silicone 1250 µl Alimentatore universale con cavo di carica dell'accumulatore, 1 supporto a mensola, 1 set di O-ring in silicone...
  • Seite 176: Disposizioni Generali Di Sicurezza

    2 Disposizioni di sicurezza 2 Disposizioni di sicurezza 2.1 Disposizioni generali di sicurezza Leggere attentamente prima dell'uso! Lo strumento da laboratorio Transferpette® -8/-12 electronic può essere utilizzato con materiali, pro- cedure di lavoro e apparecchiature pericolose. Le istruzioni per l'uso non possono però coprire tutte le eventuali problematiche di sicurezza che possono eventualmente presentarsi.
  • Seite 177: Limiti Di Impiego

    2 Disposizioni di sicurezza 2.2 Scopo La Transferpette® -8/-12 electronic è una pipetta a pistone, che funziona in base al principio del cusci- netto d'aria, controllata da un microprocessore e alimentata a batteria ricaricabile , per il pipettaggio di soluzioni acquose di media densità e viscosità. L'utilizzo corretto dello strumento prevede che il campione da dosare venga a contatto solo con il puntale e non con laTransferpette®...
  • Seite 178 3 Elementi di funzionamento e di comando 3 Elementi di funzionamento e di comando Presa per il connettore di ricarica Vano accumulatore Tasto selezione del menù Tasto freccia (+) Tasto Invio: Tasto freccia (-) Conferma inserimento/Power 'On'*) Staffa di appoggio per le dita Cono per l’inserimento del puntale Unità...
  • Seite 179 3 Elementi di funzionamento e di comando La Transferpette® -8/-12 electronic si spegne automaticamente 10 minuti dopo l'ultimo utilizzo (Auto- Power-Off). La Transferpette® -8/-12 electronic offre una gradevole presa ergonomica. Per un uso del tutto confor- tevole dei tasti funzionali, la posizione della mano può essere ulteriormente ottimizzata grazie alla staffa di appoggio per le dita regolabile in altezza mediante una vite.
  • Seite 180: Messa In Funzione

    4 Messa in funzione 4 Messa in funzione 4.1 Primi passi 1. Inserire l'accumulatore, cioè la batteria ricaricabile Aprire il coperchio del vano dell'accumulatore. Inserire l'accumulatore. A tal proposito verificare che il connettore dell'accumulatore si innesti saldamente nel- la presa dello strumento. Reinserire il coperchio del vano accumulatore e chiu- derlo.
  • Seite 181: Impostazione Del Volume

    4 Messa in funzione 4.2 Impostazione del volume Il volume è impostato in fabbrica al volume nominale della Transferpette® -8/-12 electronic e può es- sere modificato autonomamente, in modo semplice e veloce. Premendo uno dei tasti freccia si seleziona direttamen- te un volume.
  • Seite 182 4 Messa in funzione Impostazione della velocità di aspirazione Premendo una volta, brevemente, il tasto menù si rag- giunge il menù Velocità di aspirazione. ð 'Speed' (Velocità) lampeggia. Azionando i tasti freccia (+/-) si seleziona il livello della velocità (ad es. livello 5). ð...
  • Seite 183 AVVISO! > Risultati di analisi precisi possono essere ottenuti solo utilizzando puntali di qualità. Consigliamo il sistema di puntali di BRAND. > Se si utilizzano altri puntali per pipetta, verificare se questi puntali sono adatti allo strumento da laboratorio Transferpette® -8/-12 electronic e se dispongono della qualità necessaria per la desti- nazione d'uso desiderata.
  • Seite 184 4 Messa in funzione Erogare il liquido: Una volta conclusa l'aspirazione di li- quido la freccia nel display è rivolta verso il basso (ero- gazione). Appoggiare il puntale sulla parete del reci- piente. Tenere la pipetta in modo da farle formare un angolo di 30-45°...
  • Seite 185: Modalità Pip

    5 Programma di pipettaggio 5 Programma di pipettaggio Attività Denominazione Info Pipettaggio nor- Modalità PIP, vedere Mo- Programma standard. male dalità PIP, p. 185 Un volume previamente inserito viene prima aspirato e poi erogato Pipettaggio per Modalità GEL, vedere Mo- Programma per l'aspirazione dei gel per elettroforesi. elettroforesi dalità...
  • Seite 186 5 Programma di pipettaggio Confermare la modalità PIP: Premere il tasto Invio. ð Il display visualizza adesso 'blo' per blow-out (scarico). Preparazione al pipettaggio: Premendo una volta il ta- sto di pipettaggio il pistone viene portato alla propria posizione di partenza. ð...
  • Seite 187 5 Programma di pipettaggio Richiamare la selezione del menù: Premendo tre volte il tasto menù si accede alla selezione del programma. ð 'Mode' lampeggia. Impostare la modalità PIPmix: Scorrere con uno dei ta- sti freccia le modalità fino a quando appare 'PIP'mix . ð...
  • Seite 188 5 Programma di pipettaggio Concludere il pipettaggio: Premendo una volta il tasto di pipettaggio, si eroga il liquido e si attiva lo scarico (blow-out). Dopo che il residuo di liquido è stato eroga- to (ciò che viene definito come scarico o blow-out), il di- splay torna alla modalità...
  • Seite 189 5 Programma di pipettaggio Aspirare il liquido: Per aspirare il liquido premere una volta il tasto di pipettaggio. AVVISO! Con l'aspirazione del liquido viene aspirato un volume leg- germente maggiore di quello impostato! Erogare il liquido in modalità revPIP: Per l'erogazione premere una volta il tasto di pipettaggio.
  • Seite 190 5 Programma di pipettaggio Richiamare la selezione del menù: Premendo tre volte il tasto menù si accede alla selezione del programma. ð 'Mode' lampeggia. Impostare la modalità GEL: Scorrere con uno dei tasti freccia le modalità fino a quando appare 'GEL'. ð...
  • Seite 191 5 Programma di pipettaggio Erogare il liquido in modalità GEL: Per l'erogazione pre- mere brevemente una volta il tasto di pipettaggio. Sul display viene visualizzato un rombo. Il volume aspirato viene lentamente erogato. L'erogazione del campione può essere interrotta pre- mendo nuovamente il tasto di pipettaggio.
  • Seite 192 5 Programma di pipettaggio Impostare la modalità DISP: Scorrere con uno dei tasti freccia le modalità fino a quando appare 'DISP'. ð 'Mode' (Modalità) continua a lampeggiare. Confermare la modalità DISP: Premere il tasto Invio. ð Il display visualizza adesso 'blo' per blow-out (scarico). Preparazione al pipettaggio: Premendo una volta il ta- sto di pipettaggio il pistone viene portato alla propria posizione di partenza.
  • Seite 193 5 Programma di pipettaggio Confermare il numero di step (passi): Premere il tasto Invio. ð Il display visualizza il numero di step (passi) impostato. Aspirare il liquido: Per aspirare il liquido premere una volta il tasto di pipettaggio. Erogare il liquido: Ad ogni pressione del tasto di pipet- taggio avviene un passo di erogazione.
  • Seite 194: Controllo Del Volume

    6 Controllo del volume 6 Controllo del volume Si consiglia, in base al tipo di impiego, di controllare il volume dello strumento ogni 3-12 mesi. Il ciclo delle verifiche dovrebbe comunque essere adattato secondo le singole esigenze. Il controllo gravime- trico del volume della pipetta deve essere effettuato come riportato di seguito, in accordo con la nor- ma DIN EN ISO 8655, Parte 6.
  • Seite 195 *) = Calcolo dell'accuratezza (A%) e del coefficiente di variazione (CV%): A% e CV% vengono calcolati secondo le formule del controllo di qualità statistico. AVVISO! Le procedure operative standard (SOPs: Standard Operating Procedures) possono essere scaricate dal sito www.brand.de . 7 Tabella di precisione Range di Volume A* ≤...
  • Seite 196 8 Calibrazione - Easy Calibration (calibrazione facile) 8 Calibrazione - Easy Calibration (calibrazione facile) 8.1 Calibrazione Il volume nominale o uno specifico volume da controllare è impostate, nella modalità standard Pipettaggio (PIP), ad es. 200,0 µl (per la procedura vedere Modalità PIP, p. 185). Esem- pio: Volume corrispondente alla verifica del volume 201,3 µl.
  • Seite 197: Ripristino Delle Impostazioni Di Fabbrica

    8 Calibrazione - Easy Calibration (calibrazione facile) 8.2 Ripristino delle impostazioni di fabbrica Il simbolo CAL visualizzato in modo fisso e non più lampeg- giante sul display indica che è stata effettuata una calibrazio- Richiamare la modalità CAL: Premendo in modo conti- nuo (>...
  • Seite 198 9 Disinfezione/sterilizzazione in autoclave 9 Disinfezione/sterilizzazione in autoclave 9.1 Sterilizzazione UV Lo strumento resiste alla normale sollecitazione di una lampada di sterilizzazione a raggi UV. L’azione degli ultravioletti può causare una variazione di colore. 9.2 Sterilizzazione in autoclave La parte raffigurata in evidenze della Transferpette® -8/-12 electronic può...
  • Seite 199 Controllare che i gambi delle pipette, i pistoni e le guarnizioni non siano danneggiati o sporchi. Controllare la tenuta del dispositivo. Raccomandiamo di utilizzare lo strumento per prove di te- nuta PLT unit di BRAND. In alternativa, aspirare del campione e tenere lo strumento in verticale per circa 10 secondi. Se si for- mano gocce sui puntali, consultare la sezione Individuazione e risoluzione dei problemi - cosa fa- re?, p. 208.
  • Seite 200: Indicazioni Per La Pulizia

    10 Manutenzione 10.2 Smontaggio Transferpette -8 / -12 electronic fino a 300 µl I tre componenti principali dell'unità di pipettaggio possono essere facilmente separati e smontati per la manutenzione, la pulizia o la sostituzione di parti. La procedura è spiegata in modo chiaro nelle pa- gine seguenti.
  • Seite 201 10 Manutenzione Montare la guarnizione: Se necessario rilubrificare leg- germente i pistoni con il grasso siliconico incluso nella fornitura. Inserire la guarnizione sul pistone con la parte piana rivolta verso l'alto. Avvitare i gambi puliti o nuovi utilizzando la chiave di montaggio. Assemblare l'unità...
  • Seite 202 10 Manutenzione Rimuovere il pistone: Inserire la chiave di montaggio sul dado del pistone e svitare il dado. Rimuovere il dado del pistone ed estrarre il pistone. Montare il pistone: Inserire un pistone pulito o uno nuo- vo. Riavvitare saldamente il dado del pistone utilizzan- do la chiave di montaggio.
  • Seite 203 10 Manutenzione Componenti principali dell'unità di pipettaggio Sistema completo pistone-gambo con asse di guida centrale (Z), collegato alla copertura dell'allog- giamento del sistema di pipettaggio [II] (qui è leggibile la marcatura dei canali). Le unità pistone-gambo sono inserite nel telaio [I] dell'unità di pipettaggio. Le unità sono composte dal pistone (con guarnizione) (B') e dal gambo (con O-ring) (B'') che possono essere smontati per la pulizia, per la lubrificazione e per la sostituzione.
  • Seite 204 10 Manutenzione Smontaggio di gambi e pistoni per la pulizia o la sostituzione Svitare l’unità di pipettaggio: Separare l’unità di pipet- taggio dall’impugnatura. Rimuovere l'alloggiamento del sistema di pipettaggio: Estrarre lateralmente, fino all'arresto, le chiusure a scorrimento della copertura dell'alloggiamento del si- stema di pipettaggio e rimuovere l'alloggiamento in questione.
  • Seite 205 10 Manutenzione Estrarre il pistone con la guarnizione dal gambo. Immergere un pennello nel grasso per pistoni accluso e strusciarlo bene sulla parete del recipiente. Tenere il pennello contro la guarnizione e ruotare il pistone con la guarnizione di 1-2 giri. Reinserire il pistone con la guarnizione sul gambo.
  • Seite 206: Sostituire L'accumulatore

    10 Manutenzione 10.4 Ricarica e sostituzione dell'accumulatore (batteria ricaricabile) Un accumulatore completamente carico consente all'incirca 8 h di pipettaggio continuo (più di 4.000 cicli di pipettaggio) di campioni aventi viscosità e densità simile all'acqua. AVVISO! > Prima della carica è necessario accertarsi che l'alimentatore sia adatto alla tensione presente in la- boratorio.
  • Seite 207 10 Manutenzione Reinserire il coperchio del vano dell'accumulatore e chiuderlo. In caso di lunghe pause di funzionamento, rimuovere l'accu- mulatore dallo strumento. Visualizzazione della batteria dopo aver effettuato l'inserimento di un nuovo accumulatore Dopo aver inserito un accumulatore compare sul display l'in- dicazione della capacità...
  • Seite 208 11 Individuazione e risoluzione dei problemi - cosa fare? Interruzione della funzione di refresh Premendo un qualsiasi tasto il programma viene terminato. Lo strumento torna automaticamente al- la modalità di pipettaggio standard (PIP) e al volume nominale e si avvia automaticamente una nor- male procedura di ricarica, vedere Ricarica e sostituzione dell'accumulatore (batteria ricaricabi- le), p. 206.
  • Seite 209 11 Individuazione e risoluzione dei problemi - cosa fare? Problema Visualizzazio- Causa Cosa fare? ne nel display L'aspirazione è impos- — Il motore non è colle- Effettuare una corsa di riferimento sibile gato all'unità di pipet- (rEF), vedere Corsa di riferimento taggio.
  • Seite 210 Sequenza di caratteri DE-M (DE per Germania), incorniciata da un rettan- golo, più le ultime due cifre dell’anno nel quale è stata applicata la marca- tura. www.brand.de/ip Informazioni sul brevetto XXZXXXXX Numero di serie Rispettare le indicazioni fornite sullo strumento, sugli accessori e nelle istruzioni per l'uso.
  • Seite 211: Dati Di Ordinazione

    13 Informazioni ordinazione 13 Informazioni ordinazione 13.1 Dati di ordinazione ® Transferpette -8 electronic fino a 300 µl, incl. alimentatore (100-240 V/50-60 Hz) Volume 0,5-10 µl 1-20 µl 5-100 µl 10-200 µl 15-300 µl N° ord. N° ord. N° ord. N° ord. N°...
  • Seite 212: Pezzi Di Ricambio

    13 Informazioni ordinazione 13.2 Pezzi di ricambio 13.2.1 Transferpette® electronic fino a 300 µl il design e le dimensioni delle parti di ricambio corrispondono al rispettivo volume nominale (Fig. par- ti di ricambio Transferpette® -8/-12 electronic 5-100 µl). A Pistone B Gambo C O-ring D Guarnizione...
  • Seite 213: Altri Accessori

    Compilare la 'Dichiarazione di assenza di rischi per la salute' ed inviarla con lo strumento al distributo- re o al produttore. I moduli possono essere richiesti al distributore o al produttore, oppure si possono scaricare dal sito www.brand.de. All'interno degli Stati Uniti e del Canada Si invita a chiarire i prerequisiti per la restituzione con BrandTech Scientific, Inc.
  • Seite 214: Indirizzi Di Contatto

    Le istruzioni dettagliate per la verifica possono essere scaricate da www.brand.de o www.brandte- ch.com. Inoltre, BRAND vi offre la possibilità di far tarare i vostri strumenti dal nostro Servizio calibrazione in fabbrica o dal Laboratorio DAkkS BRAND. Inviateci semplicemente i vostri strumenti da tarare con l'in- dicazione del tipo di calibrazione richiesta.
  • Seite 215: Smaltimento

    16 Garanzia 16 Garanzia Non ci assumiamo alcuna responsabilità per le conseguenze di manipolazione, uso, manutenzione e impiego non corretti, o per riparazioni non autorizzate dello strumento o per le conseguenze del nor- male consumo, in particolare dei componenti soggetti ad usura, come ad esempio pistoni, guarnizioni e valvole, e in caso di rottura del vetro.
  • Seite 216 目录 1 引言 ......217 10.5 蓄电池再生功能 ....2 49 供货范围 .....217 11 故障——如何处理? ....250 使用规定 .....217 12 产品上的标识 ....... 251 2 安全规定 ......218 一般安全规定 ....218 13 订购信息 ......252 预期用途 .....218 13.1 订购信息 ...... 2 52 使用限制条件 ....218 13.2 备件...
  • Seite 217 1 引言 1.1 供货范围 Transferpette® -8/-12 electronic、电池组、1 个试剂容器、润滑脂、使用说明书。 额定体积 供货范围 最大 300 µl 电源适配器带蓄电池充电线,1 个仪器支架、1 组 FKM/硅胶 O 形圈 1250 µl 通用电源带蓄电池充电线,1 个仪器支架、1 组硅胶 O 形圈 1.2 使用规定 • 在第一次使用前请认真阅读本使用说明书。 该使用说明书是此设备所包含的部分,必须妥善保存并且易于取阅。 • • 如果将本设备交予第三方,须随附本使用说明书。 1.2.1 危险等级 下列信号词提示可能存在的危险: 信号词 含义 危险 将导致重伤或死亡。...
  • Seite 218 2 安全规定 2 安全规定 2.1 一般安全规定 务必请仔细通读! 实验室设备 Transferpette® -8/-12 electronic 可与危险材料、工作过程和配件结合使用。本使用说 明书未展示可能出现的安全问题。用户有责任确保遵守安全法规和健康法规,并在使用前确定存 在的限制条件。 所有使用者在使用本仪器之前必须阅读和注意本使用说明书。 遵守一般危险提示和安全法规,例如穿戴防护服、护目镜和防护手套。 在使用传染性或危险试样进行工作时,必须遵守标准实验室规定和标准预防规定。 请注意试剂供应商提供的所有说明。 请勿在潜在爆炸性气体环境中使用仪器,请勿对易燃介质进行移液。 仅将仪器用于液体吸移,在规定的使用极限和使用限制范围内使用。注意使用排除范围, 参见使用排除范围, 页 219!如有疑问,请联系制造商或者经销商。 请始终以对使用者及他人均安全的方式使用该仪器。避免飞溅。仅使用合适的容器。 使用腐蚀性介质时,应避免接触吸头开口。 使用该仪器时请不要过度用力。 仅使用原装备件。不得进行任何技术更改。 不得违背使用说明书的说明进一步拆解仪器。 使用前请检查本仪器的状态是否正常。如果仪器在操作时有潜在的故障迹象(如活塞不灵 活、泄漏),请立即停止移液,并遵循故障——如何处理?, 页 250一章中的说明。必要时 请联系制造商。 原装电池不得更换为其他制造商的蓄电池或电池。 只允许使用原装电源为镍氢电池充电。 电源必须防潮,并且只允许和本仪器搭配使用。 根据适用规定废弃处理蓄电池。 警告 因损坏的电池导致的潜在爆炸危险 极端情况下,如果对设备或电池操作不当(短路、机械损坏、过热等)可能导致电 池爆炸。 2.2 预期用途 Transferpette® -8/-12 electronic 是一种基于气垫原理、由微处理器控制、由蓄电池供电的活塞式 移液器,用于中等密度和粘度水性溶液的移液。在正确处理仪器时,待移取的试样仅与尖吸嘴接...
  • Seite 219 2 安全规定 • 蒸汽压力最大 500 mbar 粘度:260 mPa s • 如果是粘性介质,则可能需要调整速度。 2.4 使用限制 粘稠和润湿的液体可能对体积精度产生不良影响。也包括其温度与室温偏差超过 ± 1 °C/± 1.8 °F 的液体。 2.5 使用排除范围 用户必须自行检查仪器是否适合预期用途。不得使用仪器: • 对于会侵蚀 PP、FKM、PVDF、SI、PEI 或 PC/PBT 的液体。避免腐蚀性蒸汽(腐蚀风险)! 不可对抓握部位进行高压灭菌。 2.6 蓄电池和电源规格 蓄电池 镍氢蓄电池,带 3 个圆柱形单节电池,AAA 规格,3.6 V,700 mAh 电源 输出电压...
  • Seite 220 3 功能和操作元件 3 功能和操作元件 充电插座 电池盒 菜单选择键 箭头键 (+) Enter 键: 箭头键 (-) 输入确认 / 电源‘On’*) 指托 移液器吸头支撑锥体 移液单元 抓握部位 移液器吸头排放按键 移液按键 显示屏 *) 按下 Enter 键开启仪器!然后按下移液键,仪器移液准备就绪。 最后一次操作 10 分钟之后,Transferpette® -8/-12 electronic自动关闭(自动断电)。 Transferpette® -8/-12 electronic符合人体工学原理,称手且舒适。为了绝对轻松自如地操作各个功 能键,可以使用一个可通过螺栓调节高度的指托进一步优化手部位置。 Transferpette® -8/-12 electronic 997200 操作手册...
  • Seite 221 4 调试 4 调试 4.1 第一步 1.装入蓄电池 打开蓄电池盒的盖子。 放入电池。注意将蓄电池插头牢固插入仪器的插口 中。 重新装入并合上蓄电池盒的盖子。 2.激活仪器 装入蓄电池之后,Transferpette® -8/-12 electronic立即自动 请求基准化运行。按下移液键之后执行基准化运行,仪器 移液准备就绪! 显示屏显示了出厂设置的标准移液模式 (PIP) 和相应额定 吸移 蓄电池容量 体积。 指示器 吸入和放液速度出厂设置为最大值。 以下几页中对简单的体积和速度调节方法进行了介绍。 箭头符号 体积显示 ‘吸入’ Transferpette® -8/-12 electronic 997200 操作手册...
  • Seite 222 4 调试 4.2 调节体积 体积出厂设置为Transferpette® -8/-12 electronic的相应额定体积,可以快速且个性化改变。 按下其中一个箭头键便可以直接选择体积。 ð ‘VOL’ 闪烁。 通过按下箭头键 (-) 减小体积。长按箭头键可快速 改变体积。 ð ‘VOL’ 继续闪烁。 按下箭头键 (+) 增大体积。长按箭头键可快速改变 体积。 ð ‘VOL’ 继续闪烁。 若要确认体积选择,请按下 Enter 键。 ð 显示屏现在显示新设定的体积,如显示默认设置的 PIP 模式。 注意 按下菜单键,可以取消每个设置过程!然后显示将跳转到下一个设置选项,或返回初始显示界 面。 4.3 调节吸入和放液速度 可调节设置吸入和放液速度。调用菜单时,会显示上一次调节的速度。分别有 5 个速度等级。 Transferpette®...
  • Seite 223 4 调试 调节吸入速度 短按一次菜单键,进入吸入速度菜单。 ð ‘Speed’闪烁。 按下箭头键 (+/-) 选择速度等级(例如 5 级)。 ð “Speed” 继续闪烁。 按下 Enter 键。 ð 显示屏返回当前设定模式的基本状态,例如此时会显 示标准 PIP 模式。 调节放液速度 短按两次菜单键,进入放液速度菜单。 ð ‘Speed’闪烁。 按下箭头键 (+/-) 选择速度等级(例如 2 级)。 ð ‘Speed’继续闪烁。 Transferpette® -8/-12 electronic 997200 操作手册...
  • Seite 224 4 调试 按下 Enter 键。 ð 显示屏返回当前设定模式的基本状态,例如此时会显 示标准 PIP 模式。 4.4 吸移 体积出厂设置为Transferpette® -8/-12 electronic 的相应额定体积,可以快速且个性化改变,参见 调节体积, 页 222。 注意 > 只有使用高品质移液器吸头才能得到没有缺陷的分析结果。我们建议使用 BRAND 的吸头系 统。 > 如果使用其他移液器吸头,请检查这些吸头是否匹配实验室仪器 Transferpette® -8/-12 electronic,且对于所需用途具备所要求的质量。 请垂直插上吸头: 请根据体积范围或颜色代码使用正确的移液器吸头! 请注意吸头是否密封和紧密配合。 移液器吸头为一次性产品! 对齐吸移单元:使吸移单元在两个方向上都能自由转 动。 吸液:垂直稳住仪器,将移液器吸头浸入液体中。按 下移液键吸入液体。显示屏中的箭头朝上(吸液)。 将移液器吸头再浸入数秒,以完全提取所设体积。如 果是粘性介质和大体积移液器,尤其要注意这一点。 体积范围 浸入深度...
  • Seite 225 4 调试 弹出吸头:将移液单元保持在适用废弃处理容器上 方,将移液器吸头排放按键向下压。 注意 ISO 8655 规定实际移液过程开始前必须用样品溶液预冲洗 移液器吸头。 4.5 直接触发吹出排液 如有必要,可随时直接触发超行程(吹出排液,即 Blow-out)。 调用吹出排液功能:按下 Enter 键。显示屏显示 的‘blo’表示吹出排液。 触发超行程:按下一次移液键触发超行程,显示屏跳 转回所设定的移液模式(起始位置)。 注意 超行程(吹出排液)时,活塞完全下移。必须确保所有剩余液体的安全放液。长按移液键,活塞 保持在下方,从而防止意外吸入液体。松开之后,活塞返回起始位置。 Transferpette® -8/-12 electronic 997200 操作手册...
  • Seite 226 5 移液程序 5 移液程序 操作 名称 信息 标准程序。 PIP 模式,参见 PIP 模 正常移液 将吸取之前输入的体积,并再次放液 式, 页 226 用于装载电泳凝胶的程序。以可变的高速度吸入之前 GEL 模式,参见电泳 电泳移液 定义的试样体积,并再次缓慢放液。 (GEL) 模式, 页 230 用于混合液体的程序。 PIPmix 模式,参见 混合试样 连续重复吸入试样并放液。 PIPmix 模式, 页 227 专用于高粘度、高蒸气压力的液体,或发泡介质移液 revPIP 模式,参见 反向移液 的程序。 revPIP 模式, 页 229 用于分配液体的程序。 DISP 模式,参见 DISP 分配...
  • Seite 227 5 移液程序 确认 PIP 模式:按下 Enter 键。 ð 显示屏现在显示的‘blo’ 表示吹出排液(超行 程)。 准备移液:按下一次移液键,活塞移入其起始位置。 ð 显示屏中的箭头朝上(吸液)。 吸入液体:按下一次移液键吸入液体。 放液:按下一次移液键即可放液。 ð 显示屏中的箭头朝下(放液)。 触发超行程?您无需任何操作!PIP 模式下移液时, 将自动执行超行程(吹出排液)! 5.2 PIPmix 模式 用于混合液体的程序。连续重复吸入试样并放液。 体积和速度调节,参见调节体积, 页 222和调节吸入和放液速度, 页 222。 Transferpette® -8/-12 electronic 997200 操作手册...
  • Seite 228 5 移液程序 调用菜单选择:按下三下菜单键进入程序选择。 ð ‘Mode’闪烁。 设置 PIPmix 模式:利用其中一个箭头键滚动浏览模 式,直到显示‘PIPmix’ 。 ð ‘Mode’ 继续闪烁。 确认 PIPmix 模式:按下 Enter 键。 ð 显示屏现在显示的‘blo’表示吹出排液(超行 程)。 准备移液:按下一次移液键,活塞移入其起始位置。 ð 显示屏中的箭头朝上(吸液)。 吸入液体:按下一次移液键吸入液体。 PIPmix 模式下放液:长按移液键,可交替放液和吸 针对 液。显示屏中交替显示用于吸液和放液的箭头符号以 及循环次数。 长按 Transferpette® -8/-12 electronic 997200 操作手册...
  • Seite 229 5 移液程序 结束移液:按下一次移液键即可放液,并触发超行程 (吹出排液)。剩余液体放液(超冲程)之后,显示 屏跳转回已设定的模式(起始位置)。 注意 显示屏最多显示 19 个循环。 5.3 revPIP 模式 专用于高粘度、高蒸气压力的液体,或者发泡介质移液的程序。 体积和速度调节,参见调节体积, 页 222和调节吸入和放液速度, 页 222。 调用菜单选择:按下三下菜单键进入程序选择。 ð ‘Mode’闪烁。 设置 revPIP 模式:利用其中一个箭头键滚动浏览模 式,直到显示‘revPIP’ 。 ð ‘Mode’继续闪烁。 确认 revPIP 模式:按下 Enter 键。 ð 显示屏现在显示的‘blo’表示吹出排液(超行 程)。 准备移液:按下一次移液键,活塞移入其起始位置。 ð 显示屏中的箭头朝上(吸液)。 Transferpette® -8/-12 electronic 997200 操作手册...
  • Seite 230 5 移液程序 吸入液体:按下一次移液键吸入液体。 注意 吸入液体时,吸取的体积会比设定量多一些! revPIP 模式下放液:按下一次移液键进行放液。显 示屏上的箭头朝下(放液)。现在排放了设定的体 积,并且一些液体保留在吸头中。 revPIP 模式下再次吸液:再次按下移液键,现在重 新吸取之前设定的体积。(再次按下移液键,再次排 放该体积等) 触发超行程:最后一次移液之后,按下 Enter 键。 ð 显示屏现在再次显示‘blo’表示吹出排液(超行 程)。 结束移液:按下一次移液键,触发超行程(吹出排 液),并排放剩余液体。 ð 剩余液体放液(超冲程)之后,显示屏跳转回已设定 的模式(起始位置)。 5.4 电泳 (GEL) 模式 用于装载电泳凝胶的程序。以可变的高速度吸入之前定义的试样体积,并再次缓慢放液。 体积和速度调节,参见调节体积, 页 222和调节吸入和放液速度, 页 222。 Transferpette® -8/-12 electronic 997200 操作手册...
  • Seite 231 5 移液程序 调用菜单选择:按下三下菜单键进入程序选择。 ð ‘Mode’闪烁。 设置 GEL 模式:利用其中一个箭头键滚动浏览模 式,直到显示‘GEL’ 。 ð ‘Mode’继续闪烁。 确认 GEL 模式:按下 Enter 键。显示屏现在显示 的‘blo’表示吹出排液(超行程)。 准备移液:按下一次移液键,活塞移入其起始位置。 ð 显示屏中的箭头朝上(吸液)。 吸入液体:按下一次移液键吸入液体。 为了吸入超过设定量的液体(最多为额定体积的 针对 110%),请在吸入过程中长按移液键,直到已吸入所 需体积。 长按 ð 显示屏中显示一个井号。 Transferpette® -8/-12 electronic 997200 操作手册...
  • Seite 232 5 移液程序 GEL 模式下放液:短按一次移液键进行放液。显示屏 中显示一个井号。已吸取的体积再次缓慢放液。 再次按下移液键,可以中断试样放液。 ð 显示屏显示已排放液体量的体积。 触发超行程:最后一次移液之后,按下 Enter 键。 ð 显示屏现在再次显示‘blo’表示吹出排液(超行 程)。 结束移液:按下一次移液键,触发超行程(吹出排 液),并排放剩余液体。 ð 剩余液体放液(超冲程)之后,显示屏跳转回已设定 的模式(起始位置)。 注意 GEL 模式要求非常慢的放液速度,以防止试样出现湍流。为确保理想放液,出厂时已指定了放液 速度。它比可调节的 1 级要慢很多,并且不能个性化选择。 5.5 DISP 模式 用于分步排放已吸取液体的程序。吸取的液体要超过计算所得的需求量。 体积和速度调节,参见调节体积, 页 222和调节吸入和放液速度, 页 222。 调用菜单选择:按下三下菜单键进入程序选择。 ð ‘Mode’闪烁。 Transferpette® -8/-12 electronic 997200 操作手册...
  • Seite 233 5 移液程序 设置 DISP 模式:利用其中一个箭头键滚动浏览模 式,直到显示‘DISP’ 。 ð ‘Mode’继续闪烁。 确认 DISP 模式:按下 Enter 键。 ð 显示屏现在显示的‘blo’表示吹出排液(超行 程)。 准备移液:按下一次移液键,活塞移入其起始位置。 ð 显示屏中的箭头朝上(吸液)。 调节分量体积:按下箭头键 (+/-) 调节体积。长按 箭头键可快速改变体积。 ð ‘VOL’闪烁。 确认分量体积:按下 Enter 键。显示屏显示新设定 的分量体积。 ð ‘steps'闪烁。显示最大可能的步骤数。 调节步骤数:按箭头键 (+/-) 调节步骤数。 ð ‘steps’继续闪烁。 Transferpette® -8/-12 electronic 997200 操作手册...
  • Seite 234 5 移液程序 确认步骤数:按下 Enter 键。 ð 显示屏显示所设定的步骤数。 吸入液体:按下一次移液键吸入液体。 放液:每次按下移液键,都会执行一次分配步骤。显 示屏中的箭头朝下(放液)。步骤数显示器显示了剩 余步骤数。 触发超行程:最后一次分配之后,按下 Enter 键。 ð 显示屏现在再次显示‘blo’表示吹出排液(超行 程)。 结束分配:按下一次移液键,触发超行程(吹出排 液),并排放剩余液体。 剩余液体放液(超冲程)之后,显示屏跳转回已设定 的模式(起始位置)。 Transferpette® -8/-12 electronic 997200 操作手册...
  • Seite 235 6 检查体积 6 检查体积 我们建议根据具体使用情况每 3-12 个月检查一次仪器。但具体周期可根据个性化要求进行调 整。通过以下步骤按重量进行移液器体积检测,依据 DIN EN ISO 8655 第 6 部分的要求。 1.调节额定体积 调节注明的最高仪器体积(操作方法参见吸移, 页 224)。 2.对移液器进行温度调节 检测前,使用移液器吸头提取和分配五次检测液 (蒸馏水),对移液器进行温度调节。 3.进行检测 注意 依据 DIN EN ISO 8655-2,建议每次单独测量之后更换移液器吸头。DAkkS 准则 DKD-R8-1 可能 与该规定有偏差。 提取检测液,吸移到称重容器中。 注意 必须单独检测每条通道。 使用分析天平称量吸移量的重量。(注意天平生产商的使用说明书。) 计算吸移体积。这时要考虑检测液的温度。 建议至少在 3 个体积范围内 (100 %, 50 %, 10 %) 进行 10 次吸移和称重。 计算(用于额定体积)...
  • Seite 236 6 检查体积 *) = 计算参考值 (R%) 和变量系数 (VK%):按照统计质量检查公式计算 R% 和 VK%。 注意 可以前往 www.brand.de 下载测试规范 (SOP)。 Transferpette® -8/-12 electronic 997200 操作手册...
  • Seite 237 7 精度表 7 精度表 体积 分量 R* ≤ ± % VK* ≤ % 子 推荐的移液器吸头型号 范围 [μl] 体积 步骤 [μl] [μl] [µl] 0.5 - 10 0.01 0.5 - 20   5   1 1 - 20 0.02 0.5 - 20   2 5 - 100 0.25 2 - 200   50...
  • Seite 238 8 调整 – Easy Calibration(易校准) 8 调整 – Easy Calibration(易校准) 8.1 调整 已设定额定体积或待测试体积,标准模式移液 (PIP),例 如 200.0 µl(操作方法参见 PIP 模式, 页 226)。例如: 根据体积测试的体积 201.3 µl。 调用 CAL 模式:长按菜单键(> 3 秒)调用 CAL 模 式。 ð 显示器显示‘off’。 ð ‘CAL’闪烁。 > 3 s 激活 CAL 模式:按下其中一个箭头键激活 CAL 模 式。...
  • Seite 239 8 调整 – Easy Calibration(易校准) 确认体积:按下 Enter 键。 ð 经过测试和修正的体积出现在显示屏上。 ð 现在持续显示的 CAL 符号指示已执行调整。 8.2 恢复出厂设置 显示屏中持续显示的 CAL 符号代表已进行调整。 调用 CAL 模式:长按菜单键(> 3 秒)调用 CAL 模 式。 ð 显示屏显示‘on’。 ð ‘CAL’闪烁。 > 3 s 关闭 CAL 模式:按下其中一个箭头键停用 CAL 模 式。 ð...
  • Seite 240 9 消毒/高压消毒处理 9 消毒/高压消毒处理 9.1 紫外线消毒 该仪器耐受紫外线杀菌灯的常用功率。照射紫外线后颜色可能会变化。 9.2 高压消毒处理 Transferpette® -8/-12 electronic 的突出显示部分可以在 121 °C (250 °F),2 bar 下高压消毒处理,依据 DIN EN 285,保持时间至少为 15 分钟。 顶出移液器吸头。 将移液单元与抓握部位分开,参见维护, 页 241。 在不继续拆卸的情况下,对整个移液单元进行高压消 毒处理。 让移液单元完全冷却并干燥。 将移液单元拧回抓握部位中。 执行基准化运行 (rEF)。 注意 用户应自行对高压消毒处理的有效性进行仔细检查。通过 真空蒸馏实现最高安全性。我们建议使用蒸馏袋。 如果频繁进行高压消毒处理,使用随供的润滑脂涂抹活塞 和密封件,使其更加灵活。 9.3 基准化运行 (rEF) 每次更换移液器杆后,必须执行手动基准化运行。基准化运行用于活塞的安全对接。...
  • Seite 241 10 维护 10 维护 为保证正常发挥作用,应定期维护并在必要时清洁 Transferpette® -8/-12 electronic。 需要检查什么? 检查移液器杆、活塞和密封件是否损坏和脏污。 检查仪器的密封性。我们建议使用 BRAND 密封性检测仪 BRAND PLT unit。 为此,抽吸样品,使仪器保持垂直约 10 s。如果在移液器吸头上形成液滴,参见故障——如何处 理?, 页 250。 10.1 将移液单元与抓握部位分开 以最高 100 µl 的移液单元为例 以最高 1250 µl 的移液单元为例 顶出移液器吸头。 脱开时,将移液单元尽可能从抓握部位上向下压,之后再顺时针旋转。一圈之后,旋转时不 得再向下拉。 如果已经拧下仪器,必须将其再次向下拉,以分离磁耦合。 注意 > 在安装时必须逆时针将移液单元拧到抓握部位上,并要确保听到其卡入的声音。 > 在安装时请勿将移液单元向下拉! > 错误处理可能导致损坏! 10.2 拆卸最高 300 µl 的 Transferpette -8 / -12 electronic 在维护、清洁或更换零件时,将移液单元的三个主要组件轻轻分离并拆解。在以下页面上直观地...
  • Seite 242 10 维护 有关清洁的提示 使用皂液或异丙醇清洁单个移液器杆和活塞(仅这些零件),之后使用蒸馏水冲洗。 使零件完全干燥和冷却。移液器杆内的液体残留物会导致精度偏差。 使用随供的润滑脂重新润滑活塞。对于中心导向轴 (Z),仅使用规定的 Fluorstatic 润滑 脂! 在组装仪器之后执行基准化运行 (rEF)。 清洁或更换时移除移液器杆和密封件 拧下移液单元:将移液单元与抓握部位分开。 拔出移液外壳:将移液器壳盖的两个闭锁装置旋转 90°,拔出移液外壳。 拧下移液器杆:将安装用扳手插入到单个移液器杆 上,旋下移液器杆。 移除密封件:将活塞单元完全向下推。移除密封件, 检查,并在必要时清洁或更换。 注意 移除移液器杆之后,密封件或者在移液器杆内,或者在活 塞上。 Transferpette® -8/-12 electronic 997200 操作手册...
  • Seite 243 10 维护 安装密封件:如有必要,请使用随附的硅脂润滑活 塞。将密封件平坦的一侧朝上推到活塞上。使用安装 用扳手拧紧清洁过的或新的移液器杆。 组装移液单元:重新组装移液单元,并在抓握部位上 安装。检查仪器的密封性、灵活性和准确性。 注意 必须逆时针将移液单元拧到抓握部位上,并要确保听到其 卡入的声音。期间请勿将移液单元向下拉! 执行基准化运行:执行基准化运行 (rEF)。 移除活塞用于清洁或更换 拧下移液单元:将移液单元与抓握部位分开。 拔出移液外壳:将移液器壳盖的两个闭锁装置旋转 90°,拔出移液外壳。 移除螺栓:移除移液器杆单元上的两只外侧十字槽螺 栓。 注意 不允许松开中心导向轴 (Z)! 分开活塞和移液器杆单元:拉开并分开活塞和移液器 杆单元。 Transferpette® -8/-12 electronic 997200 操作手册...
  • Seite 244 10 维护 移除活塞:将安装用扳手插入到活塞螺母上,旋下活 塞螺母。移除活塞螺母,拔出活塞。 安装活塞:插入清洁过的或新的活塞。使用安装用扳 手重新拧紧活塞螺母。 组装活塞和移液器杆单元:将移液器杆松开半圈。然 后将移液器杆单元插到活塞单元上并固定。然后拧上 移液器杆。 组装移液单元:重新组装移液单元,并在抓握部位上 安装。检查仪器的密封性、灵活性和准确性。 注意 必须逆时针将移液单元拧到抓握部位上,并要确保听到其 卡入的声音。期间请勿将移液单元向下拉! 执行基准化运行:执行基准化运行 (rEF)。 10.3 拆卸 Transferpette -8 / -12 electronic 1250 µl 在维护、清洁或更换零件时,将移液单元的三个主要组件轻轻分离并拆解。在以下页面上直观地 说明操作方法。 在附在备件中的说明书内详细说明更换单个移液器杆上 O 形圈的方法。 Transferpette® -8/-12 electronic 997200 操作手册...
  • Seite 245 10 维护 移液单元的主要组件 完整的活塞-移液器杆系统带有中心导向轴 (Z),和移液外壳盖 [II] 相连(在这里可以读取通道 标识)。 活塞-移液器杆单元已嵌入移液单元的框架 [I] 中。该单元由活塞(带密封件)(B') 和移液器杆 (带 O 形圈)(B'') 组成,在清洁、涂脂以及更换时可将其拆下。 移液外壳,通过两个滑动式扣环与移液外壳盖 [II] 相连。 有关清洁的提示 使用皂液或异丙醇清洁单个移液器杆和活塞(仅这些零件),之后使用蒸馏水冲洗。 使零件完全干燥和冷却。移液器杆内的液体残留物会导致精度偏差。 使用随供的润滑脂重新润滑活塞。对于中心导向轴 (Z),仅使用规定的 Fluorstatic 润滑 脂! 在组装仪器之后执行基准化运行 (rEF)。 清洁或更换时移除移液器杆和活塞 拧下移液单元:将移液单元与抓握部位分开。 拔出移液外壳:侧面拉出移液外壳盖的滑动式扣环直 至止挡位置,并取下移液外壳。 Transferpette® -8/-12 electronic 997200 操作手册...
  • Seite 246 10 维护 将活塞移向下方位置:将柱塞向下推,直到活塞位于 最下方的位置。 移除移液器杆固定件:侧面拉出移液器杆固定件。 直接在移液外壳上轻轻推出活塞-移液器杆单元。 取下活塞-移液器杆单元。只能更换整个活塞-移液器 杆单元。 将活塞连同密封件从移液器杆中拉出。 Transferpette® -8/-12 electronic 997200 操作手册...
  • Seite 247 10 维护 将刷子浸入随附的活塞润滑脂中,并在容器壁上刮掉 多余油脂。将刷子贴在密封件上,并将活塞连同密封 件转动 1-2 圈。将活塞连同密封件重新插入移液器 杆。 注意 用刷子在密封件上薄涂一层活塞润滑脂。仅使用随附的润 滑脂(订购编号:7036 75)。请勿使用硅脂或 Fluorstatic 润滑脂! 安装活塞和移液器杆。重新装入活塞-移液器杆单 元。为此将移液器杆推入支架,并小心地将活塞压回 其原始位置。然后必须再次成一条线对齐移液器杆。 对于这一侧的所有 4 个或 6 个活塞-移液器杆单元 按说明继续操作。若要拆卸/更换剩余的 4 或 6 个 通道,请转动移液单元。 重新组装移液单元。为此将移液器杆固定件推到移液 器杆上,直到其卡入到位。其中需要注意通道 8/12 到通道 1 的方向(参见移液外壳盖上的标识)。然 后再次固定移液外壳,并将移液单元安装在抓握部位 上。检查仪器的密封性、灵活性和准确性 注意 必须逆时针将移液单元拧到抓握部位上,并要确保听到其 卡入的声音。期间请勿将移液单元向下拉! 执行基准化运行:执行基准化运行 (rEF)。 10.4 蓄电池充电和更换...
  • Seite 248 10 维护 蓄电池充电 将电源的充电线插头插入Transferpette® -8/-12 electronic顶部的指定插口。 ð 充电过程自动开始。 ð 充电过程中,蓄电池容量显示器上的指示条不断从下 往上涨。 ð 如果显示屏上的指示条停住不动,则蓄电池已充满 电。 在充电过程中移液? 您可以在充电时继续使用Transferpette® -8/-12 electronic 工作。如果蓄电池已完全放电,则需要 数分钟的时间才能达到指定的最小充电容量,这对于仪器的安全运行而言是必需的。最后执行的 设置在仪器的 EEPROM 中保存。当完全放电或更换蓄电池时,会保存这些设置! 更换蓄电池 打开蓄电池盒的盖子,取出蓄电池,将插头从插座中 拔出。 将新蓄电池的插头插入插座,并放入新蓄电池。 重新装入并锁上蓄电池盒的盖子。 如果长时间暂停使用,请从仪器中取出蓄电池。 重新装入蓄电池后的电池显示器 在装入蓄电池之后,显示屏中显示完整的容量显示器,且 边框闪烁(仪器目前尚未识别充电状态)。在充电 3.5 小 时后 - 蓄电池的安全且完全充电 - 边框停止闪烁。 注意 在装入蓄电池之后,务必充电...
  • Seite 249 10 维护 10.5 蓄电池再生功能 Refresh 功能 Transferpette® -8/-12 electronic 具备再生功能(Refresh 功能),可延长蓄电池使用寿命,并提 高电池的性能。通过该功能,蓄电池在程序控制下完全放电并再次充电。应当时不时利用 Refresh 功能优化蓄电池性能。 执行 Refresh 功能 将电源的充电线插头(接头)插入Transferpette® -8/-12 electronic顶部的指定插口。 按下向下箭头键 3 秒以上。在放电期间,电池显示 器上的容量指示条不断从上往下降。 放电(最多 3 小时)之后,自动开始充电过程(3.5 小时)。在充电期间,电池显示器上的容量指示条不 断从下到上涨。 取消 Refresh 功能 按下任意键退出该程序。仪器自动切换到标准移液模式 (PIP),返回额定容量,并自动开始正常 充电过程,参见蓄电池充电和更换, 页 247。拔下电源插头,同样会退出该程序。不得在放电循环 结束时取消 Refresh 功能。 Transferpette® -8/-12 electronic 997200 操作手册...
  • Seite 250 11 故障——如何处理? 11 故障——如何处理? 故障 显示屏中的显 原因 如何处理? 示 仪器无响应 ERR 1 蓄电池电量已耗尽或 在无操作的情况下为蓄电池充电 有缺陷 至少 5 分钟,然后仅在连着充电 线的情况下继续工作,直到蓄电 池完成补充充电,必要时更换蓄 电池 电子元件有缺陷 仪器送修 仪器无响应 ERR 2 电子元件有缺陷 仪器送修 仪器无响应 ERR 3 意外程序错误 按下 Enter 键确认错误,仪器重 新初始化 仪器无响应 ERR 4 仪器中没有蓄电池 装入蓄电池...
  • Seite 251 标志或编号 含义 我方通过此标志确认产品符合 EC 指令的要求,并且已采用指定的检 查方法。 UKCA: 英国合规性评估 我方通过此标志确认产品符合 UK Designated Standards 中指定的要 求。 本仪器依照德国《测量和校准法》以及《测量和校准条例》进行标 DE-M 21 识。 带一个矩形框的字符串 DE-M(DE 表示德国),以及年份的后两个数 字。 www.brand.de/ip 版权信息 XXZXXXXX 序列号 请遵守仪器、附件和使用说明书中的提示。 必须专业地处理废弃仪器或蓄电池。 中国 RoHS (EFUP) EFUP 确定了电气设备或电子设备中所含有的危险材料在正常运行条件 下不会泄露或者变异的年份时间范围。在用户正常使用时,此类电气 和电子产品不会导致严重的环境污染、不会对用户造成严重的人身伤 害或者财物损失。 不得将电气仪器与生活垃圾一起清理。 Transferpette® -8/-12 electronic 997200...
  • Seite 252 13 订购信息 13 订购信息 13.1 订购信息 最高 300 µl 的 Transferpette ® -8 electronic,包含电源 (100-240 V/50-60 Hz) 体积 0.5-10 µl 1-20 µl 5-100 µl 10-200 µl 15-300 µl 订购号 订购号 订购号 订购号 订购号 面向欧洲 705399 705400 705403 705404 705406 面向英国/爱尔兰 705409 705410 705413 705414 705416...
  • Seite 253 13 订购信息 A 活塞 B 移液器杆 C O 形圈 D 密封 体积 0.5-10 µl 705659 705677 703380 703340 1-20 µl 705671 705678 703380 703341 5-100 µl 705662 705615 705618 703344 10-200 µl 705663 705616 705618 703345 15-300 µl 705664 705617 705618 703346 * 包括密封件、O 形圈和安装用扳手。...
  • Seite 254 造商索要表格,也可以从 www.brand.de 主页下载。 在美国和加拿大以内 在返修仪器之前,请联系 BrandTech Scientific, Inc. 确认寄回仪器需满足的各项前提。 只接受已清洁并已去除污染物的仪器,将和返修授权码一同告知您地址。将返修授权码标在包装 外侧的显眼位置。 联系地址 德国: 美国和加拿大: BRAND GMBH + CO KG BrandTech ® Scientific, Inc. Otto-Schott-Straße 25 11 Bokum Road 97877 Wertheim (Germany) Essex, CT 06426-1506 (USA) 电话 +49 9342 808 0 电话...
  • Seite 255 传真 +86 21 6422 2268 www.brand.co.in info@brand.com.cn www.brand.cn.com 15 校准服务 ISO 9001 和 GLP 指令要求对您的体积测量设备进行定期检查。我们建议每 3-12 个月进行一次 体积检查。周期取决于设备的个性化要求。对于高频率使用或使用腐蚀性介质的情形,应更频繁 地进行检查。 可从 www.brand.de 或 www.brandtech.com 下载详细的检查说明。 此外,BRAND 还为您提供下列方案:通过我方工厂校准服务或者由 BRAND-DAkkS 实验室对您的设 备进行校准。您只需向我们寄送需要校准的设备和所需的校准类型在数日后您将收到设备和检查 报告(工厂校准)/DAkkS 校准单有关更多信息请直接联系您的经销商或 BRAND。订购表格可从 www.brand.de 下载(参见技术文档)。 16 缺陷责任 我们不承担由于不当拿取,使用,服务,操作或未授权的仪器维修产生的 结果,我们同样不承担 由于正常易损件如活塞,密封垫圈,阀门的磨损或 者玻璃破损而产生的结果。我们也不承担由于...
  • Seite 256 17 废弃处理 17 废弃处理 相邻图标表示,必须在电池 / 蓄电池和电子设备使用寿命 结束时将其与生活垃圾(未分类的城市垃圾)分开清理。 根据欧洲议会和理事会 2012.7.04 关于废弃电气和电子设备的 2012/19/EC 指令,必须按照国家 废物处理法规专业处理废弃电子设备。 蓄电池含有可能对环境和人类健康造成危害的物质。根据欧洲议会和理事会 2006.9.6 关于电池 和蓄电池的 2006/66/EC 指令,必须根据国家废弃处理法专业处理废弃电池和蓄电池。废弃处理 时必须将电池和蓄电池完全放电。 Transferpette® -8/-12 electronic 997200 操作手册...
  • Seite 257 997200 | Printed in Germany | 21-0122-1...

Diese Anleitung auch für:

Transferpette-12Transferpette-8 electronicTransferpette-12 electronic

Inhaltsverzeichnis