Herunterladen Diese Seite drucken
BRAND Transferpette S Gebrauchsanleitung
Vorschau ausblenden Andere Handbücher für Transferpette S:

Werbung

Verfügbare Sprachen

Verfügbare Sprachen

Liquid Handling · Easy Handling!
Transferpette
3
Gebrauchsanleitung
21
Operating Manual
39
Mode d'emploi
57
Instrucciones de manejo
F I R S T
C L A S S · B R A N D
®

Werbung

loading

Inhaltszusammenfassung für BRAND Transferpette S

  • Seite 1 Liquid Handling · Easy Handling! Transferpette ® F I R S T C L A S S · B R A N D Gebrauchsanleitung Operating Manual Mode d'emploi Instrucciones de manejo...
  • Seite 2 Inhaltsverzeichnis Seite Sicherheitsbestimmungen Funktions- und Bedienelemente Pipettieren Volumen kontrollieren Genauigkeitstabelle Justieren – Easy Calibration Autoklavieren Filter 5 ml und 10 ml Wartung und Reinigung Bestelldaten · Zubehör Ersatzteile · Zubehör Störung – was tun? Reparatur Mängelhaftung Entsorgung...
  • Seite 3 Sicherheitsbestimmungen Bitte unbedingt sorgfältig durchlesen! Dieses Gerät kann in Kombination mit gefährlichen Materialien, Arbeits- vorgängen und Apparaturen verwendet werden. Die Gebrauchsanleitung kann jedoch nicht alle Sicherheitsprobleme aufzeigen, die hierbei even- tuell auftreten. Es liegt in der Verantwortung des Anwenders, die Ein- haltung der Sicherheits- und Gesundheitsvorschriften sicherzustellen und die entsprechenden Einschränkungen vor Gebrauch festzulegen.
  • Seite 4 
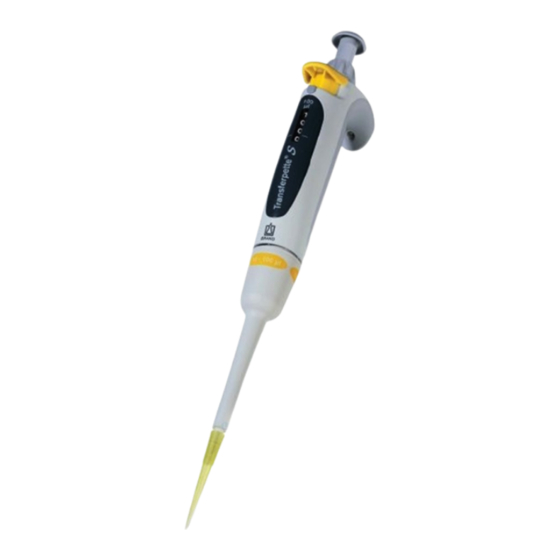
Funktions- und Bedienelemente Luftpolsterpipette zum Pipettieren von wässerigen Lösungen mittlerer Dichte und geringer bis mittlerer Viskosität. Pipettierknopf Volumeneinstellrad Easy Calibration-Funktion Spitzenabwurftaste Volumenverstellschutz Fingerbügel ® S kann mit Die Transferpette Volumenanzeige einem Etikett am Fingerbügel individuell markiert werden: Die Ziffern in der Anzeige werden Beschriftungsfenster am Finger- von oben nach unten gelesen, bügel entfernen, Beschriftungsfolie...
  • Seite 5 Pipettieren • 5 ml- und 10 ml-Geräte sollten nur mit eingebautem PE-Filter verwendet werden (s. Seite 12)! • Pipettenspitzen sind Einmalartikel! Spitze aufstecken Richtige Spitze entsprechend dem Volumenbereich bzw. Color-Code verwenden! Auf dichten und festen Spitzensitz achten. Volumen einstellen a) Volumenverstellschutz nach oben schieben (UNLOCK).
  • Seite 6 Pipettieren Probe abgeben a) Pipettenspitze an Gefäßwand anlegen. Pipette im Winkel von 30-45° zur Gefäßwand halten. b) Pipettierknopf mit gleichmäßiger Ge- schwindigkeit bis zum ersten Anschlag drücken und festhalten. Bei Seren, hochviskosen oder ent- spannten Medien entsprechende Wartezeit einhalten, um Genauigkeit zu verbessern.
  • Seite 7 Volumen kontrollieren Wir empfehlen, je nach Einsatz, alle 3-12 Monate eine Prüfung des Gerätes. Der Zyklus kann aber den individuellen Anforderungen an- gepasst werden. Die gravimetrische Volumenprüfung der Pipette erfolgt durch nach- folgende Schritte und entspricht der DIN EN ISO 8655, Teil 6. Nennvolumen einstellen Maximales angegebenes Gerätevolumen einstellen (Vorgehensweise siehe Seite 6).
  • Seite 8 – 1 *) = Berechnung von Richtigkeit (R%) und Variationskoeffizient (VK%): R% und VK% werden nach den Formeln der statistischen Qualitäts- kontrolle berechnet. Hinweis: Prüfanweisungen (SOPs) und eine Demoversion der Kalibriersoftware ™ EASYCAL 4.0 stehen unter www.brand.de zum Download.
  • Seite 9 Genauigkeitstabelle ® S , Typ Digital Transferpette Volumenbereich Teilvolumen Teilschritte Spitzentyp ≤ ± % ≤ % µl µl µl µl 0,1 - 1 0,001 nano-cap ™ 0,5 - 10 0,01 2 - 20 0,02 10 - 100 20 - 200 100 - 1000 1000 1000...
  • Seite 10 Justieren – Easy Calibration Das Gerät ist permanent justiert für wässerige Lösungen. Sollte einwand- frei feststehen, dass die Pipette ungenau arbeitet oder, um das Gerät auf Lösungen unterschiedlicher Dichte und Viskosität oder speziell geformte Pipettenspitzen einzustellen, kann es mit Easy Calibration-Technik justiert werden.
  • Seite 11 Autoklavieren ® S ist komplett autoklavierbar bei 2 bar (121°C) Die Transferpette und 20 min Einwirkzeit (t ) nach DIN. Pipettenspitze abwerfen. Ohne weitere Demontage die komplette Pipette autoklavieren. ® S vollständig abkühlen Transferpette und trocknen lassen. Hinweis: Die Wirksamkeit des Autoklavierens ist vom An- wender selbst zu prüfen.
  • Seite 12 Transferpette ® S bis 1000 µl Wartung und Reinigung Wartung Pipettenaufnahmekonus auf Beschädigung prüfen. Kolben und Dichtung auf Verschmutzung untersuchen. Dichtheit des Geräts prüfen: Dazu Probe aufsaugen und Gerät ca. 10 s senkrecht halten. Falls sich an der Pipet- tenspitze ein Tropfen bildet: Störung – was tun?, Seite 18. Demontage und Reinigung Pipettenschaft (S) vom Griffteil durch Abschrauben lösen.
  • Seite 13 ® S 5 ml - 10 ml Transferpette Wartung und Reinigung Wartung Pipettenaufnahmekonus auf Beschädigung prüfen. Kolben und O-Ring-Dichtung auf Verschmutzung unter- suchen. Dichtheit des Geräts prüfen. Dazu Probe aufsaugen, Gerät ca. 10 s senkrecht halten. Falls sich an der Pipettenspitze ein Tropfen bildet: Störung –...
  • Seite 14 Bestelldaten · Zubehör ® S , Typ Fix Transferpette Volumen Bezeichnung Best.-Nr. 10 µl F-10 27047 08 20 µl F-20 27047 16 25 µl F-25 27047 20 50 µl F-50 27047 28 100 µl F-100 27047 38 200 µl F-200 27047 44 500 µl F-500...
  • Seite 15 Ersatzteile ® S bis 1000 µl Transferpette Aussehen und Abmessungen der Ersatzteile entsprechen dem jeweiligen Nennvolumen. ® S 20-200 µl) (Abb. Ersatzteile Transferpette Abwerfer- Kolben- Dichtung mit Schaft mit Abwerfer- oberteil einheit Feder Abwerferfeder unterteil ® S , Typ Fix Transferpette Volumen 10 µl...
  • Seite 16 Ersatzteile · Zubehör ® S , 5 ml und 10 ml Transferpette Aussehen und Abmessungen der Ersatzteile entsprechen dem jeweiligen Nennvolumen. (Abb. Ersatzteile Transferpette ® S 5 ml). Abwerfer- Abwerfer- Kolben- Schaft- Abwerfer- oberteil unterteil einheit unterteil feder ® S , Typ Digital Transferpette Volumen F + F'...
  • Seite 17 Störung – was tun? Störung Mögliche Ursache Was tun? Spitze tropft Ungeeignete Spitze Nur Qualitätsspitzen (Gerät undicht) verwenden Spitze sitzt nicht fest Spitze fester aufdrücken Gerät saugt nicht Dichtung verunreinigt Dichtung reinigen oder zu wenig auf, Dichtung oder Konus Dichtung oder Schaft abgegebenes beschädigt ersetzen...
  • Seite 18 Reparatur Sollte eine evtl. Funktionsstörung nicht im eigenen Labor durch einfachen Austausch von Ersatzteilen zu beheben sein, muss das Gerät zur Repara- tur eingesandt werden. Dabei ist zu beachten, dass aus Sicherheitsgründen nur saubere und dekontaminierte Geräte geprüft und repariert werden können! Zur Reparatur einsenden Achtung! Der Transport von gefährlichem Material ohne...
  • Seite 19 Mängelhaftung Wir haften nicht für Folgen unsachgemäßer Behandlung, Verwendung, Wartung, Bedienung oder nicht autorisierter Reparatur des Gerätes oder für Folgen normaler Abnutzung, insbesondere von Verschleißteilen wie z. B. Kolben, Dichtungen, Ventilen sowie bei Glasbruch. Gleiches gilt für die Nichtbeachtung der Gebrauchsanleitung. Insbesondere übernehmen wir keine Haftung für entstandene Schäden, wenn das Gerät weiter zer- legt wurde als in der Gebrauchsanleitung beschrieben oder wenn fremde Zubehör- bzw.
  • Seite 20 Table of Contents Page Safety Instructions Operating and Control Elements Pipetting Checking the Volume Accuracy Table Adjustment – Easy Calibration Autoclaving 5 ml and 10 ml Filter Servicing and Cleaning Ordering Information · Accessories Spare Parts · Accessories Troubleshooting Repairs Warranty Information Disposal...
  • Seite 21 Safety Instructions Please read the following carefully! This instrument may sometimes be used with hazardous materials, opera- tions, and equipment. It is beyond the scope of this manual to address all of the potential safety risks associated with its use in such applications. It is the responsibility of the user of this pipette to consult and establish appropriate safety and health practices and determine the applicability of regulatory limitations prior to use.
  • Seite 22 Operating and Control Elements Air-displacement pipette for pipetting aqueous solutions of medium density and low to medium viscosity. Pipetting button Volume-setting wheel Easy Calibration-Function Tip ejection key Volume-change brake Finger rest and pipette label ® S can be The Transferpette individually marked with a label Volume display on the finger rest.
  • Seite 23 Pipetting • 5 ml and 10 ml instruments should only be used with the PE filter installed (see page 30). • Pipette tips are disposables items! Fitting the tip Use the correct tip according to the volume range or the color code. Ensure that the tip is securely seated.
  • Seite 24 Pipetting Discharge sample a) Place the pipette tip against the wall of the vessel. Hold the pipette at an angle of 30-45° relative to the container wall. b) Press the pipetting button slowly to the first stop and hold it down. For serum and liquids of high viscosity or low surface tension, observe ade- quate waiting time to improve accuracy.
  • Seite 25 Checking the Volume Depending on use, we recommend inspection of the instrument every 3 to 12 months. The cycle can, however, be adjusted to individual requirements. The gravimetric testing of the pipette volume is performed according to the following steps and is in accordance with DIN EN ISO 8655, Part 6. Set nominal volume Set volume to the maximum volume indicated on the instrument (see page 24 for proce-...
  • Seite 26 *) = Calculation of accuracy (A%) and variation coefficient (CV%): A% and CV% are calculated according to the formulas for statistical control. Note: Testing instructions (SOPs) and a demo version of the EASYCAL calibration software are available for download at www.brand.de.
  • Seite 27 Accuracy Table ® S , Digital adjustable Transferpette Volume range Volume step Increment Type of tip ≤ ± % ≤ % µl µl µl µl 0.1 - 1 0.001 ™ nano-cap 0.5 - 10 0.01 2 - 20 0.02 10 - 100 20 - 200 100 - 1000 1000...
  • Seite 28 Adjustment – Easy Calibration The instrument is permanently adjusted for aqueous solutions. If the pipette operation is clearly inaccurate, or if the instrument must be adjusted for solutions of different densities and viscosities or specially- shaped pipette tips, adjustments can be made using the Easy Calibration Technique.
  • Seite 29 Autoclaving ® S is completely autoclavable at 2 bar (30 psi) The Transferpette (121 °C / 250 °F) and 20 min. exposure time ( t ) according to DIN. Eject the pipette tip. Autoclave the complete pipette without any further disassembling. ®...
  • Seite 30 Transferpette ® S up to 1000 µl Servicing and Cleaning Servicing Inspect the pipette tip cone for damage. Inspect the piston and seal for contamination. Test the instrument's piston seal. To do this, affix a tip, and aspirate a sample. Hold the instrument vertically, with the sample in the tip for approximately 10 s.
  • Seite 31 ® S 5 ml - 10 ml Transferpette Servicing and Cleaning Servicing Inspect the pipette tip cone for damage. Inspect the piston and O-Ring-seal for contamination. Test the instrument‘s piston seal. To do this, affix a tip, and aspi- rate a sample. Hold the instrument vertically, with the sample in the tip for approximately 10 s.
  • Seite 32 Ordering Information · Accessories ® S , Fixed volume Transferpette Capacity Description Cat. No. 10 µl F-10 27047 08 20 µl F-20 27047 16 25 µl F-25 27047 20 50 µl F-50 27047 28 100 µl F-100 27047 38 200 µl F-200 27047 44 500 µl...
  • Seite 33 Spare Parts ® S up to 1000 µl Transferpette Parts will differ slightly depending on nominal volume of instrument. (Fig. shows spare parts ® S 20-200 µl) for Transferpette Upper part Piston Seal with Shaft with Lower part of ejector unit spring ejector spring...
  • Seite 34 Spare Parts · Accessories ® S , 5 ml and 10 ml Transferpette Parts will differ slightly depending on nominal volume of instrument. (Fig. shows spare parts for Transferpette ® S 5 ml). Upper part of Lower part of Piston Lower part of Ejector ejector...
  • Seite 35 Troubleshooting Problem Possible cause Corrective action Tip dripping Unsuitable tip Only use high-quality (instrument leaks) tips Tip not seated tightly Press tip on fi rmly The instrument does Seal contaminated Clean seal not aspirate or as- The seal or cone is Replace seal or shaft pirates too little;...
  • Seite 36 Repairs If a problem cannot be fixed by following the troubleshooting guide, or by replacing spare parts, then the instrument must be sent in for repair. Please note: for the safety of courriers and our employees, and to avoid violation of federal and local laws, only clean instruments free of any chemical, biological or radioactive hazards can be inspected and repaired! Return for repair...
  • Seite 37 Warranty We shall not be liable for the consequences of improper handling, use, servicing or unauthorized repairs of the instrument or the consequences of normal wear and tear especially of wearing parts such as pistons, seals, valves and the breakage of glass as well as the failure to follow the instructions of the operating manual.
  • Seite 38 Table de matières Page Règles de sécurité Eléments de fonction et de commande Pipetage Réglage du volume Table de précision Ajustage – Easy Calibration Autoclavage ® S 5 ml et 10 ml Filtre pour Transferpette Entretien et nettoyage Données de commande · Accessoires Pièces de rechange ·...
  • Seite 39 Règles de sécurité A lire attentivement! Cet appareil peut être utilisé avec des matériaux dangereux ou en relation avec des appareillages ou procédés dangereux. Le livret mode d'emploi n'a pas pour but d‘exposer tous les problèmes de sécurité pouvant en résulter.
  • Seite 40 Eléments de fonction et de commande Pipette à coussin d'air, faite pour pipeter des solutions aqueuses de densité moyenne et de viscosité faible à moyenne. Bouton de pipetage Molette de réglage du volume Fonction d'Easy Calibration Touche d'éjection de pointe Anse de maintien Protection du réglage de volume ®...
  • Seite 41 Pipetage • Les appareils de 5 ml et 10 ml ne devraient être utilisés qu'avec des filtres PE intégrés (voir page 48)! • Les pointes de pipette sont des articles à usage unique. Pose de la pointe N'utiliser que des pointes appropriées correspondant au volume ou au code couleur! Veiller à...
  • Seite 42 Pipetage Ejection de l'échantillon a) Placer la pointe de la pipette contre la paroi du récipient. Maintenir la pipette avec un angle de 30 à 45° par rapport à la paroi du récipient. b) Appuyer le bouton de pipetage jusqu'à la première butée et l'y maintenir.
  • Seite 43 Réglage du volume En fonction de l'usage, nous recommandons de faire contrôler l'appa- reil tous les 3 à 12 mois. Mais le cycle peut être adapté aux exigences individuelles. L'essai volumétrique gravimétrique des pipettes s’effectue de la manière suivante et satisfait aux exigences de la 6ème partie de la norme DIN EN ISO 8655.
  • Seite 44 E% et CV% seront calculés selon les formules utilisés pour le contrôle statistique de qualité. Remarque: Des instructions de contrôle (SOPs) et une version de démonstration du ™ logiciel de calibrage EASYCAL 4.0 peuvent être téléchargées sur le site www.brand.de.
  • Seite 45 Table de précision ® S , type Digital Transferpette Gamme de Volume de Pas inter- Type de ≤ ± % ≤ % volume µl la fraction µl médiares µl pointe µl 0,1 - 1 0,001 ™ nano-cap 0,5 - 10 0,01 2 - 20 0,02...
  • Seite 46 Ajustage – Easy Calibration Cet appareil est ajusté pour les solutions aqueuses. S’il est établit avec certitude que la pipette ne fonctionne pas précisément, ou s’il faut ajuster l’appareil pour des densités et des viscosités différentes ou pour des pointes de pipettes spéciales, les réglages correspondants peuvent être effectués grâce à...
  • Seite 47 Autoclavage ® S est complètement autoclavable à 2 bar (121 °C) La Transferpette et 20 min de temps d'action conformément à la norme DIN. Jeter la pointe de la pipette. Autoclaver la pipette complète sans rien démonter de plus. Laisser complètement refroidir et sécher la Transferpette ®...
  • Seite 48 ® S jusqu'à 1000 µl Transferpette Entretien et nettoyage Entretien Contrôler l’absence de détérioration au niveau du cône pour le logement de la pointe. Contrôler la propreté du piston et du joint d’étanchéité. Contrôlez l’étanchéité de l’appareil. Pour ce faire, aspirer l’échantillon puis tenir l’appareil à...
  • Seite 49 ® S 5 ml - 10 ml Transferpette Entretien et nettoyage Entretien Contrôler l’absence de détérioration au niveau du cône pour le logement de la pointe. Contrôler la propreté du piston et du joint torique. Contrôlez l’étanchéité de l’appareil. Pour ce faire, aspirer l’échantillon puis tenir l’appareil à...
  • Seite 50 Données de commande · Accessoires ® S , type Fix Transferpette Volume Spécification Réf. 10 µl F-10 27047 08 20 µl F-20 27047 16 25 µl F-25 27047 20 50 µl F-50 27047 28 100 µl F-100 27047 38 200 µl F-200 27047 44 500 µl...
  • Seite 51 Pièces de rechange ® S jusqu'à 1000 µl Transferpette Aspect visuel et dimensions des pièces de rechange conformément au volume nominal correspondant ® (illustr. pièces de rechange de la Transferpette 20-200 µl) Partie supérieure Unité du Joint d’étanchéité Tige avec Partie inférieure de l’éjecteur piston...
  • Seite 52 Pièces de rechange · Accessoires ® S , 5 ml et 10 ml Transferpette Aspect visuel et dimensions des pièces de rechange conformément au volume nominal correspondant (illustration pièces de rechange de la Transferpette ® S 5 ml). Partie supérieure Partie inférieure Unité...
  • Seite 53 Dérangement – que faire? Dérangement Cause possible Que faire? Pointe goutte Pointe inadéquate Employer uniquement (l'appareil n'est des pointes de qualité pas étanche) La pointe n'est pas Resserrer la pointe fixée correctement Joint d'étanchéité Nettoyer le joint encrassé Joint ou cône Remplacer le joint L’appareil n’aspire endommagé...
  • Seite 54 Réparation L'appareil doit être envoyé en réparation dans la mesure ou il n'est pas possible de remédier à une panne dans le laboratoire en remplaçant simplement les pièces. Veuillez observer que, pour des raisons de sécurité, seuls les appareils propres et décontaminés seront contrôlés et réparés! Envoyer en réparation Attention: Transporter des matériaux dangereux sans autorisation...
  • Seite 55 Garantie Nous déclinons toute responsabilité en cas de conséquences d'un trai- tement, d'une utilisation, d'un entretien et d'une manipulation incorrecte ou d'une réparation non-autorisée de l'appareil ou d'une usure normale, notamment des pièces d'usure, telles que les pistons, les joints d'étan- chéité, les soupapes et de rupture de pièces en verre.
  • Seite 56 Contenido Página Normas de seguridad Elementos funcionales y operativos Pipetear Controlar el volumen Tabla de precisión Ajustar – Easy Calibration Autoclavage Filtro 5 ml y 10 ml Mantenimiento y limpieza Referencias · Accesorios Recambios · Accesorios ¿Qué hacer en caso de avería? Reparación Garantía Eliminación...
  • Seite 57 Normas de seguridad ¡Rogamos lea este documento cuidadosamente! Este aparato puede entrar en contacto con instalaciones, aplicaciones o materiales peligrosos. Estas instrucciones de manejo no tienen por objeto enumerar todas las limitaciones de seguridad que pueden presentarse durante el uso. El usuario del aparato tiene responsabilidad de tomar las medidas suficientes para su seguridad y su salud, así...
  • Seite 58 Elementos funcionales y operativos Pipeta con cojín de aire para pipeteado de soluciones acuosas de densidad media y viscosidad baja a media. Pulsador de pipeteado Selector de volumen Función Easy Calibration Tecla de eyección de puntas Protección contra Estribo para dedo cambio del volumen ®...
  • Seite 59 Pipetear • Los aparatos de 5 ml y 10 ml sólo deben utilizarse teniendo un filtro PE instalado (ver pág. 66). • Puntas de pipeta son artículos desechables! Acoplar la punta Utilizar la punta apropiada, de acuerdo con el rango de volumen y el código de color.
  • Seite 60 Pipetear Expulsar la muestra a) Apoyar la punta de la pipeta en la pared del recipiente. Sostener la pipeta contra la pared del recipiente en un ángulo de 30-45°. b) Apretar el pulsador de pipeteado hasta el primer tope y mantenerlo así. Con sueros, líquidos de alta viscosidad o humectantes seleccionar tiempo de espera adecuado para mejorar la...
  • Seite 61 Controlar el volumen Recomendamos, dependiendo del uso, que el aparato pase por un control cada 3-12 meses. No obstante, el ciclo puede adaptarse a sus necesidades individuales. La comprobación de volumen gravimétrica de la pipeta se realiza en pasos subsiguientes y cumple con la norma DIN EN ISO 8655, parte 6. Ajustar el volumen nominal Ajuste el volumen al máximo volumen indica- do en el instrumento (para informarse sobre...
  • Seite 62 *) = Cálculo de la exactitud (E%) y el coeficiente de variación (CV%): E% y CV% se calculan según las fórmulas de control estadístico de calidad. Indicación: Bajo www.brand.de se encuentran instrucciones de ensayo disponibles, como así también una versión del programa de calibración ™ EASYCAL...
  • Seite 63 Tabla de precisión ® S , Tipo Digital Transferpette Gama de ajuste Volumen Pasos Tipo de ≤ ± % ≤ % µl parcial µl parciales µl punta µl 0,1 - 1 0,001 nano-cap ™ 0,5 - 10 0,01 2 - 20 0,02 10 - 100 20 - 200...
  • Seite 64 Ajustar – Easy Calibration El aparato está ajustado permanentemente para soluciones acuosas. Si la pipeta no funcionara de forma exacta, o fuera necesario regularla para trabajos con densidades o viscosidades distintas, o para emplear puntas de pipeta con formatos especiales, puede ajustarse mediante la técnica Easy Calibration.
  • Seite 65 Autoclavage ® S es completamente autoclavable (121°C) a 2 bar y La Transferpette 20 min. tiempo de actuación (t ) según DIN. Expulsar la punta de la pipeta. Sin desmontarlo adicionalmente, autoclavizar la pipeta completo ® S se enfríe y Dejar que la Transferpette seque completamente.
  • Seite 66 Transferpette ® S hasta 1000 µl Mantenimiento y limpieza Mantenimiento Compruebe que el cono de acoplamiento de puntas de pipetas no está dañado. Compruebe también si los émbolos y la obturación están limpios. Compruebe la hermeticidad del aparato. Para ello, absorba una muestra y mantenga el aparato en posición vertical durante unos 10 segundos.
  • Seite 67 ® S 5 ml - 10 ml Transferpette Mantenimiento y limpieza Mantenimiento Compruebe que el cono de acoplamiento de puntas de pipetas no está dañado. Compruebe también que el émbolo y la junta (anillo O) estén limpios. Compruebe la hermeticidad del aparato. Para ello, aspire una muestra y mantenga el aparato en posición vertical durante unos 10 segundos.
  • Seite 68 Referencias · Accesorios ® S , Tipo Fix Transferpette Volumen Especificación Ref. 10 µl F-10 27047 08 20 µl F-20 27047 16 25 µl F-25 27047 20 50 µl F-50 27047 28 100 µl F-100 27047 38 200 µl F-200 27047 44 500 µl F-500...
  • Seite 69 Recambios ® S hasta 1000 µl Transferpette Aspecto y dimensiones de las piezas de repuesto según el volumen nominal correspondiente. (Ilustr. de ® piezas de recambio para Transferpette S 20-200 µl). Pieza superior Unidad de Junta con Vástago con muelle Pieza inferior de eyección émbolos...
  • Seite 70 Recambios · Accesorios ® S , 5 ml y 10 ml Transferpette Aspecto y dimensiones de las piezas de repuesto según el volumen nominal corres- pondiente. (Ilustr. de repuestos para Transferpette ® S 5 ml). Pieza superior Pieza inferior Unidad Parte inferior Muelle de eyección...
  • Seite 71 ¿Qué hacer en caso de avería? Avería Causa probable ¿Qué hacer? La punta gotea Punta no adecuada Utilizar sólo puntas de (el aparato no es calidad hermético) La punta no está bien Apretar más fuerte la sujeta punta El aparato no aspira La junta está...
  • Seite 72 Reparación En caso de que no sea posible solucionar una avería de funciones en el propio laboratorio mediante la sustitución de piezas de repuesto, deberá enviarse el aparato a reparación. Rogamos tenga en cuenta que, por motivos de seguridad, sólo podrán comprobarse y repararse los aparatos limpios y desconta- minados.
  • Seite 73 Garantía No seremos responsables de las consecuencias derivadas del trato, manejo, mantenimiento, uso incorrecto o reparación no autorizada del aparato, ni de las consecuencias derivadas del desgaste normal, en especial de partes susceptibles de abrasión, tales como émbolos, juntas hermeticas, valvulas, ni de la rotura de partes de vidrio o del incumpli- miento de las instrucciones de manejo.
  • Seite 74 BrandTech Scientific, Inc. · 11 Bokum Road · Essex, CT 06426-1506 · USA Phone: (860) 767-2562 · Fax: (860) 767-2563 · Internet: www.brandtech.com 9979 93 · Printed in Germany · 21/1108/3...