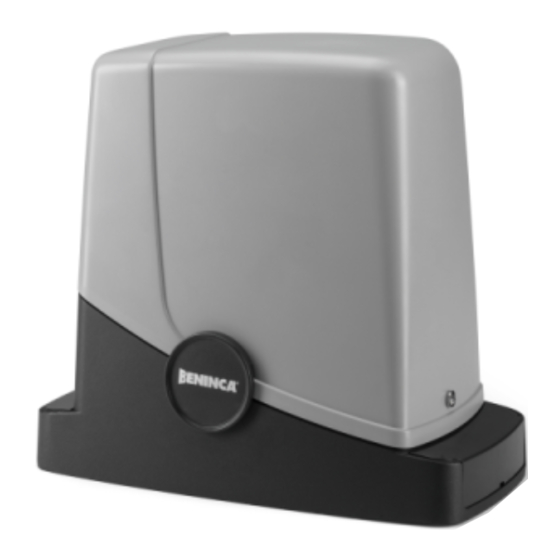
Herunterladen Diese Seite drucken
Beninca PONY Bedienungsanleitung
Vorschau ausblenden Andere Handbücher für PONY:

Werbung

Verfügbare Sprachen
  • DE

Verfügbare Sprachen

  • DEUTSCH, seite 27
L8543230
06/2016 rev 0
All manuals and user guides at all-guides.com
PONY
PONY
115
UNIONE NAZIONALE COSTRUTTORI
AUTOMATISMI PER CANCELLI, PORTE
SERRANDE ED AFFINI
IT
EN
DE
FR
ES
PL

Werbung

loading

Inhaltszusammenfassung für Beninca PONY

  • Seite 1 All manuals and user guides at all-guides.com L8543230 06/2016 rev 0 PONY PONY UNIONE NAZIONALE COSTRUTTORI AUTOMATISMI PER CANCELLI, PORTE SERRANDE ED AFFINI...
  • Seite 2 All manuals and user guides at all-guides.com...
  • Seite 3 Le descrizioni e le illustrazioni presenti in questo manuale non sono impegnative. Lasciando inalterate le caratteristiche essenziali del prodotto il fabbricante si riserva il diritto di apportare qualsiasi modifica di carattere tecnico, costruttivo o commerciale senza impegnarsi ad aggiornare la presente pubblicazione. Legenda componenti: Motori i duttore con centrale incorporata PONY Crema a gliera M4 Nylon/Fe Staffe dei finecorsa...
  • Seite 4 I materiali con cui e costruita la porta, lo stato di manutenzione e particolari condizioni di utilizzo possono ridurre i valori indicati. In nessun caso l'installazione di PONY può essere considerata una soluzione per l'apertura di porte non efficienti. Fig.1 Fig.2a...
  • Seite 5 All manuals and user guides at all-guides.com La piastra di fondazione presenta due ampi fori per il passaggio delle canalette. Sono entrambi utilizzabili, grazie allo spazio presente sul fon- In alcuni casi è possibile che la cremagliera sporga di qualche centi- do del motoriduttore, ma risulta più...
  • Seite 6 All manuals and user guides at all-guides.com Fig. 11 Verificare che la pavimentazione sia ben livellata e idonea al fissaggio mediante tasselli. Indipendentemente dal tipo di fissaggio prescelto, la piastra deve risultare saldamente fissata, perfettamente livellata e pa- rallela all'anta. Fig.
  • Seite 7 All manuals and user guides at all-guides.com Fig. 17 Fig. 18 Fig. 19 Verificate con alcune manovre di apertura e chiusura manuale che la cremagliera sia correttamente ingranata, su tutta la lunghezza. even- tualmente, i fori presenti sulla cremagliera consentono la registrazione dell'altezza.
  • Seite 8 All manuals and user guides at all-guides.com Fig.1 A display spento il pulsante " " esegue un comando Passo-Passo, que- sta funzionalità si può rilevare utile durante le fasi di programmazione e collaudo. La pressione del pulsante PGM, provoca l'immediato arresto di qualsiasi movimento dell'anta.
  • Seite 9 All manuals and user guides at all-guides.com Durante le operazioni di autoset, la centrale esegue automaticamente alcune manovre di apertura e chiusura. Prima di procedere verificare che nessuna persona, animale od ostacolo si trovi o possa trovarsi nell'area di manovra della porta. AUTO PGM+ * La fase di rallentamento deve essere attivata per mezzo del parametro TSM, la centrale viene fornita con il parametro settato a 0 (Off);...
  • Seite 10 All manuals and user guides at all-guides.com 0000 0004 PGM+ PGM+ PGM+ PGM+...
  • Seite 11 All manuals and user guides at all-guides.com PHCL PGM+ I cancelli scorrevoli possono avere l'apertura con scorrimento a destra (DX) o sinistra (SX) come indicato in Figura. OPEN OPEN A seconda della posizione del motore può essere necessario invertire il senso di rotazione. MINV o--c c--o...
  • Seite 12 All manuals and user guides at all-guides.com Radi Push PGM+ Radi Push PGM+ Radi Push PGM+...
  • Seite 13 All manuals and user guides at all-guides.com Radi PGM+...
  • Seite 14 All manuals and user guides at all-guides.com ERR1 ERR2 ERR3 ERR4 STOP PHOT OPEN Clos BATT...
  • Seite 15: Waste Disposal

    All manuals and user guides at all-guides.com WARNING WASTE DISPOSAL Descriptions and figures in this manual are not binding. While leaving the essential characteristics of the product unchanged, the manufacturer reserves the right to modify the same under the technical, design or commercial point of view without necessarily update this manual.
  • Seite 16 M4, i.e. about 12 mm between one notch and the next. The materials with which the door is built, the state of maintenance and particular conditions of use can reduce the values indicated. In no case can the installation of PONY be considered a solution for opening inefficient doors. Fig.1 Fig.2a...
  • Seite 17 All manuals and user guides at all-guides.com The foundation plate has two large holes for the passage of the raceways. In some cases it is possible that the rack projects by a few centimetres They can both be used, thanks to the space present on the bottom of with respect to the plumb line of the gate in order to allow complete the gear motor, but it is easier to use the hole of the left if the pinion, closure.
  • Seite 18 All manuals and user guides at all-guides.com Fig. 11 Check that the floor is well-levelled and suitable for fixing via plugs. Independently from the type of pre-selected fixing, the plate must result well-fixed, perfectly levelled and parallel to the leaf. f Fig.
  • Seite 19 All manuals and user guides at all-guides.com Fig. 17 Fig. 18 Fig. 19 Use several manual opening and closing manoeuvres to check that the rack is correctly engaged, along its entire length. If necessary, the holes present on the rack allow height adjustment. Fig.
  • Seite 20 All manuals and user guides at all-guides.com Fig.1 PGM+ With the display off, the “ ” button performs a Step-by-Step command. This function can be useful during the programming and inspection phases. Pressing the PGM button causes the immediate stop of any leaf movement.
  • Seite 21 All manuals and user guides at all-guides.com During the autoset operations, the control unit automatically performs several opening and closure manoeuvres. Before proceeding, check that no person, animal or obstacle is or can be in the door manoeuvre area. All the accessories provided for the system should be already connected to the control unit. If further accessories should be added, self-adjustment must be repeated.
  • Seite 22 All manuals and user guides at all-guides.com 0000 0004 PGM+ PGM+ PGM+ PGM+...
  • Seite 23 All manuals and user guides at all-guides.com PHCL PGM+ OPEN OPEN MINV o--c c--o PGM+ PGM+ PGM+...
  • Seite 24 All manuals and user guides at all-guides.com Radi Push PGM+ Radi Push PGM+ Radi Push PGM+...
  • Seite 25 All manuals and user guides at all-guides.com Radi PGM+...
  • Seite 26 All manuals and user guides at all-guides.com ERR1 ERR2 ERR3 ERR4 STOP PHOT OPEN Clos BATT...
  • Seite 27 All manuals and user guides at all-guides.com HINWEISE ENTSORGUNG Die in diesem Handbuch enthaltenen Beschreibungen und Abbildungen sind nicht verbindlich. Ausgenommen der Haupteigenschaften des Produkts, behält sich der Hersteller das Recht vor eventuelle technische, konstruktive oder kommerzielle Änderungen vorzunehmen ohne dass er vorliegende Veröffentlichung auf den letzten Stand bringen muss.
  • Seite 28 Die angegebenen Werte können sich entsprechend der Materialien, aus denen das Tor hergestellt ist, des Erhaltungszustands und besonderer Benutzungsbedingungen verringern. Auf keinen Fall darf die Installation von PONY als Lösung für das Öffnen nicht funktionsfähiger Tore in Betracht gezogen werden. Fig.1 Fig.2a...
  • Seite 29 All manuals and user guides at all-guides.com Die Ankerplatte weist zwei große Bohrungen für die Kabelkanäle auf. Sie In einigen Fällen kann die Zahnstange um einige Zentimeter über die können wegen des großzügigen Platzes im Boden des Getriebemotors Kante des Tores überstehen, um das vollständige Schließen zu ermög- beide benutzt werden, es ist jedoch bequemer, die links vom Ritzel gele- lichen.
  • Seite 30 All manuals and user guides at all-guides.com Abb. 11 Kontrollieren Sie, ob die Bodenplatte ausreichend in Waage und für die Verankerung mittels Dübeln geeignet ist. Unabhängig von der gewählten Befestigungsart muss die Ankerplatte fest verankert, vollkommen in Waa- ge und parallel zum Torblatt sein. Abb.
  • Seite 31 All manuals and user guides at all-guides.com Fig. 17 Fig. 18 Fig. 19 Kontrollieren Sie mit einigen Öffnungs- und Schließvorgängen, ob das Ritzel über die ganze Länge ordnungsgemäß in die Zahnstange greift. Gegebenenfalls erlauben die Löcher in der Zahnstange die Einstellung der Höhe.
  • Seite 32 All manuals and user guides at all-guides.com Abb.1 PGM+ Bei abgeschaltetem Display wird durch Drücken von „ “ ein Schrittbe- triebsbefehl ausgeführt. Diese Funktion kann während der Programmierung und Abnahmeprüfung hilfreich sein. Wird die Taste PGM gedrückt, wird das Tor sofort angehalten.
  • Seite 33 All manuals and user guides at all-guides.com Während des Autoset-Vorgangs führt die Steuerung automatisch einige Öffnungs- und Schließvorgänge aus. Vergewissern Sie sich bevor Sie fortfahren, dass sich im Bewegungsbereich des Tors keine Personen, Tiere oder Hindernisse befinden oder dorthin gelangen können. AUTO PGM+ * Die Verlangsamungsphase muss über den Parameter TSM aktiviert werden, bei der Auslieferung ist der Parameter auf 0 (Off) gesetzt;...
  • Seite 34 All manuals and user guides at all-guides.com 0000 0004 PGM+ PGM+ PGM+ PGM+...
  • Seite 35 All manuals and user guides at all-guides.com PHCL PGM+ OPEN OPEN MINV o--c c--o PGM+ PGM+ PGM+...
  • Seite 36 All manuals and user guides at all-guides.com Radi Push PGM+ Radi Push PGM+ Radi Push PGM+...
  • Seite 37 All manuals and user guides at all-guides.com Radi PGM+...
  • Seite 38 All manuals and user guides at all-guides.com Problem Ursache Lösung ERR1 ERR2 ERR3 ERR4 STOP PHOT OPEN Clos BATT...
  • Seite 39 All manuals and user guides at all-guides.com AVERTISSEMENTS DÉMOLITION Les descriptions et les illustrations présentées dans ce manuel ne sont pas contraignantes. En laissant inaltérées les caractéristiques essentielles du produit, le fabricant se réserve le droit d’apporter toute modification à caractère technique, de construction ou commerciale sans s’engager à revoir la cette publication.
  • Seite 40 M4, c-à-d environ 12 mm entre une dent et l’autre. Les matériaux utilisés pour fabriquer les portes, l’état de maintenance et les conditions particulières d’utilisation peuvent réduire les valeurs indiquées. En aucun cas l’installation de PONY peut être considérée comme une solution pour ouvrir les portails défectueux. Fig.1 Fig.2a Fig.2c...
  • Seite 41 All manuals and user guides at all-guides.com La plaque de fondation présente deux orifices pour le passage des caniveaux. Tous les deux sont utilisables, grâce à l’espace présent sur le fond du motoréducteur, mais il est plus facile d’utiliser l’orifice à gauche Dans certains cas il se peut que la crémaillère dépasse de quelques du pignon, mis en évidence dans les figures.
  • Seite 42 All manuals and user guides at all-guides.com Fig. 11 Vérifier que le pavement soit bien à niveau et idoine pour la fixation à l’aide de chevilles. Indépendamment du type de fixation choisie, la plaque doit être solidement fixée, parfaitement à niveau et parallèle au portail. Fig.
  • Seite 43 All manuals and user guides at all-guides.com Fig. 17 Fig. 18 Vérifier avec quelques manœuvres d’ouverture et de fermeture manuelles que la Fig. 19 crémaillère soit correctement engrenée sur toute sa longueur. Eventuellement, les trous présents sur la crémaillère permettent de régler la hauteur. Fig.
  • Seite 44 All manuals and user guides at all-guides.com Fig.1 PGM+ Quand l’afficheur est éteint le bouton « » effectue une commande Pas à Pas, cette fonction peut être utile pendant les phases de programmation et de test. La pression sur la touche PGM, implique l’arrêt immédiat de tout mouve- ment du portail.
  • Seite 45 All manuals and user guides at all-guides.com Durant les opérations d’autoset, la centrale effectue automatiquement certaines manœuvres d’ouverture et de fermeture. Vérifier, avant de procéder, qu’aucune personne. aucun animal et aucun obstacle ne se trouvent dans la zone d’action de la porte. Tous les accessoires prévus dans l’installation doivent être déjà...
  • Seite 46 All manuals and user guides at all-guides.com 0000 0004 PGM+ PGM+ PGM+ PGM+...
  • Seite 47 All manuals and user guides at all-guides.com PHCL PGM+ OPEN OPEN MINV o--c c--o PGM+ PGM+ PGM+...
  • Seite 48 All manuals and user guides at all-guides.com Radi Push PGM+ Radi Push PGM+ Radi Push PGM+...
  • Seite 49 All manuals and user guides at all-guides.com Radi PGM+...
  • Seite 50 All manuals and user guides at all-guides.com ERR1 ERR2 ERR3 ERR4 STOP PHOT OPEN Clos BATT...
  • Seite 51 All manuals and user guides at all-guides.com ADVERTENCIAS ELIMINACIÓN Las descripciones y las ilustraciones presentadas en este manual no son vinculantes. Sin cambiar las características esenciales del producto, el fabricante se reserva el derecho de aportar cualquier modificación de carácter técnico, constructivo o comercial sin obligación de actualizar la presente publicación.
  • Seite 52 Los materiales con los que está hecha la puerta, el estado de manteni- miento y las condiciones especiales de uso pueden reducir los valores indicados. En ningún caso la instalación de PONY se puede considerar una solución para la apertura de puertas no eficientes. Fig.1 Fig.2a...
  • Seite 53 All manuals and user guides at all-guides.com La placa de cimentación tiene dos agujeros amplios para el pasaje de las canaletas. Se pueden usar los dos, gracias al espacio presente en En algunos casos es posible que la cremallera sobresalga algunos cen- el fondo del motorreductor, pero es más cómodo utilizar el agujero a la tímetros respecto al filo de la cancela para permitir el cierre completo.
  • Seite 54 All manuals and user guides at all-guides.com Fig. 11 Controle que la pavimentación esté bien nivelada y que sea idónea para la fijación mediante tacos. Independientemente del tipo de fijación selec- cionado, la placa se debe fijar fuertemente y estar perfectamente nivelada y paralela a la hoja.
  • Seite 55 All manuals and user guides at all-guides.com Fig. 17 Fig. 18 Controle con algunas maniobras de apertura y cierre manual que la cre- Fig. 19 mallera esté engranada correctamente, a todo lo largo. De ser necesario, los agujeros presentes en la cremallera permiten regular la altura. Fig.
  • Seite 56 All manuals and user guides at all-guides.com Fig.1 PGM+ Con la pantalla apagada, el pulsador " " realiza un mando Paso-Paso, esta funcionalidad puede ser útil durante las fases de programación y prueba. La presión del pulsador PGM, provoca la parada inmediata de cualquier movimiento de la hoja.
  • Seite 57 All manuals and user guides at all-guides.com Durante las operaciones de autorregulación, la central realiza automáticamente algunas maniobras de apertura y cierre. Antes de continuar controle que no hayan personas, animales o cosas obstaculizando el área de maniobra de la puerta. AUTO PGM+ La fase de ralentización se debe activar mediante el parámetro TSM, la central se suministra con el parámetro configurado en 0 (Off);...
  • Seite 58 All manuals and user guides at all-guides.com 0000 0004 PGM+ PGM+ PGM+ PGM+...
  • Seite 59 All manuals and user guides at all-guides.com PHCL PGM+ OPEN OPEN MINV o--c c--o PGM+ PGM+ PGM+...
  • Seite 60 All manuals and user guides at all-guides.com Radi Push PGM+ Radi Push PGM+ Radi Push PGM+...
  • Seite 61 All manuals and user guides at all-guides.com Radi PGM+...
  • Seite 62 All manuals and user guides at all-guides.com ERR1 ERR2 ERR3 ERR4 STOP PHOT OPEN Clos BATT...
  • Seite 63 All manuals and user guides at all-guides.com OSTRZEŻENIA ELIMINACJA I DEMOLOWANIE Opisy i ilustracje znajdujące się w niniejszym podręczniku podane są wyłącznie przykładowo. Pozostawiając niezmienione istotne charakterystyki techniczne produktu, producent zastrzega sobie prawo do wprowadzania każdej zmiany o charakterze technicznym, konstrukcyjnym lub handlowym, bez konieczności modyfikowania niniejszej publikacji.
  • Seite 64 M4, tj. ok. 12 mm między zębami. Materiały, z których wykonana jest brama, jej stan techniczny oraz szczególne warunki użytkowania mogą powodować obniżenie wartości powyższych parametrów. Instalacji systemu PONY nie można w żadnym wypadku traktować jako rozwiązania do otwierania niesprawnych bram. Fig.1 Fig.2a Fig.2c...
  • Seite 65 All manuals and user guides at all-guides.com W płycie montażowej znajdują się dwa duże otwory, umożliwiające po- prowadzenie kanałów kablowych. Można wykorzystać oba te otwory W pewnych przypadkach zębatka wystaje o kilka centymetrów w sto- dzięki przestrzeni znajdującej się w dolnej części motoreduktora, ale sunku do linii pionowej bramy, aby można było całkowicie zamknąć...
  • Seite 66 All manuals and user guides at all-guides.com Fig. 11 Sprawdzić, czy podłoże jest dobrze spoziomowane i nadaje się do moco- wania płyty za pomocą kołków rozporowych. Niezależnie od wybranego sposobu mocowania płyta musi być solidnie przymocowana, idealnie spo- ziomowana i równoległa do skrzydła bramy. Fig.
  • Seite 67 All manuals and user guides at all-guides.com Fig. 17 Fig. 18 Fig. 19 Kilkakrotnie zamknąć i otworzyć bramę ręcznie w celu sprawdzenia, czy zębatka prawidłowo współpracuje z kołem zębatym na całej swojej długości. W razie potrzeby otwory we wspornikach zębatki umożliwiają regulację...
  • Seite 68 All manuals and user guides at all-guides.com KLUCZ: Fig.1 Jeśli wyświetlacz jest wyłączony, naciśnięcie przycisku „ ” powoduje wywołanie polecenia „krok po kroku”. Ta funkcja może być używana podczas programowania i w fazie kontroli. Naciśnięcie przycisku PGM powoduje natychmiastowe zatrzymanie ruchu skrzydła drzwi.
  • Seite 69 All manuals and user guides at all-guides.com Podczas pracy w trybie automatycznym jednostka sterująca wykonuje automatycznie kilka operacji otwierania i zamykania. Należy przedtem sprawdzić, czy żadne osoby, zwierzęta ani inne przeszkody nie znajdują się w obszarze ruchu drzwi. Wszystkie akcesoria dostarczone wraz z systemem powinny być już połączone z jednostką...
  • Seite 70 All manuals and user guides at all-guides.com 0000 0004 PGM+ PGM+ PGM+ PGM+...
  • Seite 71 All manuals and user guides at all-guides.com PHCL PGM+ Bramy przesuwne mogą być otwierane w kierunku do prawej lub lewej strony, jak pokazano na rysunku. OPEN OPEN Kierunek obrotów można odwrócić odpowiednio do usytuowania silnika. MINV o--c c--o PGM+ PGM+ Funkcję...
  • Seite 72 All manuals and user guides at all-guides.com Radi Push PGM+ Radi Push PGM+ Radi Push PGM+...
  • Seite 73 All manuals and user guides at all-guides.com Radi PGM+...
  • Seite 74 All manuals and user guides at all-guides.com ERR1 ERR2 ERR3 ERR4 STOP PHOT OPEN Clos BATT...
  • Seite 75 All manuals and user guides at all-guides.com • • •...
  • Seite 76 All manuals and user guides at all-guides.com •...
  • Seite 77 All manuals and user guides at all-guides.com Code Note 9688164 9688165 9686414 9688166 9686622 PONY 9688142 PONY 115 9686623 9686624 9688169 9686626 9688170 PONY 9688143 PONY 115 9686488 9688174...
  • Seite 78 All manuals and user guides at all-guides.com...
  • Seite 79 All manuals and user guides at all-guides.com...
  • Seite 80 All manuals and user guides at all-guides.com AUTOMATISMI BENINCÀ À SpA - Via Capitello, 45 - 36066 Sandrigo (VI) - Tel. 0444 751030 r.a. - Fax 0444 759728...

Diese Anleitung auch für:

Pony 115