Herunterladen Diese Seite drucken

Werbung

Verfügbare Sprachen
  • DE

Verfügbare Sprachen

  • DEUTSCH, seite 18
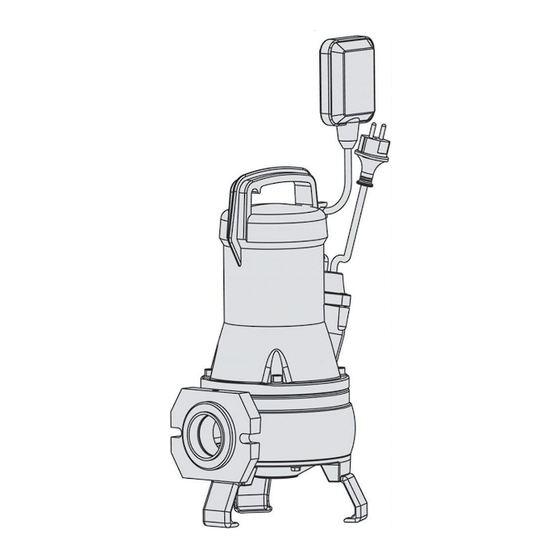
DRAINEX 200/300
DRAINCOR
ES
Manual de instrucciones ........................
(Original)
EN
Instruction manual ..................................
(Translation from the original Spanish)
Manuel d'instructions .............................
FR
(Traduction de l'original en espagnol)
DE
Gebrauchsanweisung ............................
(Übersetzungausdem Original in Spanisch)
Manuale d'istruzioni ...............................
IT
(Traduzione dall'originale spagnolo)
PT
Manual de instruções .............................
(Tradução do original em espanhol)
NL
Handleiding ...........................................
(vertaling van de oorspronkelijke Spaanse)
RU
(Перевод с оригинального испанского)
AR
(
............
‫ترجمة من اإلسبانية األصلي‬
6
10
14
18
22
26
30
34
38
)

Werbung

loading

Inhaltszusammenfassung für Espa DRAINEX 200

  • Seite 1: Inhaltsverzeichnis

    DRAINEX 200/300 DRAINCOR Manual de instrucciones ......(Original) Instruction manual ........(Translation from the original Spanish) Manuel d’instructions ......(Traduction de l'original en espagnol) Gebrauchsanweisung ......(Übersetzungausdem Original in Spanisch) Manuale d’istruzioni ....... (Traduzione dall'originale spagnolo) Manual de instruções ......
  • Seite 3: Declaracion De Conformidad

    DECLARACION DE CONFORMIDAD DECLARACIÓN DE CONFORMIDAD DE: KONFORMITÄTSERKLÄRUNG Declaramos, bajo nuestra responsabilidad, que los Erklären unter unserer Verantwortung, dass das productos de este manual cumplen con las siguientes Produkt in diesem Handbuch erfüllen mit den directivas comunitarias y normas técnicas: folgenden Richtlinien und Normen: - Directiva 2006/42/CE (Seguridad máquinas): - Maschinenrichtlinie 2006/42/EG:...
  • Seite 4: Declaracion De Conformidad Ce

    Normen EN 60335-1, EN 60335-2-41 ‫المعيار‬ ‫الخطرة‬ ‫االستدامة‬ ‫تقييد‬ 2011 ‫التوجيه‬ EN 50581 - Richtlijn 2011/65/UE (RoHS II): Norm EN 50581. Banyoles, 13 de Enero de 2021 Josep Unyó (Technical Manager) ESPA 2025, SL Ctra. de Mieres, s/n – 17820 Banyoles Girona - Spain...
  • Seite 5 - The Restriction of the Use of Certain Hazardous Substances in Electrical and Electronic Equipment Regulations 2012. Standard BS 50581. Banyoles, January 13th 2021 Josep Unyó (Technical Manager) ESPA 2025, SL Ctra. de Mieres, s/n – 17820 Banyoles Girona - Spain...
  • Seite 6: Manual De Instrucciones

    MANUAL DE INSTRUCCIONES (ORIGINAL) Instrucciones de seguridad y prevención de daños para las personas y equipos (Véase figura 5) A Atención a los límites de empleo. B La tensión de la placa tiene que ser la misma que la de la red.
  • Seite 7 Pasaje de sólidos en los modelos La instalación eléctrica deberá disponer de DRAINEX 200 = 45mm (MAX) y en los modelos una eficaz puesta a tierra y debe cumplir la DRAINEX 300 = 60mm (MAX).
  • Seite 8: Controles Previos A La Puesta En Marcha Inicial

    Si esto no es posible, contacte con el 4. PUESTA EN MARCHA servicio técnico de ESPA más cercano. Si existe alguna válvula de paso, ábrala totalmente. Conectar el enchufe del cuadro eléctrico en una 7.
  • Seite 9: Datos Técnicos

    8. POSIBLES AVERIA, CAUSAS Y SOLUCIONES 1) La bomba no arranca. 2) La bomba funciona pero no sale agua. 3) La bomba para automáticamente 4) El caudal no corresponde a la curva facilitada. 1 2 3 4 CAUSAS SOLUCIONES Falta corriente en la base Sustituir fusibles o activar el interruptor diferencial Protector térmico activado Rearmar el protector térmico, comprobar que el...
  • Seite 10: Instruction Manual

    INSTRUCTION MANUAL (Translation from the original Spanish) Damage prevention and safety instructions (See figure 5) A Warning! Observe limitations of use. The name plate voltage must be the same as the mains voltage. Connect the pump to the mains via an omnipolar switch with at least a 3 mm opening between contacts.
  • Seite 11: General Information

    Contents The pump cannot be used in a swimming- Safety precautions ..........10 pool while there are people bathing. 1. General information ........... 11 Do not put your hand or any object into the 2. Handling ............. 11 suction or discharge mouth, since the 3.
  • Seite 12: Starting

    All main components are material identified to allow selective disposal. This product or parts of it must be disposed of in an environmentally sound way, waste collection service. If this is not possible, contact the nearest ESPA service workshop.
  • Seite 13: Possible Faults, Causes And Solutions

    8. POSSIBLE FAULTS, CAUSES AND SOLUTIONS The pump does not start. Pump runs but there is no flow. Pump stops automatically. Pump does not deliver rated capacity. 1 2 3 4 POSSIBLE PROBLEM SOLUTIONS Lack of electricity Replace fuses or switch RCCB (30mA) Improper thermal protection Switch thermal protector or check that voltage is correct...
  • Seite 14: Manuel D'instructions

    MANUEL D’INSTRUCTIONS (Traduction de l'original en espagnol) Indications de sécurité pour les personnes et prévention des dommages à la pompe et aux choses. (Voir figure 5) A Attention aux limitations d’utilisation. B La tension indiquée sur la plaque doit être identique à celle du secteur.
  • Seite 15: Généralités

    L’omission des instructions de ce manuel Sommaire Avertissements pour la sécurité des personnes et peut produire surcharges au moteur, la des choses ............. 14 diminution des caractéristiques techniques, la réduction de la vie de la pompe et d’autres 1. Généralités ............15 2.
  • Seite 16: Contrôles Préalables À La Première Mise En Marche

    Si ce n'est SEC. pas possible, envoyer ce produit au réparateur agréé ESPA le plus proche. 4. MISE EN MARCHE S’il existe une vanne de passage, ouvrez-la à fond. 7. PLAQUE DES CARACTÉRISTIQUES Brancher la prise du tableau électrique sur une...
  • Seite 17: Pannes Éventuelles, Causes Et Solutions

    8. PANNES EVENTUELLES, CAUSES ET SOLUTIONS 1) Le groupe ne démarre pas. 2) Le moteur fonctionne mais ne débite pas. 3) Le groupe démarre et s’arrête continuellement. 4) Pression insuffisante. 2 3 4 CAUSES SOLUTIONS Remplacer les fusibles o activer l’interrupteur différentiel Manque de courant Intervention de la protection thermique Effectuer le réarmement thermique ou vérifier si le voltage est correct...
  • Seite 18: Gebrauchsanweisung

    GEBRAUCHSANWEISUNG (Übersetzung aus dem Original in Spanisch) Anweisungen für die Sicherheit der Personen und zur Verhütung von Schäden an der Pumpe und an Sachen. (Siehe Abbildung 5) Bitte beachten Sie die Anwendungsbegrenzungen Die angegebene Spannung muß mit der Netzspannung übereinstimmen. Die Motorpumpe wird mittels eines allpoligen Schalters, mit einem Öffnungsabstand zu den Kontakten von mindestens 3mm, an das Netz angeschlossen.
  • Seite 19: Allgemeines

    Die elektrische Anlage muß korrekt geerdet septischen Gruben usw. in Frage. Feststoffteilchen und nach den vor Ort geltenden techni-schen passieren die Modelle DRAINEX 200 bis max. 45 Auflagen erstellt werden. mm und die Modelle DRAINEX 300 bis max. 60 mm.
  • Seite 20: Wartung

    DIE PUMPE DARF AUF KEINEN FALL TROCKEN umweltgerecht entsorgt werden, nutzen Sie die LAUFEN. Entsorgungsgesellschaften. Ist das nicht möglich, wenden Sie sich bitte an eine von ESPA 4. INBETRIEBNAHME anerkannte Servicewerkstatt in Ihrer Nähe. Öffnen ggf. vorhandene Durchlaufventile vollständig.
  • Seite 21: Technische Daten

    8. MÖGLICHE OEFEKTE, URSACHEN UNO ABHILFE Pumpe läuft nich an. Pumpe läuft, aber ohne Förderleistung. Pumpe unterbricht automatisch. Fördermenge weicht von der entsprechenden Kurve ab. 1 2 3 4 URSACHEN ABHILFE Kein Strom Sicherungen sonstige Schutzeinrichtungen überprüfen Thermoschutzrelais hat angesprochen Thermoschutzrelais zurückstellen oder ein erneutes Abkühlen abwarten Unterbrechung durch Niveaugeber Abwarten bis genügend Wässer vorhanden ist...
  • Seite 22: Manuale D'istruzioni

    MANUALE DI ISTRUZIONI (Traduzione dall'originale spagnolo) Indicazioni di sicurezza per le persone e prevenzione danni alla pompa e alle cose. (Vedere la figura 5) A Attenzione alle limitazioni d’impiego. B La tensione di targa deve essere uguale a quella di rete. C Collegate l’elettropompa alla rete tramite un interruttore onnipolare con distanza di apertura dei contatti di almeno 3mm.
  • Seite 23: Generalità

    Índice Dal mancato rispetto delle istruzioni di questo Avvertimenti per la sicurezza delle persone e manuale possono derivare sovraccarichi del delle cose ................22 motore, alterazioni delle caratteristiche 1. Generalità ............23 tecniche, riduzione della vita utile della 2. Manipolazione ..........23 pompa e altri inconvenienti di ogni tipo, per i 3.
  • Seite 24 “A” indicate nella stessa figura. ATTENZIONE: caso guasto, sostituzione cabo elettrico manipolazione de la pompa potranno essere eseguiti soltanto da un servizio di assistenza tecnica ufficiale. L'elenco servizi tecnici autorizzati è www.espa.com.
  • Seite 25: Dati Tecnici

    8. POSSIBILI AVARIE, MOTIVI E SOLUZIONI 1) Il motore non si mette in moto. 2) La pompa funziona, ma non da portata. 3) La pompa si ferna e si mette in moto automaticamente 4) La portata non corrisponde alla curva fornita. 1 2 3 4 MOTIVI SOLUZIONI Mancanza di corrente...
  • Seite 26: Manual De Instruções

    MANUAL DE INSTRUÇÕES (Tradução do original em espanhol) Indicações de segurança para as pessoas e de prevenção de prejuízos à bomba e às coisas. (Ver figure 5) Atenção às limitações de emprego. A tensão de placa de classificação deve ser igual à da rede.
  • Seite 27 A instalaçâo eléctrica deve dispor de uma suspensão, fossas sépticas, etc. Passagem de eficaz tomada de terra e deve cumprir a sólidos nos modelos DRAINEX 200 = 45mm (máx.) normativa nacional vigente. e nos modelos DRAINEX 300 = 60mm (máx.).
  • Seite 28: Eliminação Do Produto

    “A” indicados na mesma figura. ATENÇÃO: em caso de avaria, tanto a substituiçaô do cabo eléctrico o manipulaçâo da bomba sô deverâ ser realizada por um serviço técnico autorizado. A lista de serviços técnicos autorizados está na www.espa.com.
  • Seite 29: Dados Técnicos

    8. POSSÍVEIS AVARIAS, CAUSAS E SOLUÇÕES 1) A bomba não arranca. 2) A bomba funciona, mas não dá caudal. 3) A bomba para automaticamente. 4) O caudal não corresponde ao indicado na curva. 1 2 3 4 CAUSAS SOLUÇÕES Falta de corrente en la base Verificar fusíveis e demais dispositivos de proteção Atuação da proteção térmica Rearmar o térmico, depois de estar frio o verificar se a...
  • Seite 30: Handleiding

    HANDLEIDING (ORIGINEEL) Veiligheidsvoorschriften en aanwijzingen om persoonlijke en materiële schade te voorkomen (Zie afbeelding 5) A Houd rekening met de gebruiksbeperkingen. B De plaatje aangeduide spanning moet overeenkomen met de spanning van het lichtnet. C Sluit de elektrische pomp aan met behulp van een alpolige schakelaar met een openingsafstand tot de contacten van ten minste 3mm.
  • Seite 31: Algemeen

    Vaste bestanddelen afdoende aarding te beschikken en de installatie dient te worden uitgevoerd door worden doorgelaten in de modellen DRAINEX 200 een erkend elektricien,met inachtneming van = 45 mm (MAX.) en in de modellen DRAINEX 300 de daartoe geldende regelgeving.
  • Seite 32: Controles Voor De Eerste Inbedrijfstelling

    Wanneer dit niet mogelijk is, neemt u Open alle doorstroomkleppen in de buizen. dan contact op met uw ESPA leverancier. Controleer of de aansluiting correct is en schakel de stroom in;als het waterpeil juist is, slaat de pomp PLAATJE MET TECHNISCHE SPECIFICATIES direct aan.
  • Seite 33: Mogelijke Storingen, Oorzaken En Oplossingen

    8. MOGELIJKE STORINGEN, OORZAKEN EN OPLOSSINGEN 1) Motor slaat niet aan. 2) Motor werkt wel, maar pomp geeft geen debiet. 3) Motor stopt automatisch (Klixon). 4) Te laag debiet. 1 2 3 4 OORZAKEN OPLOSSINGEN Gebrek aan elektriciteit Vervang zekeringen activeren differentiële schakelaar...
  • Seite 34: Руководство По Эксплуатации

    ИНСТРУКЦИЯ ПО МОНТАЖУ И ЭКСПЛУАТАЦИИ (Перевод с оригинального испанского) Инструкции по безопасному обращению с оборудованием (рис. 5) Внимательно изучите настоящую инструкцию по монтажу и эксплуатации. B Напряжение в сети должно соответствовать указанному на шильдике (информационной табличке) насоса. C Подключение электронасоса к сети должно быть выполнено с...
  • Seite 35: Основные Сведения

    использования насоса и его безопасной Электрооборудование должно быть заземлено. эксплуатации. Однофазные насосы снабжены кабелем с DRAINEX 200/300, DRAINCOR - погружные вилкой для подключения к сети. насосы для откачки сточных, фекальных вод и Все однофазные модели оборудованы встроенной грязных жидкостей с содержанием твердых...
  • Seite 36: Хранение

    4. ОБСЛУЖИВАНИЕ И ХРАНЕНИЕ 5. ШИЛЬДИК (ИНФОРМАЦИОННАЯ ТАБЛИЧКА) ОБОРУДОВАНИЯ Если работа насоса не планируется в течение длительного периода времени, рекомендуется слить воду из него и трубопровода, очистить и хранить в сухом, хорошо проветриваемом помещении. ОПИСАНИЕ Модель оборудования Напряжение + частота + спецификации оборудования Диапазон...
  • Seite 37: Технические Данные

    включают в себя все производственные подшипники, конденсаторы, щетки и т.п. дефекты или дефекты комплектующих, Условия гарантийного обслуживания не подтвержденные производителем. Определение применяются в случае обнаружения следов причин возникновения неисправностей насоса самостоятельной разборки или ремонта насоса. производится авторизованными сервисными центрами ESPA.
  • Seite 38: تعليماتالتشغيل

    ‫التشغيل‬ ‫عليمات‬ ‫األصلي‬ ‫اإلسبانية‬ ‫من‬ ‫ترجمة‬...
  • Seite 40: List Of Main Components

    Cable Cable Câble Kabel Cavo Carcasa del motor Motor casing Carcasse de moteur Motorgehäuse Carcassa del motore Condensador Capacitor Condensateur Kondensator Condensatore Rodete Impeller Roue Laufrad Girante Cuerpo bomba Pump casing Corps de pompe Pumpengehäuse Corpo della pompa Fond d’aspiration Tapa aspiración Suction cover Saugdekel...
  • Seite 41: Illustrations

    Fig.1 / Abb.1 / Afb.1 / Рис.1...
  • Seite 42 Fig.2 / Abb.2 / Afb.2 / Рис.2 NEGRO AZUL MARRON BLACK BLUE BROWN NOIR BLEU MARRON SCHWARZ BLAU BRAUN NERO AZZURRO MARRONE PRETO AZUL CASTANHO ZWART BLAUW BRUIN ЧЕРНЫЙ СИНИЙ КОРИЧНЕВЫЙ ‫أسمر‬ ‫أسود‬ ‫أزرق‬ Fig.3 / Abb.3 / Afb.3 / Рис.3...
  • Seite 43 Fig.4 / Abb.4 / Afb.4 / Рис.4 Fig. 5 / Abb.5 / Afb.5 / Рис.5...
  • Seite 44 Cód. 23000225 01-2021/10...

Diese Anleitung auch für:

Drainex 300Draincor