JUKI MO-644 Bedienungsanleitung
Überwendlich-nähmaschine mit 2 nadeln, 2/3/4 fäden
Vorschau ausblenden
Andere Handbücher für MO-644:
- Bedienungsanleitung (40 Seiten) ,
- Bedienungsanleitung (37 Seiten)
Inhaltsverzeichnis
Quicklinks
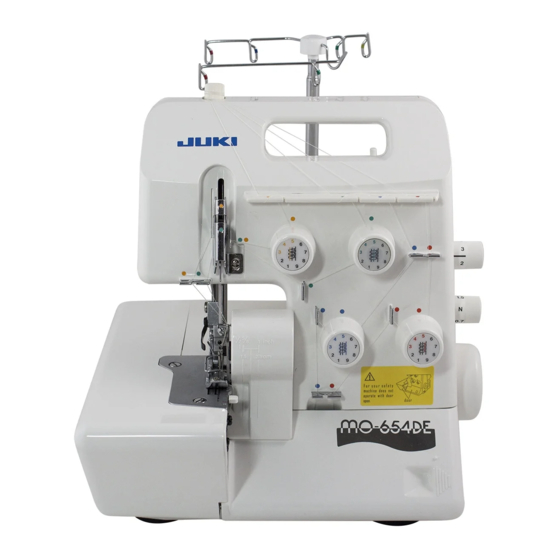
2-Needle, 2/3/4-Thread Overlock Sewing Machine
2-naalds, 2/3/4-draads Overlock machine
Surjeteuse-Raseuse 2 Aiguilles, 2/3/4 Fils
Überwendlich-Nähmaschine Mit 2 Nadeln, 2/3/4 Fäden
MO-644/654
Instruction Manual
Gebruiksaanwijzing
Manuel d'instructions
Bedienungsanleitung
IMPORTANT:
Read all safety regulations carefully and under-
stand them before using your sewing machine.
Retain this instruction manual for future reference.
BELANGRIJK:
Lees alle veiligheidsvoorschriften zorgvuldig door
en zorg ervoor dat u deze begrijpt voordat u deze
naaimachine gaat gebruiken.
Bewaar deze instructies voor later gebruik.
IMPORTANT:
Avant de mettre la machine en marche, lire
attentivement et assimiler les regles de securite
de ce manuel.
Conserver le manuel afin de pouvoir le consulter
ul terieurement.
WICHTIG:
Alle sicherheitsvorschriften vor gebrauch der
nähmaschine sorgfältig durchlesen.
Bewahren Sie diese bedienungsanleitung für
weitere bezüge auf.
MO-644
MO-654
®
Inhaltsverzeichnis

Verwandte Anleitungen für JUKI MO-644


Inhaltszusammenfassung für JUKI MO-644
- Seite 1 ® 2-Needle, 2/3/4-Thread Overlock Sewing Machine 2-naalds, 2/3/4-draads Overlock machine Surjeteuse-Raseuse 2 Aiguilles, 2/3/4 Fils Überwendlich-Nähmaschine Mit 2 Nadeln, 2/3/4 Fäden MO-644/654 Instruction Manual Gebruiksaanwijzing Manuel d’instructions Bedienungsanleitung MO-644 IMPORTANT: Read all safety regulations carefully and under- stand them before using your sewing machine.
- Seite 2 “IMPORTANT SAFETY INSTRUCTIONS” When using an electrical appliance, basic safety precautions should always be followed, including the following: Read all instructions before using this overlock sewing machine. “DANGER _____To reduce the risk of electric shock:” 1. The appliance should never be left unattended when plugged in. 2.
- Seite 3 “Belangrijke veiligheidsinstructies” Als u een elektrisch apparaat gebruikt, moet u altijd de basis veiligheidseisen in het oog houden, inclusief deze: Lees alle instructies voordat u deze naaimachine gaat gebruiken. “gevaar! ________ Voorkom een elektrische schok.” 1. Laat het apparaat nooit alleen met de stekker in het stopcontact. 2.
- Seite 4 “PRESCRIPTIONS DE SECURITE IMPORTANTES” L’emploi d’un appareil électrique exige d’observer les mesures de sécurité suivantes: “DANGER _____Pour la protection contre tout choc électrique:” 1. Ne pas laisser la surjeteuse sans surveillance tant qu’elle est raccordée au réseau. 2. Après usage et avant un nettoyage, séparer toujours la machine du réseau. 3.
- Seite 5 “WICHTIGE SICHERHEITSHINWEISE” Beim Gebrauch eines elektrischen Gerätes sind folgende Sicherheitsmassnahmen zu beachten: “GEFAHR _____Zum Schutz vor elektrischem Schlag:” 1. Die Overlockmaschine nie unbeaufsichtigt stehen lassen, solange sie am Stromnetz angeschlossen ist. 2. Nach Gebrauch und vor einer Reinigung die Maschine immer vom Stromnetz trennen. 3.
-
Seite 6: Inhaltsverzeichnis
Contents / Inhoud / Inhalt / Sommaire IMPORTANT SAFETY INSTRUCTIONS Sewing in tape ..........24 • Overlocking width selection knob ....10 • Presser foot pressure adjusting screw ..... 10 Details of the machine ....... 1,2 Differential feed .........25 • Changing the needles ........11 Gathering ............26 •... -
Seite 7: Details Of The Machine
Details of the machine / Details van de machine Piéces principales de la machine / Details der Maschine 1. Looper cover 15. Power/light switch 2. Looper cover opening handle 16. Handwheel (pulley) 3. Chip guard cover 17. Machine socket 4. Cloth plate 18. -
Seite 8: Accessories
3. Differentieel transport-instelknop (MO-644) Vue intérieure de la machine, plateau-box ouvert 1. Sélecteur de position du couteau inférieur 2. Sélecteur de mécanisme d’entraînement (MO-644) 3. Sélecteur de mécanisme d’entraînèment à différentiel (MO-644) Ansicht bei geöffnetem Stoffauflagedeckel 1. Einstellknopf für Untermesser (MO-644) 2. -
Seite 9: Fixation Du Support Des Broches À Bobines
Assembling thread stand / Opbouwen van het draadgeleidersysteem Mise en place du support de guide-fil / Anbringen der Fadenführung Raise the support rod fully Turn the thread stand until it engages the positioning stopper (A) with a click. schuif de antenne volledig uit Draai de antenne zodanig heen en weer, dat de pinnetjes (A ) in de gaatjes schieten. - Seite 10 Assembling thread stand / Opbouwen van het draadgeleidersysteem Mise en place du support de guide-fil / Anbringen der Fadenführung For overlock spools kleine conen Pour bobines de surjetage-rasage (overlock) Für Überwendlich-spulen For large spools For spools of large inside diameter, position the anti-vibration come upside down. grote conen Pour grosses bobines industrielles Avec des bobines de diamètre interne important, installer l’antivibrateur de bobine...
-
Seite 11: Preparing Machine
Preparing machine / Voorbereiden van de machine Installation de la machine / Inbetriebnahme der Maschine Attaching the foot controller 1. Plug foot controller into machine socket. 2. Plug foot controller into power supply socket. 3. Lay your foot on the foot controller. Step on the foot controller strongly (deeply), and the sewing speed increases. -
Seite 12: Handwheel (Pulley)
Operation and function / Instellingen en gebruik Opération et fonction / Betrieb und Funktion Handwheel (Pulley) The handwheel turns toward you. * Upon completion of threading, at sewing start or sewing end, be sure to turn the handwheel toward you. handwiel Het handwiel draait naar u toe, net zoals bij een huishoudnaaimachine. -
Seite 13: Presser Foot Lifter
Operation and function / Instellingen en gebruik Opération et fonction / Betrieb und Funktion Presser foot lifter (To raise the presser foot by the presser foot lifter) A For regular sewing operation (sewing a medium-weight material), raise the presser foot to position (A) illustrated in the figure. -
Seite 14: Raising The Upper Knife
Operation and function / Instellingen en gebruik Opération et fonction / Betrieb und Funktion Raising the upper knife Be sure to turn the power switch OFF. 1. Turn the handwheel until the upper knife is fully raised. Open the looper cover. 2. -
Seite 15: Vorschub-Einstellknopf
• Le réglage standard des coutures overlock se situe sur 2 ou sur 3. vorschub-einstellknopf (für stichlänge) Die Stichlänge ist während des nähens im Bereich von 1 bis 4 einstellbar. MO-644 Dazu den Vorschub-Einstellknopf nach oben oder unten drehen. • Für normales Überwendlichnähen eine Einstellung im Bereich von 2 bis 3 verwenden. -
Seite 16: Stichbreitenhebel
Operation and function / Instellingen en gebruik Opération et fonction / Betrieb und Funktion Overlocking width selection knob (for overlocking or roll hemming) * Turn the handweel until the needles are fully raised. • For overlocking Push the overlocking width selection knob back so that it aligns with the rear red marking on the throat plate. -
Seite 17: Wechseln Der Nadeln
Operation and function / Instellingen en gebruik Opération et fonction / Betrieb und Funktion Changing the needles Be sure to turn the power switch OFF. • Applying the needle attaching hole (A) of the cleaning brush will help replace the needle ease. 1. -
Seite 18: Preparation
Threading / Inrijgen Enfilage / Einfädeln Thread the machine carefully and in the correct sequence. Enfiler la machine avec le plus grand soin en veillant à respecter This is important for marking beautiful seams. l’ordre des opérations qui est indiqué, car cas conditions sont Preparation essentielles pour obtenir des points réguliers. -
Seite 19: Upper Looper Thread (Blue)
Threading (1) / Inrijgen (1) Enfilage (1) / Einfädeln (1) 1. Upper looper thread (Blue) Place the spool on the spool holder pin right under blue marking on the retractable support rod thread guide. (1) Bring thread up from the rear of the retractable support rod thread guide with blue marking. -
Seite 20: Lower Looper Thread (Red)
Threading (2) / Inrijgen (2) Enfilage (2) / Einfädeln (2) 2. lower looper thread (red) Place the spool on the spool holder pin right under red marking on the retractable support rod thread guide. (1,2) Bring thread up from the rear of the retractable support rod thread guide to the front of it. (3,4) Pass the thread through the thread guide plate. - Seite 21 Threading (2) / Inrijgen (2) MO-644 Enfilage (2) / Einfädeln (2) MO-644 only: alleen MO-644: seulement MO-644: nur MO-644: (13) Using the looper threader, (13) Gebruik grijper- (13) Faire passer le fil de droite à (13) faden pass the threader from the right draadinrijger (zie accessoires).
- Seite 22 MO-644 MO-654...
-
Seite 23: Right-Hand Needle Thread (Green)
Threading (3) / Inrijgen (3) Enfilage (3) / Einfädeln (3) 3. Right-hand needle thread (Green) Place the spool on the spool holder pin right under the green marking on the retractable support rod thread guide. (1,2) Bring thread up from the rear of the retractable support rod thread guide with the green markings to the front of it. -
Seite 24: Left-Hand Needle Thread (Yellow)
Threading (4) / Inrijgen (4) Enfilage (4) / Einfädeln (4) 4. Left-hand needle thread (Yellow) Place the spool on the spool holder pin right under the yellow marking on the retractable support rod thread guide. (1) Bring thread up from the spool to the thread guide and take it through the yellow thread guide. -
Seite 25: 3-Thread Overlocking
3-thread overlocking / 3-draads overlocken Overlock à 3 fils / 3-Fäden-Überwendlichnaht 4 mm wide 3-thread Overlocking (Right-hand needle) (Blue, red and green) * Remove the left-hand needle. Thread in the following order. (1) Upper looper thread (Blue) (2) Lower looper thread (Red) (3) Right-hand needle thread (Green) * If the machine is already threaded with the left-hand needle thread, cut off and remove the thread. -
Seite 26: How To Use The 2/3 Thread Converter
2/3-thread converter / 2/3-Bovengrijper converter Convertisseur 2/3 fils / 2/3-Fäden-Konverters How to use the 2/3 thread converter 2-thread flatlock 2-draads flatlock * This attachment enable the 1-needle type machine to perform overedging or Couture plate à 2 fils decorative-stitching for 1-ply fabric. It enables the 2-needle type machine to perform 2-fäden flatlock 3-thread super stretch stitching. -
Seite 27: Trial Sewing
Trial sewing / Proefnaaien Couture d’essai / Nähprobe After threading, make a trial sewing Be sure to use a double layer of fabric in order to check whether the seam and thread tension are adequate. 1. Set the lower/upper looper, left-hand/right-hand needle thread tension dial “4”. 2. -
Seite 28: Adjusting The Thread Tension
Thread tension dial / Draadspanningsknop Bouton de réglage de la tension du fil / Fadenspannung Adjusting the thread tension Imperfect stitch formation can be corrected by adjusting the set value (1 to 9) on the thread tension dial. Standard of the thread tensioner dial Upper looper thread tension adjusting 3 - 5... -
Seite 29: Aanpassen Van De Draadspanning
Adjusting the thread tension / Draadspanning afstellen Réglage de la tension du fil / Anpassen der Fadenspannung Adjusting the thread tension Turn the thread tension dial in the direction of the arrow, and make a trial sewing. A - If the upper looper thread meet on the underside of the fabric: B - If the lower looper thread meet on the upper side of the fabric: C - If the right-hand needle thread forms loops on the underside of the fabric: D - If the left-hand needle thread forms loops on the underside of the fabric:... -
Seite 30: Rollsäumen
3. Den Stichbreitenhebel bis and die rote Markierung der Stichplatte vorziehen. 4. Den Vorschub-Einstellknopf für die Stichlänge in den Bereich „1 ~ 1,5“ bewegen. MO-654 MO-644 * Die Fadenspannungen wunschgemäß einstellen. (a): rollsaum Beim rollsaumstich wird der Stoffrand mit dem oberen Greiferfaden genäht. - Seite 31 Standard thread tension list for roll hemming (rolled hem, narrow overlock sitich) Thread tension slightly differs depending on the types of the fabric and thread. Use the woolly nylon thread or thinner thread for roll hemming to attain the beautiful finish. Use the thin spun thread thinner than #80.
-
Seite 32: Sewing In Tape
Sewing in tape / Innaaien van band Pose de bande de renfort / Einnähen von Bändern Sewing in tape The standard presser foot is equipped with a tape guide. When sewing shoulders or side seams of stretchy fabrics as a knitted fabric, a tape works effectively to prevent undesirable stretch of the fabric. -
Seite 33: Differential Feed
Gathering and stretching of the fabric can be adjusted by adjusting the differential feed adjusting knob (differentiate the feeding amount of front feed dog (A) or rear MO-644 feed dog (B)). After adjusted, be sure to sew on trial. differentieel transport rimpelen en lubberen kan worden vermeden door het differentieel transport correct in te stellen met de knop. -
Seite 34: Kräuselnähen
Gathering / Rimpelen Fronces / Kräuselnähen Gathering 1. A single layer of light-weight fabric can be gathered. 2. Set the stitch length adjusting knob at max. “4”. 3. Set the differential feed adjusting knob at “1.5 - 2”. For examples: Sleeve heads, lower edges, yokes, lace edging or frills * When sewing without differential feed, set the differential feed adjusting knob at “N”. -
Seite 35: Thread Breakage During Sewing
Thread breakage during sewing / Draadbreuk tijdens het naaien Fil cassé en cours de travail / Fadenriss beim Nähen Thread breakage during sewing 1. Turn the workpiece at a right angle direction and stop sewing immediately. The remove the workpiece. 2. -
Seite 36: Securingseams
Securing seams / Veiligstellen van het zoomeinde Renforcement des fins de couture / Sichern der Fadenenden Securing seams 1. Sew about 3 to 4 cm of the thread chain at the beginning of seams. 2. Sew 2 to 3 stitches on the fabric. 3. -
Seite 37: Changing The Knife
Das obere Messer ist aus extra-hartem Spezialstahl hergestellt und muss nicht ersetzt werden. Ein Auswechseln ist nur erforderlich, wenn die Spitze der klinge beschädigt wurde. Wenden Sie sich dazu bitte an Ihren jUkI-Händler. auswechseln des unteren Messers Unbedingt den netzschalter ausschalten 1. -
Seite 38: Replacing The Bulb
Maintenance / Onderhoud Entretien / Wartung Replacing the bulb Be sure to turn the power switch OFF. Unscrew the bulb and replace it with a new one. The power consumption of the bulb is 10W (230V,240V), 15W (120V). The bulbs are available from your local dealer. - Seite 39 Before you call for help: Trouble and corrective measures The followingproblems should not be regarded as the machine trouble. Check the following table before you call for help from us. Trouble Page Fabric does not • Presser foot pressure is too low. Increase the presser foot pressure by turning the feed presser foot pressure adjusting screw to the right.
- Seite 40 Dépistage des pannes et remèdas: avant d’appeler le mécanecien Les problèmes ci-dessous ne sont pas de défaut mécanique, vérifier le tableau ci-après avant appeler le mécanicien. Défaut è Page L’étoffe n’est pas • La pression du pied presseur est insuffisante. Tourner la vis de réglage de pression du pied entraînée presseur vers la droite pour augmenter la pression.
-
Seite 41: Technische Daten
Specifications / Specificaties Caractérsteques techniques / Technische Daten Specifications Caractérsteques techniques Item Specifications Item Specifications 4 threads, 3 threads, 2 threads Nombre de fils 4 fils, 3 fils, 2 fils Number of threads Needles Right-hand needle 130/705H Aiguilles aiguille droite 130/705H Left-hand needle 130/705H (JLx2) aiguille gauche 130/705H (JLx2) Overlocking width... - Seite 42 Vraag uw dealer voor meer informatie. Näheres hierzu erfahren Sie von lhrem Händler. Contacter le distributeur de vorte région. MO-644 8-2-1, KOKURYO-CHO, CHOFU-SHI, TOKYO 182-8655, JAPAN PHONE : (81)3-3480-5034 FAX : (81)3-3480-5037 Copyright © 2005 JUKI CORPORATION. All rights reserved throughout the world. 2005.7 A915065400D...