Herunterladen Inhalt Inhalt Diese Seite drucken
Peg Perego Martinelli Viaggio1 Duo-Fix ASIP Bedienungsanleitung

Peg Perego Martinelli Viaggio1 Duo-Fix ASIP Bedienungsanleitung

Vorschau ausblenden Andere Handbücher für Martinelli Viaggio1 Duo-Fix ASIP:

Werbung

Verfügbare Sprachen
  • DE

Verfügbare Sprachen

  • DEUTSCH, seite 30
WWW.LACARROZZINAMARTINELLI.COM
MADE IN ITALY
Viaggio1 Duo-Fix
Downloaded from
www.Manualslib.com
manuals search engine

Werbung

Inhaltsverzeichnis
loading

Inhaltszusammenfassung für Peg Perego Martinelli Viaggio1 Duo-Fix ASIP

  • Seite 1 WWW.LACARROZZINAMARTINELLI.COM MADE IN ITALY Viaggio1 Duo-Fix Downloaded from www.Manualslib.com manuals search engine...
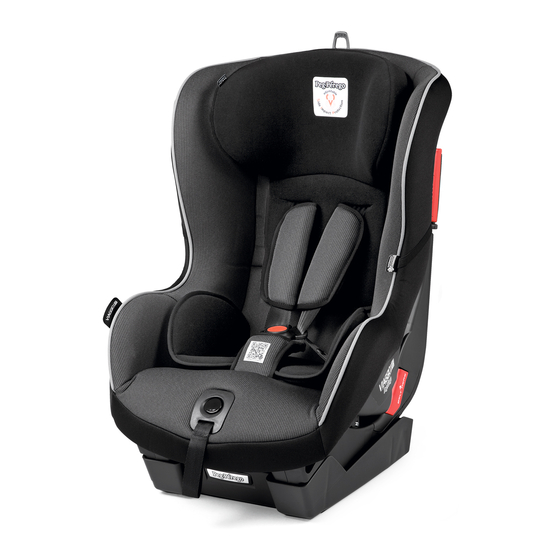
  • Seite 2 UNIVERSAL CATEGORY SEMI-UNIVERSAL Classe A 9-18 Kg Y CATEGORY 9-18 Kg Y Viaggio1 Duo-Fix ASIP Viaggio1 Duo-Fix ASIP Isofix Base 0+1 IT• Il seggiolino auto "Viaggio1 Duo-Fix ASIP" viene fissato in auto con IT• Il seggiolino auto "Viaggio1 Duo-Fix ASIP" si aggancia in auto la cintura di sicurezza a tre punti. con il sistema ISOFIX. Consultare il manuale istruzioni di "Isofix E N• The "Viaggio1 Duo-Fix ASIP" car safety seat is attached to the car Base 0+1" per le istruzioni di fissaggio in auto. using a three-point seat belt. E N• The “Viaggio1 Duo-Fix ASIP” car seat is secured in vehicles with F R• Le siège-auto "Viaggio1 Duo-Fix ASIP" se fixe dans la voiture à l’aide the ISOFIX system. See the “Isofix Base 0+1” instruction manual de la ceinture de sécurité à trois points. for the vehicle installation procedure. D E• Der Autokindersitz "Viaggio1 Duo-Fix ASIP" wird mit dem F R• Le siège-auto « Viaggio1 Duo-Fix ASIP » se fixe dans le véhicule Sicherheitsgurt an drei Stellen im Auto befestigt.
  • Seite 3 UNIVERSAL CATEGORY Downloaded from www.Manualslib.com manuals search engine...
  • Seite 4 Downloaded from www.Manualslib.com manuals search engine...
  • Seite 5 Downloaded from www.Manualslib.com manuals search engine...
  • Seite 6 SEMI-UNIVERSAL CATEGORY Downloaded from www.Manualslib.com manuals search engine...
  • Seite 7 Downloaded from www.Manualslib.com manuals search engine...
  • Seite 8 Downloaded from www.Manualslib.com manuals search engine...
  • Seite 9 Downloaded from www.Manualslib.com manuals search engine...
  • Seite 10 Downloaded from www.Manualslib.com manuals search engine...
  • Seite 11 Downloaded from www.Manualslib.com manuals search engine...
  • Seite 12 Downloaded from www.Manualslib.com manuals search engine...
  • Seite 13 Downloaded from www.Manualslib.com manuals search engine...
  • Seite 14 Downloaded from www.Manualslib.com manuals search engine...
  • Seite 15 Downloaded from www.Manualslib.com manuals search engine...
  • Seite 16: Caratteristiche Prodotto

    IT_Italiano Viaggio1 Duo-Fix ASIP MARTINELLI È UN MARCHIO PEG PEREGO • Peg-Pérego S.p.A. è certificata ISO 9001. • La certificazione offre ai clienti e ai consumatori la garanzia di una trasparenza e fiducia nel modo di lavorare dell'impresa. Caratteristiche prodotto Seggiolino-auto, Gruppo 1, categoria “Universale” • Omologato secondo la normativa Europea UN/ECE R44/04 per bambini di peso da 9-18 kg (da 9 mesi a 4 anni circa). • Adatto alla maggior parte dei sedili delle autovetture, ma non a tutti. • Il seggiolino-auto può essere correttamente installato se 1) BMADUOMA• nel manuale d’uso e manutenzione del veicolo è indicata la 2) BRIDUOMA• compatibilità con sistemi di ritenuta “Universali” di Gruppo 1. 3) MUCI0082N • Questo seggiolino-auto è classificato “Universale” secondo 4) BSPDUO00• criteri di omologazione più severi rispetto ai modelli precedenti 5) SPST6757NF che non dispongono dell’ etichetta di omologazione. • Il seggiolino-auto puó essere utilizzato solo su veicoli...
  • Seite 17 installato in senso di marcia. • Se la vettura é in movimento, non togliere mai il bambino • Non installare “Viaggio1 Duo-Fix ASIP” su sedili dal seggiolino-auto. rivolti in direzione opposta al senso di marcia o • Prestare attenzione che il seggiolino-auto non rimanga trasversalmente al senso comune di marcia del veicolo. bloccato da una parte mobile del sedile o da una portiera. • Si consiglia sempre l'uso del sedile posteriore sul lato • Regolare l’altezza e la tensione delle cinture verificando opposto al guidatore.
  • Seite 18 costruttore o dalle competenti autorità. azionando le apposite leve di sgancio (freccia a e b). 1 1• Posizionare il seggiolino sulla Isofix Base 0+1 agganciando Istruzioni d'uso gli attacchi posteriori del seggiolino ai ganci della base più vicini al sedile (freccia a). CATEGORIA UNIVERSALE Premere la parte anteriore del seggiolino fino al "click" Aggancio in auto con cinture di sicurezza (freccia b). IMPORTANTE: i due indicatori posti dietro la Base Isofix, 1• Applicare il seggiolino Viaggio1 Duo-Fix ASIP sul sedile 1 2• dell'auto nel senso di marcia del veicolo, come in figura. da rossi diventano verdi per indicare il corretto aggancio Il seggiolino auto è dotato di una sua base di protezione. del seggiolino alla base. Non rimuoverla nell'istallazione con cinture. 1 3• Tirare la maniglia posta sulla base (freccia a) e spingere 2• Per facilitare il passaggio sul retro delle cinture di sicurezza la stessa con il seggiolino contro il sedile fino a fine corsa dell'auto al seggiolino, è necessario reclinare la seduta del (freccia b). seggiolino nella posizione più bassa, agendo sulla leva IMPORTANTE: il corretto posizionamento della Base come indicato in figura. Isofix è verificabile dall'indicazione posta sulla maniglia: OK 3• Far passare la cintura di sicurezza dell'auto, tra il telaio e la (verde) per indicare la posizione corretta, NO (rosso) per scocca del seggiolino.
  • Seite 19 Come sfoderare il rivestimento bambino). 2 0• Per allentare la tensione delle cinture dei cinturini di Per rimuovere il rivestimento del seggiolino auto Viaggio1 sicurezza, premere il bottone posto nel centro del Duo-Fix ASIP: seggiolino-auto e contemporaneamente tirare le cinture • sfilare il riduttore se presente (punto 21); del cinturino di sicurezza, verso di sè. • sganciare i cinturini di sicurezza (punto14); IMPORTANTE: afferrare e tirare i cinturini di 2 6• sganciare le cinture dalla staffa posteriore; sicurezza sotto gli spallacci, come in figura. 2 7• sganciare dal retro i cinturini di sicurezza e poi sfilarli dal • Il seggiolino è dotato di un cuscino riduttore, indicato solo davanti ; per il bambino quando è più piccolo e quando i cinturini 2 8• sganciare dal retro gli spallacci e poi sfilarli dal davanti dai i di sicurezza sono posizionate al primo livello. Quando il cinturini di sicurezza;...
  • Seite 20: Numeri Di Serie

    Come leggere l'etichetta di omologazione rossa che deve passare nell' asola del tessuto. • infilare gli spallacci nei cinturini di sicurezza. • In questo paragrafo vi spieghiamo come leggere l’etichetta 3 7• Inserire i cinturini nell'asola del seggiolino in sequenza, di omologazione (etichetta arancione). prima il gancio degli spallacci, poi le cinture. • L’etichetta è doppia perchè questo seggiolino-auto è 3 8• prolungare i cinturini e inserirli nella scocca del seggiolino, i omologato per essere fissato in auto in due modi: cinturini nel foro in alto, la fibbia nel foro in basso, • Sistema di aggancio ISOFIX (la scritta SEMI-UNIVERSAL 3 9• agganciandoli correttamente sul retro, come in figura. classe A indica la compatibilità del seggiolino-auto con • agganciare i cinturini di sicurezza (punto 17) veicoli equipaggiati con questo sistema). IMPORTANTE: i cinturini, non devono essere • Sistema di aggancio con cintura a tre punti statica attorcigliati.
  • Seite 21: Product Characteristics

    • “Viaggio1 Duo-Fix ASIP” Group 1, must be fitted facing the vehicle’s normal direction of travel. MARTINELLI IS A PEG PEREGO BRAND • Do not fit “Viaggio1 Duo-Fix ASIP” on vehicle seats that face away or sideways with respect to the normal •...
  • Seite 22 with standards. be replaced if it undergoes significant strain due to an • Do not use accessories that are not approved by the accident. manufacturer or by the competent authorities. • Never leave the child unattended in the car seat: observe him/her even when he/she is sleeping. Instructions for use • Never remove the child from the car seat while the vehicle is in motion. UNIVERSAL CATEGORY • Make sure that the car seat is not obstructed by any Attachment in vehicles with safety belts moving parts of the vehicle’s seat or by one of the doors. 1• Place the Viaggio1 Duo-Fix ASIP car seat on the vehicle’s • Adjust the height and tension of the straps, ensuring that seat, facing in the normal direction of travel of the vehicle, they are snug to the child's body without being too tight. as shown in the figure. The car seat is equipped with a Check that the harness is not twisted and that the child protective base. does not release it. Do not remove it when fitting the car seat with the • This car seat is not designed for extended periods of sleep.
  • Seite 23 instructions provided with the base. towards you as shown in the picture. The straps will tighten 9• If the base is already attached in the vehicle, ensure that its round the child. Be careful not to pull too much. IMPORTANT: Do not tighten too much (the harness Isofix attachments are extended to their maximum length. should be loose enough for you to slip a finger 1 0• Remove the protective base attached to the car seat with the special release switches (Arrows A and B). between the strap and the child’s chest). 1 1• Position the car seat on the Isofix Base 0+1 and secure the 20• To loosen the safety straps, push the button in the middle of rear connectors of the car seat to the attachment points the car seat and at the same time pull the straps towards you. IMPORTANT: Grab hold of the safety harness under of the base nearest to the vehicle seat (Arrow A). Press the front part of the car seat until it clicks into place (Arrow B).
  • Seite 24: Serial Numbers

    • slip the booster cushion off if there is one (point 21); • Thread the shoulder straps in the safety harness. • unfasten the safety harness (point14); 3 7• Insert the safety straps in the seat in this order: begin with 2 6• unfasten the straps from the back attachment point; the buckle of the shoulder straps and then deal with the 2 7• release, from the back, the safety harness straps and pull straps. them away from the front; 3 8• extend the straps and insert them in the seat’s frame (the 2 8• release, from the back, the shoulder pads and pull them straps in the upper hole, the buckle in the lower one). away from the safety harness from the front; 3 9• fasten them properly in the back, as shown in the picture. 2 9• slip the head rest off from the top; • fasten the safety harness straps (point 17) 3 0• unfasten, from underneath the frame, the buckle of the leg IMPORTANT: the straps must not be twisted around. divider strap (fig. a) and extract the strap from the pad of 4 0• fasten them to the back attachment point, threading them the leg divider (fig. b);...
  • Seite 25: Assistance Service

    FR_Français two types of installation in cars: • ISOFIX attachment systems (the term SEMI-UNIVERSAL class A indicates compatibility of the car seat with vehicles MARTINELLI EST UNE MARQUE PEG PEREGO fitted with this system). • Attachment systems using static or inertia-reel three-point safety belts (the term UNIVERSAL indicates compatibility of the • Peg-Pérego S.p.A. est certifiée ISO 9001. car seat with vehicles fitted with this type of belt). • La certification offre à la clientèle une garantie • The top of the label displays the trademark of the de transparence et constitue un gage de manufacturing company and the name of the product. confiance dans la façon de travailler de • The letter E in a circle indicates the European approval l’entreprise. mark and the number indicates the country that issued the approval (1: Germany, 2: France, 3: Italy, 4: Netherlands, 11: Caractéristiques du produit Great Britain, 24: Republic of Ireland).
  • Seite 26 • S’assurer que l’utilisation du système Isofix a été prévue présents dans l’habitacle. En cas d’accident, ils peuvent causer dans le véhicule. Consulter également la liste des modèles des lésions à l’ e nfant installé dans le siège-auto. d’automobiles fournie avec le produit. • Ne pas utiliser de procédures d’installation différentes de celle indiquée : le siège-auto pourrait se décrocher du IMPORTANT siège du véhicule. • S’assurer que la ceinture à trois points du véhicule utilisée • « Viaggio 1 Duo-Fix ASIP », Groupe 1, doit être installé pour fixer le siège-auto est toujours tendue et non vrillée. dans le sens de la marche. La remplacer en cas de sollicitations excessives suite à un • Ne pas installer « Viaggio 1 Duo-Fix ASIP » sur un siège accident.
  • Seite 27: Instructions D'utilisation

    • Ne pas apporter de modifications au produit. et non vrillée (fig. b). • Pour toute réparation, demande de pièces de rechange Fermer la languette de sécurité (fig. c). 8• IMPORTANT : se saisir de la ceinture et la tirer avec et d’information relative au produit, contacter le service force vers le haut pour bien plaquer Viaggio 1 Duo-Fix d’assistance après-vente. Les informations à ce sujet figurent à la dernière page de ce manuel. ASIP au siège du véhicule (fig. d). • Le siège-auto doit toujours être fixé dans le véhicule, même lorsqu’il n’est pas occupé par l’enfant. En cas de Une fois l’opération terminée, le siège-auto peut être freinage soudain, il pourrait blesser les personnes présentes incliné dans la position souhaitée (point 2).
  • Seite 28 Comment installer l’enfant dans le l’appuie-tête vers le haut; l’appuie-tête doit être soulevé simultanément. siège-auto Viaggio 1 Duo-Fix ASIP Pour passer d’une position haute vers une position plus 1 4• Avant d'installer l'enfant sur le siège-auto décrocher les basse : ceintures de sécurité en appuyant sur le bouton rouge tirer la languette située en haut et au centre de l’appuie- situé sur la boucle de la sangle d’entrejambes tête vers le haut et simultanément, pousser l’appuie-tête 1 5• Soulever les ceintures de sécurité en accrochant les vers le bas, jusqu’à la position désirée. boucles aux élastiques sur les côtés. Une fois l’opération effectuée, tenter de faire bouger 1 6• Installer l'enfant et placer les ceintures de sécurité au l’appuie-tête pour vérifier qu’il est bien fixé. niveau des épaules et à la taille, comme le montre la figure.
  • Seite 29: Numéros De Série

    Entretien des parties en tissu derrière le porte-instructions. • appliquer le coussin réducteur si l’enfant est encore petit. brosser les éléments en tissu pour éliminer la poussière. • laver en machine à la température maximale de 30° C avec Numéros de série action mécanique et essorage réduit ; • ne pas blanchir au chlore ; 4 1• Les informations suivantes sont inscrites sous l’assise • ne pas repasser ; de Viaggio1 Duo-Fix ASIP : nom du produit, date de • ne pas laver à sec ; production et numéro de série du produit. ne pas utiliser de solvants pour enlever les taches ; 4 2• L’étiquette d’homologation se trouve derrière le dossier de • ne pas sécher dans un sèche-linge à tambour rotatif. Viaggio1 Duo-Fix ASIP 4 3• Date de production de la ceinture. Ces informations sont indispensables en cas de réclamation. ° Nettoyage du produit Comment remettre la housse sur • Ce produit requiert un entretien minimum. Les opérations de nettoyage et d’entretien doivent être effectuées Viaggio1 Duo-Fix ASIP...
  • Seite 30: Produkteigenschaften

    DE_Deutsch véhicules équipés de ce type de ceinture). • Dans la partie supérieure de l’étiquette figurent la marque du fabricant et la dénomination du produit. MARTINELLI IST EINE MARKE VON PEG • La lettre E entourée d’un cercle indique la marque d’homologation européenne et le numéro représente le PEREGO (PEG-PÉREGO) pays qui a délivré l’homologation (1 : Allemagne ; 2 : France; 3 : Italie, 4 : Pays-Bas ; 11 : Grande-Bretagne ; 24 : Irlande). • Peg-Pérego S.p.A. besitzt das Zertifikat ISO 9001. • Numéro d’homologation : s’il commence par 04, cela • Die Zertifizierung bietet den Kunden und signifie qu’il est fait référence au quatrième amendement Konsumenten die Garantie für Transparenz und (celui actuellement en vigueur) du règlement R44. Vertrauen in die Arbeitsweise des Unternehmens. • Norme de référence : UN/ECE R44/04. • Numéro progressif de production : il est propre à chaque Produkteigenschaften siège-auto ; lorsque l’homologation est délivrée, chaque Autokindersitz, Gruppe 1, „Universal“ produit est caractérisé par un numéro différent. • Gemäß europäischer Prüfnorm UN/ECE R44/04 für Kinder Service d’assistance mit einem Gewicht von 9 bis 18 kg (für Kinder zwischen ca.
  • Seite 31 System ausgestattet ist. Eine Liste der Fahrzeugmodelle ist Bauteilen eingeklemmt werden. auch dieser Produktbeschreibung beigelegt. • Im Auto besonders darauf achten, dass das Kind bei einem Unfall nicht von Gepäckstücken oder anderen WICHTIG Gegenständen verletzt werden kann. • Den Autokindersitz nicht anders befestigen, als in dieser • Der „Viaggio1 Duo-Fix ASIP“, Gruppe 1, muss in Anleitung angegeben, da er sich sonst vom Autositz lösen Fahrtrichtung befestigt werden. könnte. • Der „Viaggio1 Duo-Fix ASIP“ darf nicht auf Autositzen • Überprüfen Sie, ob der Drei-Punkt-Sicherheitsgurt des befestigt werden, die entgegengesetzt oder längs der Fahrzeuges für die Befestigung des Autokindersitzes Fahrtrichtung ausgerichtet sind.
  • Seite 32 aufweist oder Teile fehlen, wenn er aus zweiter Hand Autositz. stammt oder wenn er bei einem Unfall stark beansprucht 6• Überprüfen Sie, ob die Gurte durch die rot wurde, da unter diesen Umständen äußerst gefährliche gekennzeichneten Vertiefungen verlaufen und ziehen Sie Beschädigungen der Bauteile möglich sind. die Gurte fest (Pfeil A). • Keinerlei Veränderungen am Produkt vornehmen. 7• Zur vollständigen Befestigung das Steady-Fix-System • Für eventuelle Reparaturen, den Austausch von Bauteilen oder verwenden: Den Sicherheitsverschluss öffnen, den weitere Informationen über das Produkt wenden Sie sich bitte Diagonalgurt hindurchziehen und dabei darauf achten, dass an unseren Kundendienst. Informationen hierzu finden Sie auf er nicht zu straff gespannt und nicht verdreht ist (Pfeil B). der letzten Seite der vorliegenden Beschreibung. Den Sicherungsriegel schließen (Pfeil C). • Auch wenn kein Kind darin sitzt, muss der Kindersitz sicher 8• WICHTIG: Den Sicherheitsgurt einrasten und kräftig nach oben ziehen, um den Viaggio1 Duo-Fix ASIP so im Fahrzeug befestigt sein. Andernfalls könnten mitfahrende fest wie möglich am Autositz zu befestigen (Pfeil D).
  • Seite 33: Einstellen Der Höhe Der Kopfstütze

    erfolgen muss, bis in der Anzeige OK erscheint. Höhe der Kopfstütze im Verhältnis zur Größe des Kindes WICHTIG: Versuchen Sie nach erfolgter Montage, die angepasst werden. Diese kann auf 7 verschiedene Stufen Basis zu bewegen, um den festen Sitz beider Isofix-Bügel eingestellt werden. sicherzustellen. 2 2• Umstellen von einer niedrigeren in eine höhere Position: Die Lasche, die sich in der Mitte des oberen Randes der So setzen Sie Ihr Kind in den Kopfstütze befindet, nach oben ziehen. Die Kopfstütze wird mit hochgezogen. Autokindersitz Viaggio1 Duo-Fix ASIP Umstellen von einer höheren in eine niedrigere Position: 1 4• Bevor das Kind in den Autokindersitz gesetzt wird, den Die Lasche, die sich in der Mitte des oberen Randes der Schrittgurt durch Drücken des roten Knopfes auf dem Kopfstütze befindet, nach oben ziehen und gleichzeitig die Gurtschloss lösen. Kopfstütze bis in die gewünschte Position nach unten drücken. 1 5• Die Sicherheitsgurte nach oben ziehen und die Schnallen Anschließend die Kopfstütze bewegen, um an beiden Seiten in die elastischen Schlaufen einhaken. sicherzustellen, dass sie korrekt befestigt ist. 1 6• Das Kind in den Autokindersitz setzen und die 2 3• Die richtige Position der Gurte ist die, in der sich die Sicherheitsgurte über den Schultern und in der Taille...
  • Seite 34: Pflege Der Polsterung

    3 0• von der Unterseite der Sitzschale den Haken des untere Öffnung, Schrittgurts (Abb. A) lösen und den Gurt aus dem 3 9• indem diese korrekt auf der Rückseite befestigt werden, Schrittgurt herausziehen (Abb. B); wie in der Abbildung dargestellt. 3 1• die Polsterung von oben abziehen und dabei darauf • die Sicherheitsgurte befestigen (Punkt 17); achten, den Gurt durch die Öse zu ziehen. WICHTIG: Die Gurte dürfen nicht verdreht sein. 4 0• Die Gurte am hinteren Bügel befestigen, indem diese hinter der Halterung der Bedienungsanleitung entlang Pflege der Polsterung geführt werden. Die Stoffteile abbürsten, um Staub zu entfernen. • bei Kleinkindern den Sitzverkleinerer verwenden. • Bei höchstens 30°C im Schonwaschgang und mit leichtem Schleudergang in der Waschmaschine waschen. Seriennummern • Nicht bleichen. 4 1• Auf dem Viaggio1 Duo-Fix ASIP finden Sie unterhalb • Nicht bügeln. des Sitzes folgende Angaben: Produktbezeichnung, • Nicht Trockenreinigen.
  • Seite 35: Características Del Producto

    ES_Español • Das Etikett ist doppelt angebracht, weil der Autokindersitz für zwei verschiedene Befestigungsarten im Fahrzeug zugelassen ist: MARTINELLI ES UNA MARCA PEG PEREGO • Das Befestigungssystem ISOFIX (die Benennung SEMI- UNIVERSAL der Klasse A bedeutet, dass der Autokindersitz in Fahrzeugen verwendet werden darf, die mit diesem • Peg-Pérego S.p.A. posee la certificación ISO 9001. System ausgestattet sind). • La certificación ofrece a los clientes y a los • Das Befestigungssystem ISOFIX (die Benennung SEMI- consumidores la garantía de transparencia y UNIVERSAL der Klasse A bedeutet, dass der Autokindersitz confianza en cuanto a los procedimientos de in Fahrzeugen verwendet werden darf, die mit diesem trabajo de la empresa. System ausgestattet sind). • Über dem Etikett befindet das Firmenzeichen des Características del producto Herstellers und die Produktbezeichnung. Silla de auto, Grupo 1, categoría “Universal” • Der Kreis mit dem Buchstaben E: Er bedeutet, dass die • Homologada conforme a la norma europea UN/ECE...
  • Seite 36 con el producto. puesto que podría desengancharse del asiento. • Asegurarse de que el cinturón de tres puntos del vehículo IMPORTANTE para fijar la silla de auto esté siempre extendido y no plegado, y se aconseja reemplazarlo si ha estado sometido • “Viaggio1 Duo-Fix ASIP”, grupo 1, debe instalarse en el a fuertes golpes debido a un accidente. sentido de marcha. • No dejar nunca a su hijo en la silla de auto sin vigilancia: • No instalar “Viaggio 1 Duo-Fix ASIP” en asientos Vigilarlo incluso mientras duerme. colocados en dirección opuesta al sentido de la • No quitar nunca al niño de la silla de auto si el automóvil marcha o transversalmente al sentido normal de la está en movimiento.
  • Seite 37 Instrucciones de uso incluso cuando el niño no esté subido en ella. En caso de frenado repentino, podría ocasionar lesiones a los CATEGORÍA SEMI-UNIVERSAL ocupantes del vehículo. Enganche en el automóvil con Base Isofix 0+1 • El límite de uso de esta silla de paseo es de cinco años Antes de enganchar Viaggio1 Duo-Fix ASIP a la base Isofix, transcurridos a partir de la fecha de producción indicada en el instalar la Base en el asiento del automóvil siguiendo las chasis, pues debido al envejecimiento natural de los materiales instrucciones proporcionadas junto con la base. podría no ser conforme con la reglamentación vigente. 9• Si la base estuviera ya acoplada en el vehículo, asegurarse • No utilizar accesorios que no estén aprobados por el de que los enganches Isofix de la base estén en el máximo fabricante o por las autoridades competentes. de su longitud. 1 0• Quitar la base de protección enganchada a la silla presionando Instrucciones de uso las respectivas palancas de desenganche (flechas a y b) CATEGORÍA UNIVERSAL 1 1• Colocar la silla sobre la Isofix Base 0+1 enganchando los Enganche en el automóvil con cinturones de seguridad acoples traseros de la silla a los enganches de la base más próximos al asiento (flecha a). 1• Acoplar la silla Viaggio1 Duo-Fix ASIP en el asiento del Presionar la parte delantera de la silla hasta oír el clic (flecha b). automóvil en el sentido de la marcha del vehículo tal y como se muestra en la figura. La silla de auto está 1 2• IMPORTANTE: Las señales presentes detrás de la Base equipada con su base de protección.
  • Seite 38 de las piernas hasta oír el encastre. (fig. a) y tirar hacia sí en la posición deseada (fig. b). 1 8• Niño colocado correctamente con las correas de seguridad • Para desenganchar la silla de auto Viaggio1 Duo-Fix ASIP de bien abrochadas. la Base Isofix 0+1, presionar también sobre la misma palanca 1 9• Para terminar la operación, adherir los cinturones de para desengancharla de su base de protección (punto 10). las correas de seguridad al niño tirando del cinturón de regulación central como en la figura, con cuidado para no Cómo quitar el revestimiento apretar demasiado; Para quitar el revestimiento de la silla de auto Viaggio1 IMPORTANTE: dejar un mínimo de juego (el espesor Duo-Fix ASIP: de un dedo entre el cinturón y el tórax del niño). • quitar el reductor, si está presente (punto 21); 2 0• Para aflojar la tensión de los cinturones de las correas de • desenganchar las correas de seguridad (punto 14);...
  • Seite 39: Limpieza Del Producto

    puede causar cambios de color de muchos materiales. 3 4• enganchar la lengüeta en el alojamiento del separador de • Conservar el producto en un lugar seco. las piernas; 3 5• calzar el acolchado partiendo desde el asiento y pasando a la Significado de la etiqueta de homologación parte superior, prestando atención a las solapas del respaldo. 3 6• Calzar el reposacabezas prestando atención a la lengüeta • Este apartado explica el significado de la etiqueta de roja, que debe pasar por la ranura del tejido. homologación (etiqueta naranja). • enganchar los tirantes en las correas de seguridad. • La etiqueta es doble porque esta silla de auto está 3 7• Introducir las correas en la ranura de la silla; primero el homologada para acoplarse en el automóvil de dos maneras: gancho de los tirantes y luego los cinturones. • Sistema de enganche ISOFIX (la inscripción SEMI- 3 8• prolongar las correas e insertarlas en el chasis de la silla; las UNIVERSAL clase A indica la compatibilidad de la silla de correas en el orificio superior; la hebilla en el orificio inferior; auto con vehículos equipados con dicho sistema). 3 9• enganchándolas correctamente en la parte posterior como • Sistema de enganche con cinturón de tres puntos indica la figura.
  • Seite 40 WWW.LACARROZZINAMARTINELLI.COM MADE IN ITALY FIMA1101I128 07/06/2011 Downloaded from www.Manualslib.com manuals search engine...

Inhaltsverzeichnis